Creating Student Notes
AfterSchool HQ makes it simple to create and manage student notes. This quick guide walks you through how to add a new note, lock it for privacy, and control staff access with just a few clicks.
Easily document student details, lock notes, and manage who can view them in AfterSchool HQ.
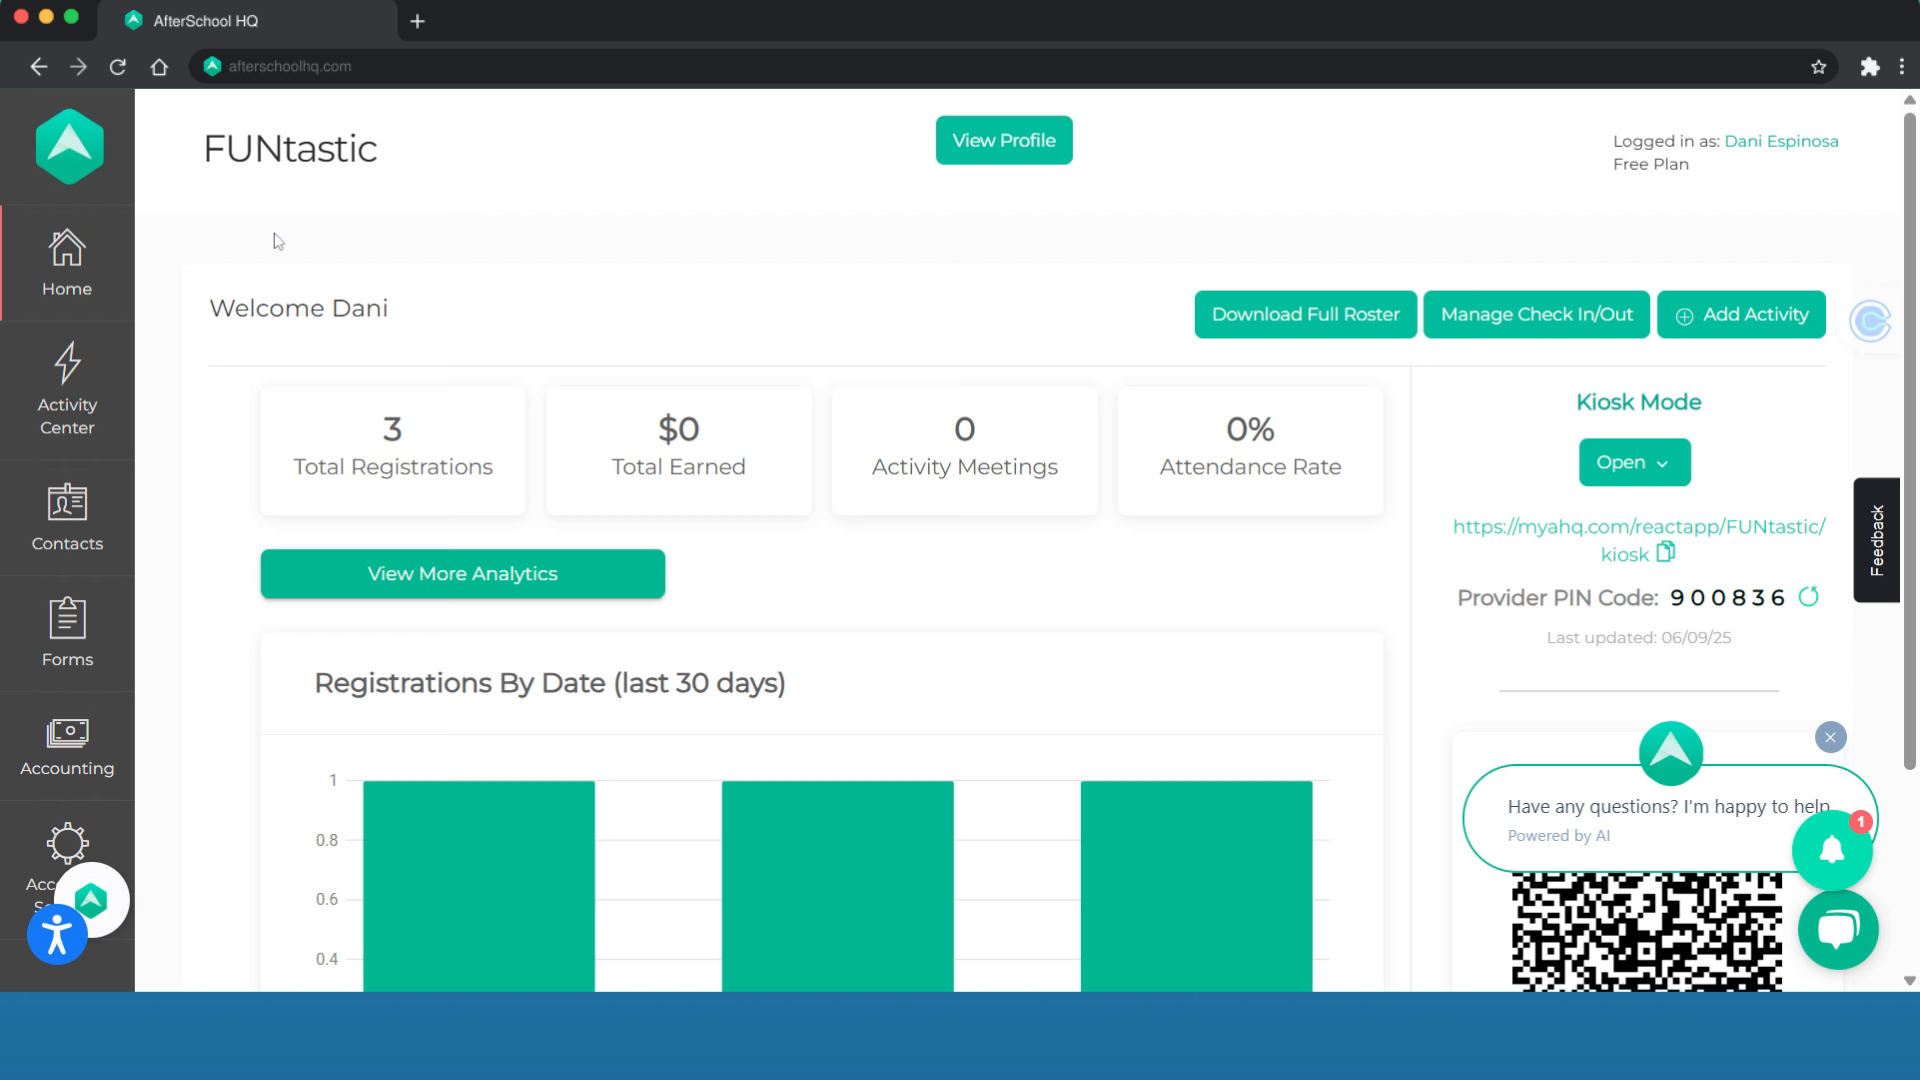
Go to afterschoolhq.com
1. Introduction
This guide will walk you through Creating Student Notes with AfterSchool HQ.
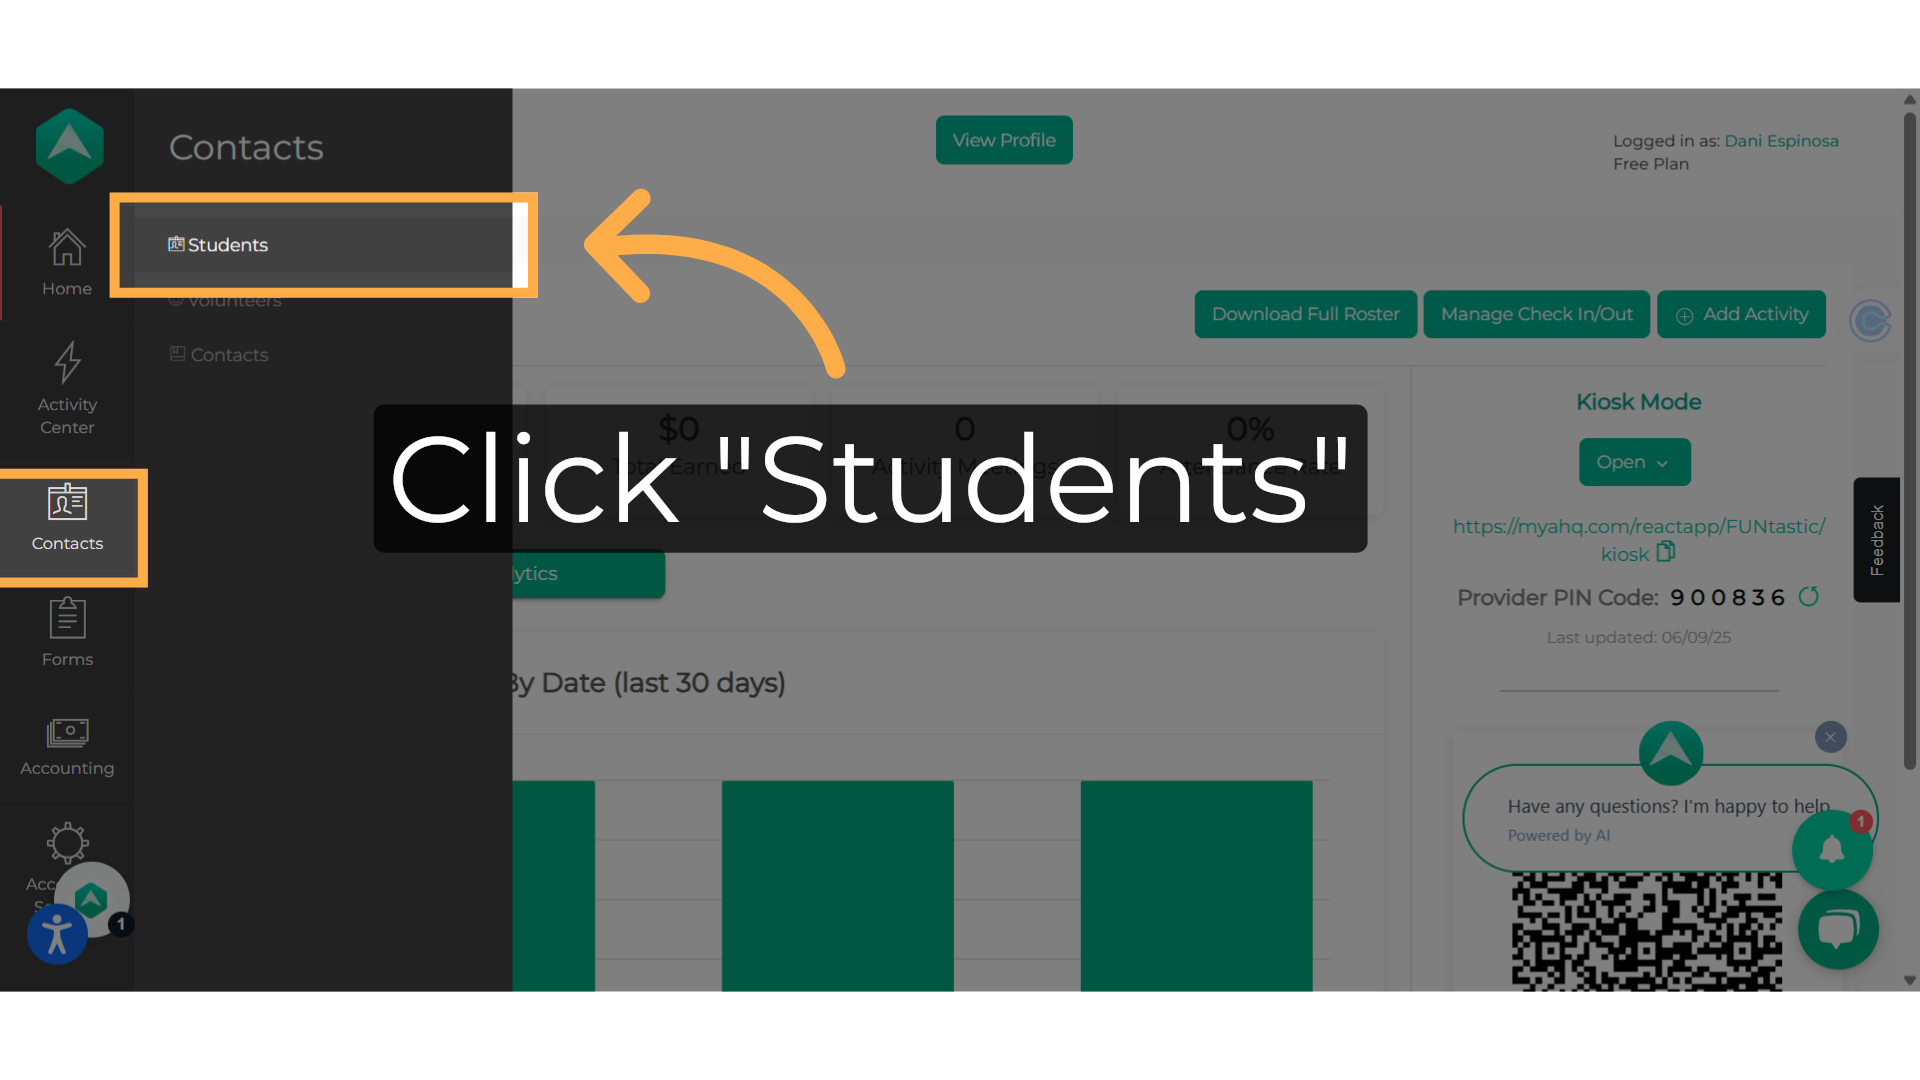
2. Click "Students"
Hover over "Contacts" and select "Students"
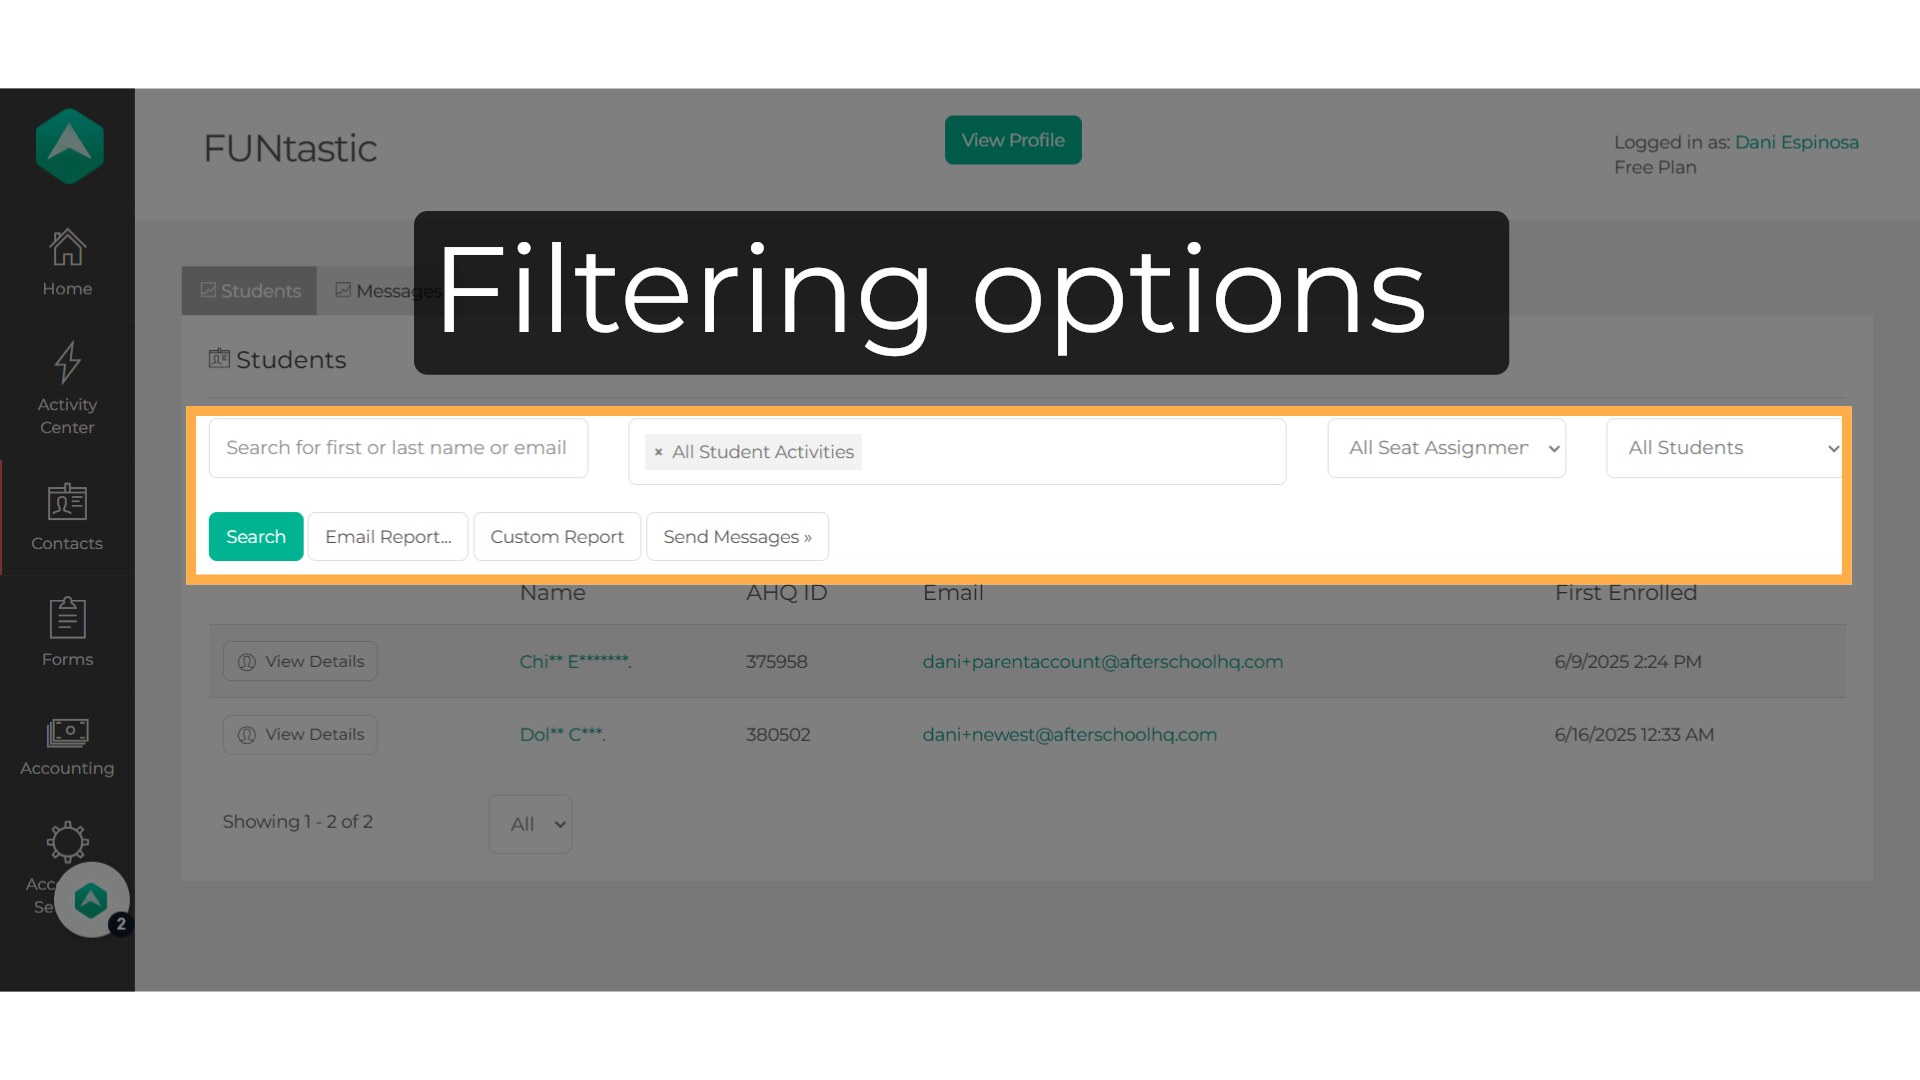
3. Filtering options
You can narrow down your search by looking for the student's name, filtering by activity, checking assigned seats, or determining if the student is past, present, or future.
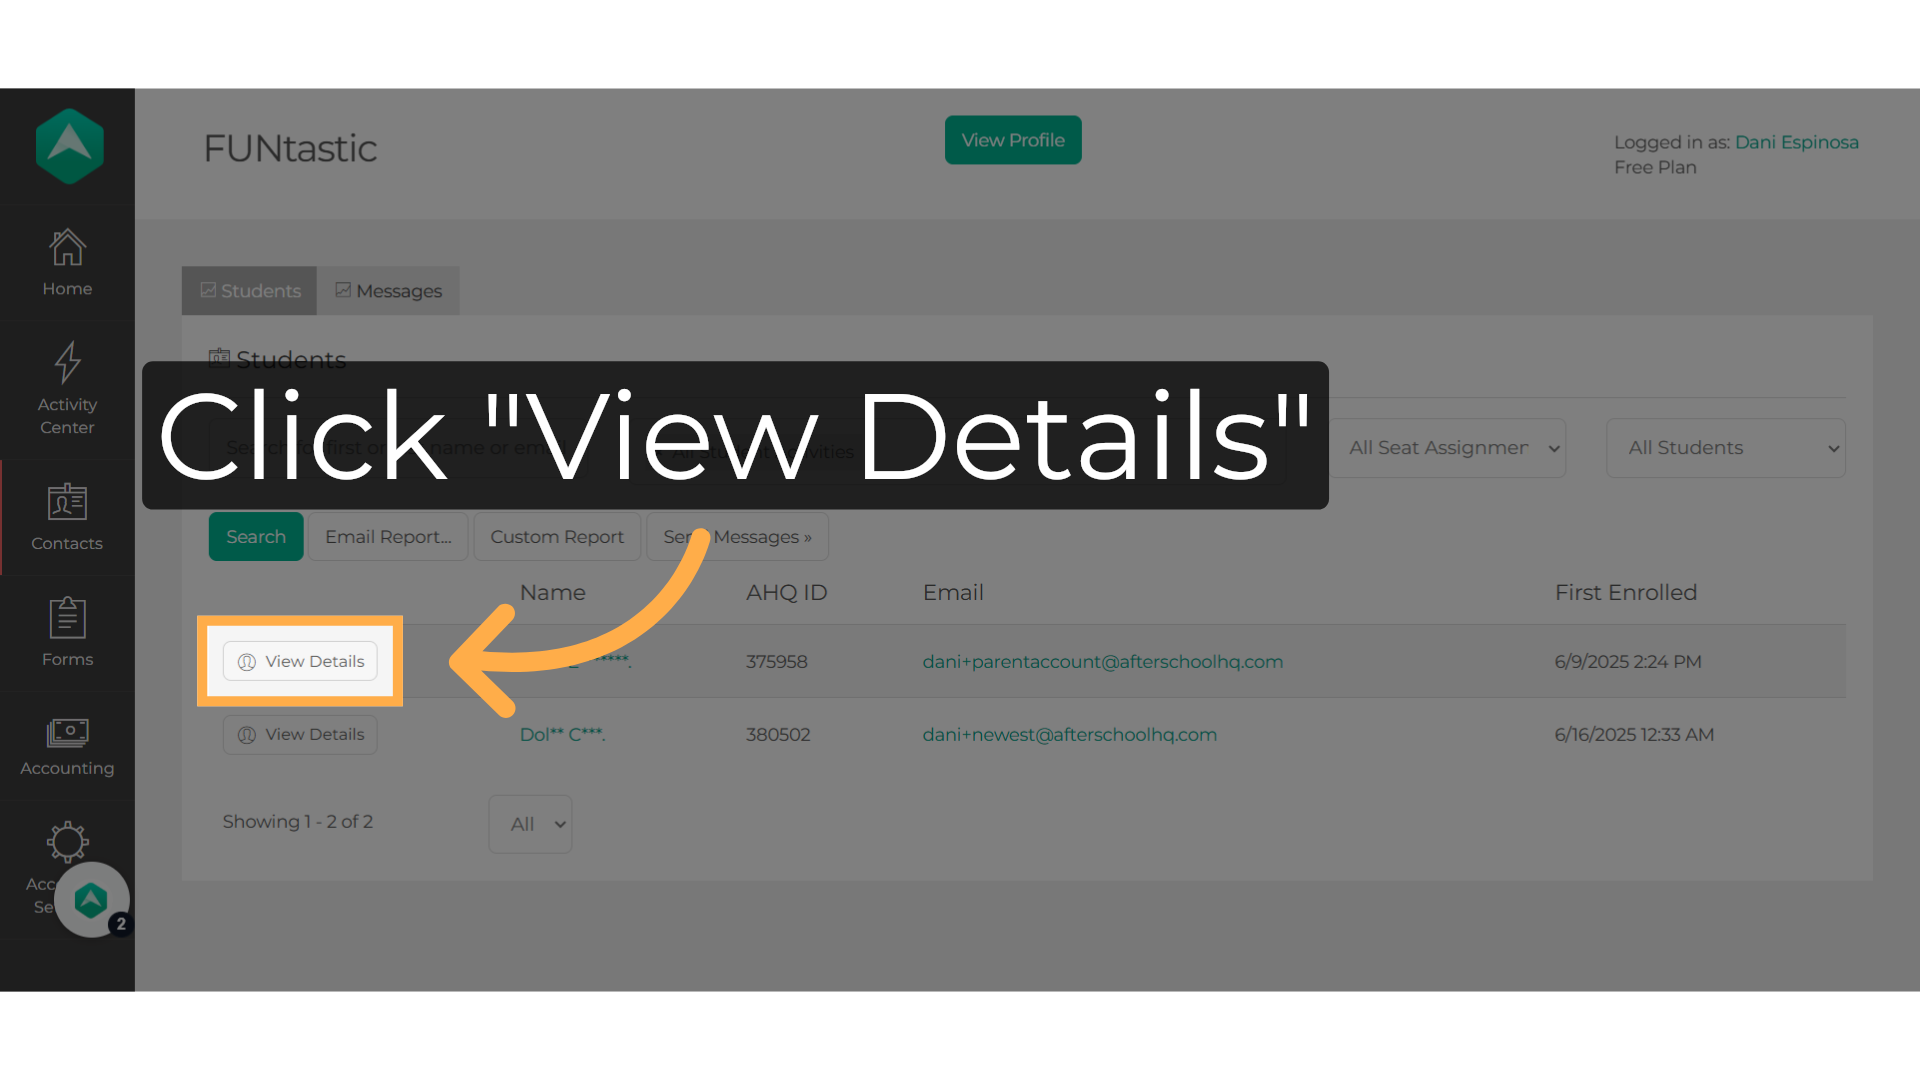
4. Click "View Details"
Then click on "View Details" next to the student name.
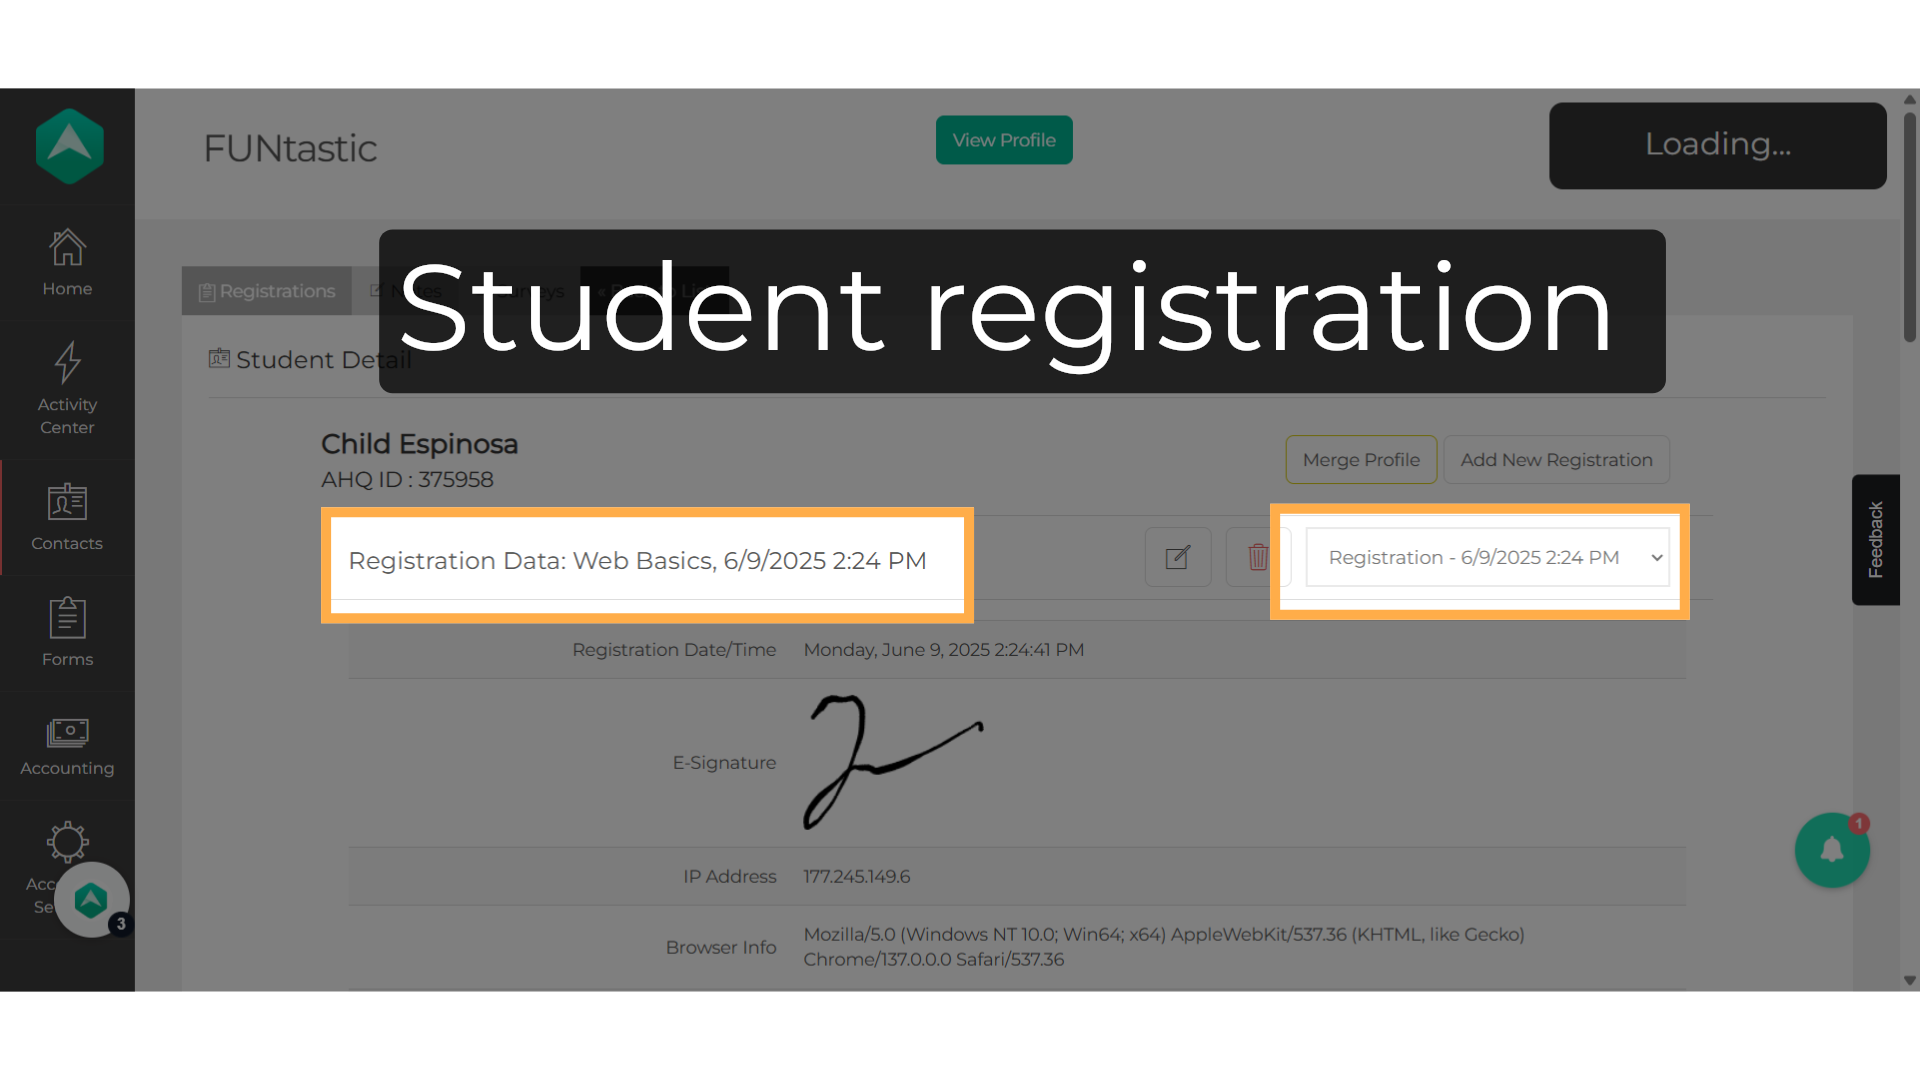
5. Student registration
You can identify the activity associated with the student registration by looking at the activity name in the "Registration Data" section. To change the activity, simply click on the "Registration" dropdown and switch registrations.
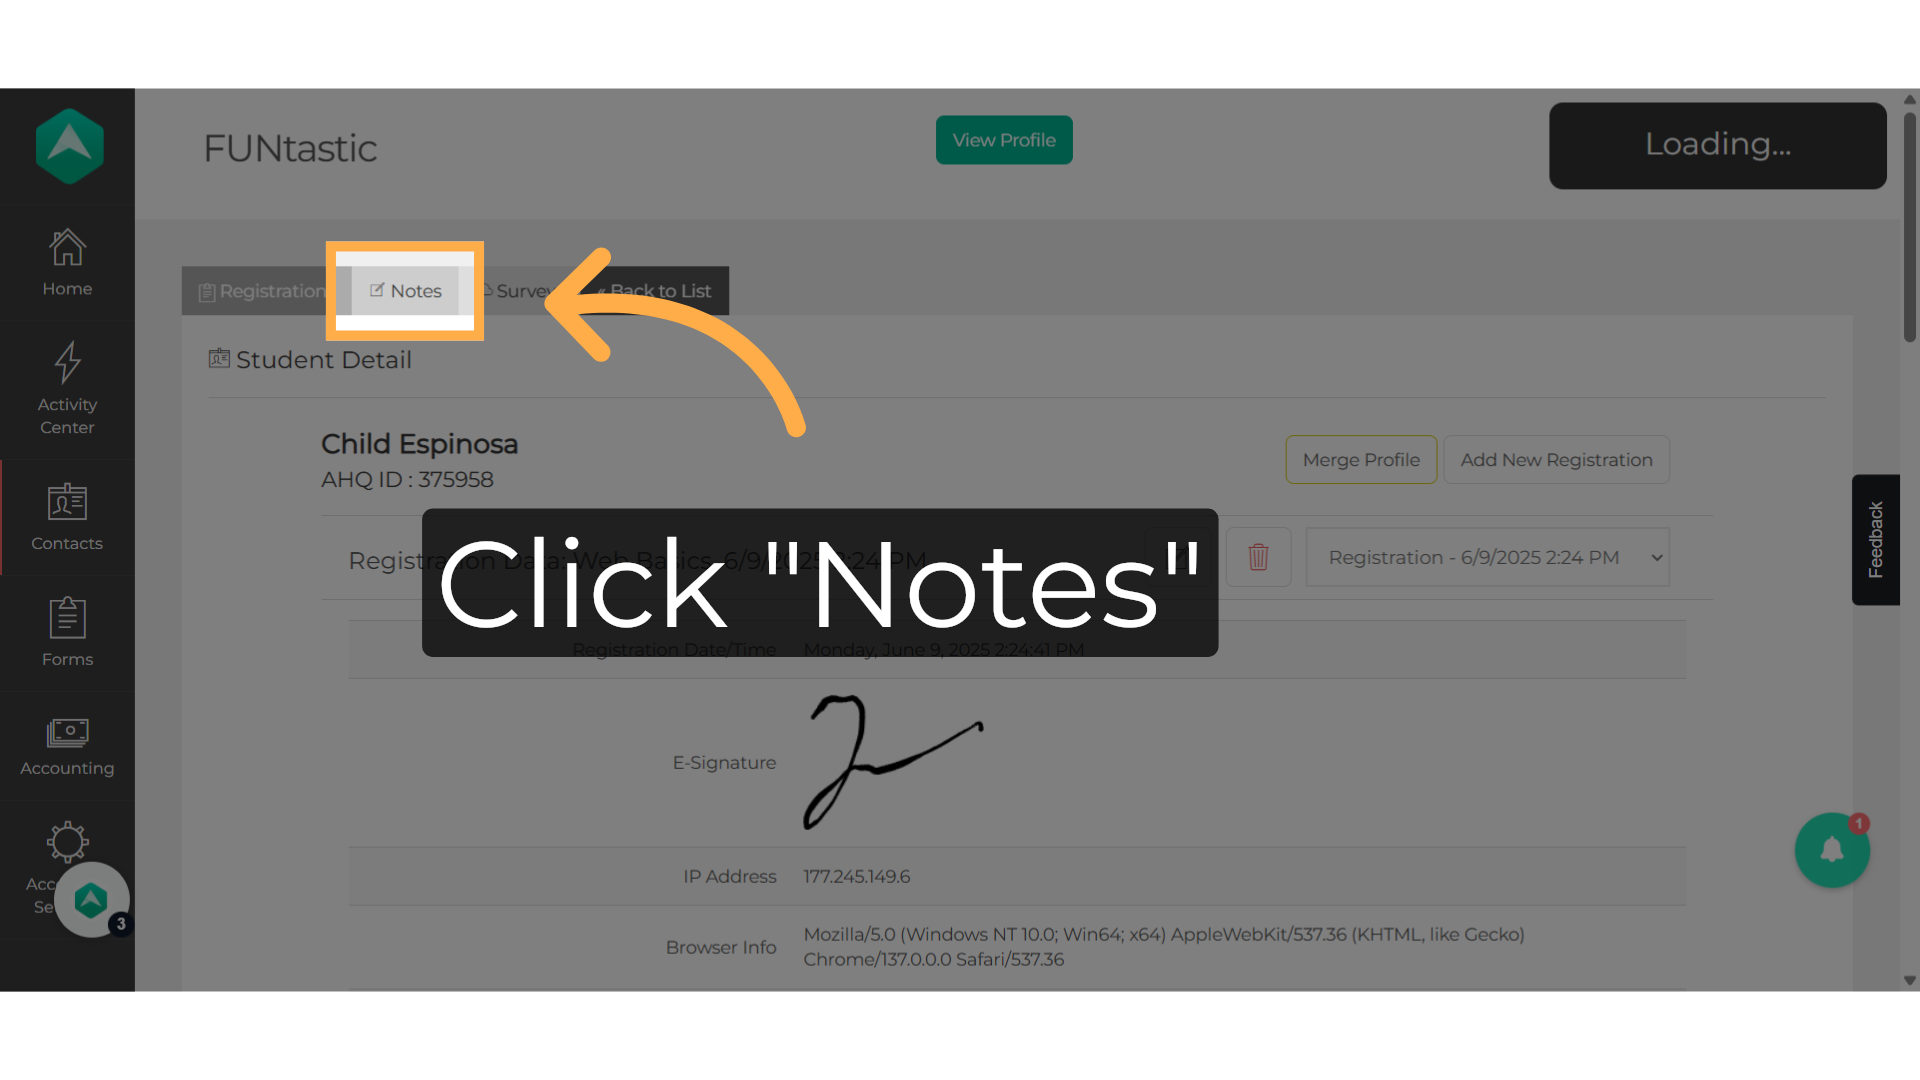
6. Click "Notes"
Access the notes section by clicking on the "Notes" tab.
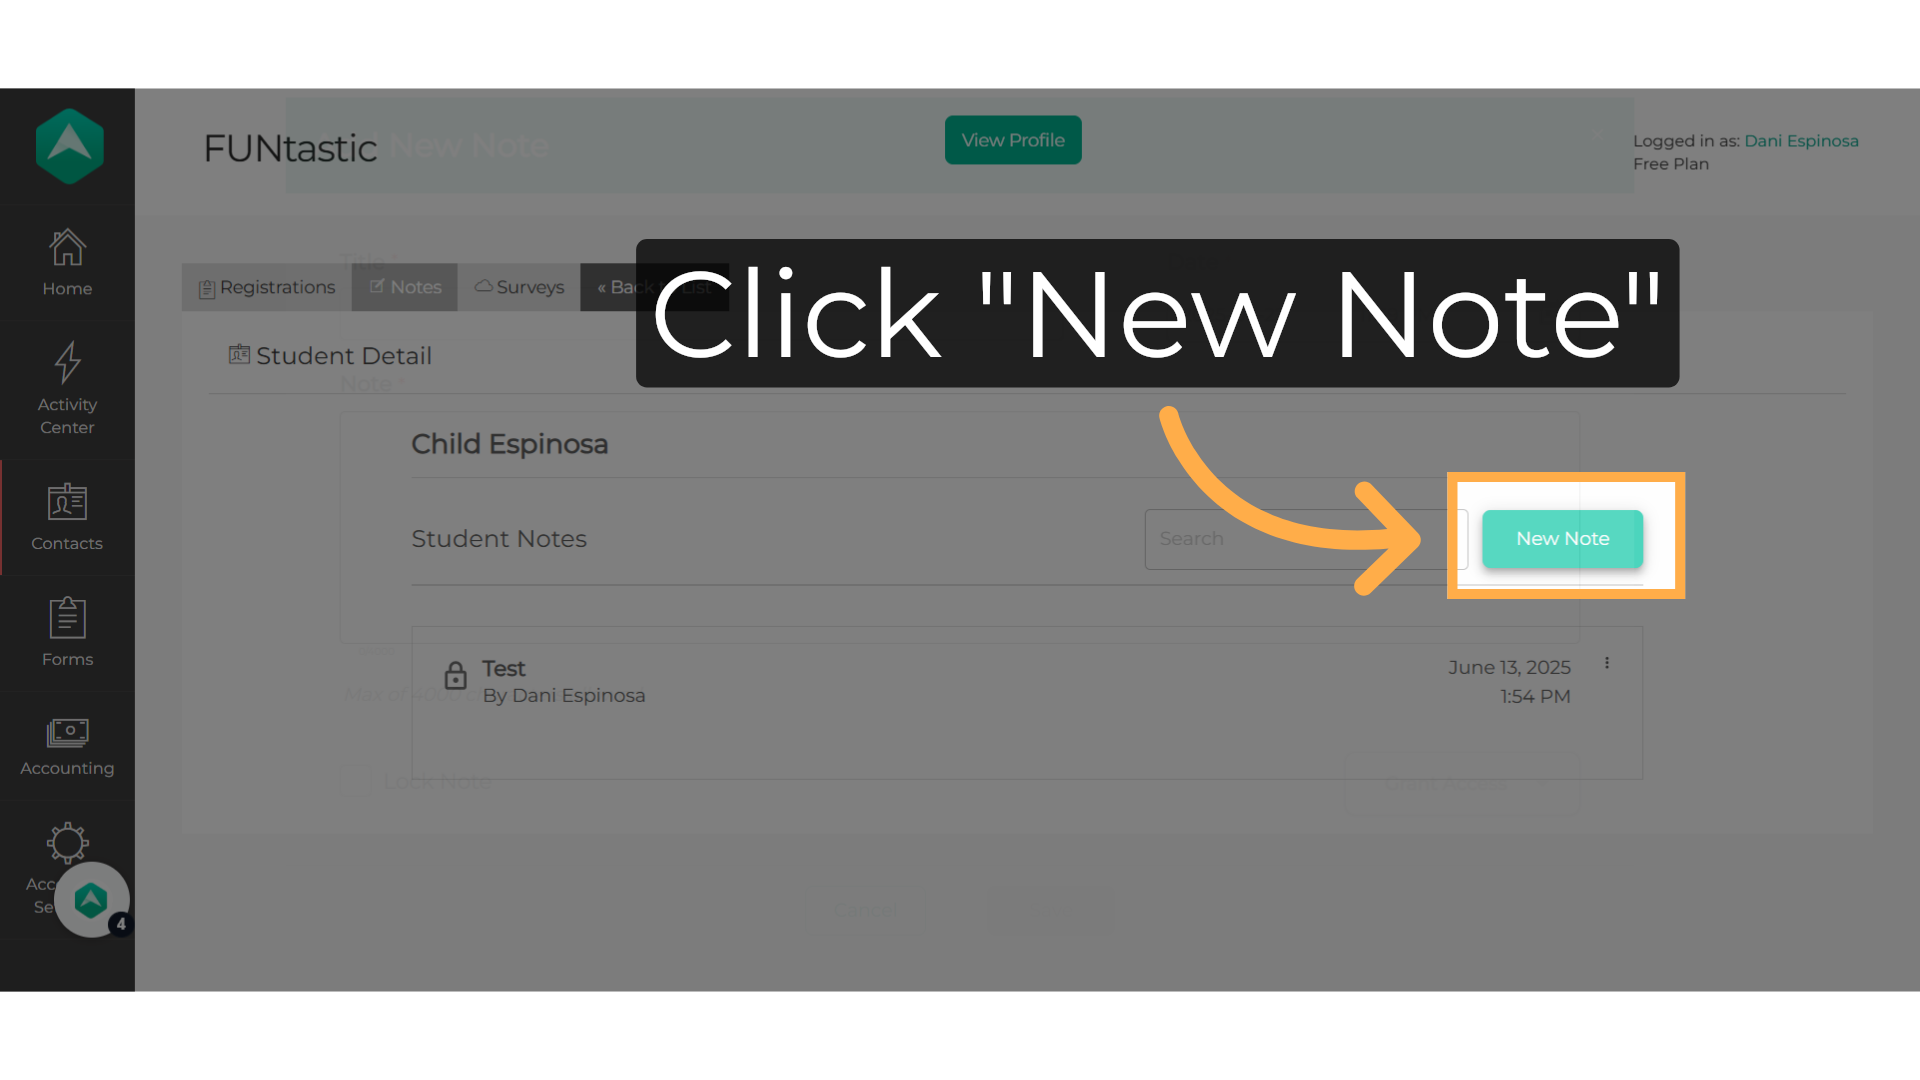
7. Click "New Note"
Then select "New Note"
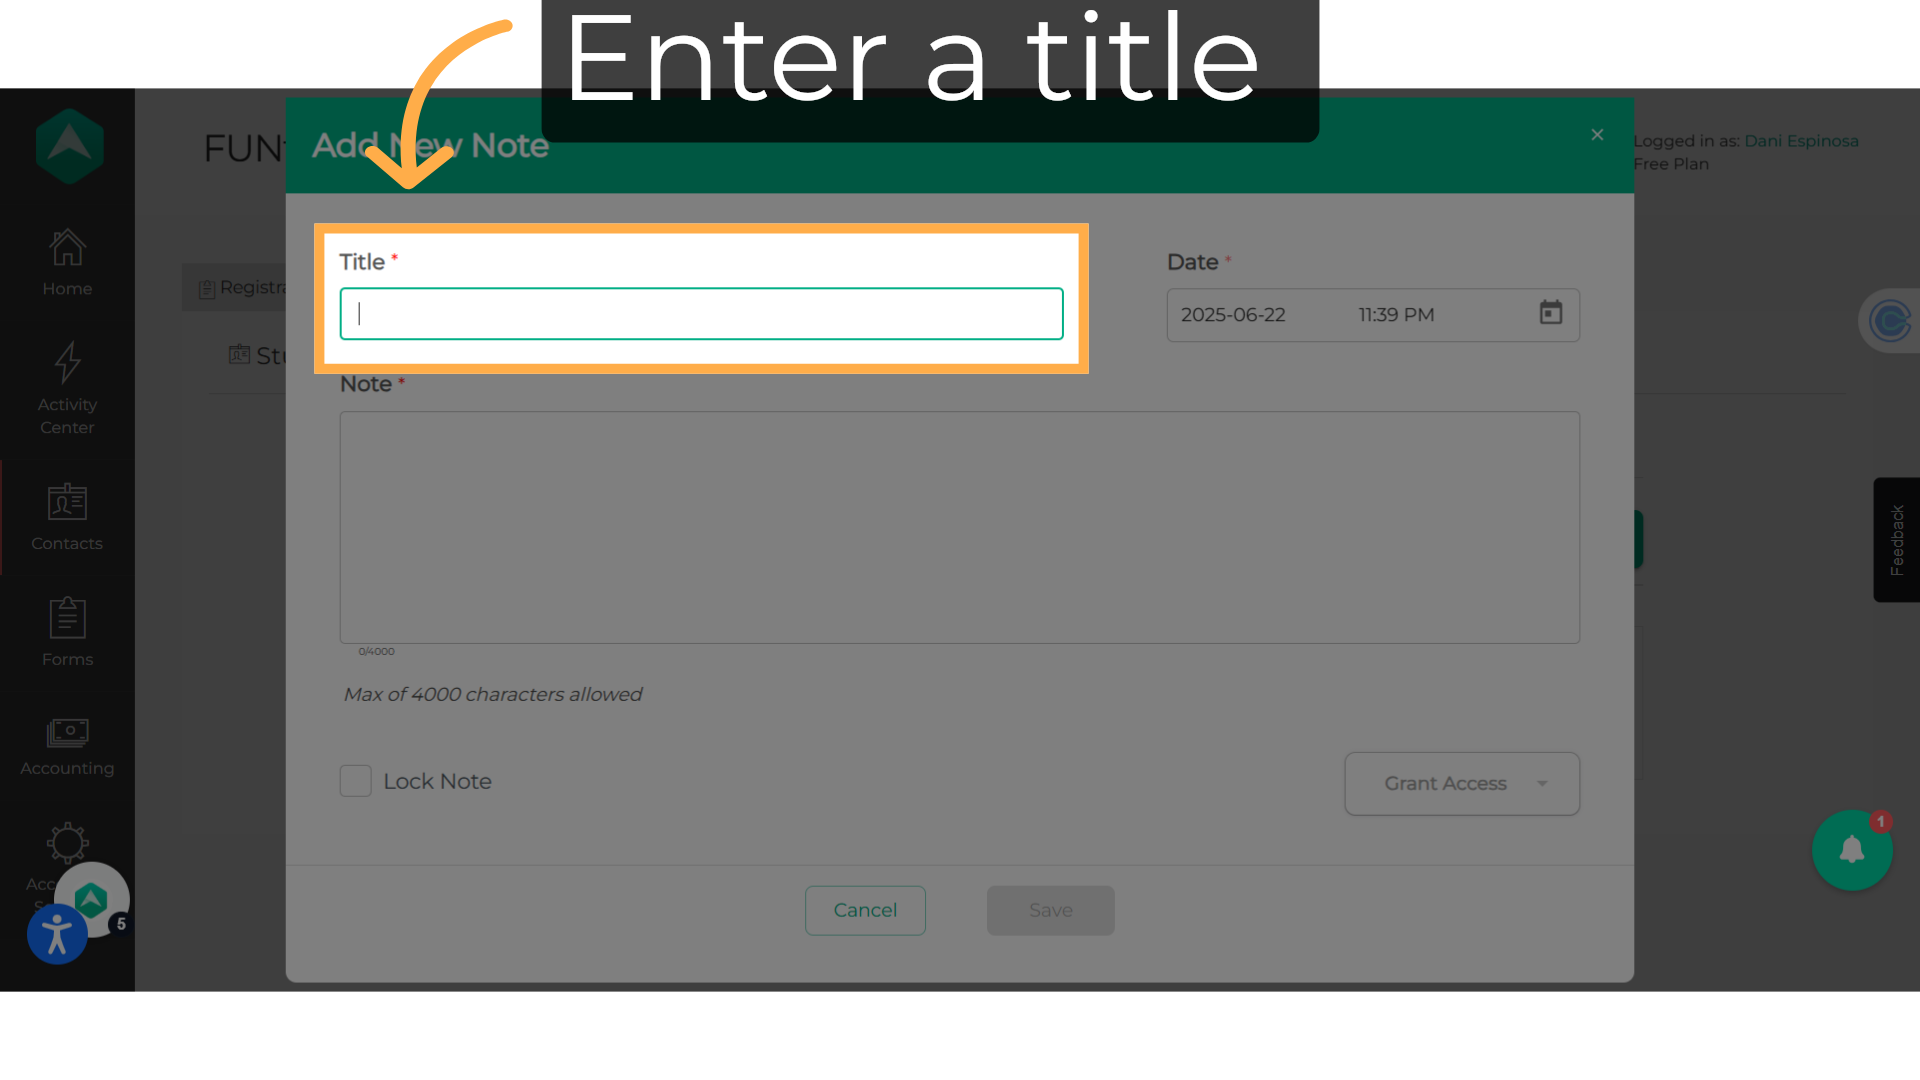
8. Enter a title
Title your student note.
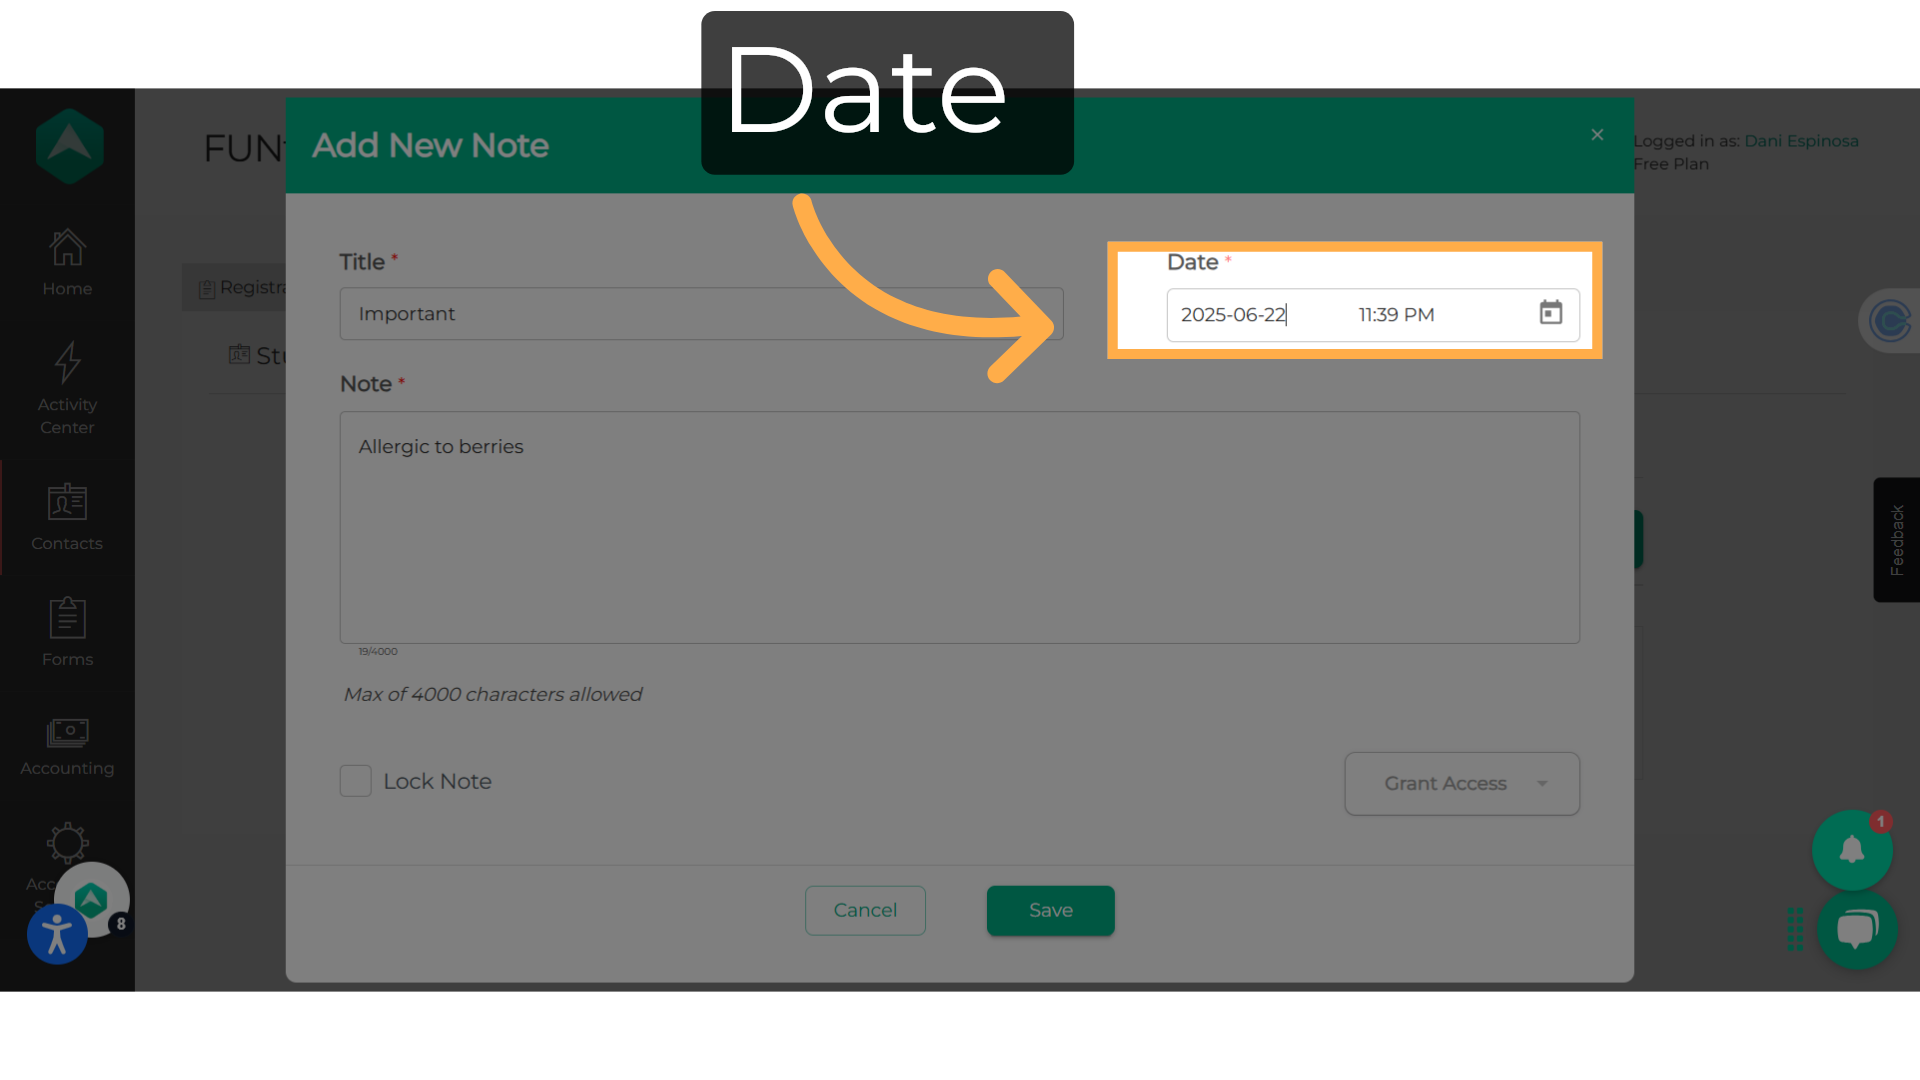
9. Date
You can change the date by clicking on it.
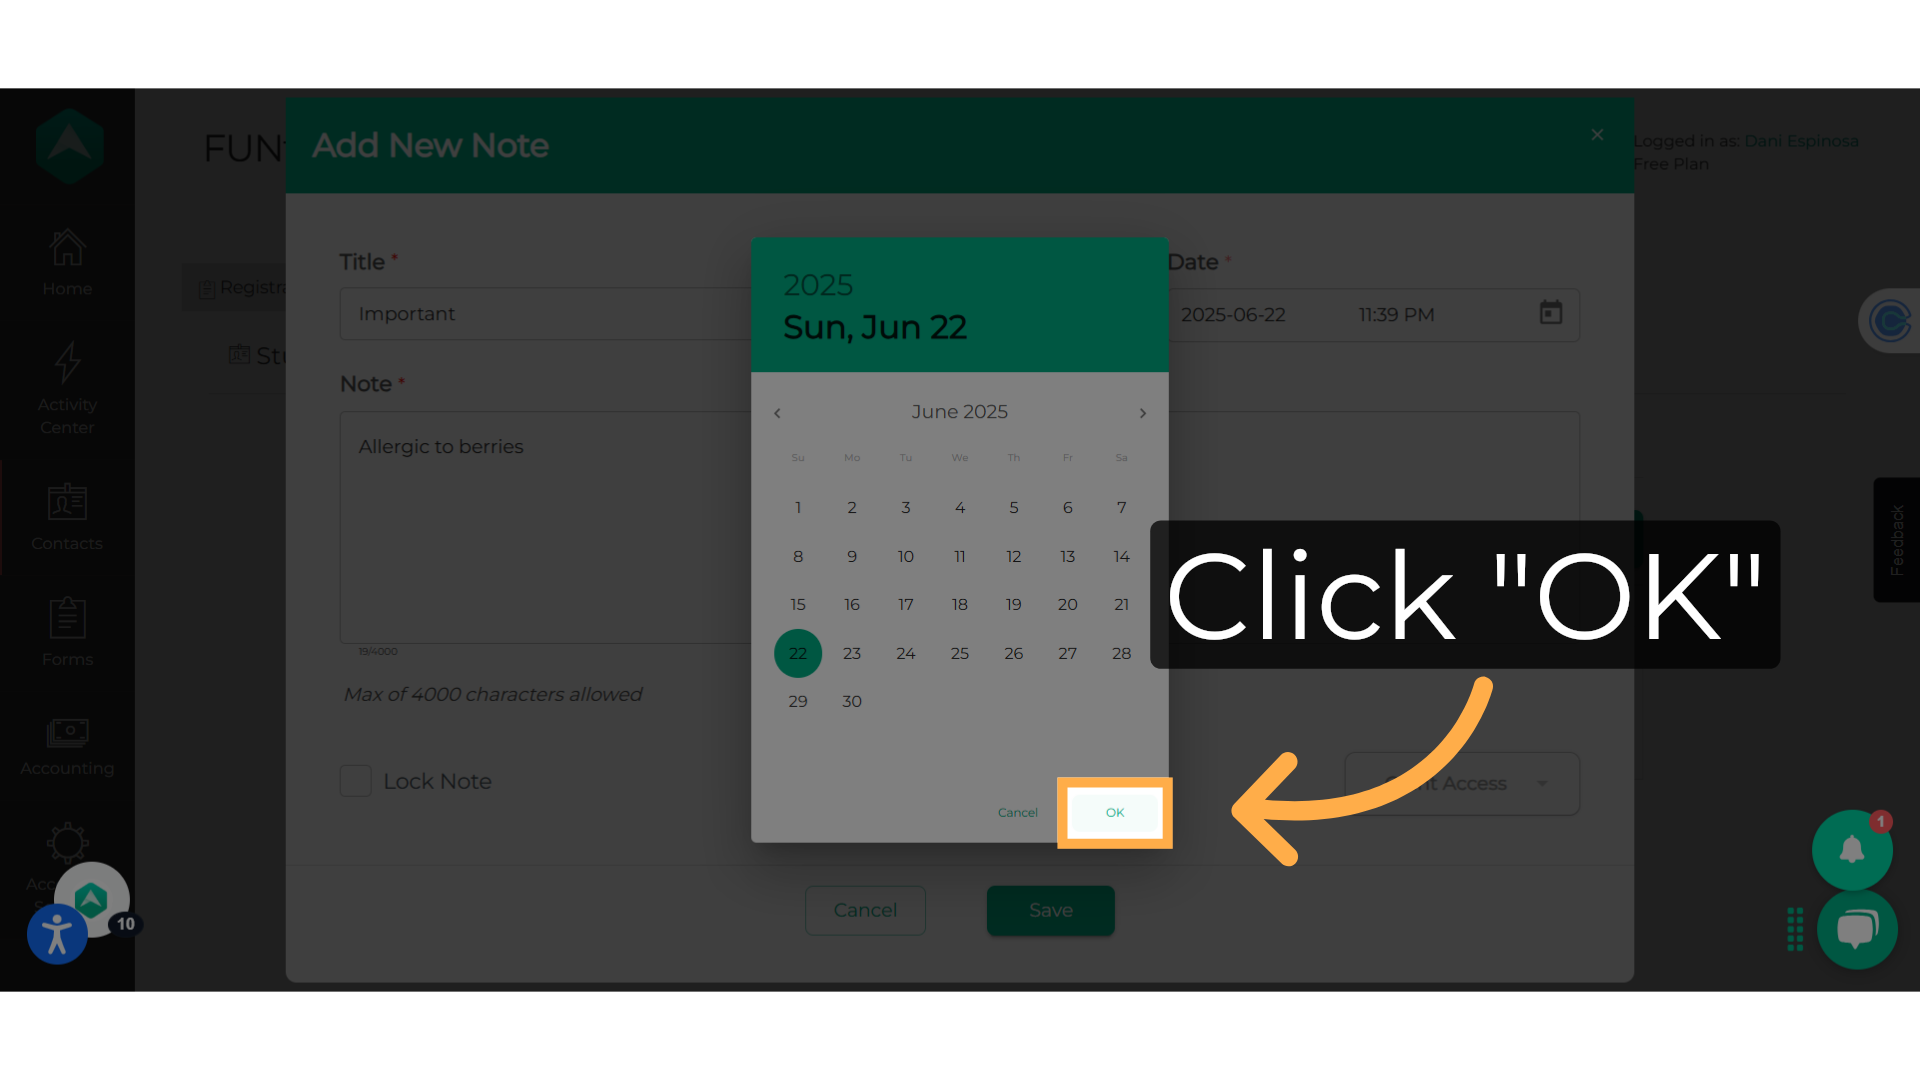
10. Click "OK"
Select the date and hit "OK".
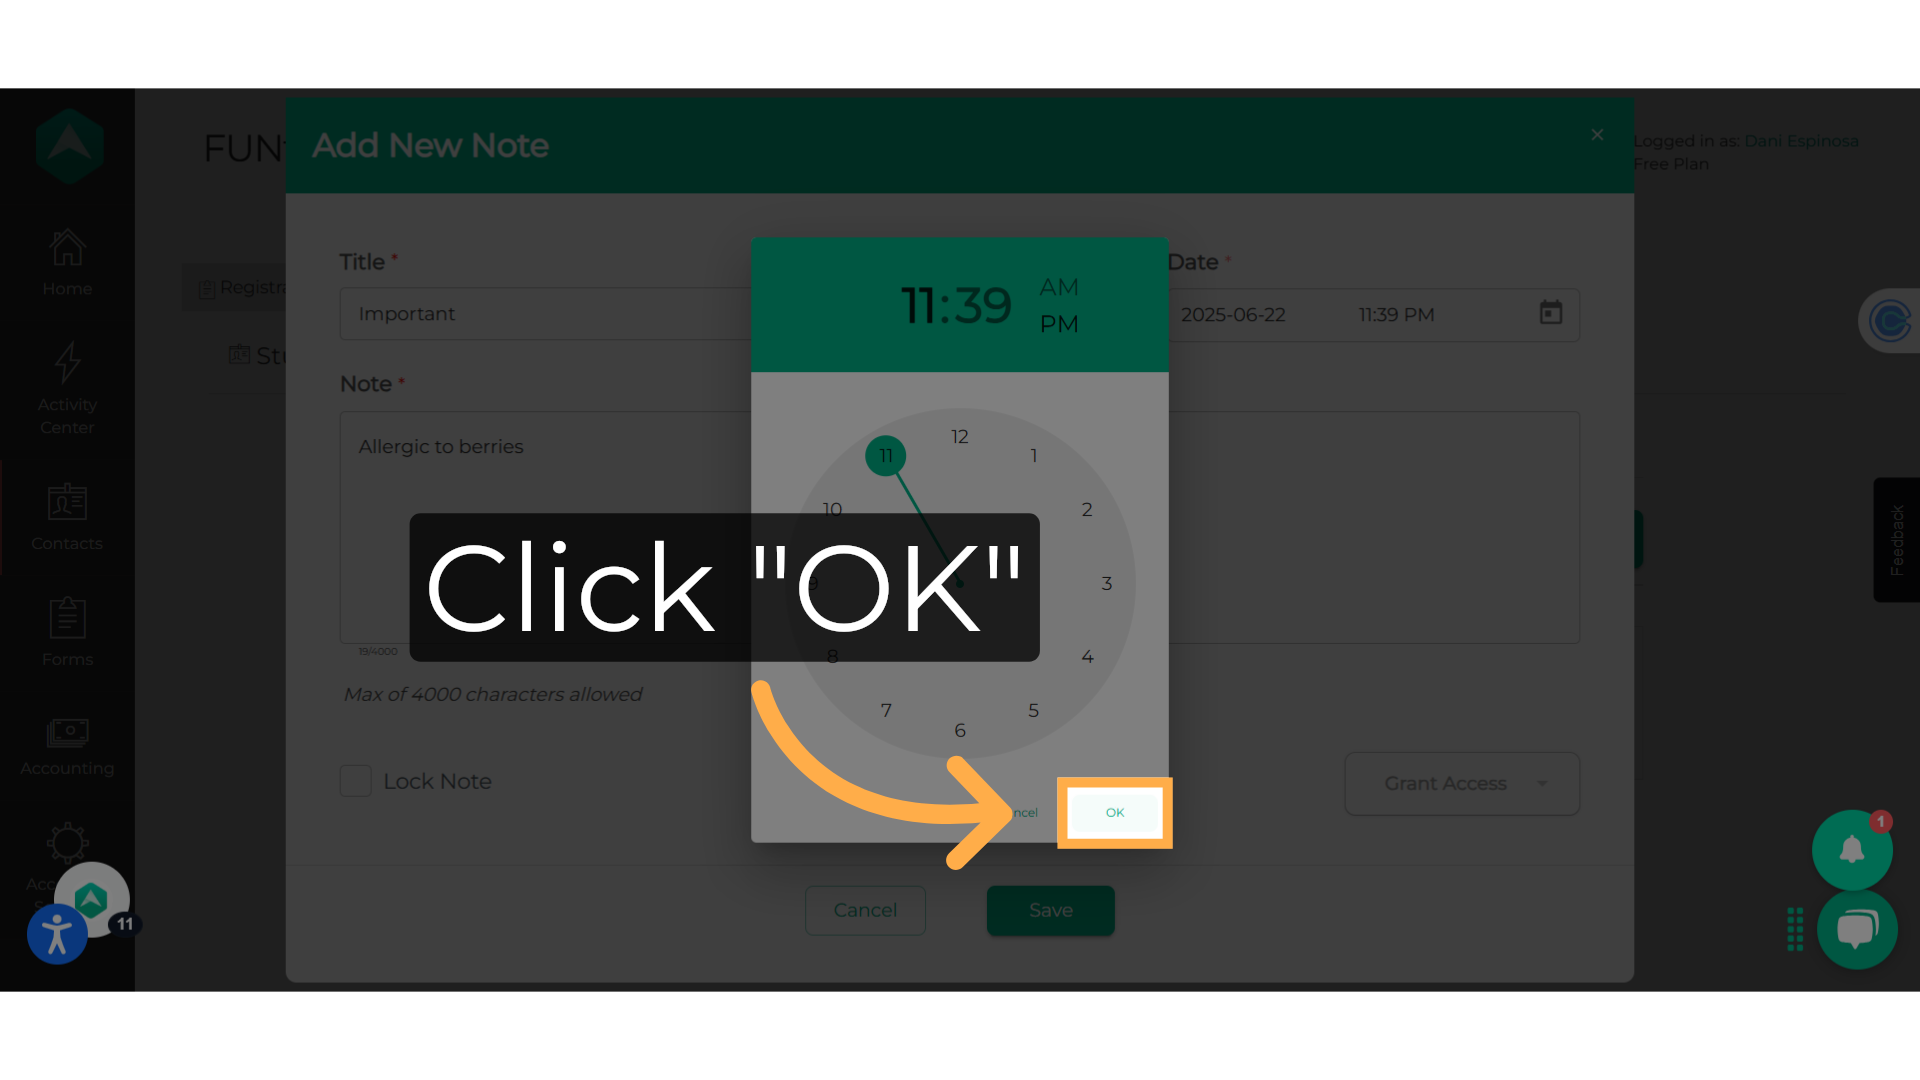
11. Click "OK"
Select the time and hit "OK"
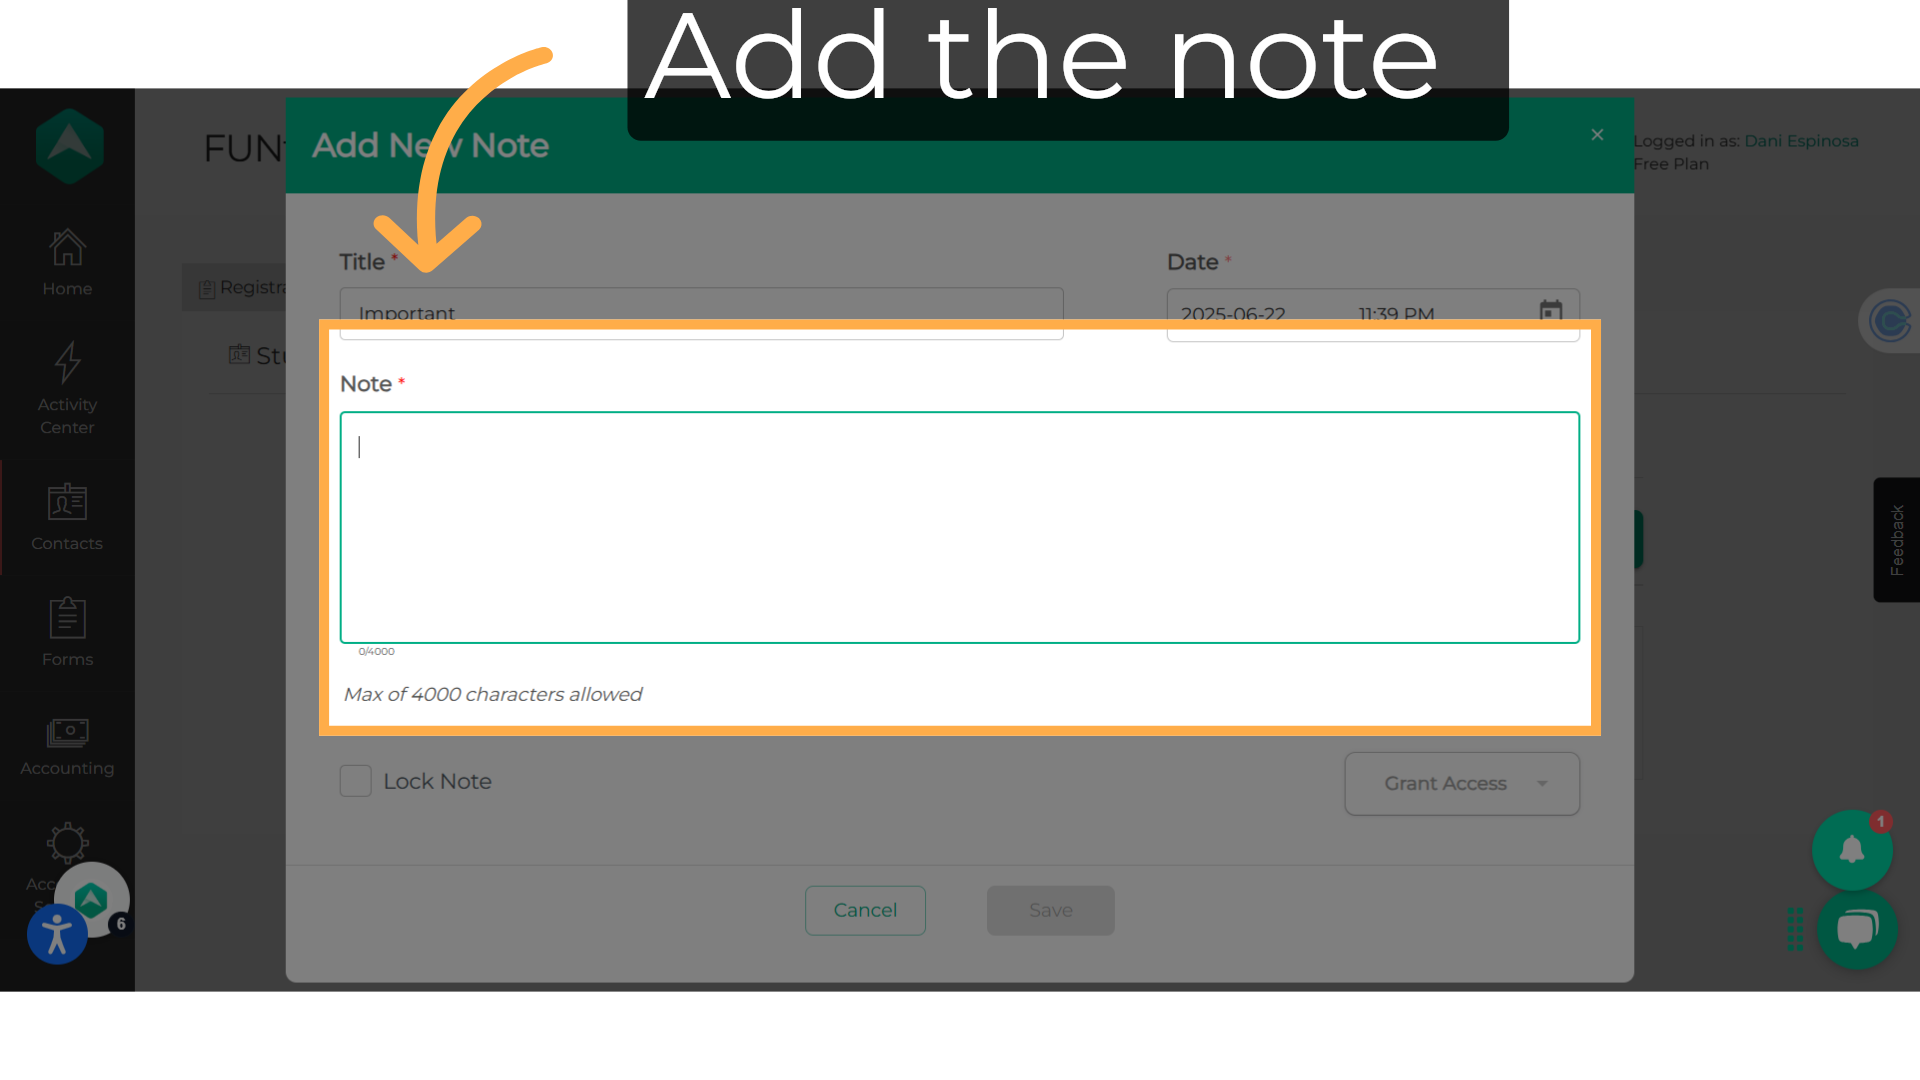
12. Add the note
You have 4,000 characters available when creating your student note.
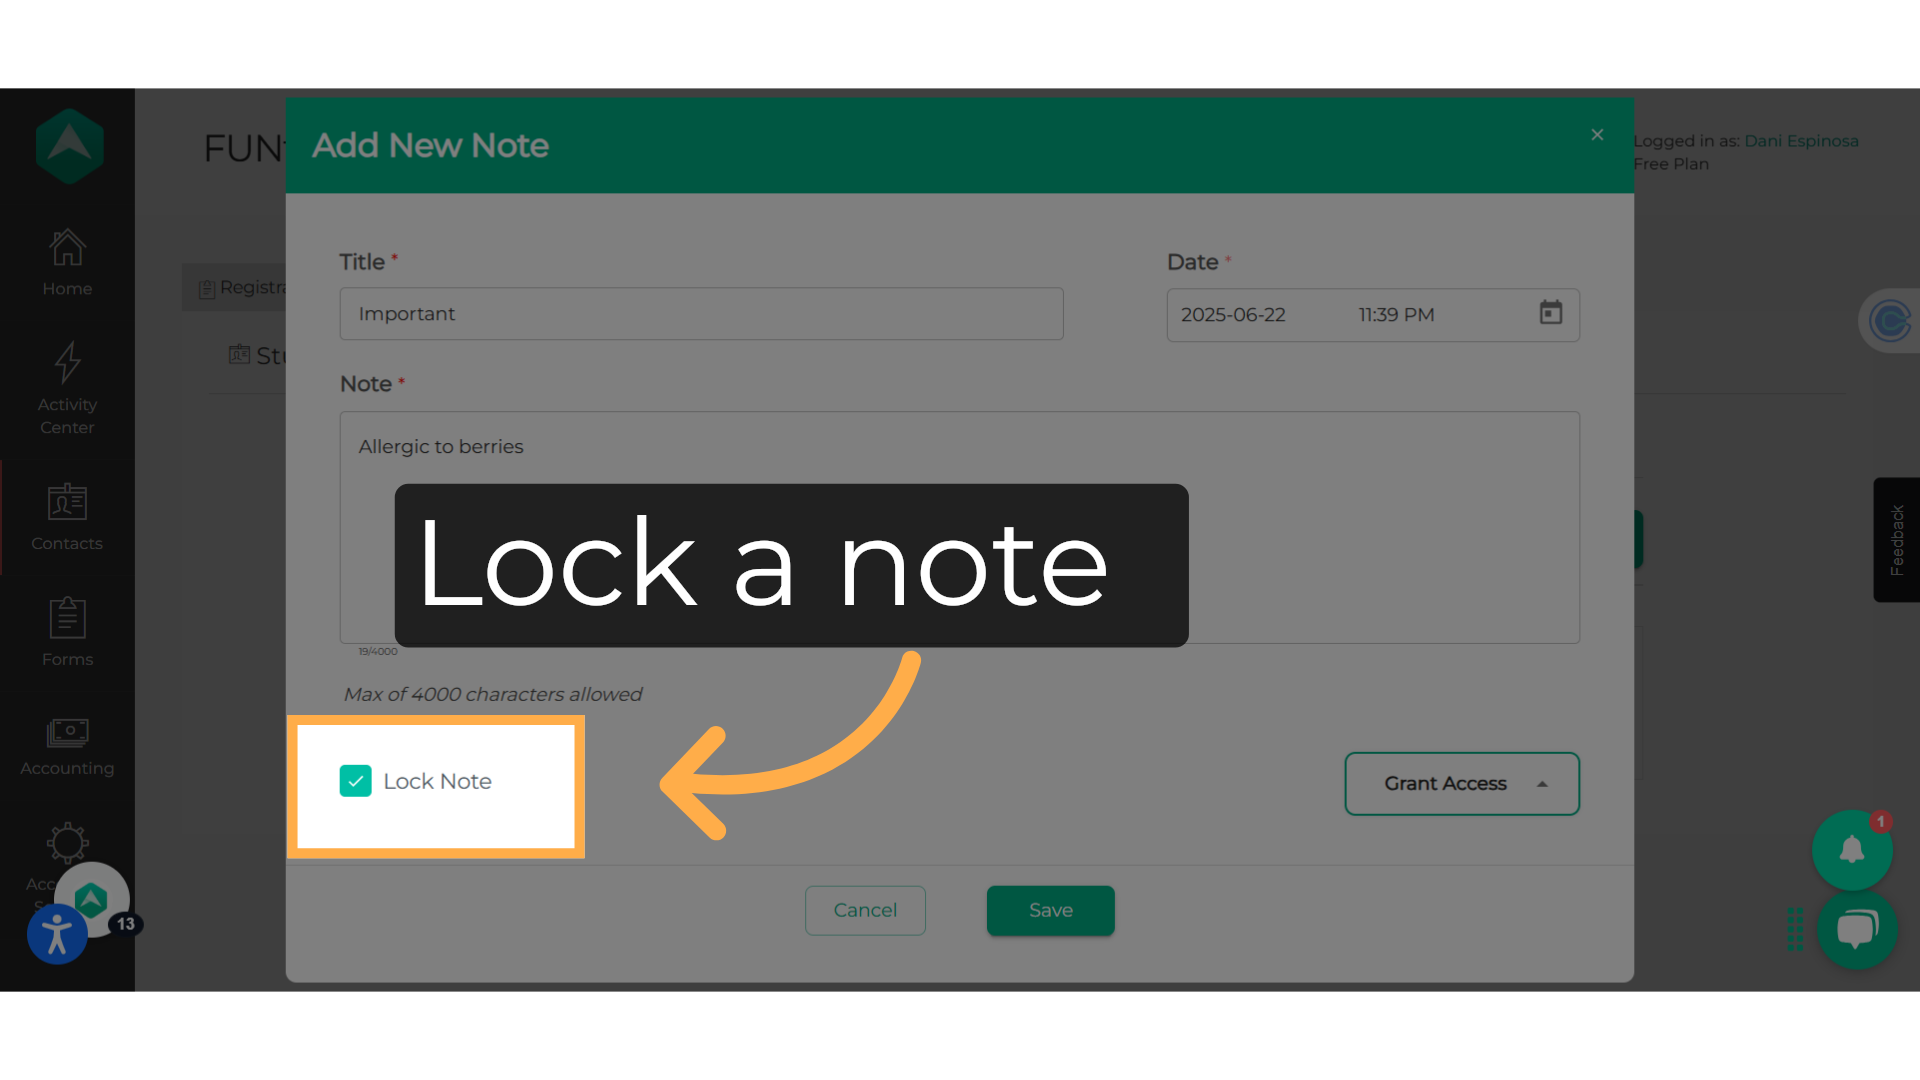
13. Lock a note
You can lock a student note by checking the box.
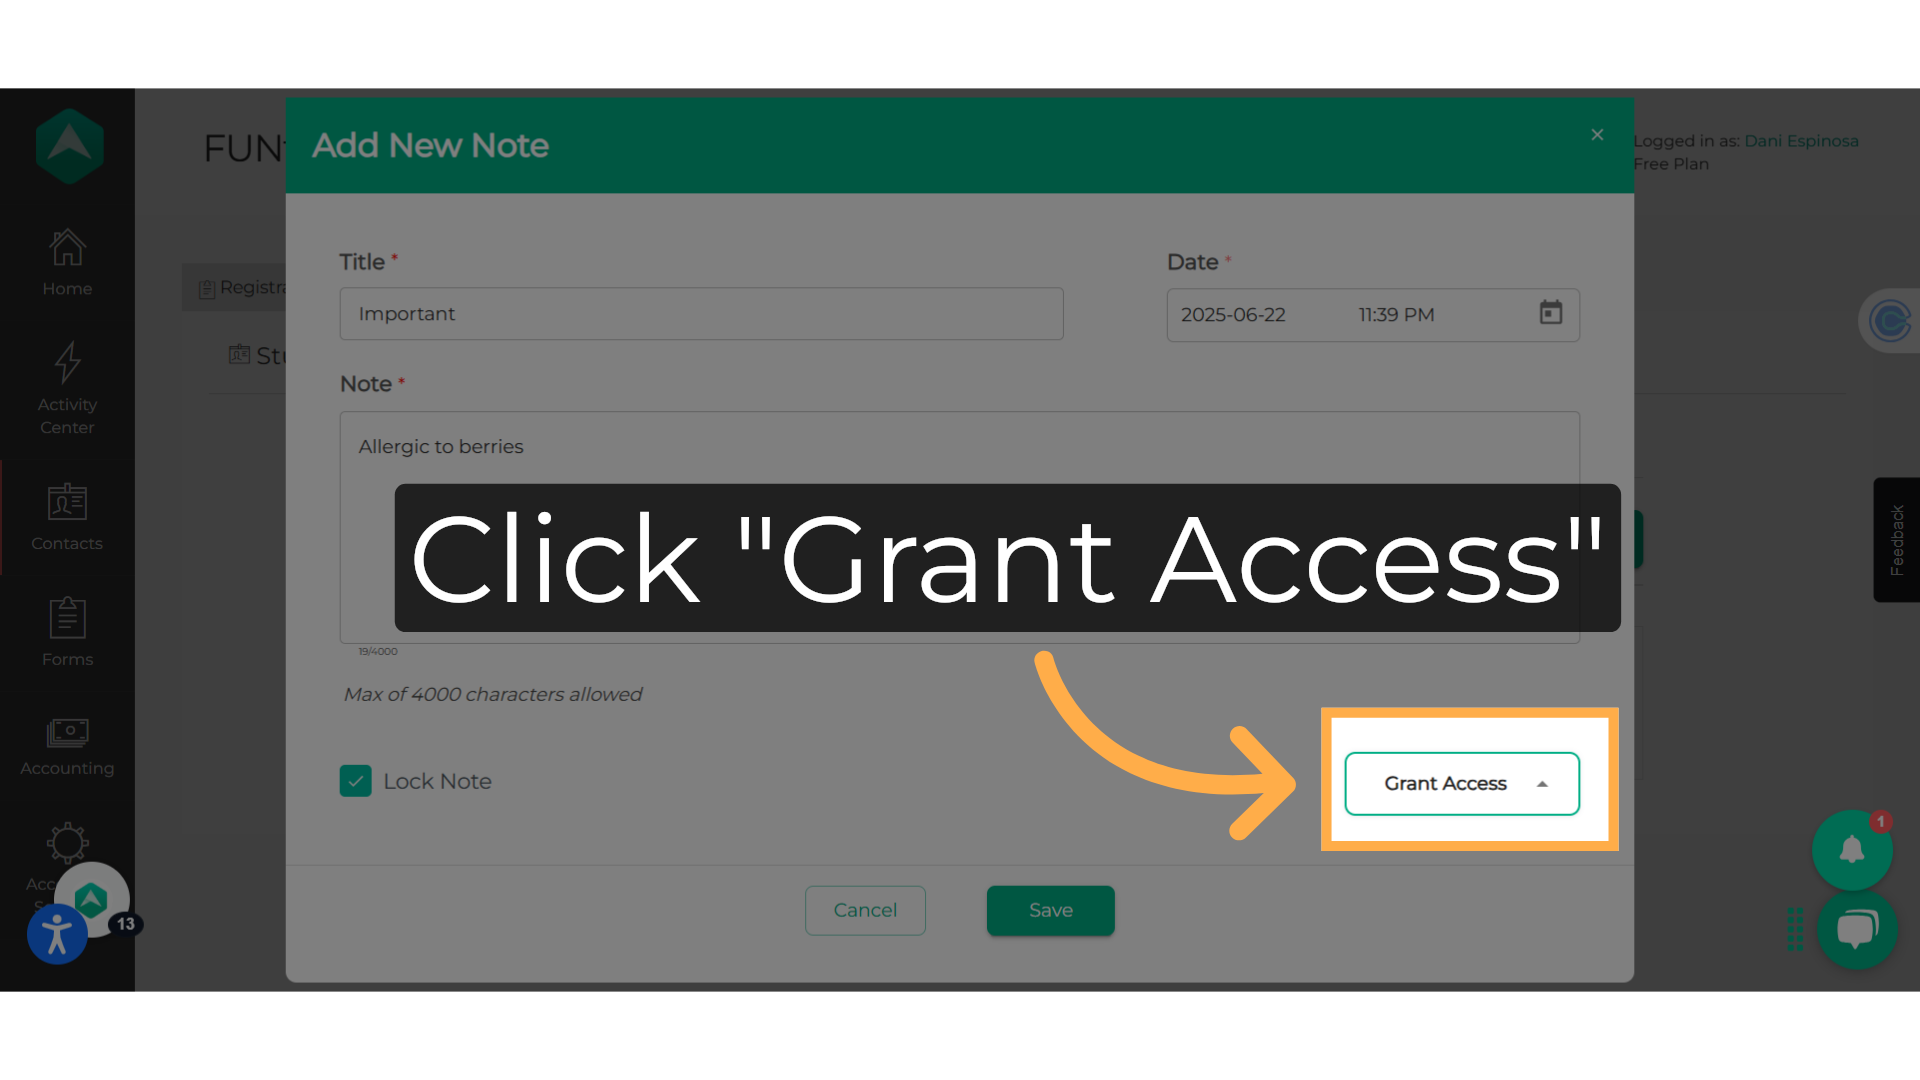
14. Click "Grant Access"
Also, provide access to the note if necessary, by clicking the "Grant Access" dropdown, entering the staff members name, and hitting enter.
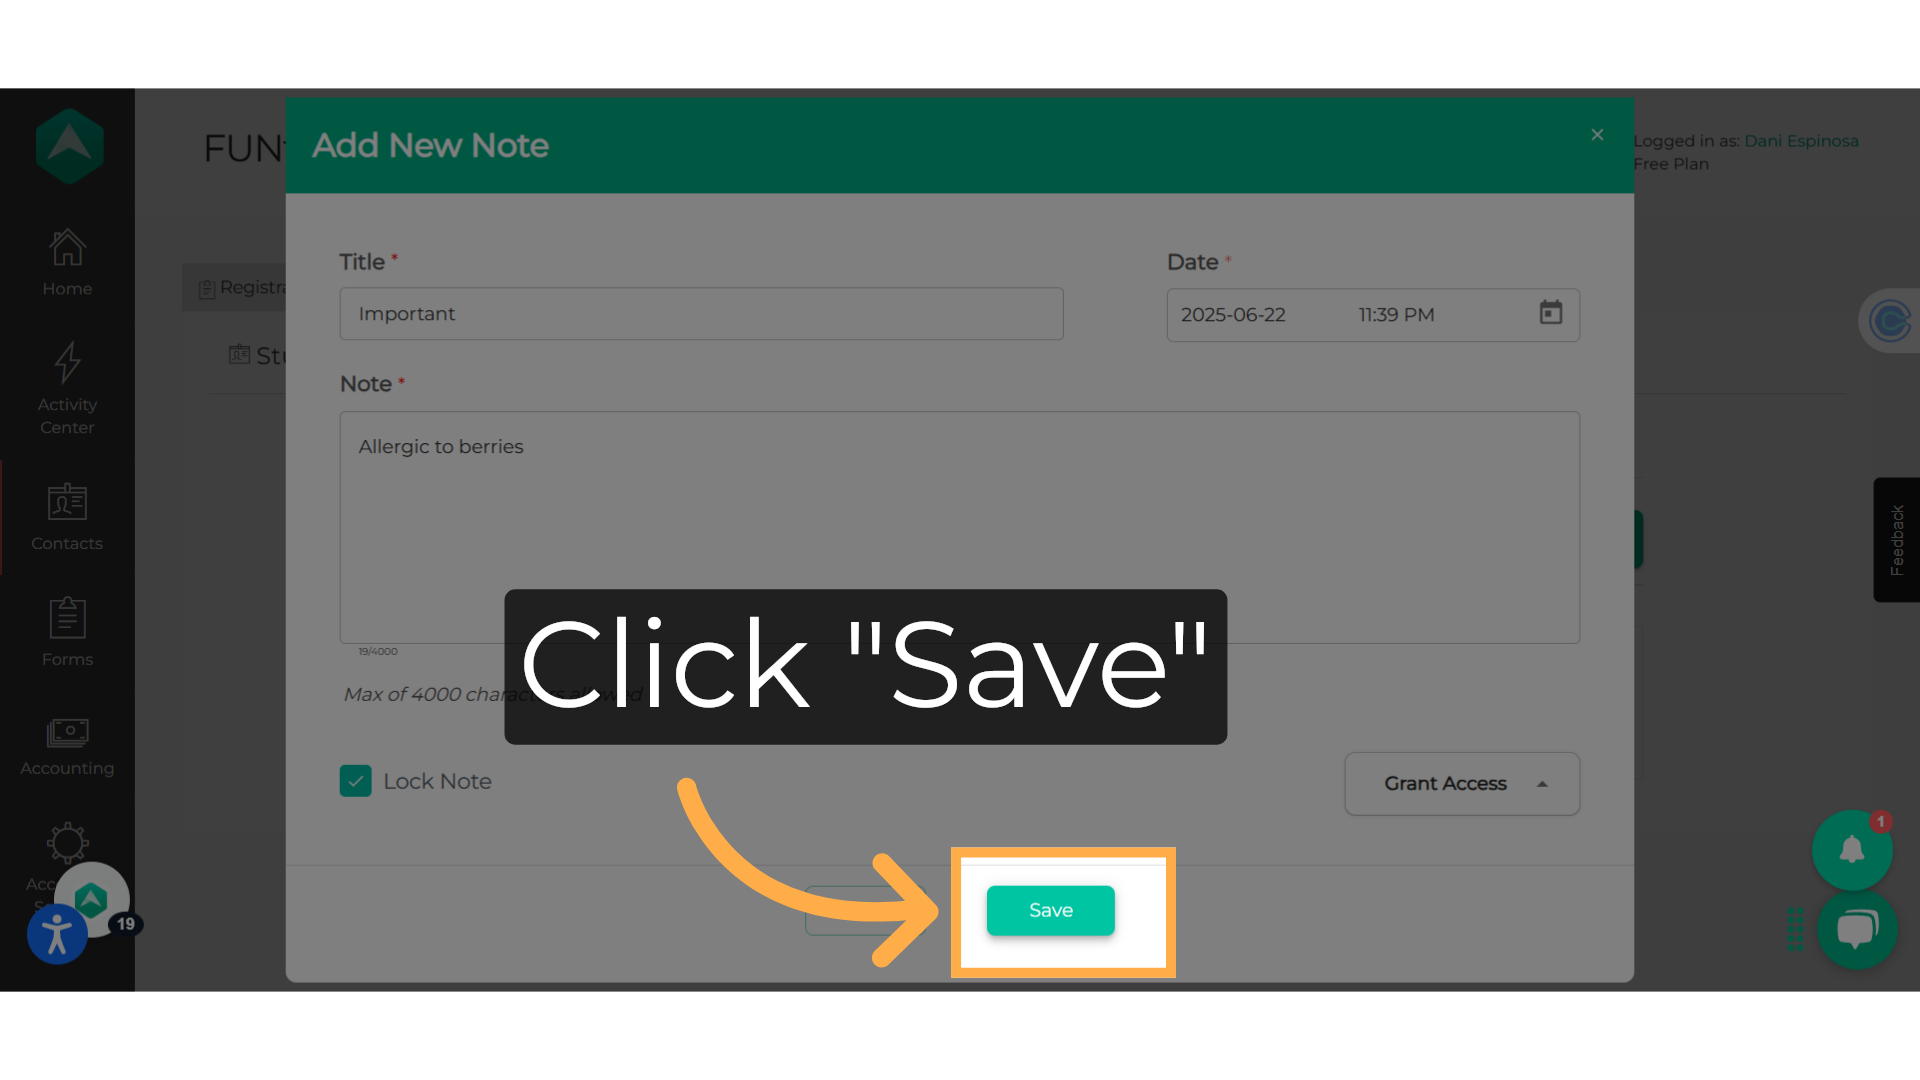
15. Click "Save"
Save the student note that you created.
This guide walked you through Creating Student Notes on Afterschool HQ. Thanks for watching!