![ASHQ Logo Vert Flat.png]](https://support.afterschoolhq.com/hs-fs/hubfs/ASHQ%20Logo%20Vert%20Flat.png?height=40&name=ASHQ%20Logo%20Vert%20Flat.png)
AfterSchool HQ forms give you the flexibility to collect the information your organization needs during registration.
You can use pre-built questions, create custom questions and sections, choose who should see or answer each question, and organize your form to fit your registration needs.
1. Access Forms
From the main menu, click “Forms” to open the form management area in AfterSchool HQ.
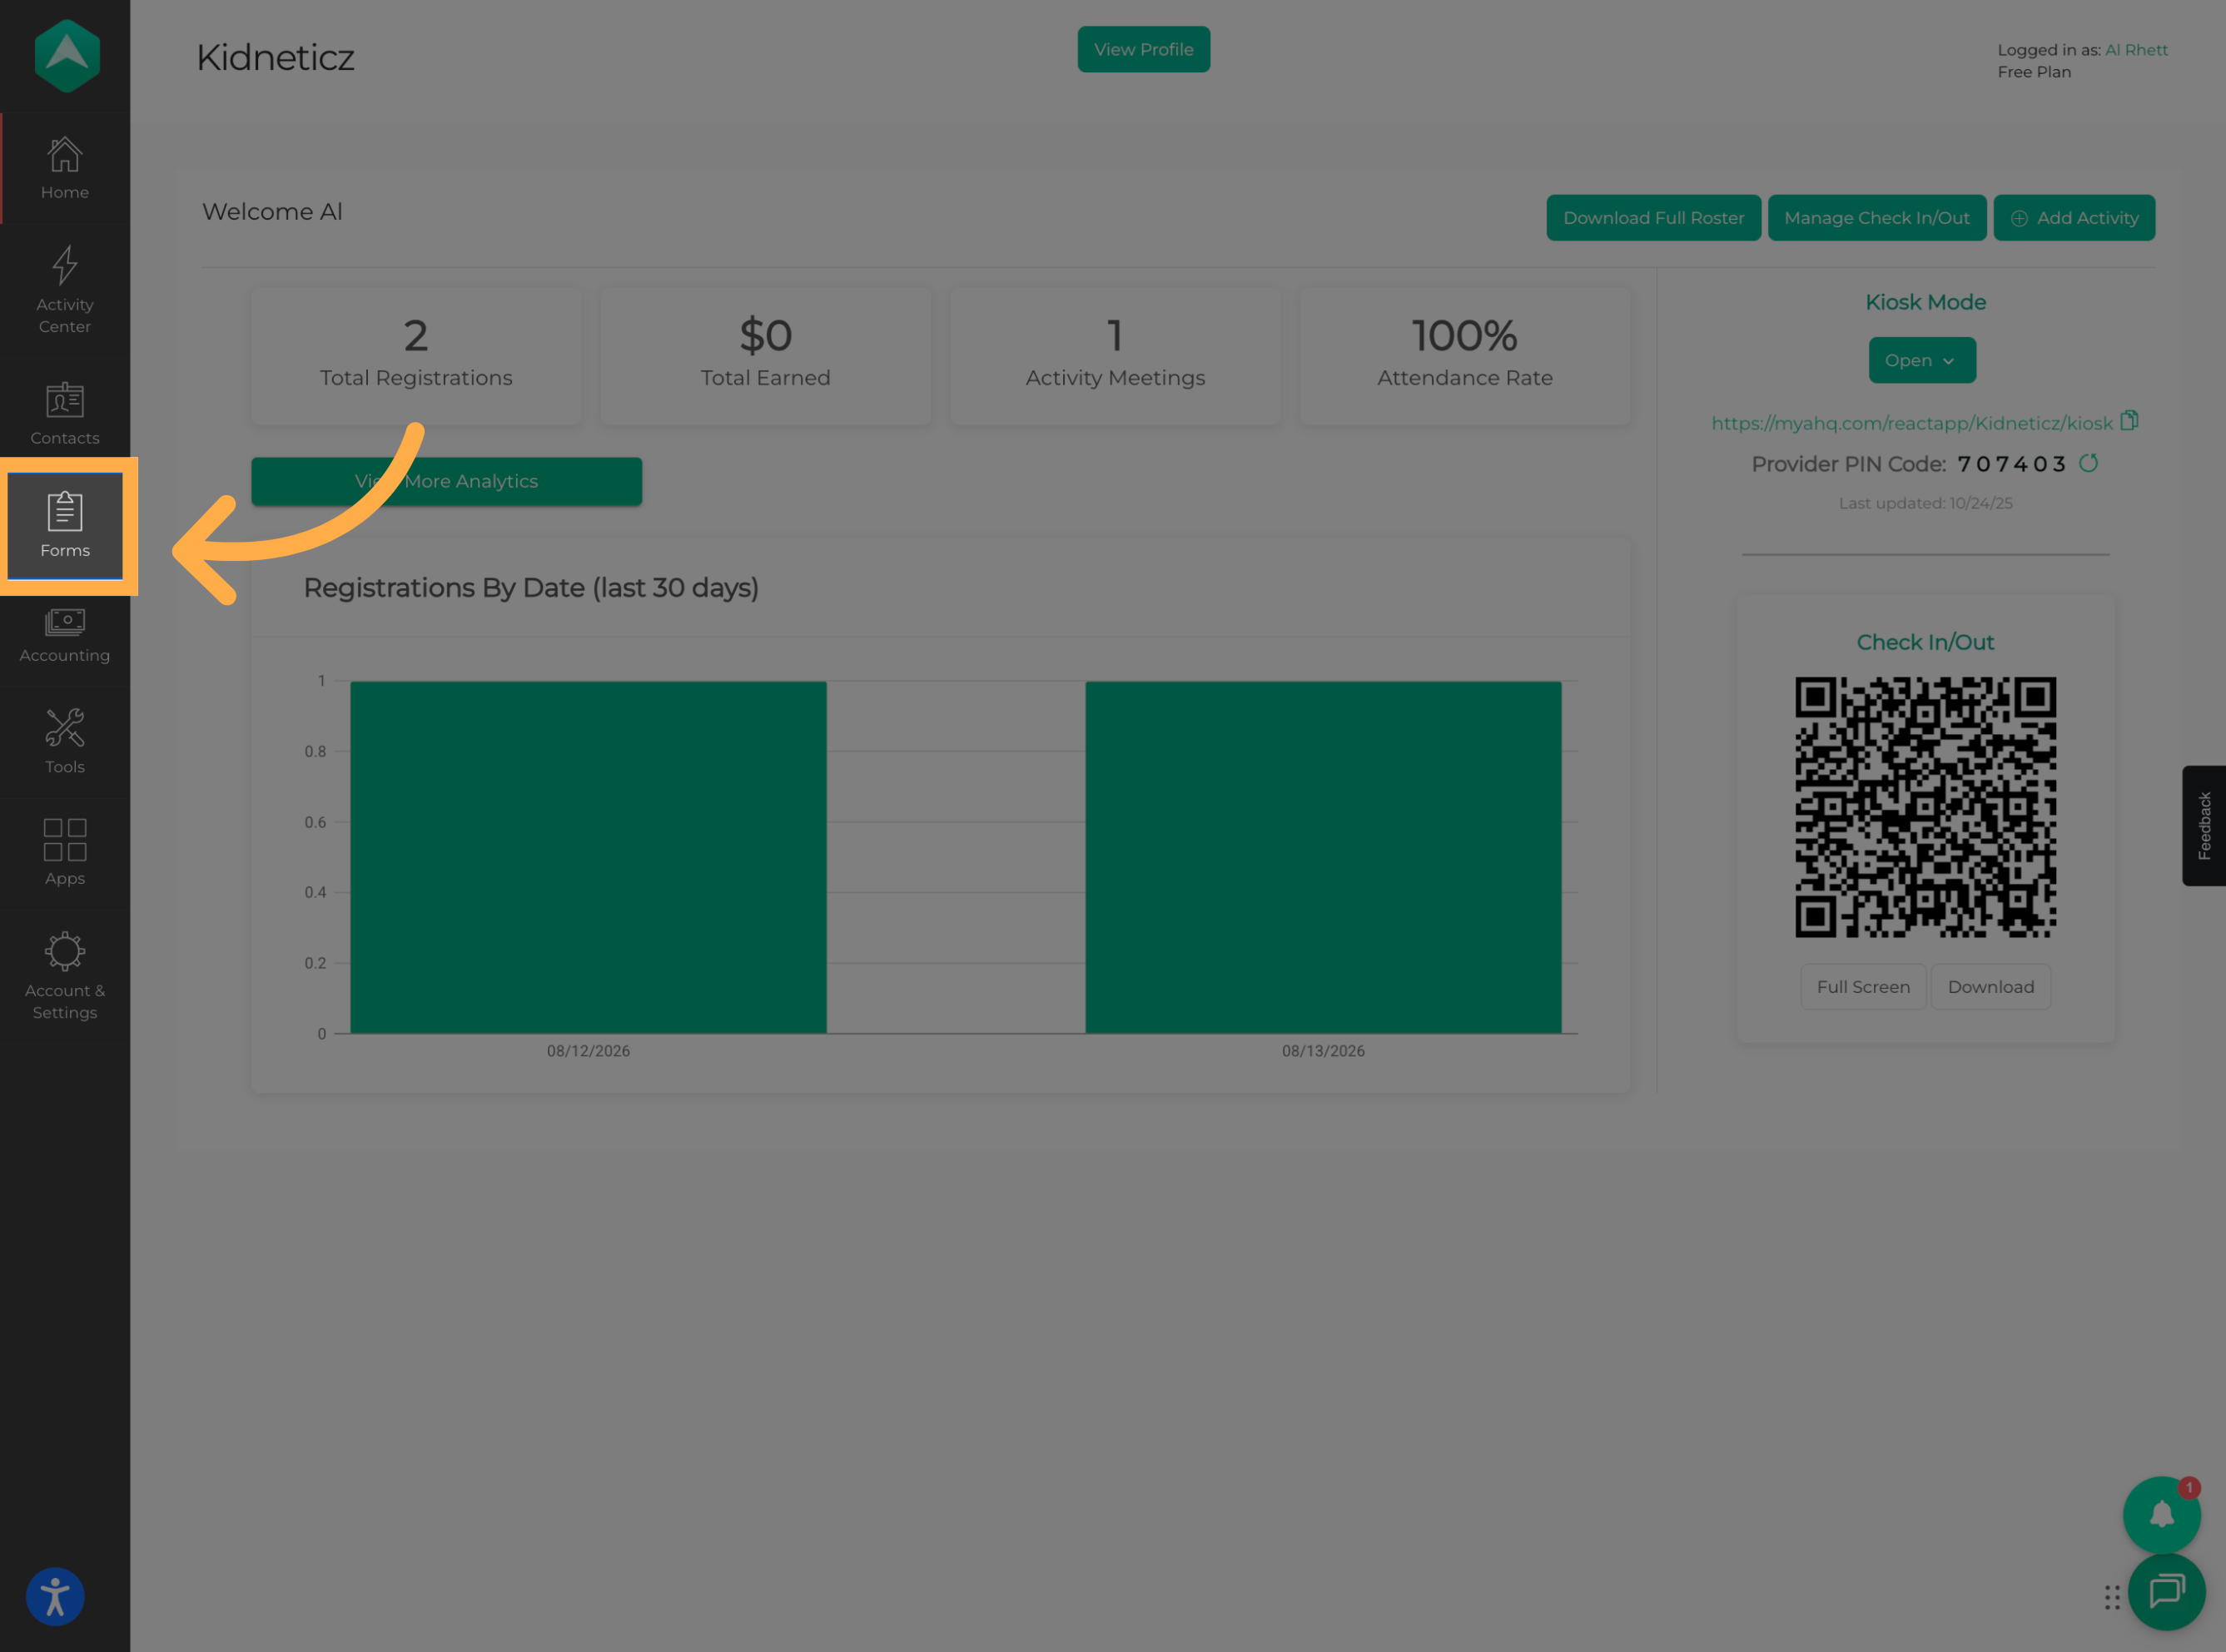
💡Tip: The Forms section is where you can create new forms and manage forms you have already created.
2. Create a New Form
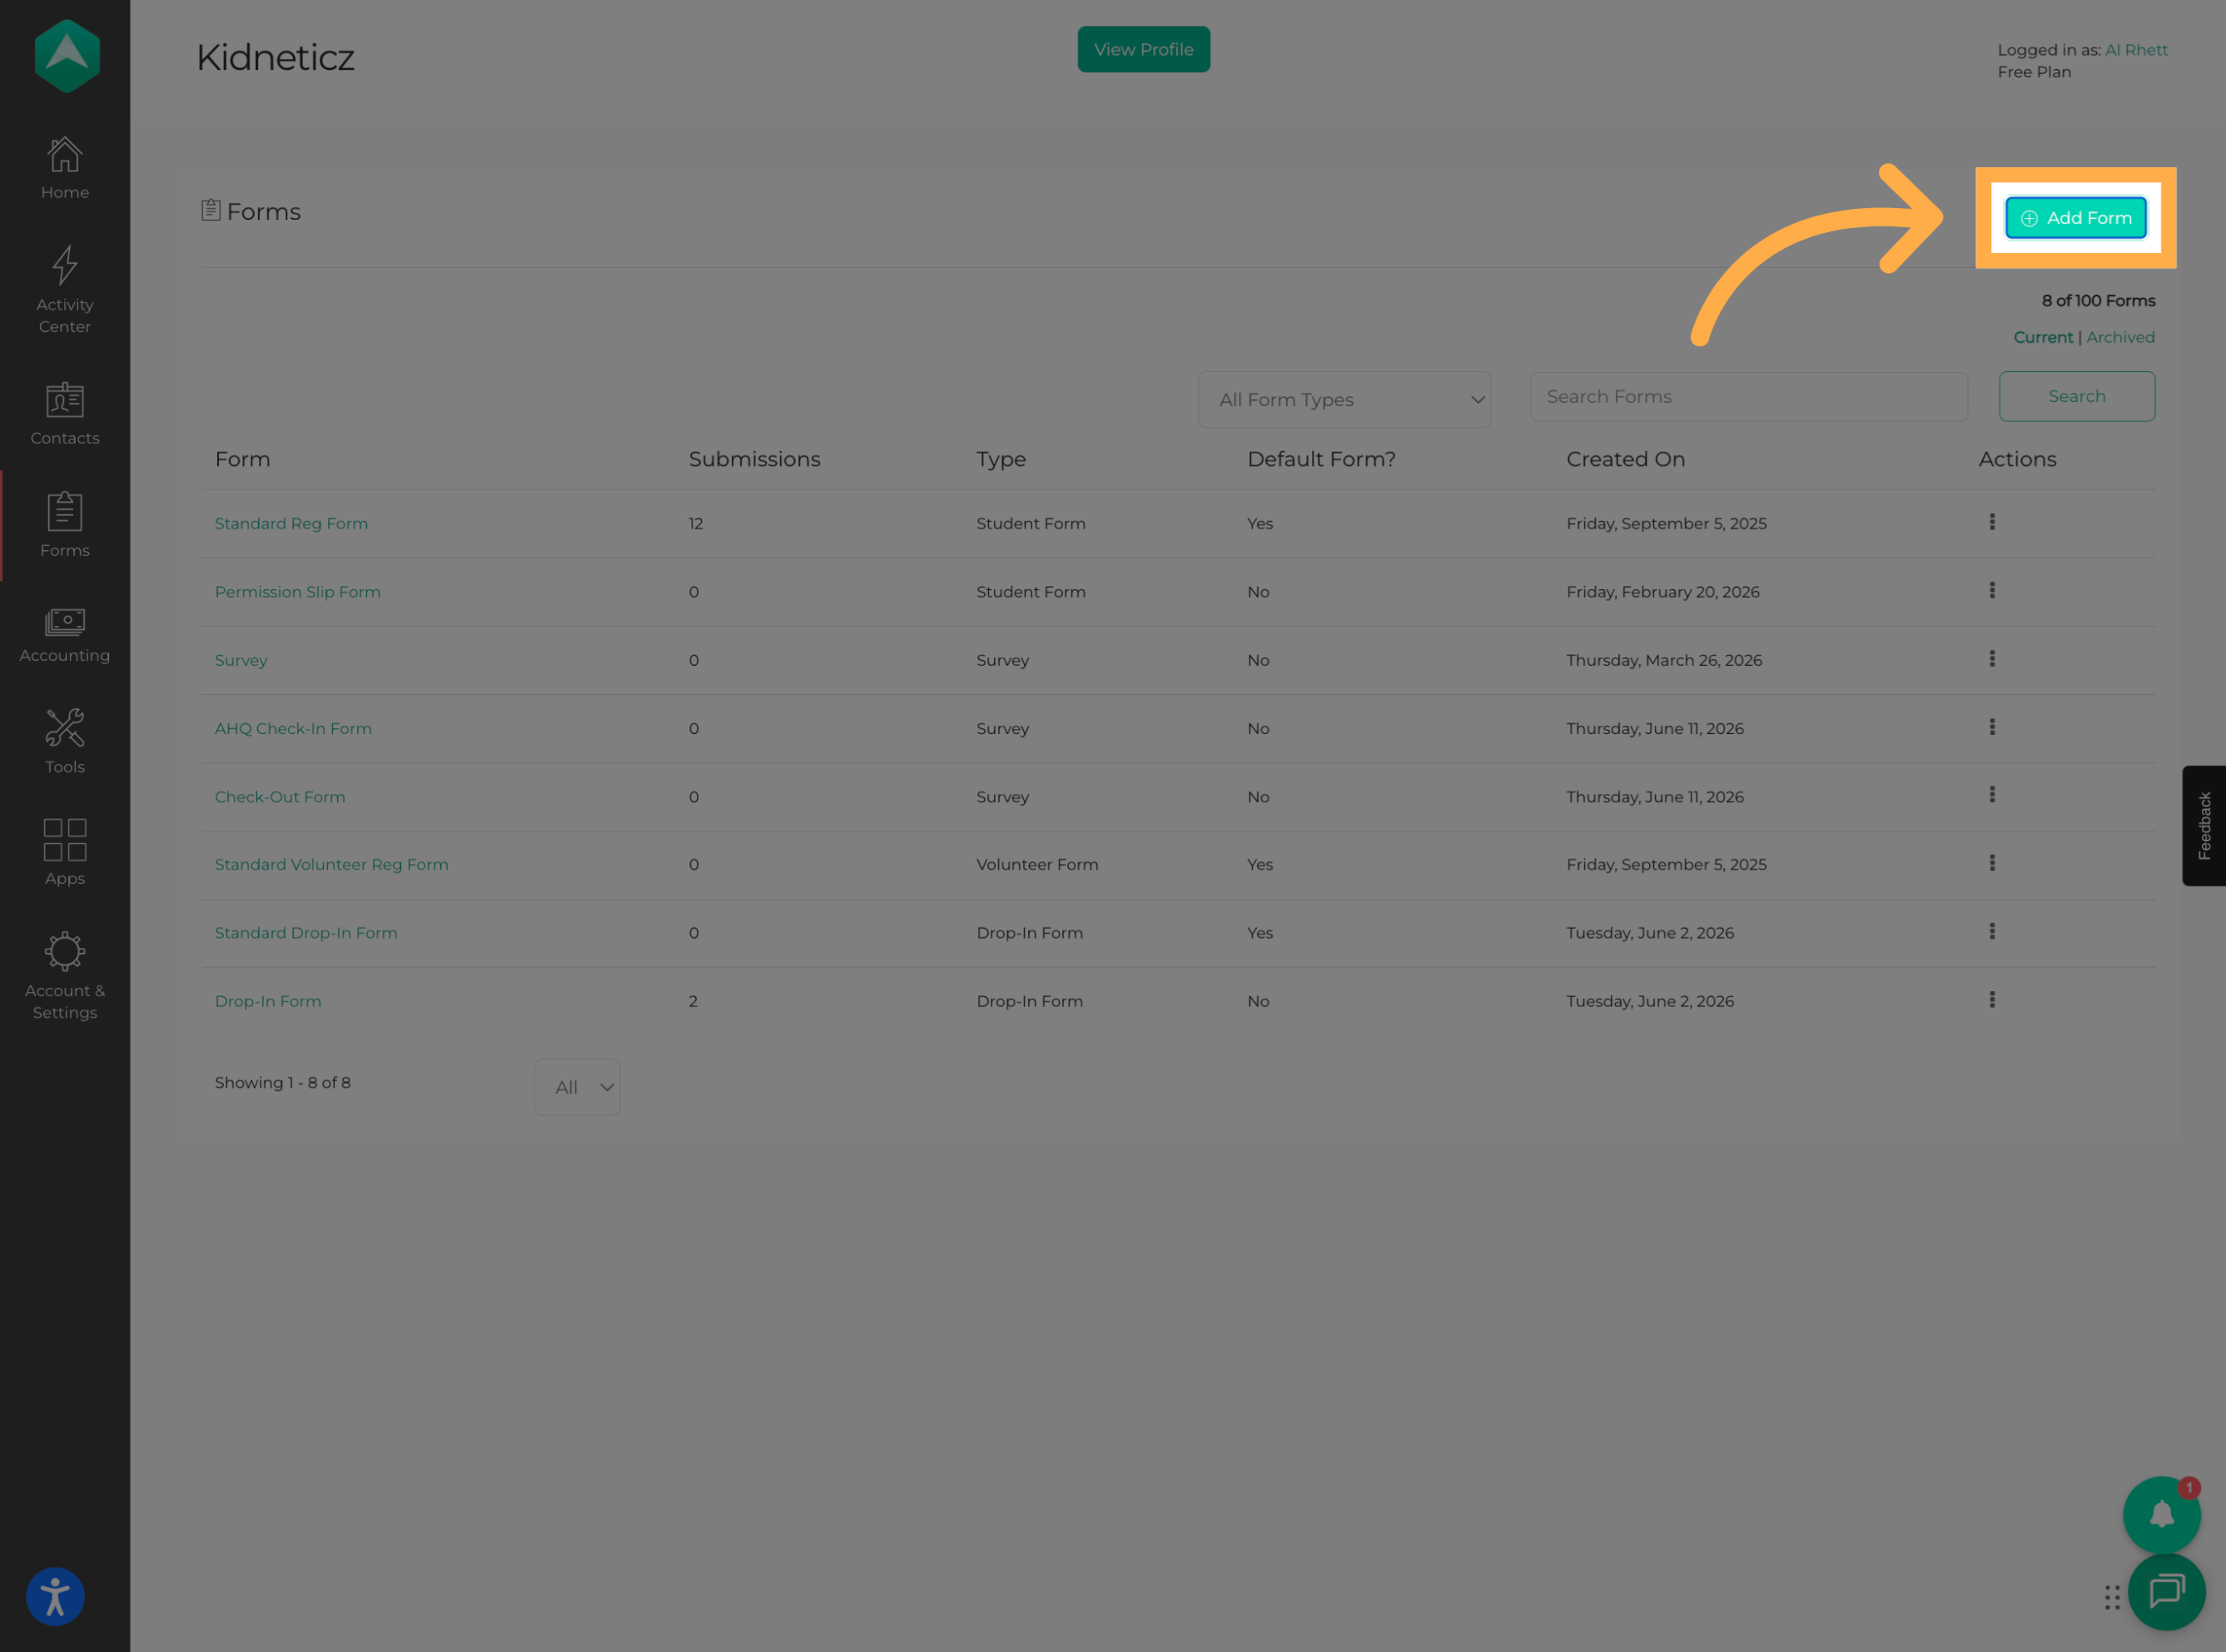
Click “Add Form” to begin creating a new form.
3. Enter the Form Title
Enter a name for your form in the Form Title field.
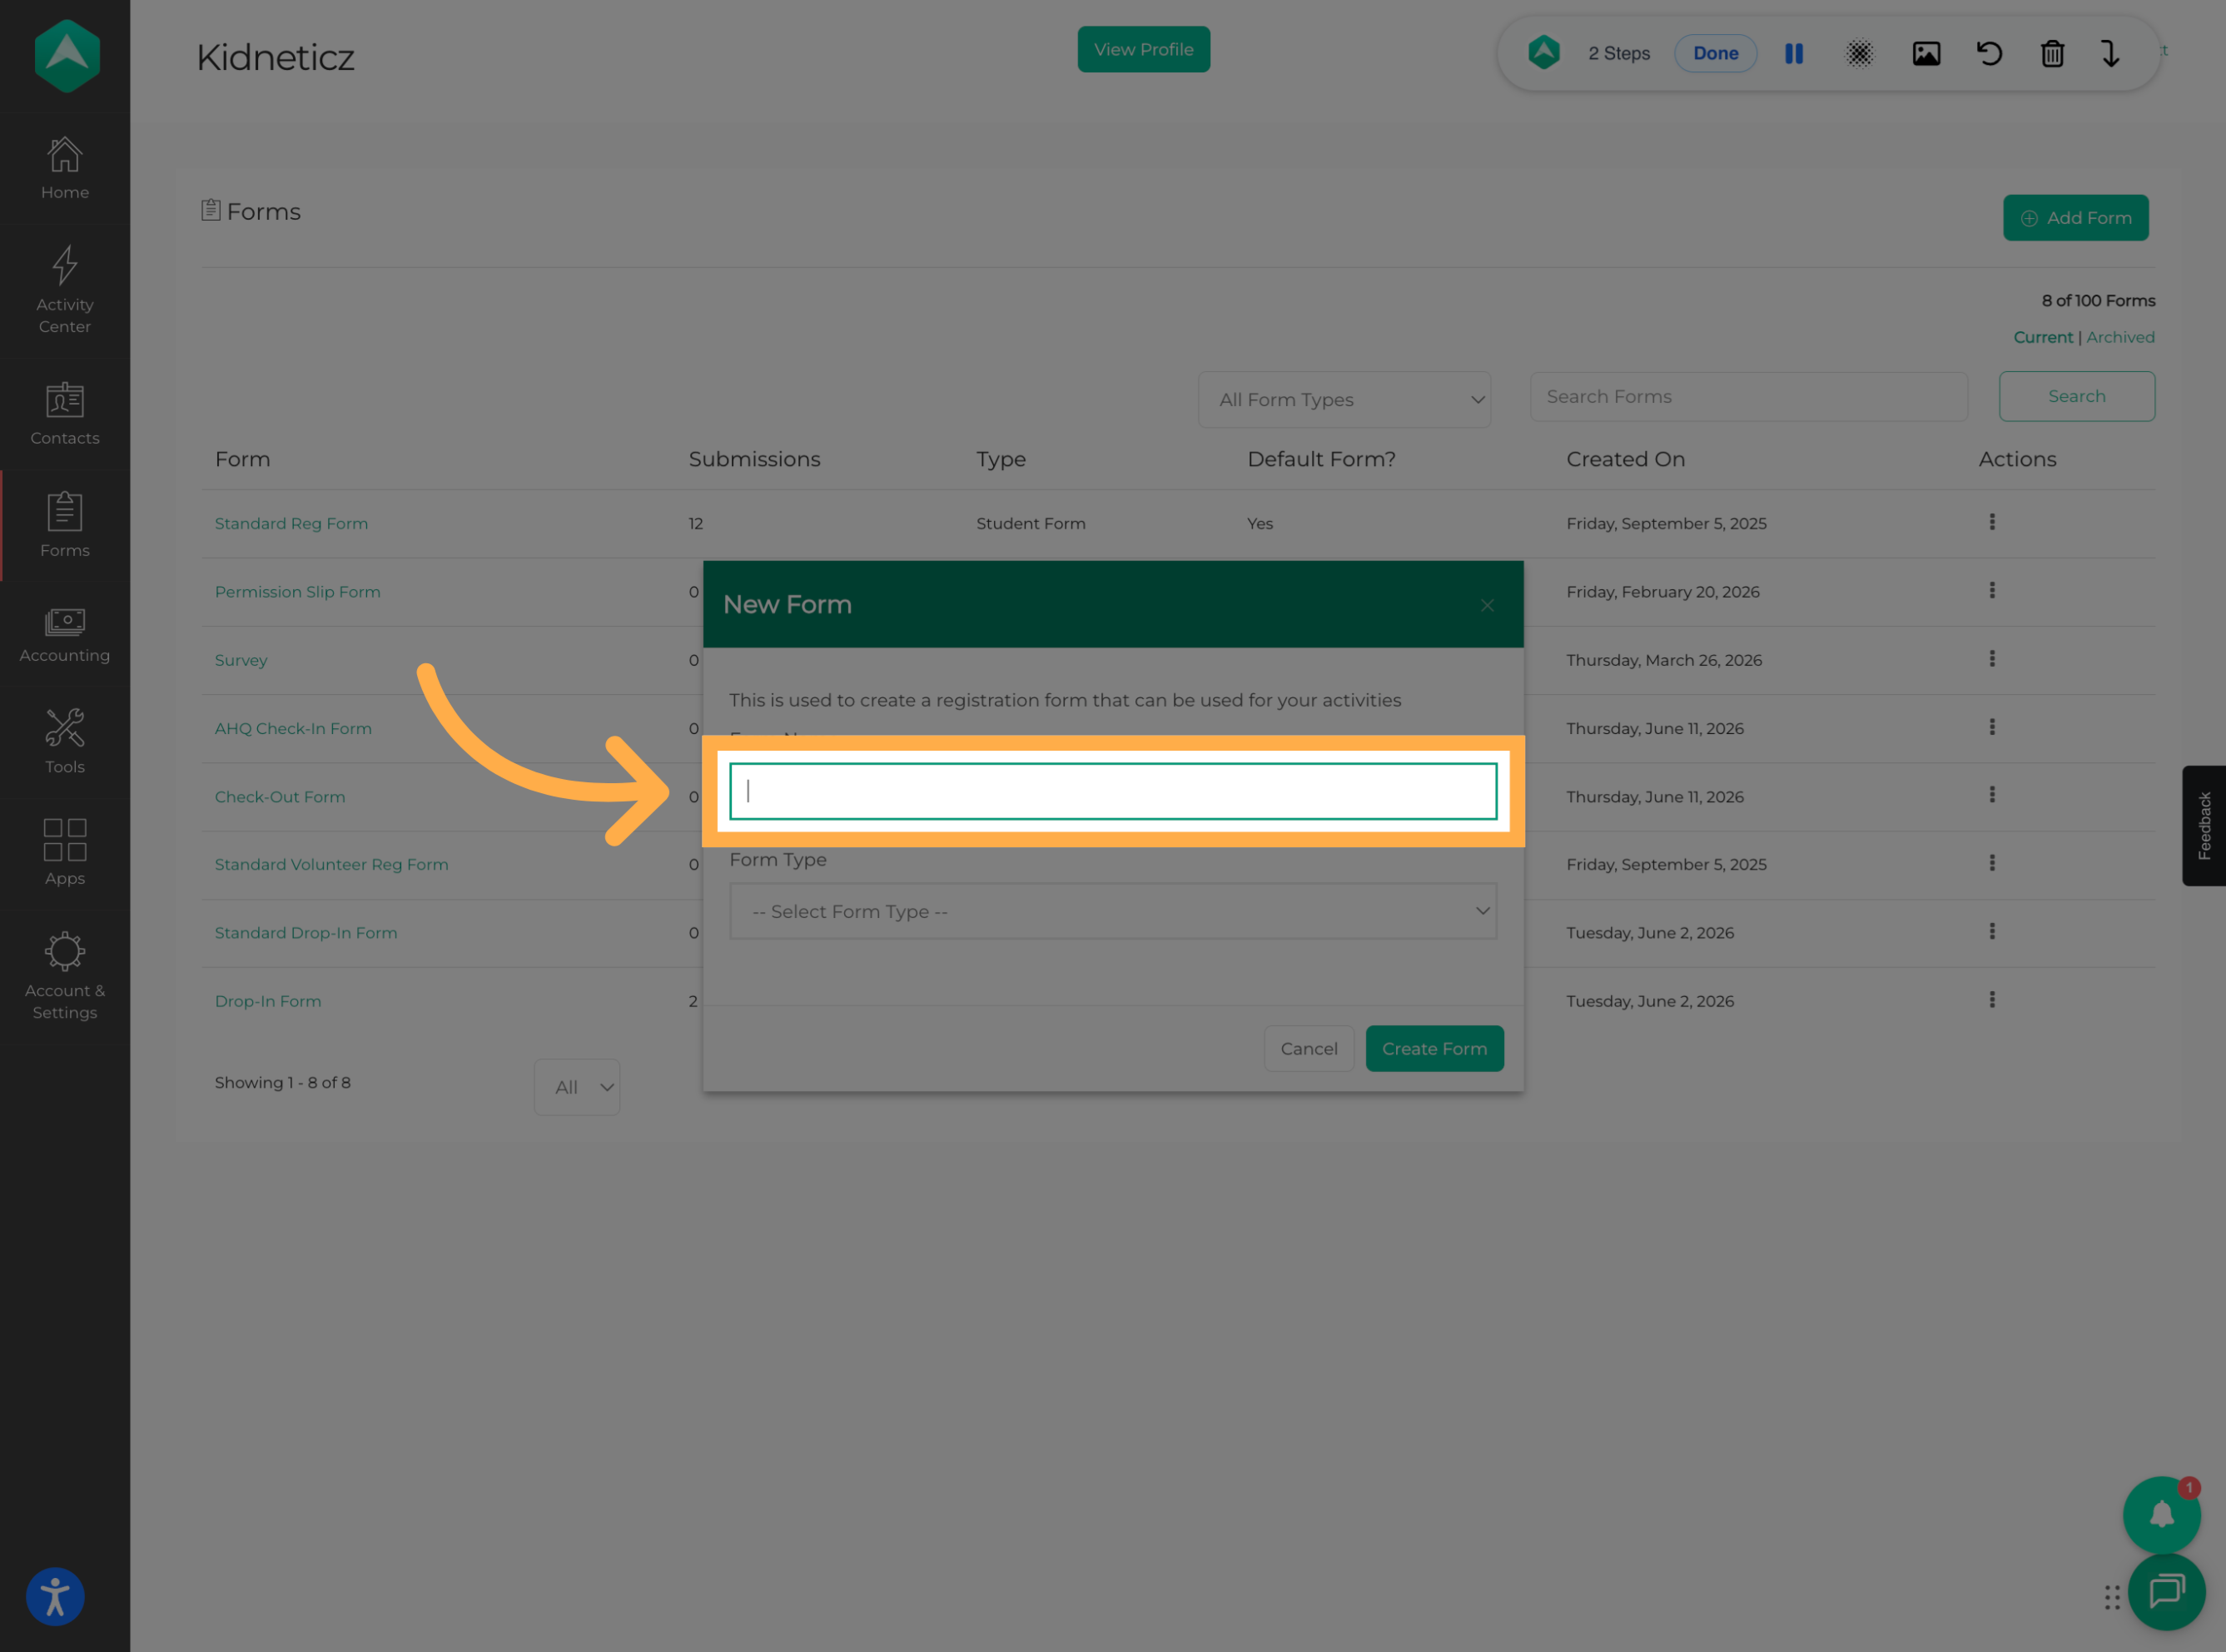
💡Tip: Choose a clear name that will make the form easy to identify when you need to attach it to an activity or review submissions.
4. Choose a Form Type
Select the type of form you want to create based on how you plan to use it.
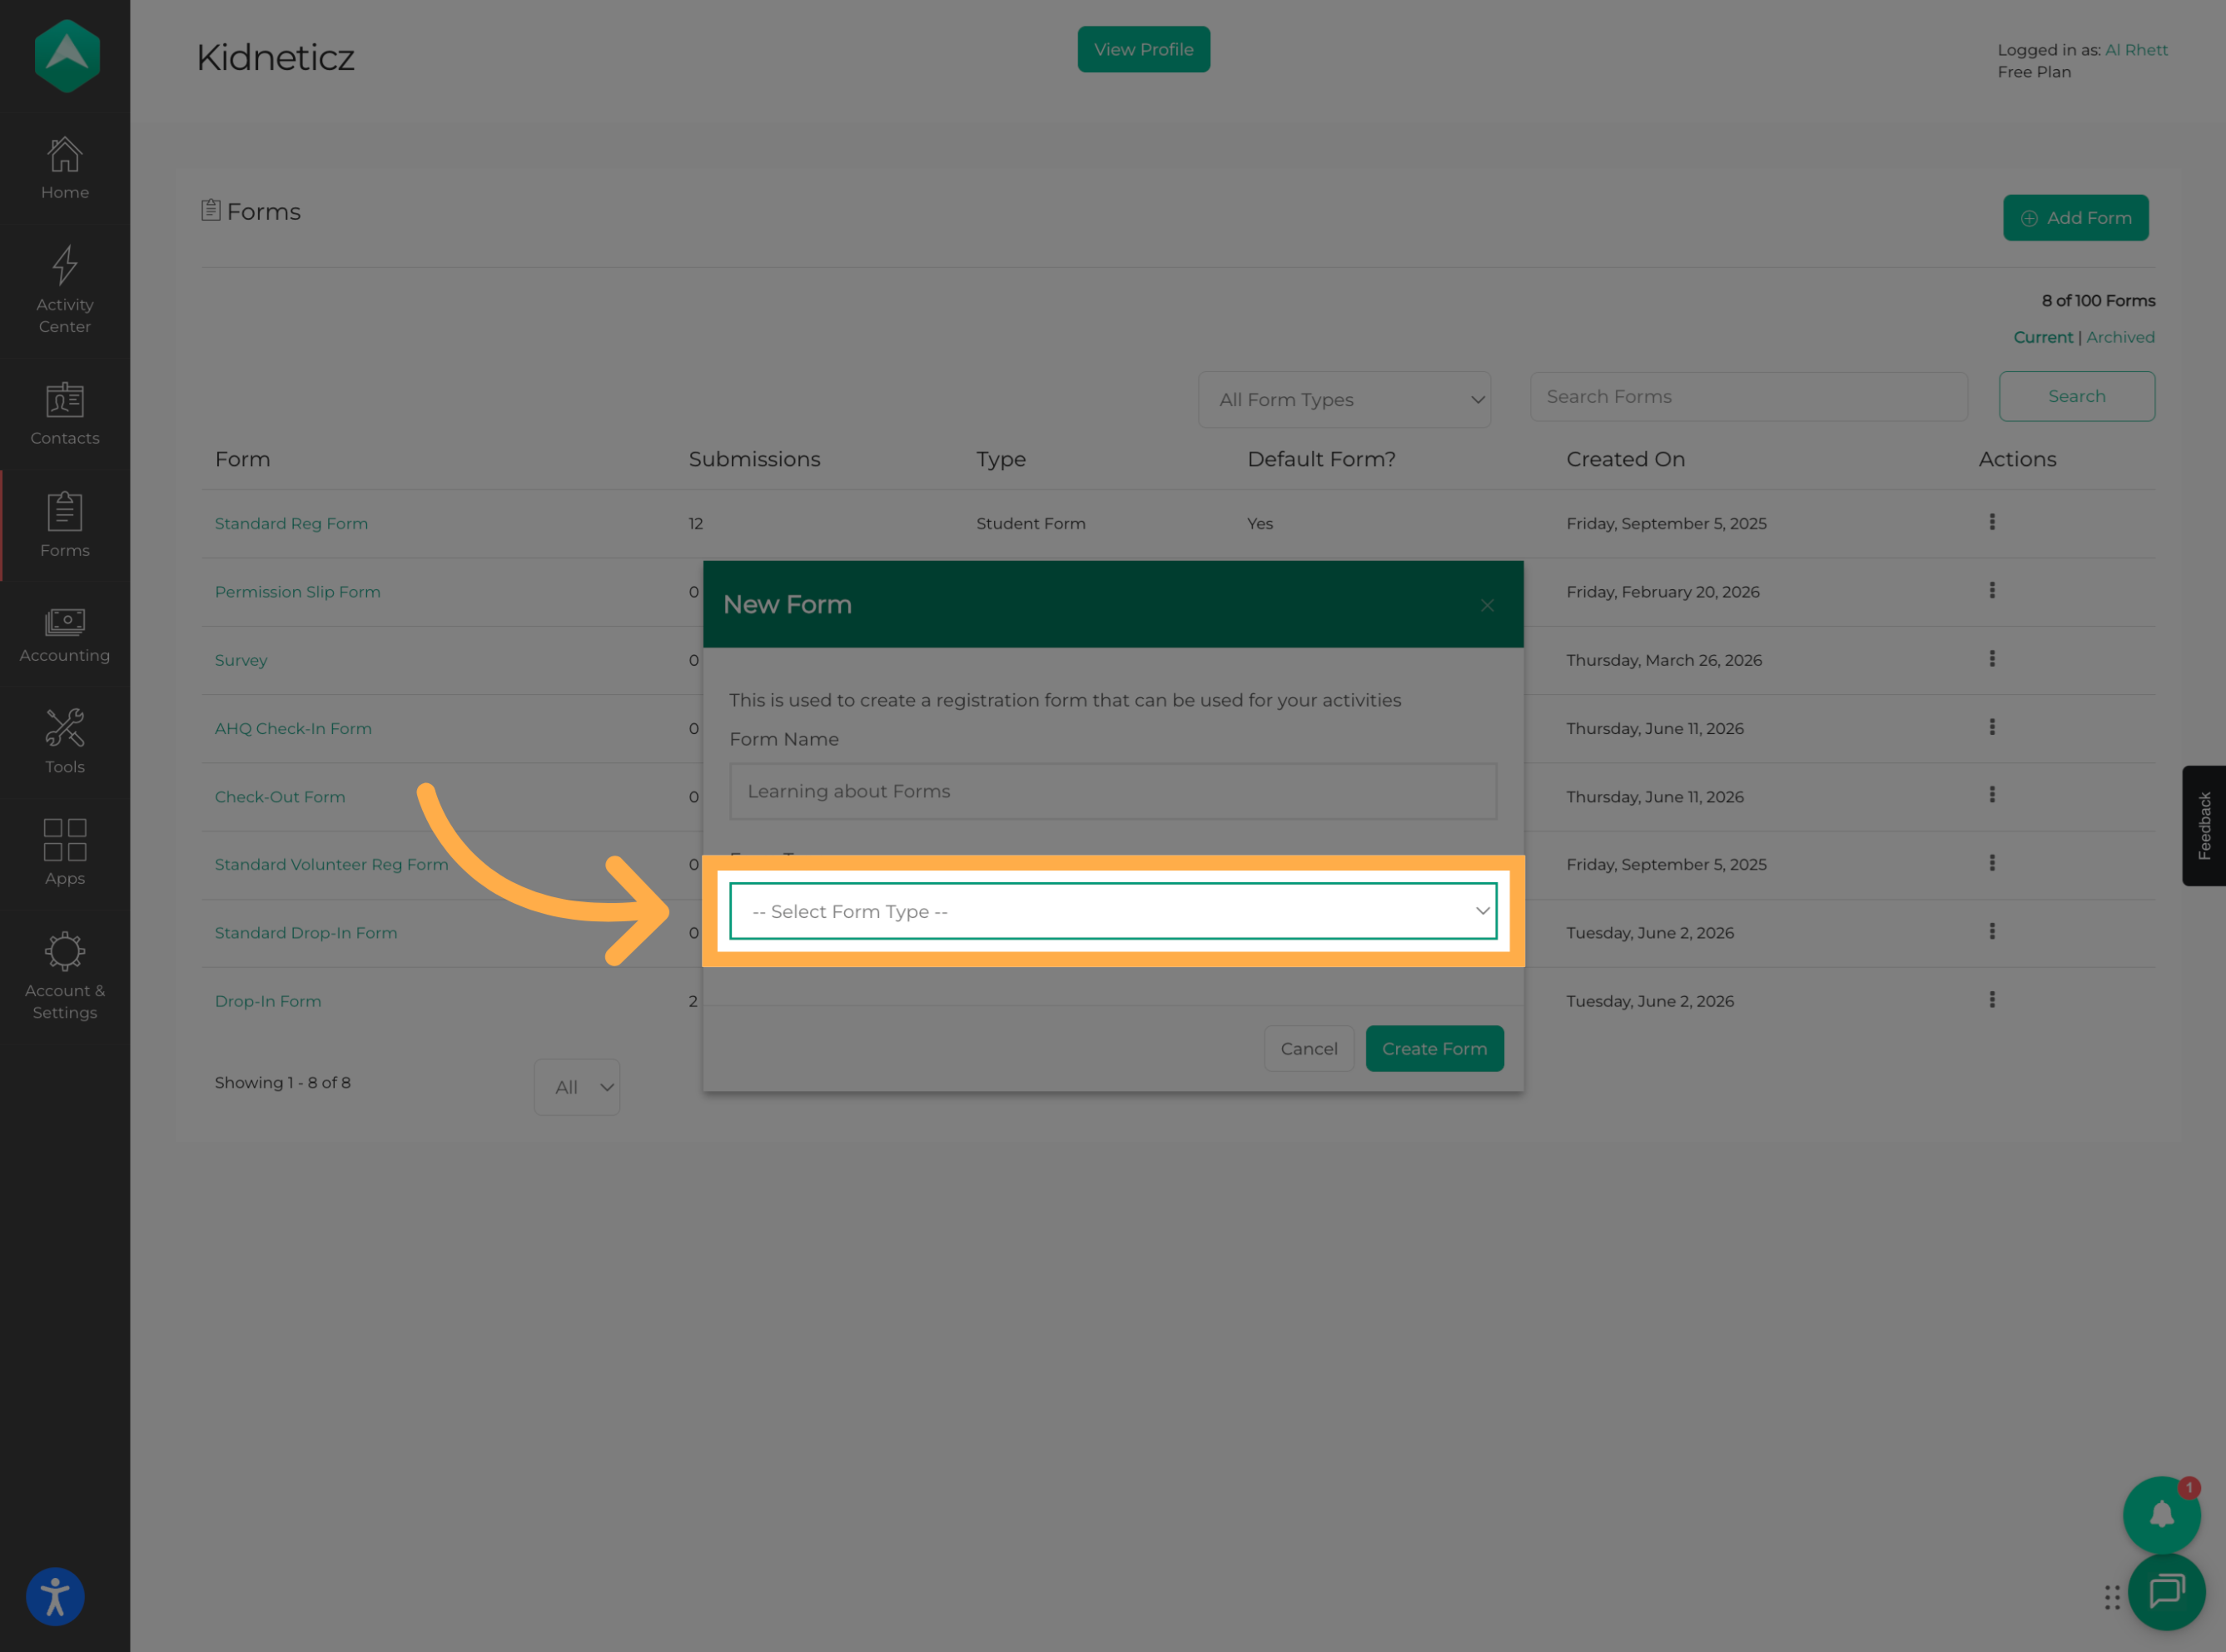
💡Tip: Make sure you select the appropriate form type because different forms may be used for different registration or participation workflows.
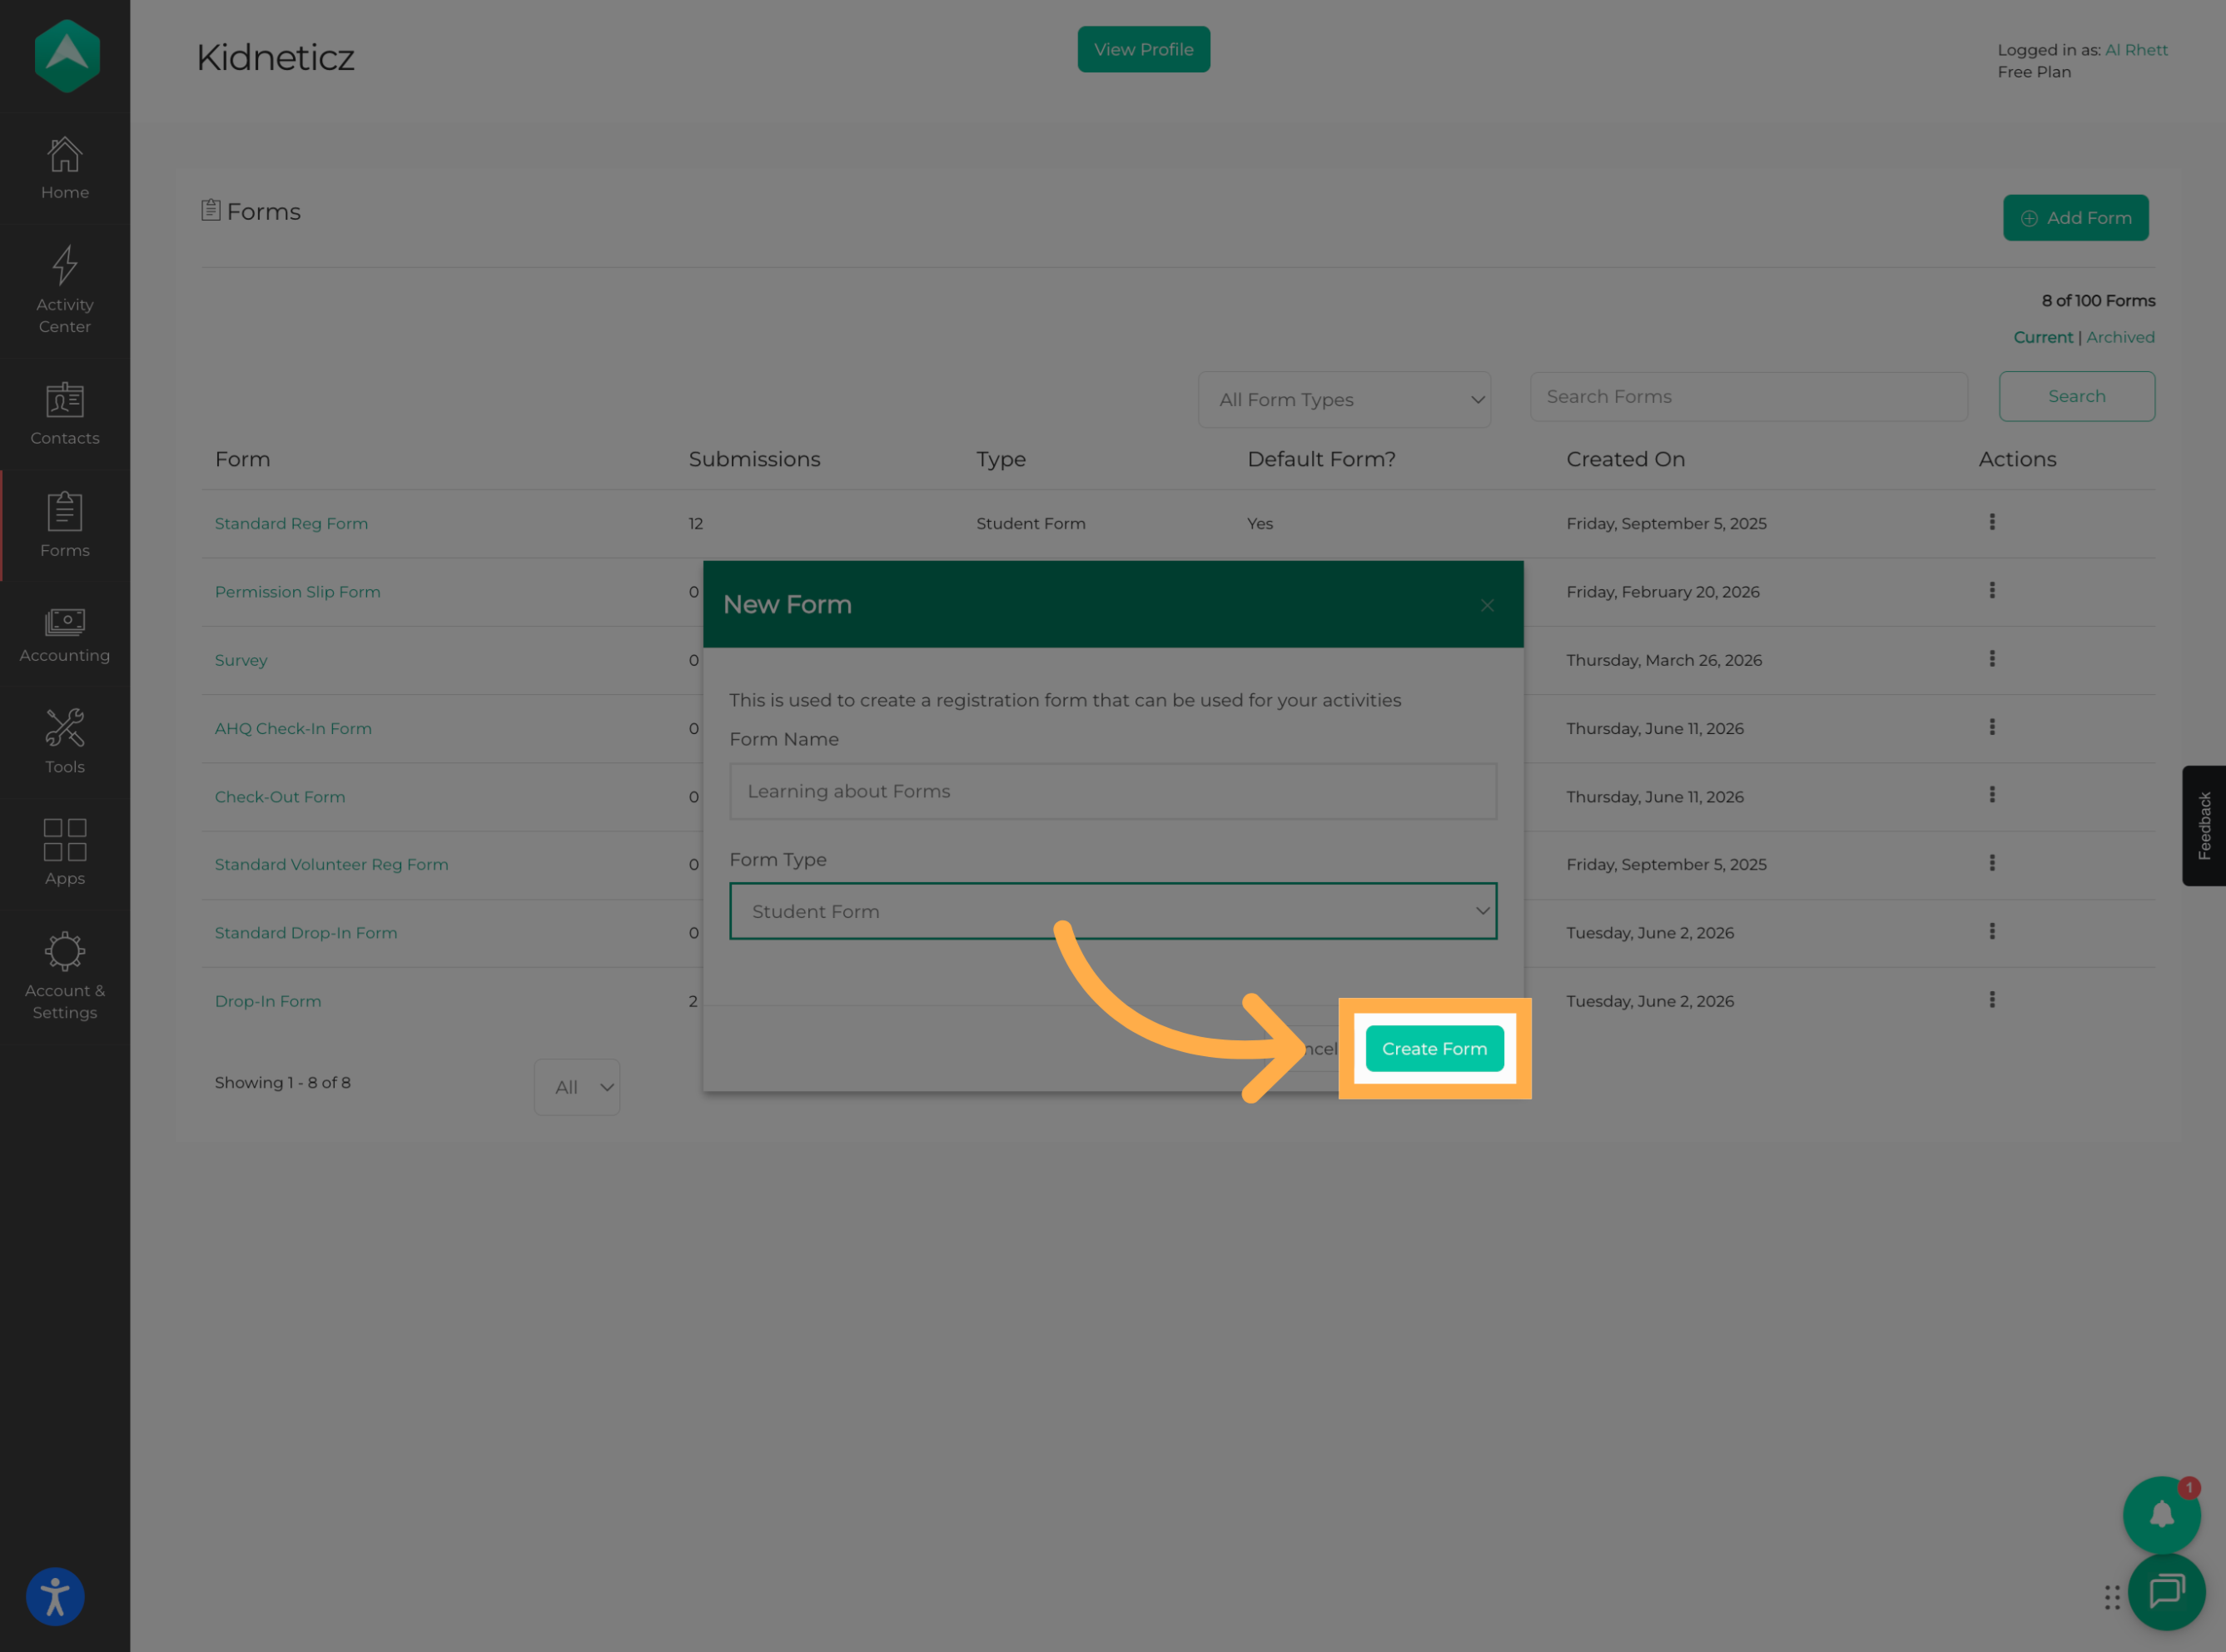
5. Create the Form
Once you’ve entered the form details and selected the form type, click “Create Form” to generate your new form.
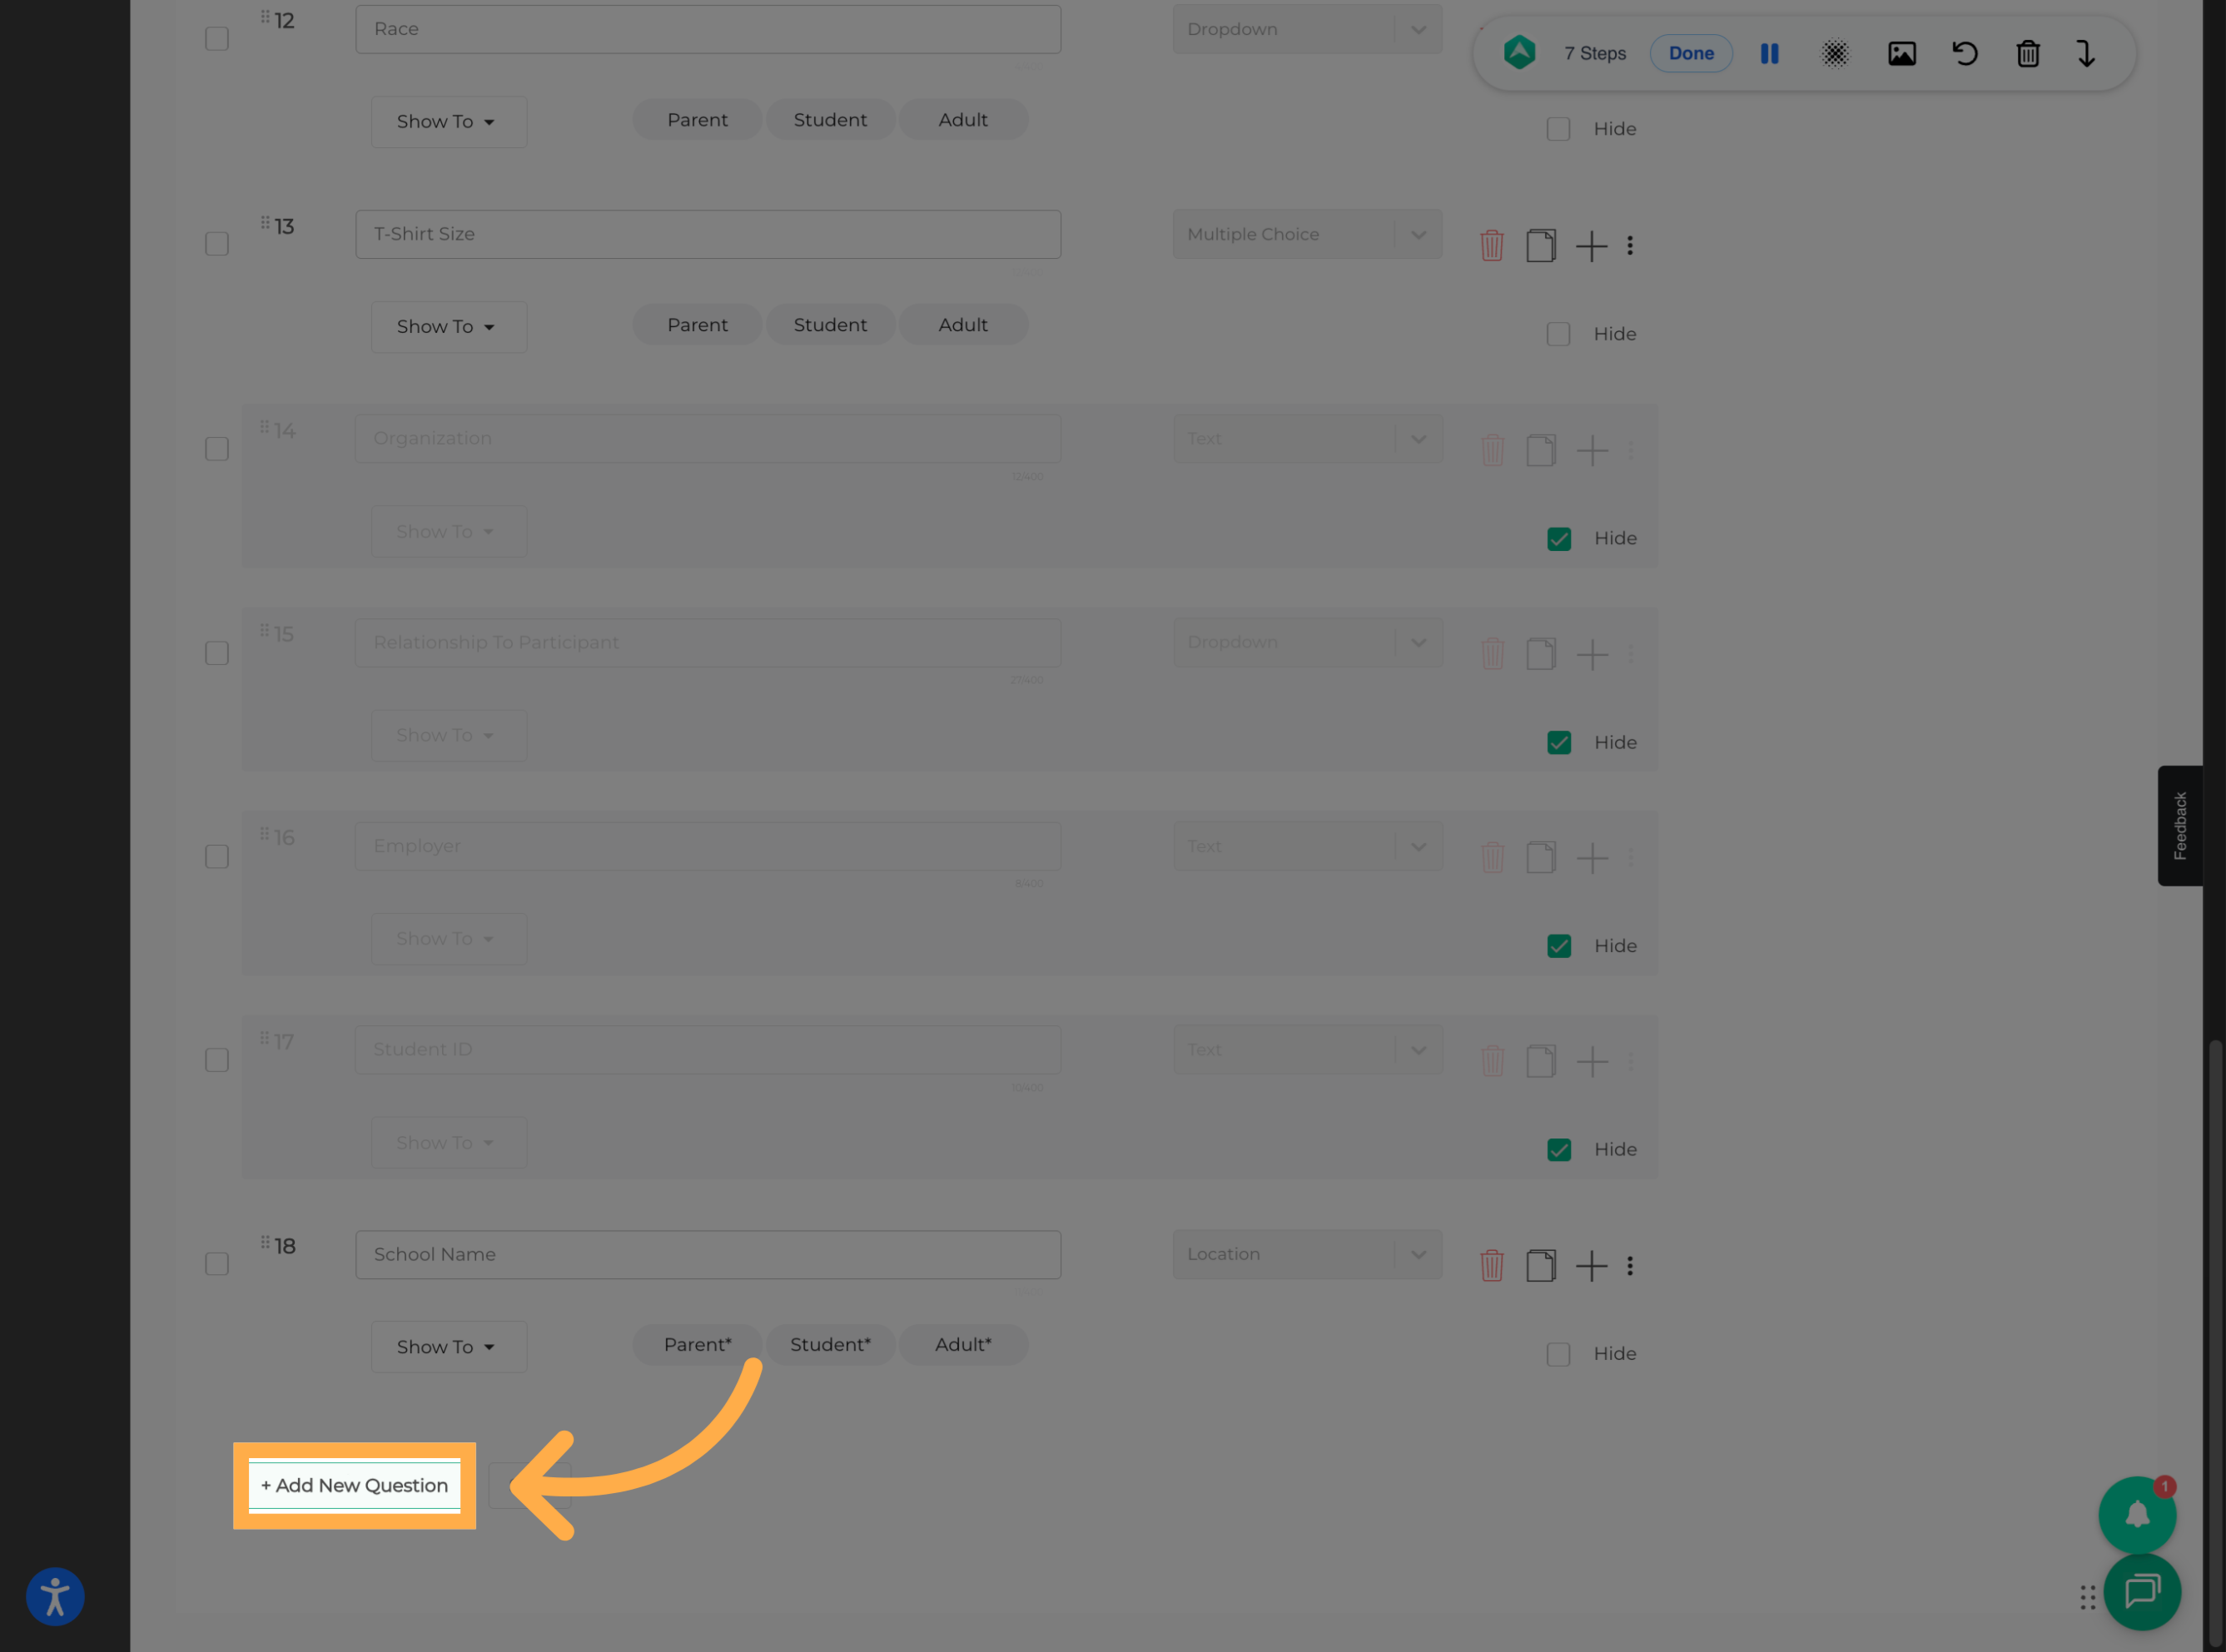
6. Add a New Question
Scroll to the bottom of the form and click “Add New Question” to add a new question.
💡Tip: Add only the information you need to collect so the registration process remains simple for families.
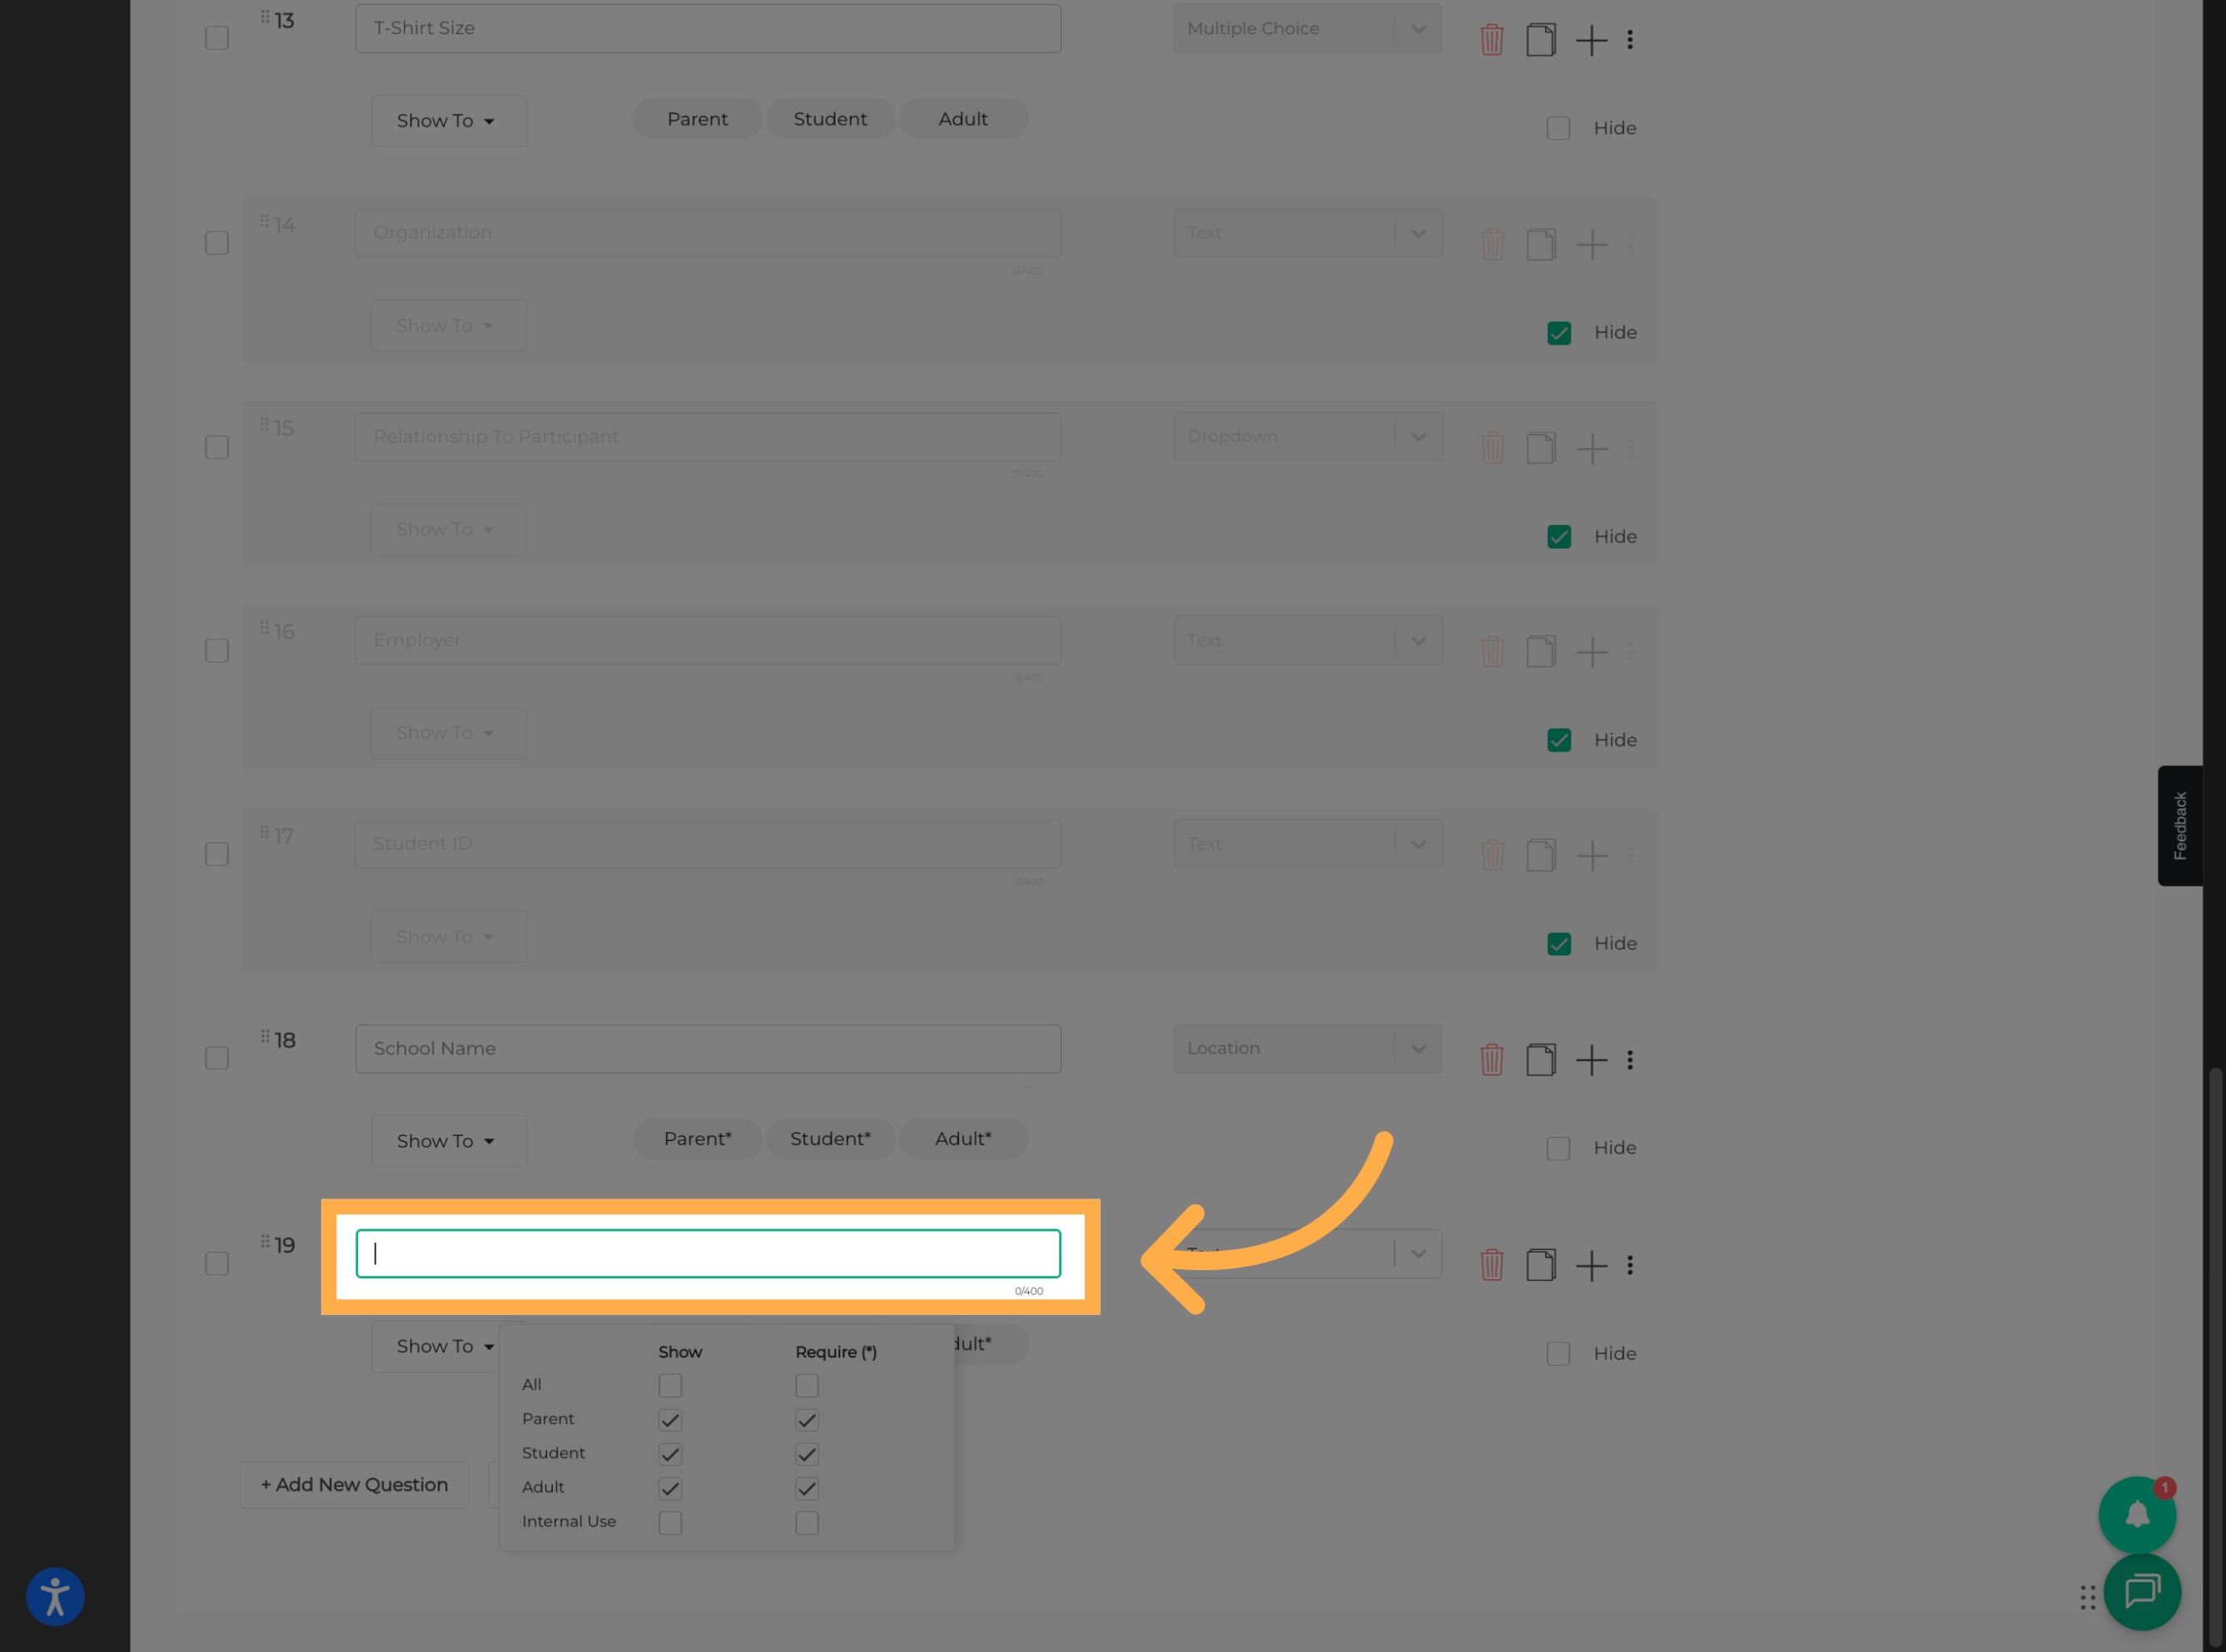
7. Enter Your Question
Click the question field and enter the question you want to include on your form.
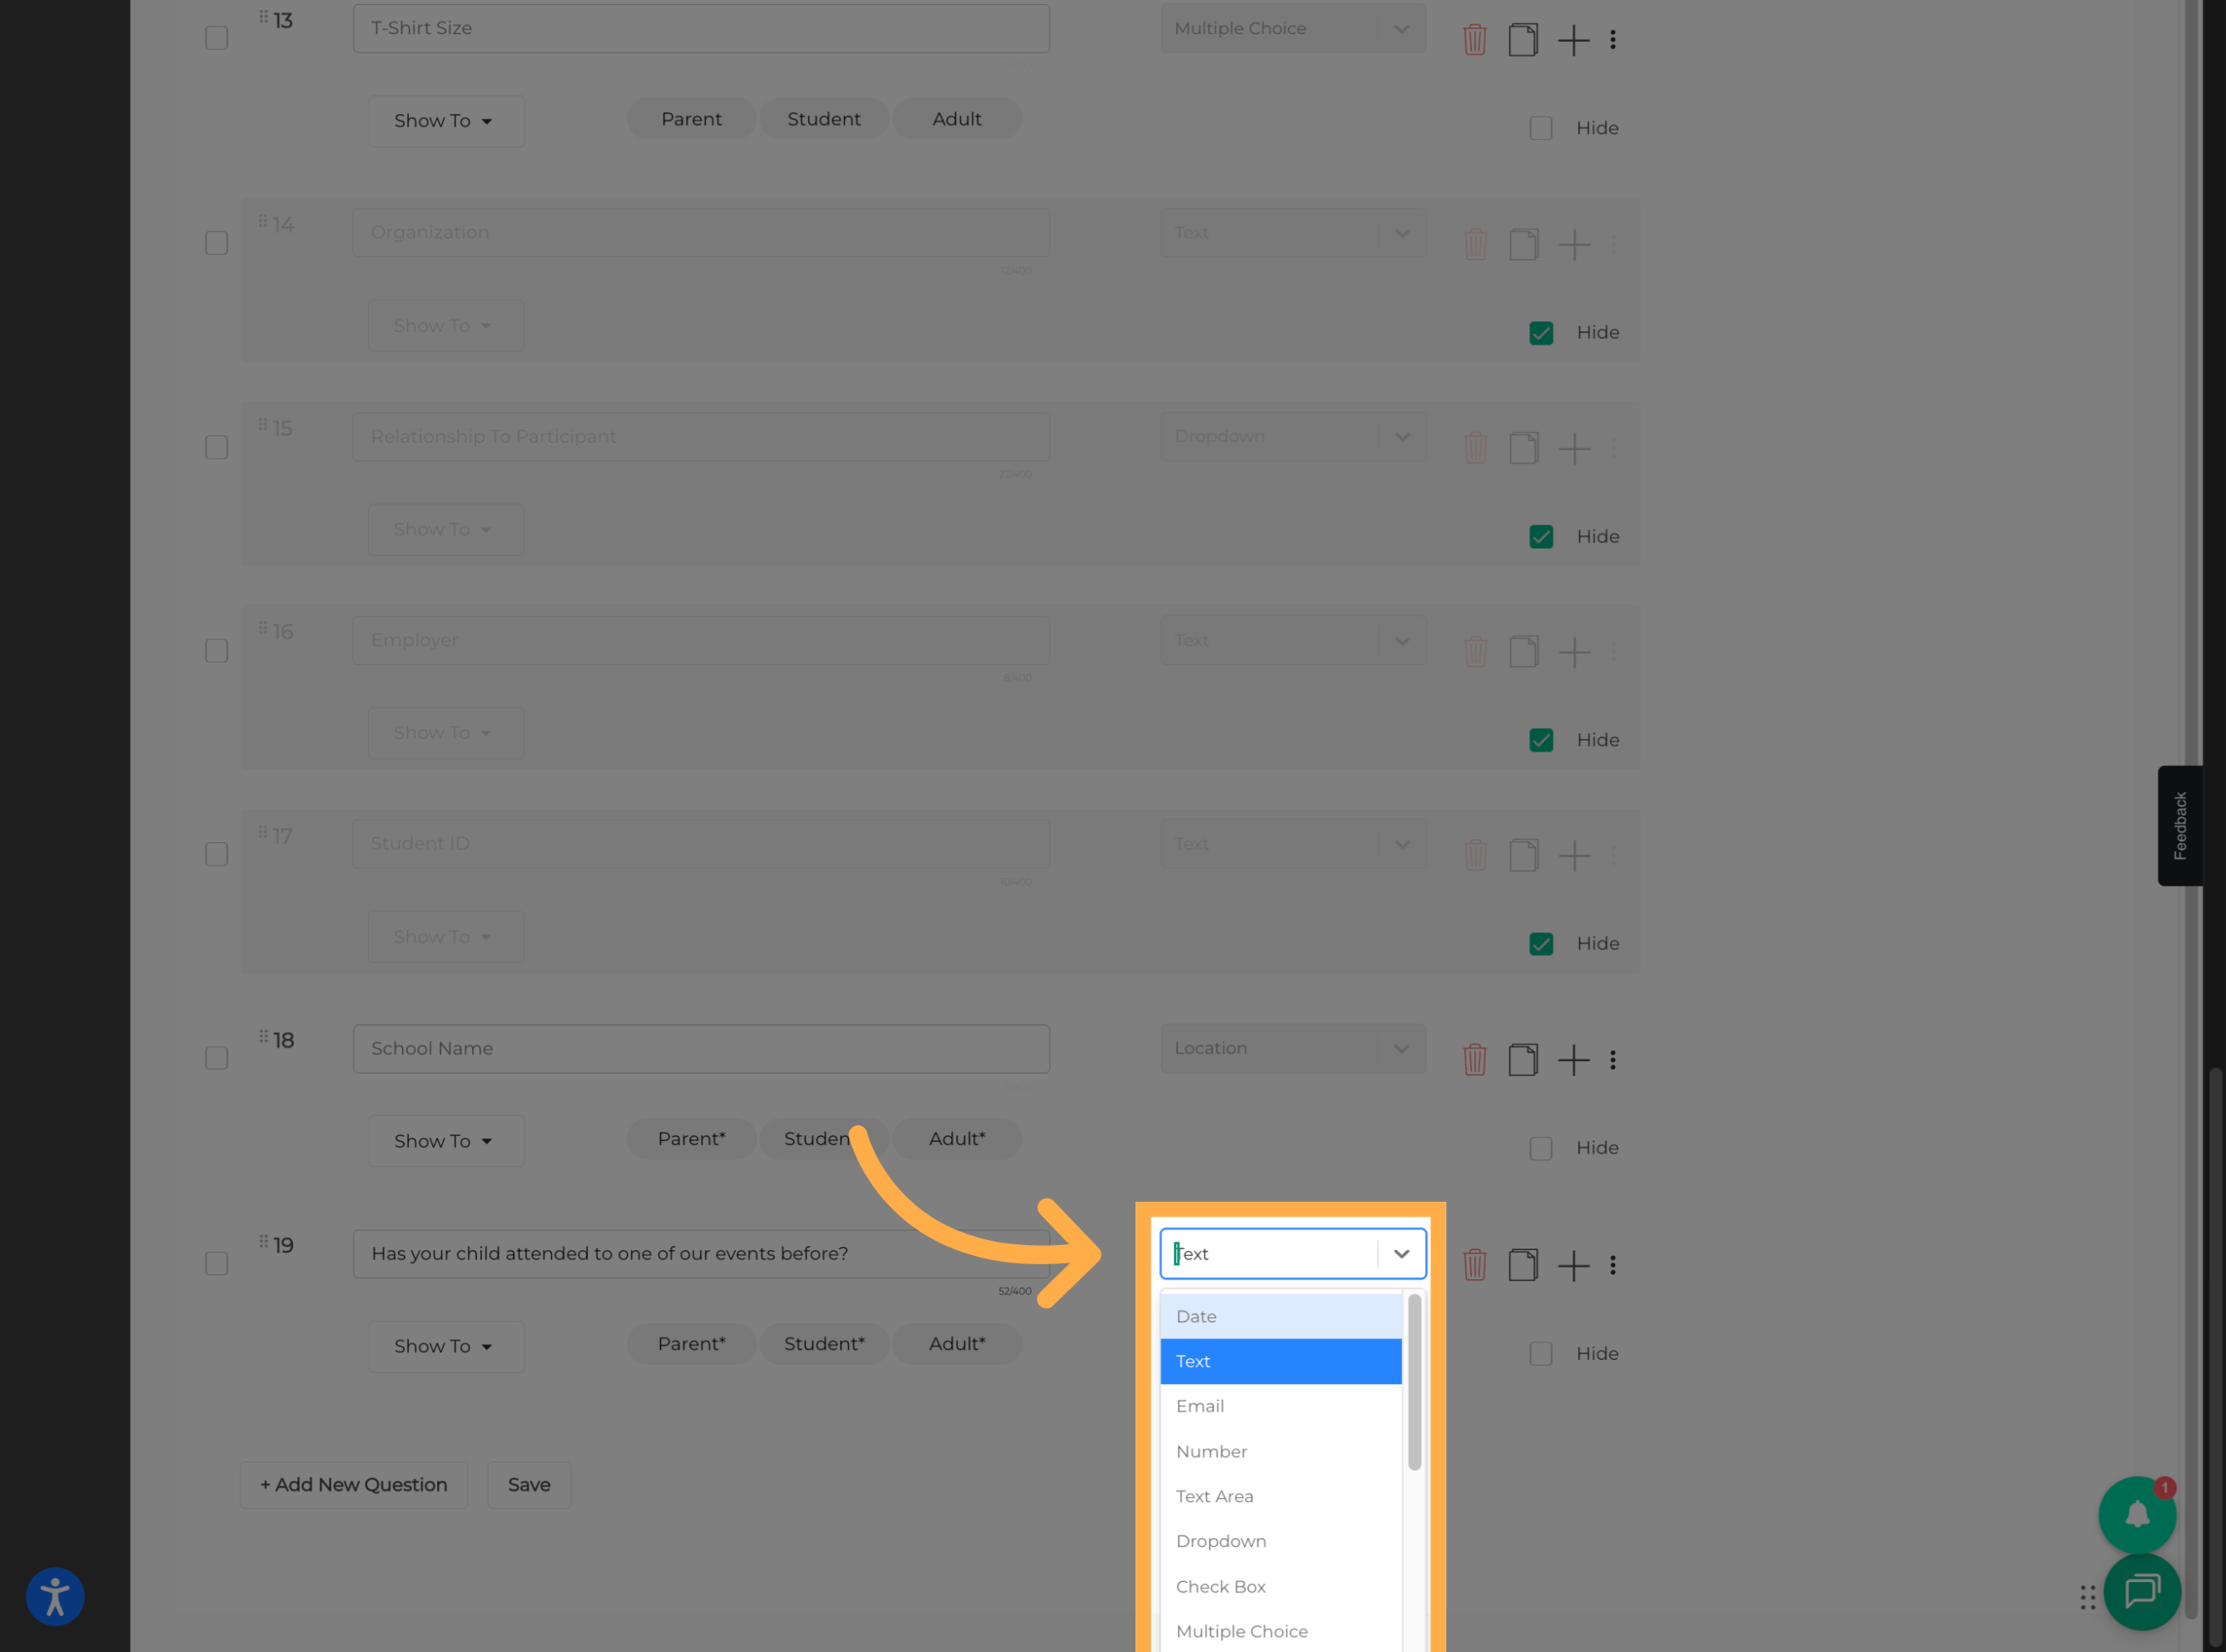
8. Choose a Question Type
Select the question type that best fits the type of response you want to collect.
💡Tip: Choose a question type that makes it easy for the person completing the form to provide the correct type of answer.
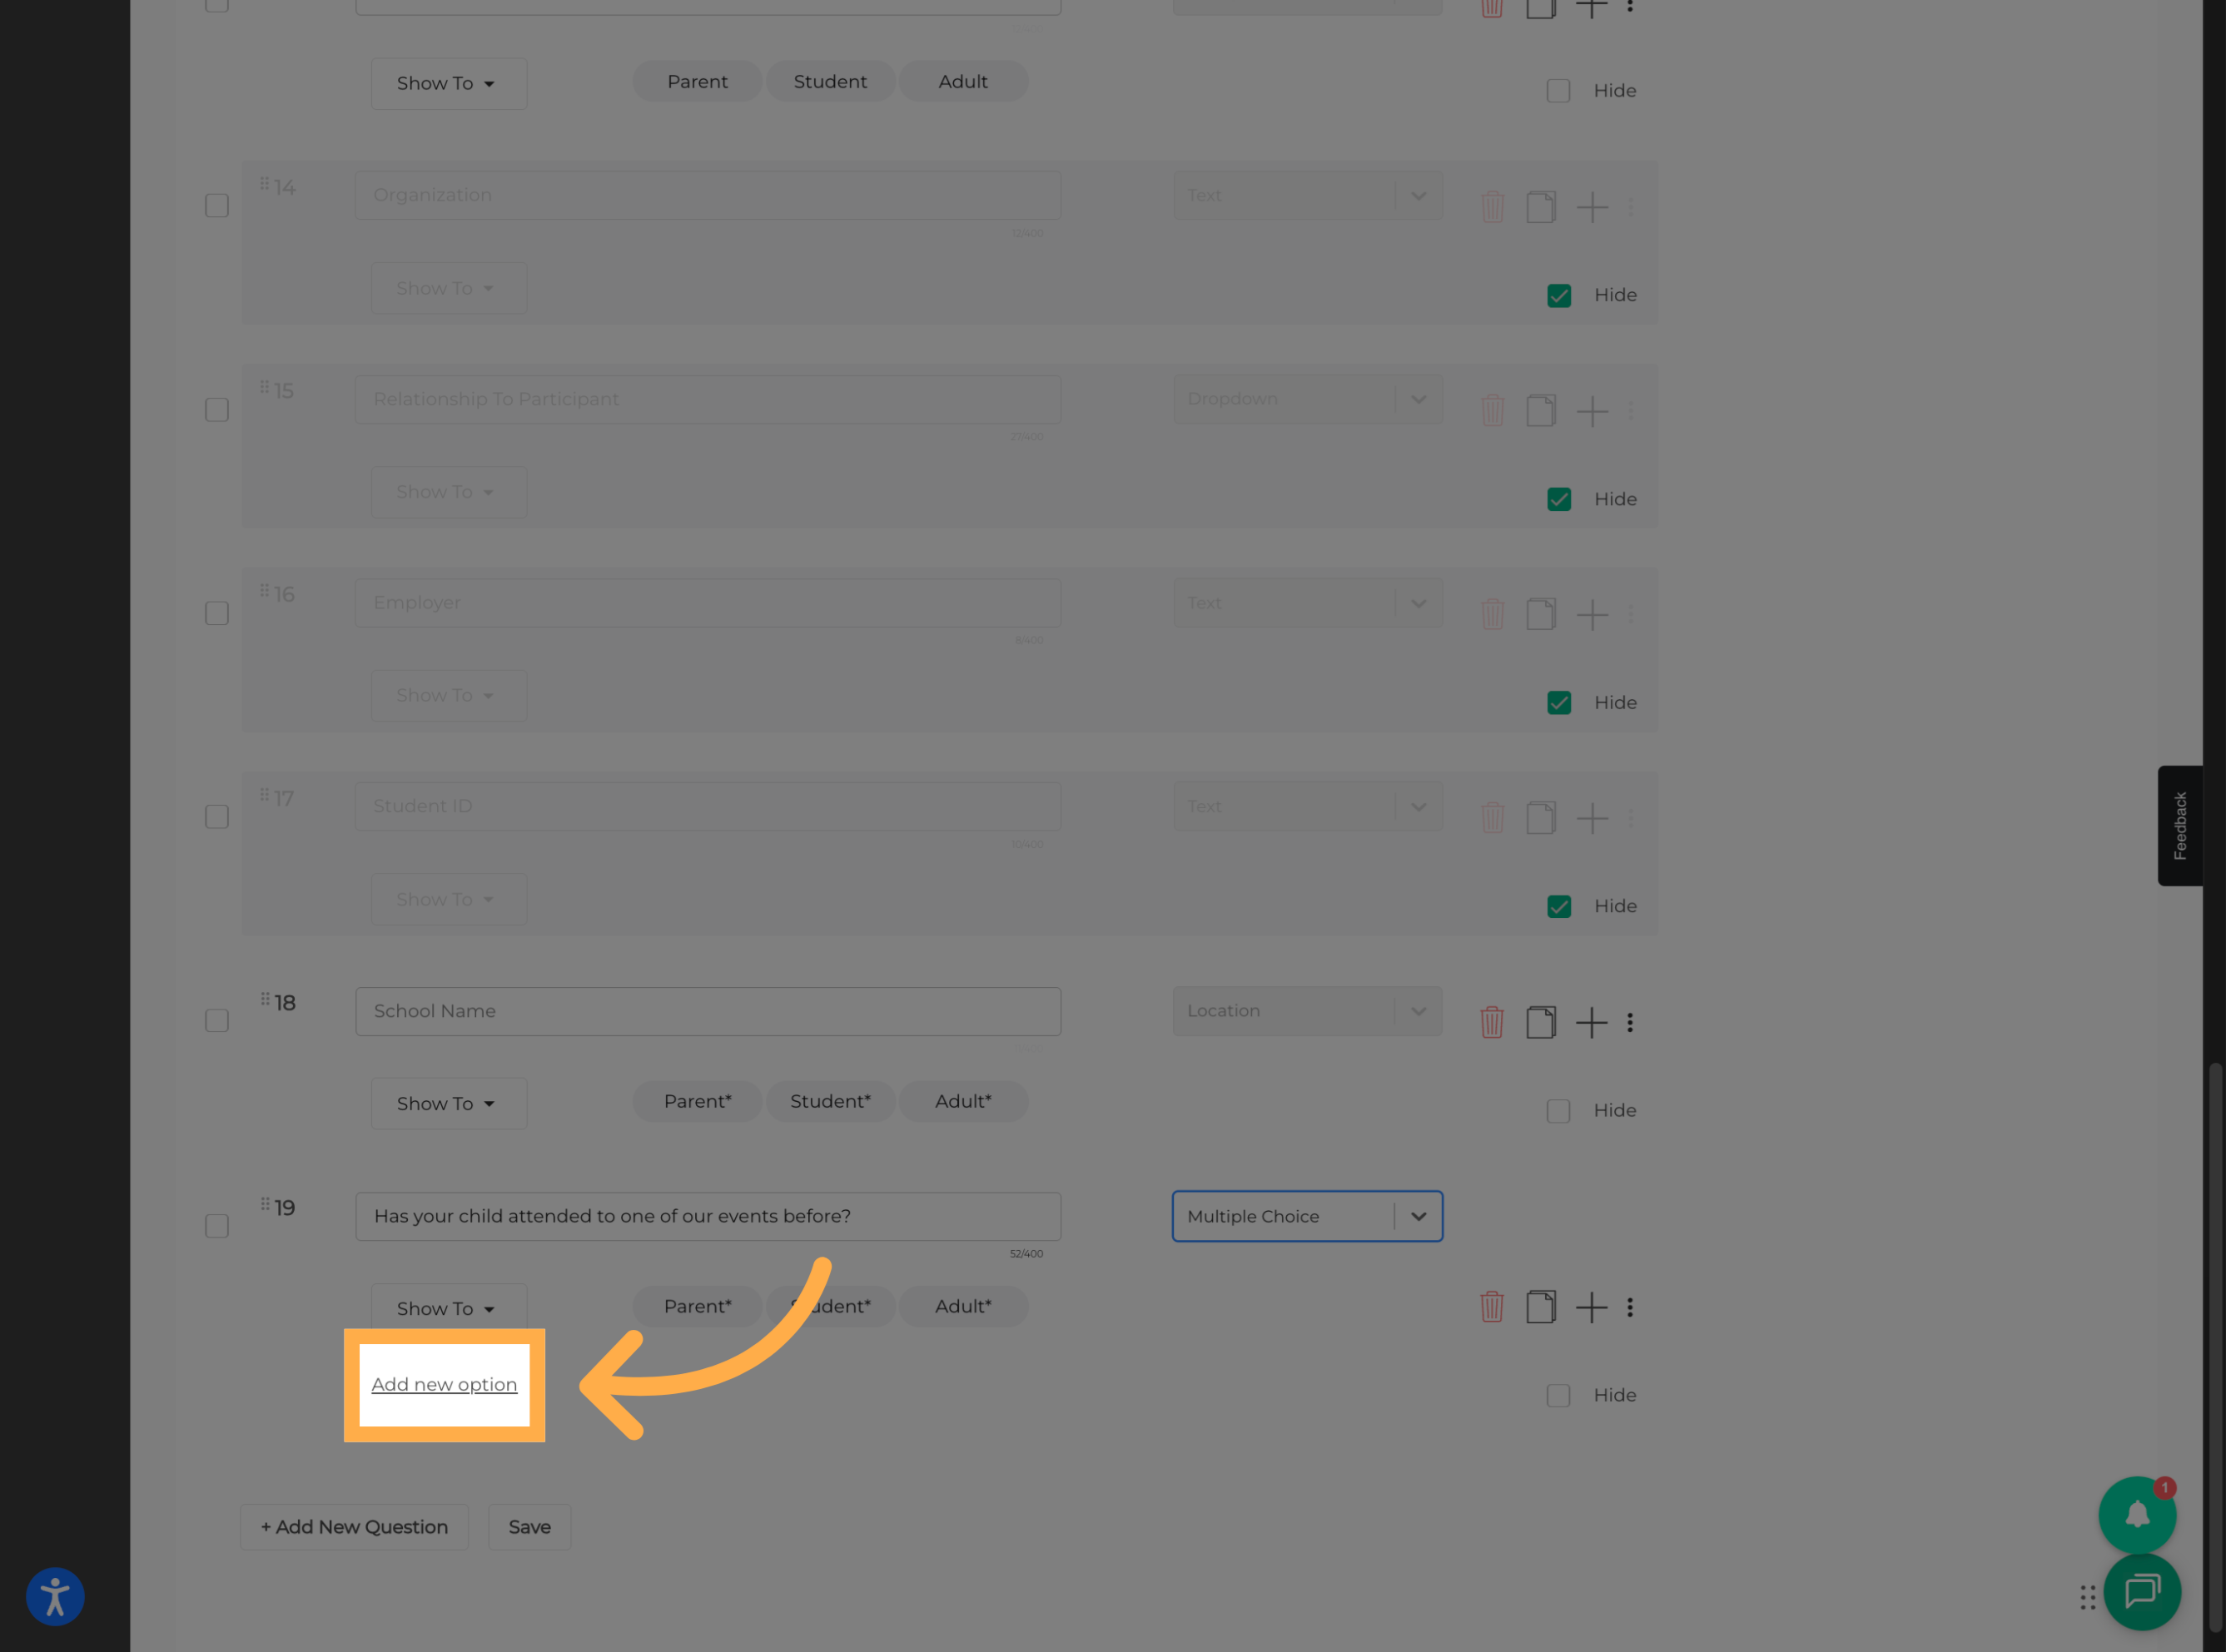
9. Add an Answer Option
If your question uses answer choices, click “Add New Option” to add the first response option.
10. Add Additional Options
Continue clicking “Add New Option” to add as many answer choices as needed.
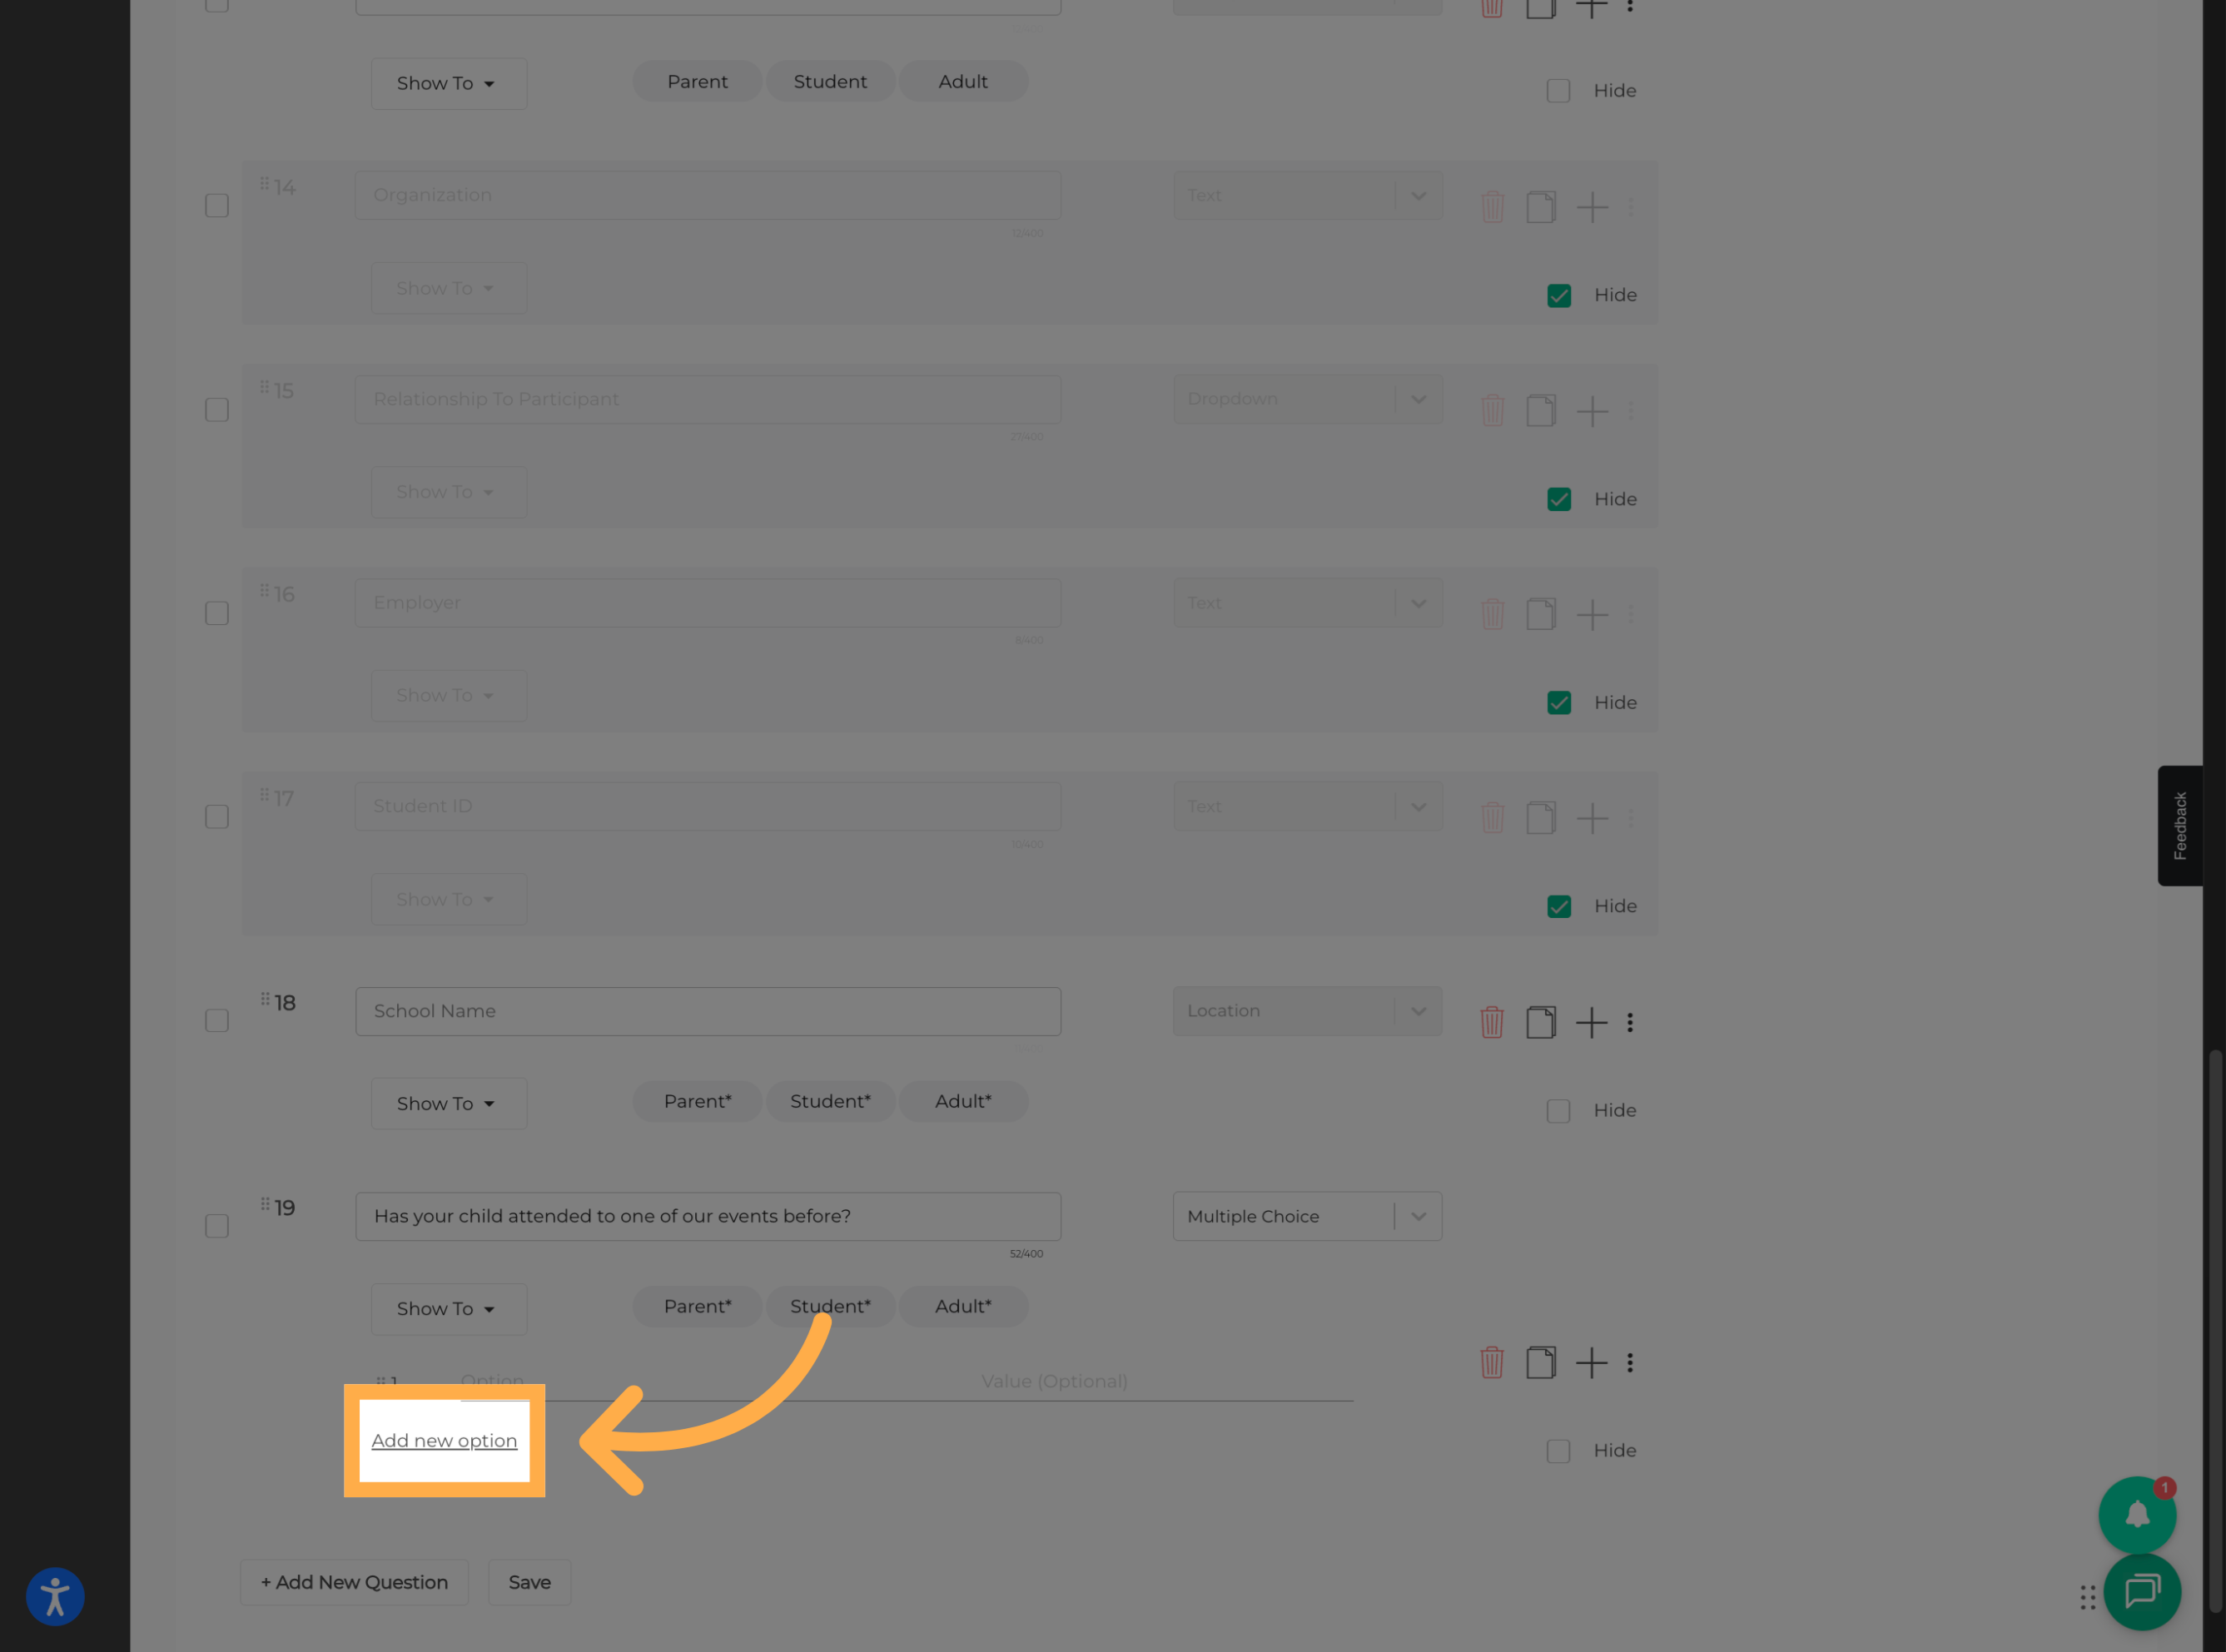
💡Tip: Review your answer choices before saving to make sure all appropriate options are available to registrants.
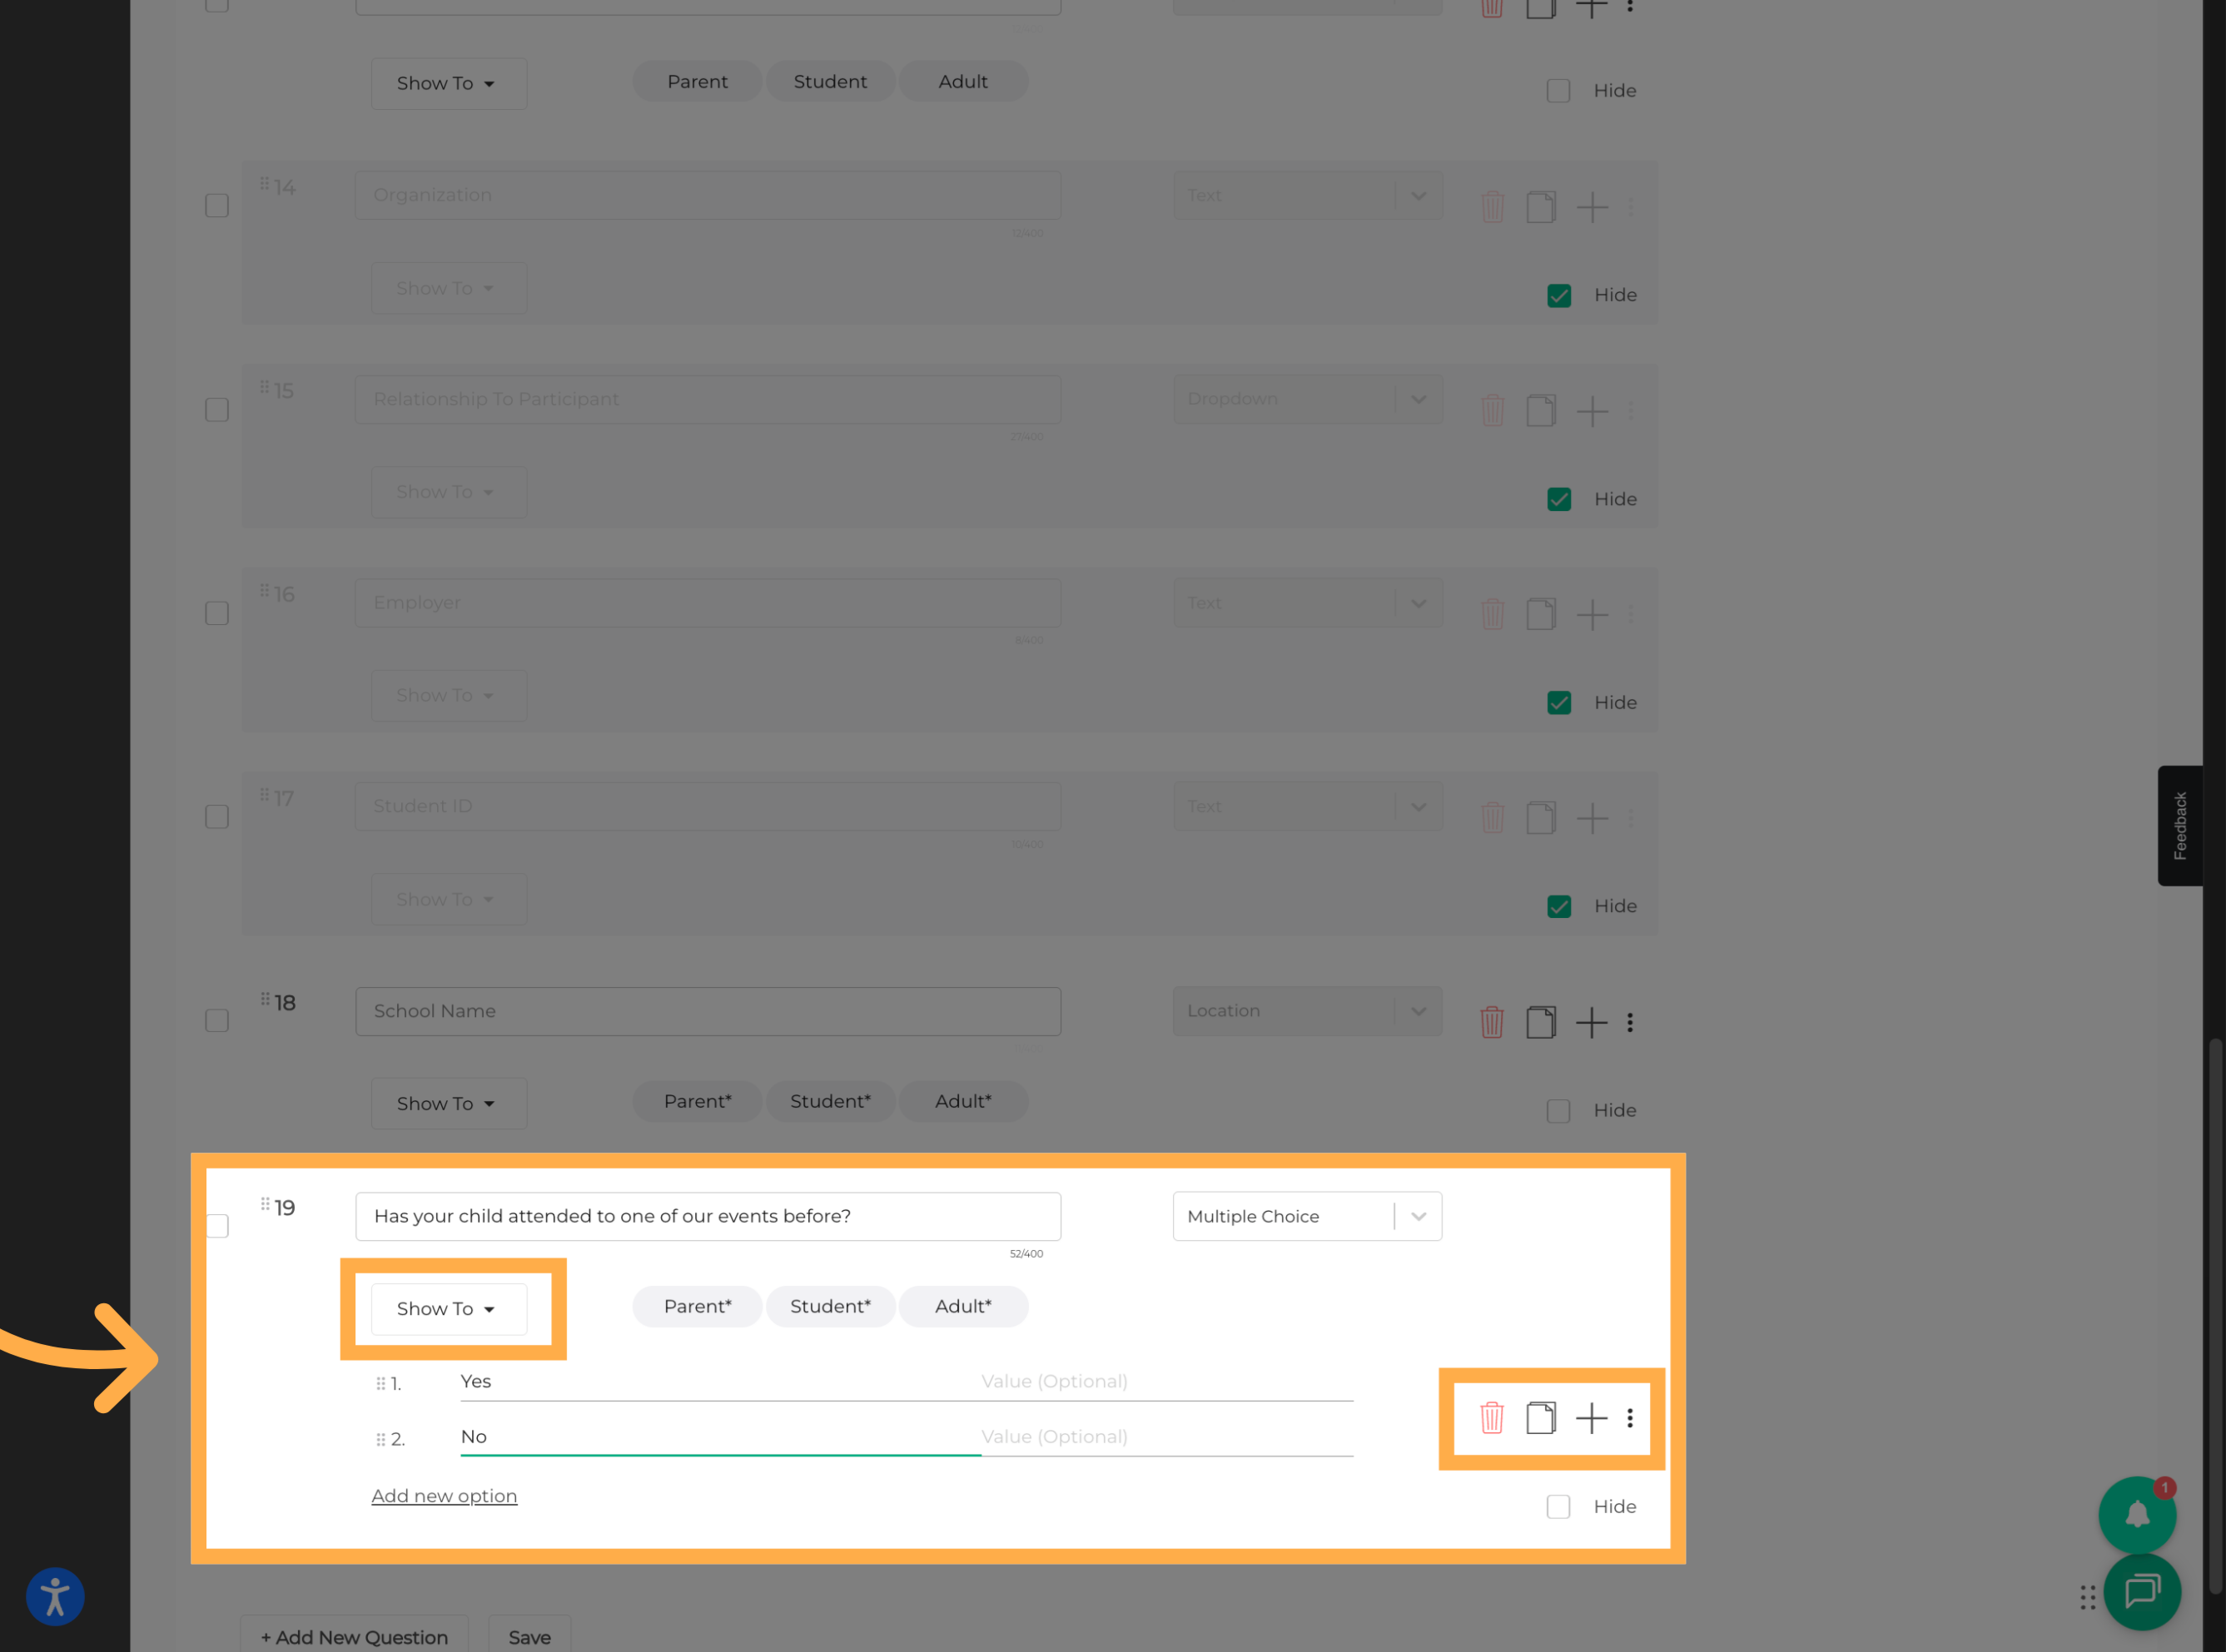
11. Configure Question Settings
Review the question settings to configure additional options, including how the question is displayed and who can see it.
12. Save the Question
Once you’ve finished setting up the question, click “Save” to save your changes.
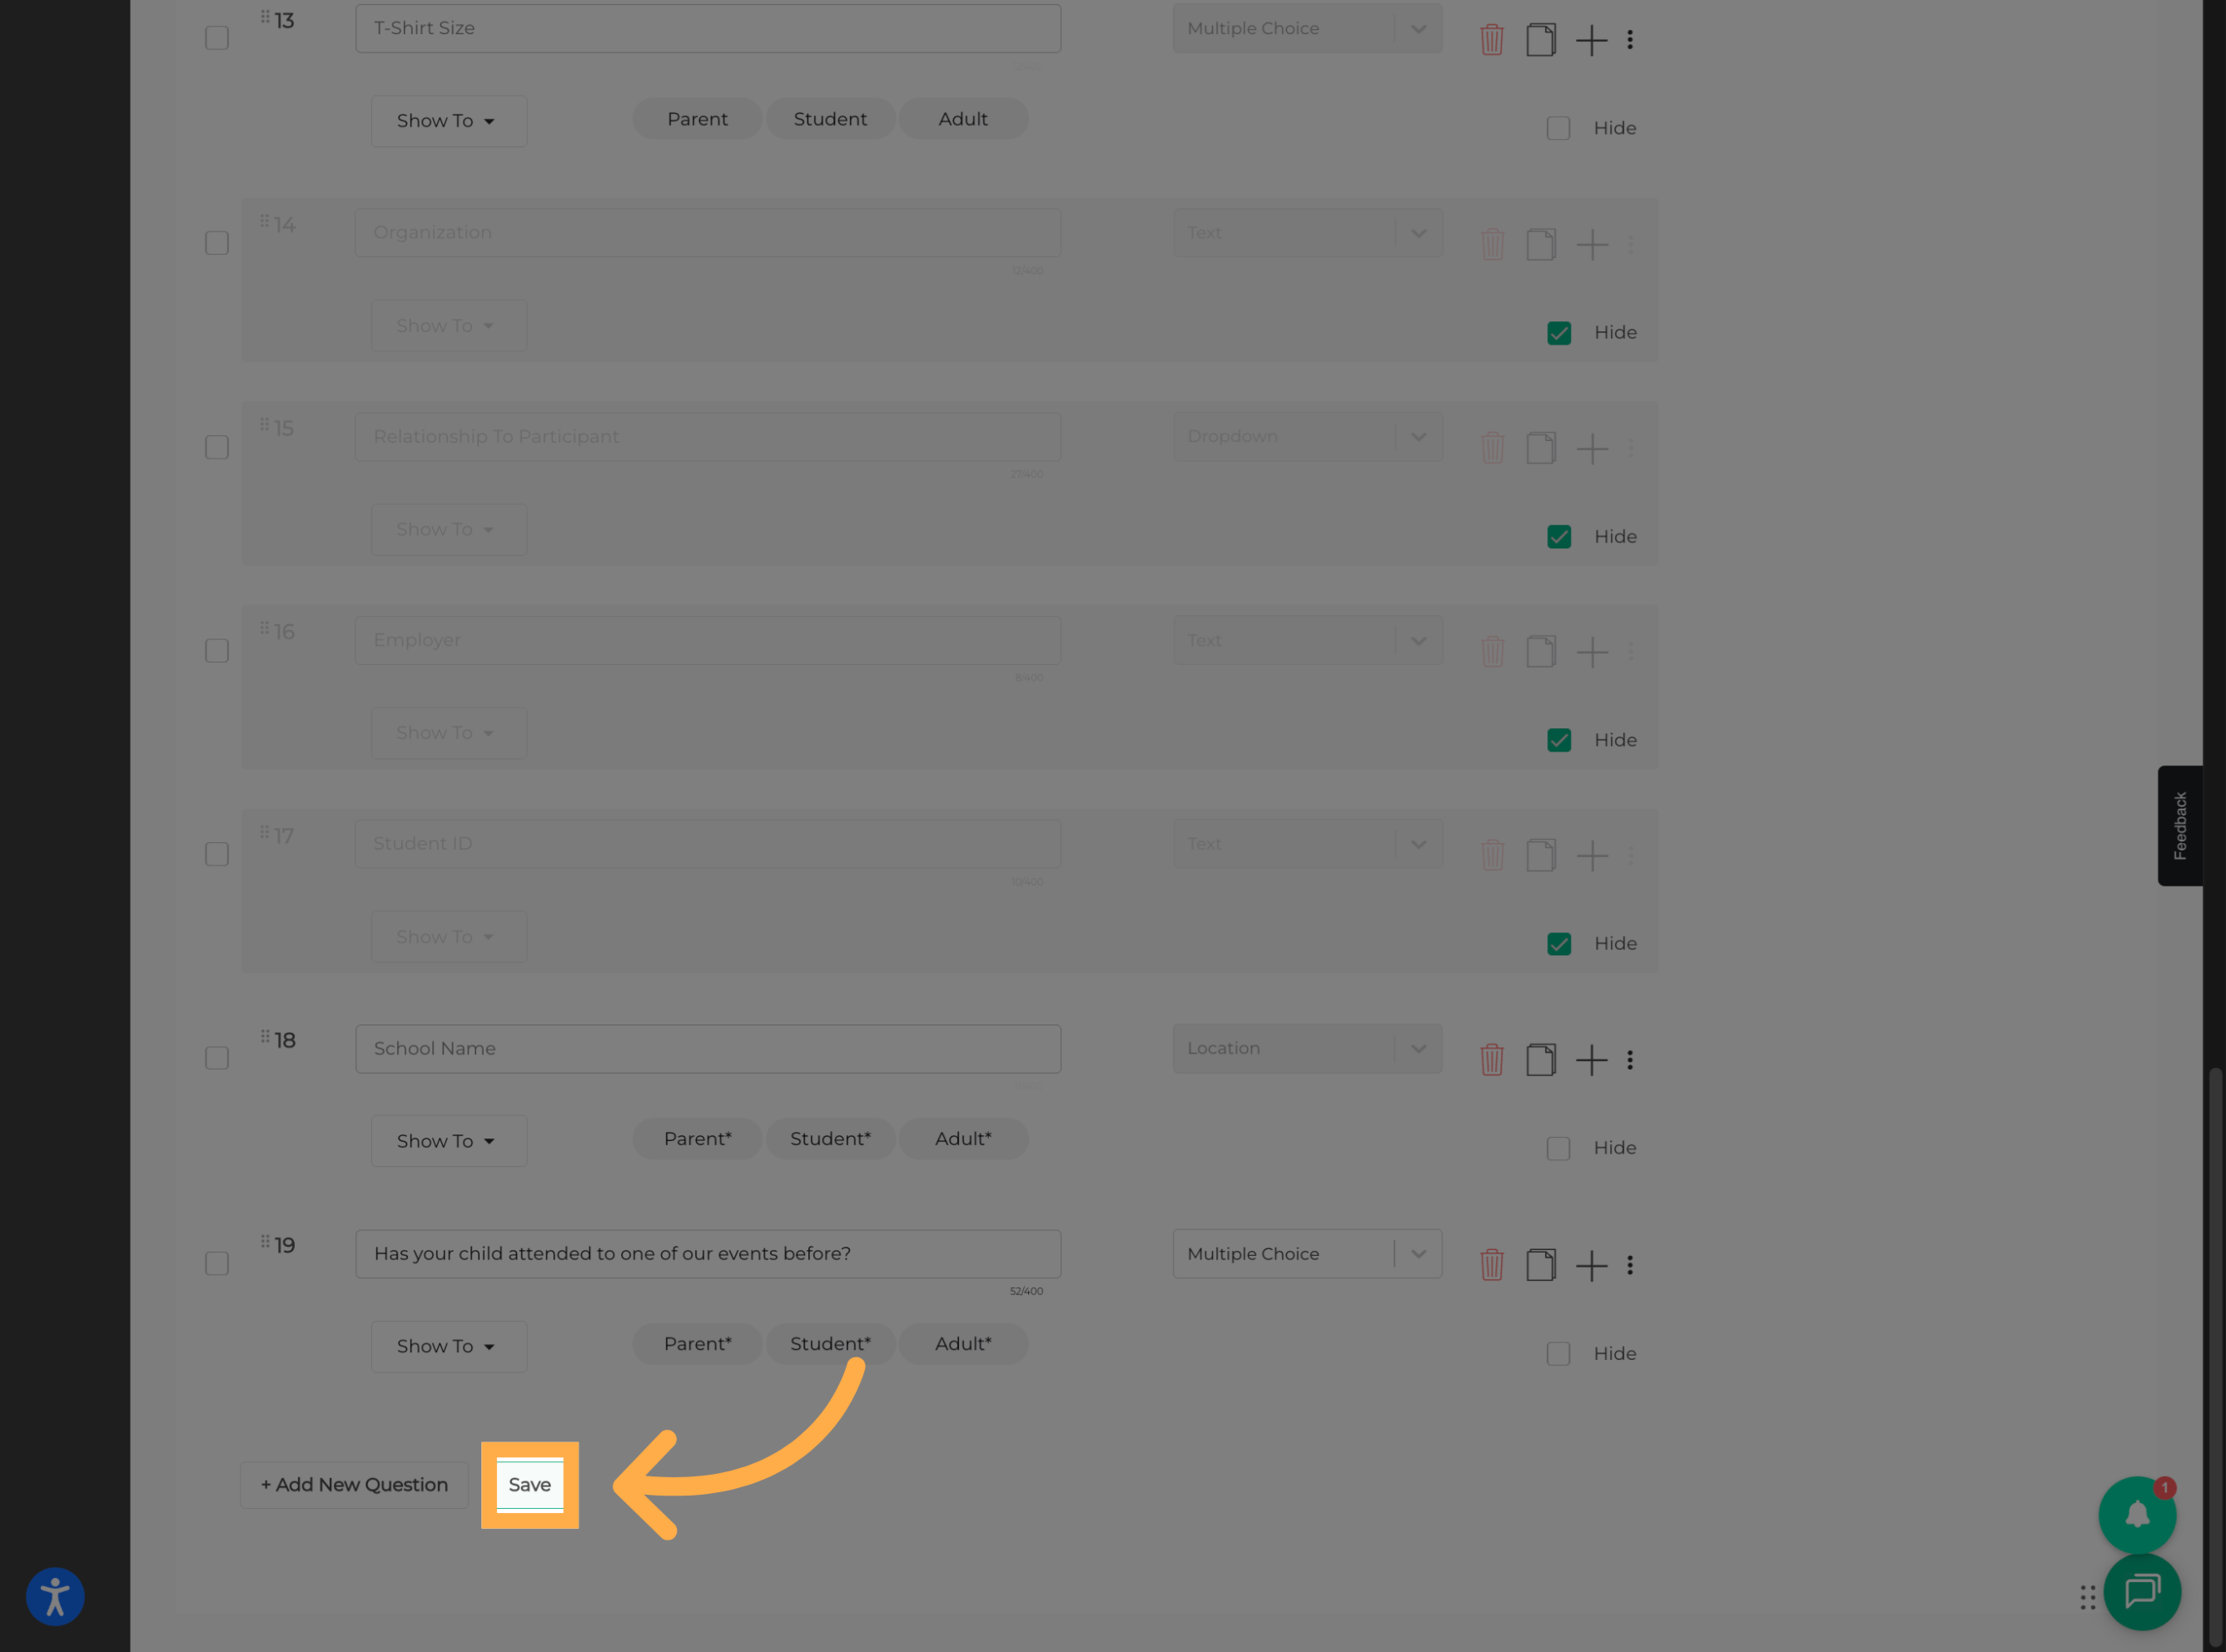
💡Tip: Save your questions as you work to help prevent losing changes.
13. Reorder Form Sections
To change the order of your sections, locate the drag handle next to the custom section you want to move.
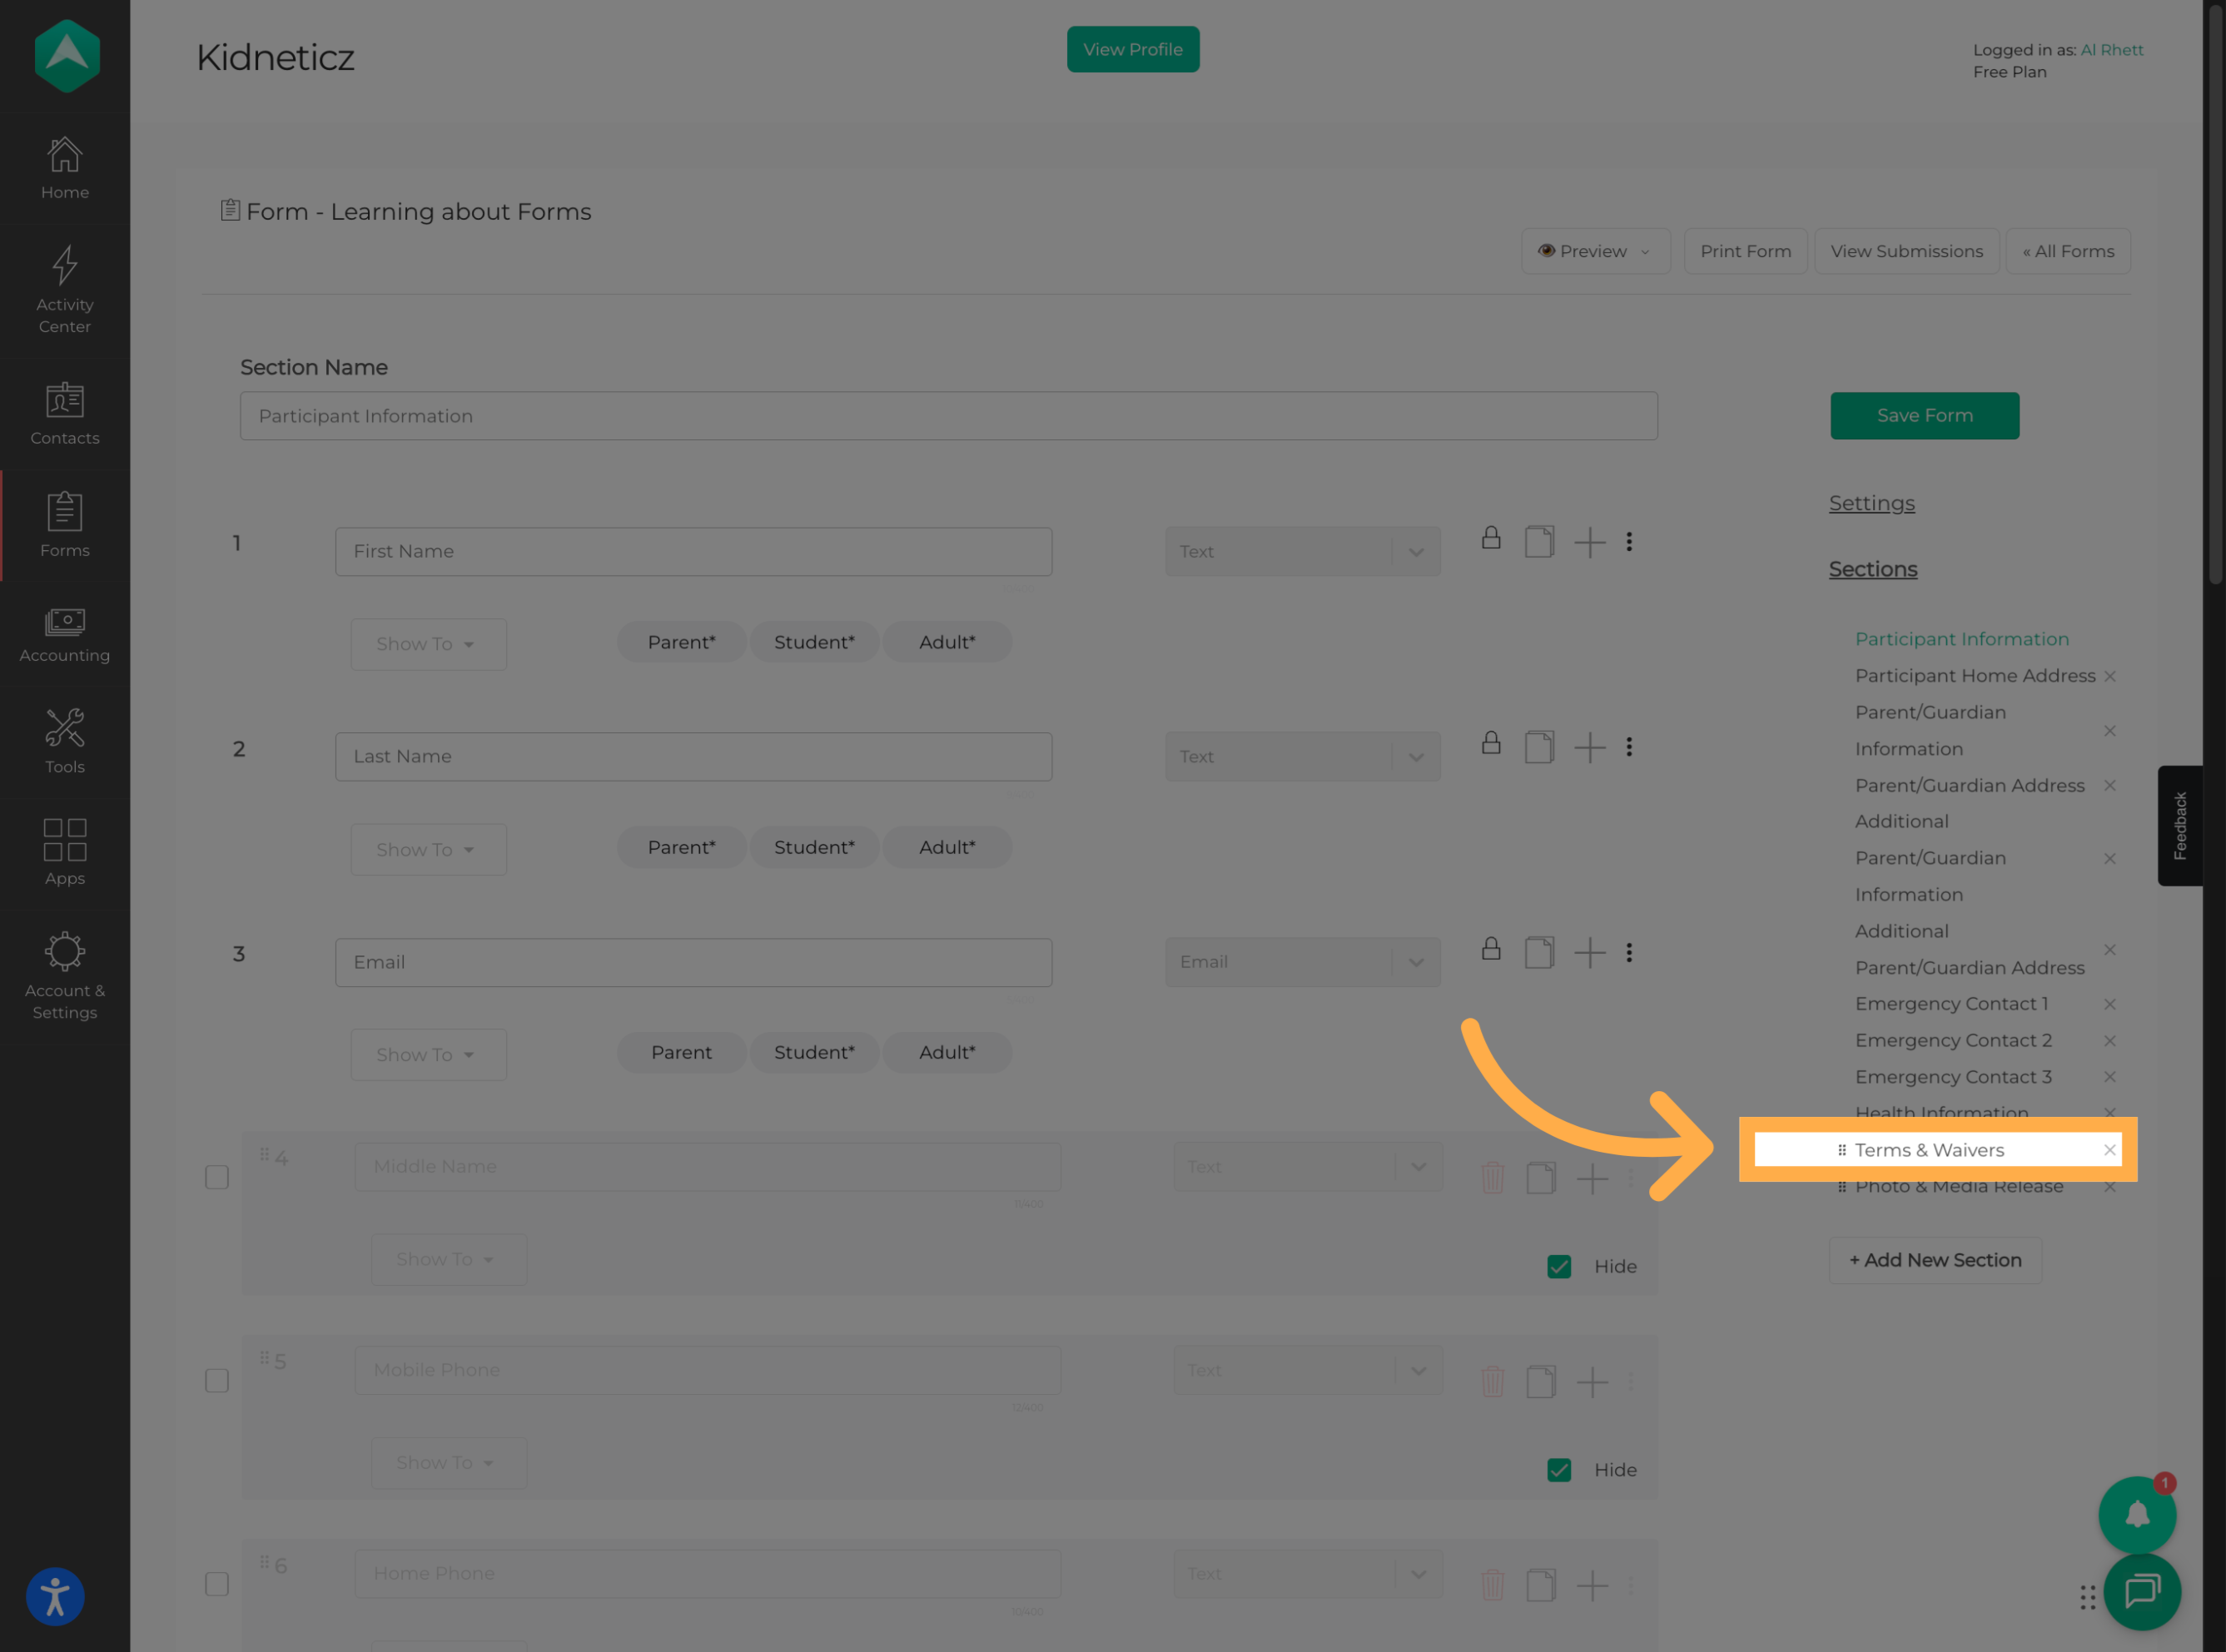
💡Tip: Only custom sections can be reordered. Built-in sections, such as Personal Information, cannot be moved and remain at the top.
14. Move a Section
Click and hold the drag handle, then move the section to your preferred position.
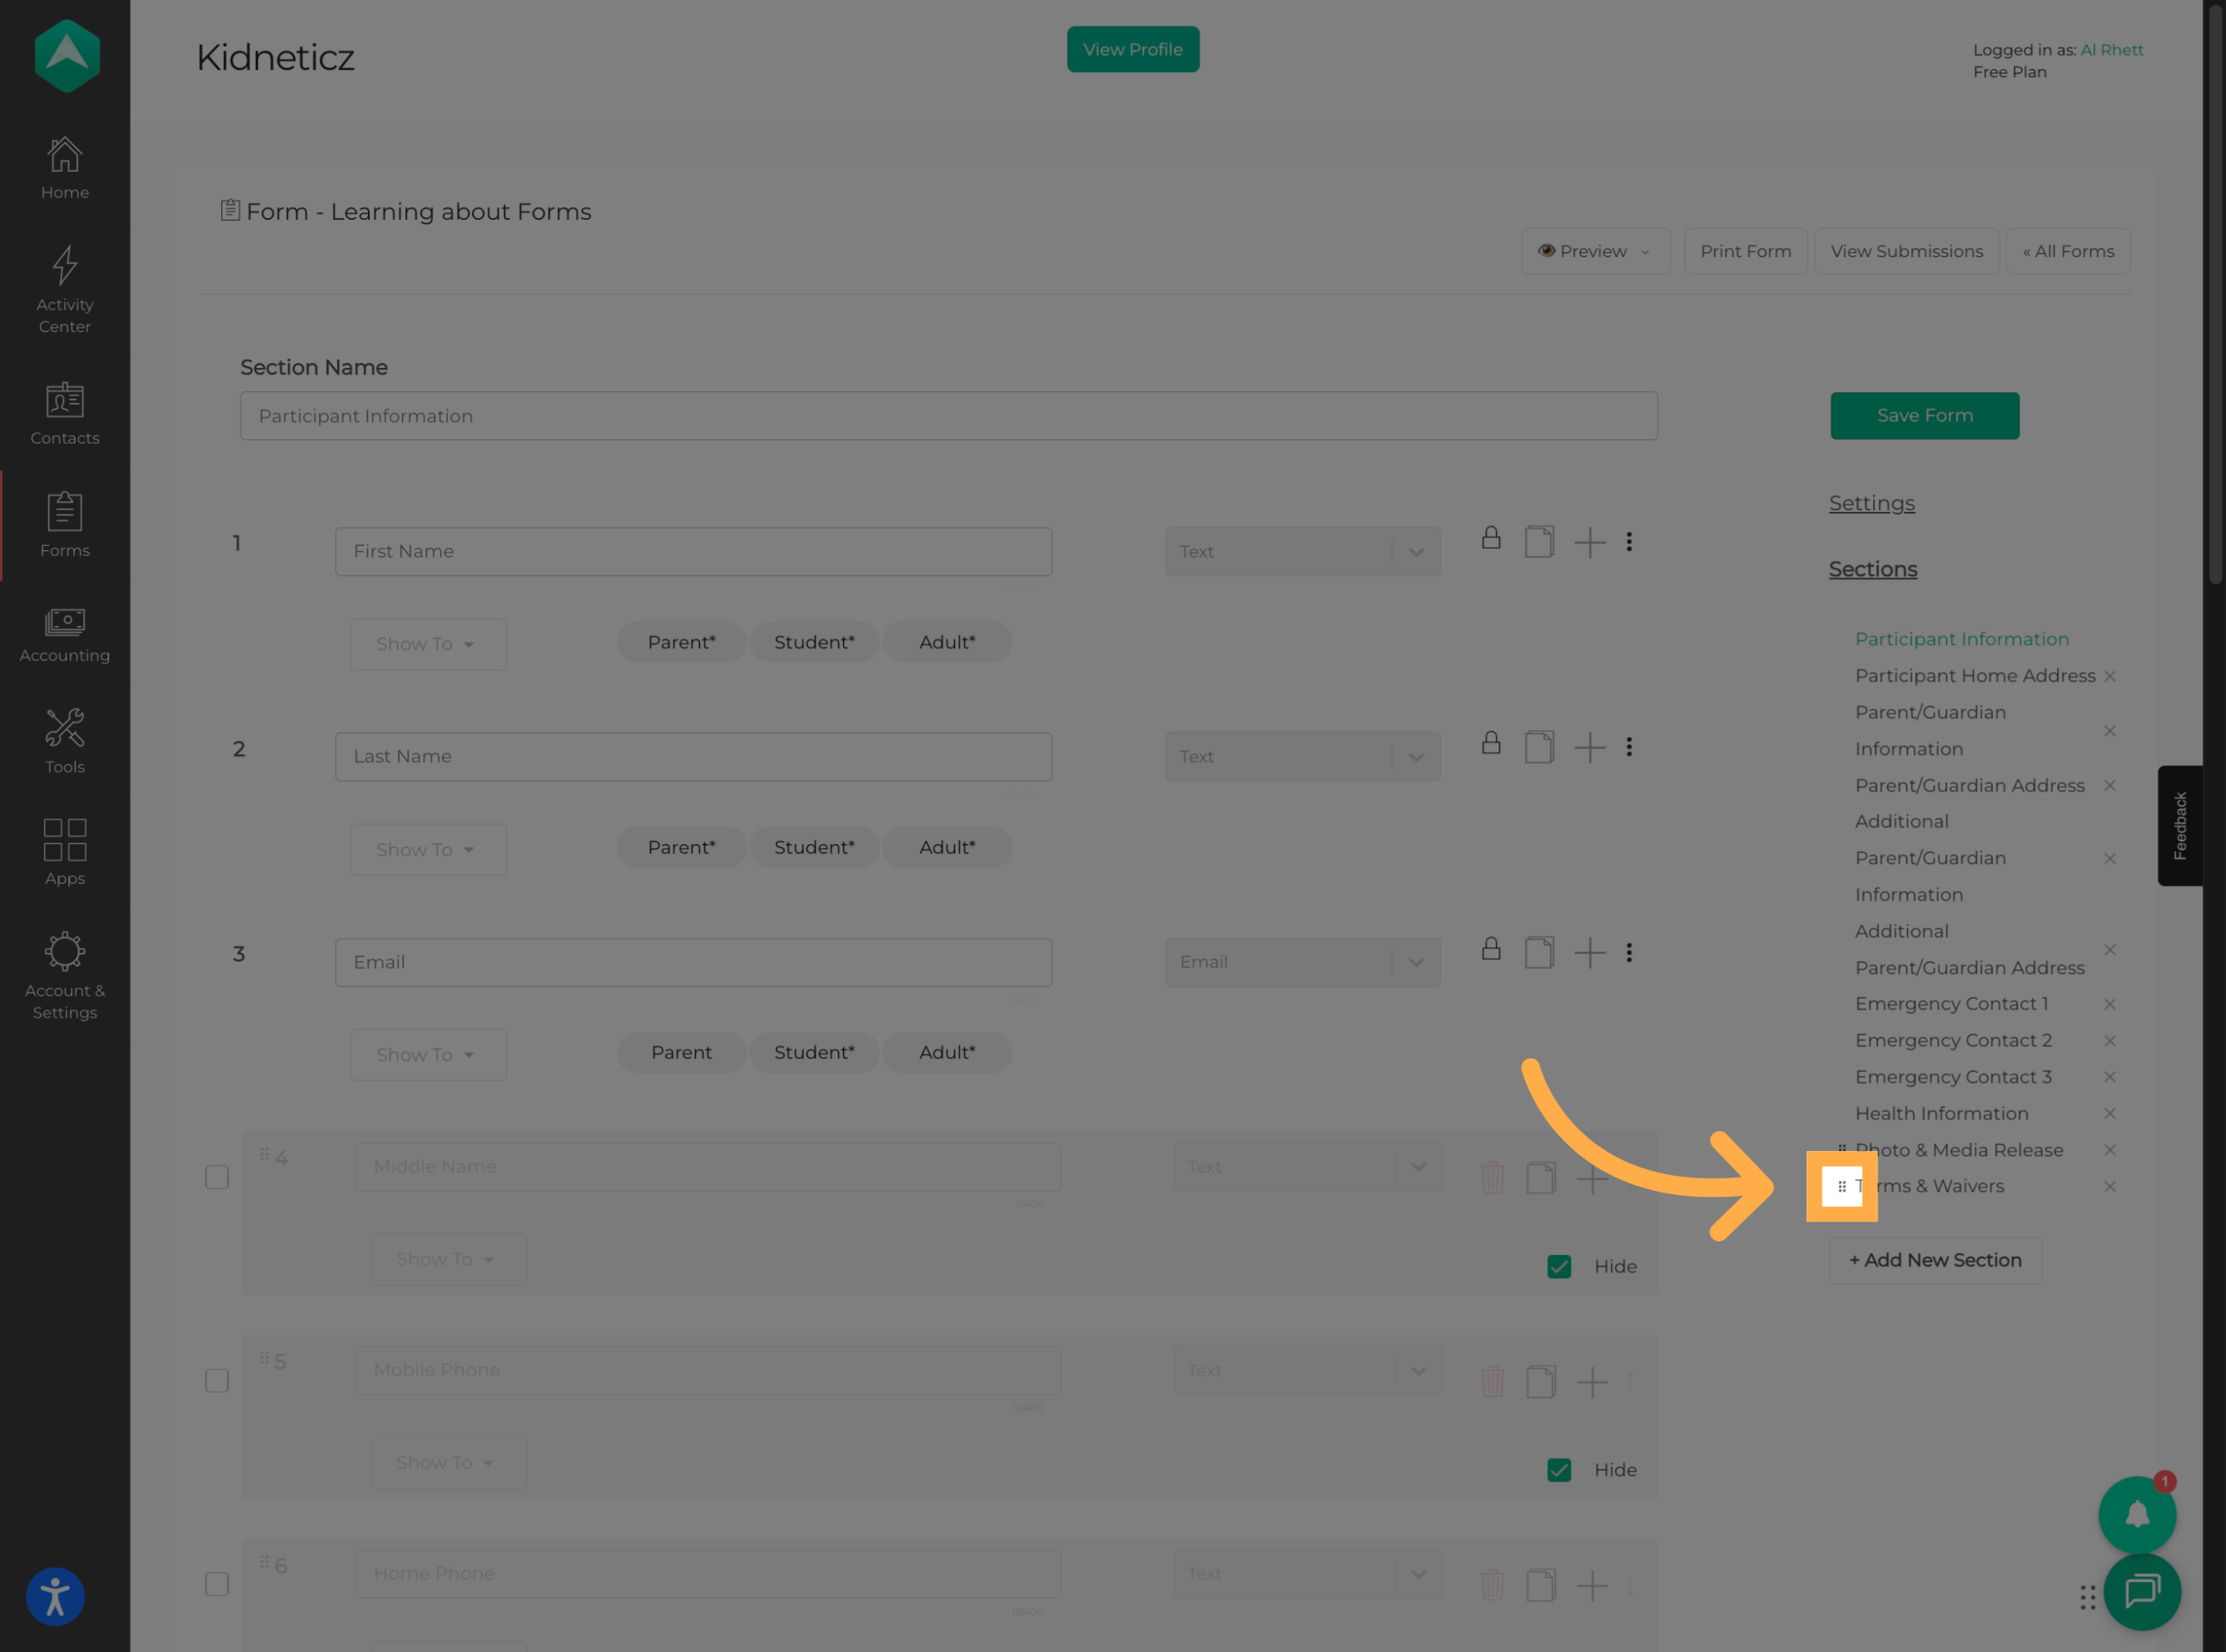
💡 Tip: You can reorder your custom sections to create a more logical flow for the person completing the form.
15. Save Your Form
Once you’ve finished making your changes, click “Save Form” to save the updated form.
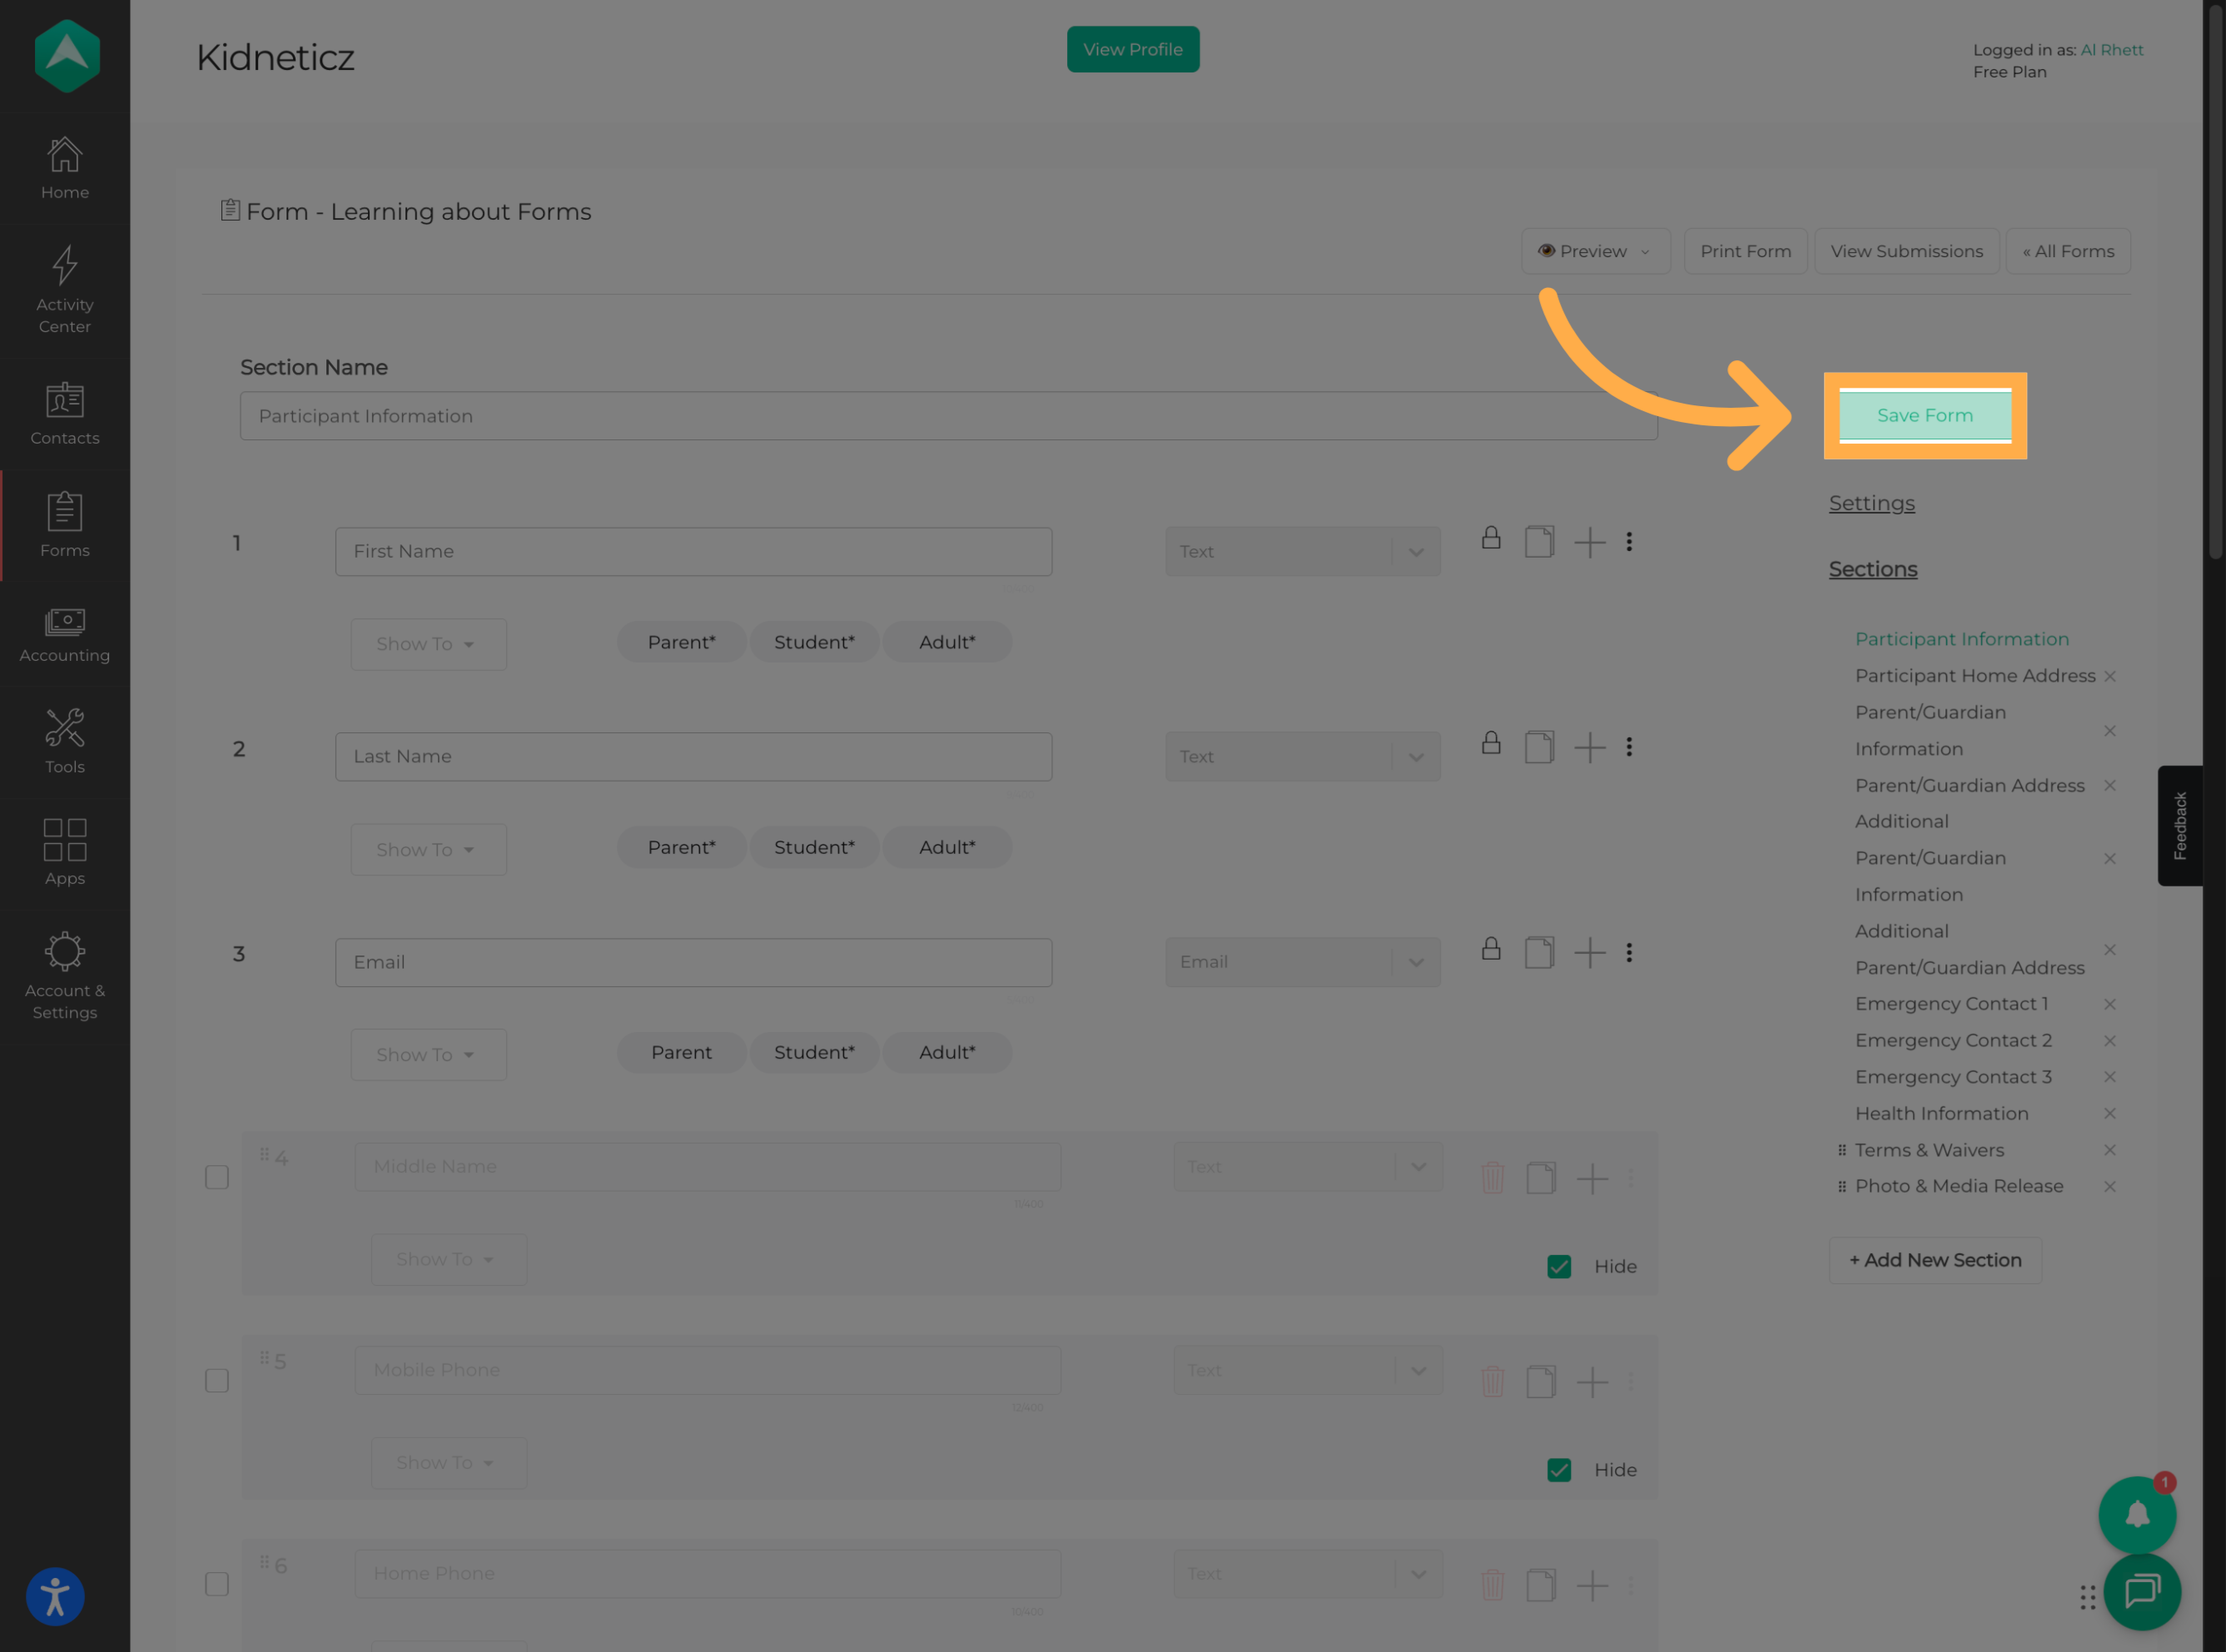
💡 Tip: Refresh the page after saving if you want to confirm that your new section order has been saved correctly.
16. Manage Question Options
Use the options next to a question to manage it. You can delete or copy a question, or add a new question below it.
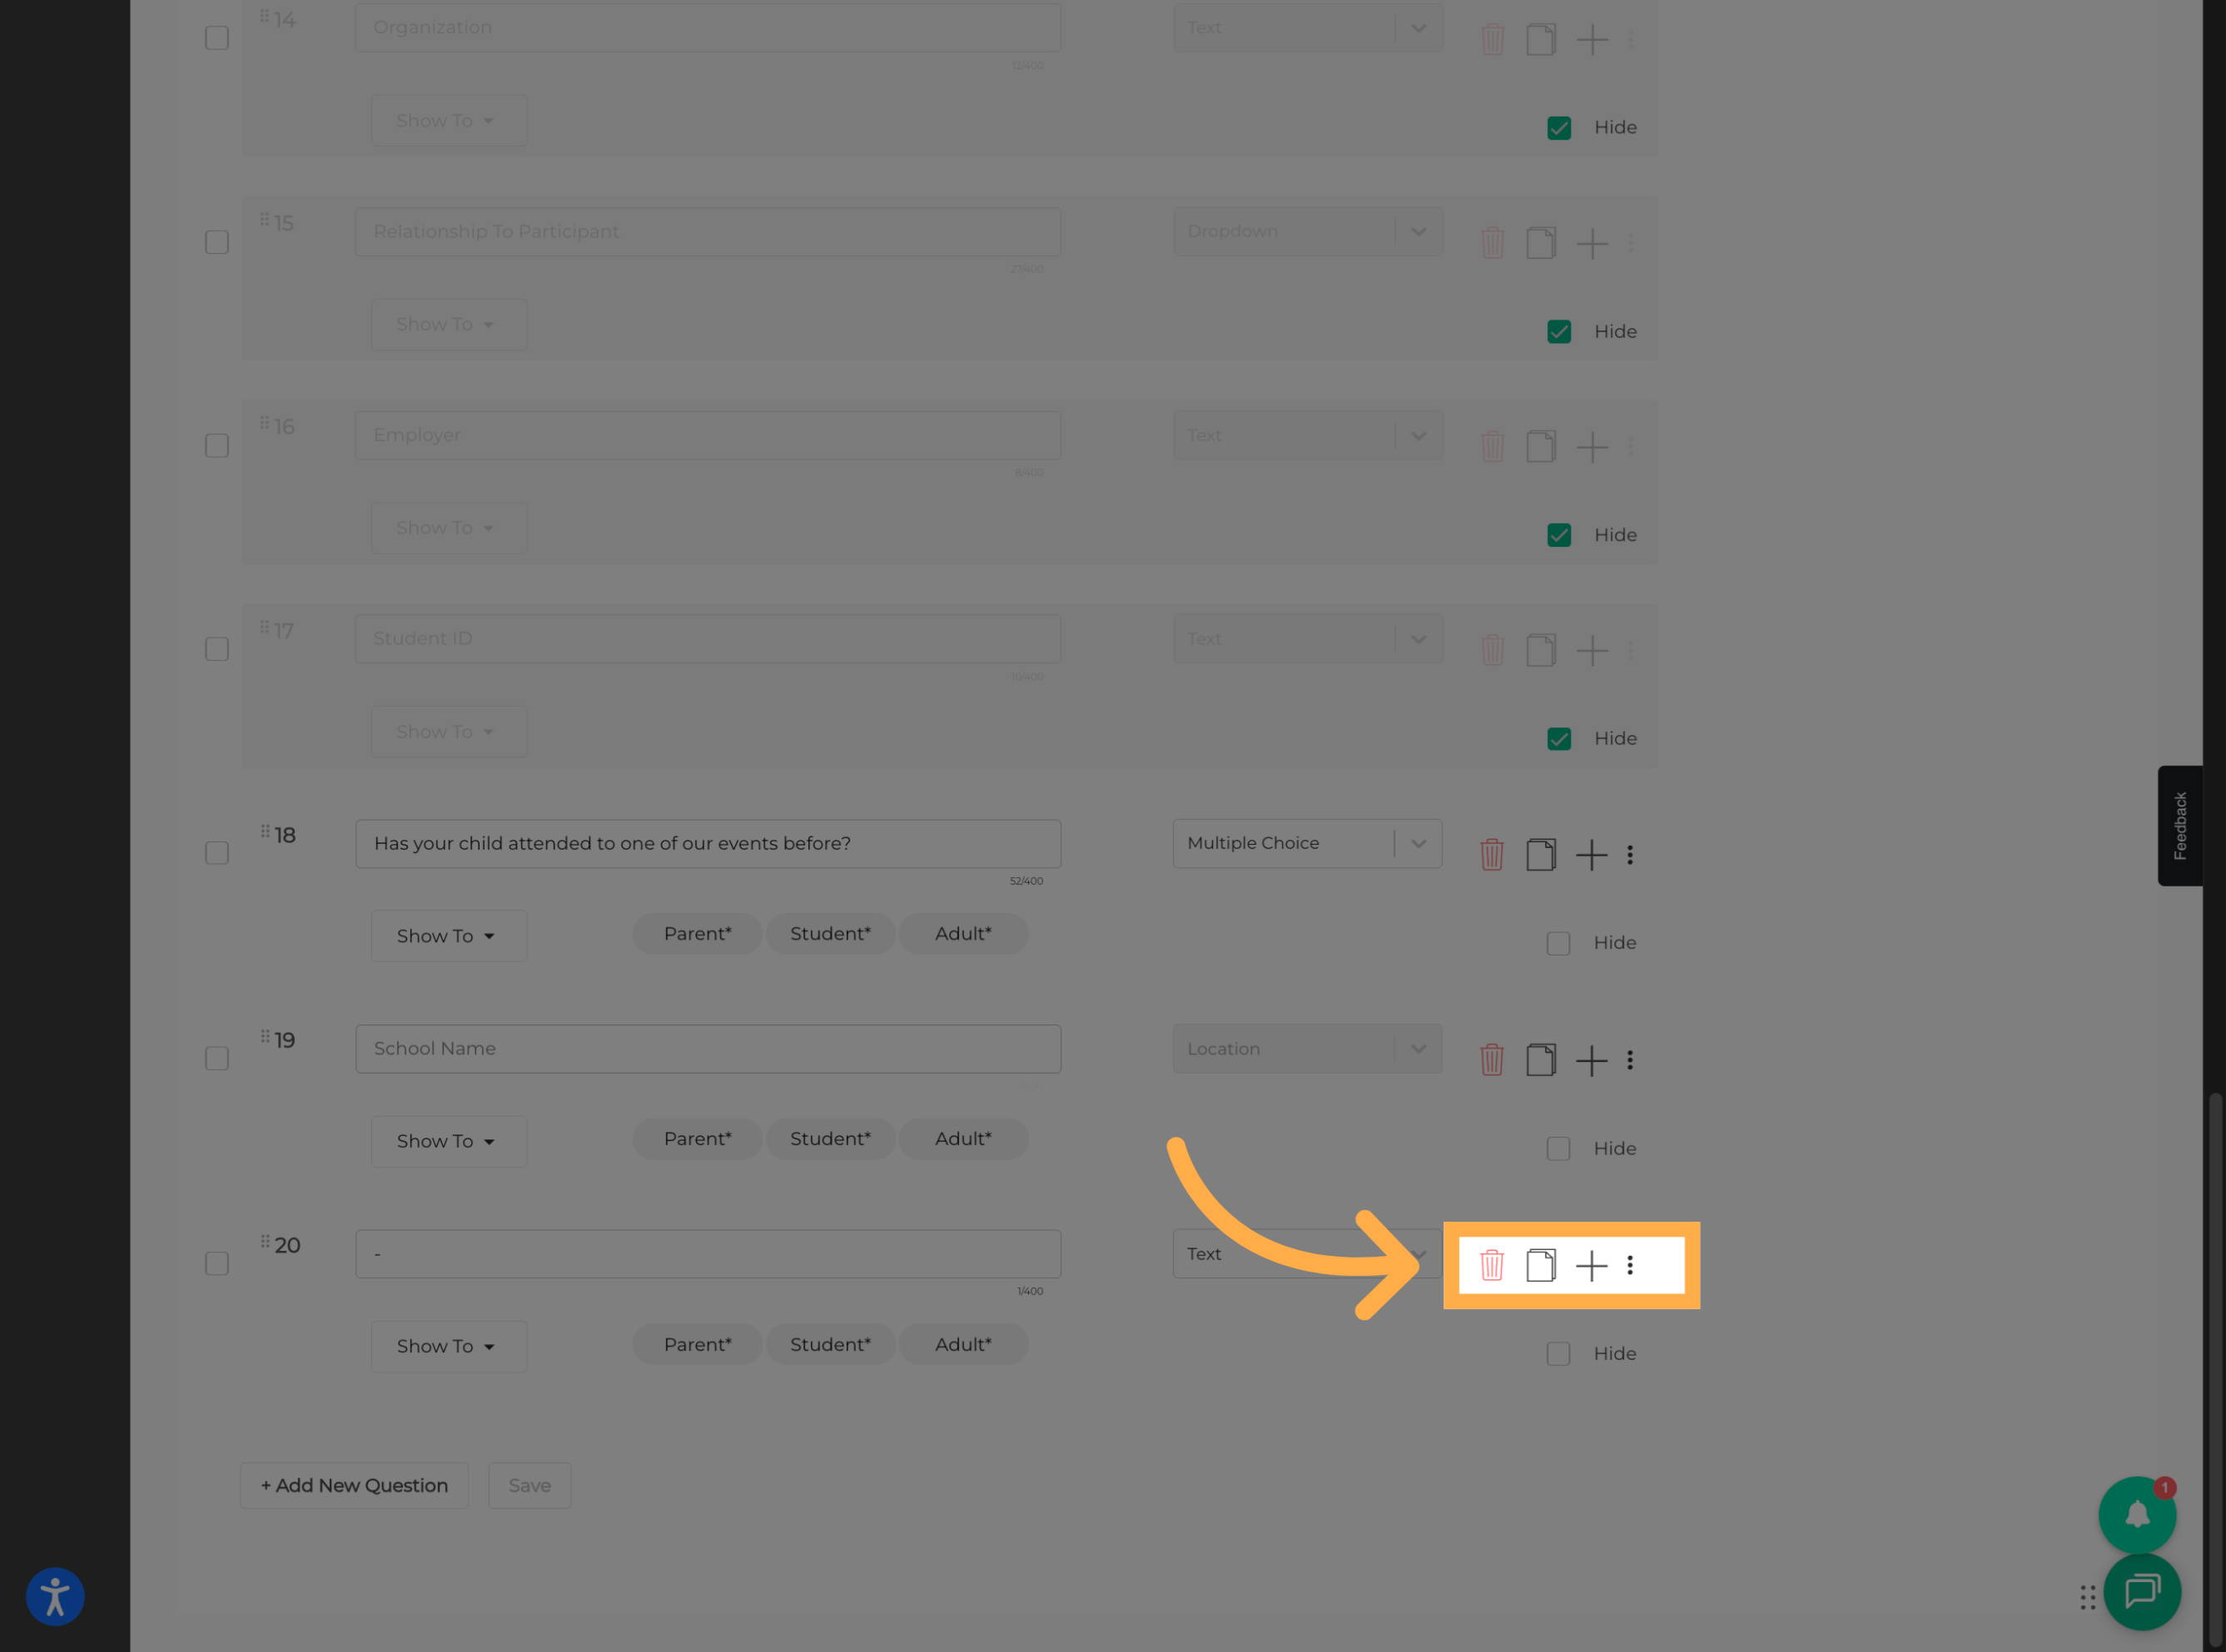
💡 Tip: Review a question before deleting it, especially if the form is already being used for registration.
17. Delete a Section
If you no longer need a section, click the “X” next to the section to remove it.
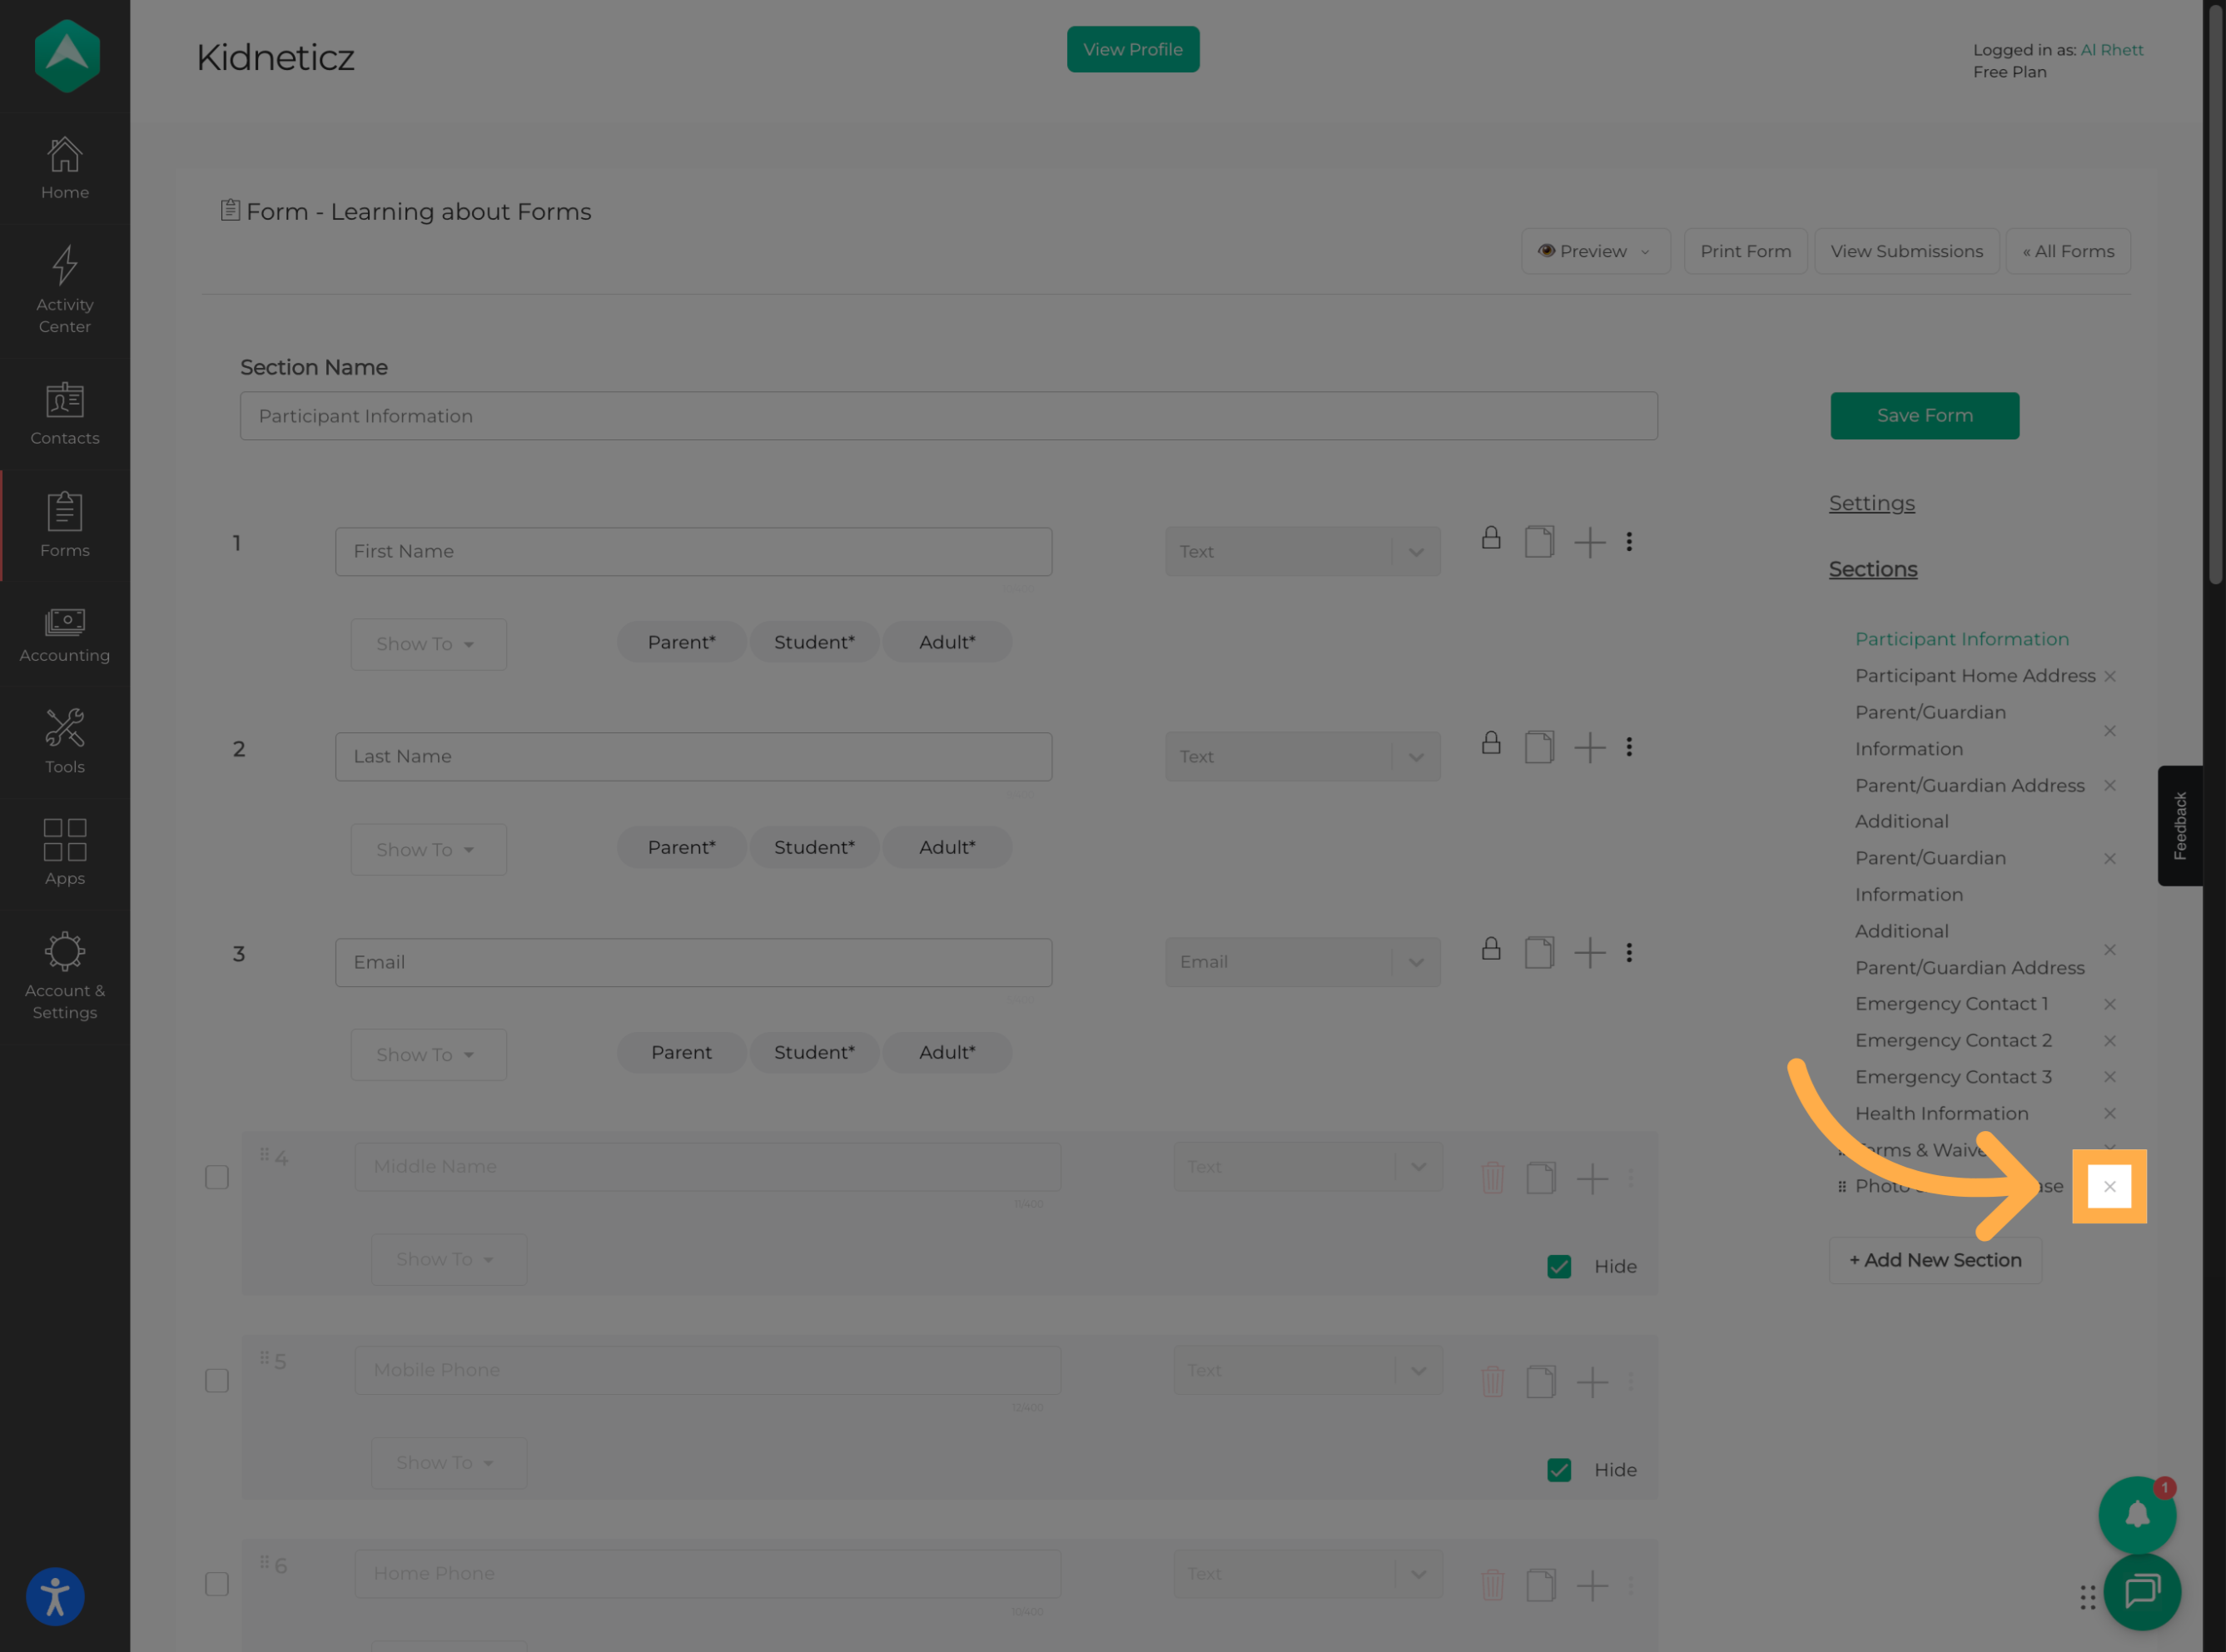
💡 Tip: Review the questions within a section before deleting it to make sure you don't remove information you still need to collect.
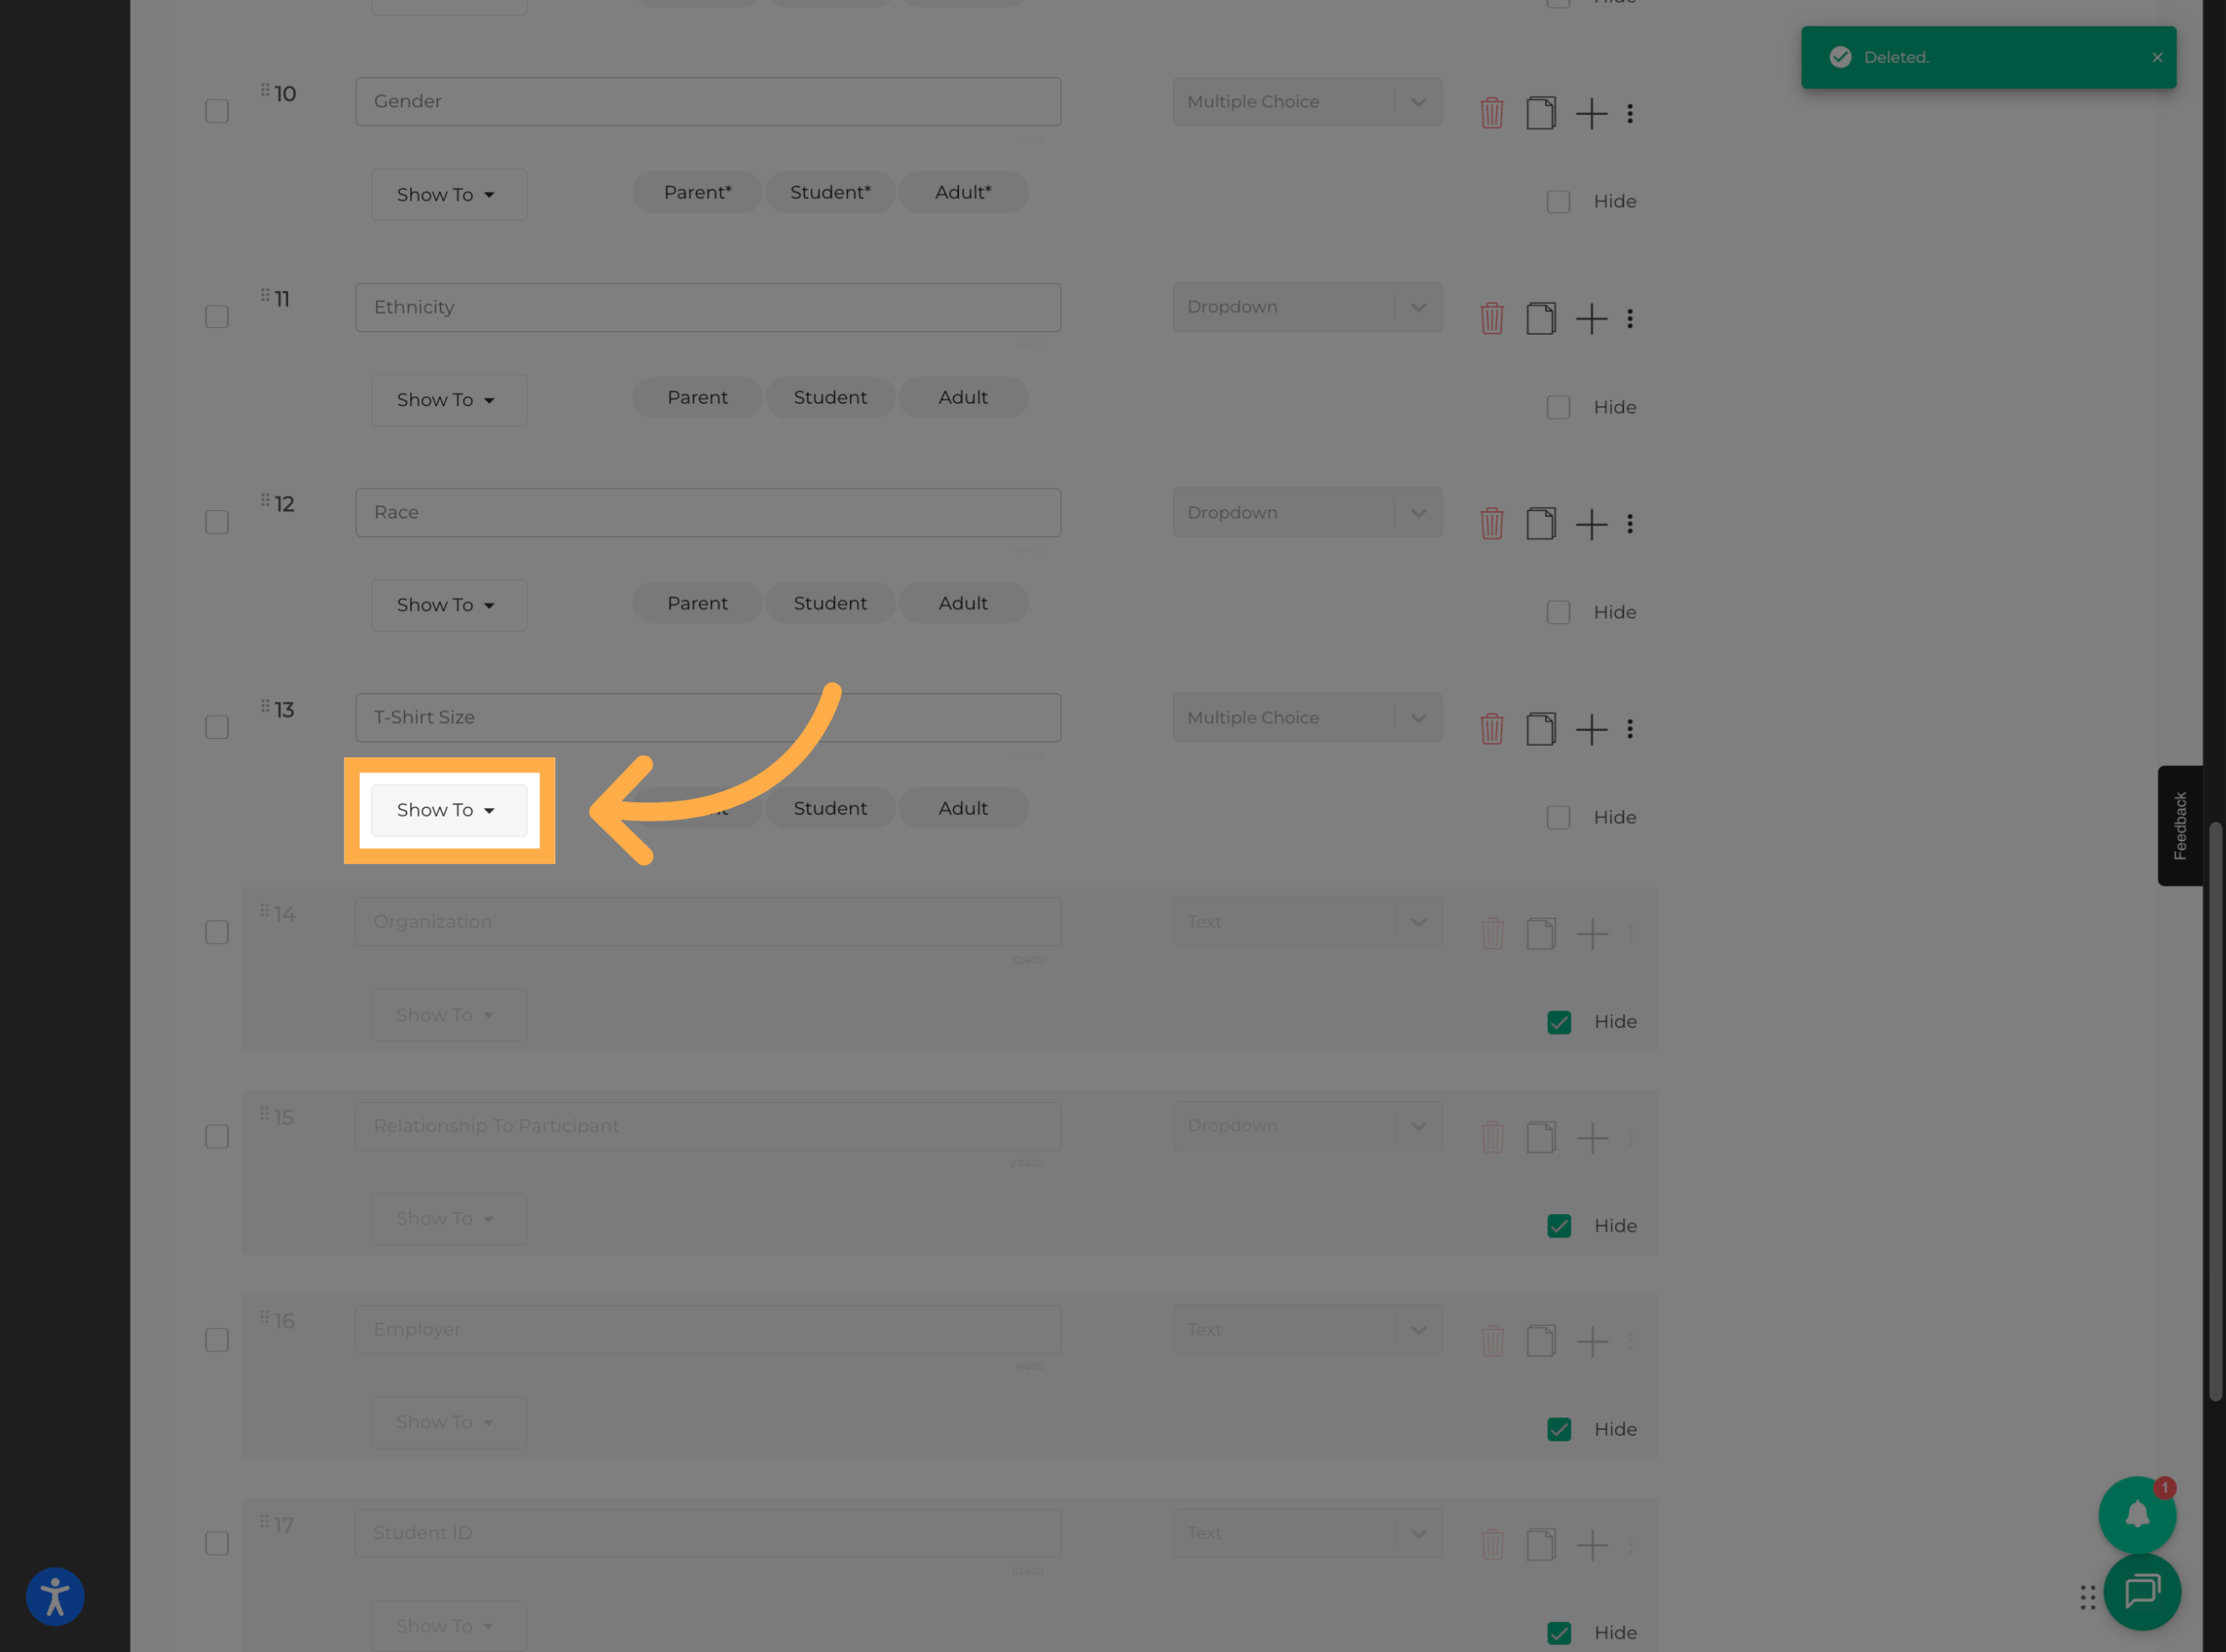
18. Open Visibility Settings
Select Show To to choose who can see the question or section.
19. Set Visibility and Requirements
Choose the audience that should see the question and set whether the question should be required or optional for each audience.
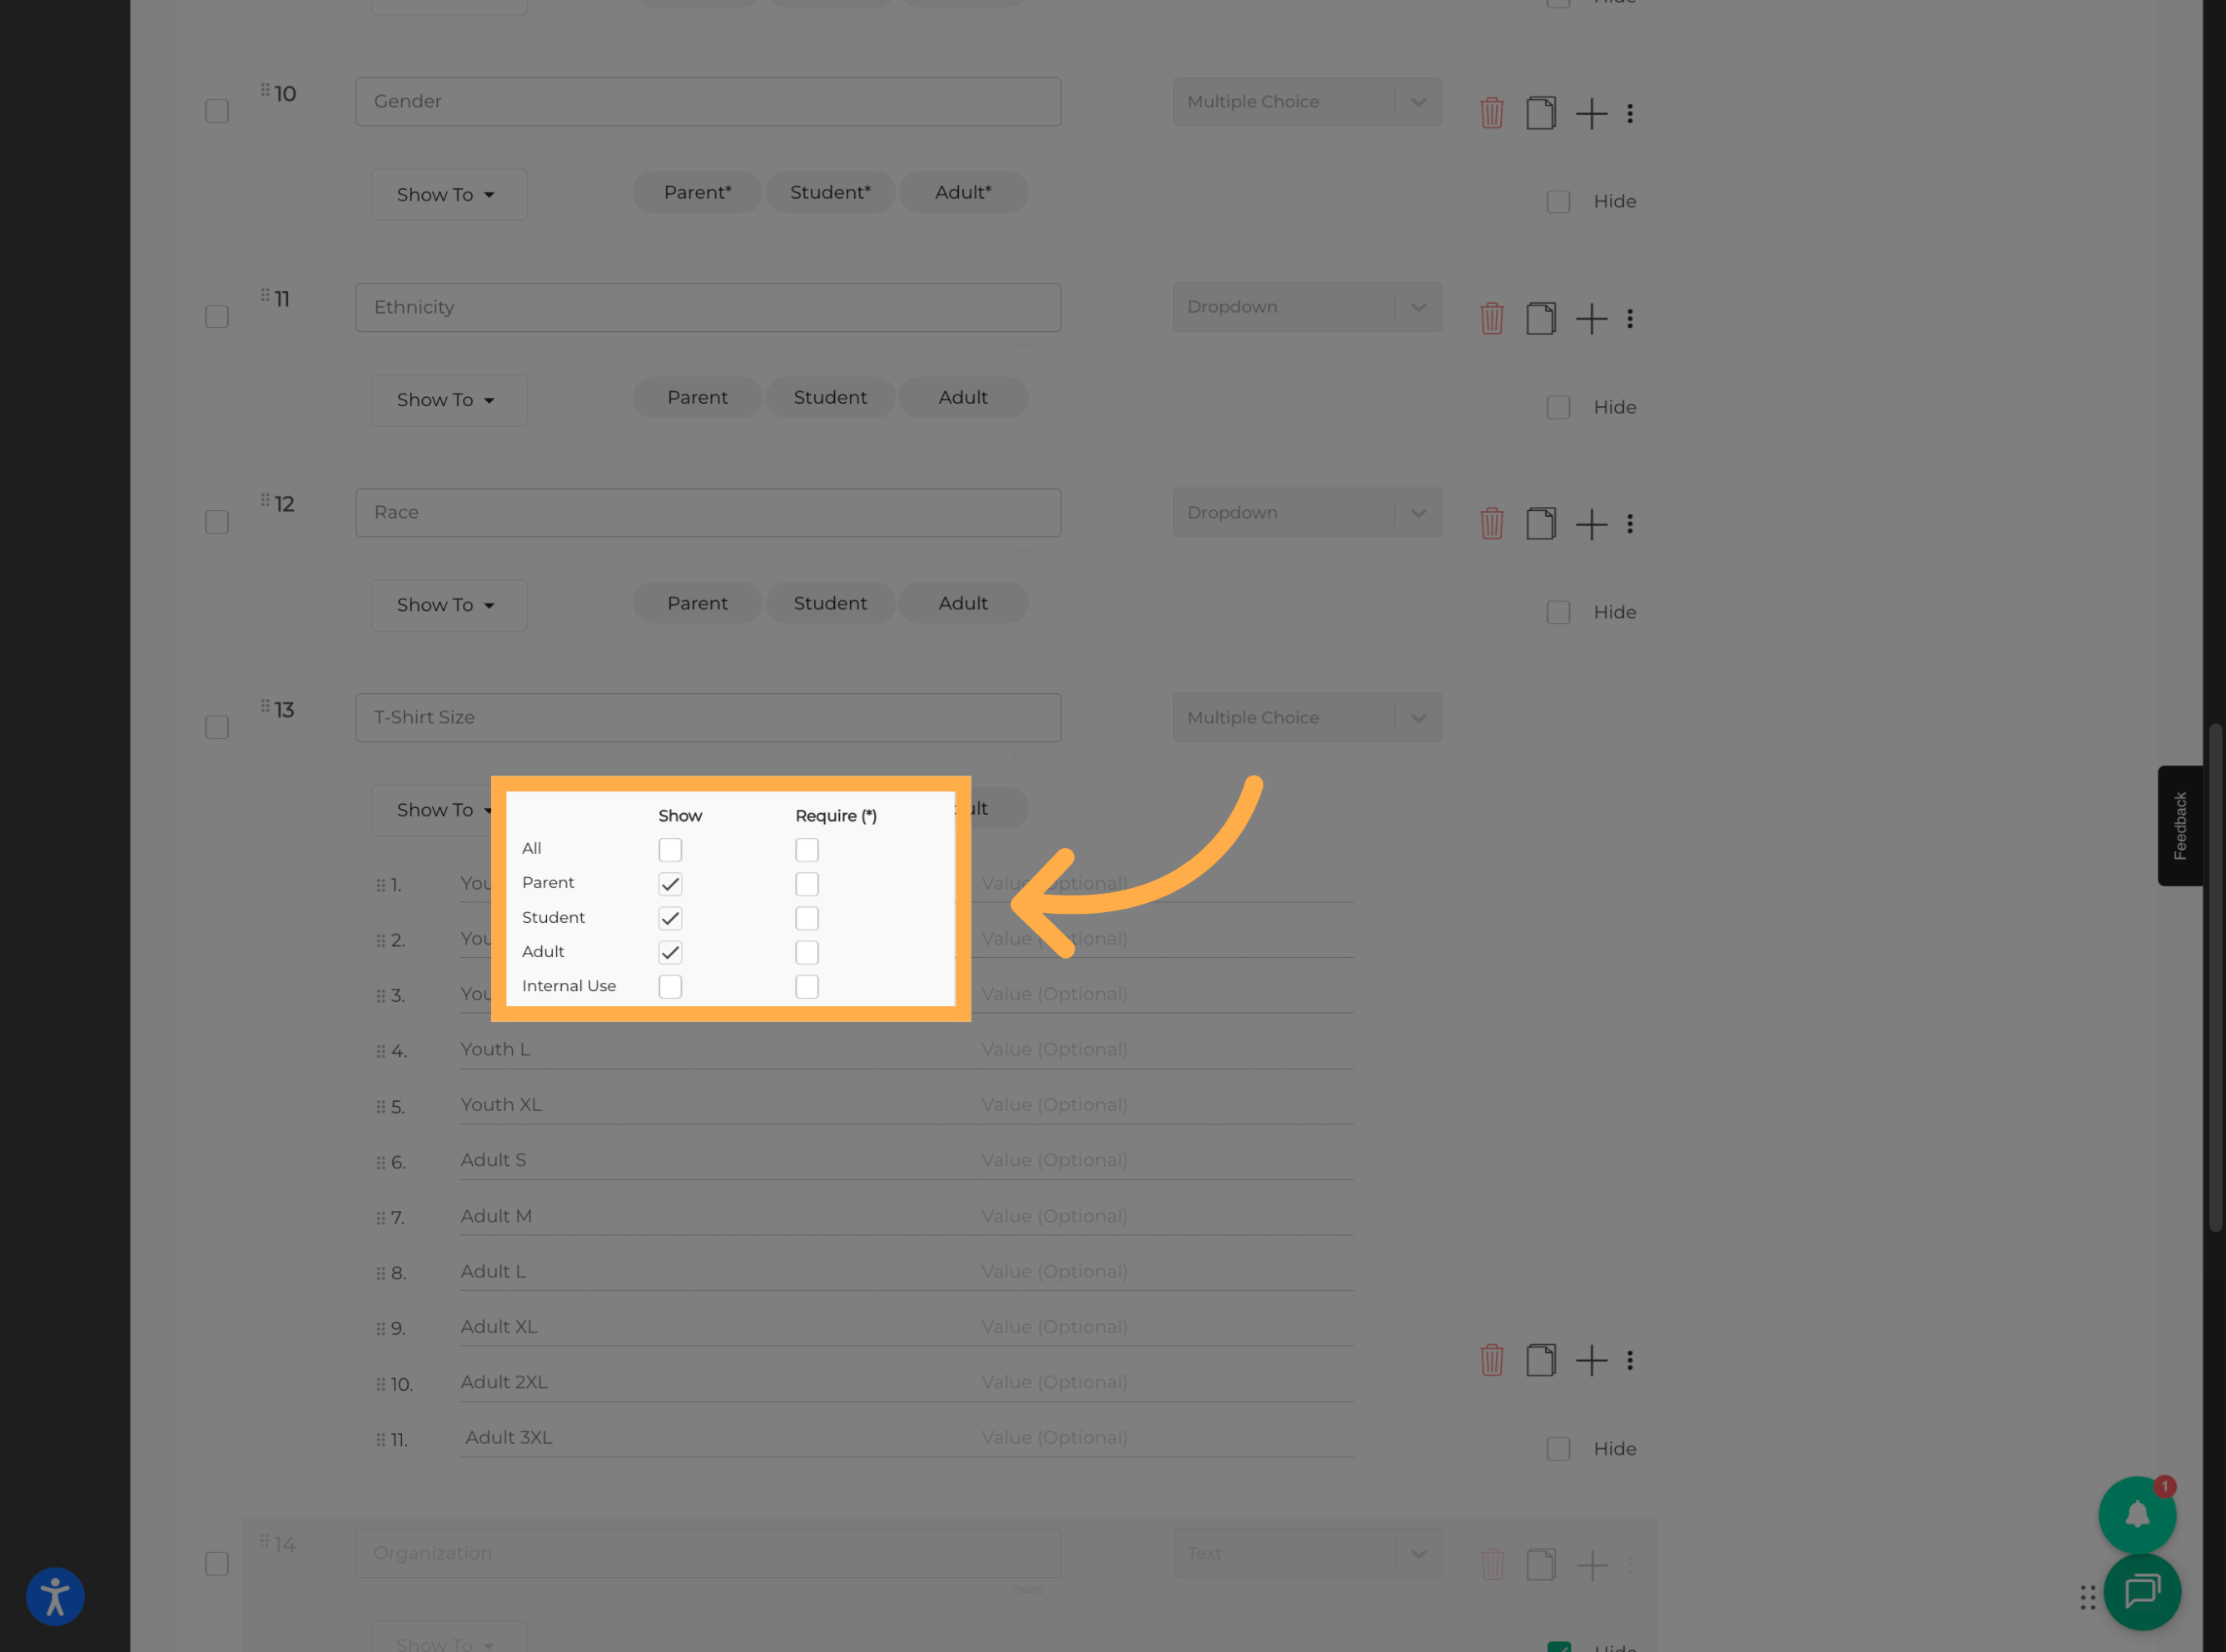
💡 Tip: A question can be required for one audience while remaining optional for another.
Required questions are identified with an asterisk (*) next to the applicable audience.
20. Hide a Question
If you don't want a question to appear on the registration form, use the available settings to hide it from registrants.
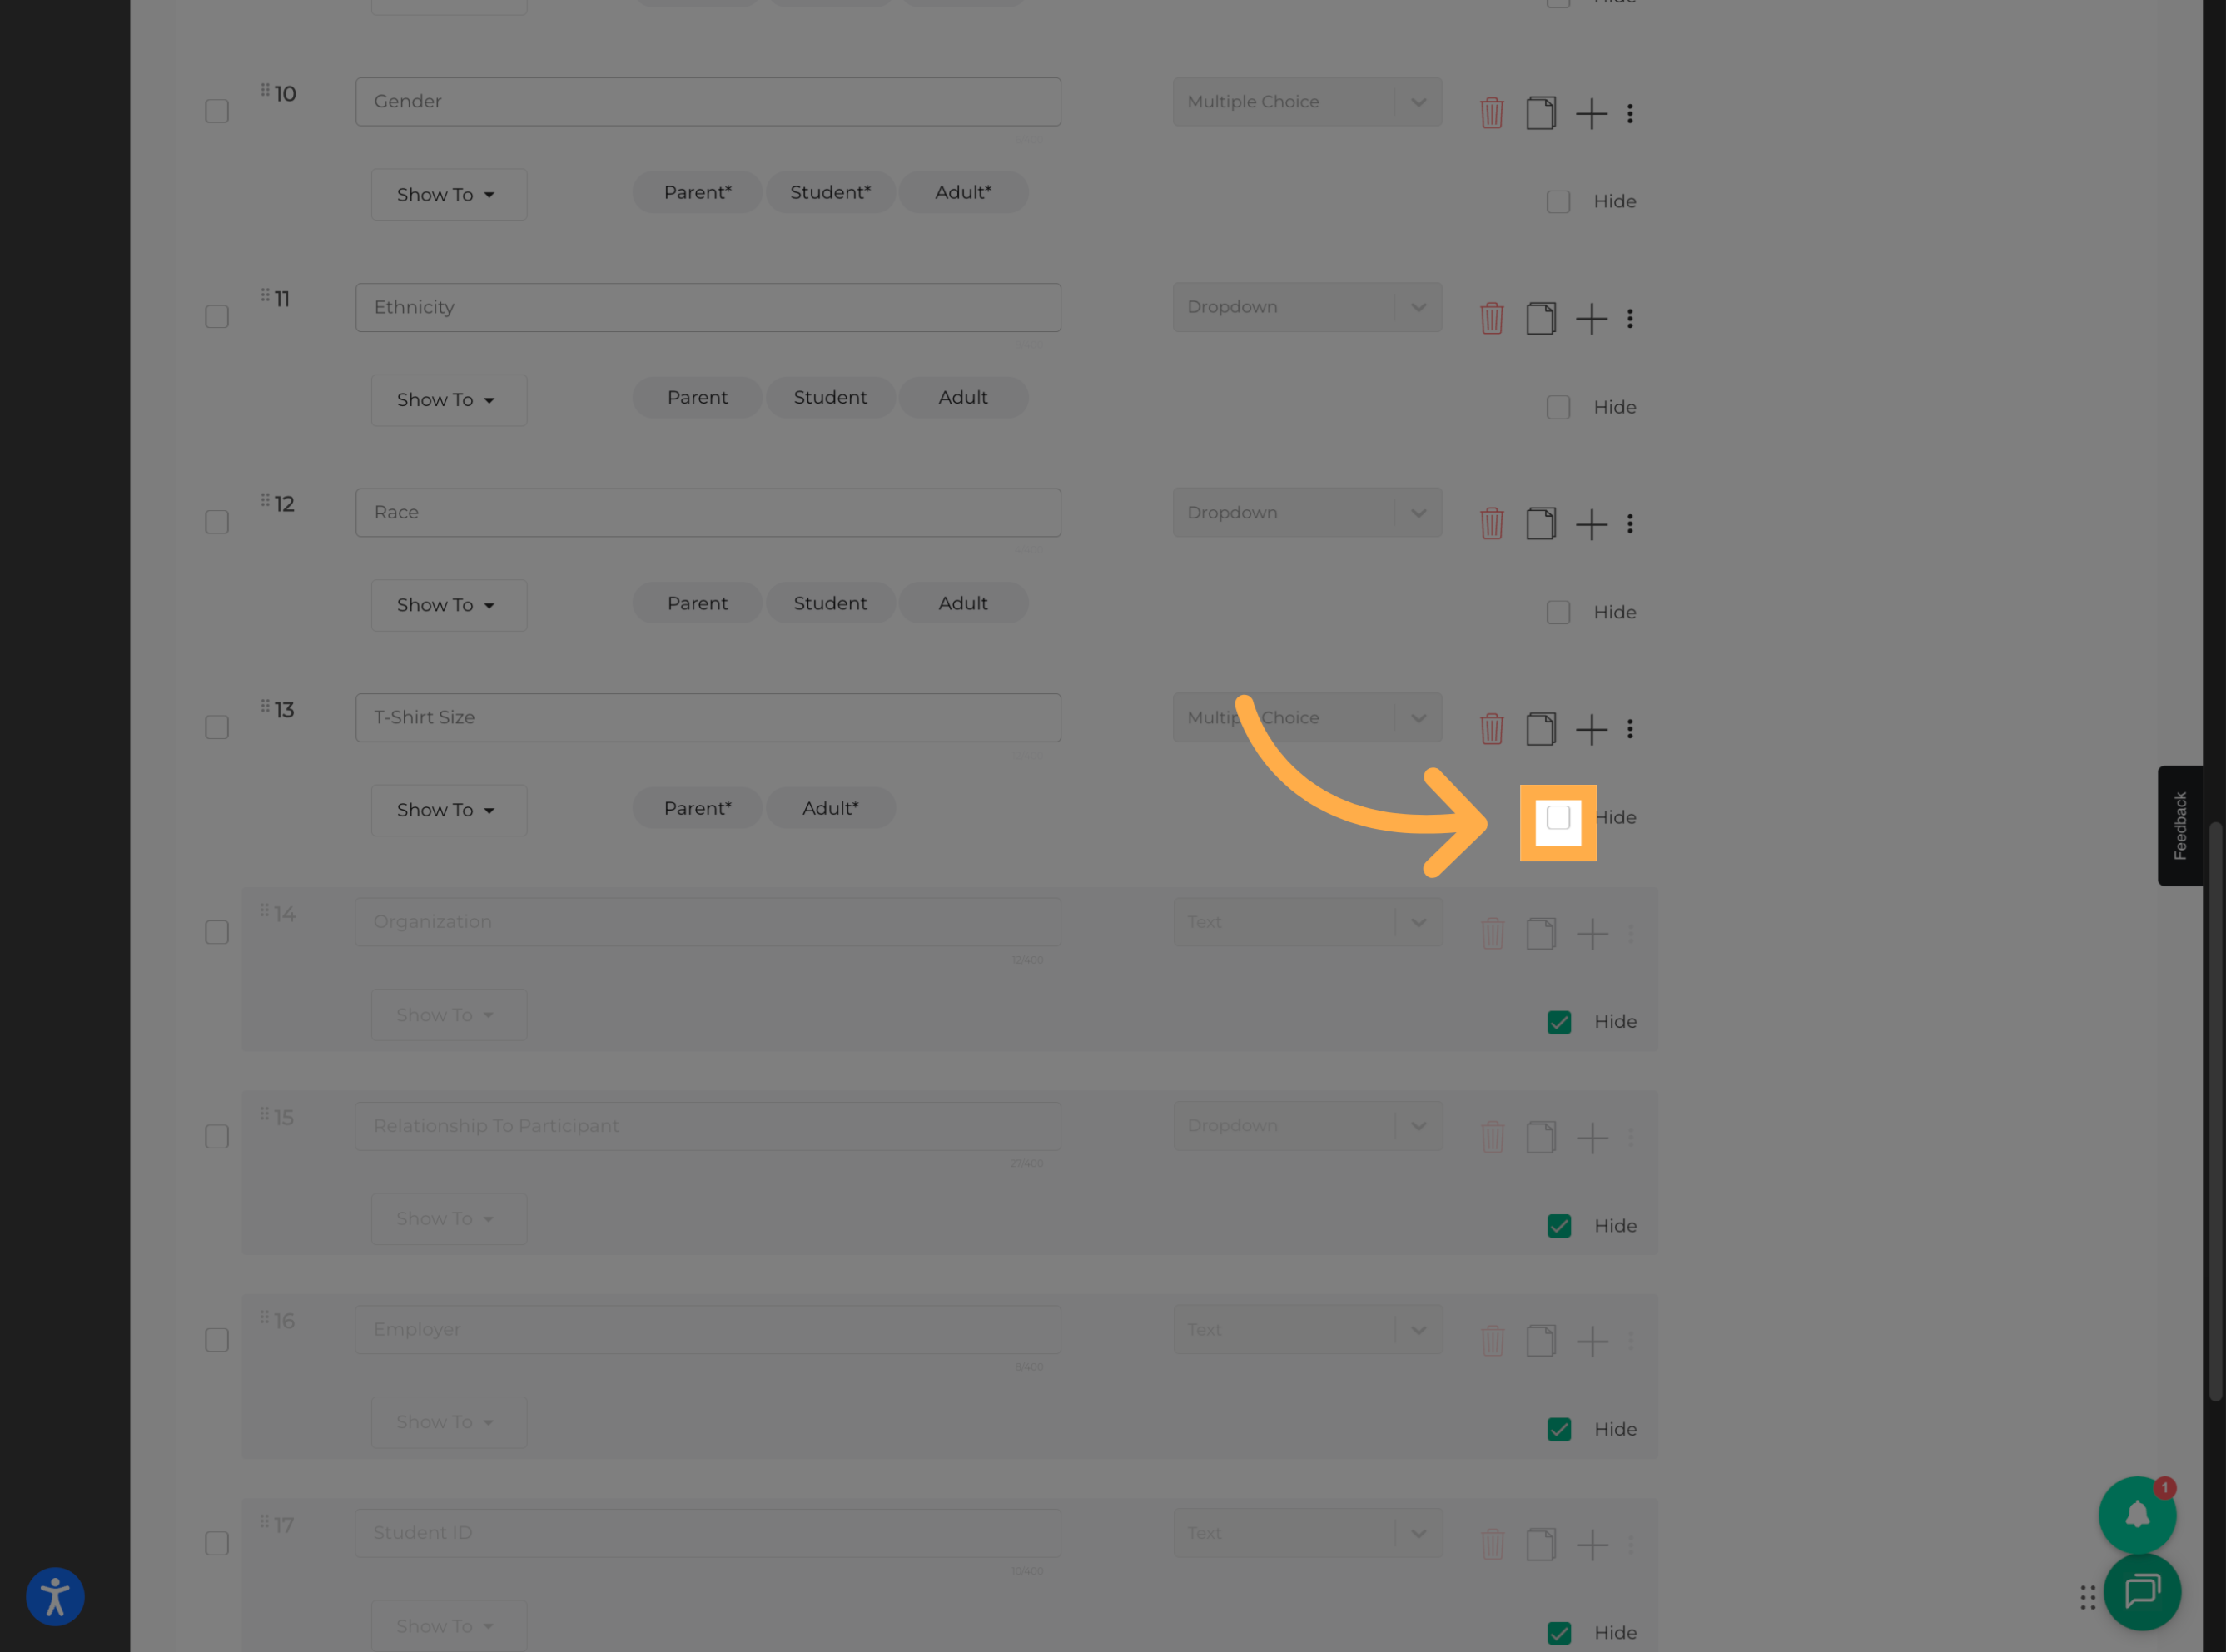
💡 Tip: Hiding a question overrides the Required setting. A hidden question will not appear on the registration form even if it was previously marked as required.
21. Preview Your Form
Before using your form, click “Preview” to see how it will appear to users.
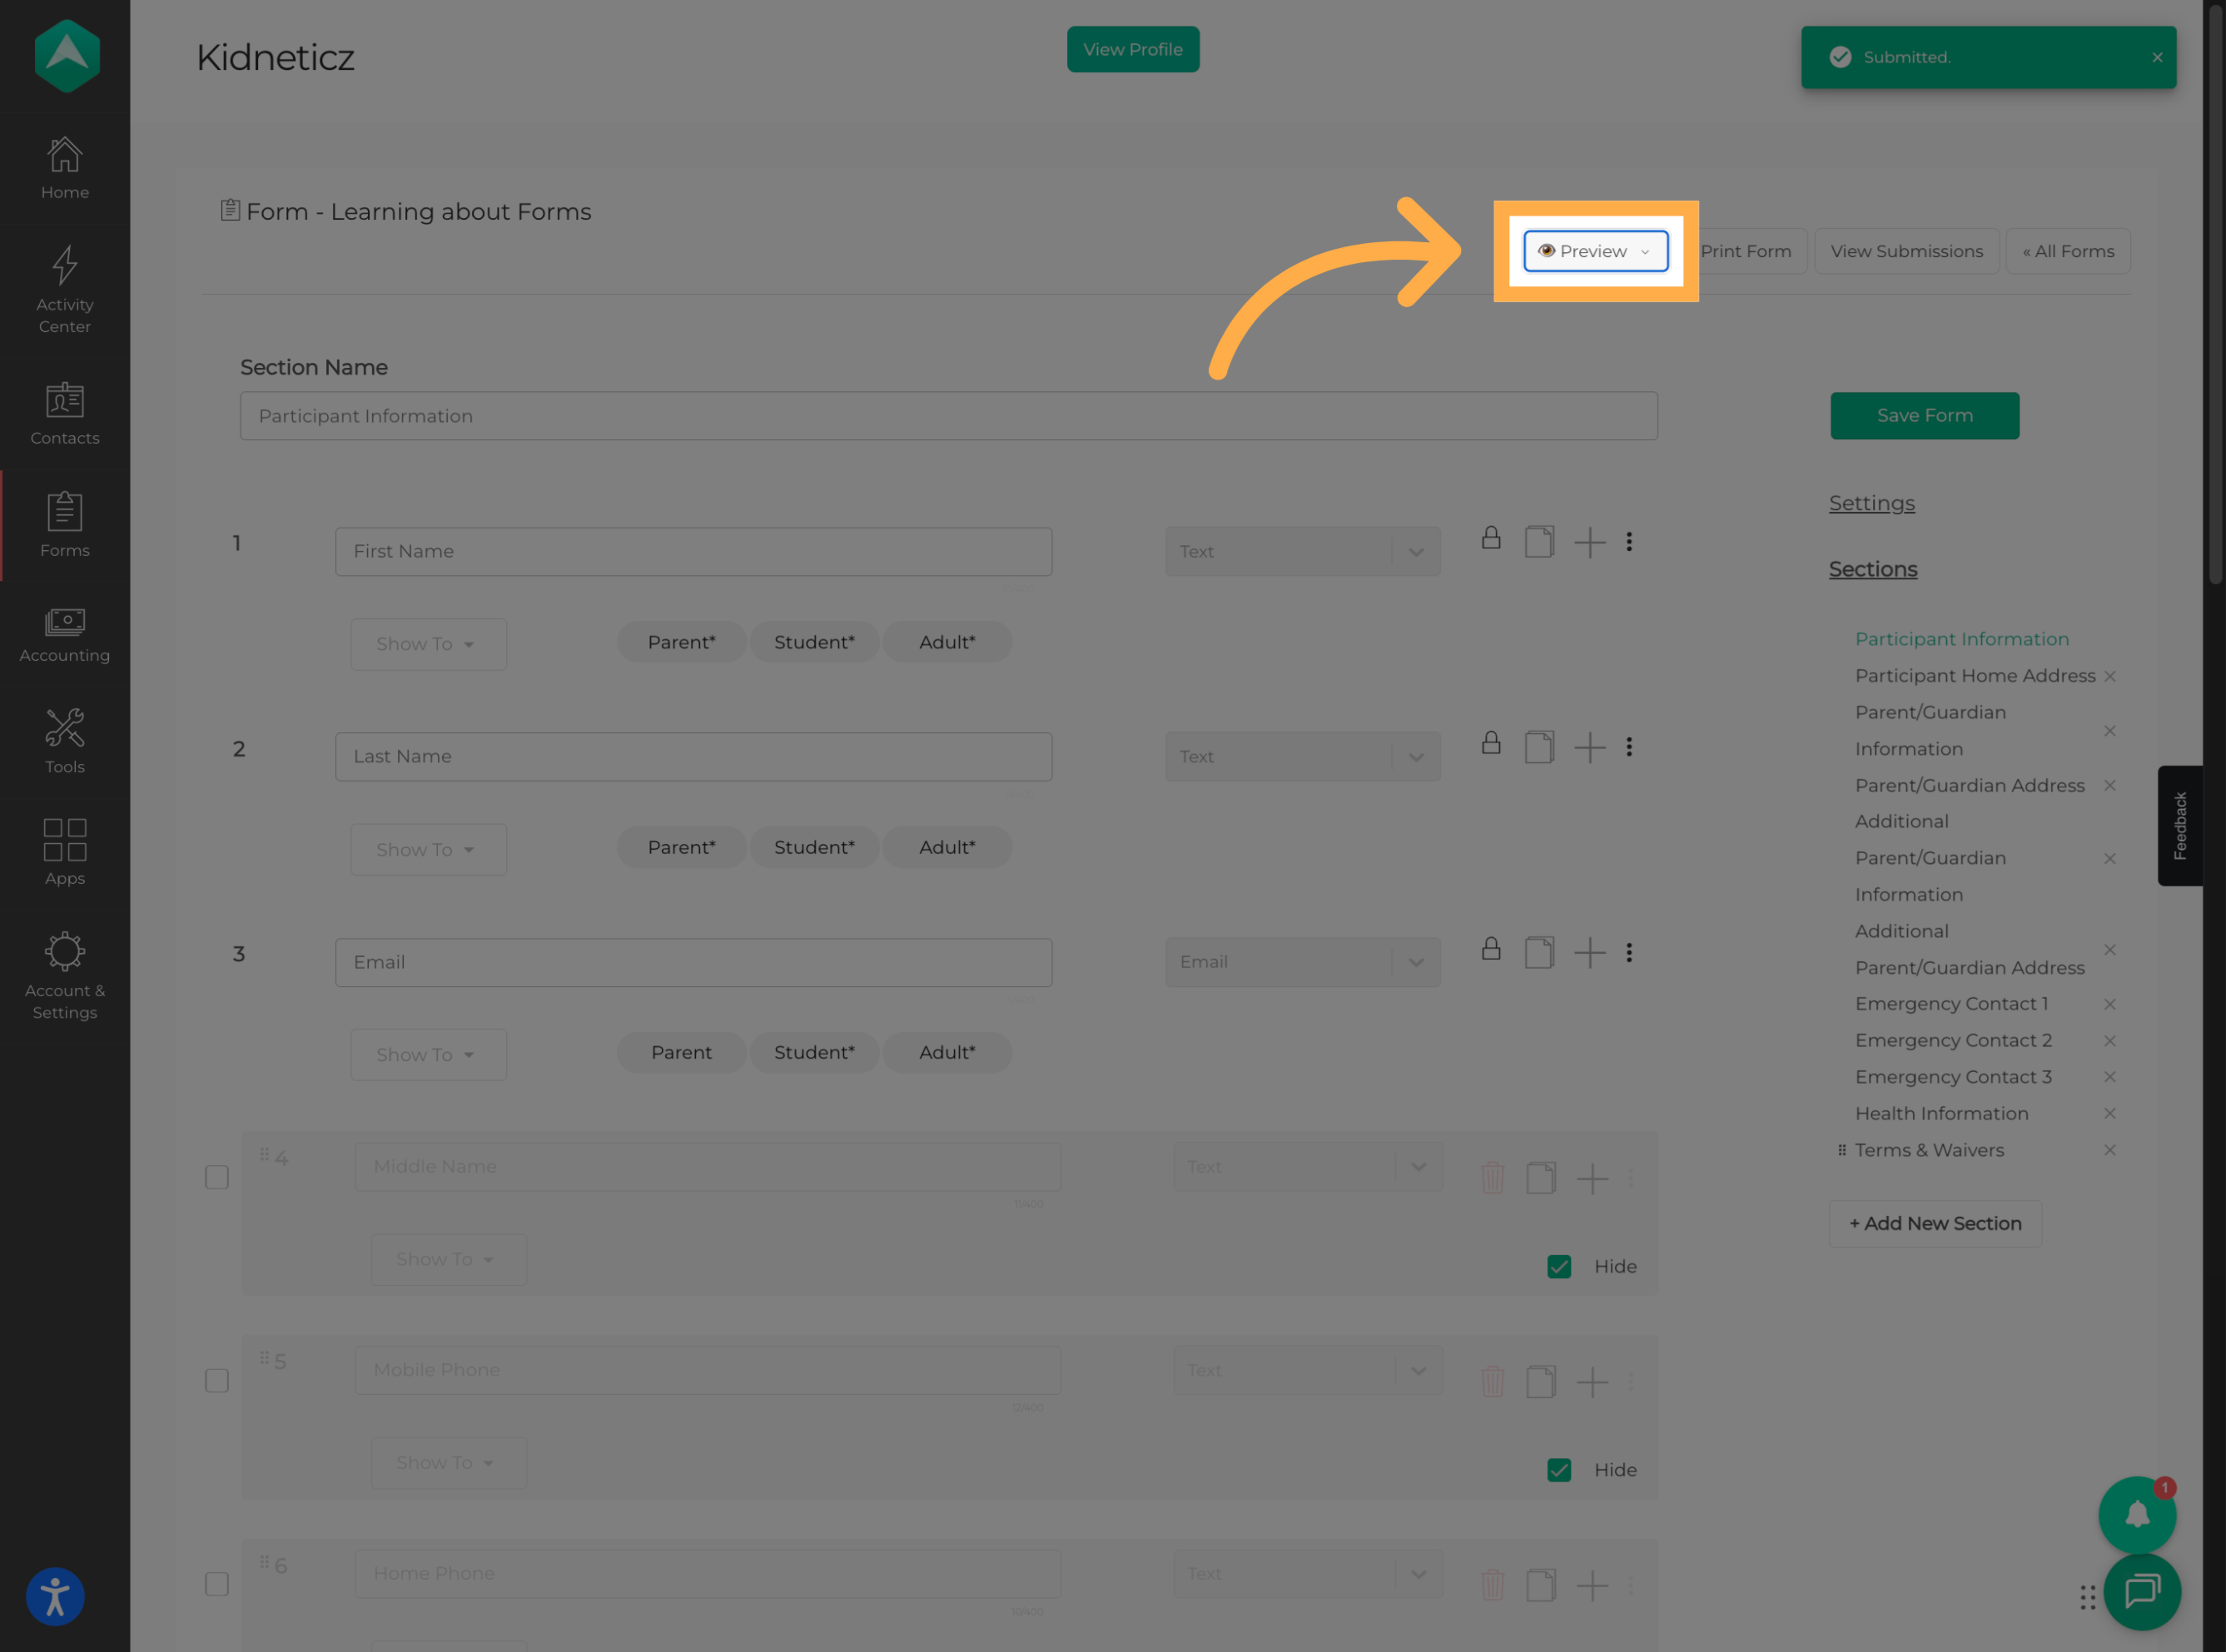
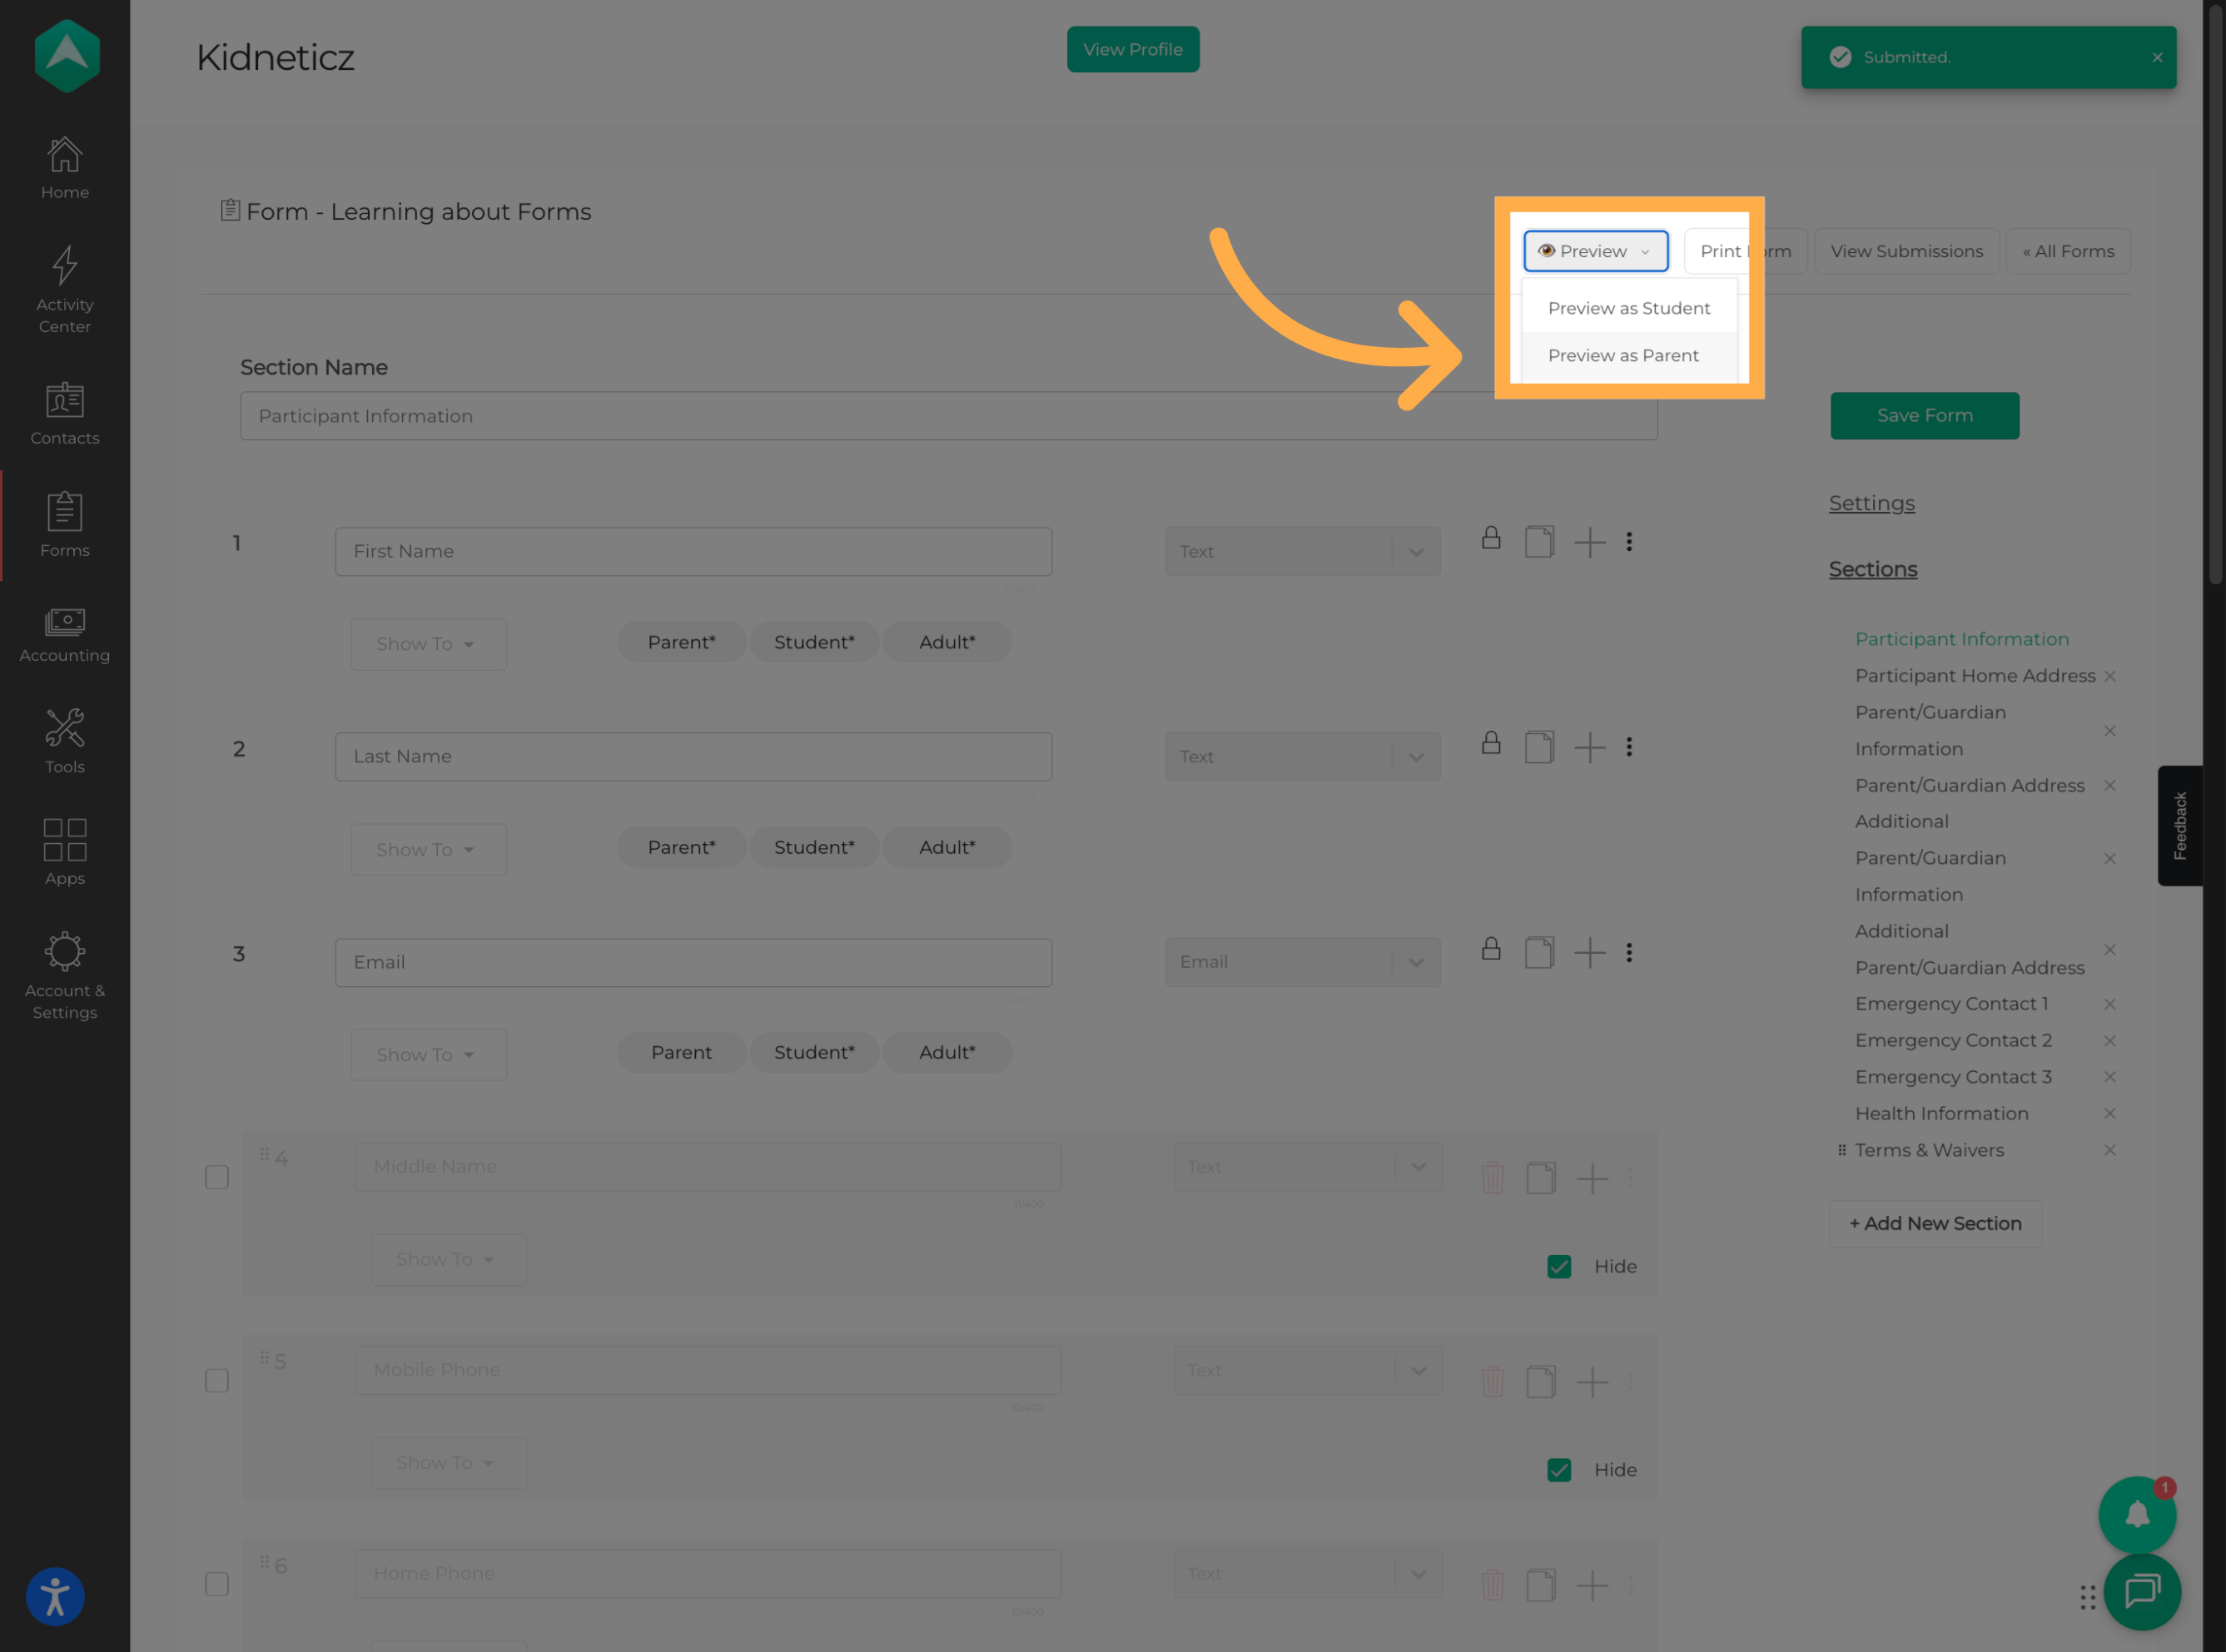
💡 Tip: Use the preview to check your questions, section order, required fields, and visibility settings before attaching the form to an activity.
22. Review the Form
Review the form carefully to make sure the questions, sections, visibility settings, and section order appear as expected.
💡Tip: If you recently reordered sections, confirm that the new order is reflected in the registration experience before publishing or sharing the activity.
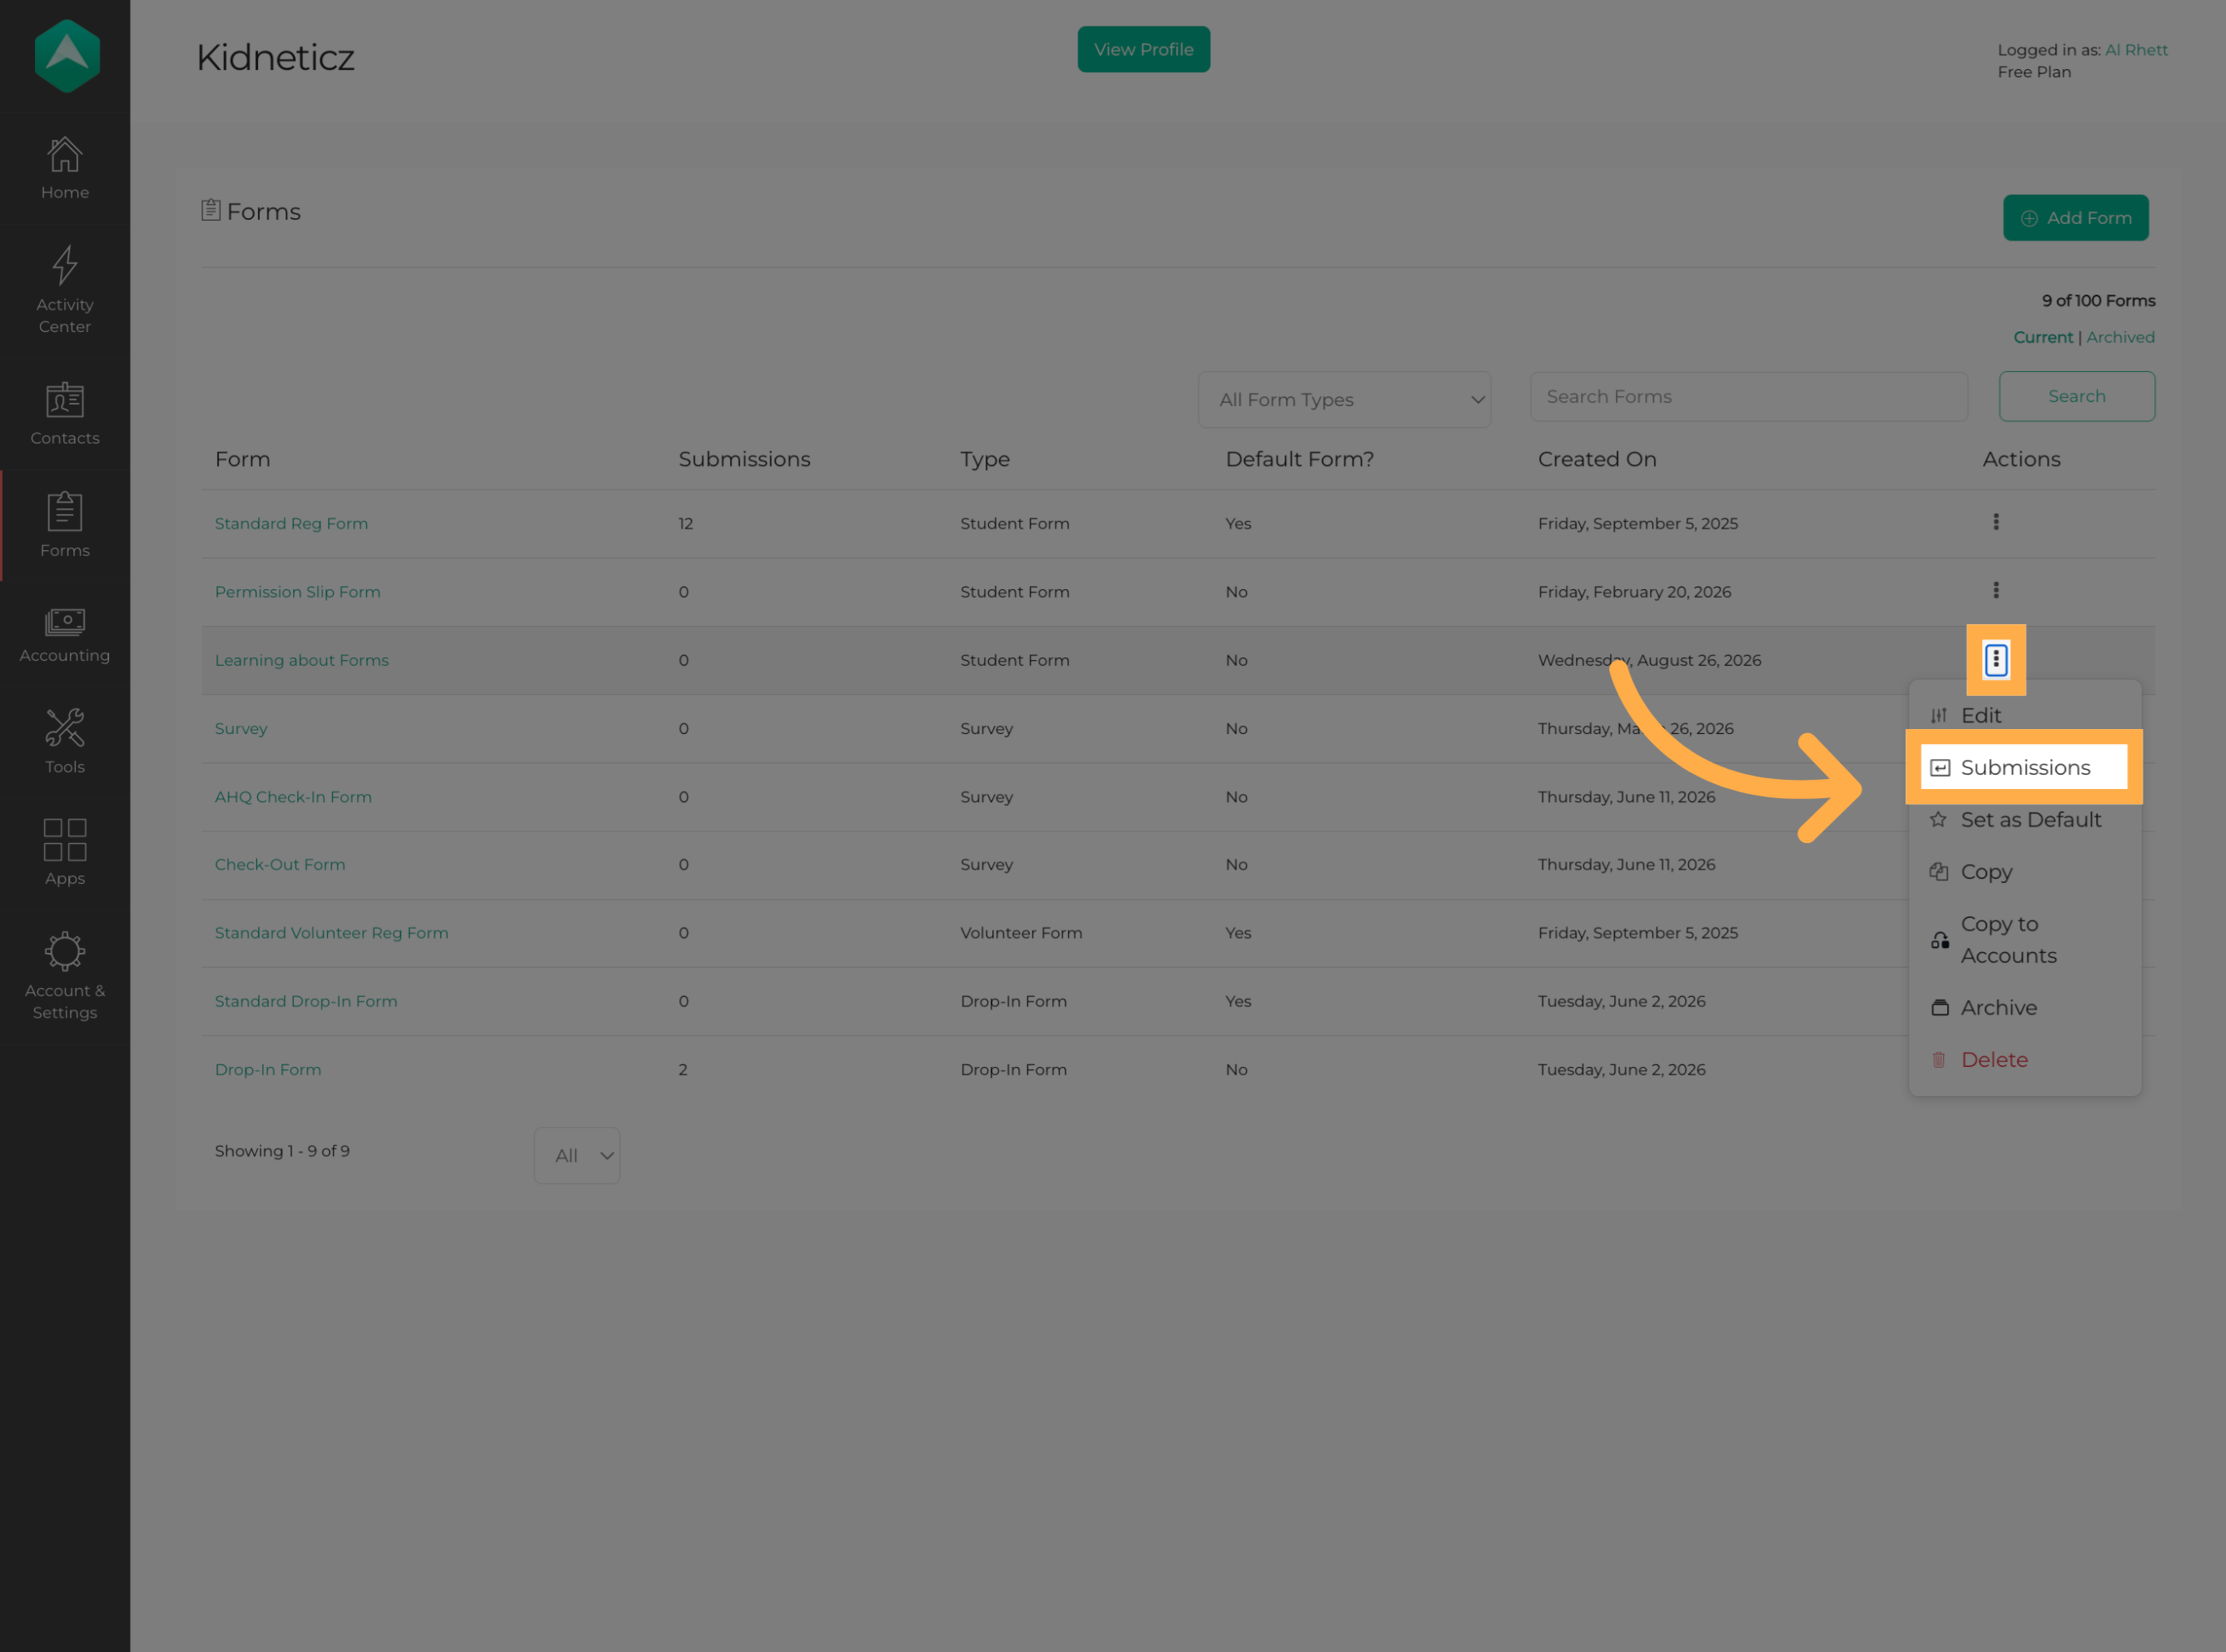
23. View Form Submissions
Once registrants have completed the form, click “View Submissions” to review the responses that have been collected.
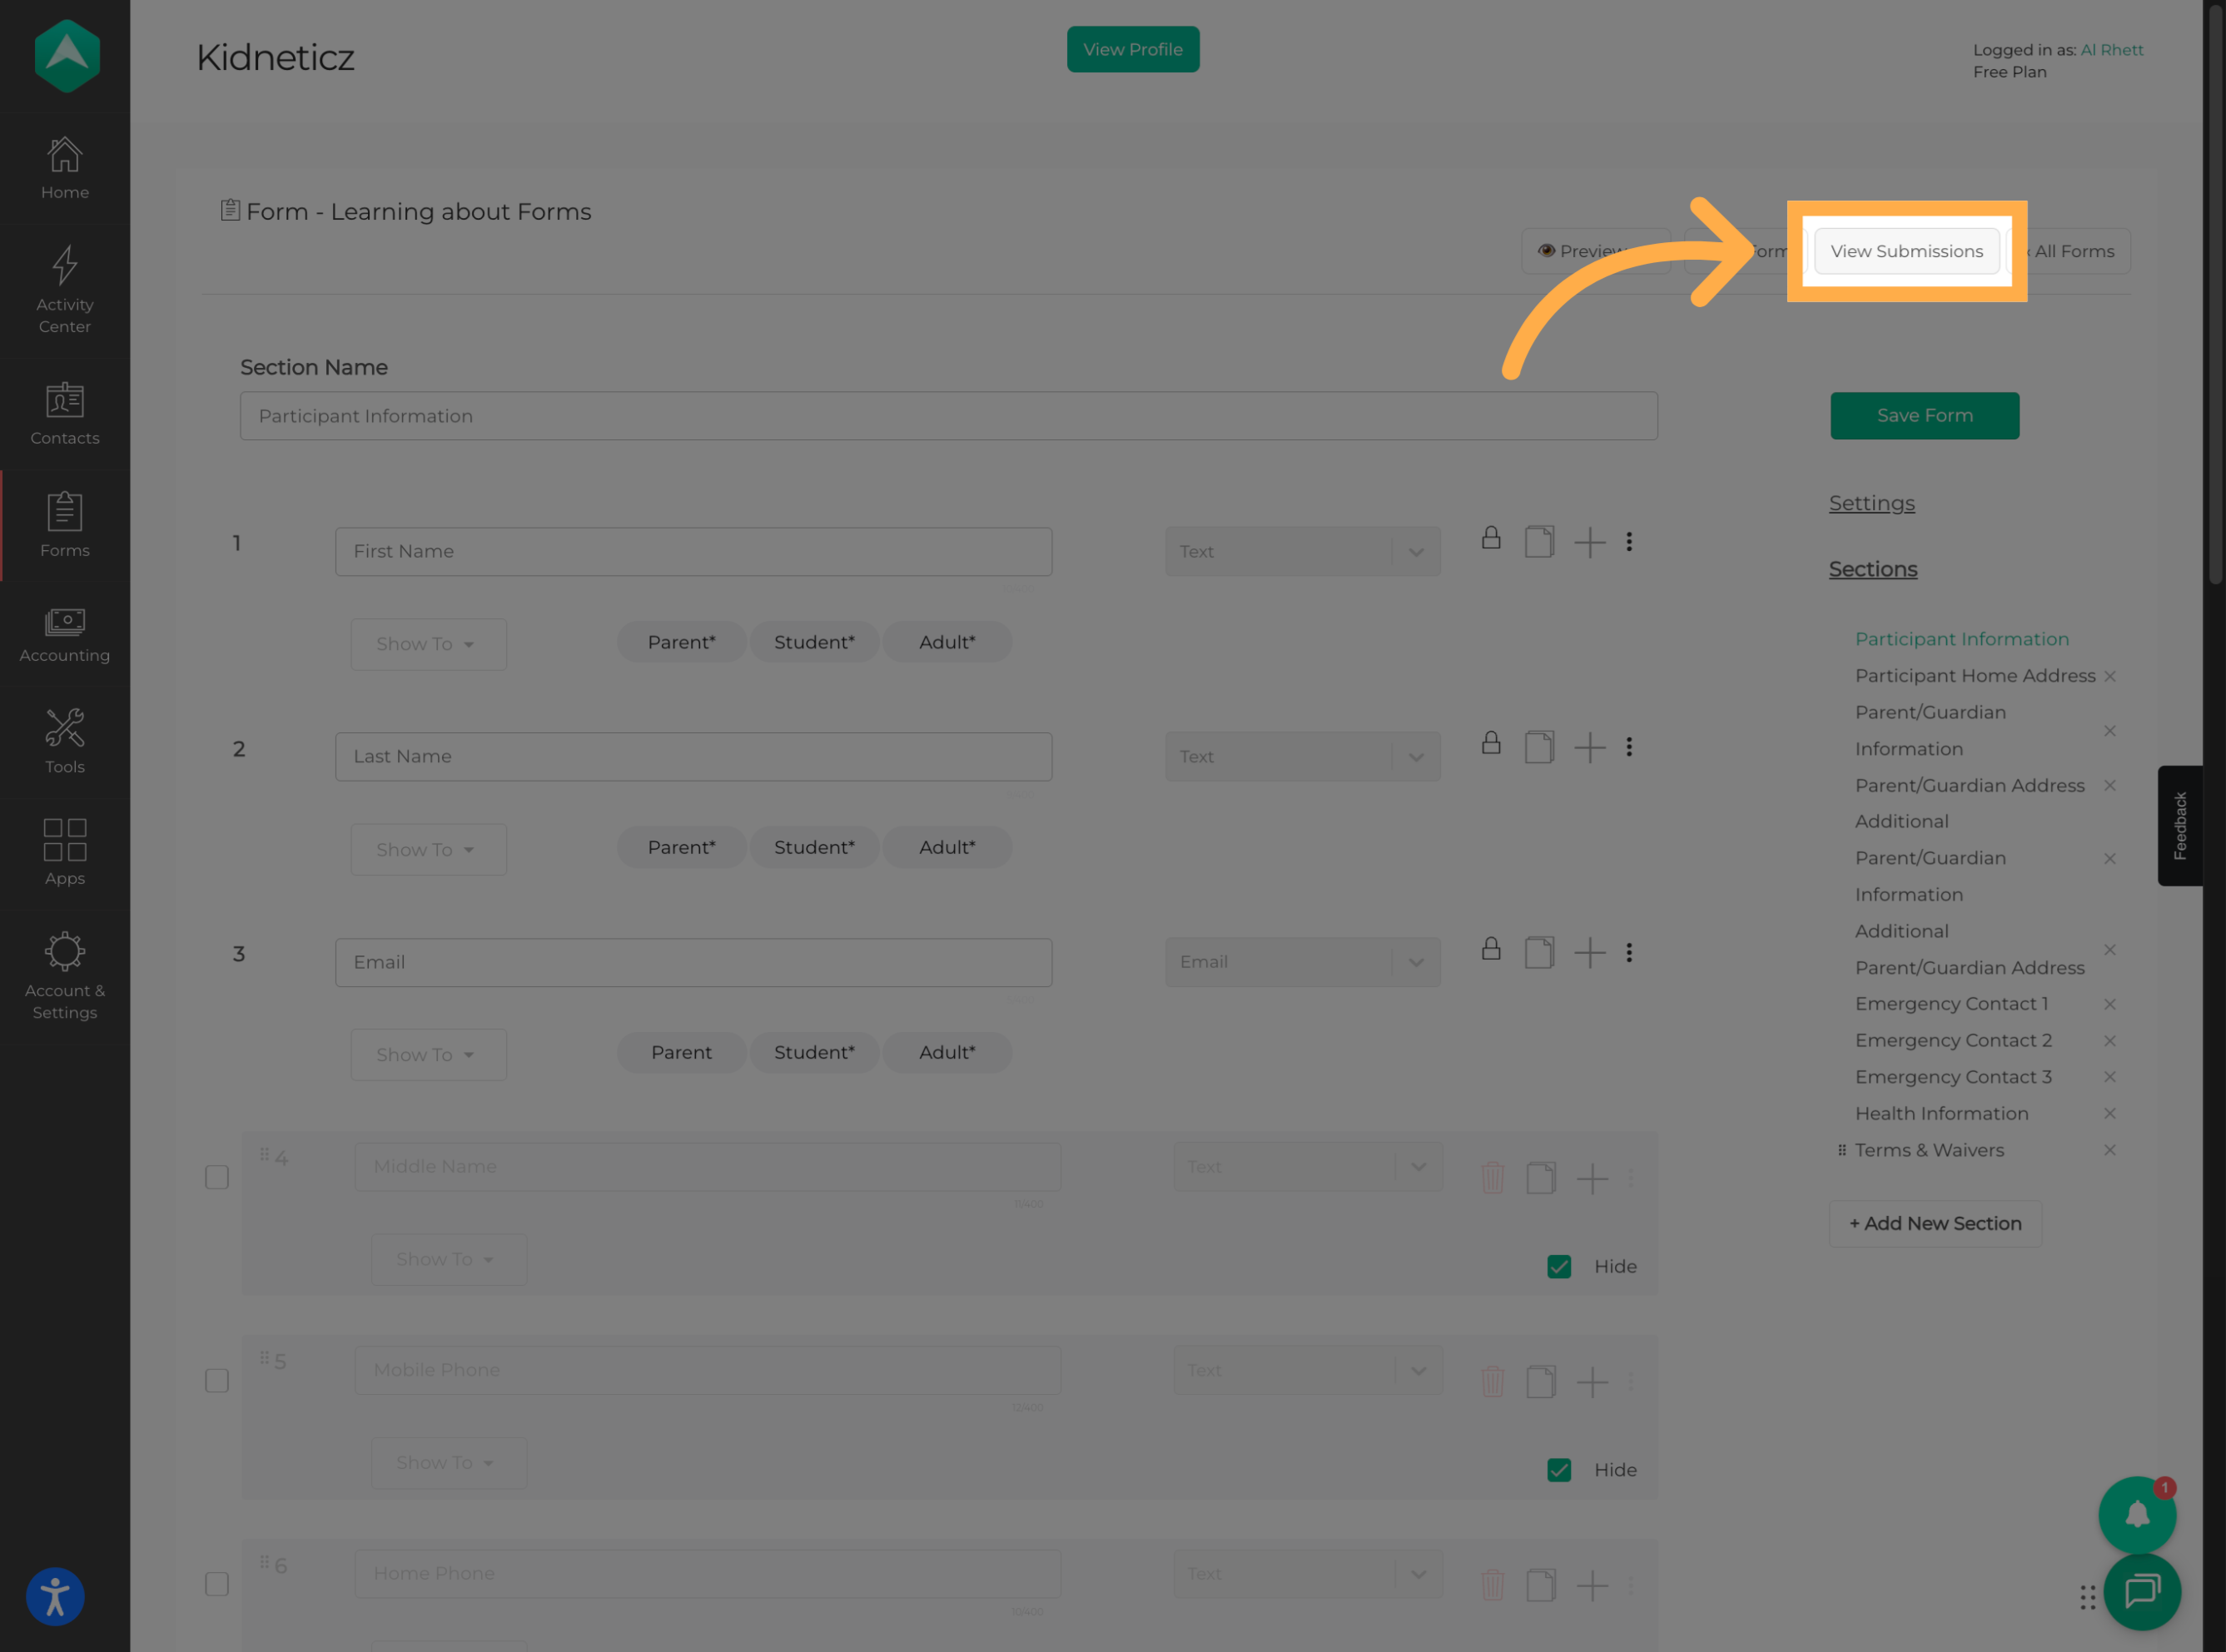
💡 Tip: If you need to work with your submission data outside of AfterSchool HQ, you can use the available reporting and export tools.
Additional Form Information
Forms With Existing Responses
You can reorder sections on a form that already has responses. When you do this, AfterSchool HQ will display a confirmation message asking whether you want to continue.
💡Tip: If the form already has submissions, review the change carefully before confirming.
After confirming the change, the submission report/export columns follow the new section order.
Where the Reordered Sections Appear
The updated section order is reflected in supported areas of the form and registration experience, including:
- Registration
- Submission forms
- Registration Details
- Attendance roster
🗒️ Note: The current section order is not reflected in Kiosk or Parent CICO. If the reordered sections do not appear in the new order in those areas, this is expected based on the current implementation.
Form Accessibility
The section drag-and-drop functionality supports keyboard interaction and includes a clear label for screen readers.
💡 Tip: If you are using keyboard navigation, the drag handle can be focused and operated using the available keyboard controls.
Frequently Asked Questions
Q: Can parents see the name and description of my form?
A: No. The form name and description are intended to help providers organize and manage their forms.
Q: Can I use pre-built questions?
A: Yes. AfterSchool HQ provides pre-built questions that you can add to your form. You can also create custom questions when you need to collect additional information.
Q: Can I create my own sections?
A: Yes. You can add custom sections to organize your questions.
Q: Can I reorder my form sections?
A: Yes. Custom sections can be reordered using the drag-and-drop functionality in the Sections list.
Q: Can I move the built-in sections?
A: No. Built-in sections, such as Personal Information, cannot be moved and will remain at the top of the form.
Q: Can I reorder sections on a form that already has responses?
A: Yes. If a form already has responses, you will receive a confirmation message before continuing with the change.
Q: Will reordering sections change my existing responses?
A: Reordering sections does not remove existing responses. It changes the order in which information is displayed, and the submission report and export columns will follow the new section order.
Q: Can I make a question required for one person but optional for another?
A: Yes. Under Audience, you can choose who sees the question and who is required to answer it.
Q: What happens if I hide a required question?
A: The Hide setting overrides the Required setting. If a question is hidden, it will not appear on the registration form.
Q: Can I preview what parents will see?
A: Yes. Use “Preview Registration” to see how the form will appear to a parent or student, depending on the activity settings.
Q: Where can I view submitted forms?
A: Navigate to “Forms → Submissions” to view submitted forms. You can also review an individual student’s registration details from the activity’s “Students” section.
💡If you experience any issues or have further questions with “How to Create and Customize Forms”, don't hesitate to get in touch with our support team at support@afterschoolhq.com.