![ASHQ Logo Vert Flat.png]](https://support.afterschoolhq.com/hs-fs/hubfs/ASHQ%20Logo%20Vert%20Flat.png?height=40&name=ASHQ%20Logo%20Vert%20Flat.png)
Need a better way to organize activities and help families filter programs more easily?
Follow the instructions below to learn how to create, manage, and assign tags within AfterSchool HQ.
1. Open Tools
Click “Tools” from the main navigation menu.
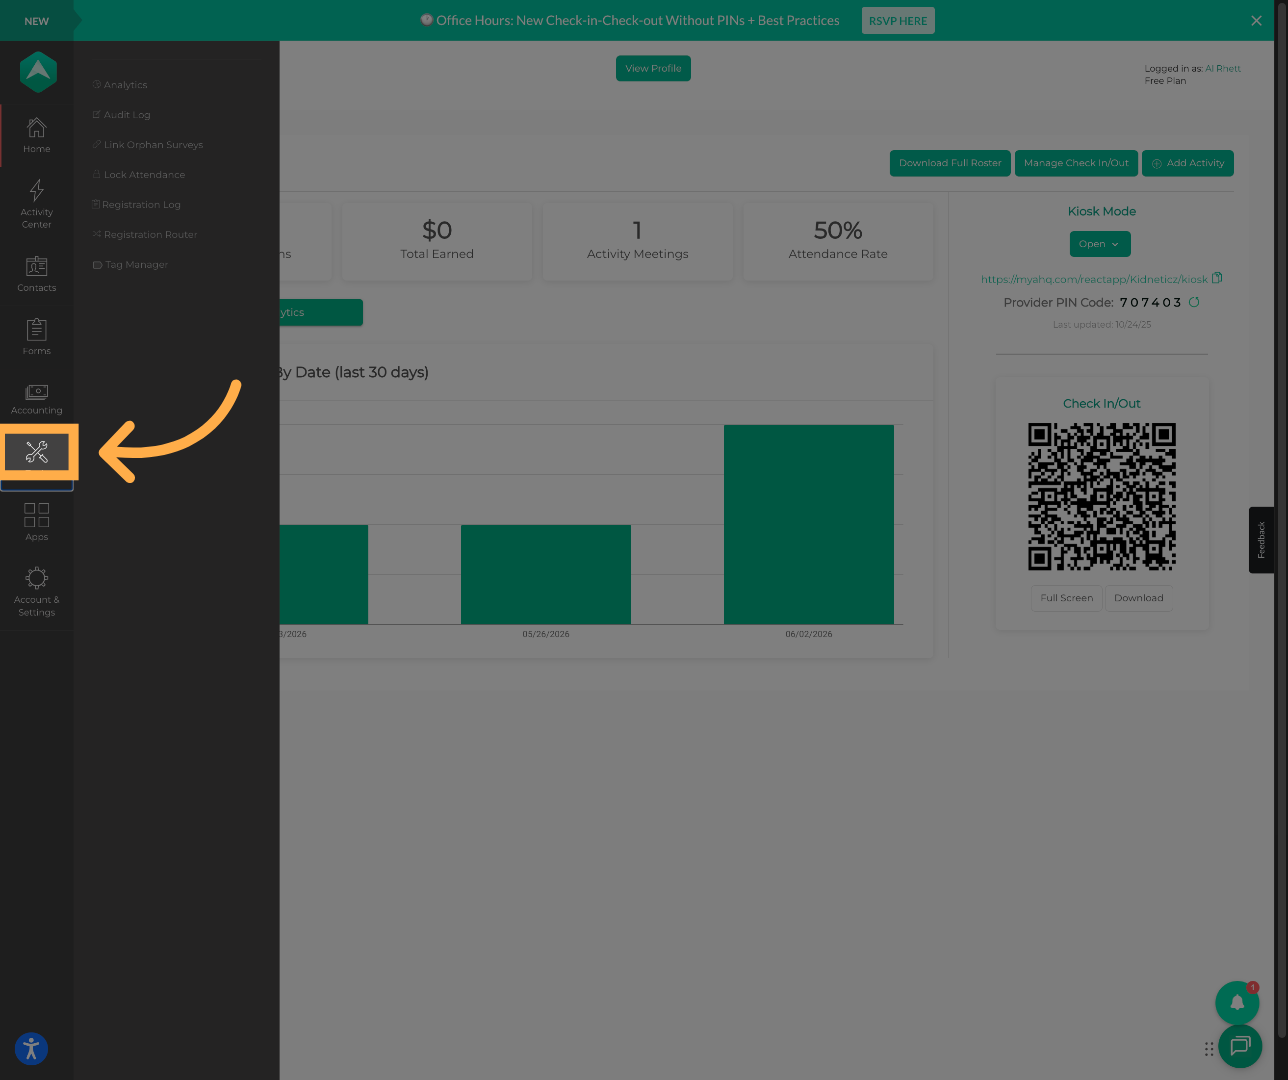
💡 Tip: The Tools section contains additional configuration and management features within AfterSchool HQ.
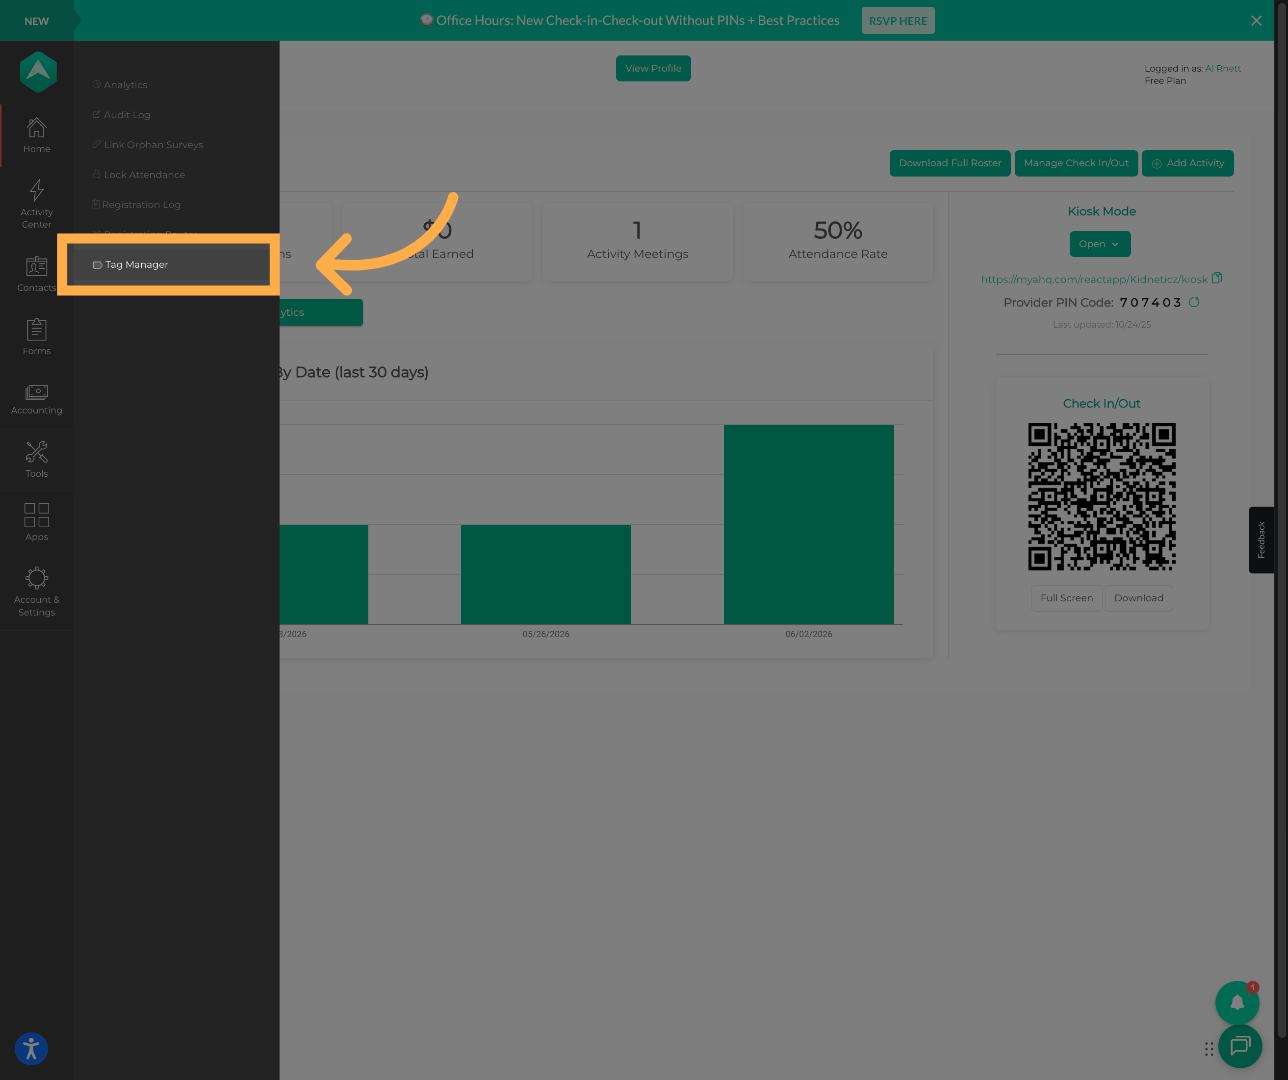
2. Open Tag Manager
Click “Tag Manager” to access the tag management interface.
3. Create a New Tag
Click “Create New Tag” to begin creating a new activity tag.
Examples:
- STEM
- Sports
- Arts
- Tutoring
- Elementary
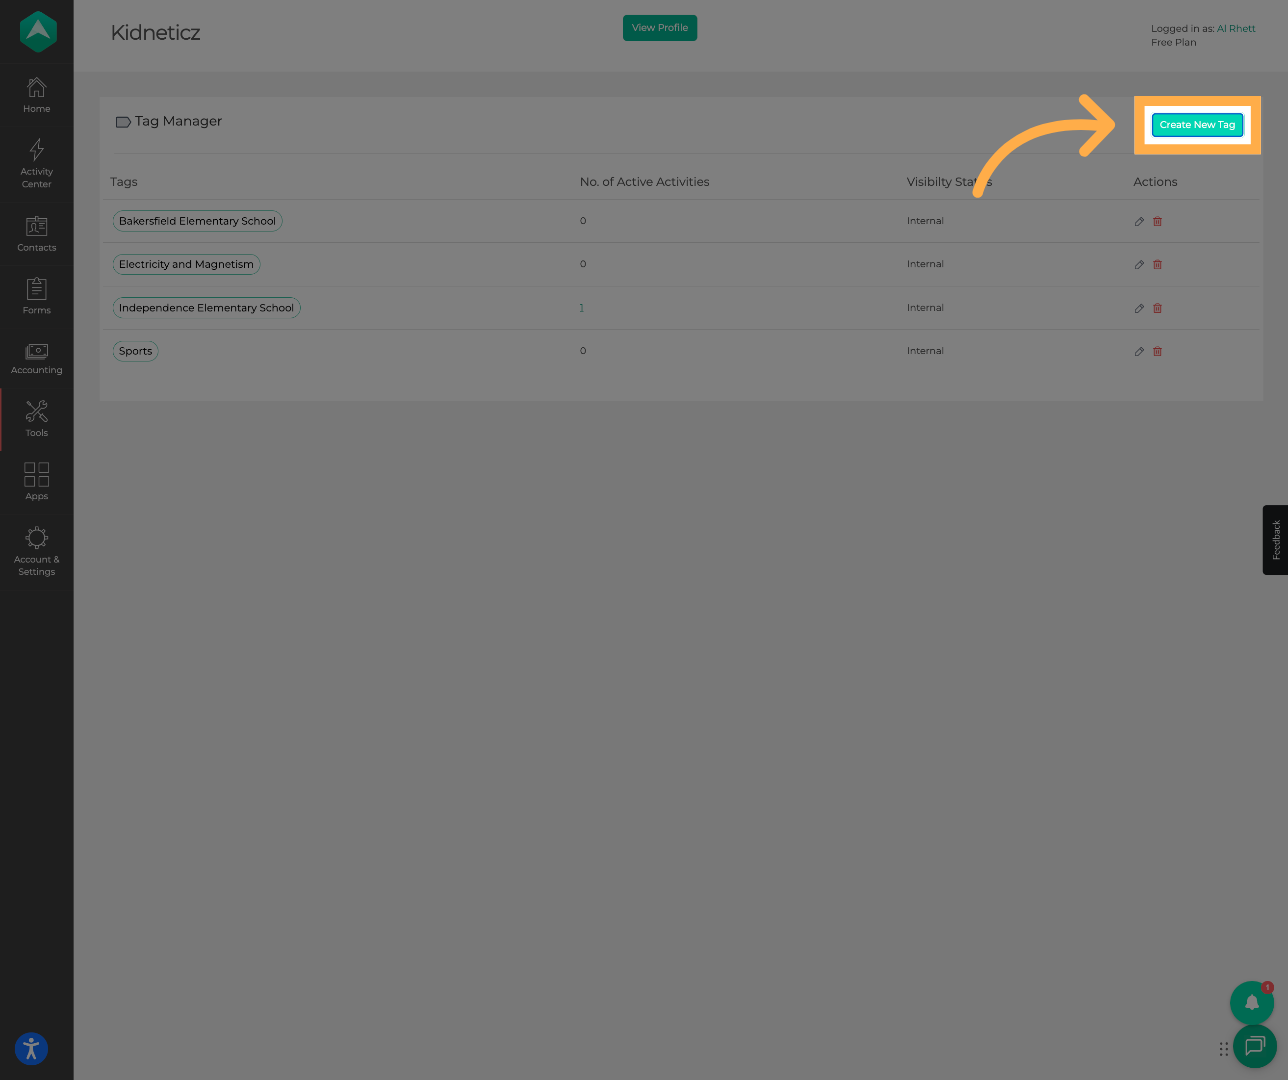
💡 Tip: Use short and recognizable tag names that families can easily understand.
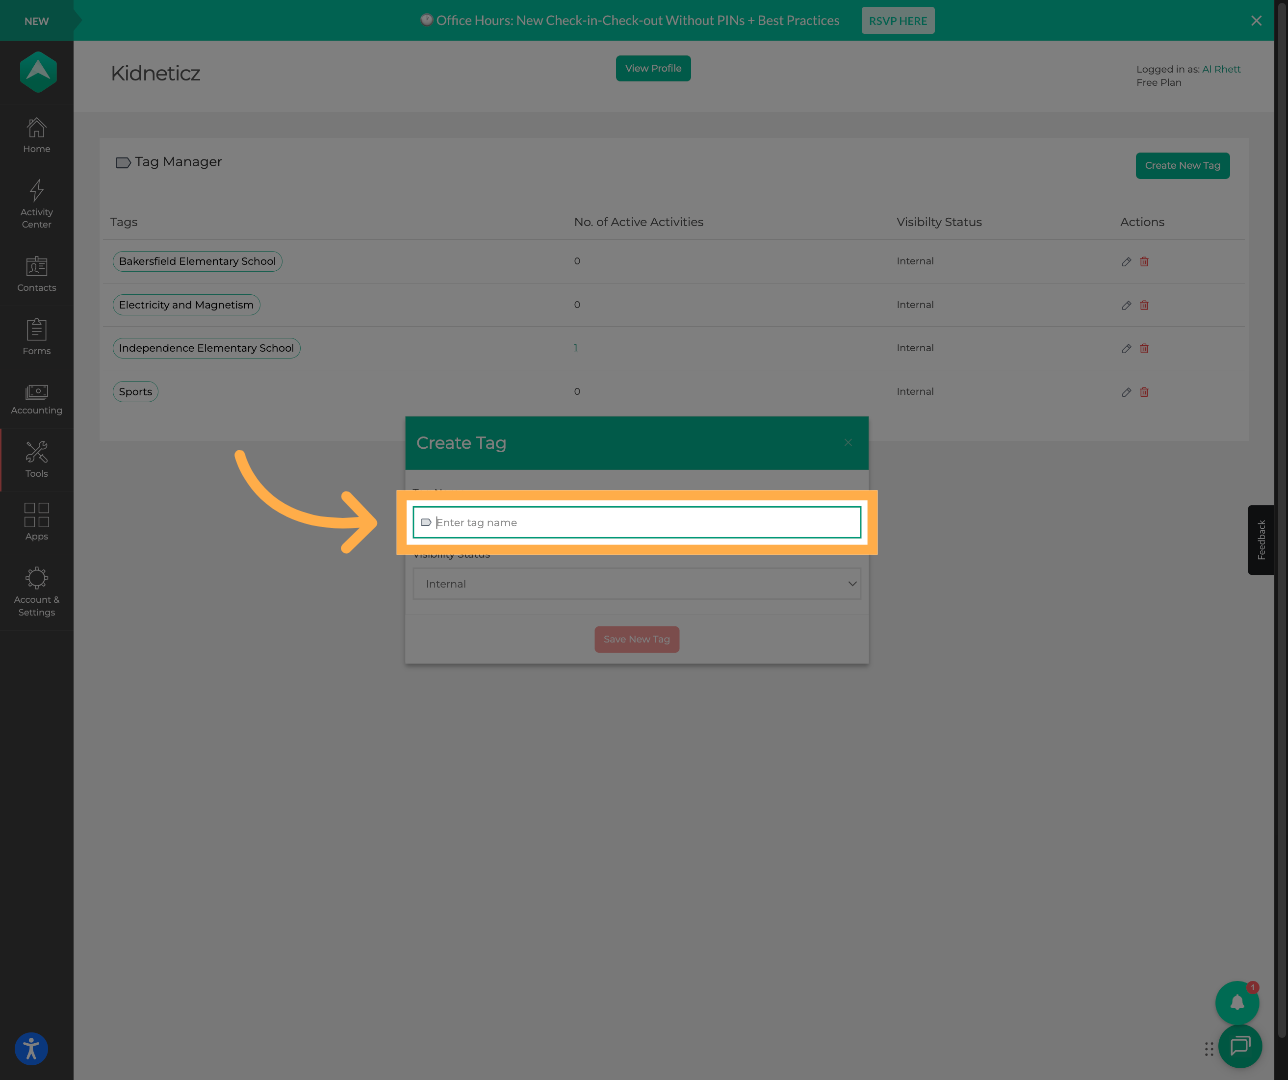
4. Enter Tag Name
Enter the name for your new tag.
5. Configure Tag Visibility
Choose whether the tag should be:
- Public → visible to families and participants
- Internal → visible only to staff members
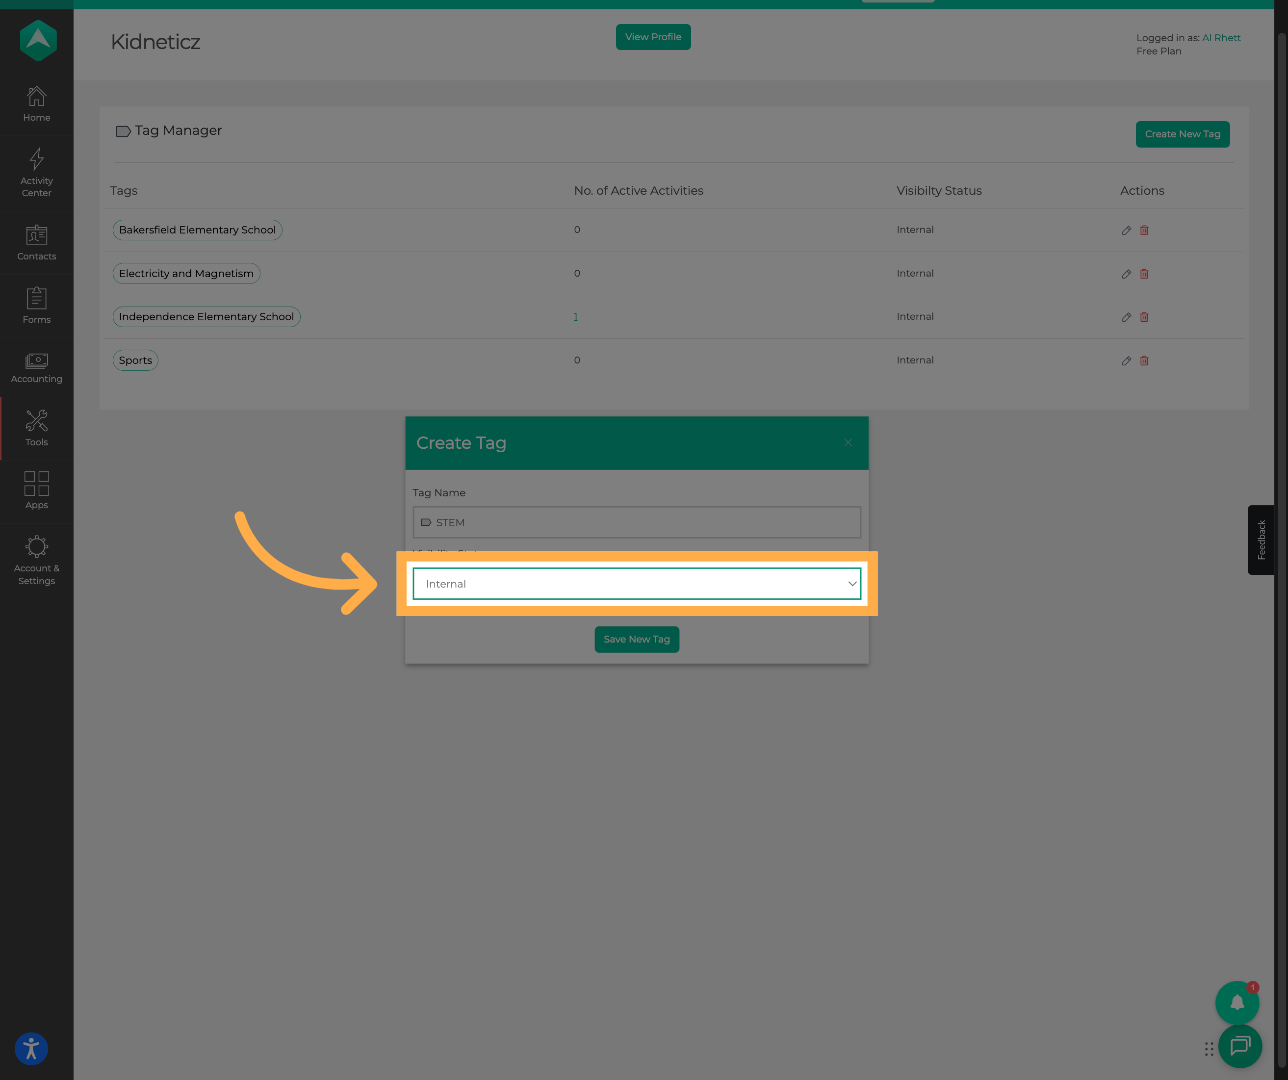
💡 Tip: Public tags are useful for participant filtering, while internal tags can help staff organize activities internally.
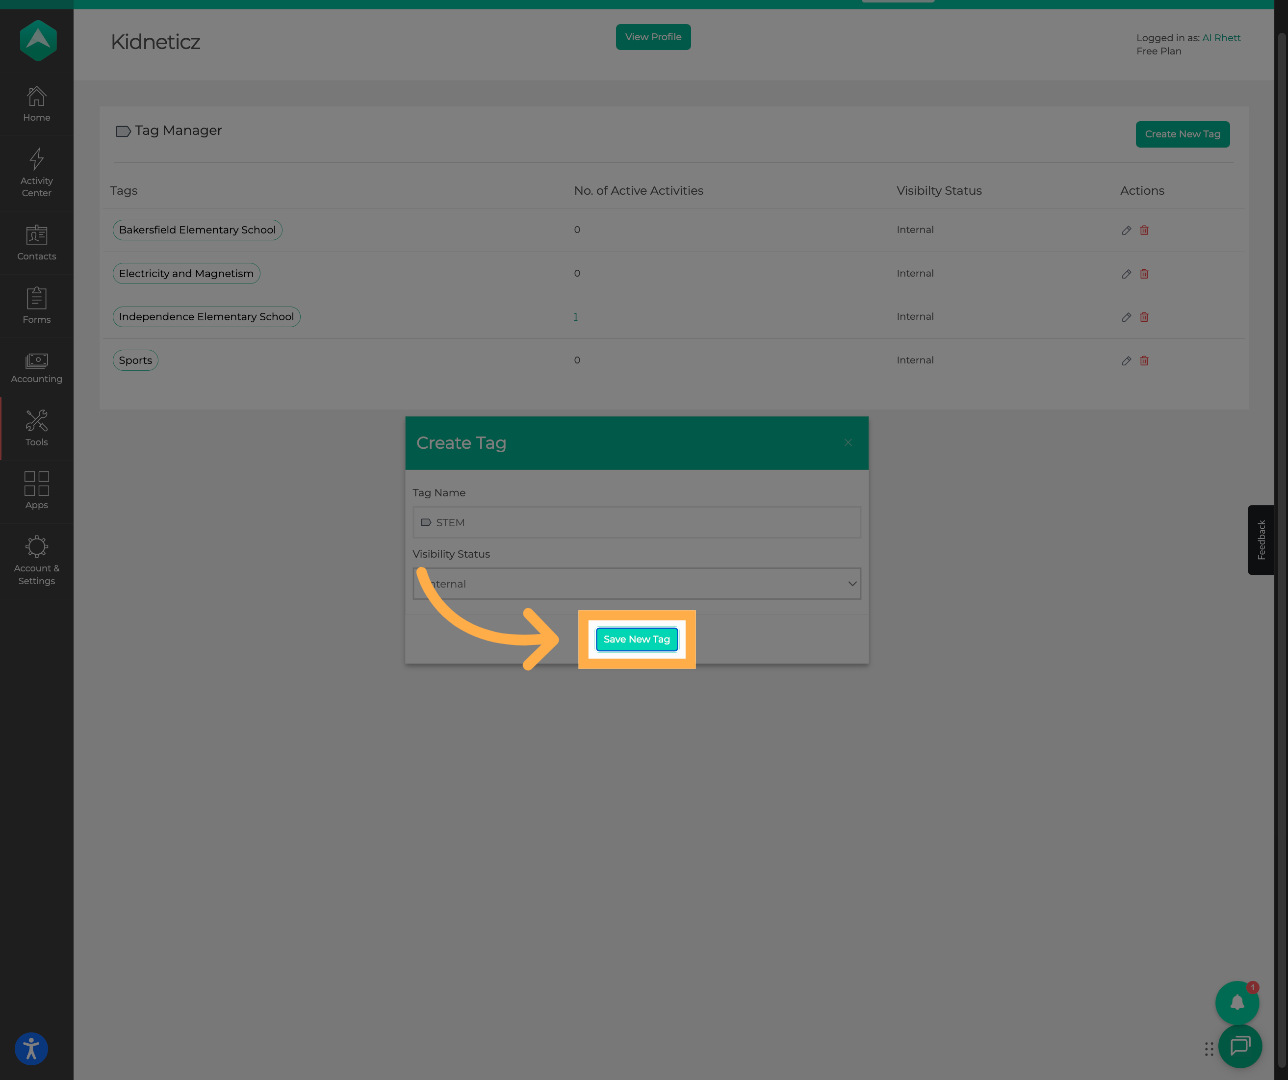
6. Save the Tag
Click “Save New Tag” to create the tag.
7. Create Additional Tags (Optional)
Repeat the process if additional tags are needed.
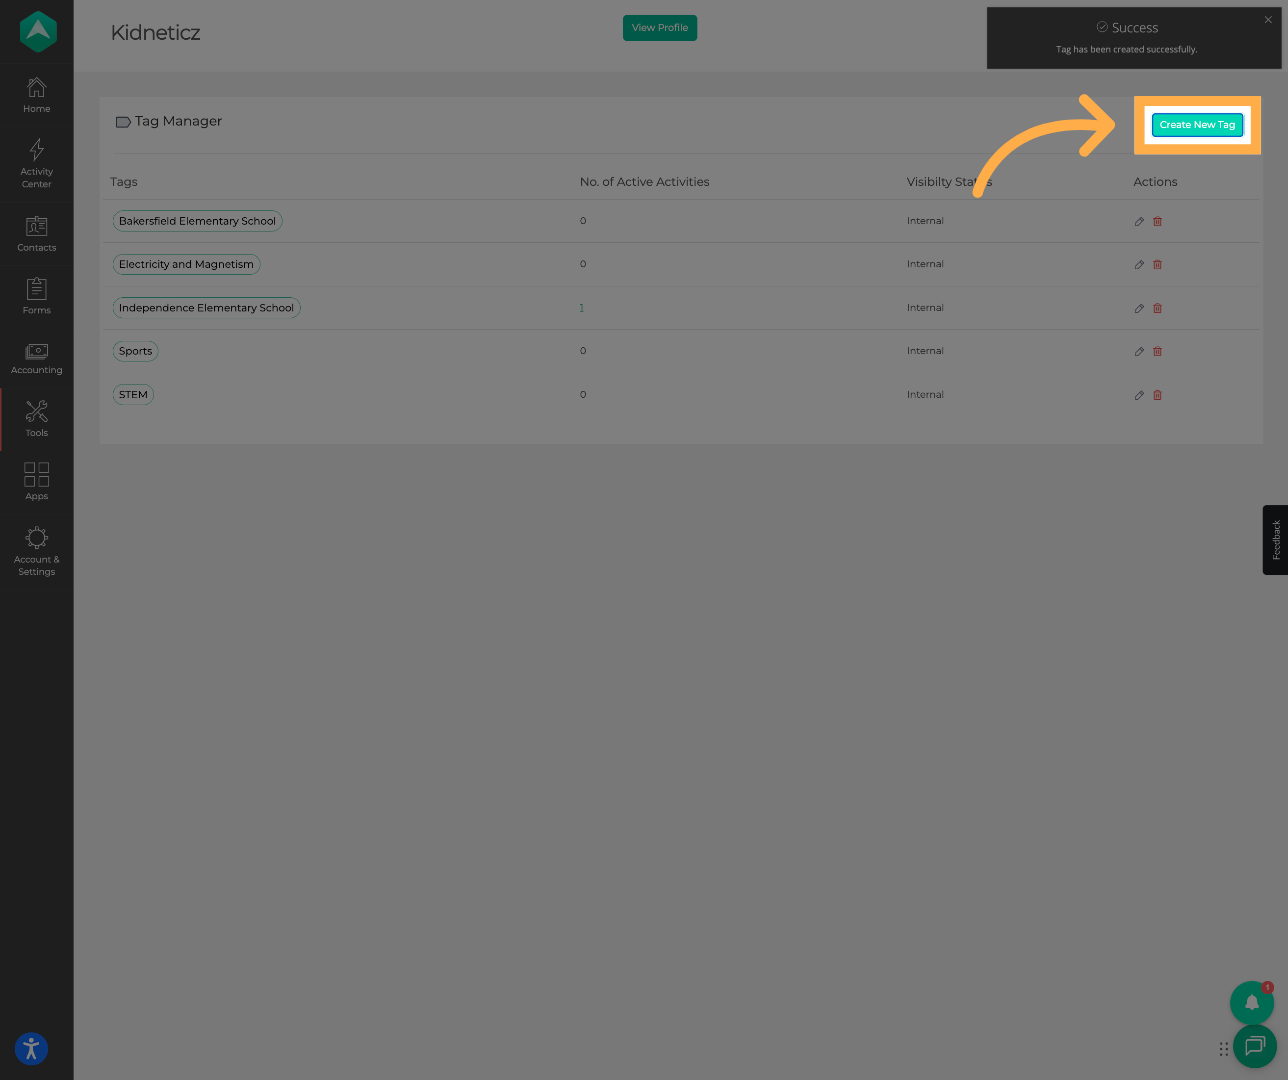
💡 Tip: Consistent tagging structures make filtering and reporting much easier later.
8. Assign Tags to Activities
Click “Activity Center” from the navigation menu.
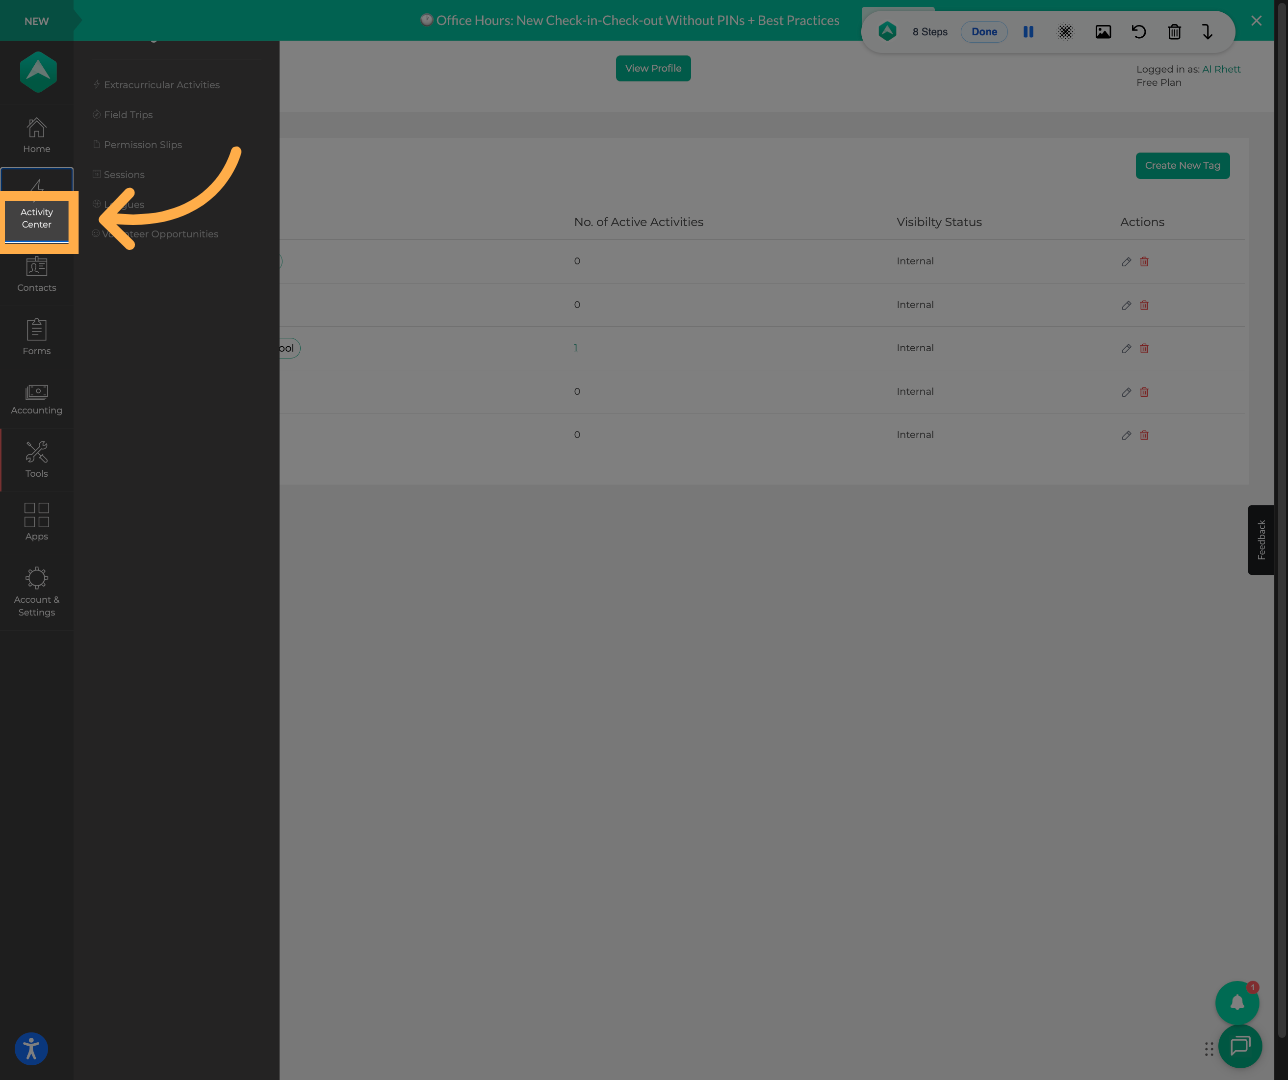
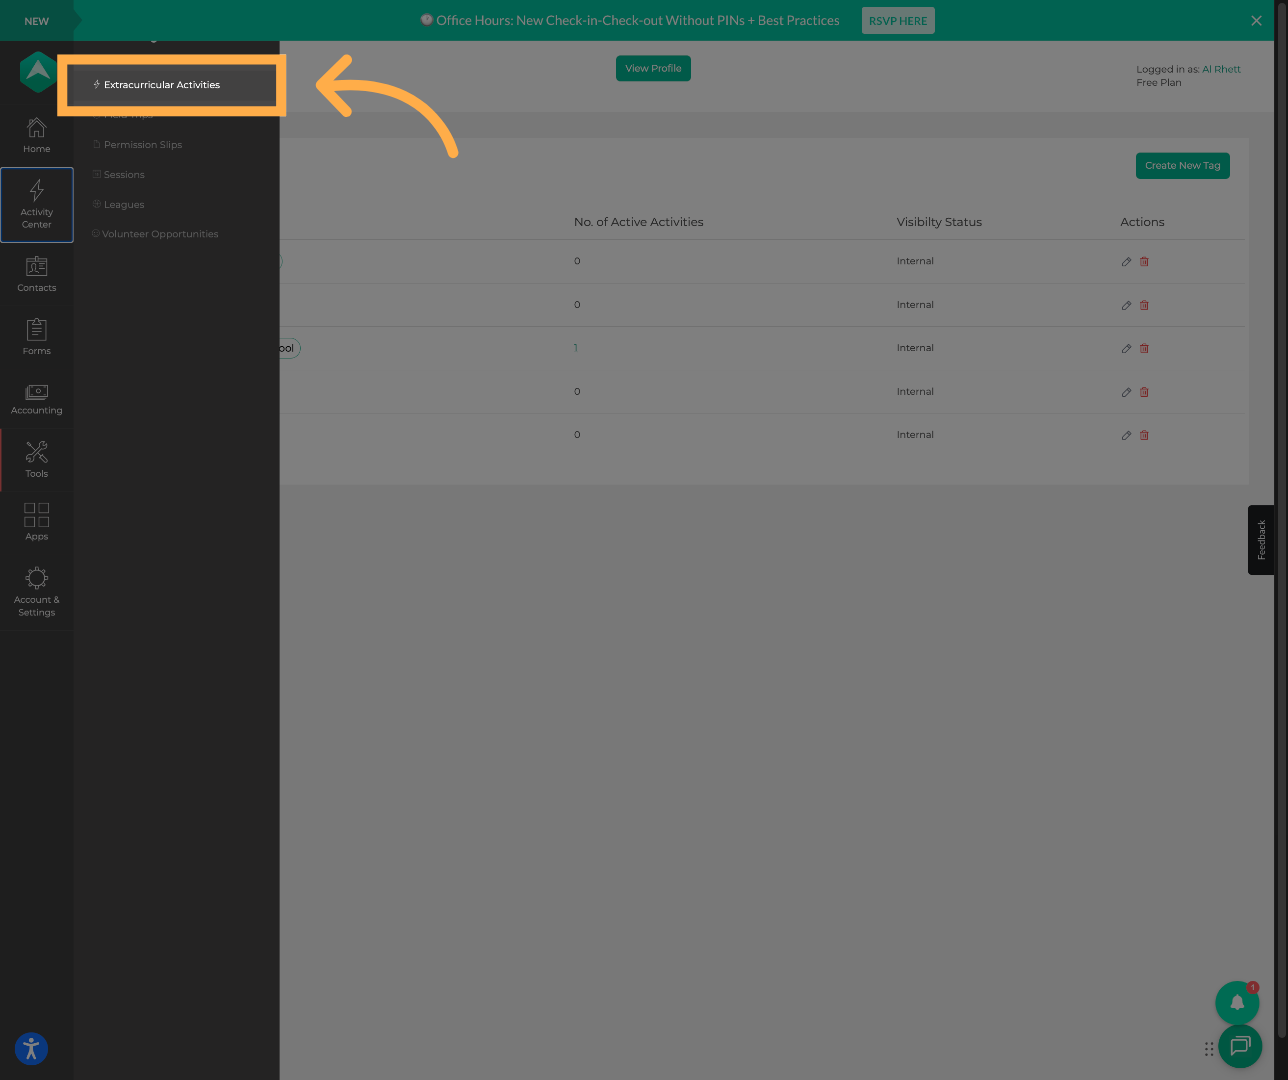
9. Open Extracurricular Activities
Click “Extracurricular Activities” to view your list of activities.
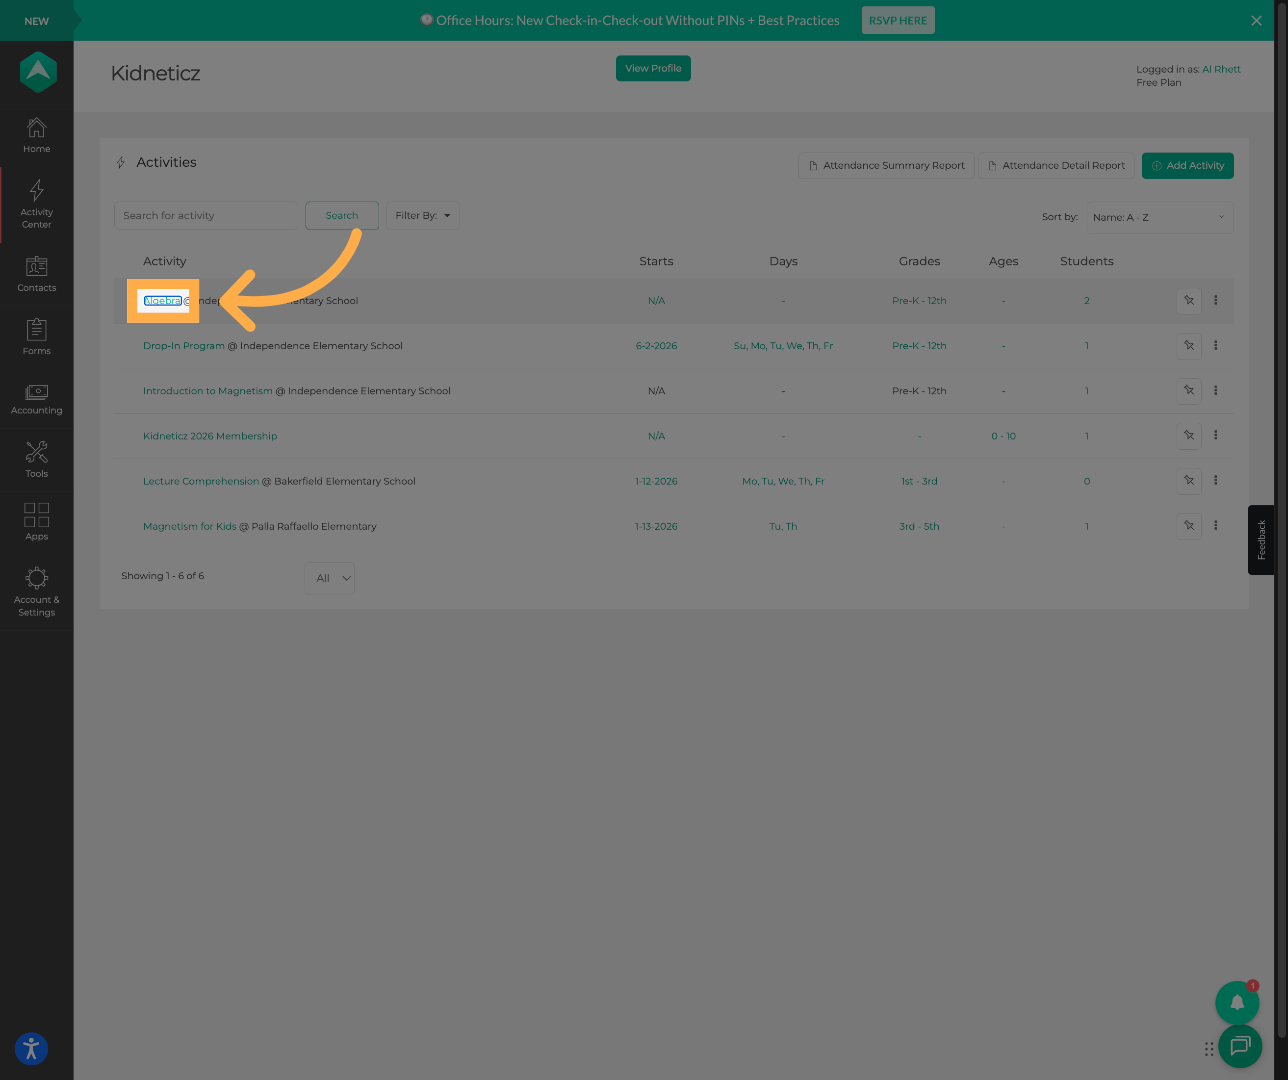
10. Select an Activity
Open the activity you would like to assign tags to.
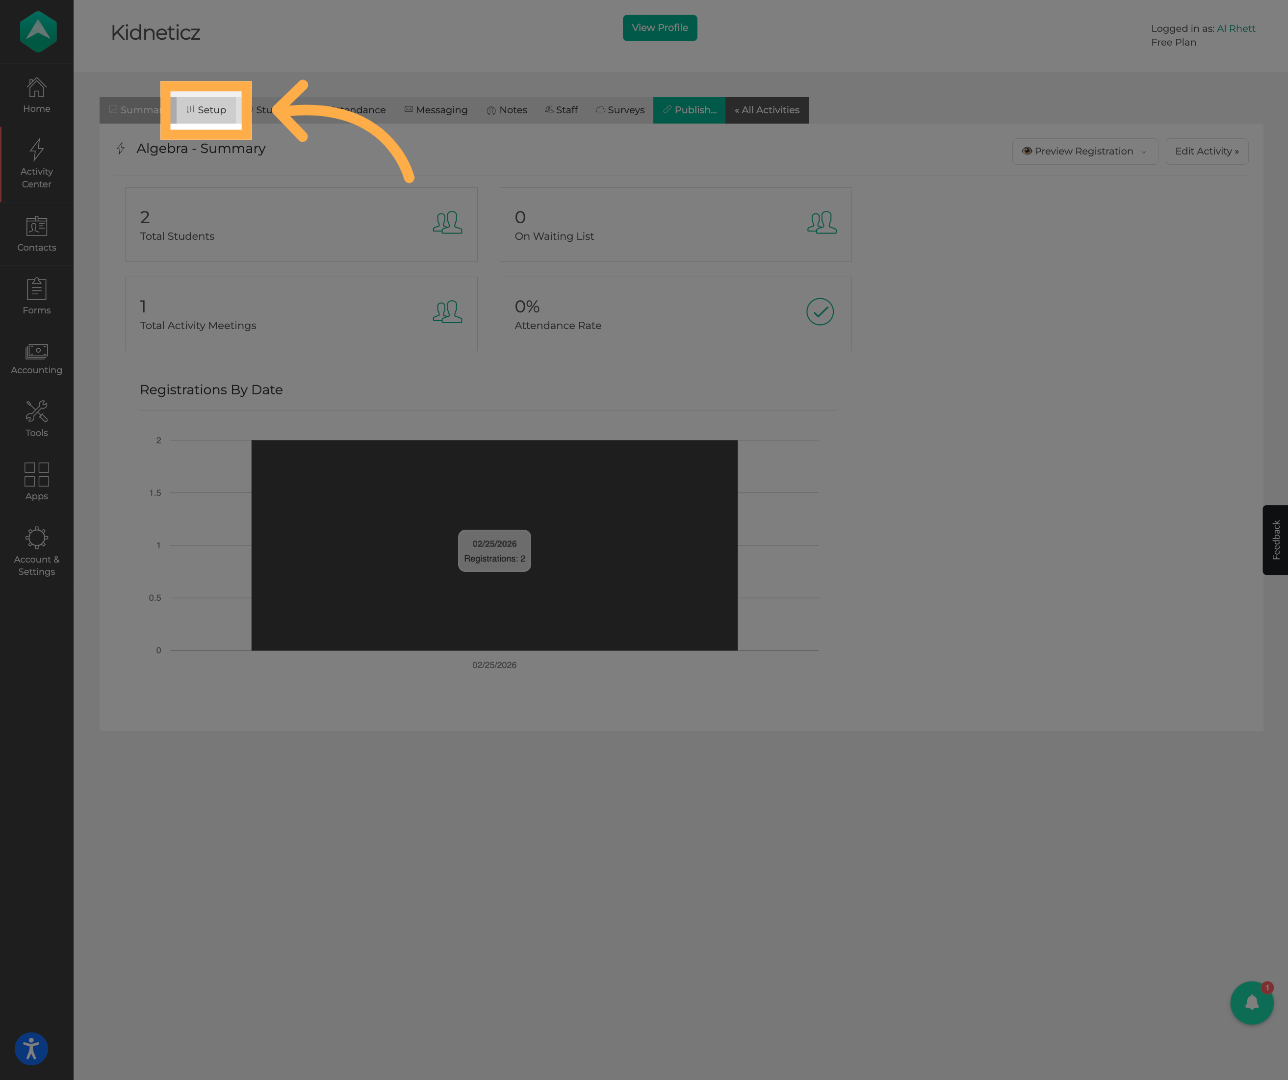
11. Open Activity Setup
Click “Setup” to configure the selected activity.
12. Open Tag Selection
Locate the tag dropdown section within the activity setup settings.
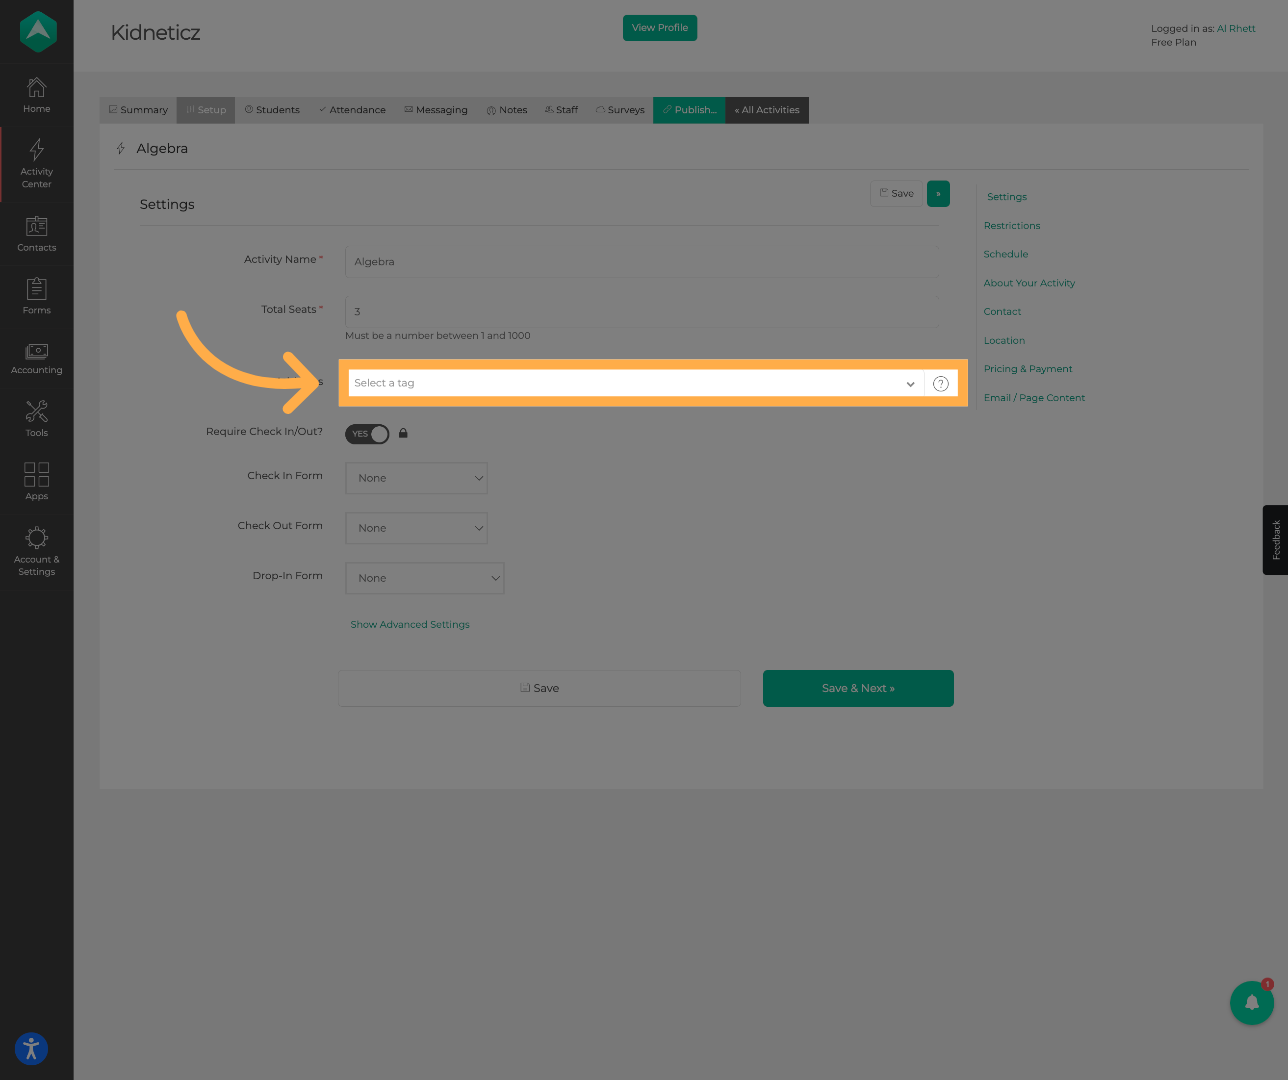
13. Assign Tags
Select one or more tags to attach to the activity.
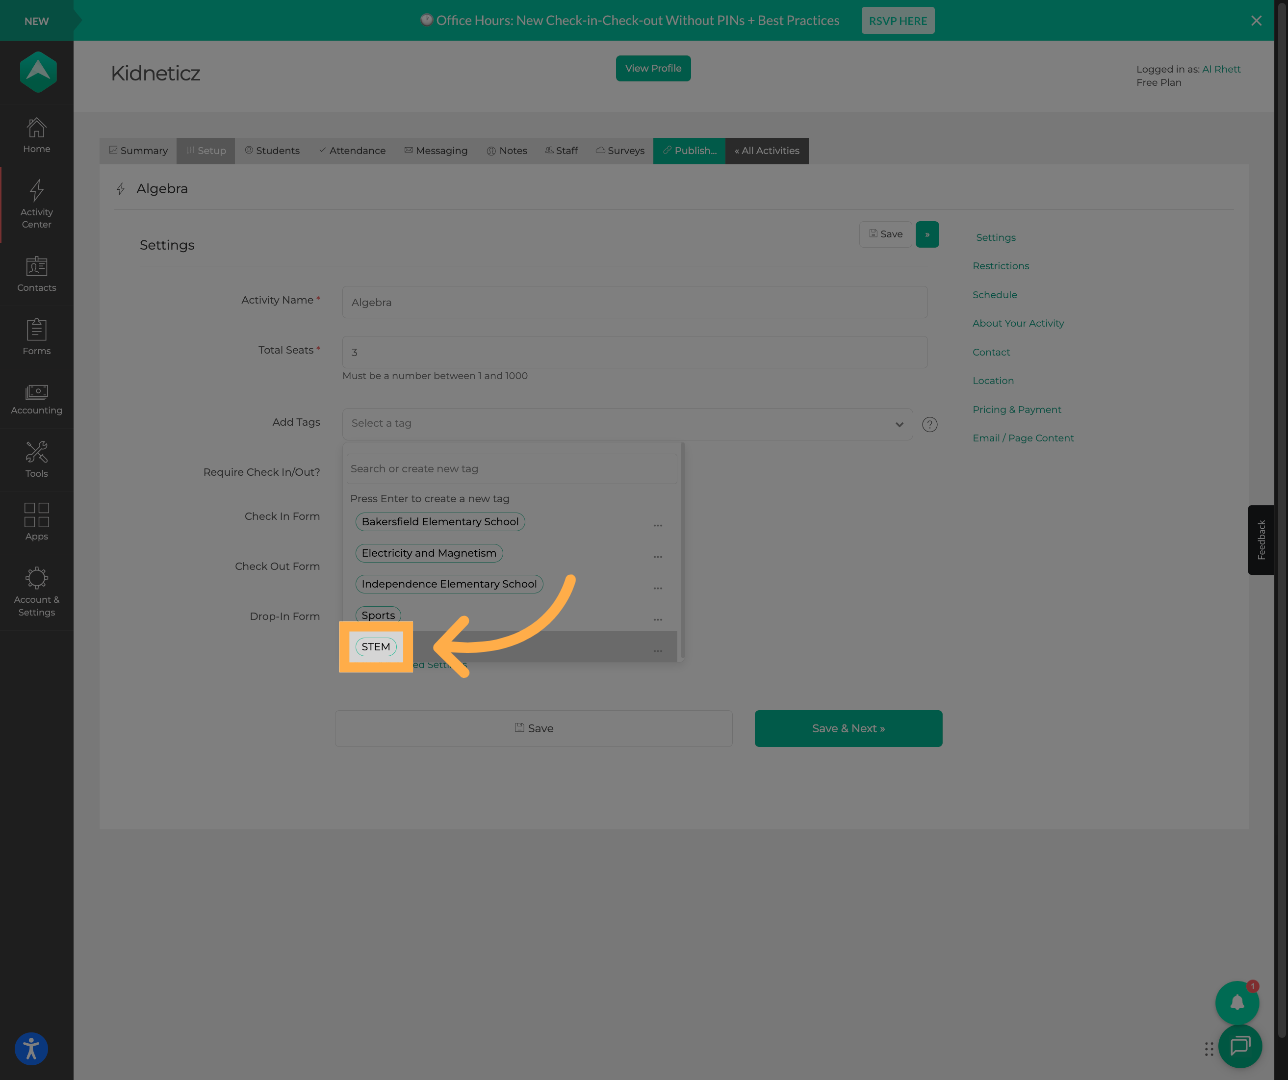
💡 Tip: Activities can have multiple tags assigned for better participant filtering and discoverability.
14. Save Activity Tags
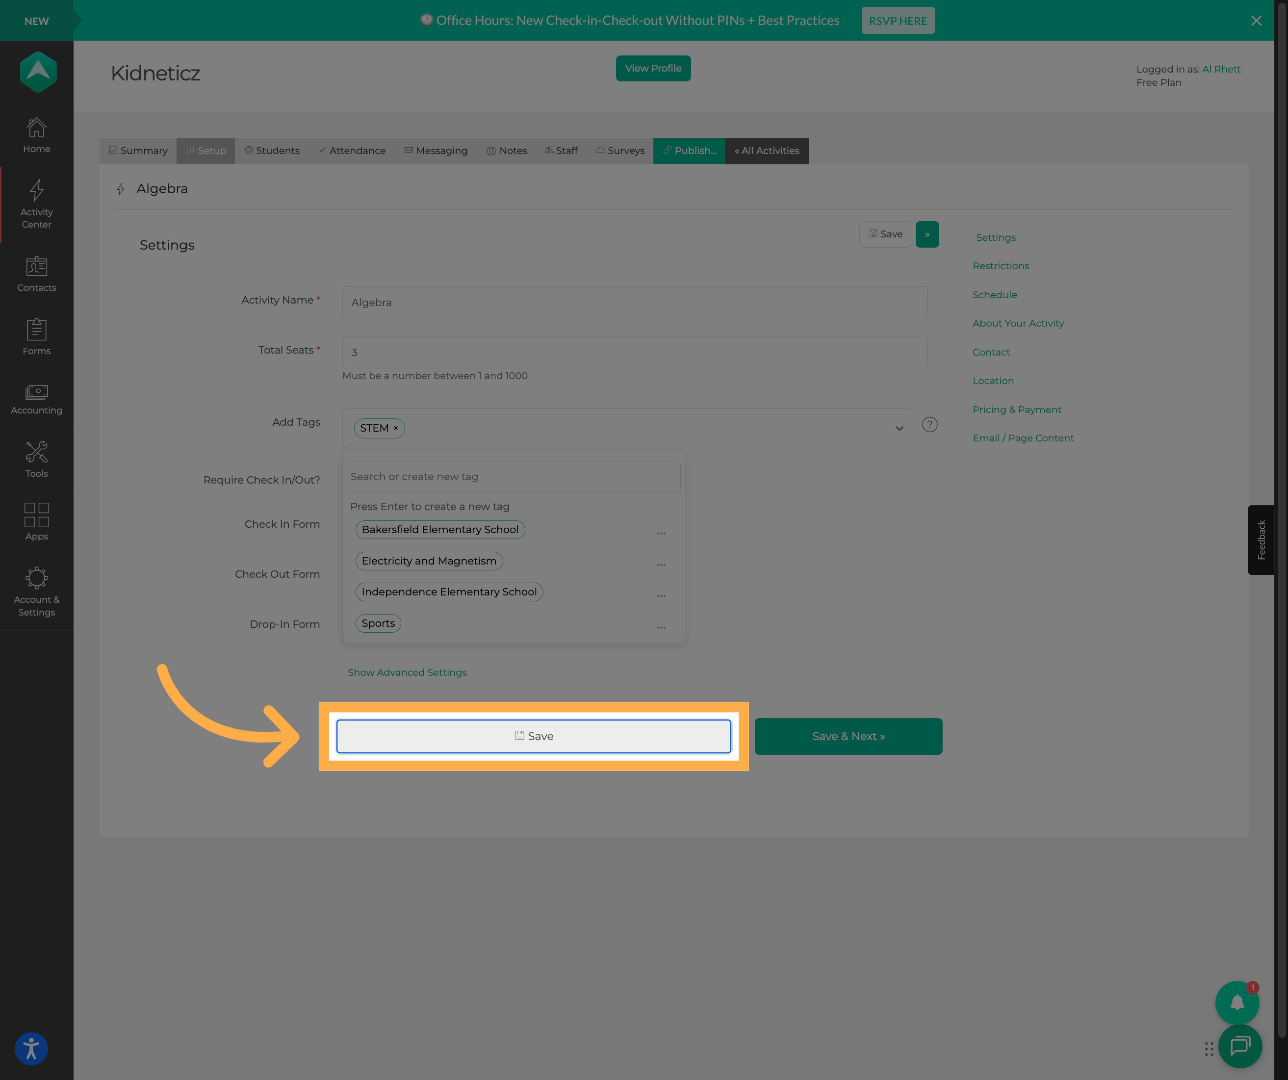
Click “Save” to apply the tags to the activity.
15. Participant Activity Filtering
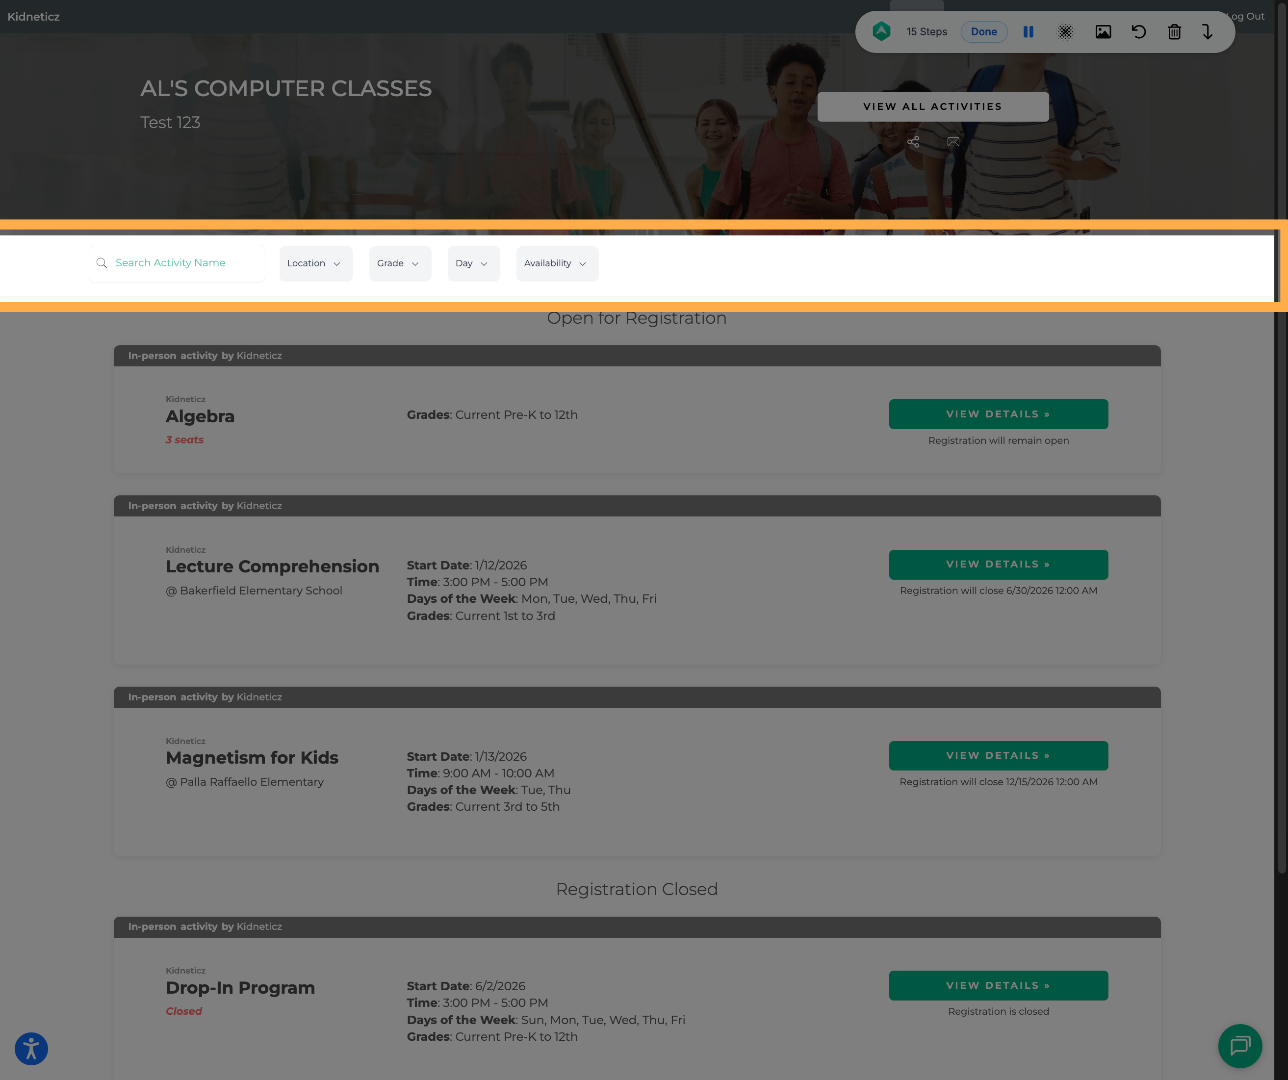
Participants and families can use public tags to filter activities on:
- Provider landing pages
- Main activity pages
- Activity detail pages
Frequently Asked Questions
Q: What are tags used for?
A: Tags help organize activities into searchable categories and improve filtering for participants and staff.
Q: What is the difference between Public and Internal tags?
A: Public tags are visible to participants and families, while Internal tags are only visible to staff members.
Q: Can activities have multiple tags?
A: Yes. Activities can be assigned multiple tags for more flexible filtering and organization.
Q: Where can participants see tags?
A: Public tags can appear on provider landing pages, activity listings, and activity detail pages.
Q: Can tags be edited later?
A: Yes. Tags can typically be updated, renamed, or reassigned later if needed.
💡If you experience any issues or have further questions with “How to Create and Manage Activity Tags”, don't hesitate to get in touch with our support team at support@afterschoolhq.com.