Need to document important information about a student? This guide will walk you through how to create, view, and manage student notes within AfterSchool HQ.
1. Access Students
Click on “Students” to view the roster of enrolled participants.
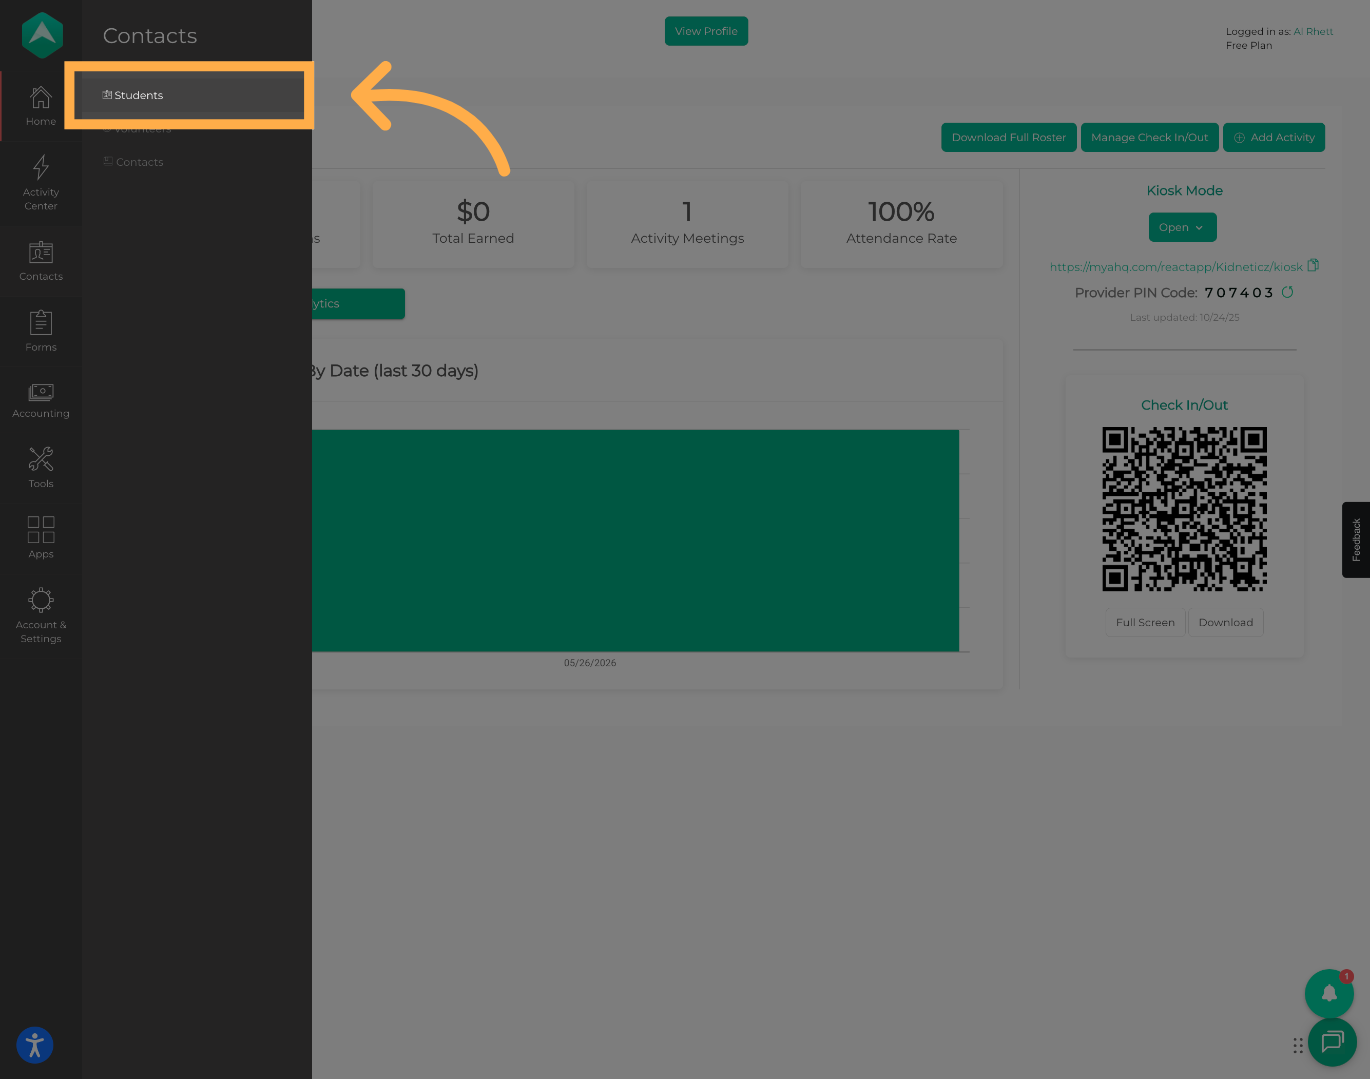
💡 Tip: You can use filters and search options to quickly locate a specific student.
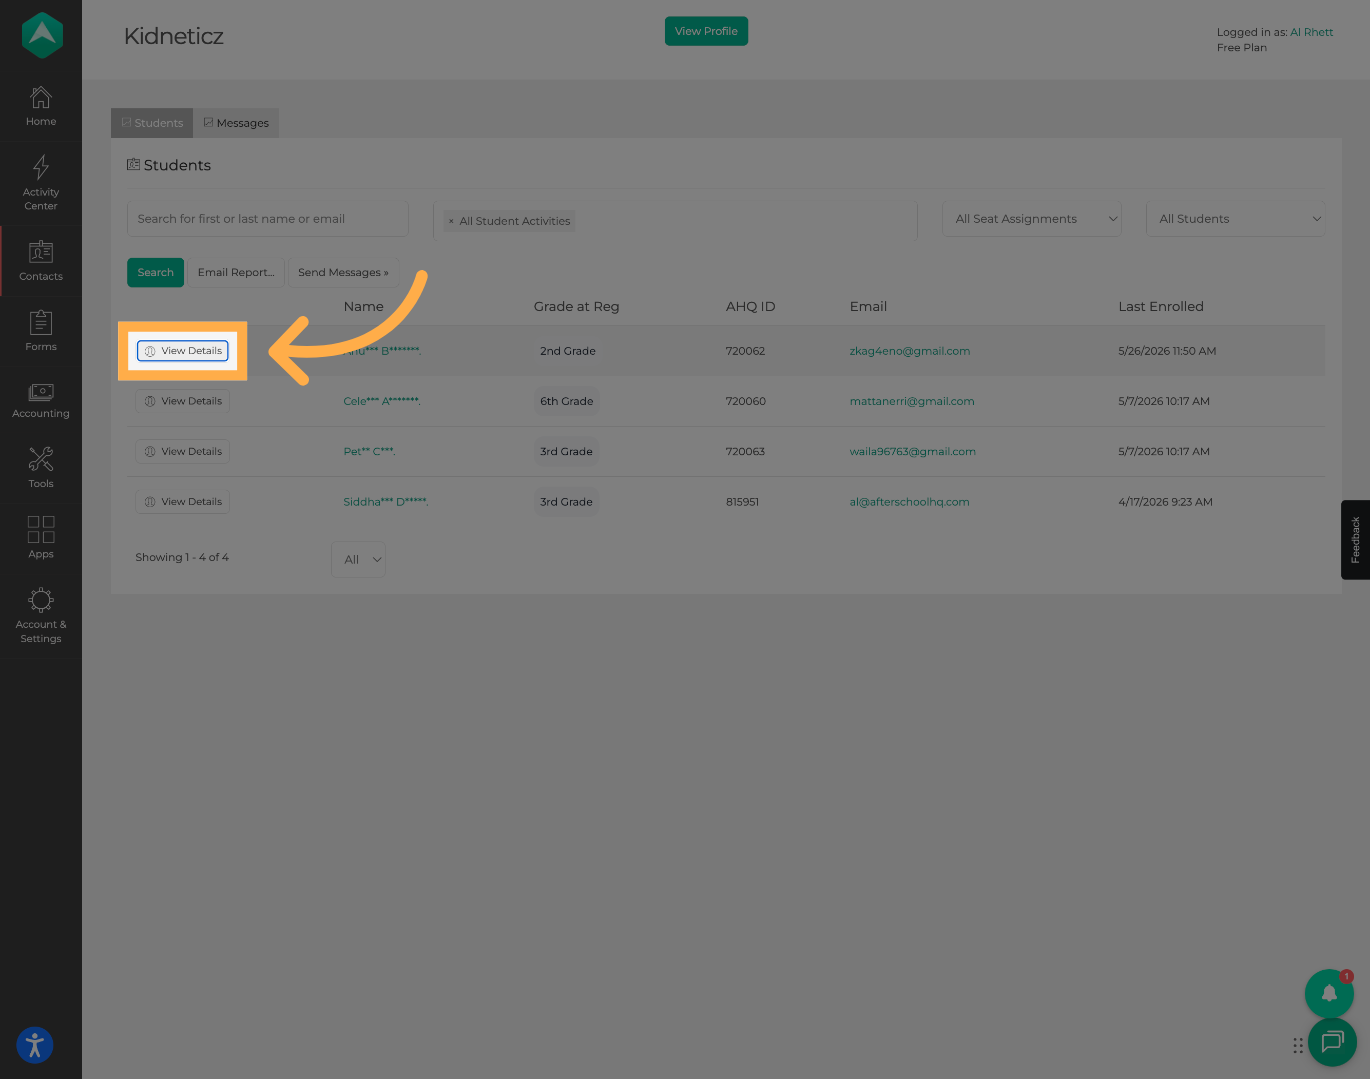
2. Open Student Details
Select “View Details” to open the student's profile and access additional information.
3. Open the Notes Tab
Click on “Notes” to view existing notes and manage student records.
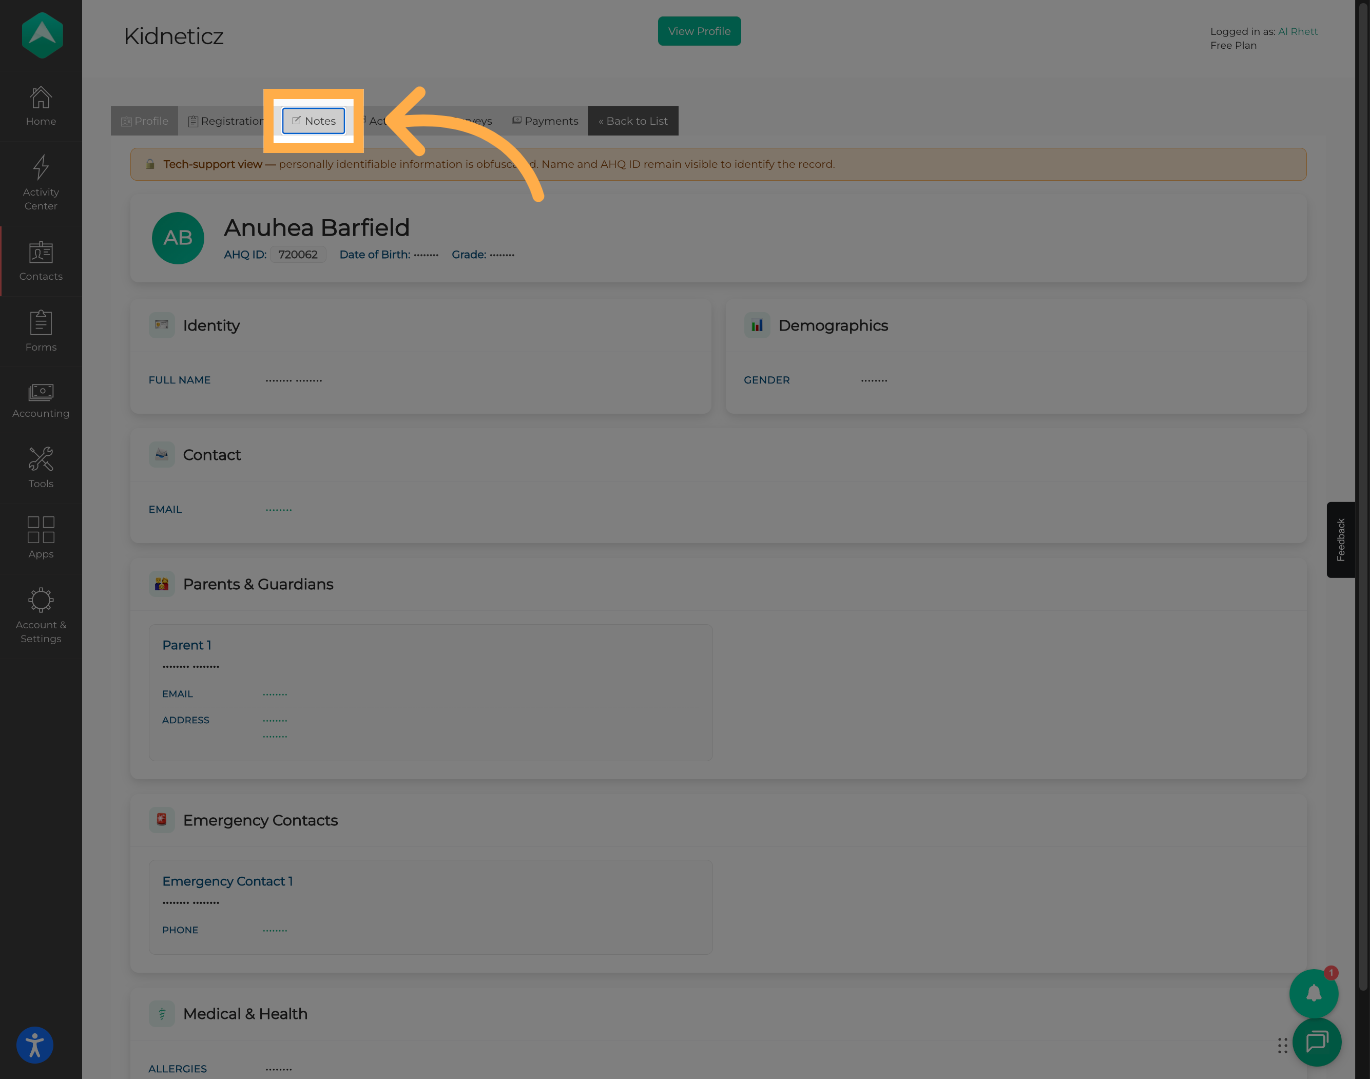
💡 Tip: All notes associated with the student will be displayed in this section.
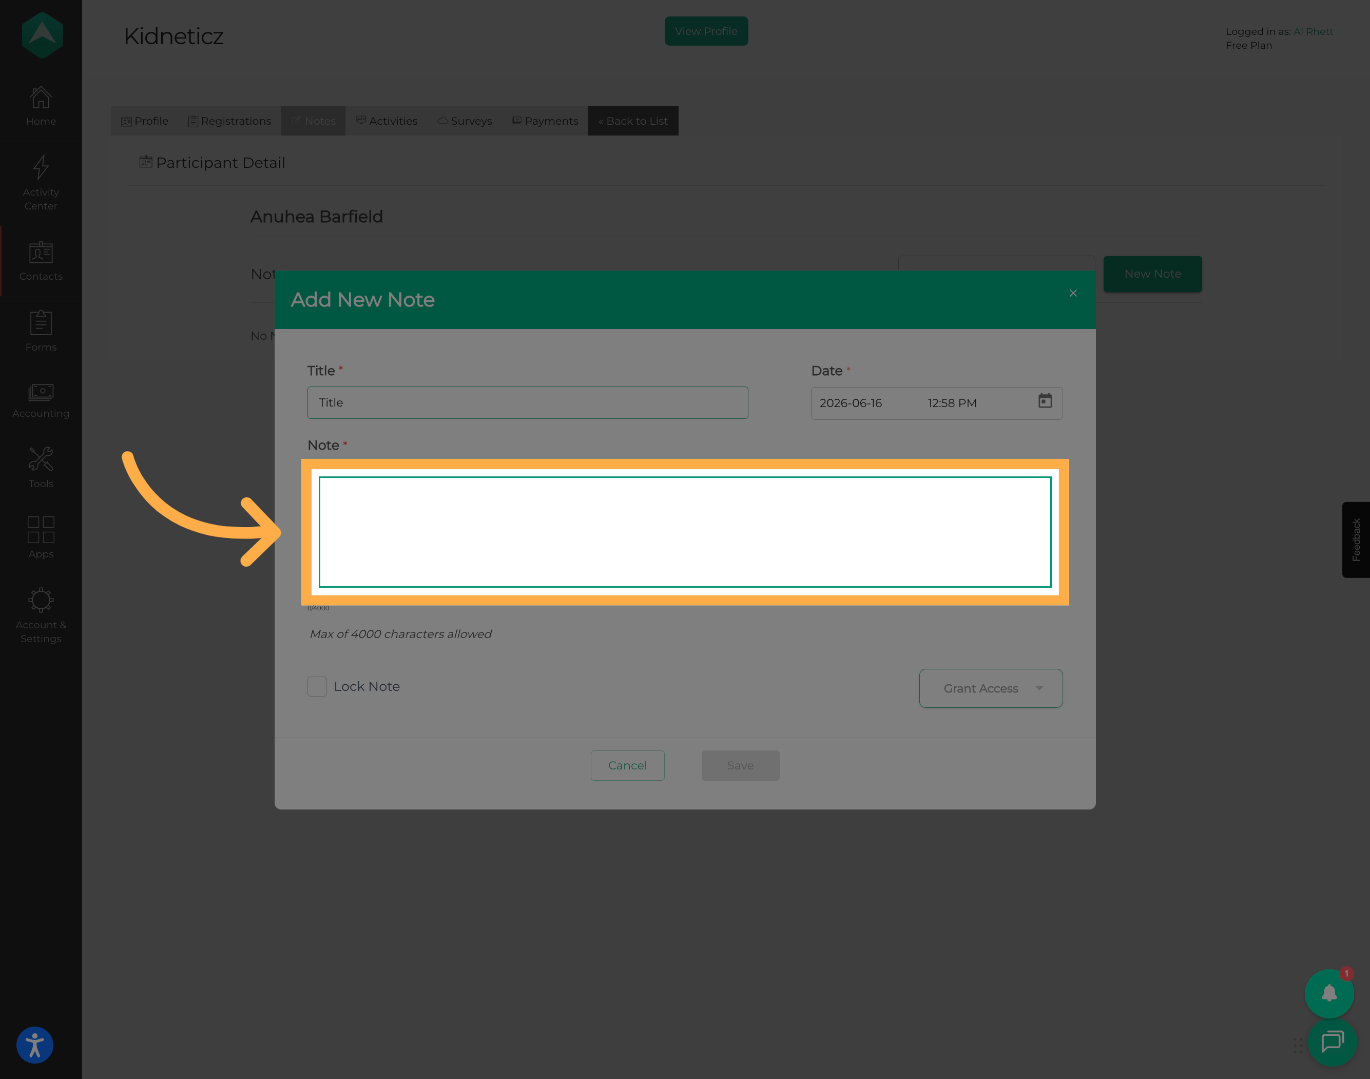
4. Create a New Note
Click “New Note” to create a note for the selected student.

5. Enter a Note Title
Add a title to help identify the purpose or topic of the note.
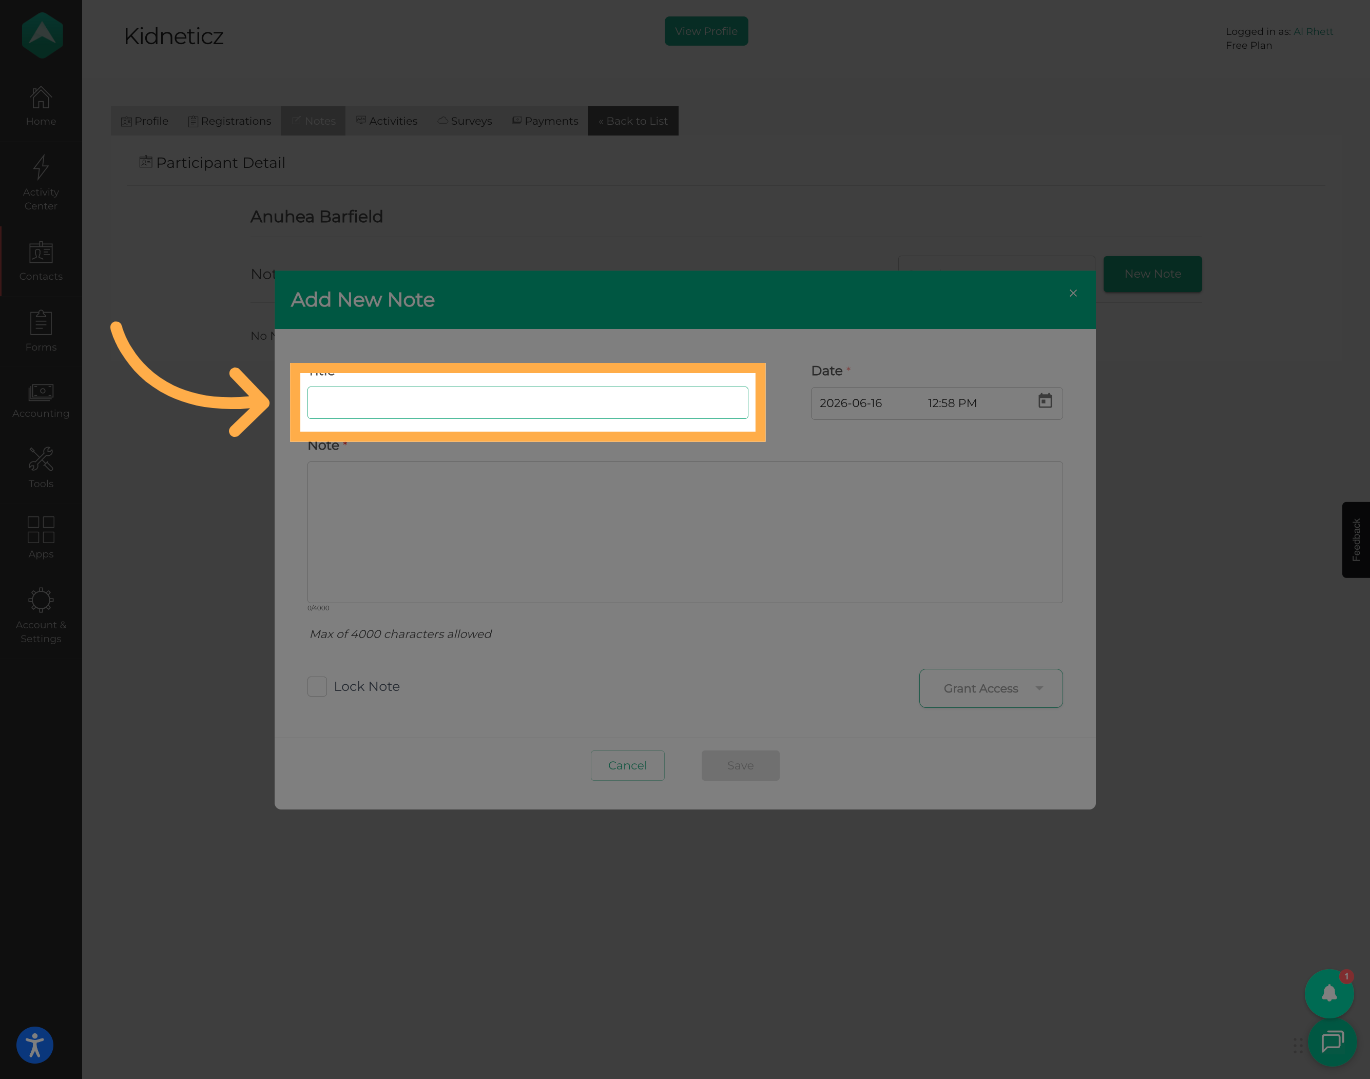
💡 Tip: Use clear, descriptive titles such as "Parent Conversation," "Behavior Observation," or "Attendance Follow-Up."
6. Enter Note Details
Add the note content, including any observations, updates, or important information related to the student.
💡 Tip: Include enough detail to provide context while keeping notes professional and objective.
7. Select a Note Date
Choose the date associated with the note entry.
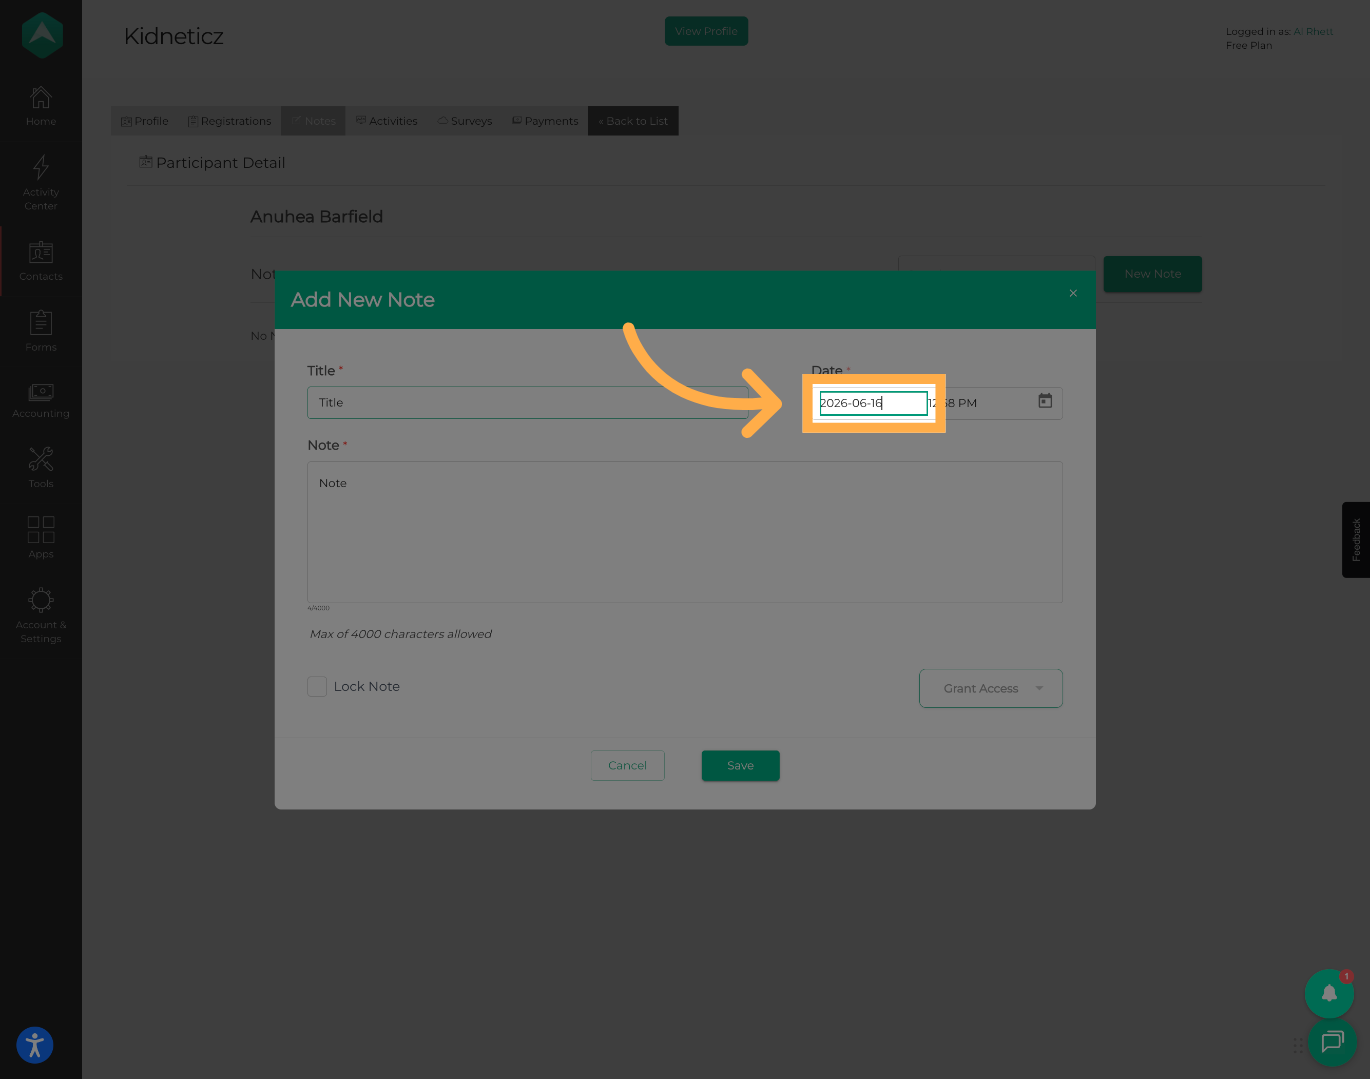
💡 Tip: Use the date the event occurred whenever possible to maintain accurate records.
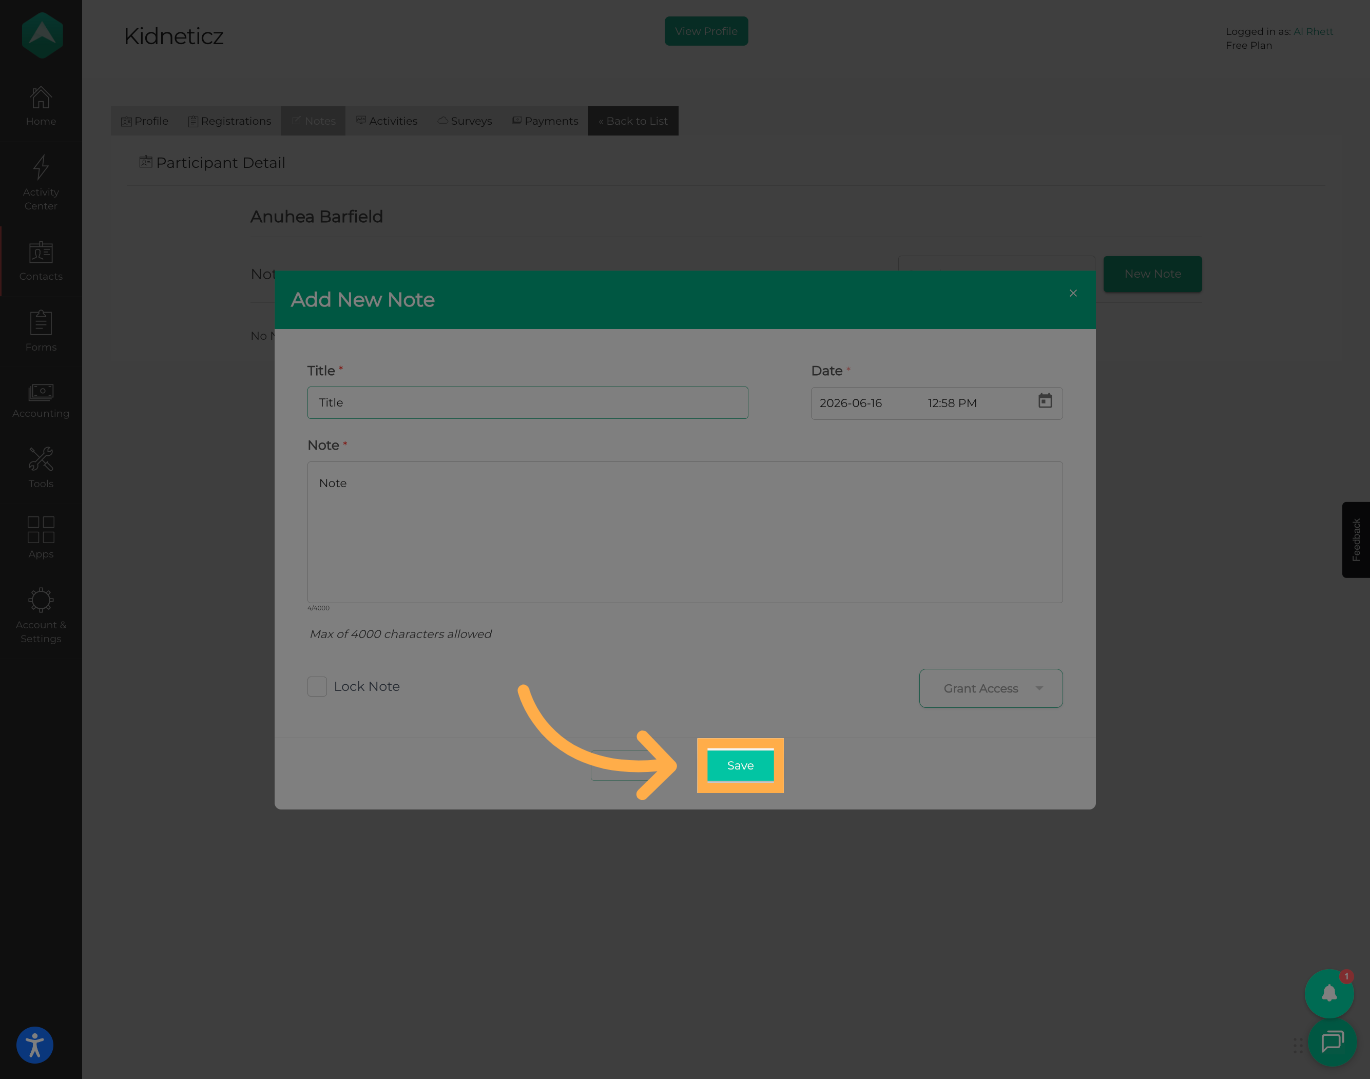
8. Save the Note
Click “Save” to add the note to the student's profile.
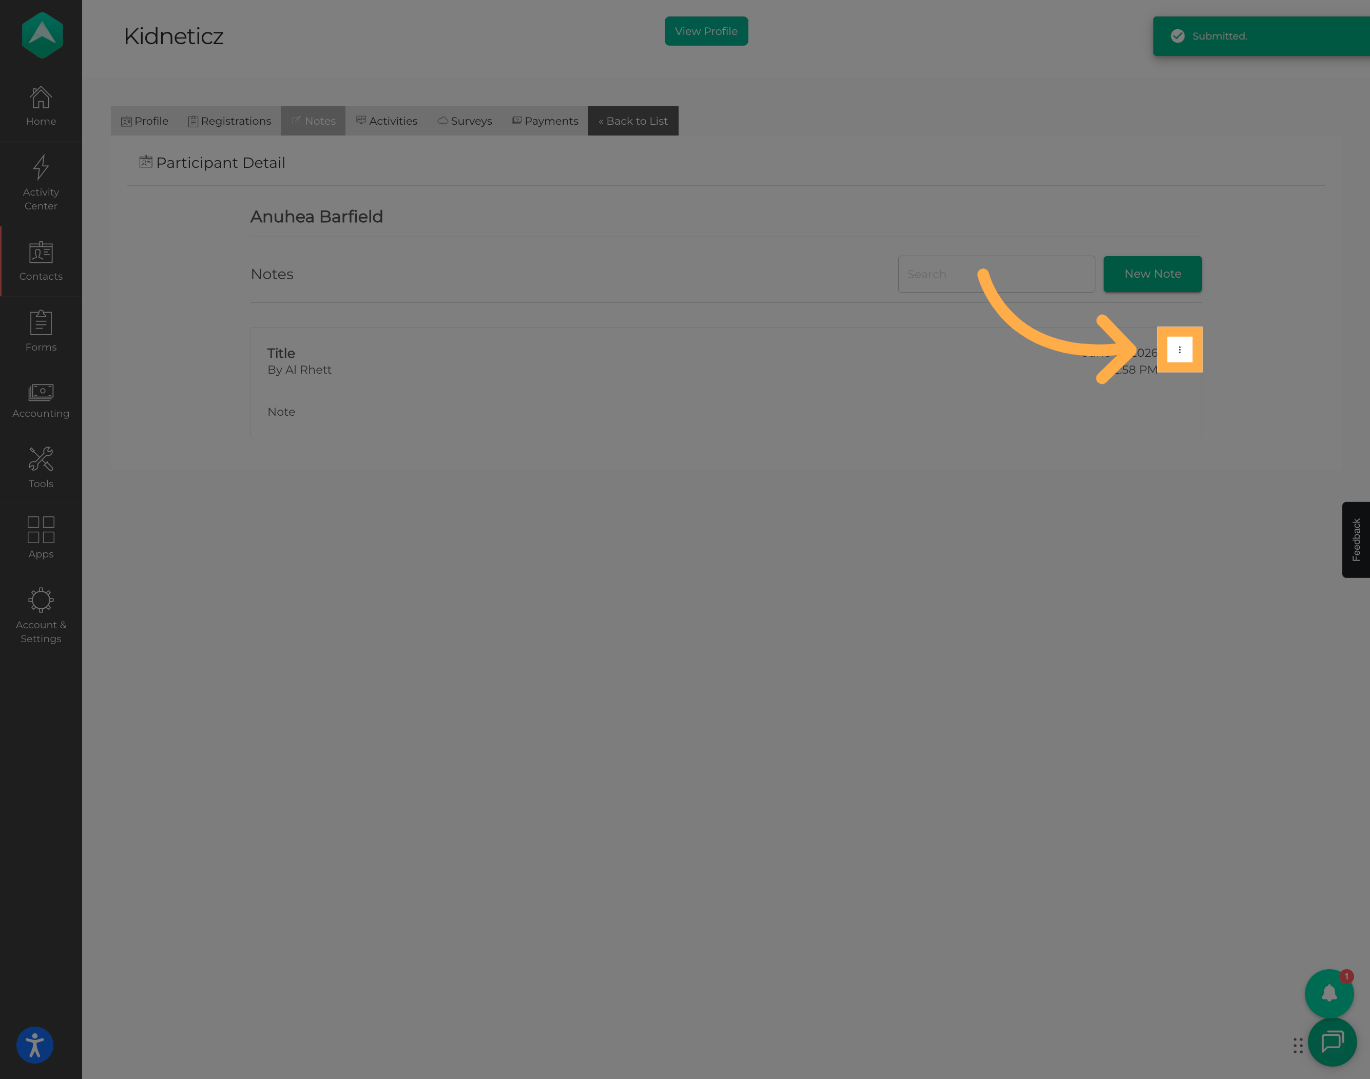
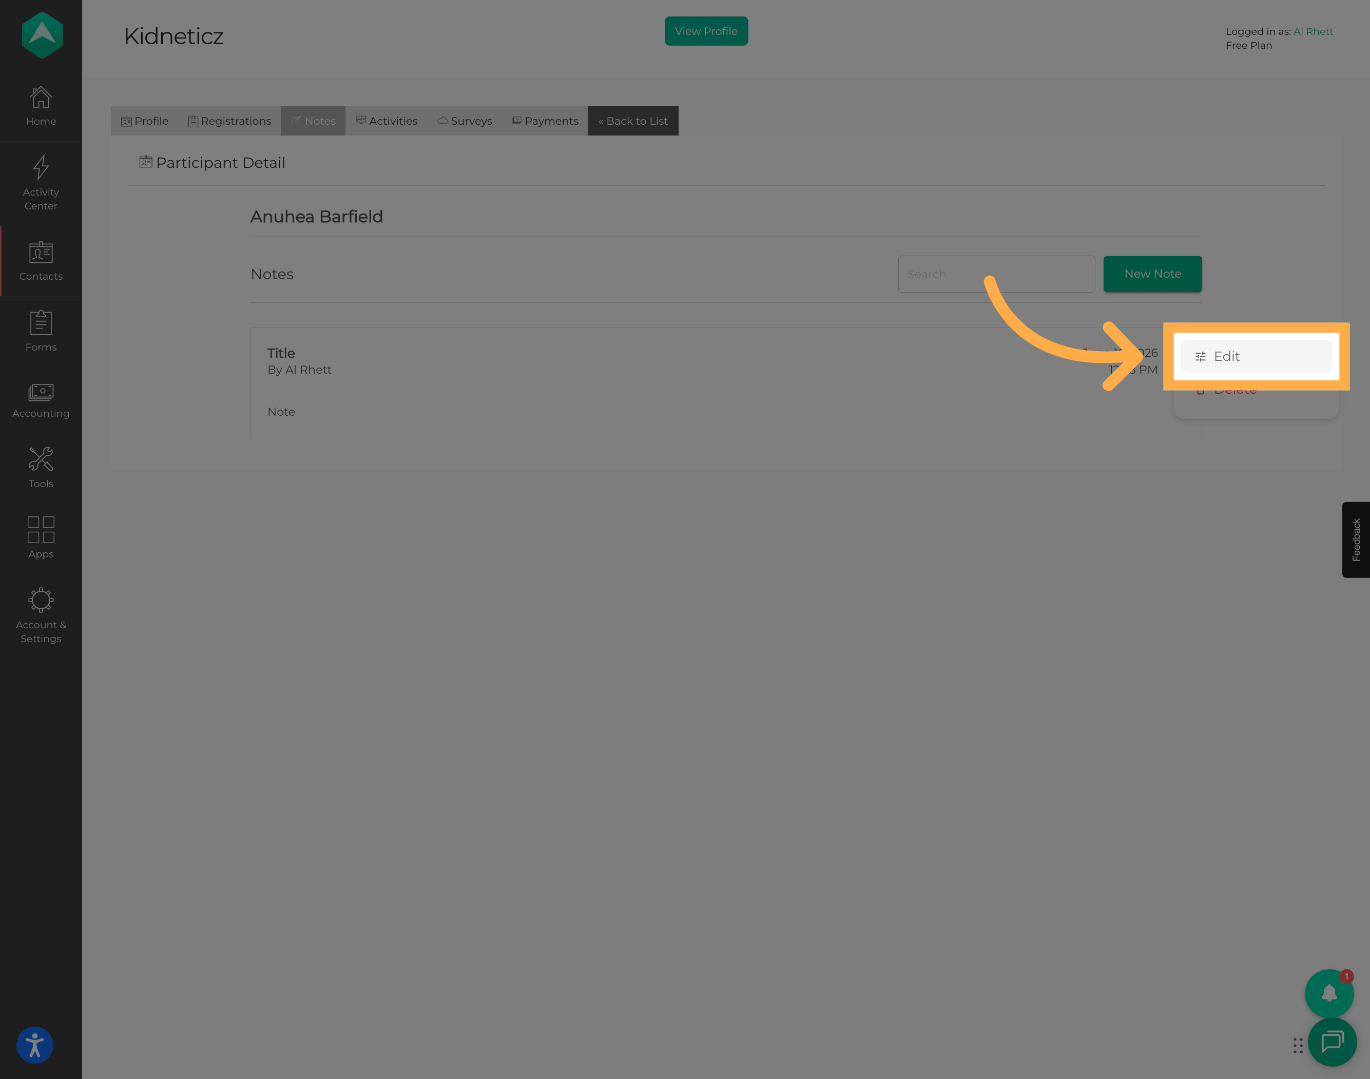
9. Note Options
Open the note options menu to view additional actions available for the selected note.
10. Edit a Note
Click “Edit” to update or modify an existing note.
💡 Tip: Notes can be updated if additional information becomes available or corrections are needed.
11. Delete a Note
Click “Delete” if the note is no longer needed or was created in error.

⚠️ Important: Deleting a note is permanent and cannot be undone.
Frequently Asked Questions
Q: Who can view student notes?
A: Visibility depends on your organization's permissions and staff access settings.
Q: What types of information should be included in student notes?
A: Student notes can be used to document observations, parent communications, incidents, attendance follow-ups, behavioral updates, or other important participant information.
Q: Can I edit a note after it has been saved?
A: Yes. Existing notes can be edited as needed.
Q: Can deleted notes be restored?
A: No. Once a note is deleted, it cannot be recovered.
Q: Are student notes visible to parents?
A: Student notes are intended for staff use and are not typically visible to parents or guardians.
💡If you experience any issues or have further questions with “How to Create and Manage Activity Notes”, don't hesitate to get in touch with our support team at support@afterschoolhq.com.