![ASHQ Logo Vert Flat.png]](https://support.afterschoolhq.com/hs-fs/hubfs/ASHQ%20Logo%20Vert%20Flat.png?height=40&name=ASHQ%20Logo%20Vert%20Flat.png)
Student and volunteer tags provide a simple way to organize and categorize records within AfterSchool HQ.
You can assign existing tags directly from a student or volunteer’s profile, create new tags as needed, and use the Tag Manager to manage tags across your organization.
The steps shown in this guide use a student record as an example, but the same process can be used to create and assign tags to volunteers.
1. Access the Students Section
Navigate to the “Students” section to view and manage student records within your account.
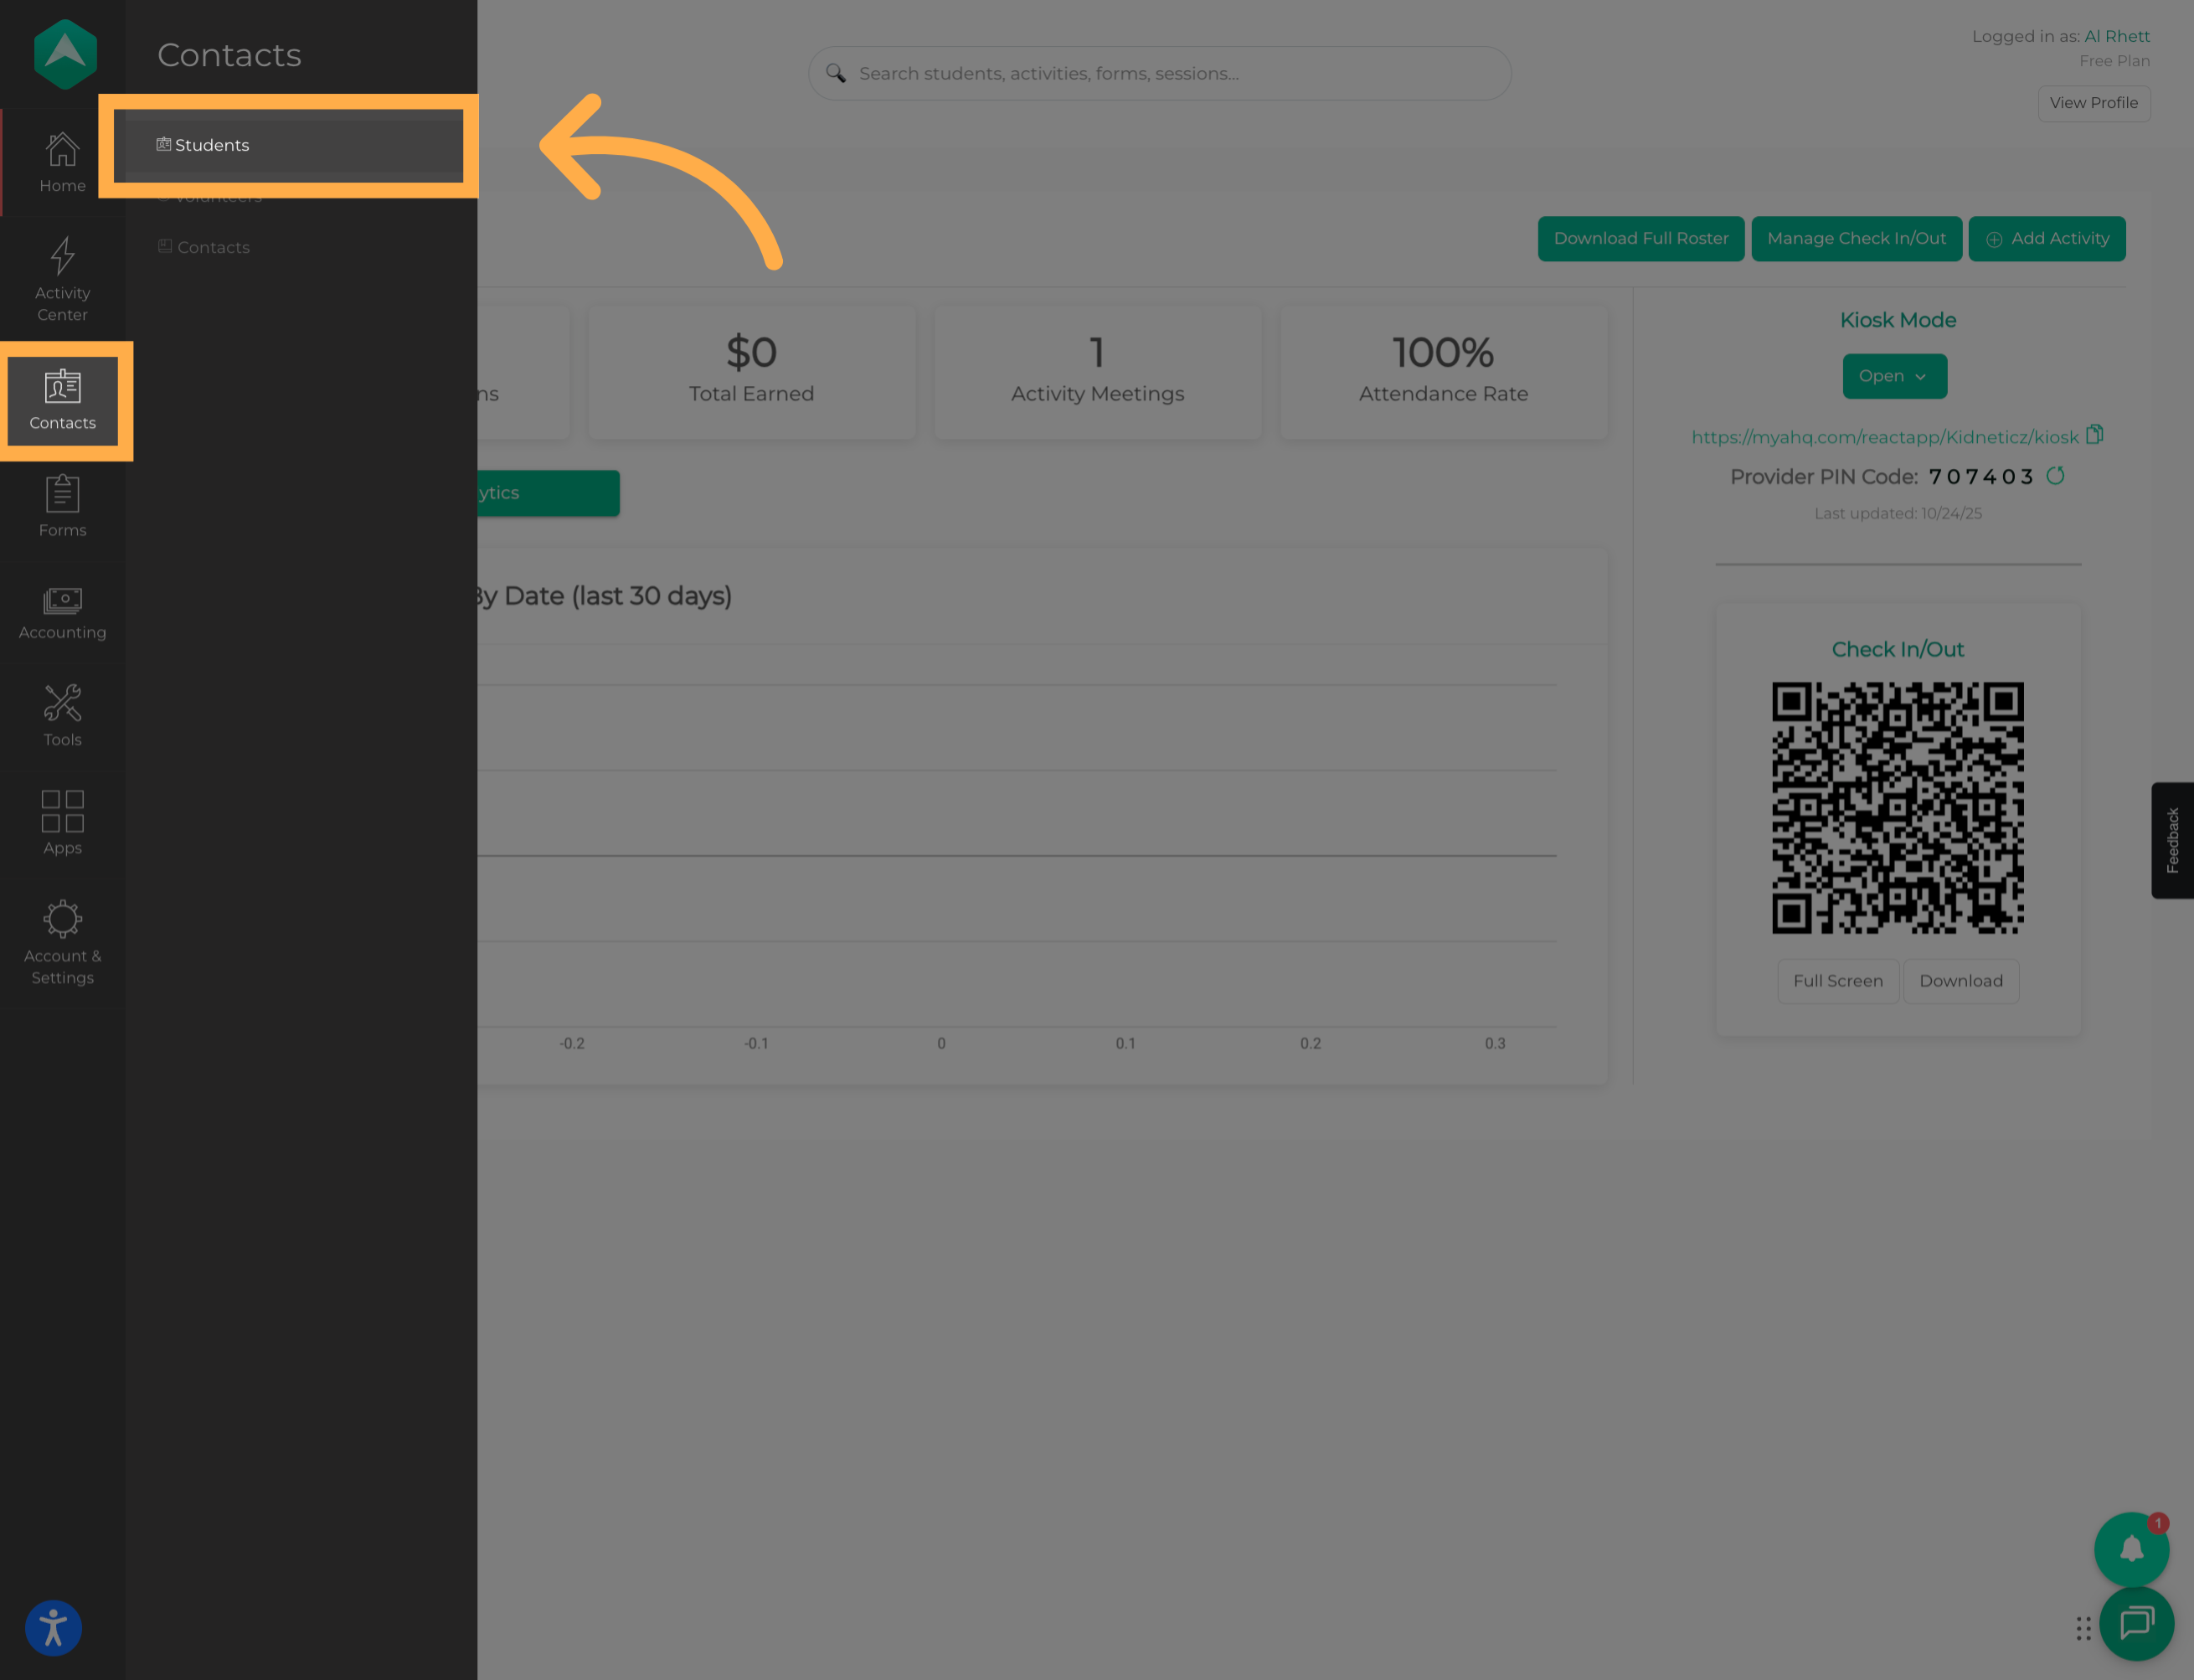
💡 Tip: If you’re adding a tag to a specific student, locating the student first is the quickest way to assign or create a tag.
❗Adding tags to volunteers? Navigate to the “Volunteers” section instead. From there, select the volunteer you want to manage and follow the same steps shown below to search for, create, and assign tags.
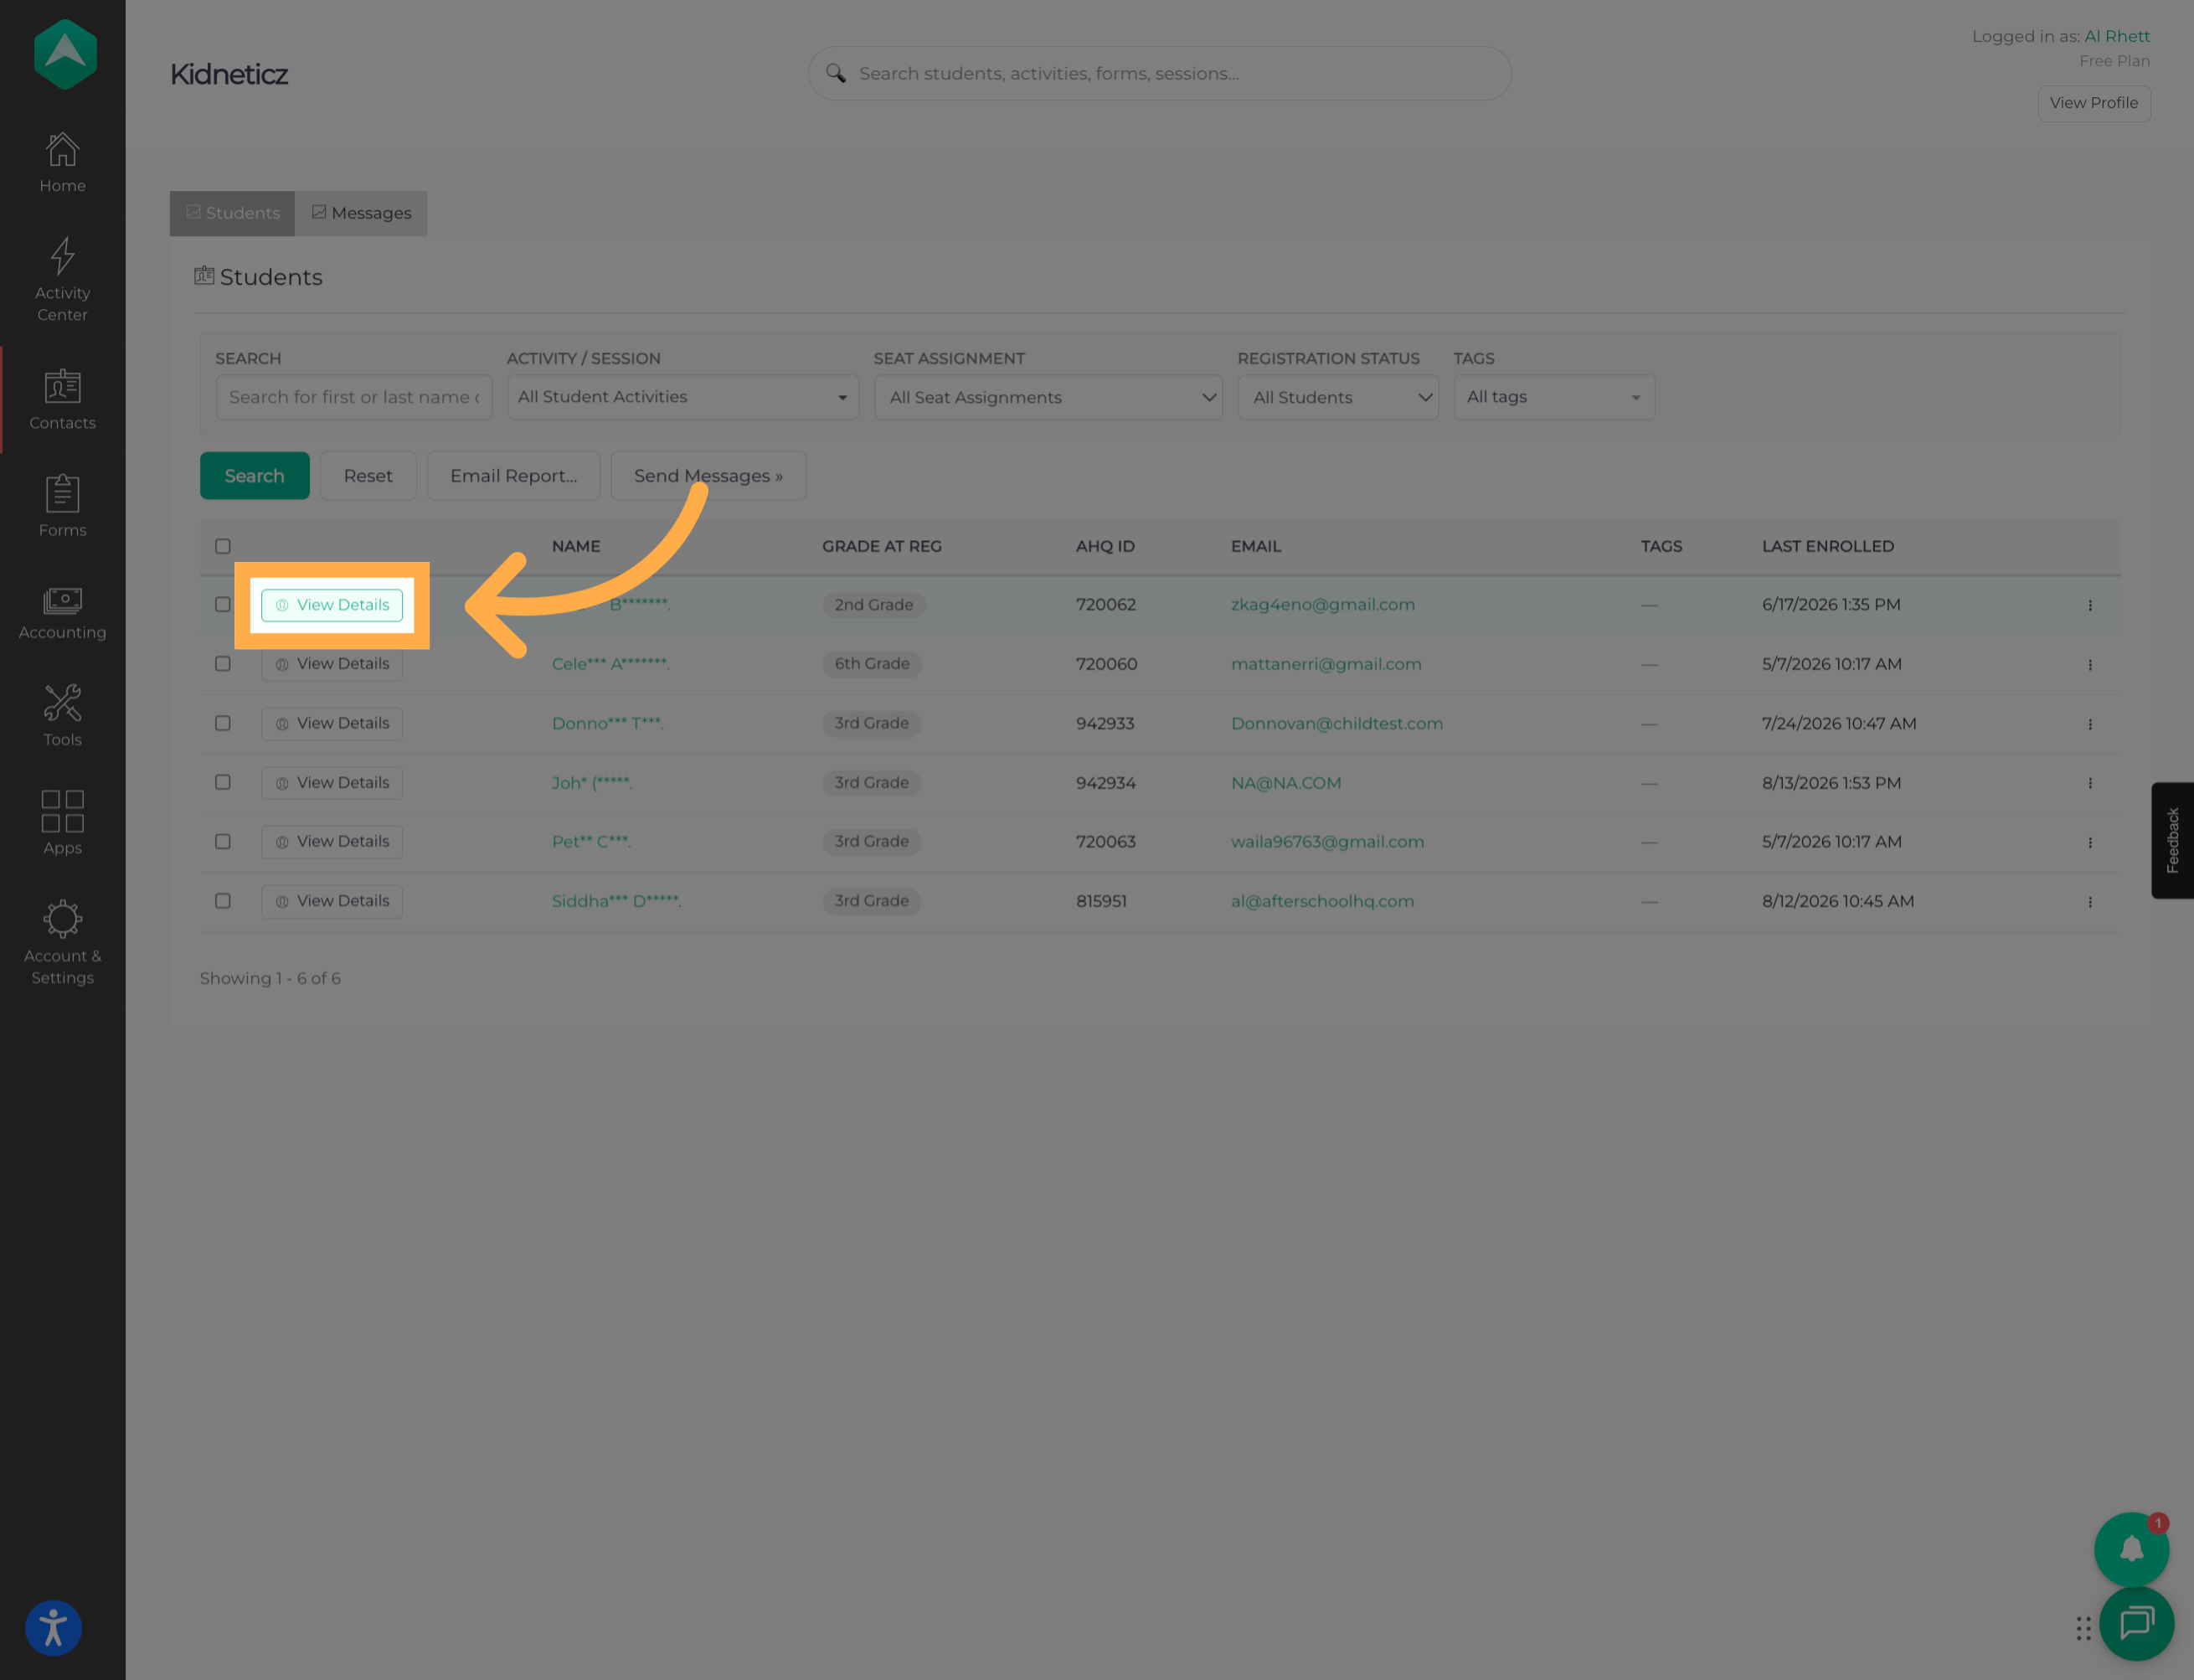
2. View Student Details
Select the student you’d like to manage to open their profile and view their information.
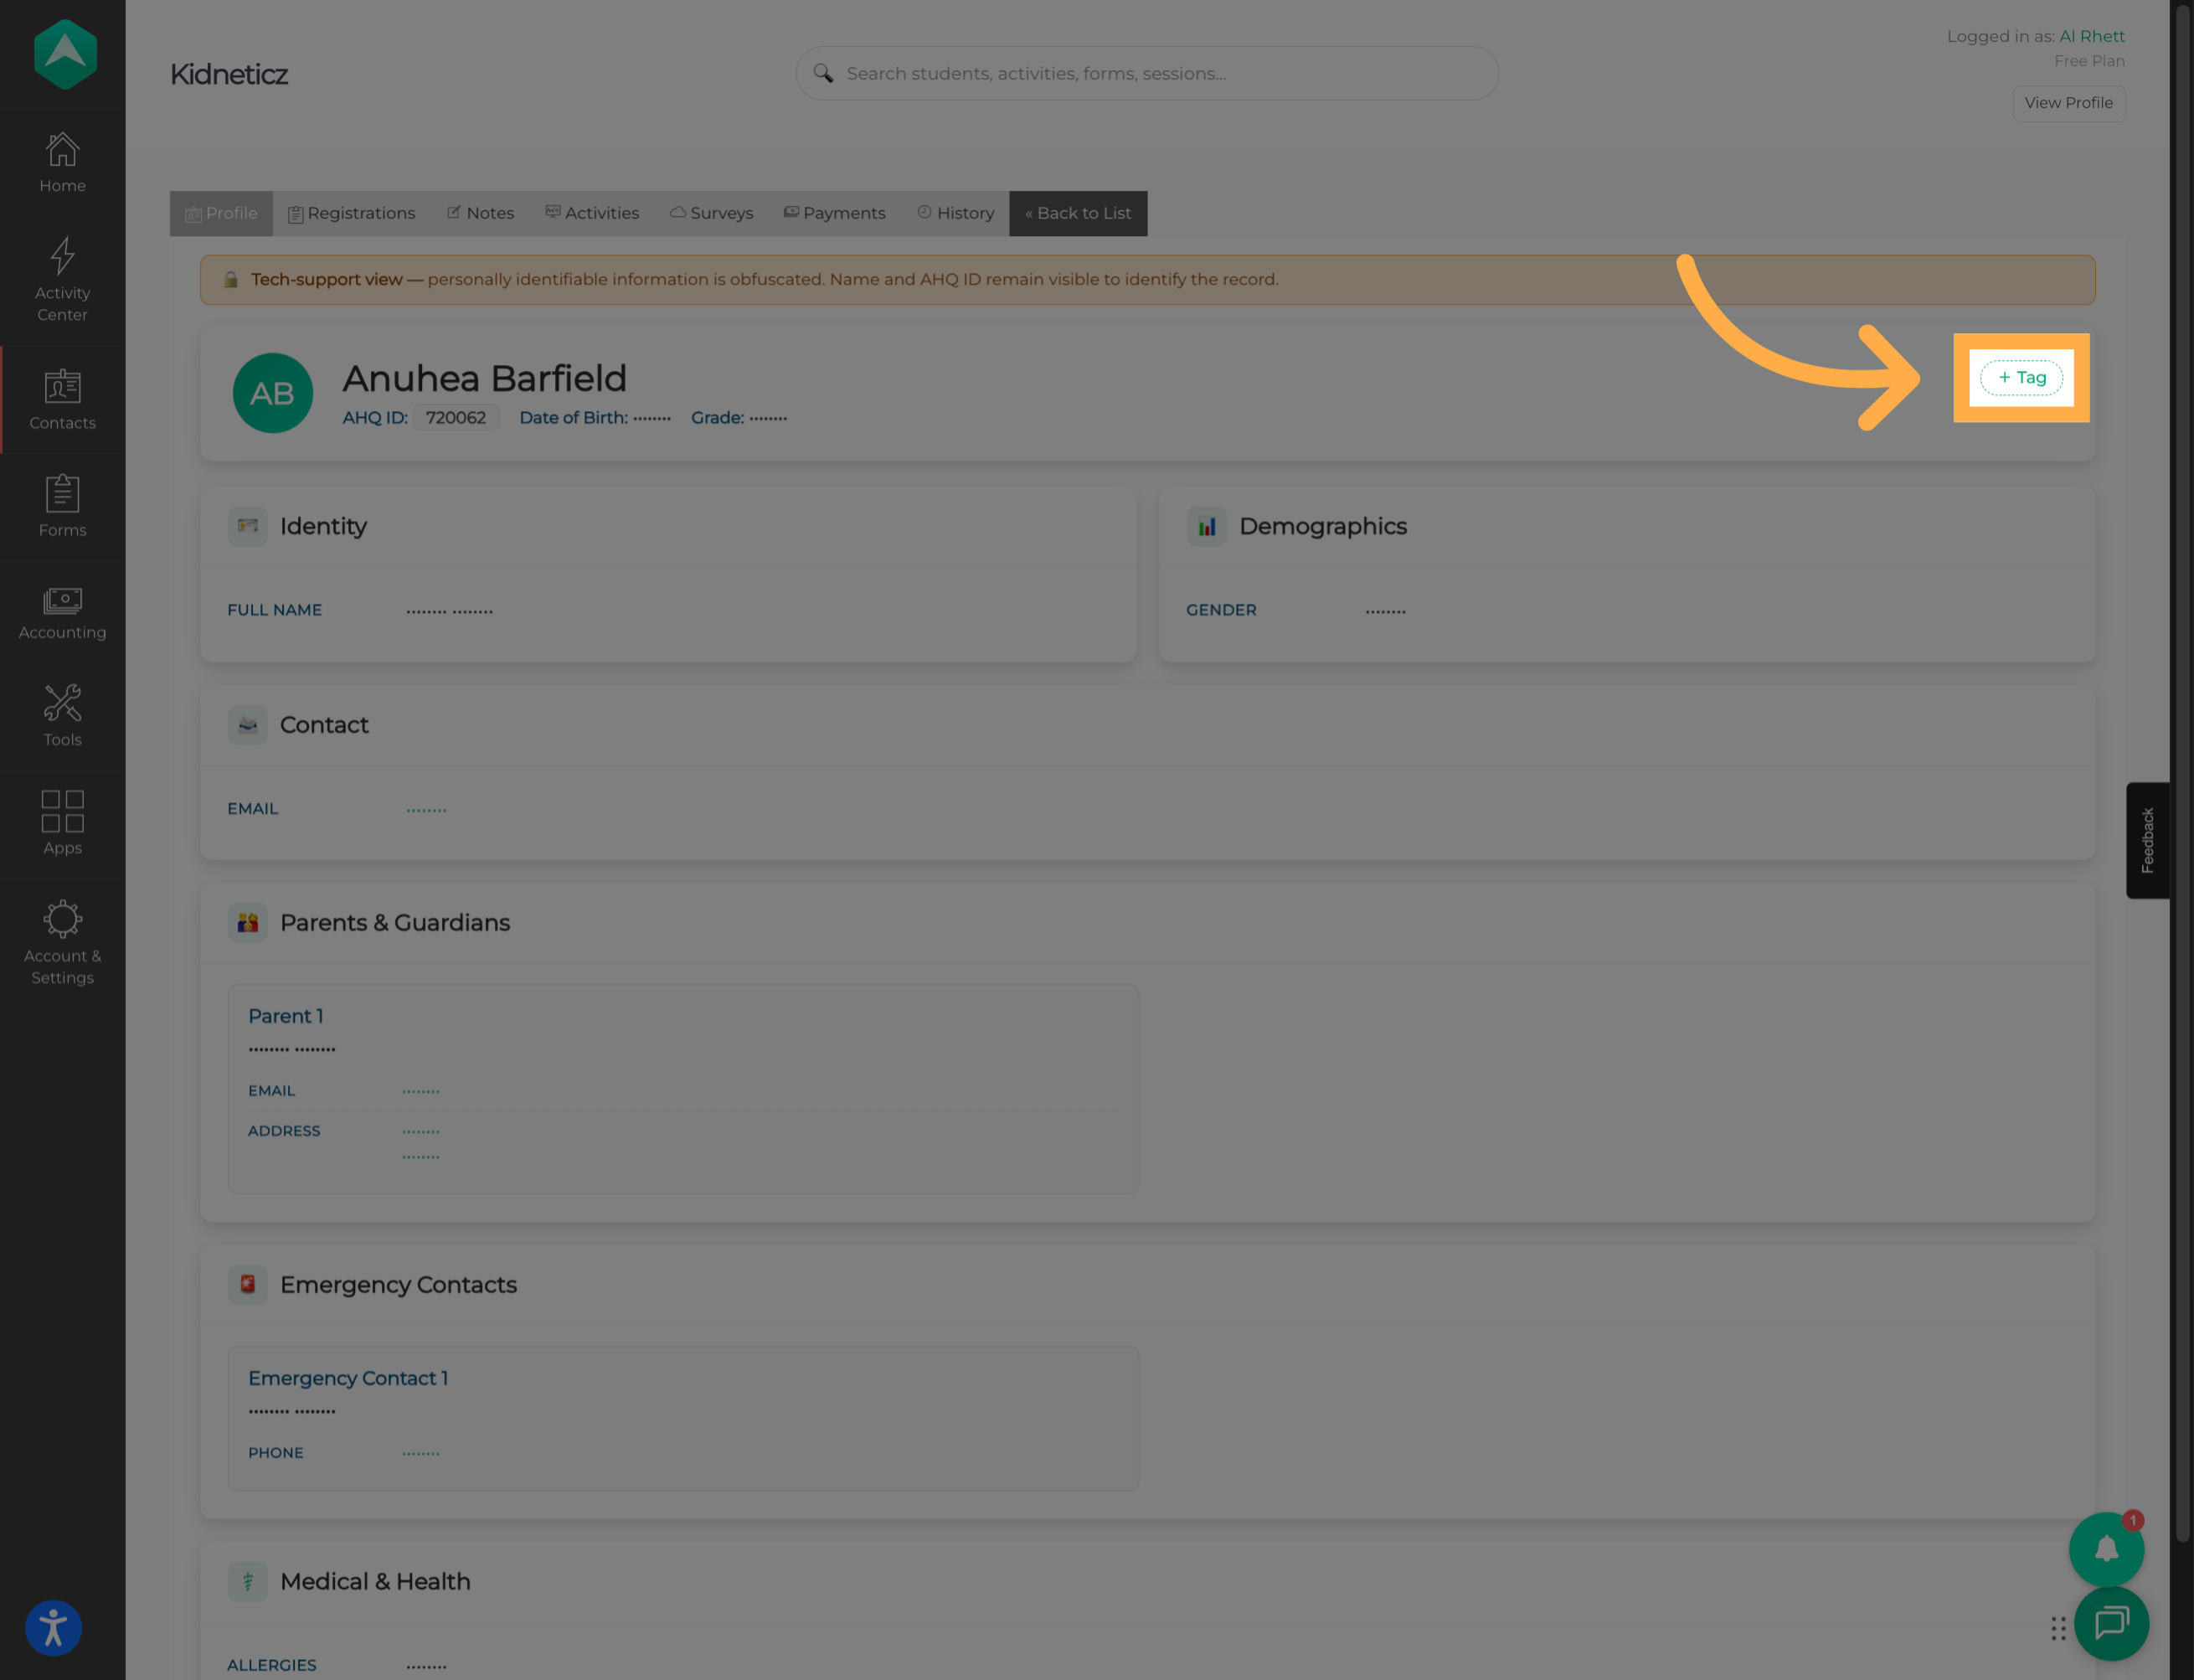
3. Initiate Tag Addition
From the student’s profile, select the option to add a new tag. This allows you to assign an existing tag or create a new one for the student.
4. Search or Create a Tag
Enter the name of the tag you want to assign.
If the tag already exists, you can select it from the available results. If you don’t find the tag you need, you can create a new one.
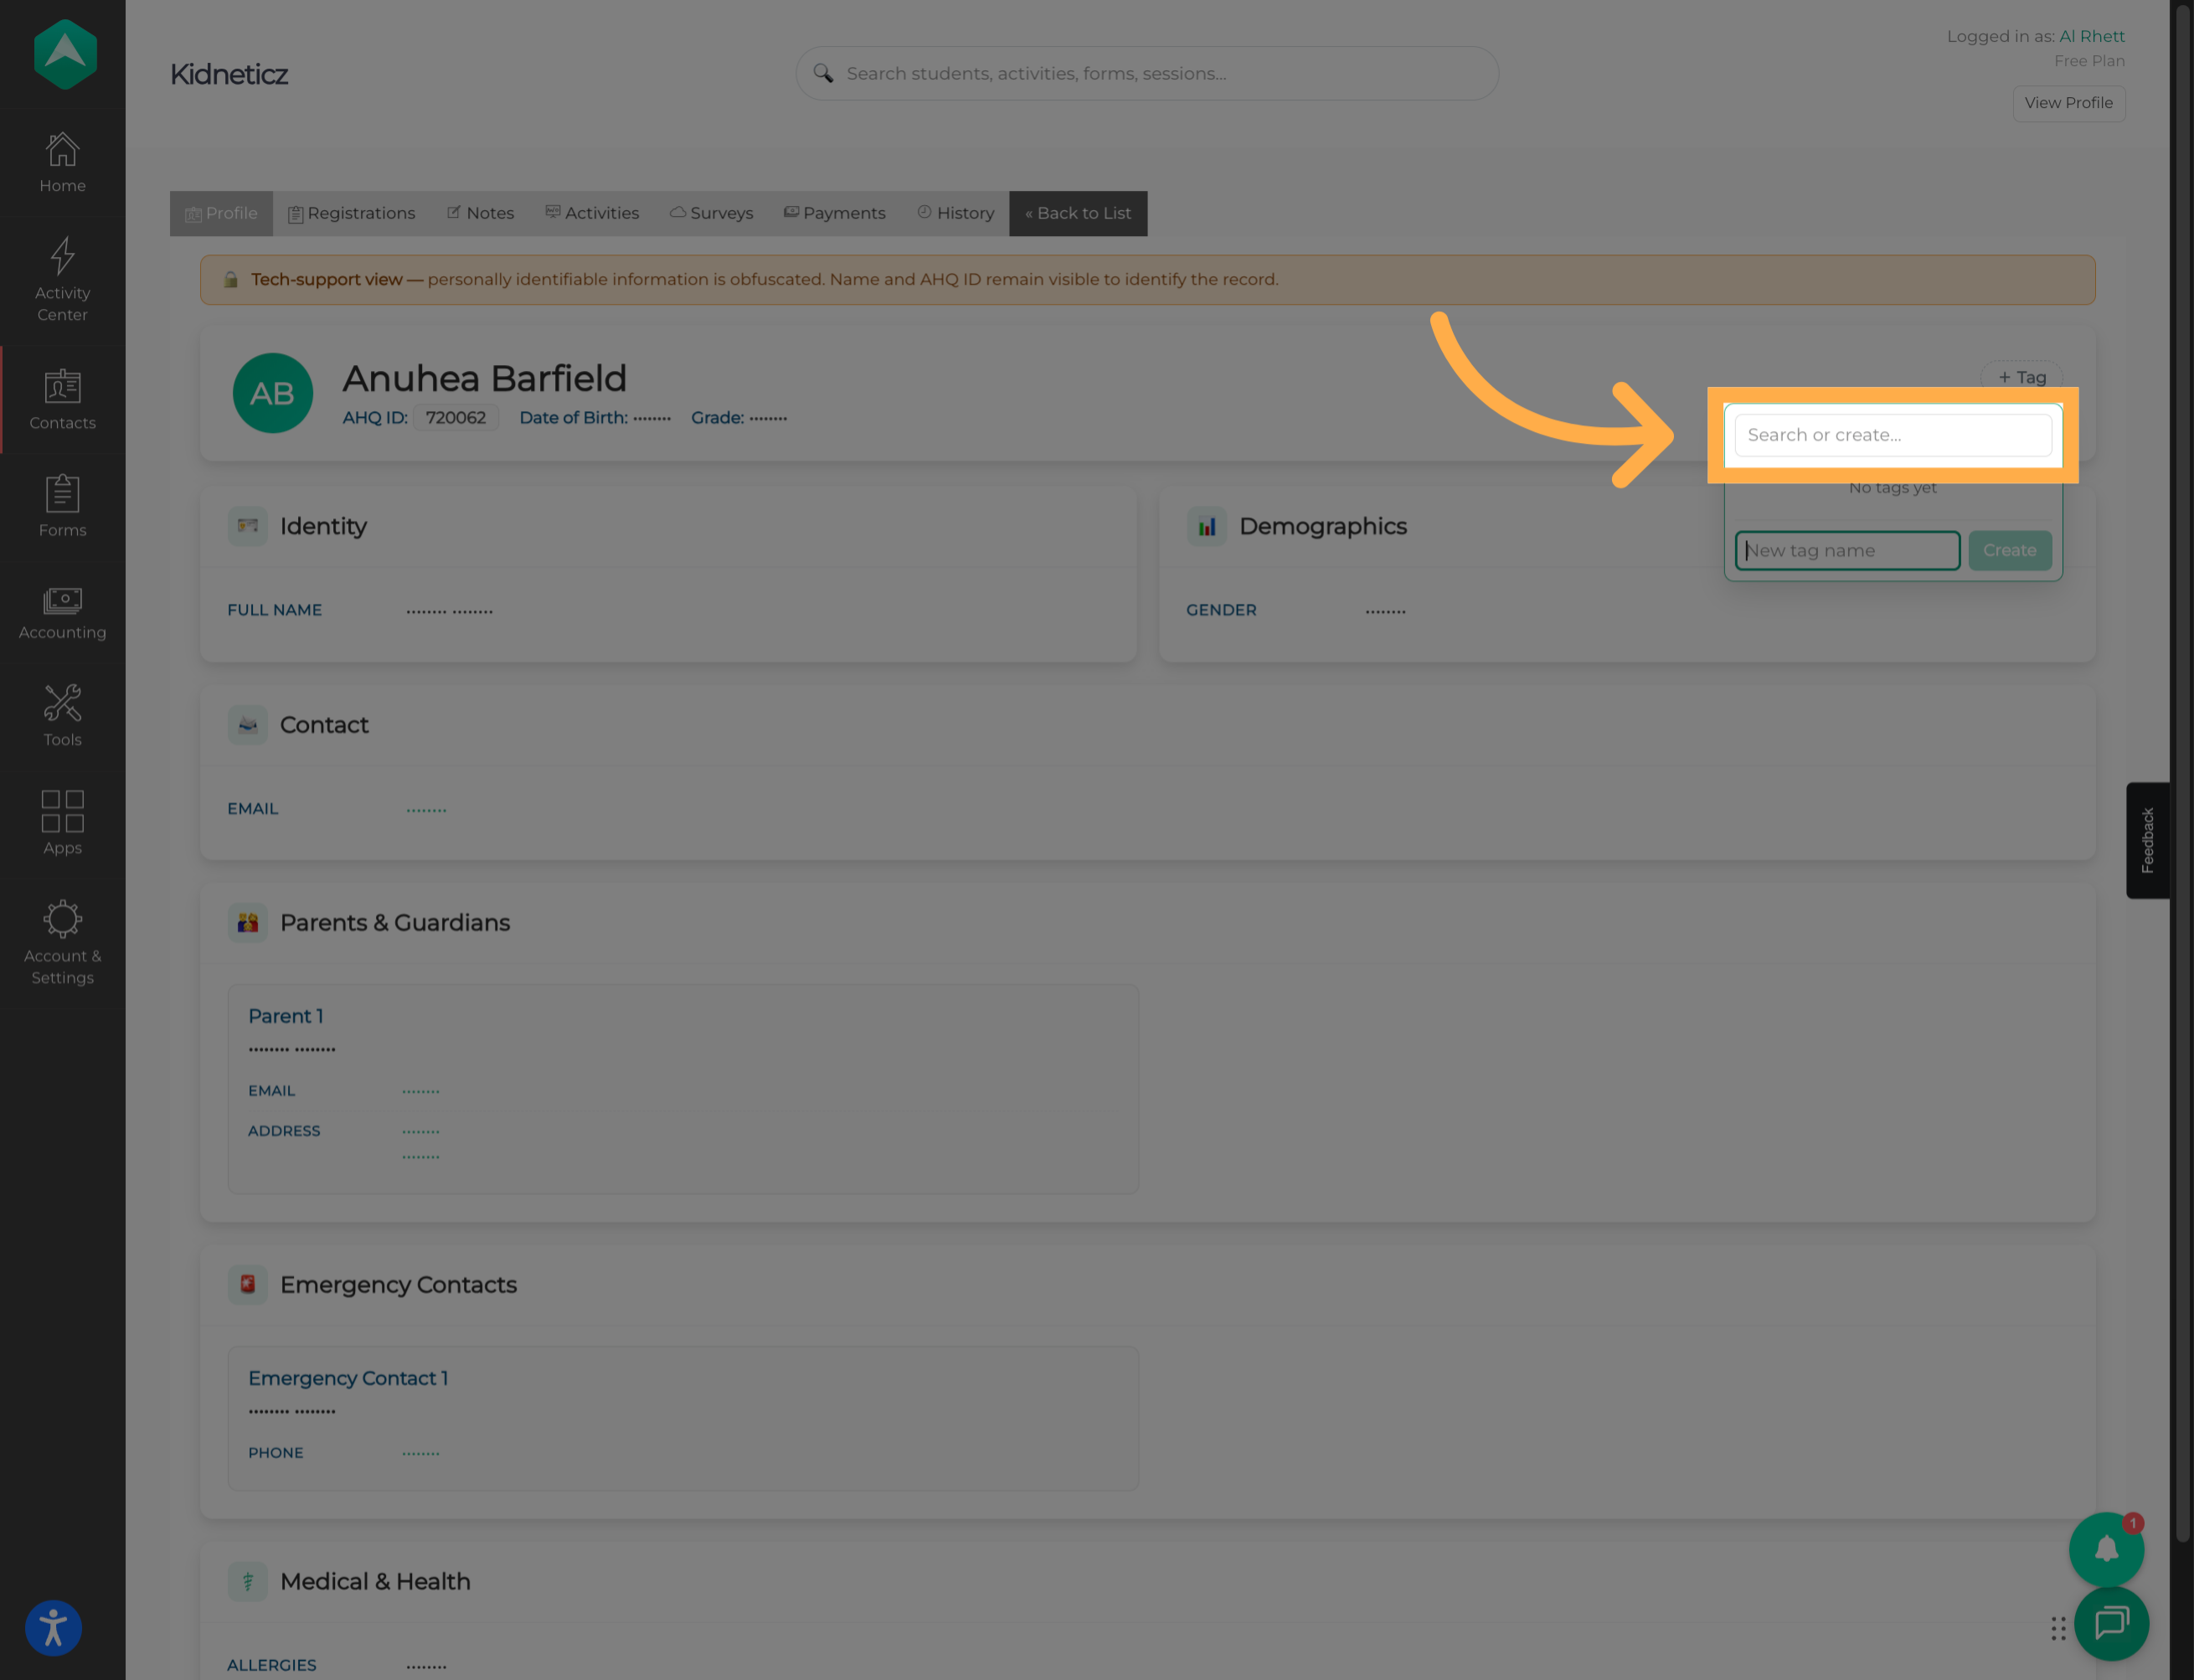
💡 Tip: Search for a tag before creating a new one to help avoid creating duplicate tags with similar names.
5. Select New Tag Creation
If the tag you need doesn’t already exist, select the option to create a new tag.
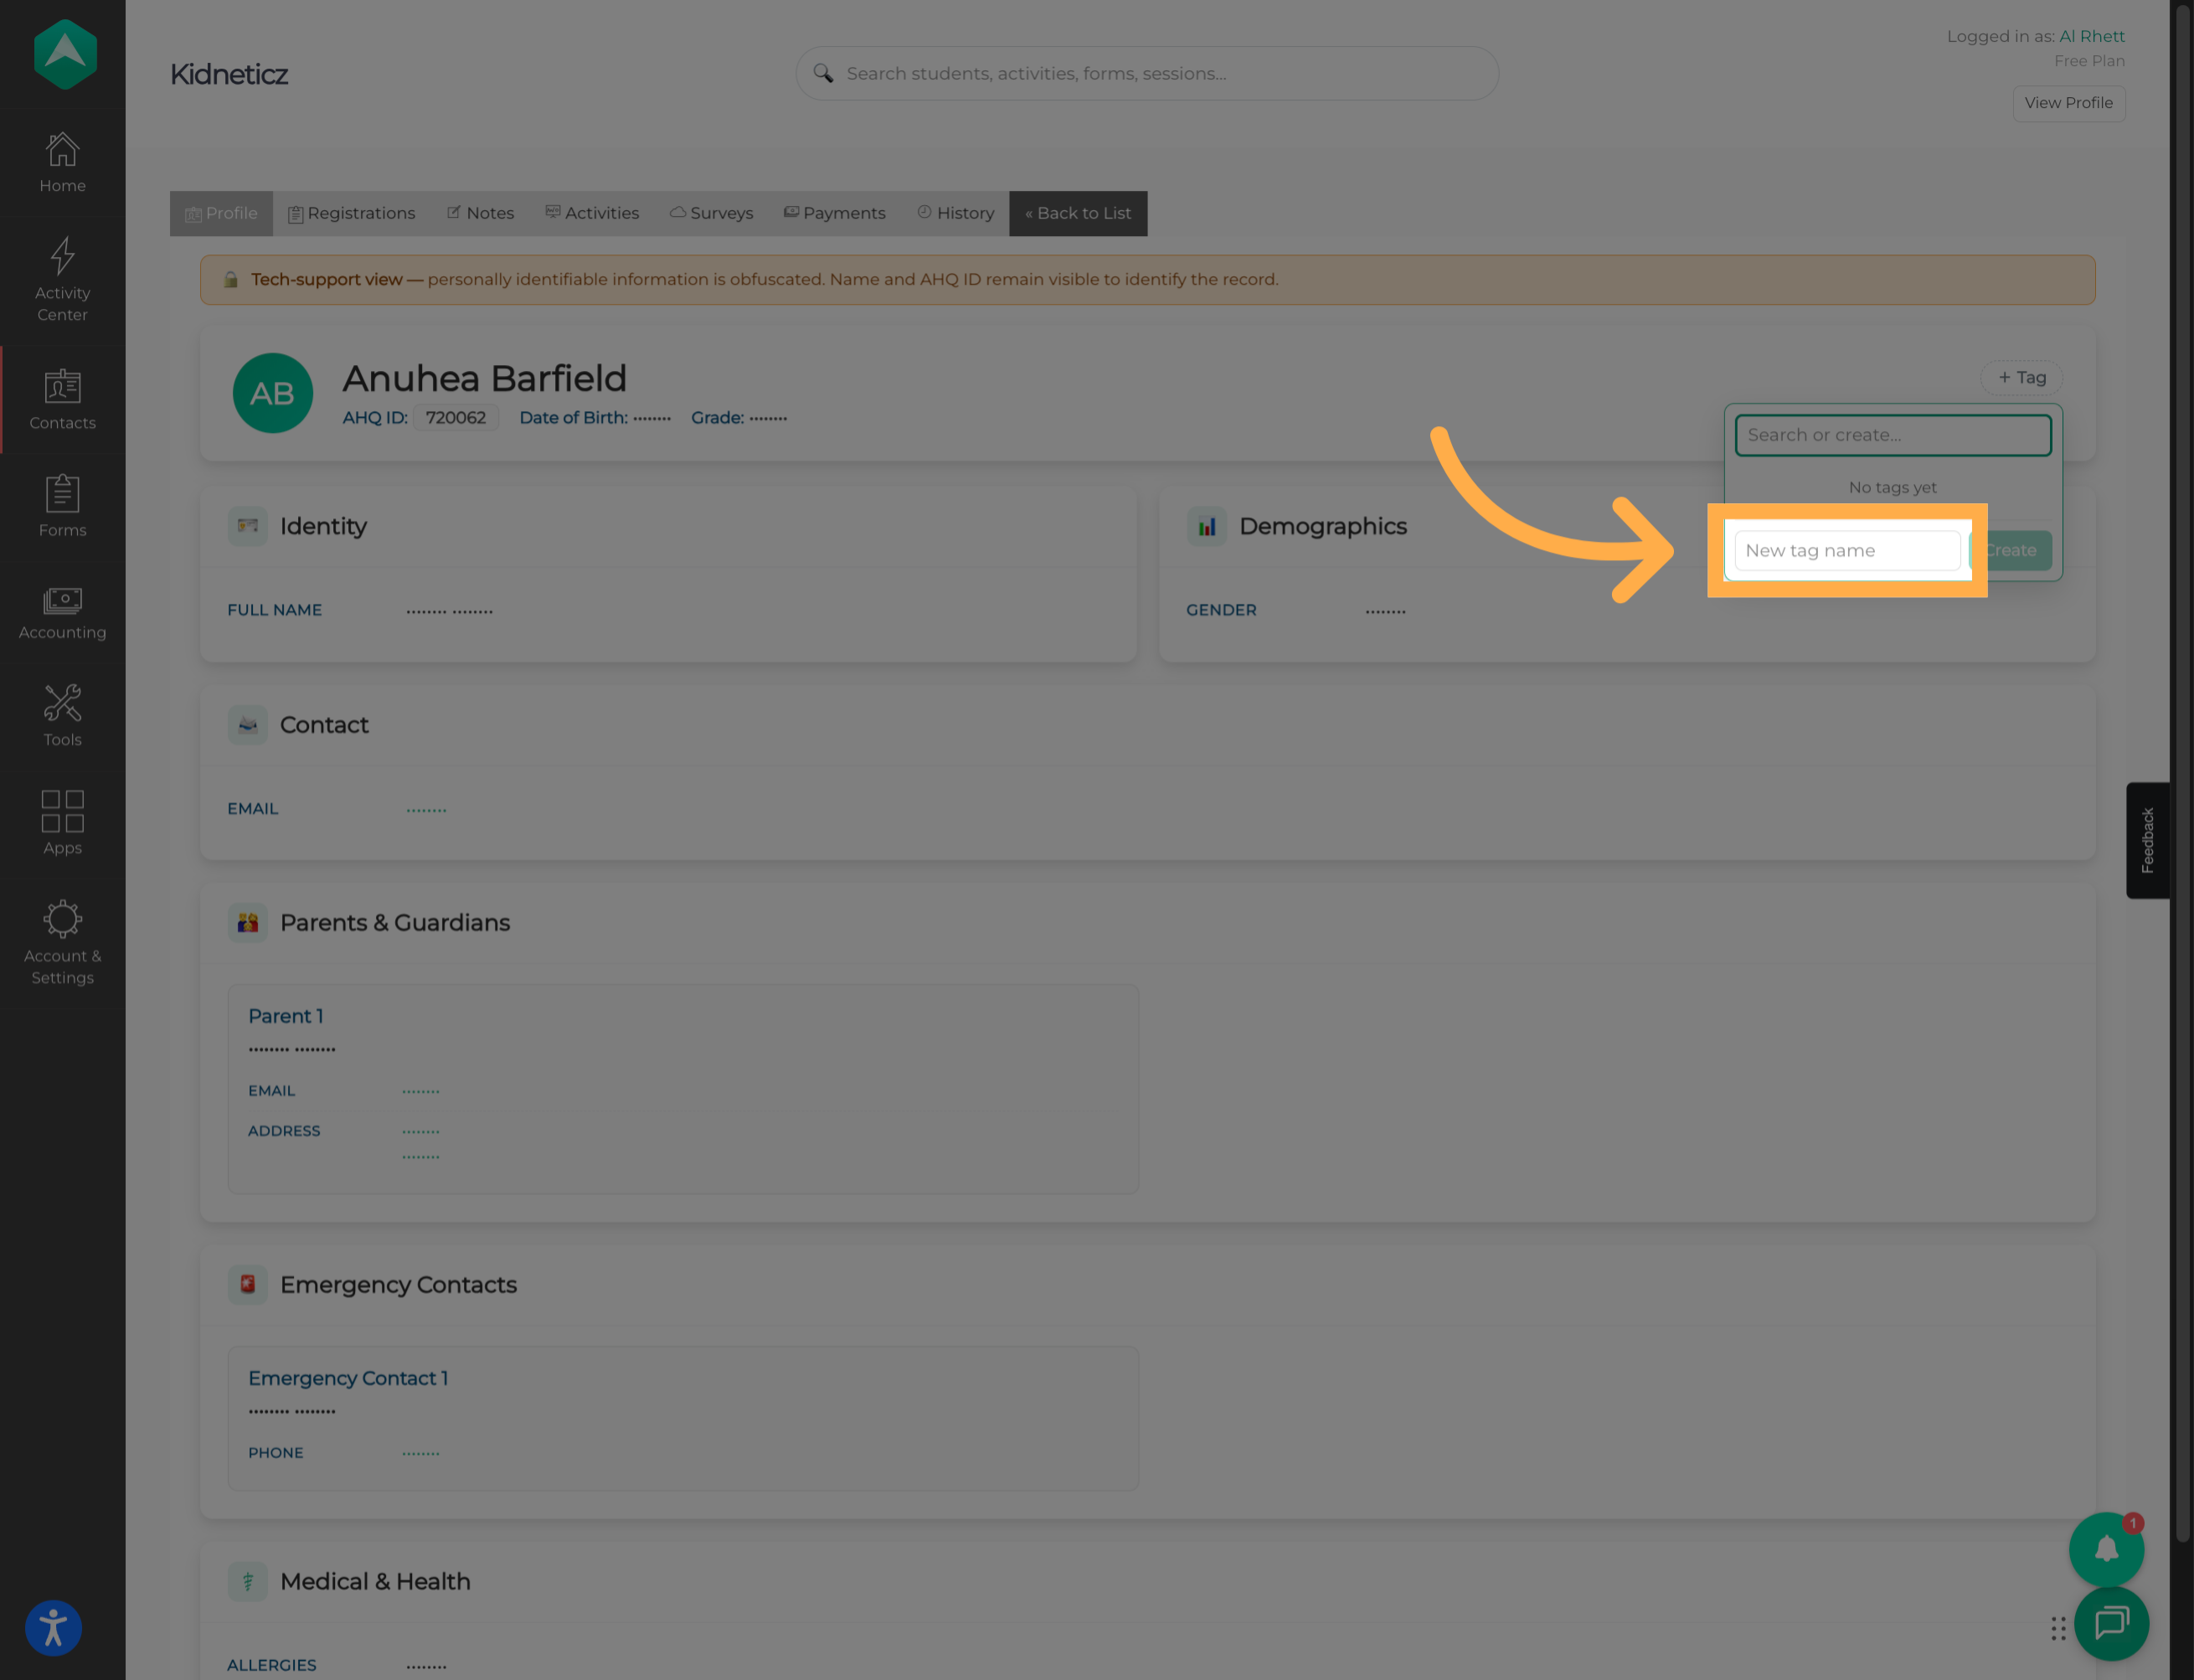
6. Create the New Tag
Enter the tag information and create the new tag. Once created, the tag becomes available for use on student profiles.
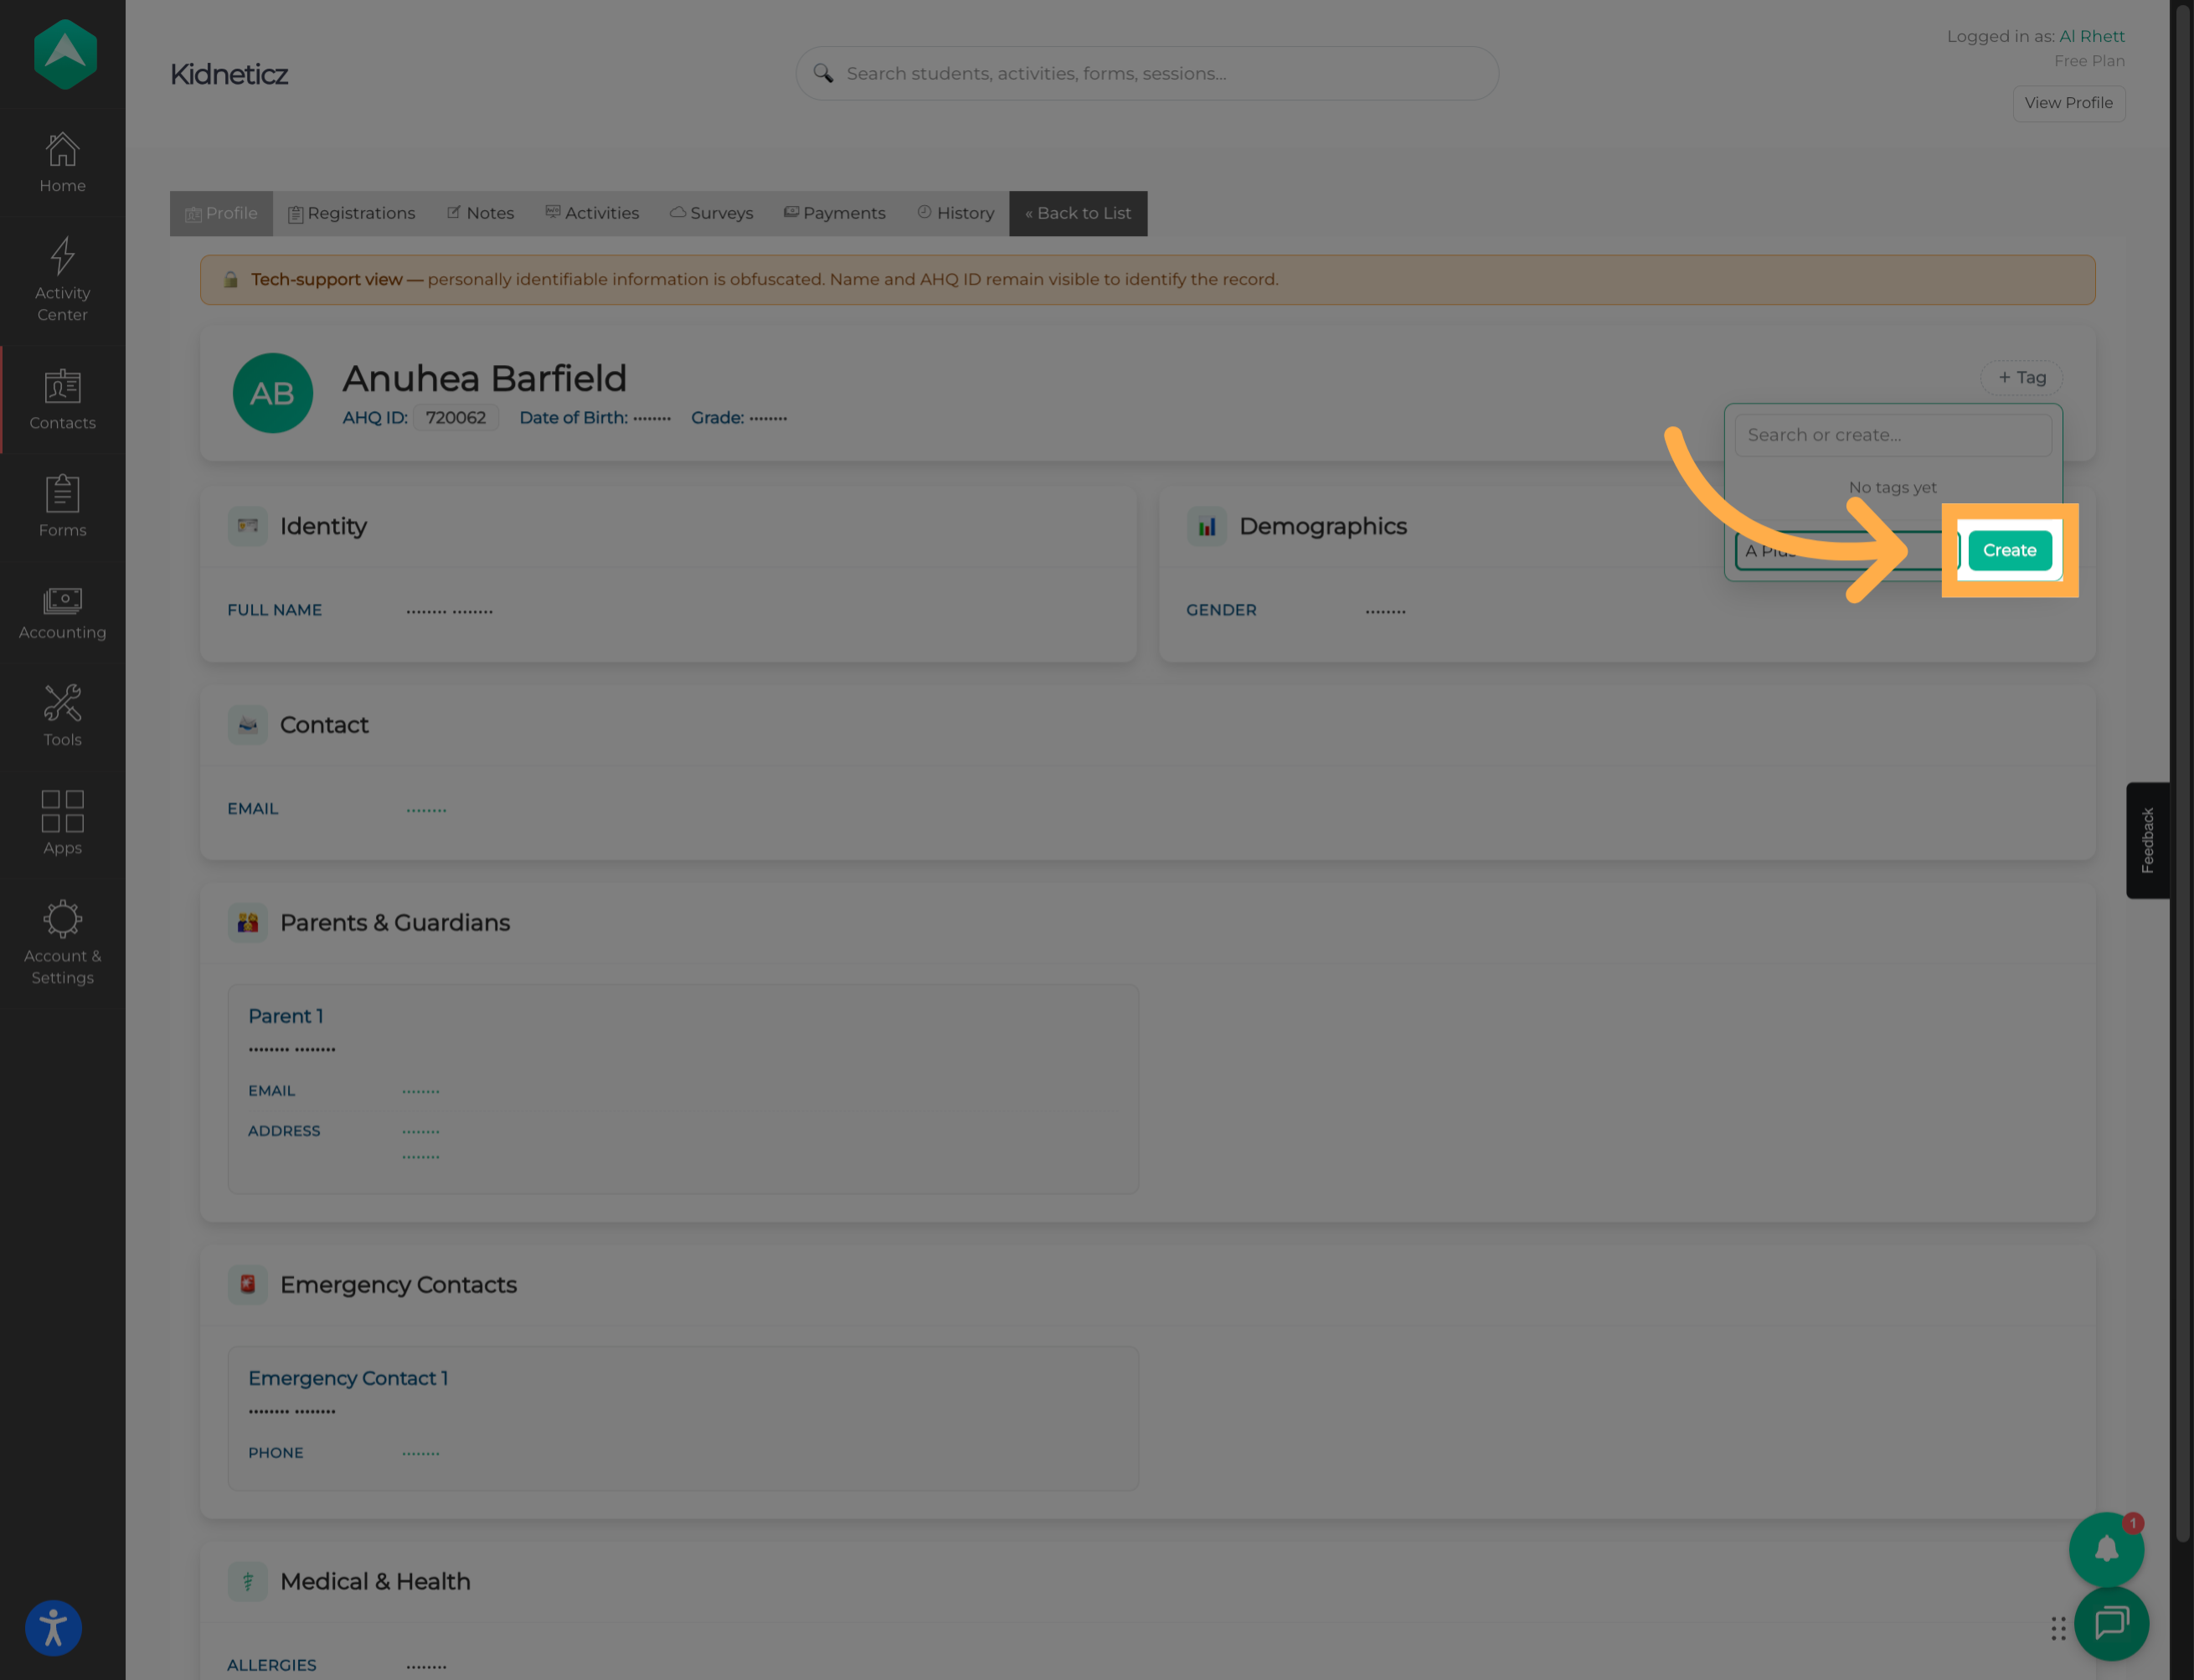
7. Add Another Tag
You can assign additional tags to the student whenever needed. Repeat the tag selection process to search for or create another tag.
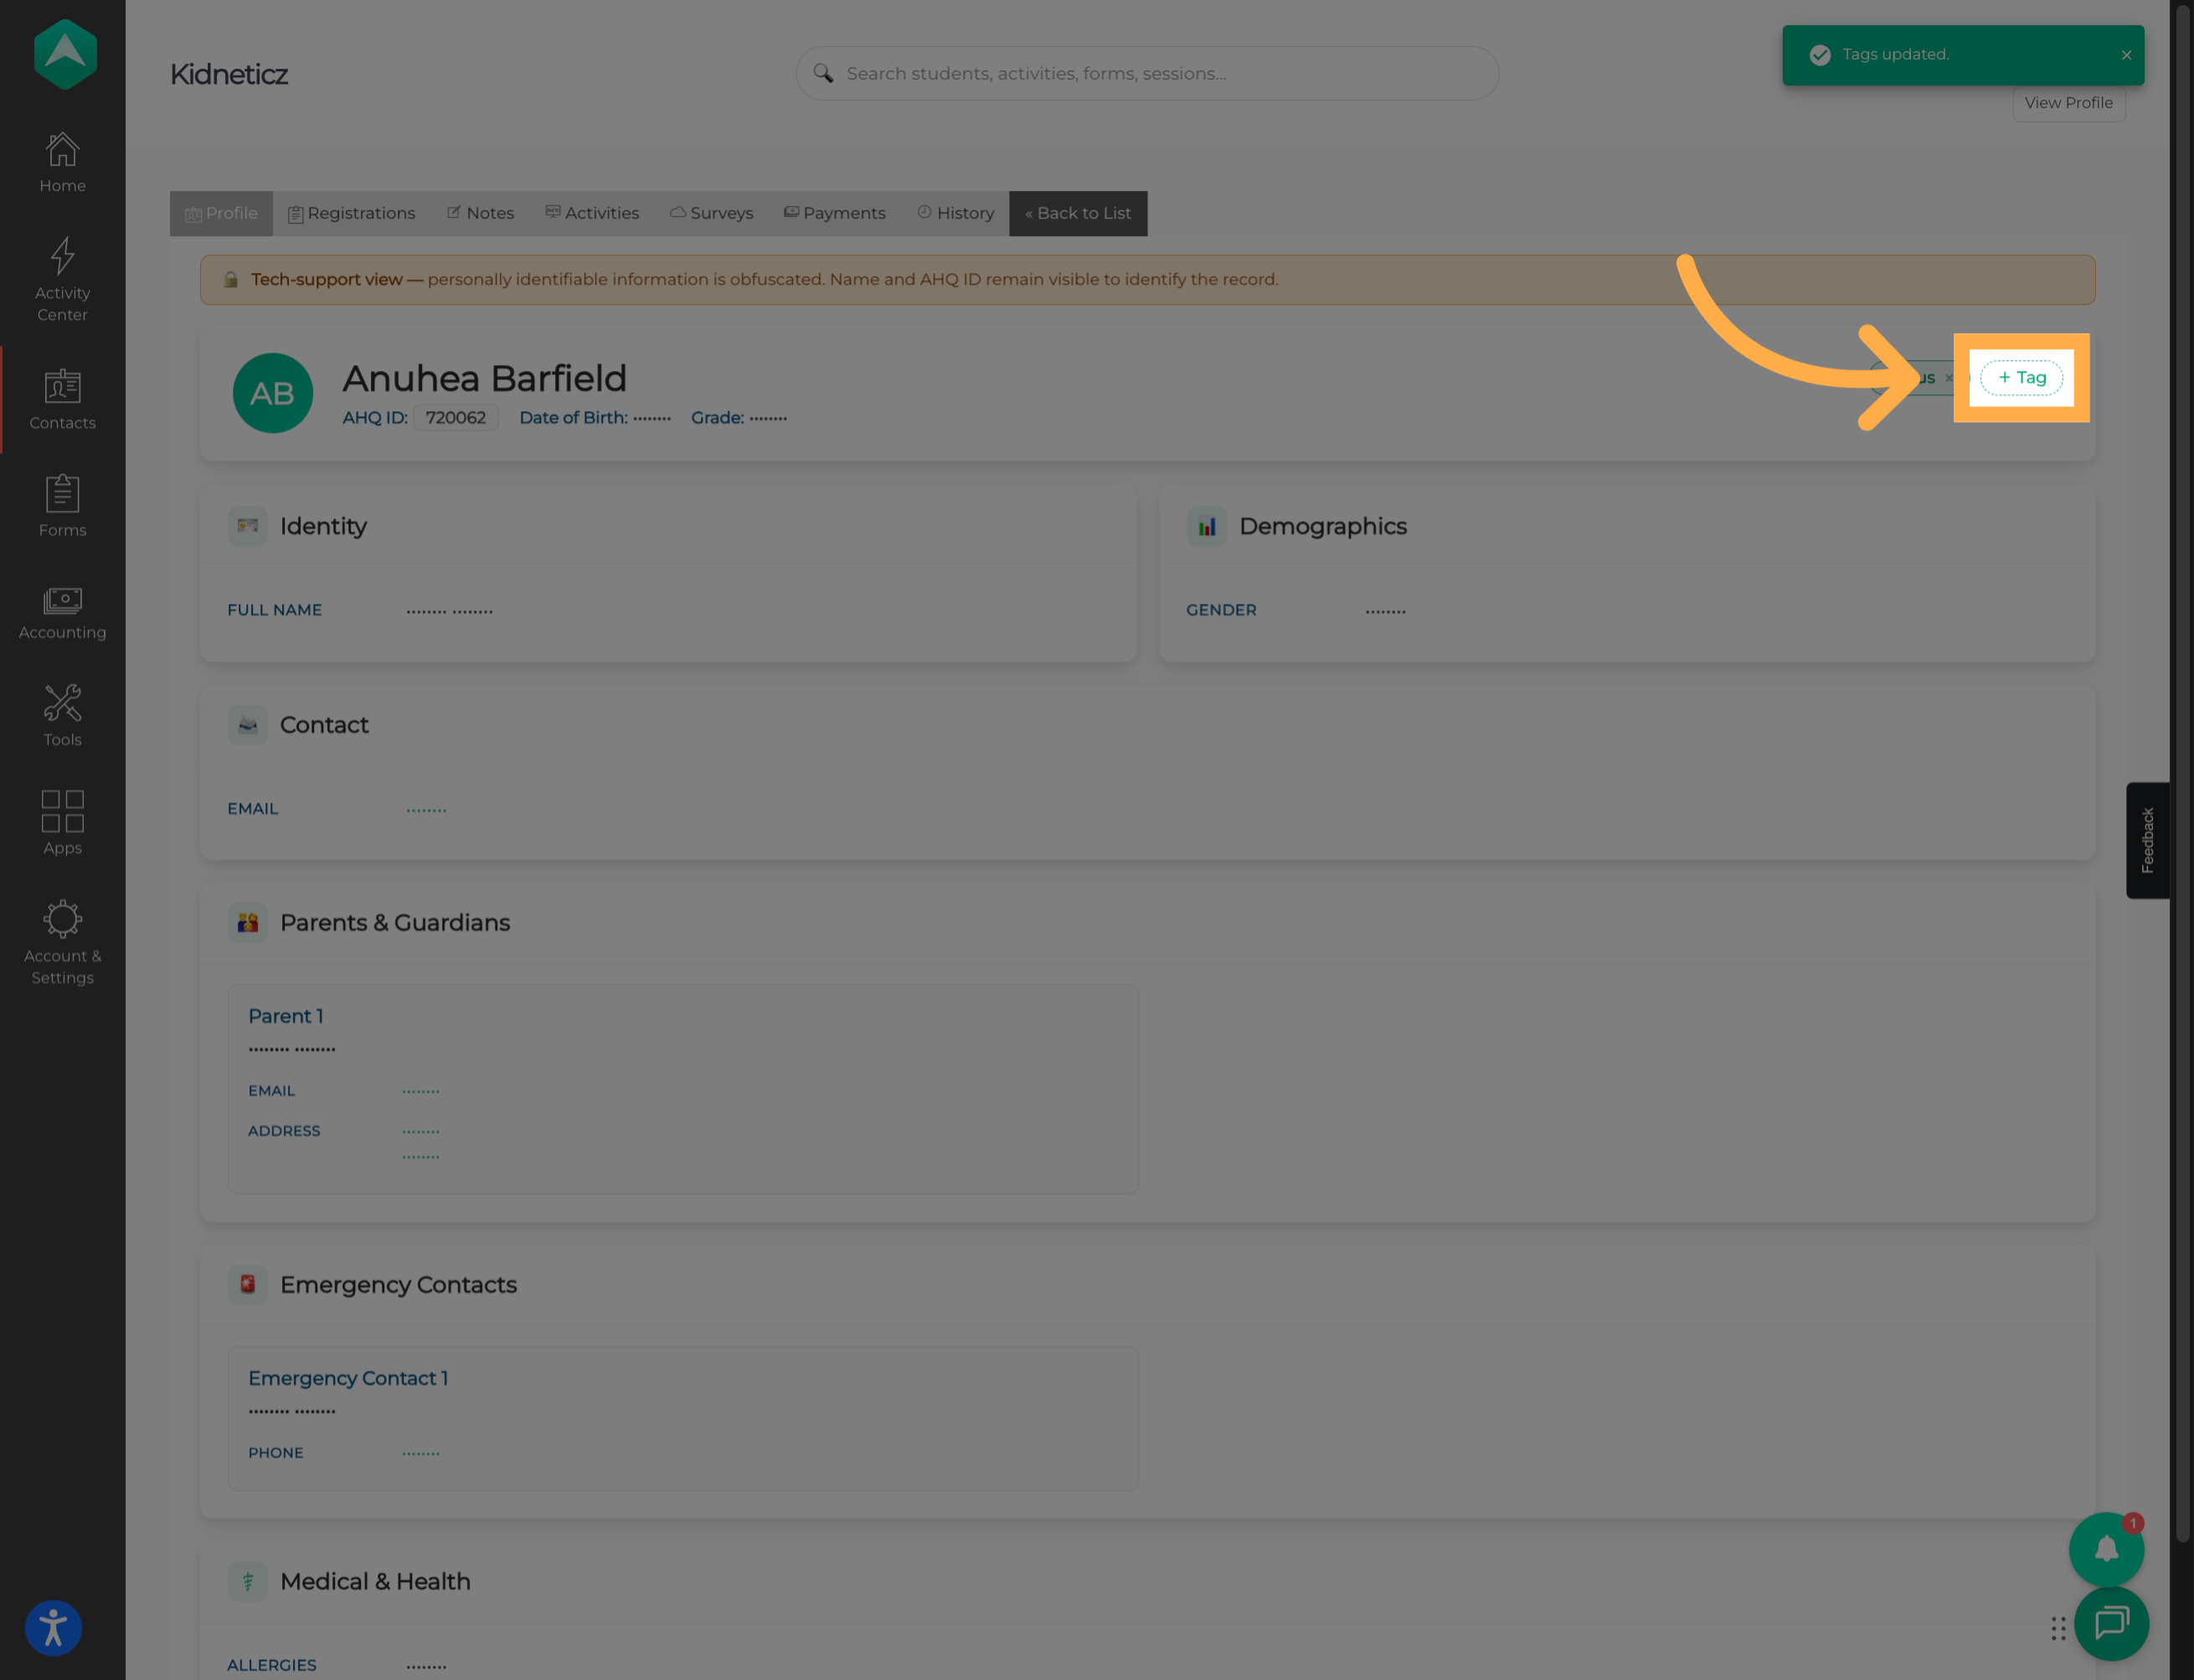
💡 Tip: A student can have multiple tags, allowing you to categorize their record in different ways as needed by your organization.
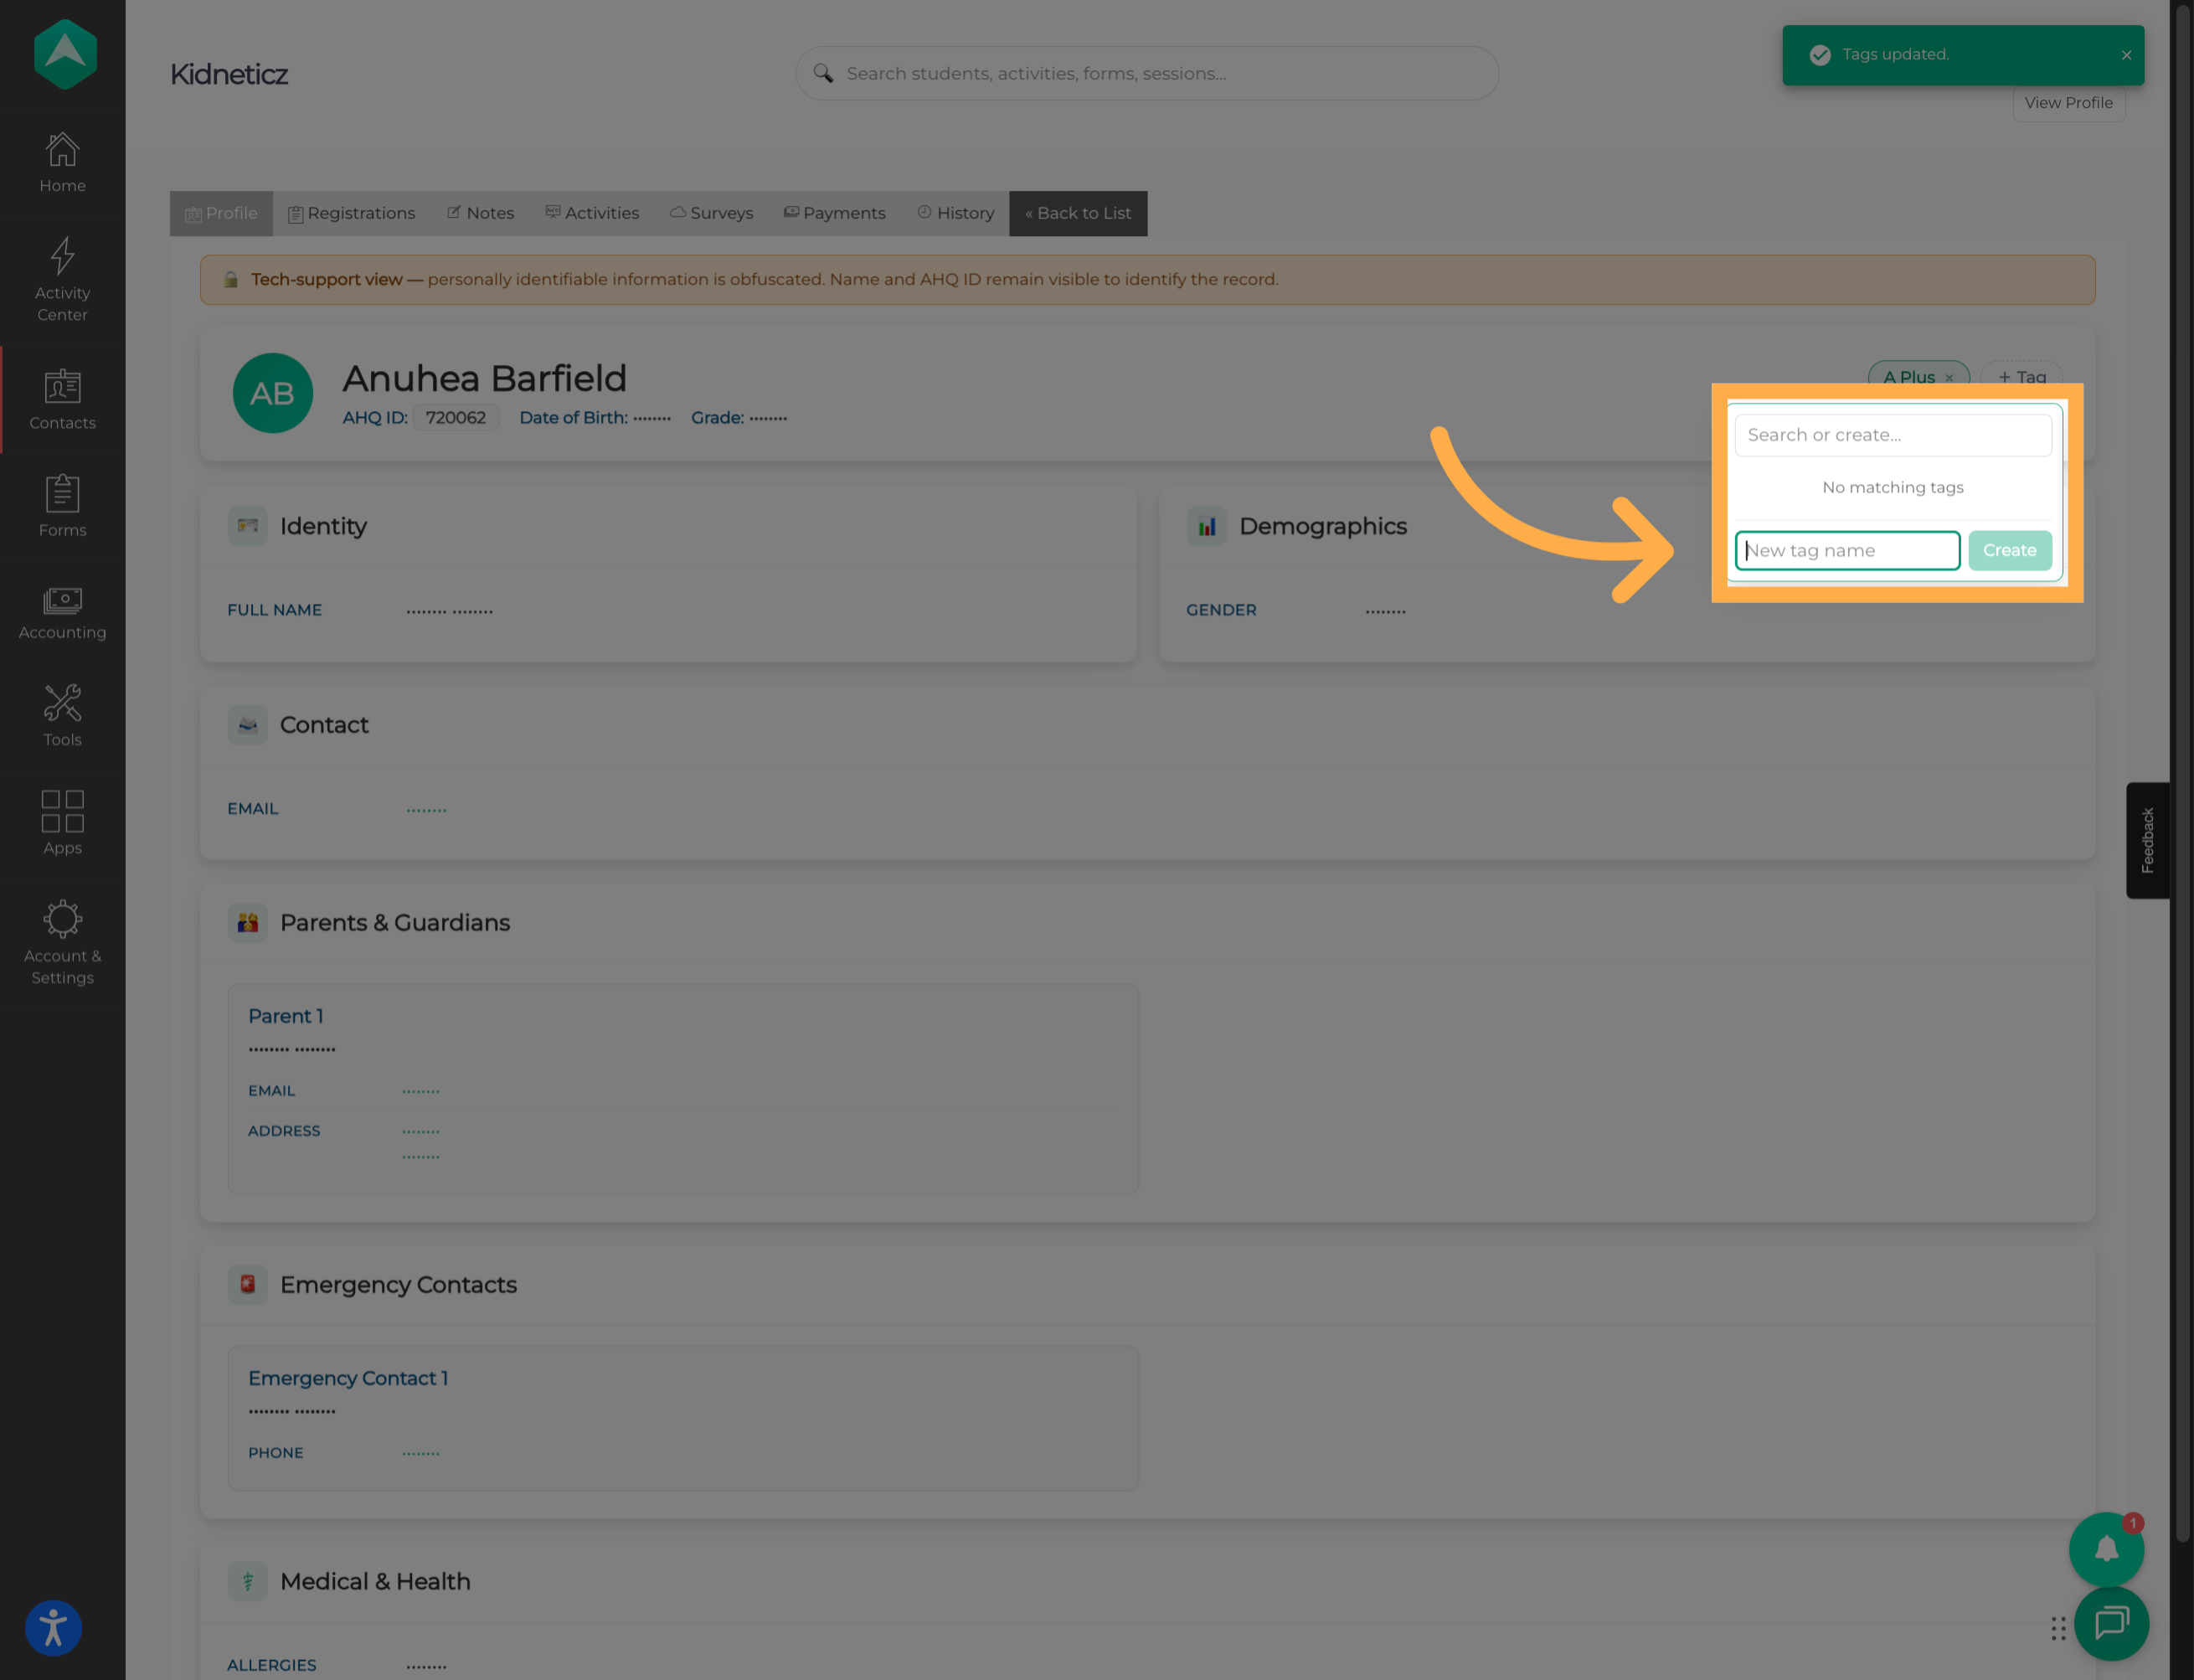
8. Start a New Tag Entry
Search for another existing tag or select the option to create a new one.
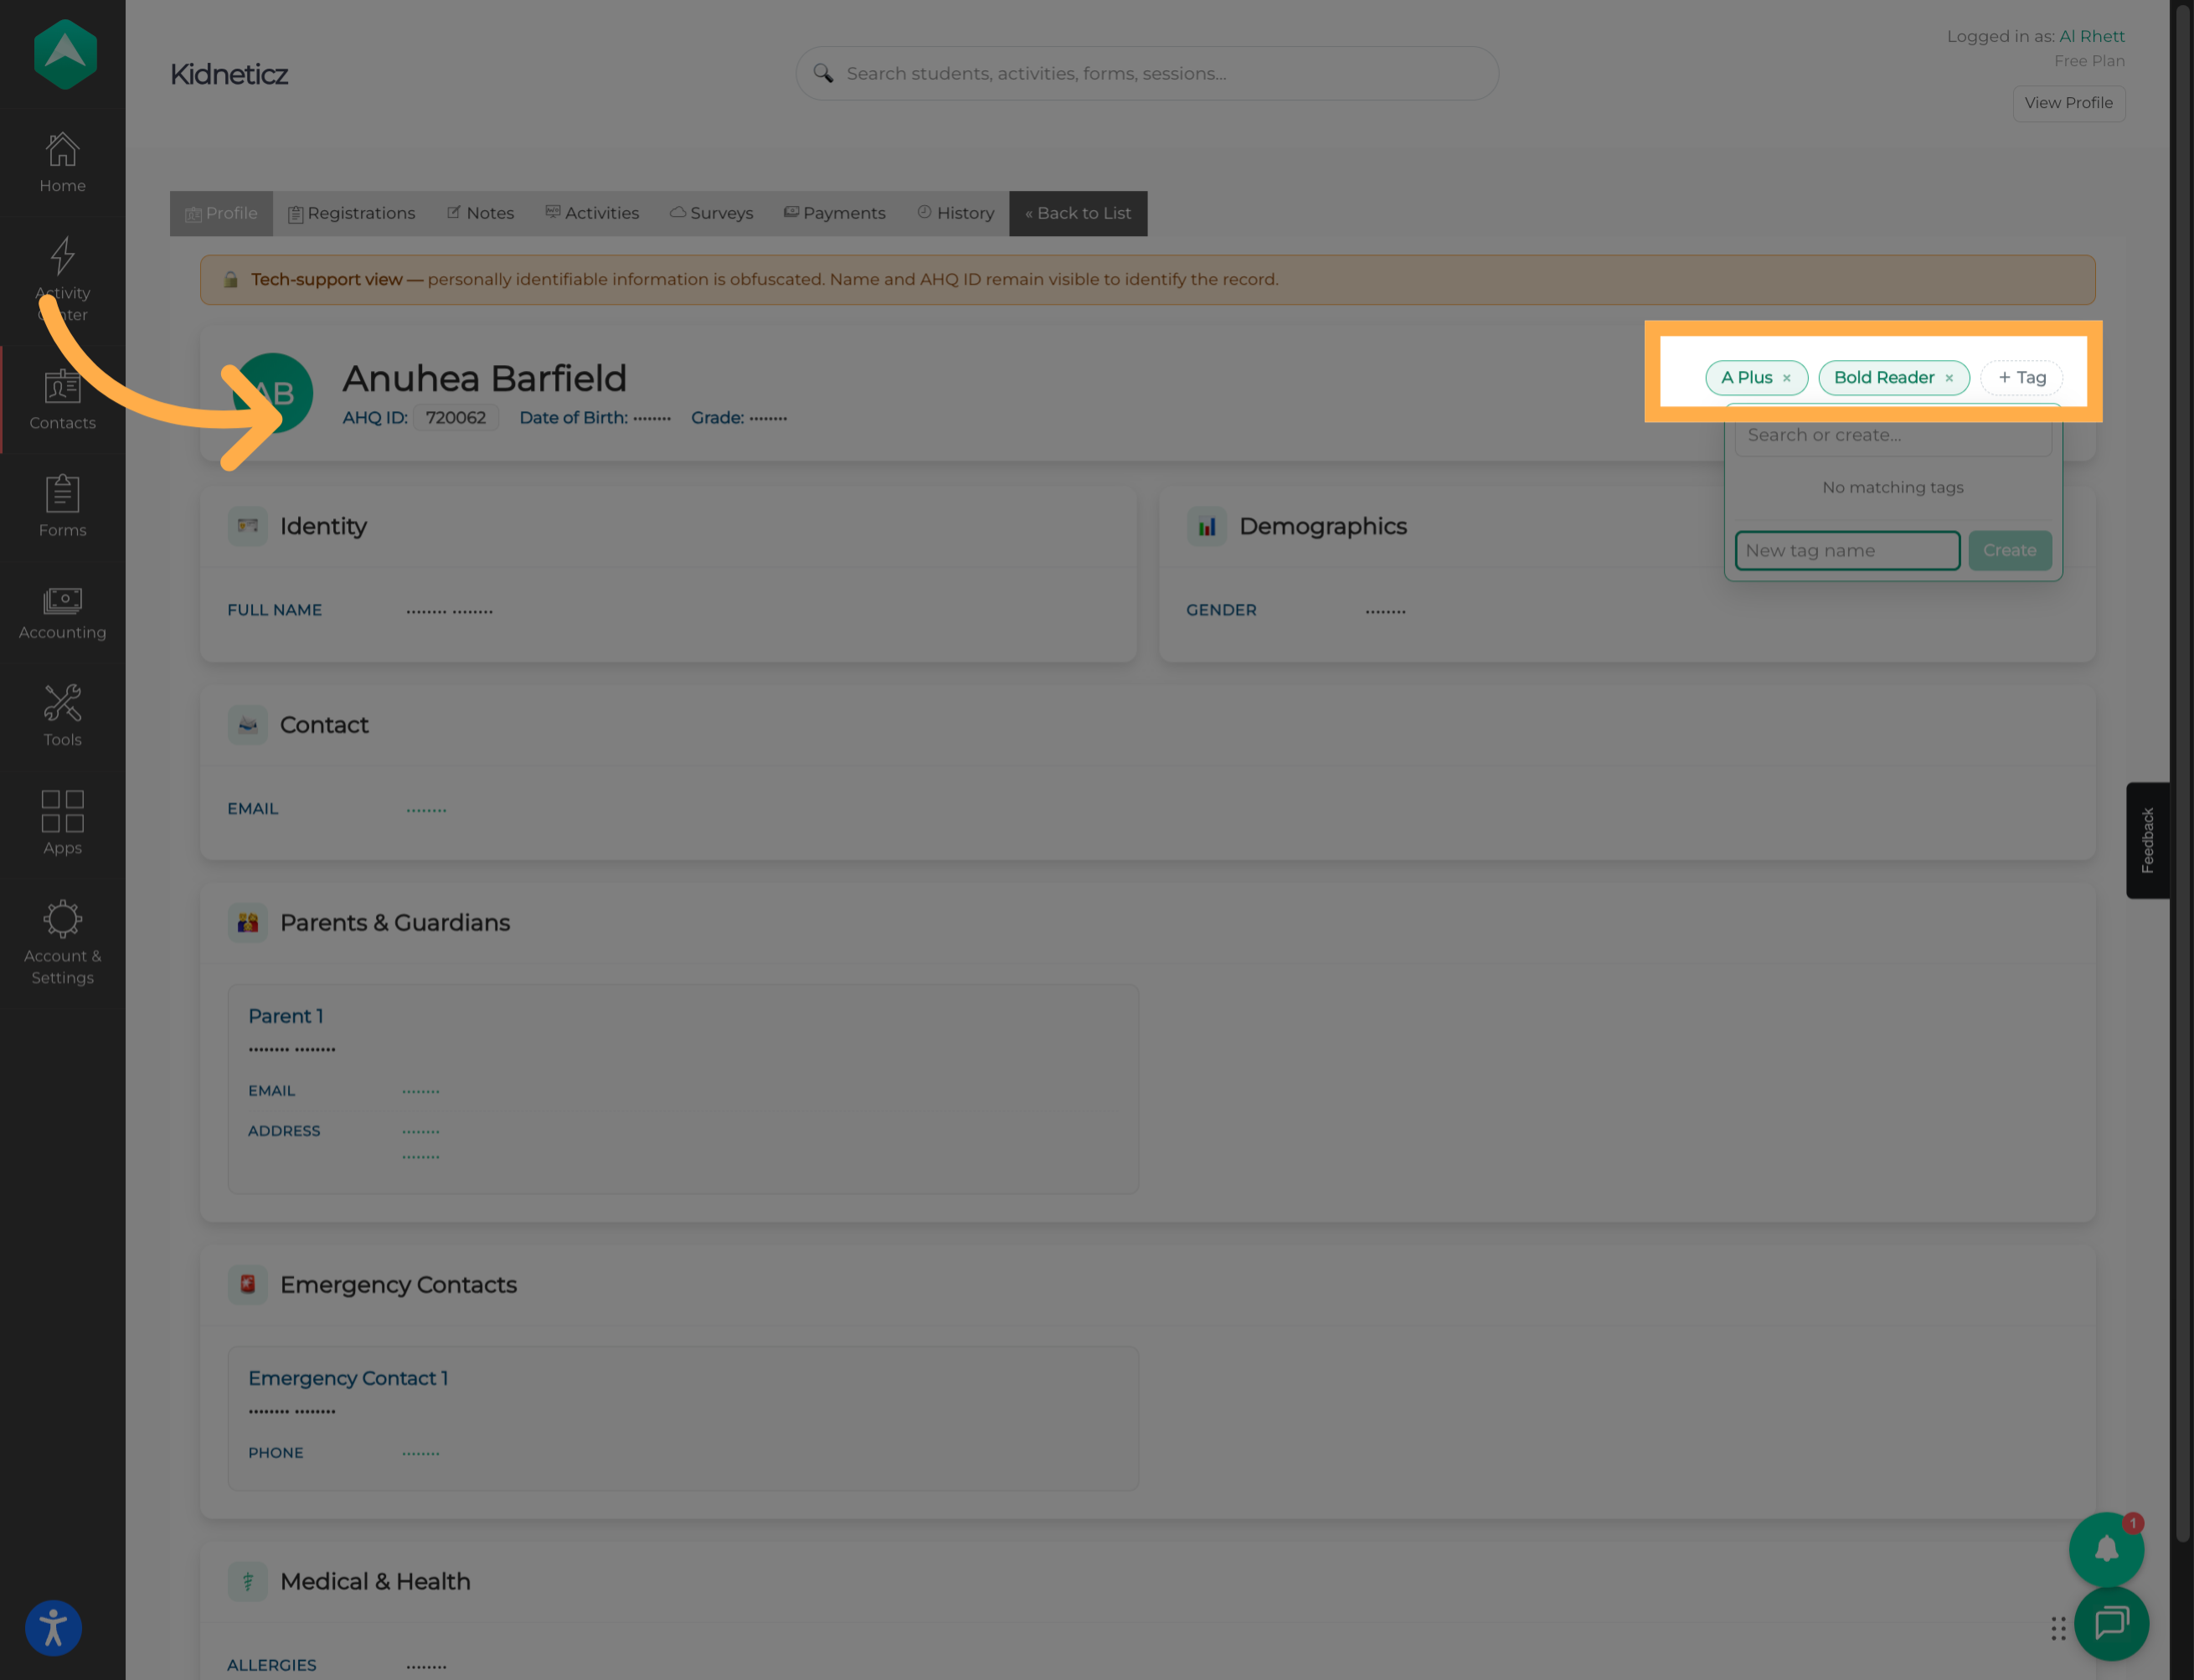
9. View Tags in Student Information
Once tags have been assigned, they’ll appear within the student’s information for easy reference.
This makes it easier for staff to identify the tags associated with the student while reviewing their record.
Managing Student Tags
In addition to creating and assigning tags from individual student profiles, you can use the Tag Manager to manage the student tags available across your organization.
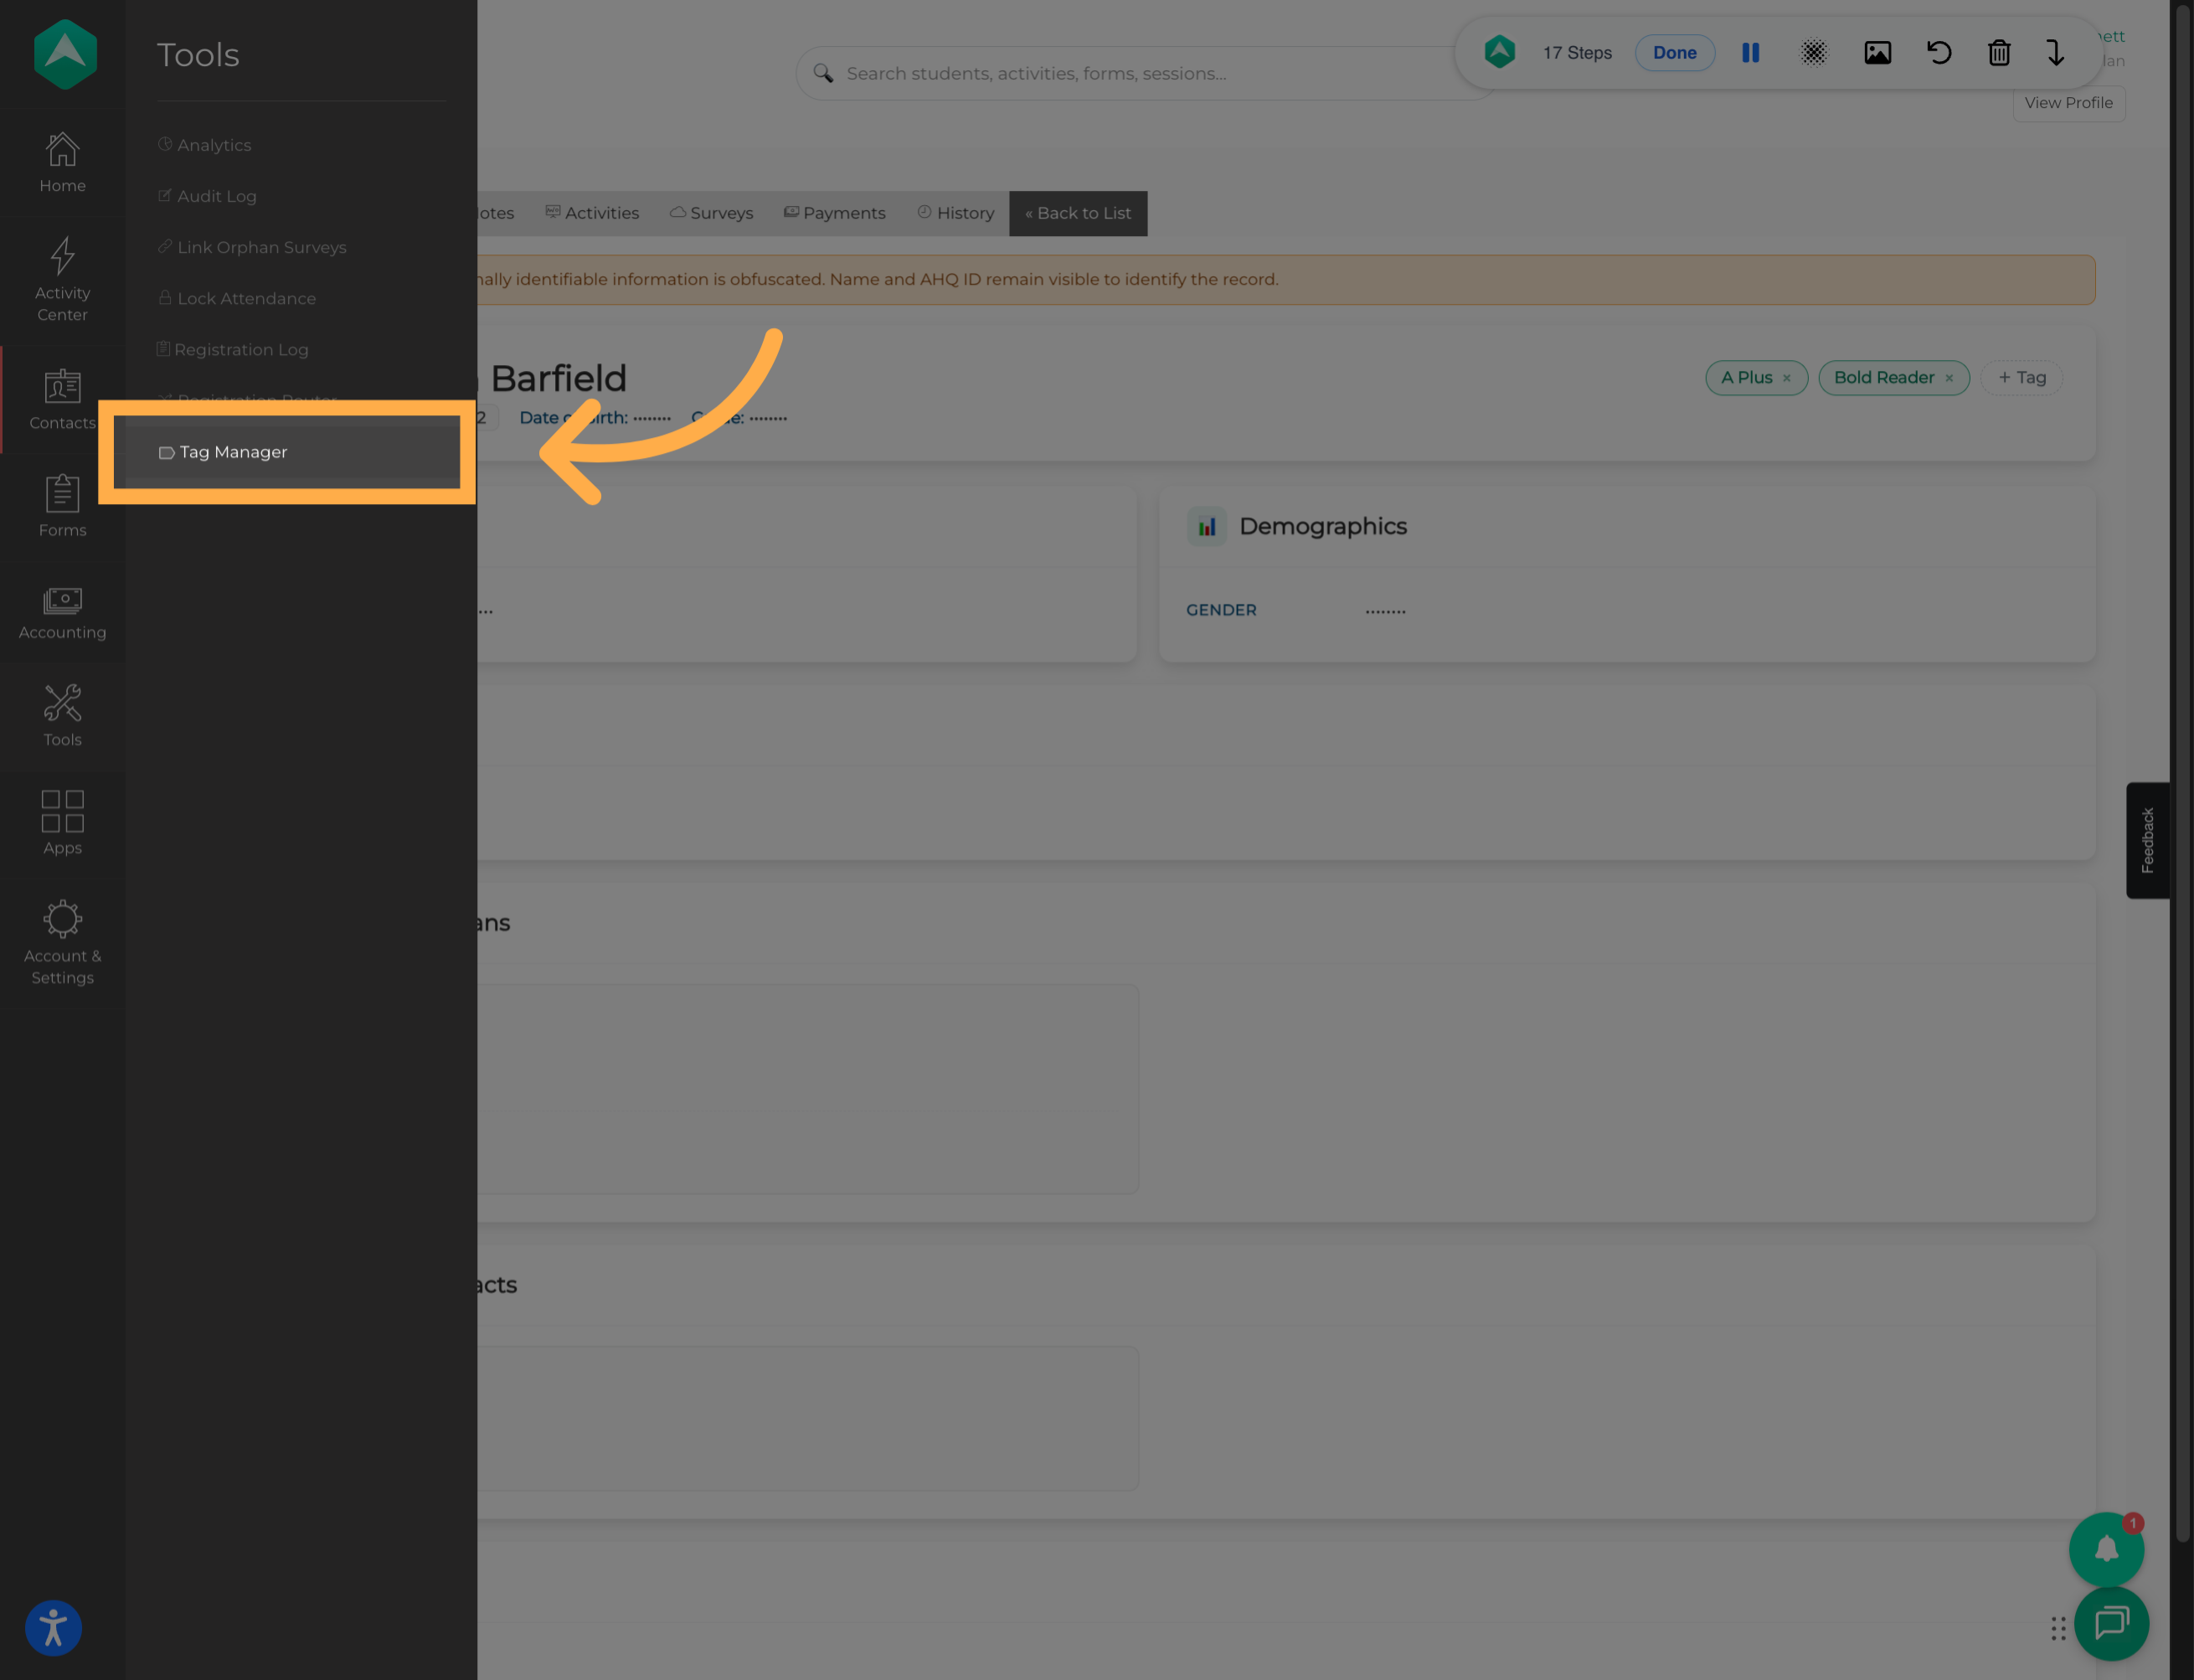
10. Open Tag Manager
Navigate to the Tag Manager to view and manage tags within AfterSchool HQ.
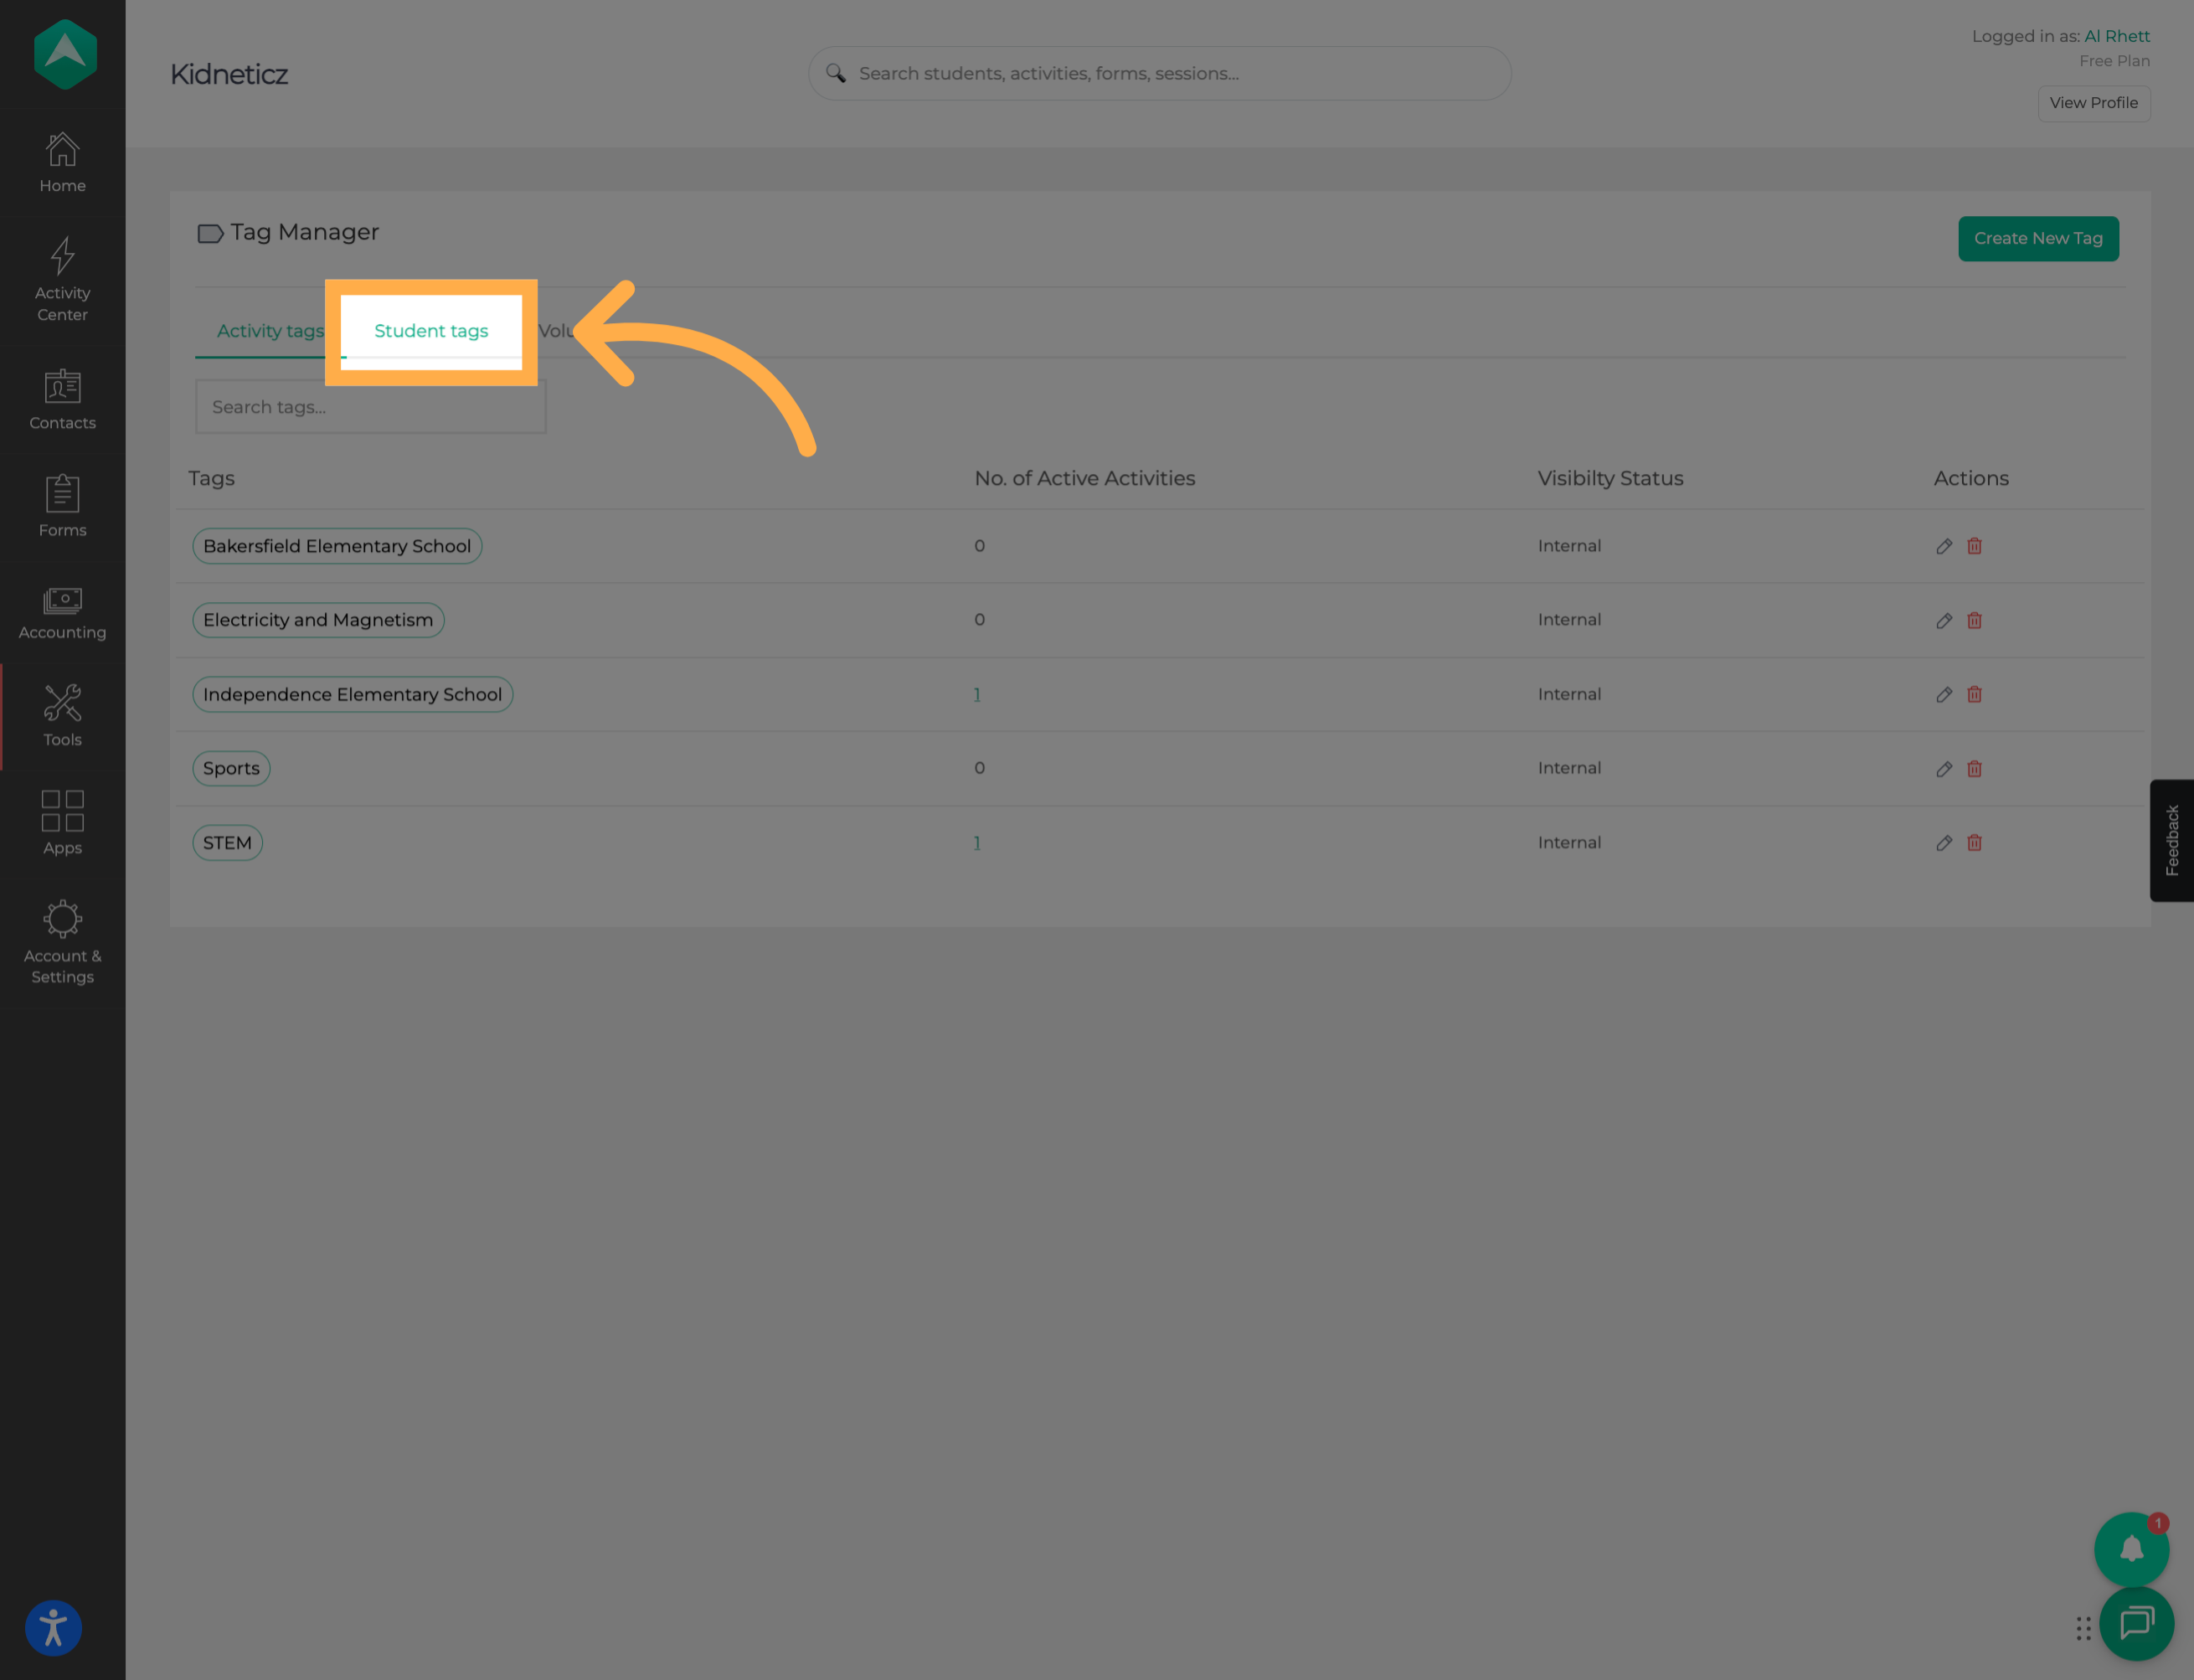
11. Select Student Tags
Select “Student Tags” to view the tags available for student profiles.
From here, you can review and manage your organization’s existing student tags.
12. View a Specific Tag
Select the tag you want to review or manage.
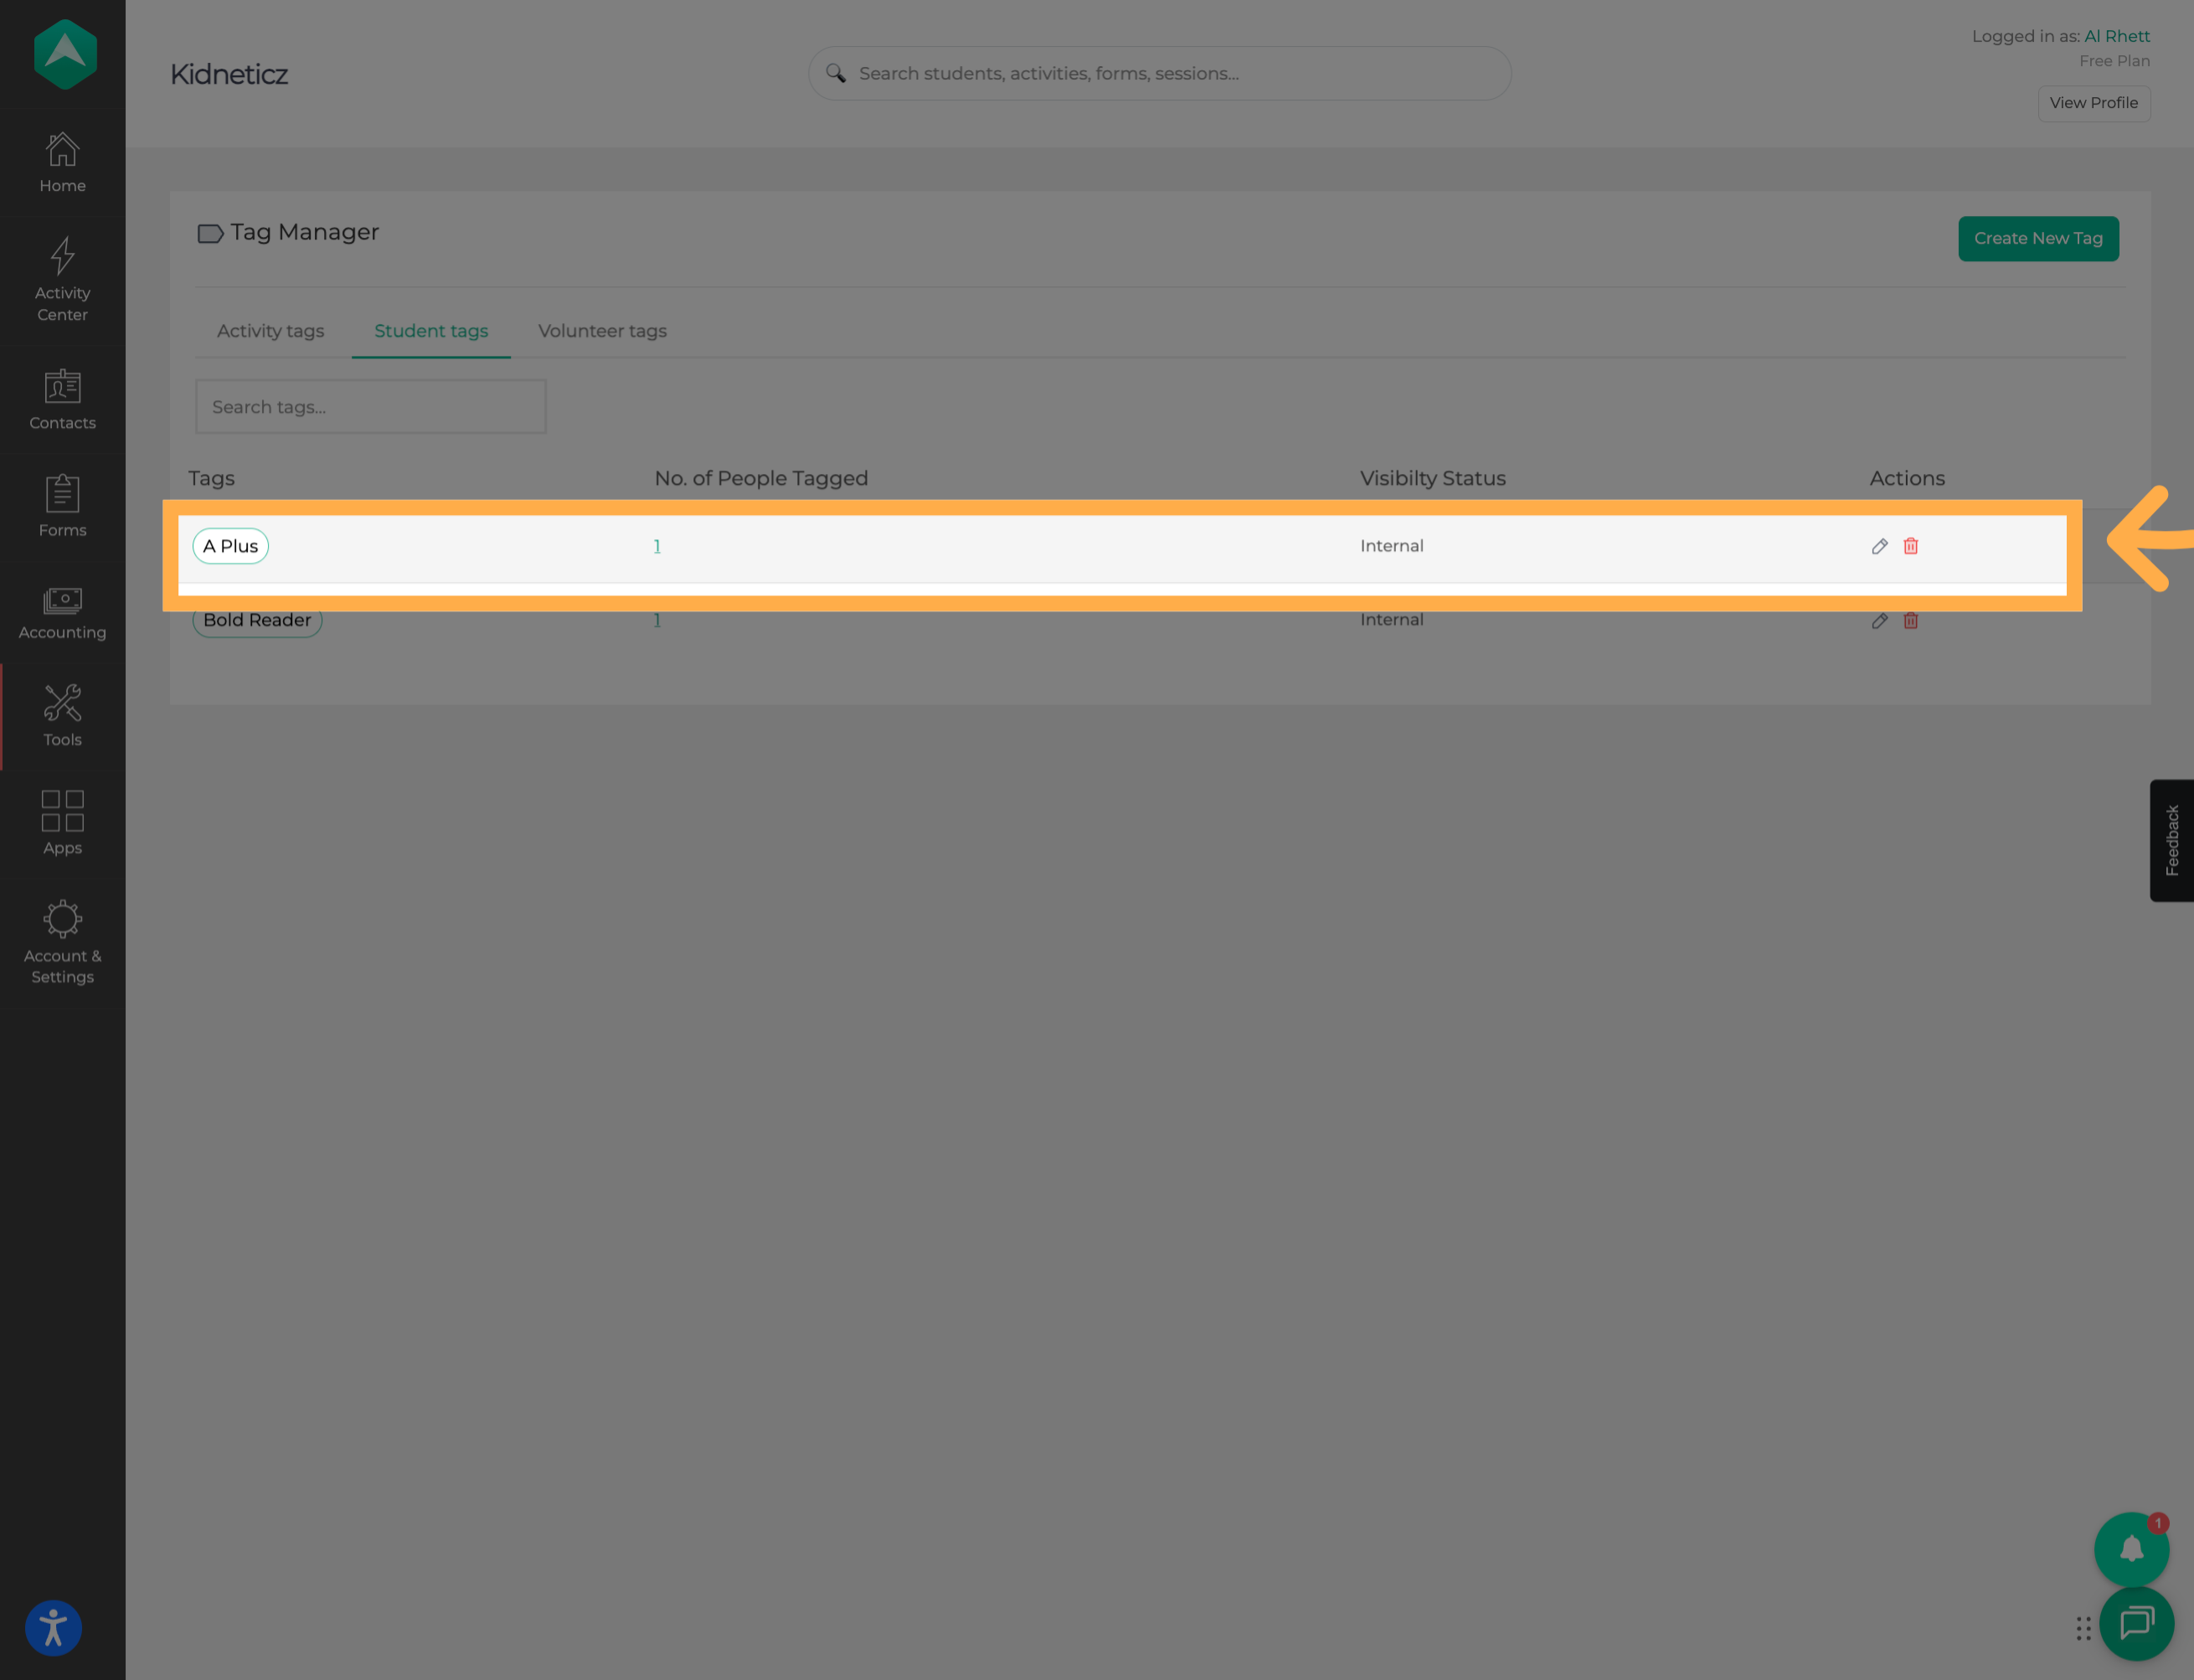
13. Access Tag Options
Review the available options for the selected tag. From here, you can choose to edit or delete the tag as needed.
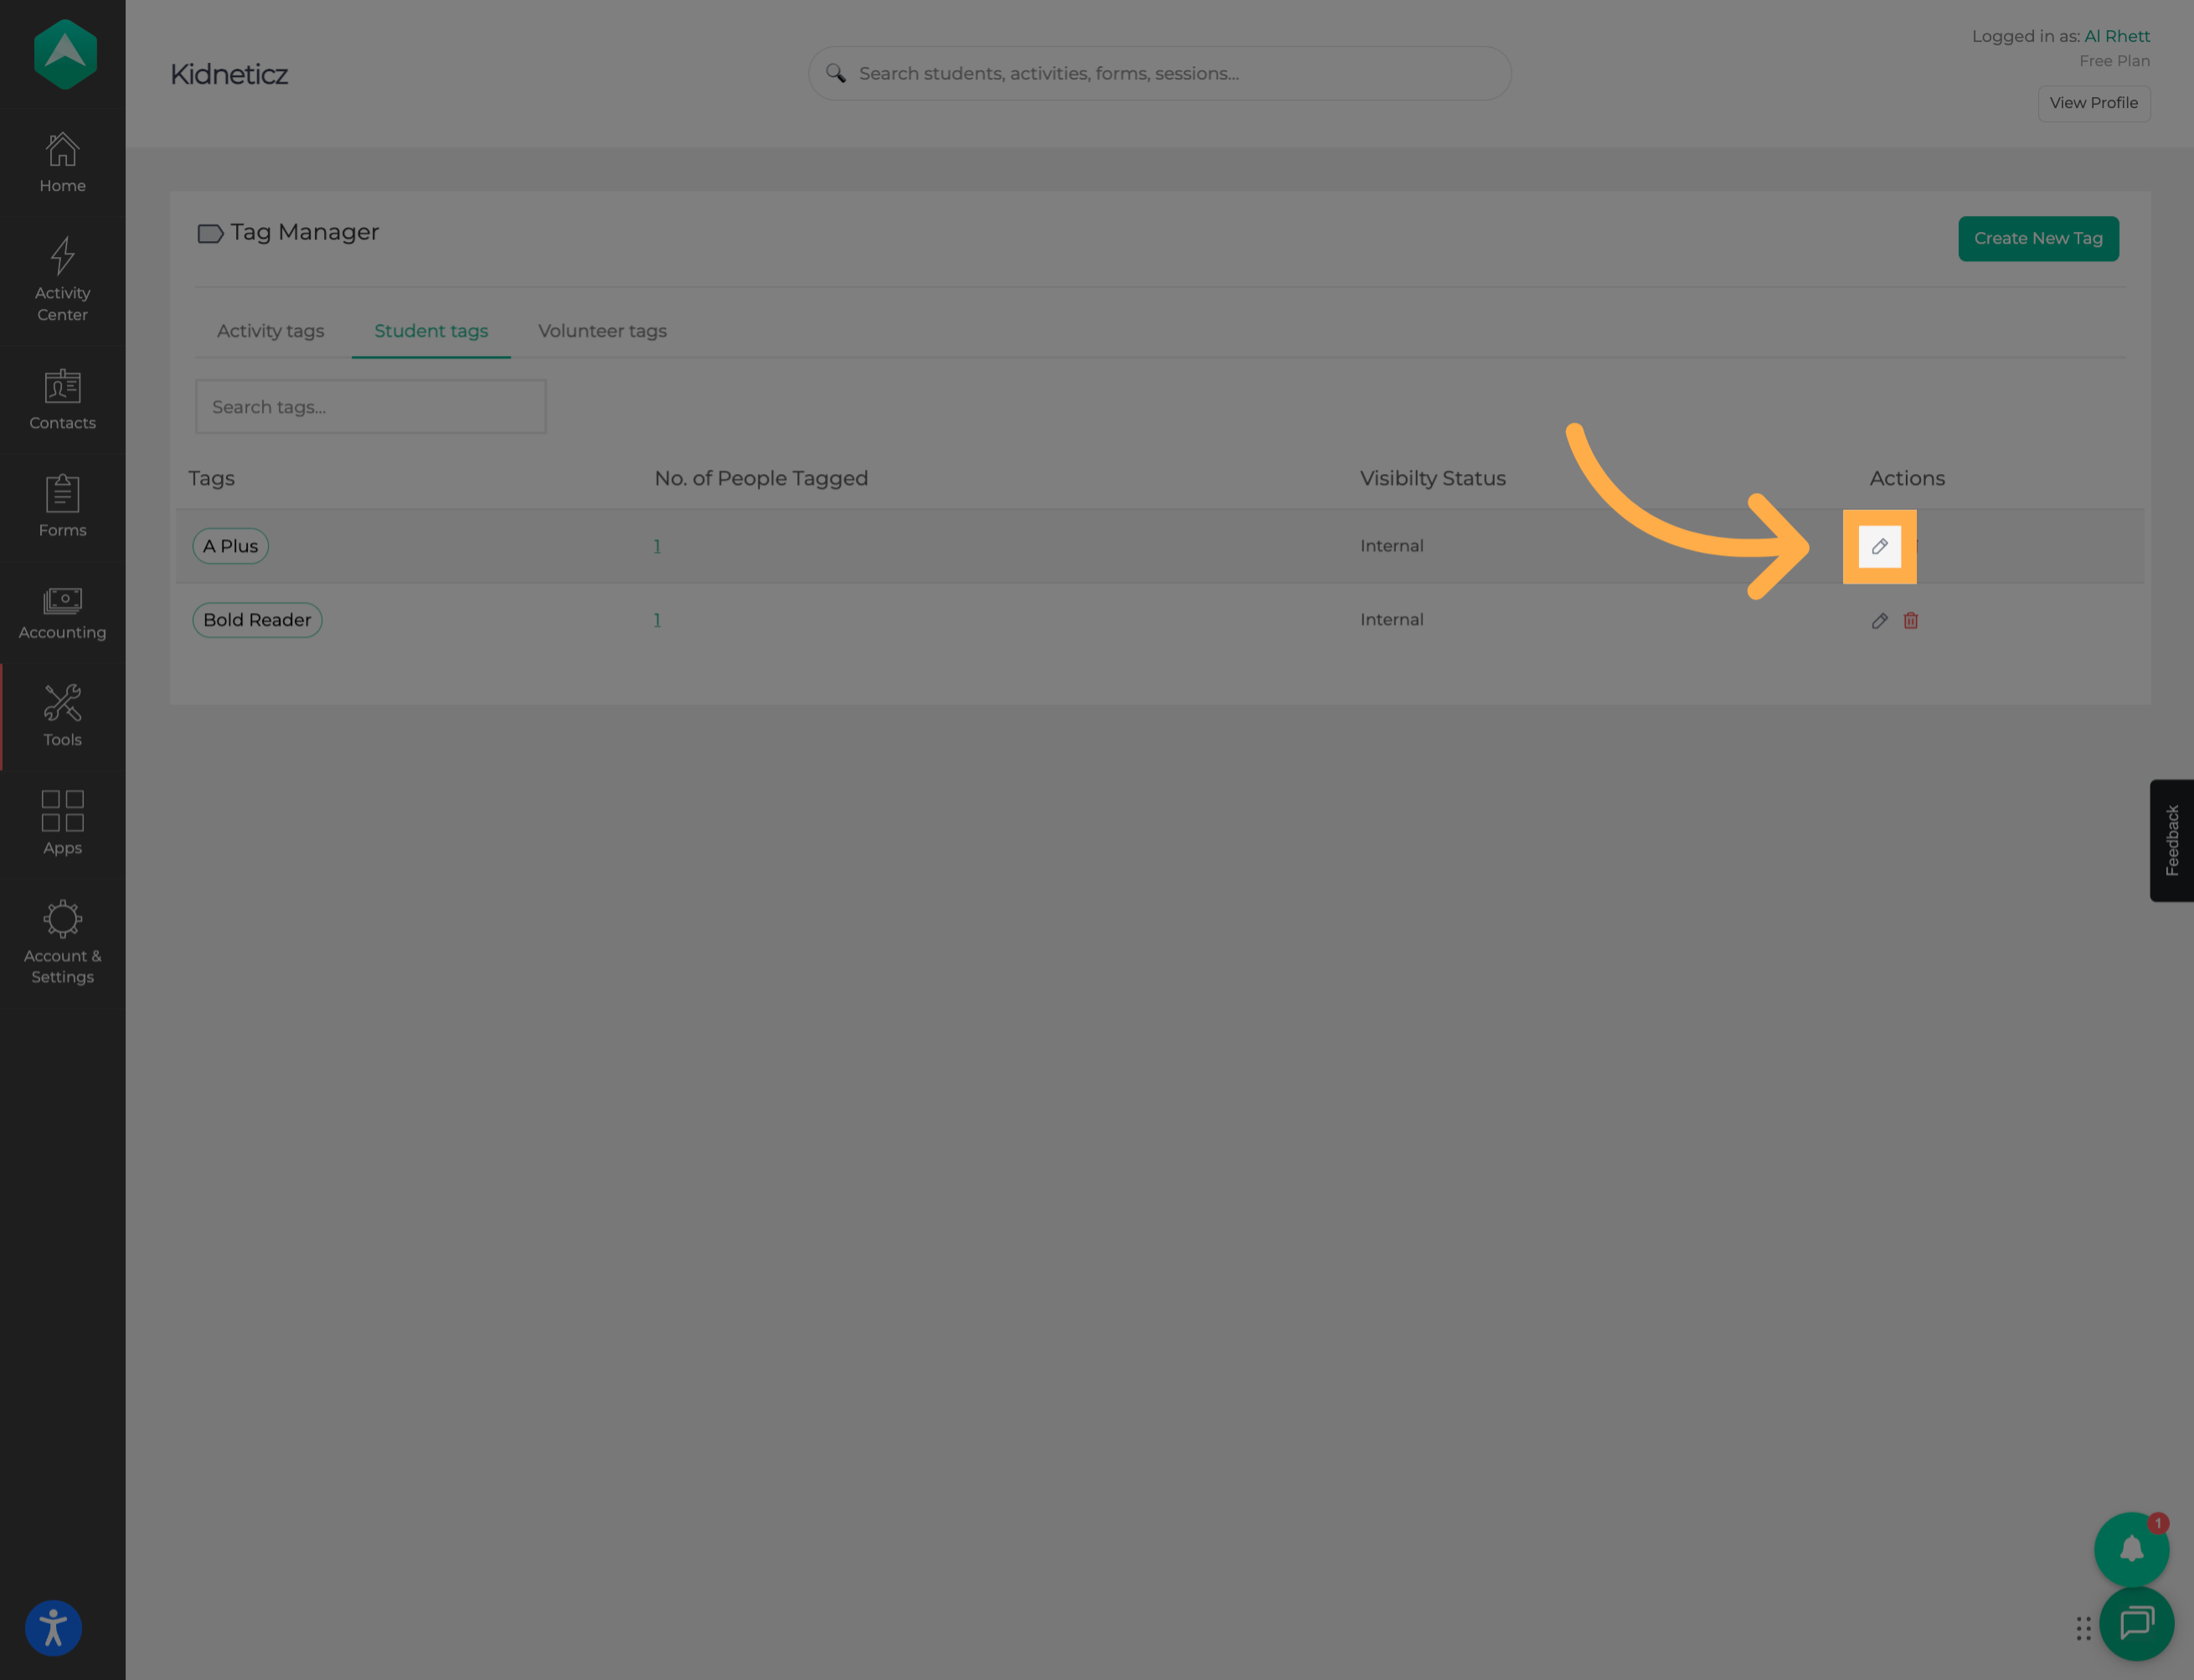
💡 Tip: Before making changes to an existing tag, confirm that you’ve selected the correct one.
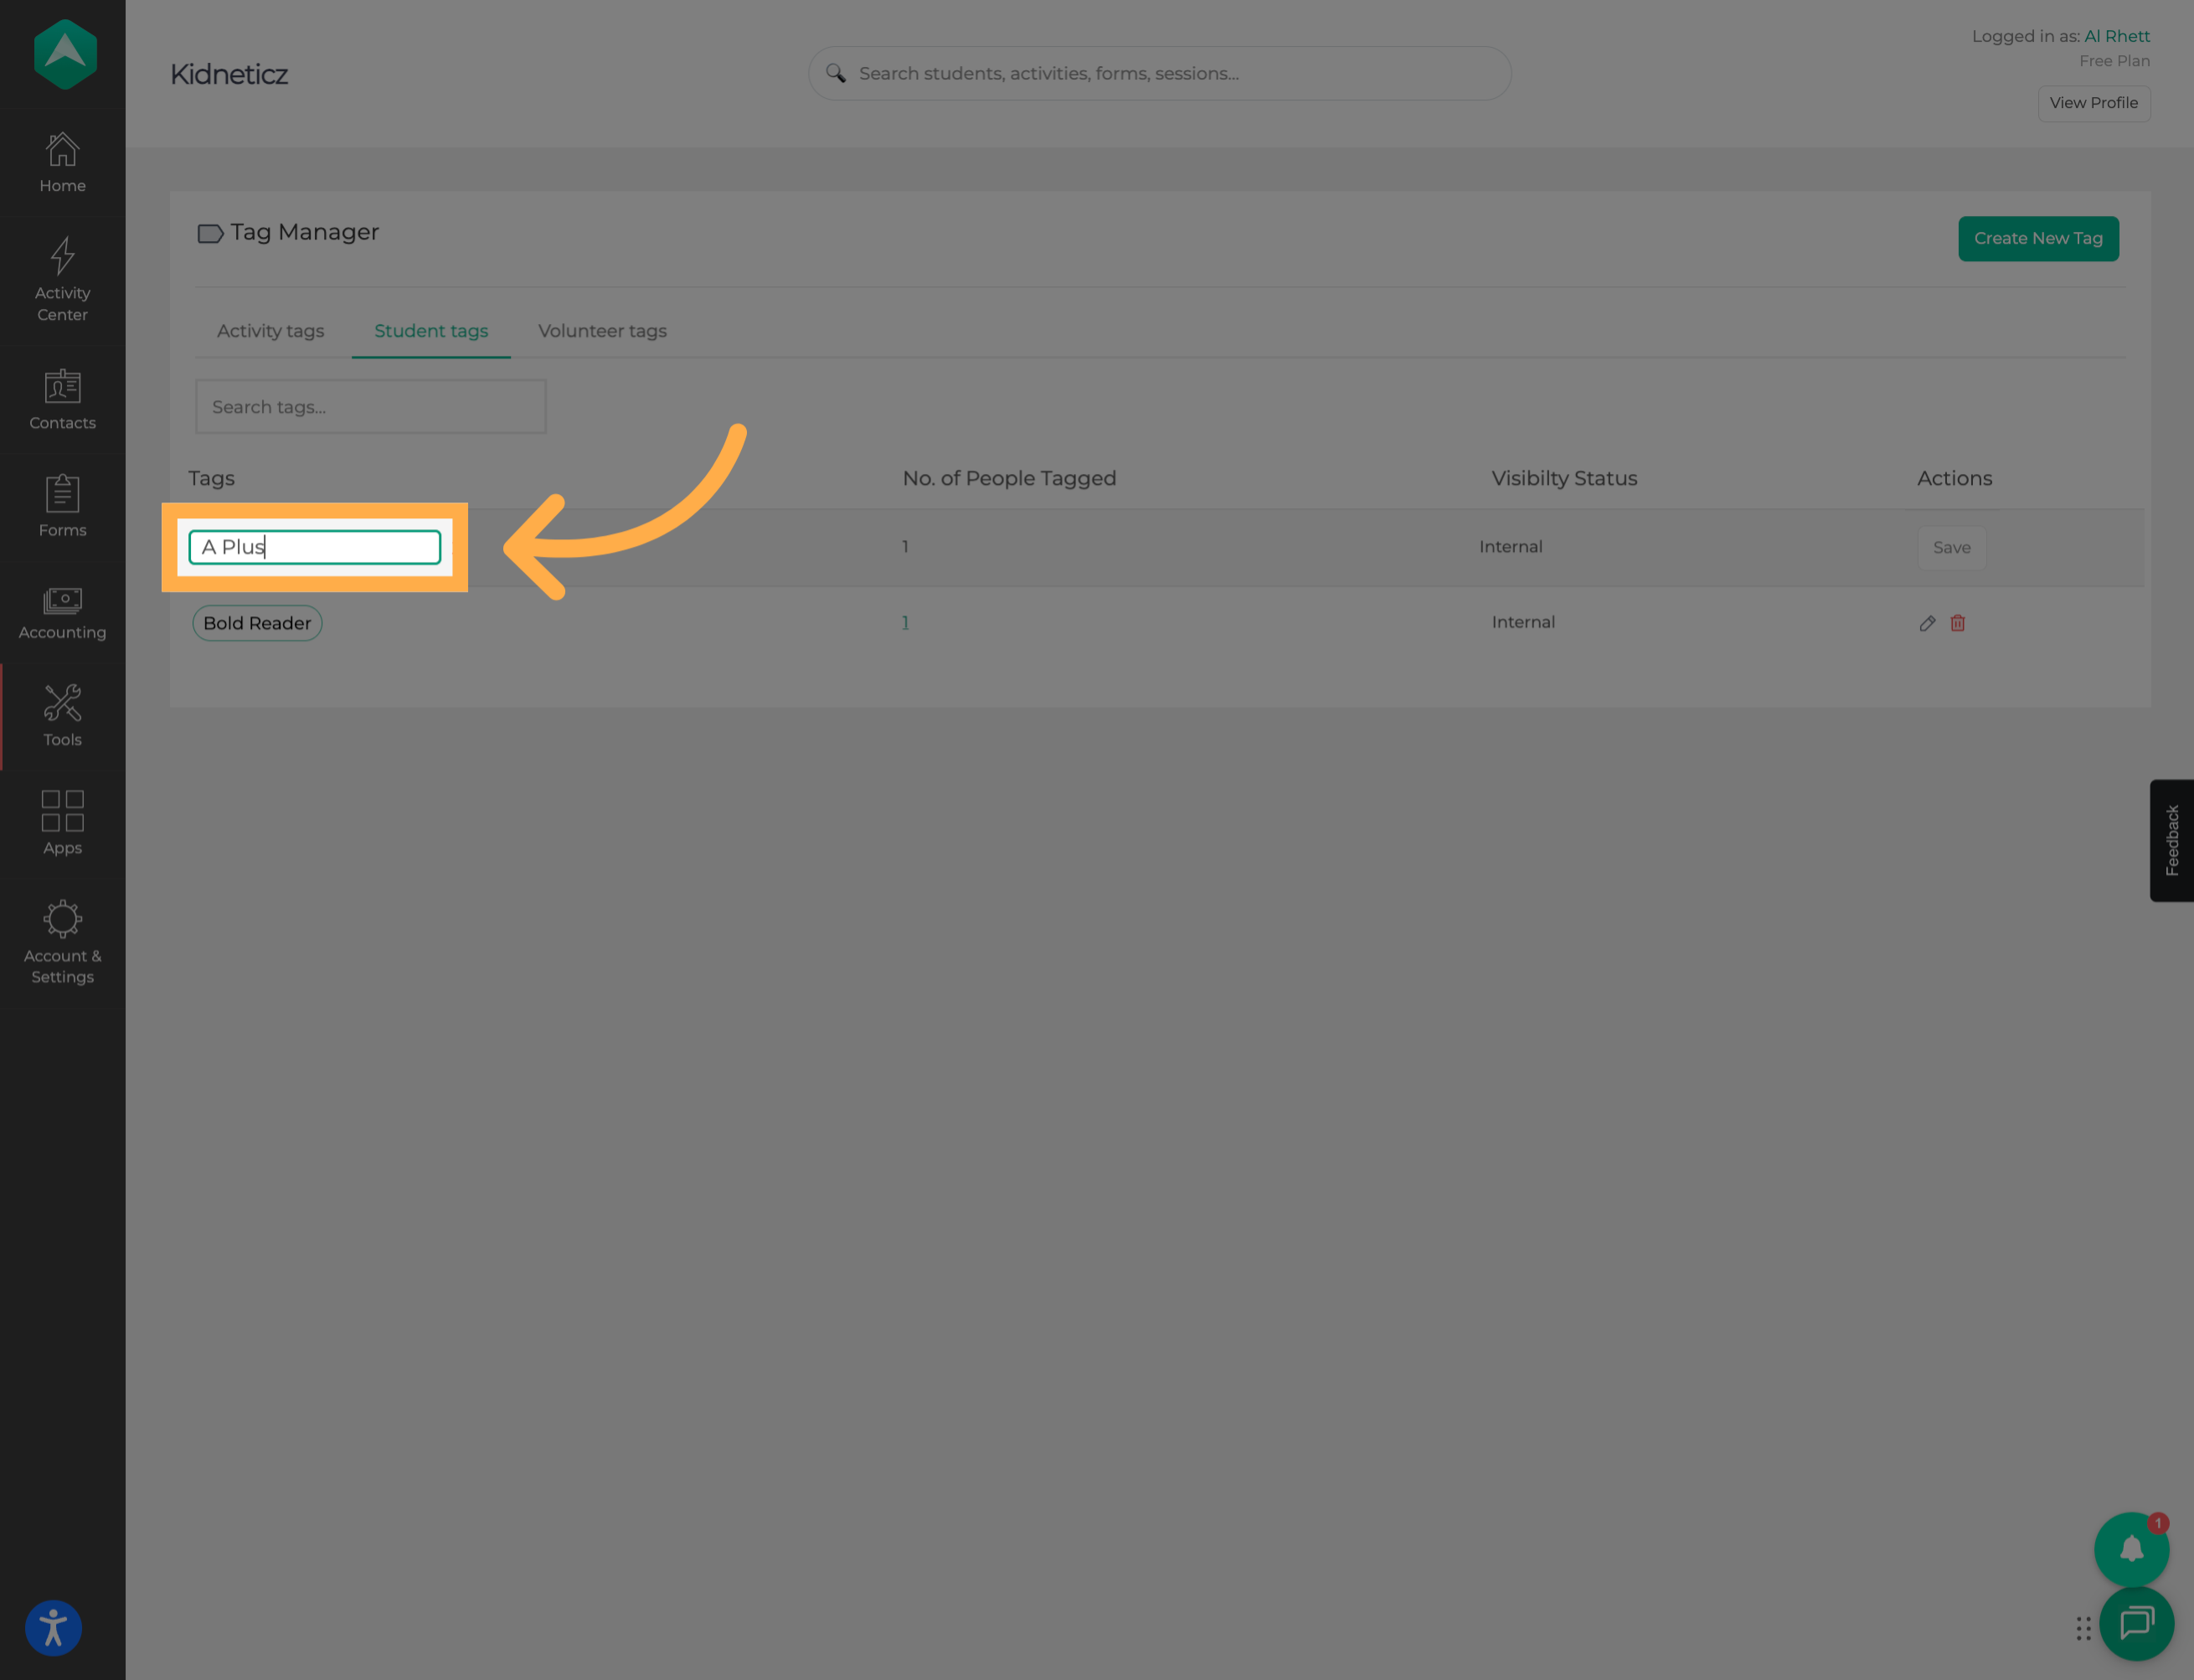
14. Edit a Tag
Select the “Edit” option when you need to rename an existing tag. Update the tag name as needed and save your changes.
15. Create a New Tag from Tag Manager
You can also create student tags directly from the Tag Manager, without first opening an individual student profile.
Select the option to create a new tag.
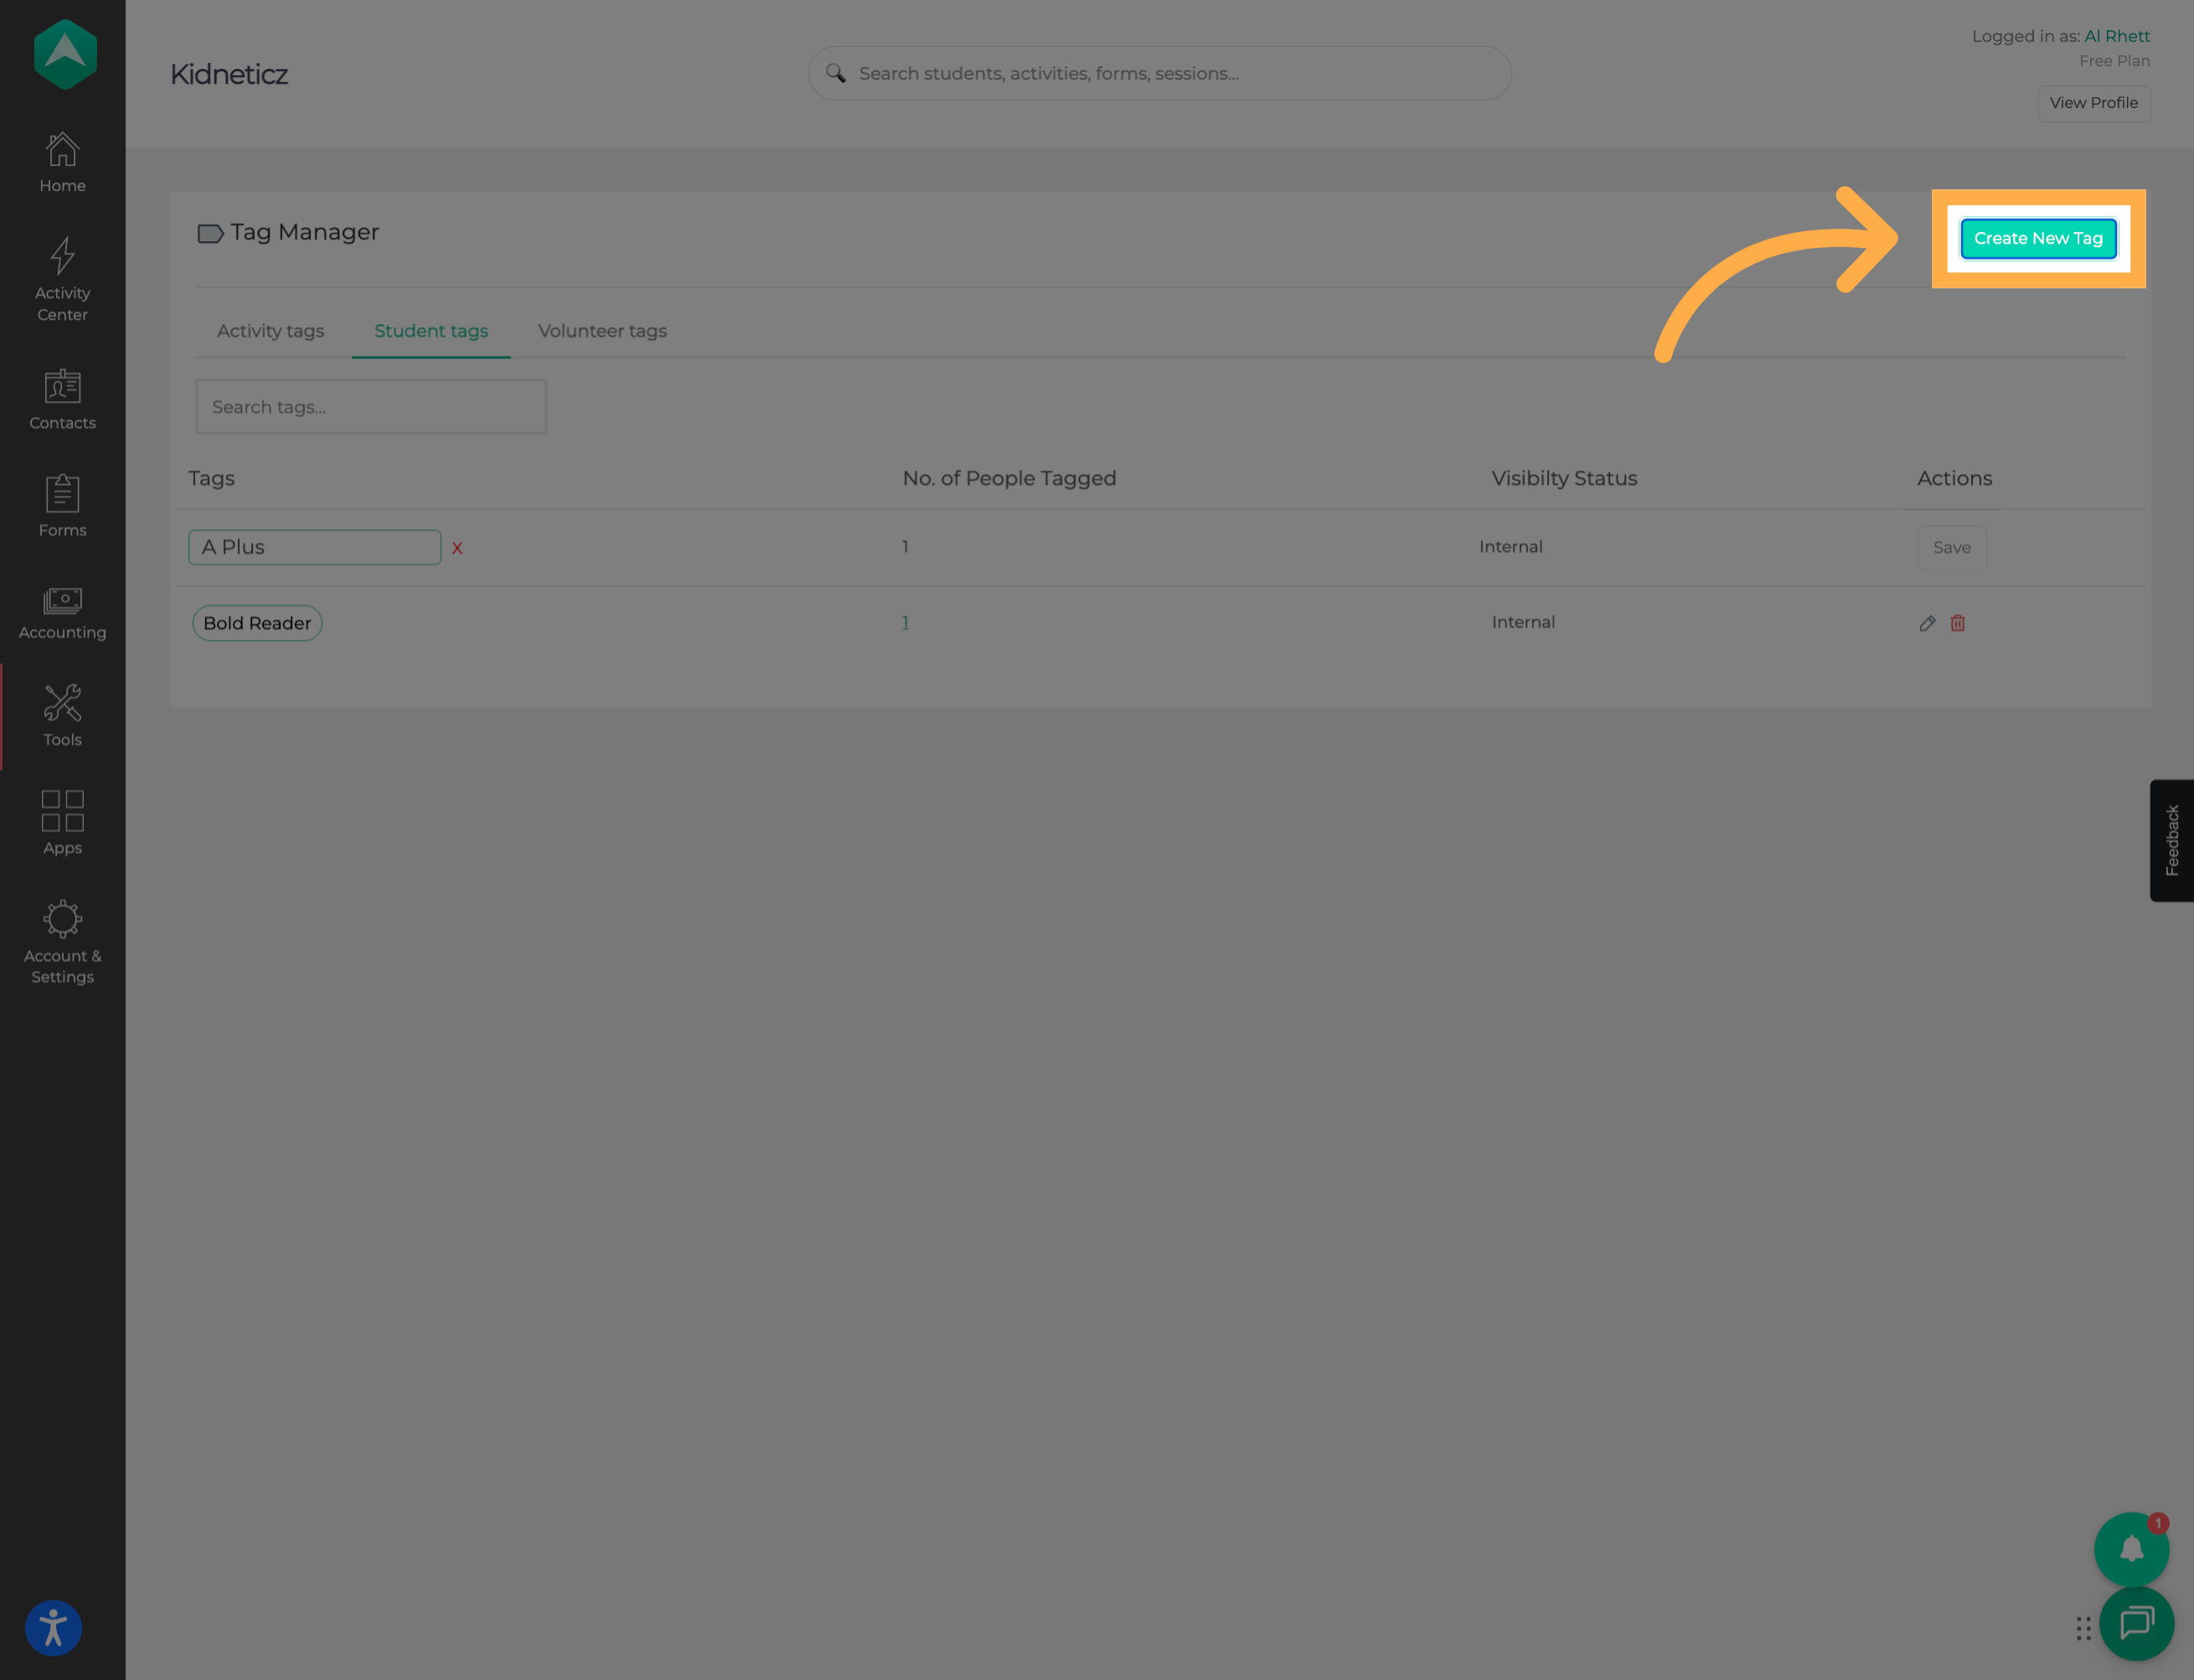
💡 Tip: Creating tags from Tag Manager can be helpful when preparing the tags your organization plans to use before assigning them to individual students.
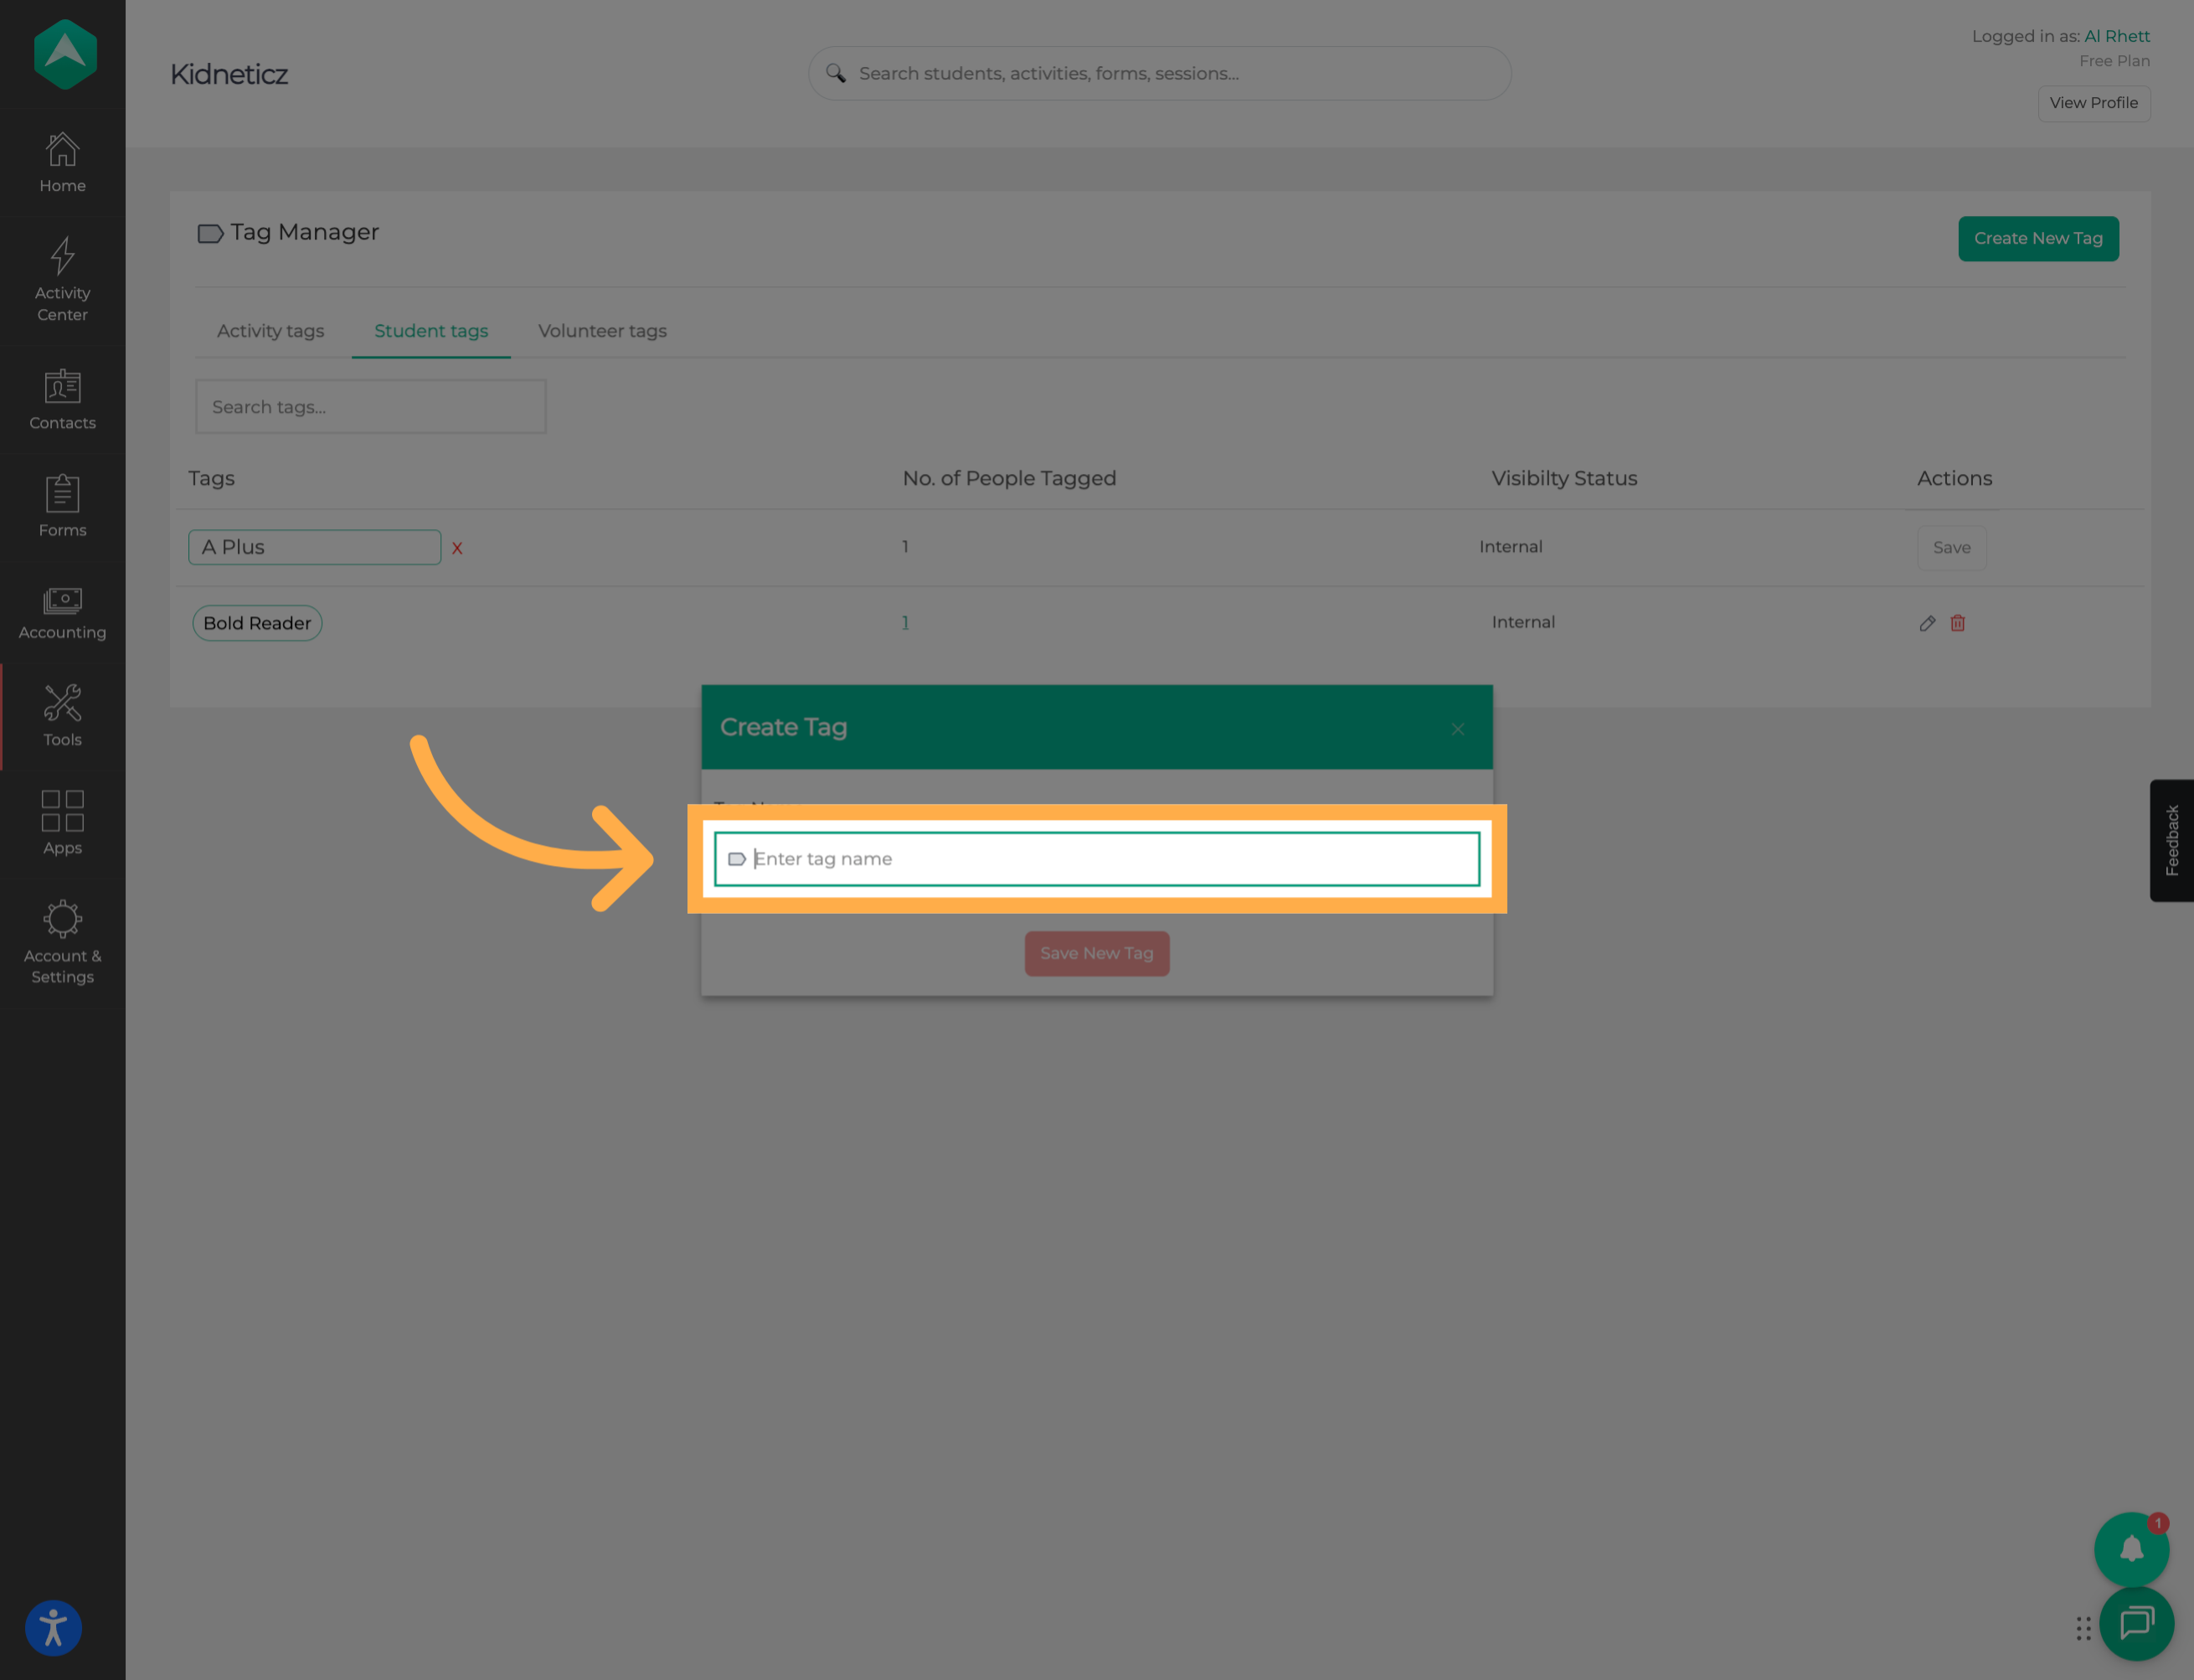
16. Enter the New Tag Name
Enter a name for the new tag. Choose a name that makes the tag easy for your team to recognize and use consistently.
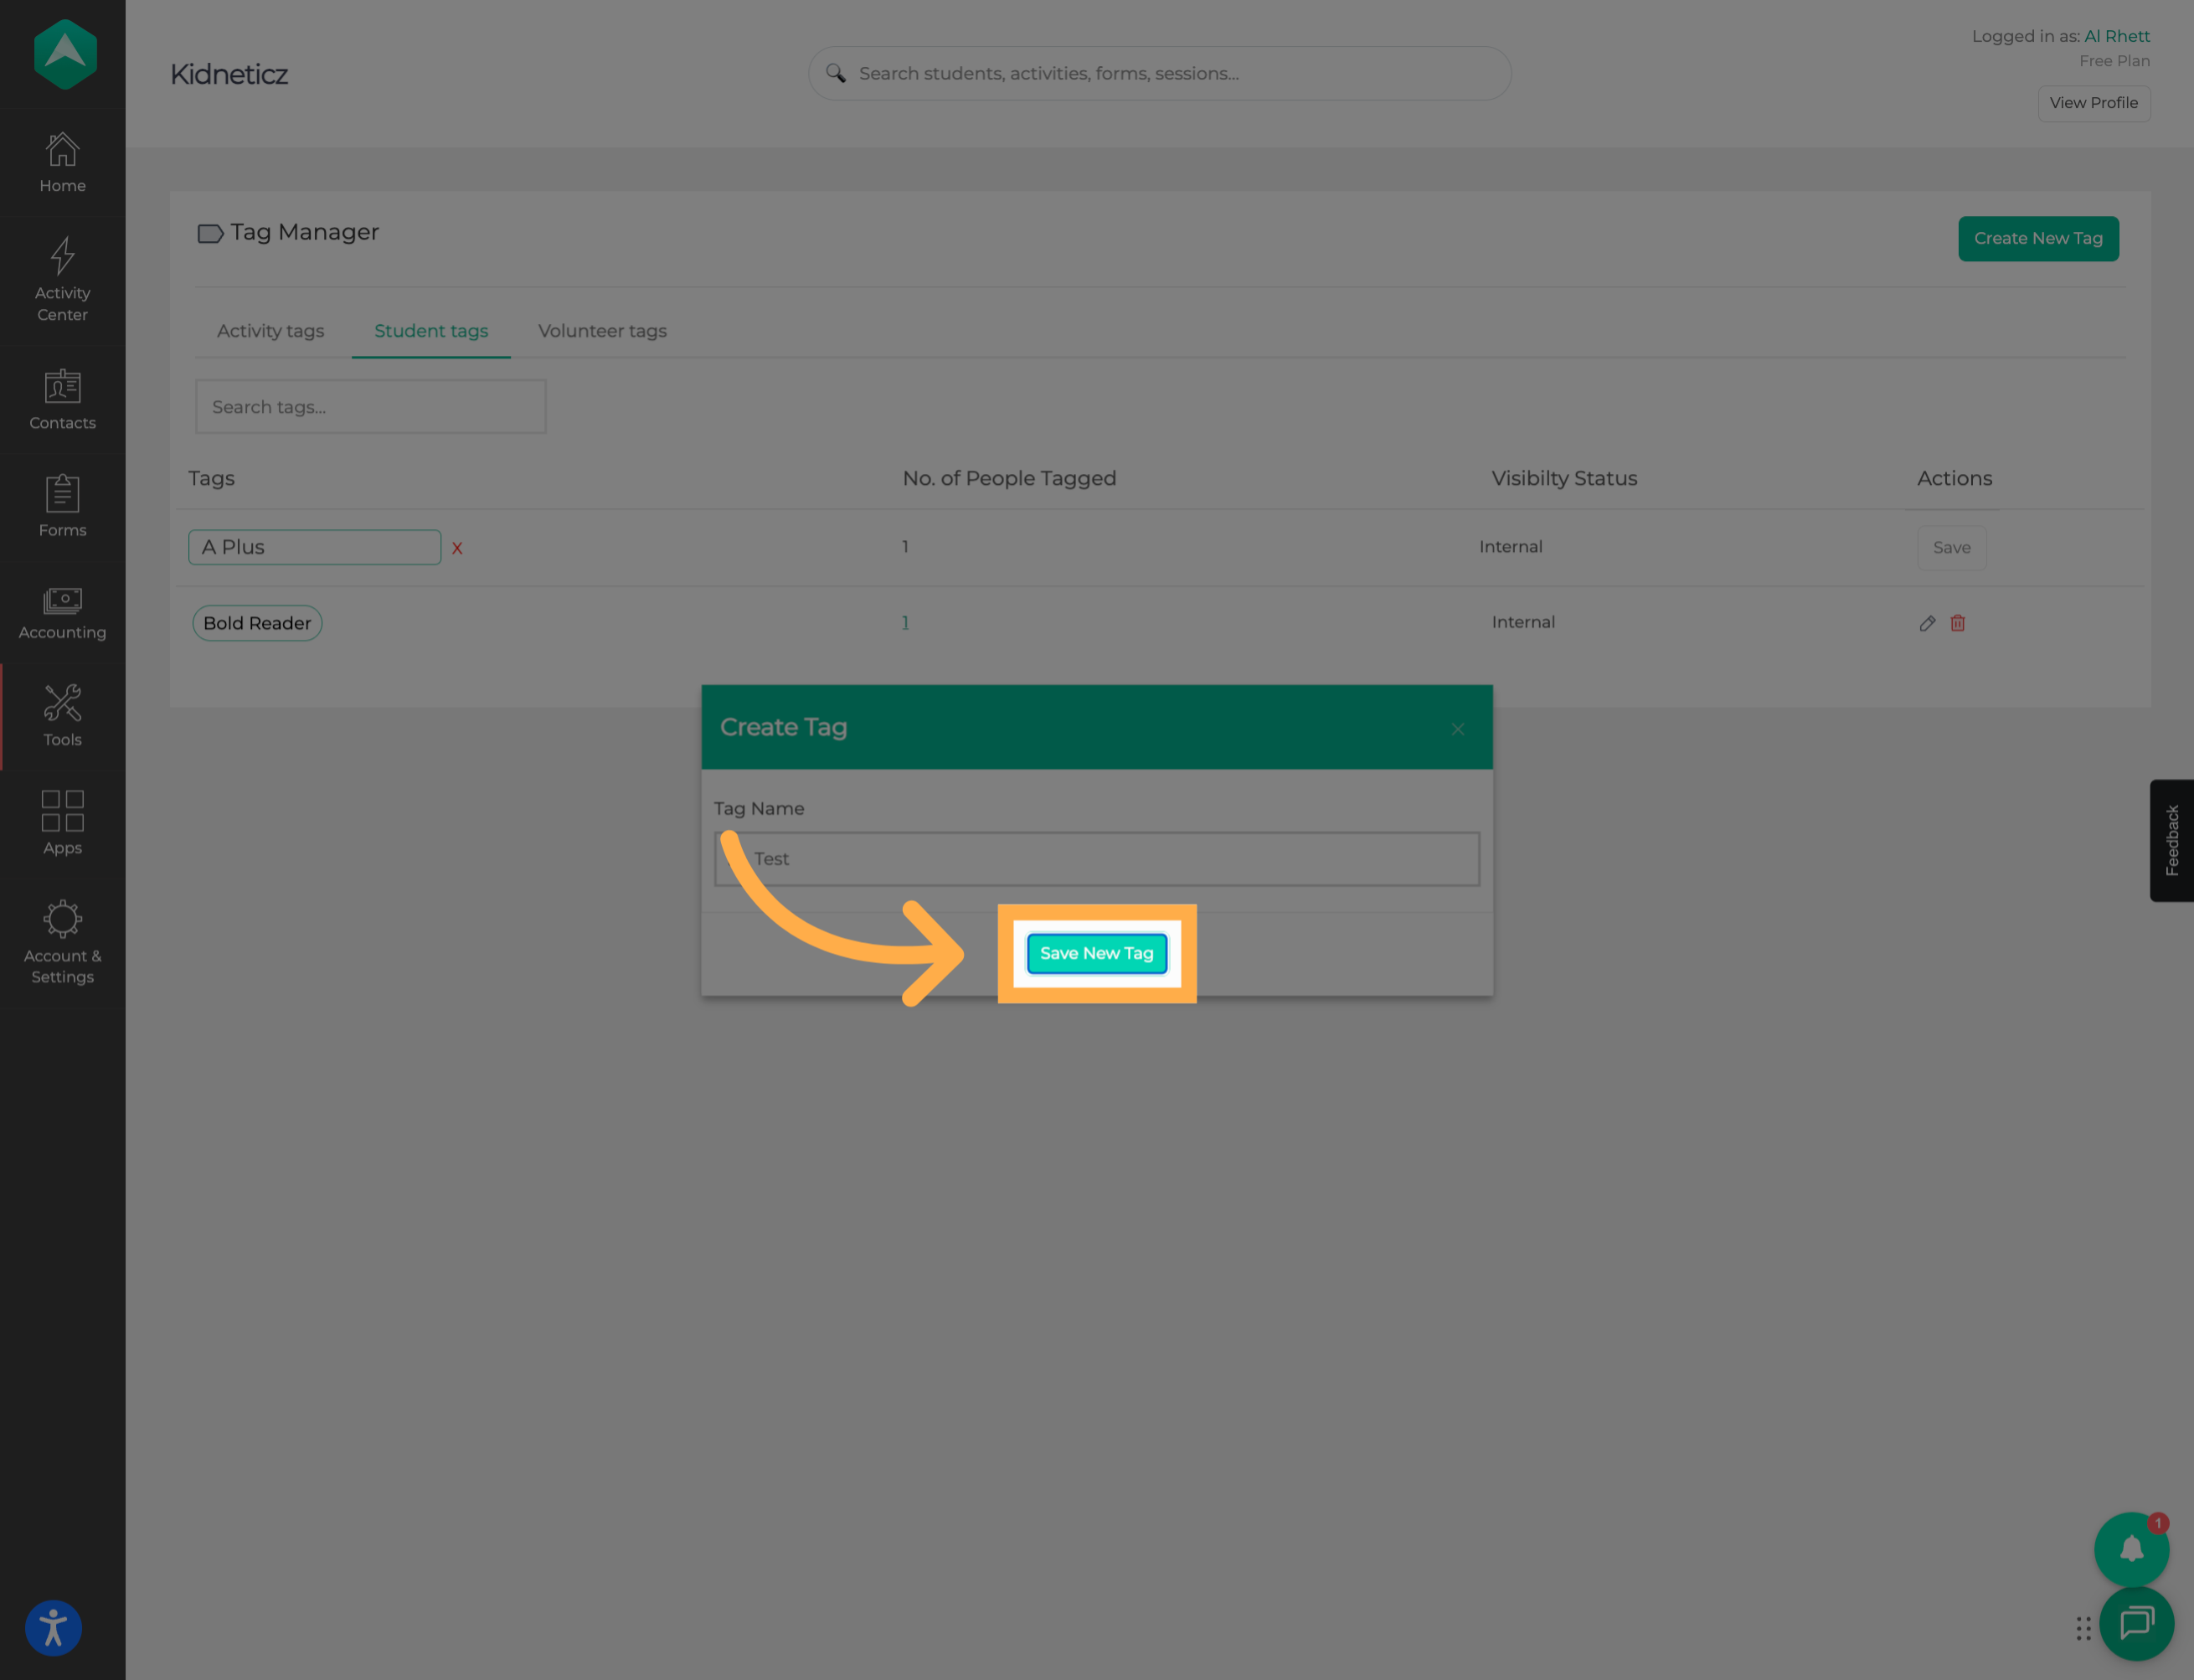
17. Save the New Tag
Once you’re ready, save the tag. The newly created tag will then be available for use on student profiles.
Frequently Asked Questions
Q: What are student tags used for?
A: Student tags help your organization categorize and organize student records. Once assigned, tags appear within the student’s information for easy reference.
Q: Can I assign an existing tag to a student?
A: Yes. When adding a tag from a student’s profile, search for the existing tag and select it from the available results.
Q: Can I create a new tag while viewing a student?
Yes. If the tag you need doesn’t already exist, you can create a new one directly while adding tags to the student.
Q: Can I assign more than one tag to a student?
Yes. You can add additional tags to a student as needed.
Q: Where can I see the tags assigned to a student?
After tags have been assigned, they appear within the student’s information.
Q: What is the Tag Manager?
The Tag Manager provides a central location for viewing and managing tags available within your organization.
Q: Can I create a tag without opening a student profile?
Yes. You can create new student tags directly from the Tag Manager by opening Student Tags and selecting the option to create a new tag.
Q: Can I rename an existing student tag?
Yes. Open Tag Manager, select Student Tags, locate the tag, and use the edit option to rename it.
Q: Can I delete a student tag?
Yes. The available options for a tag include the ability to edit or delete it.
Q: Should I search before creating a new tag?
Yes. Searching first can help you determine whether an appropriate tag already exists and can help prevent duplicate or similarly named tags.
💡If you experience any issues or have further questions with “How to Create and Manage Student Tags”, don't hesitate to get in touch with our support team at support@afterschoolhq.com.