How to Enable Wet Signature Requirements
Learn how to set up and enforce wet signature capture to verify attendance accurately and securely.
This guide will walk you through the process of enabling wet signatures for attendance in the Afterschool HQ platform .
Go to afterschoolhq.com
1. Introduction
From configuring settings to completing the signature process, this guide ensures a seamless transition to utilizing wet signatures for attendance management.
2. Click here
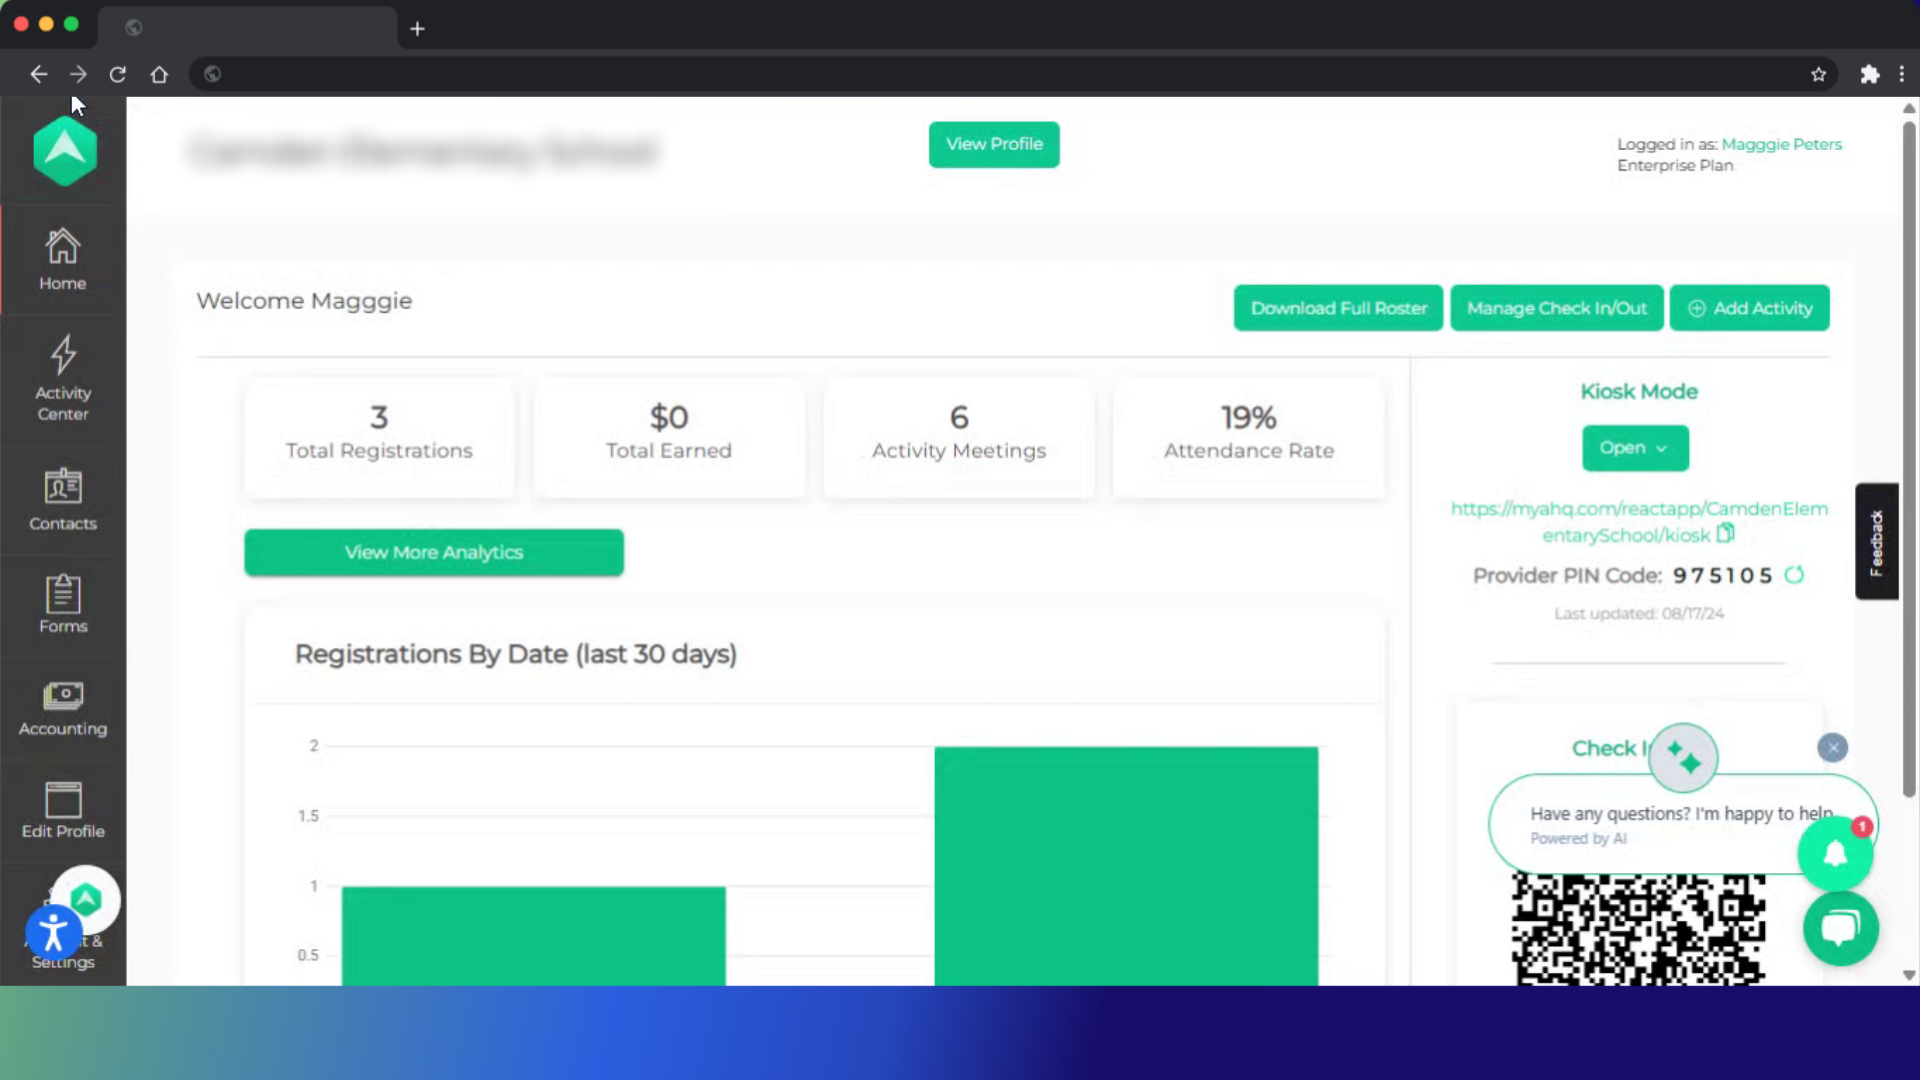
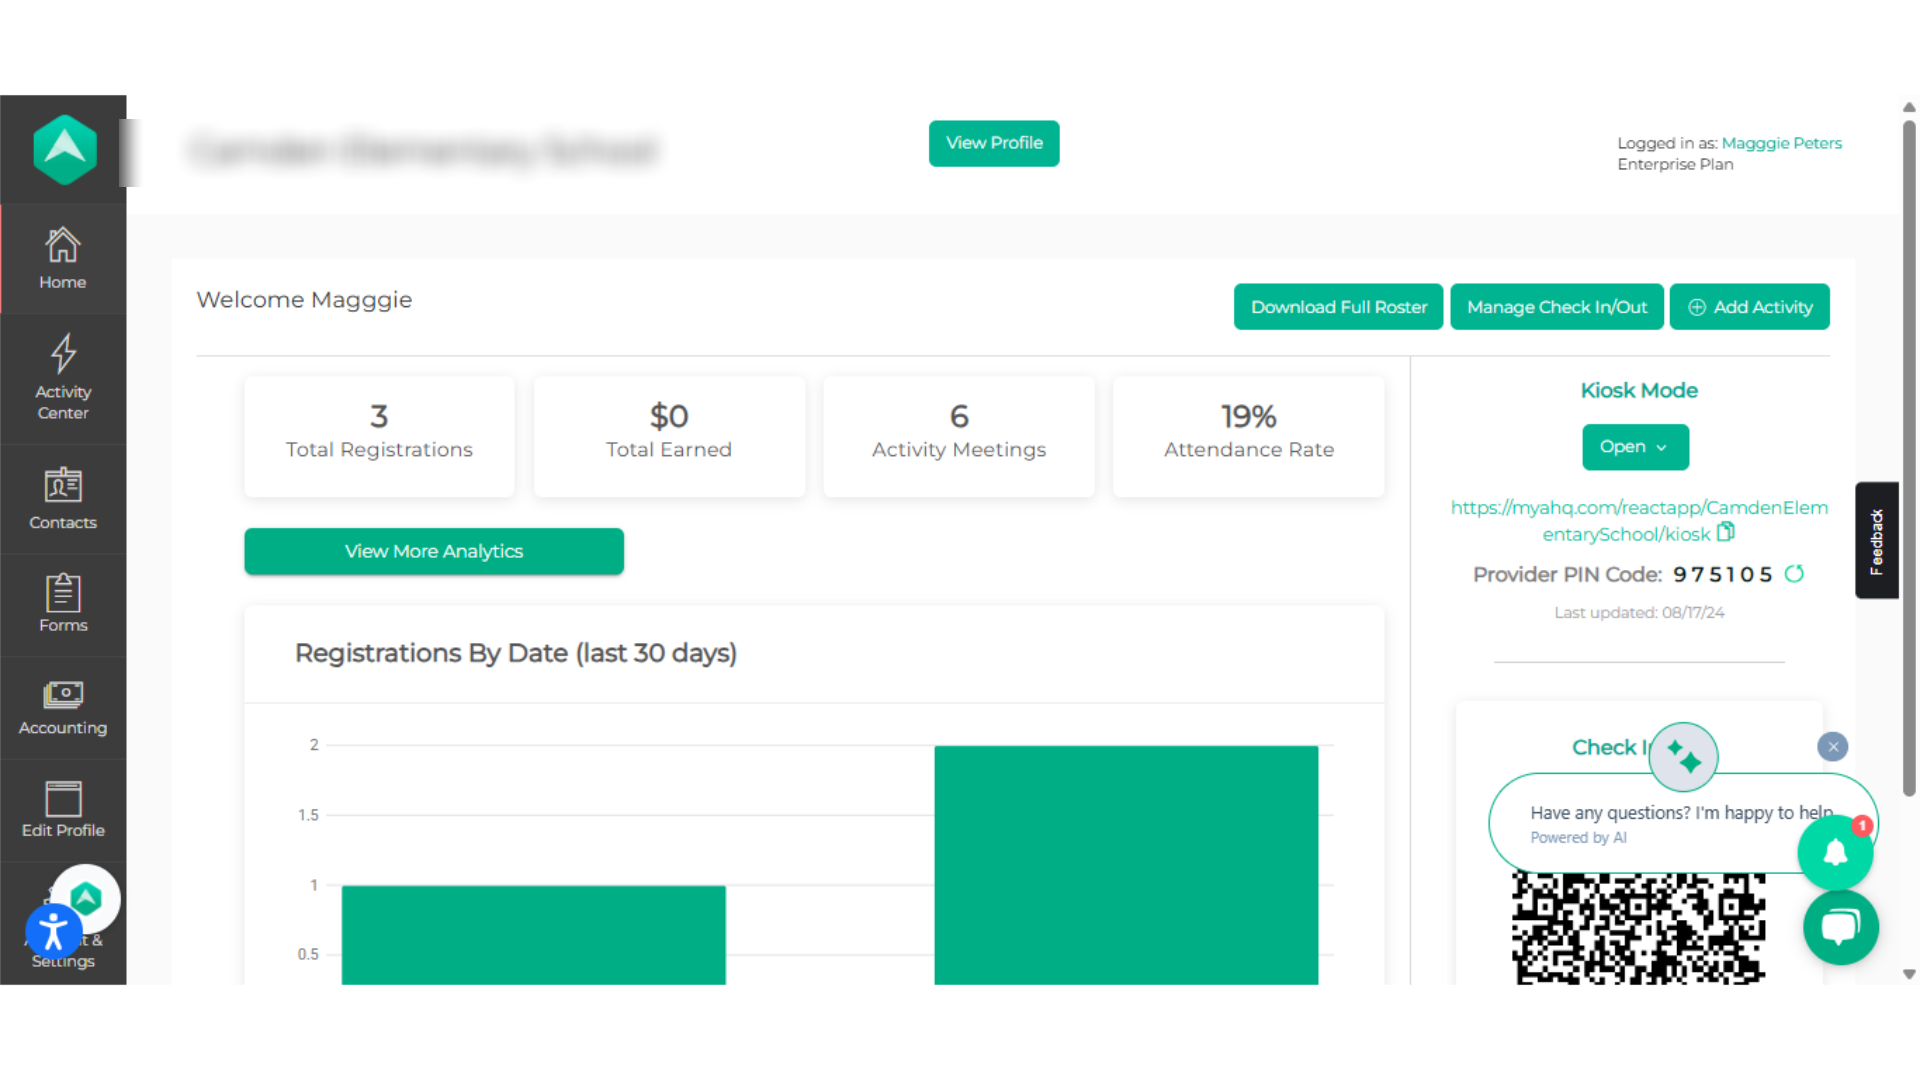
To get started, log in to the AfterSchool HQ platform. Once logged in, this will be your Home Page view.
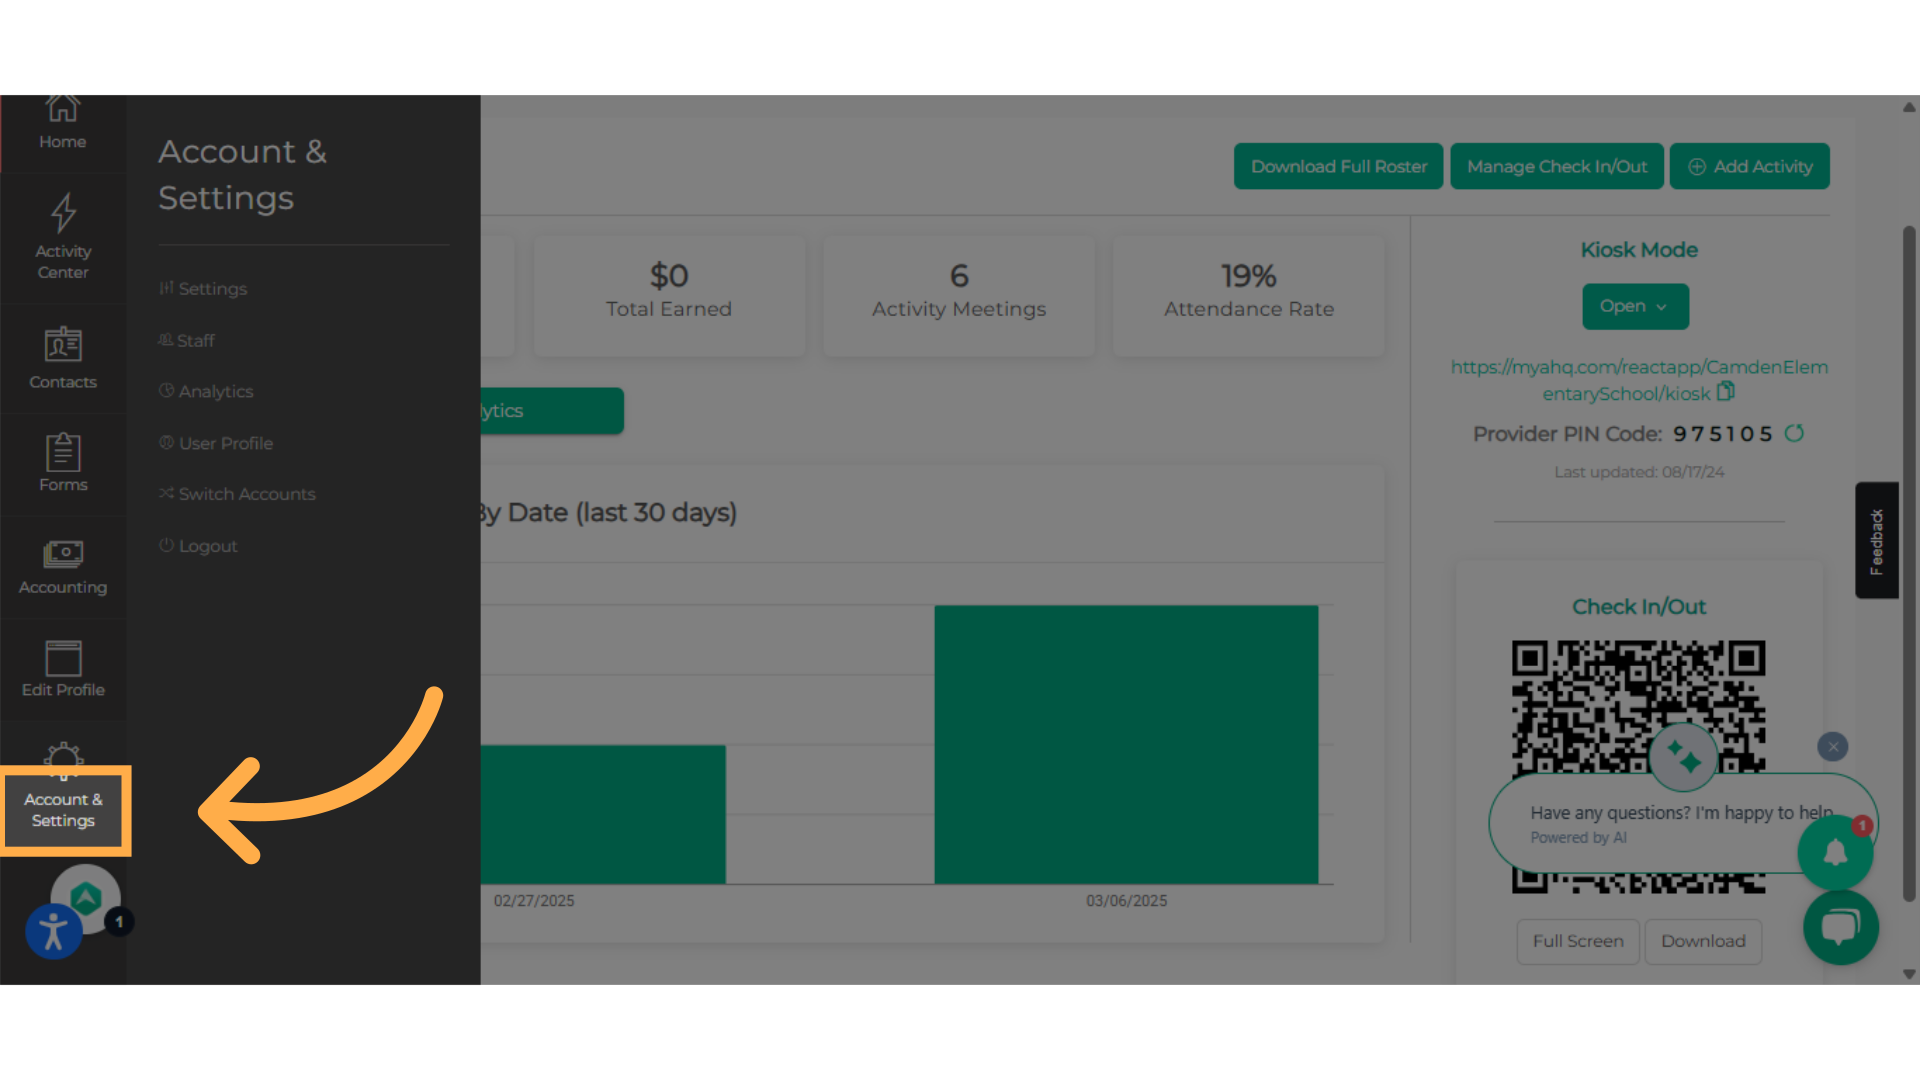
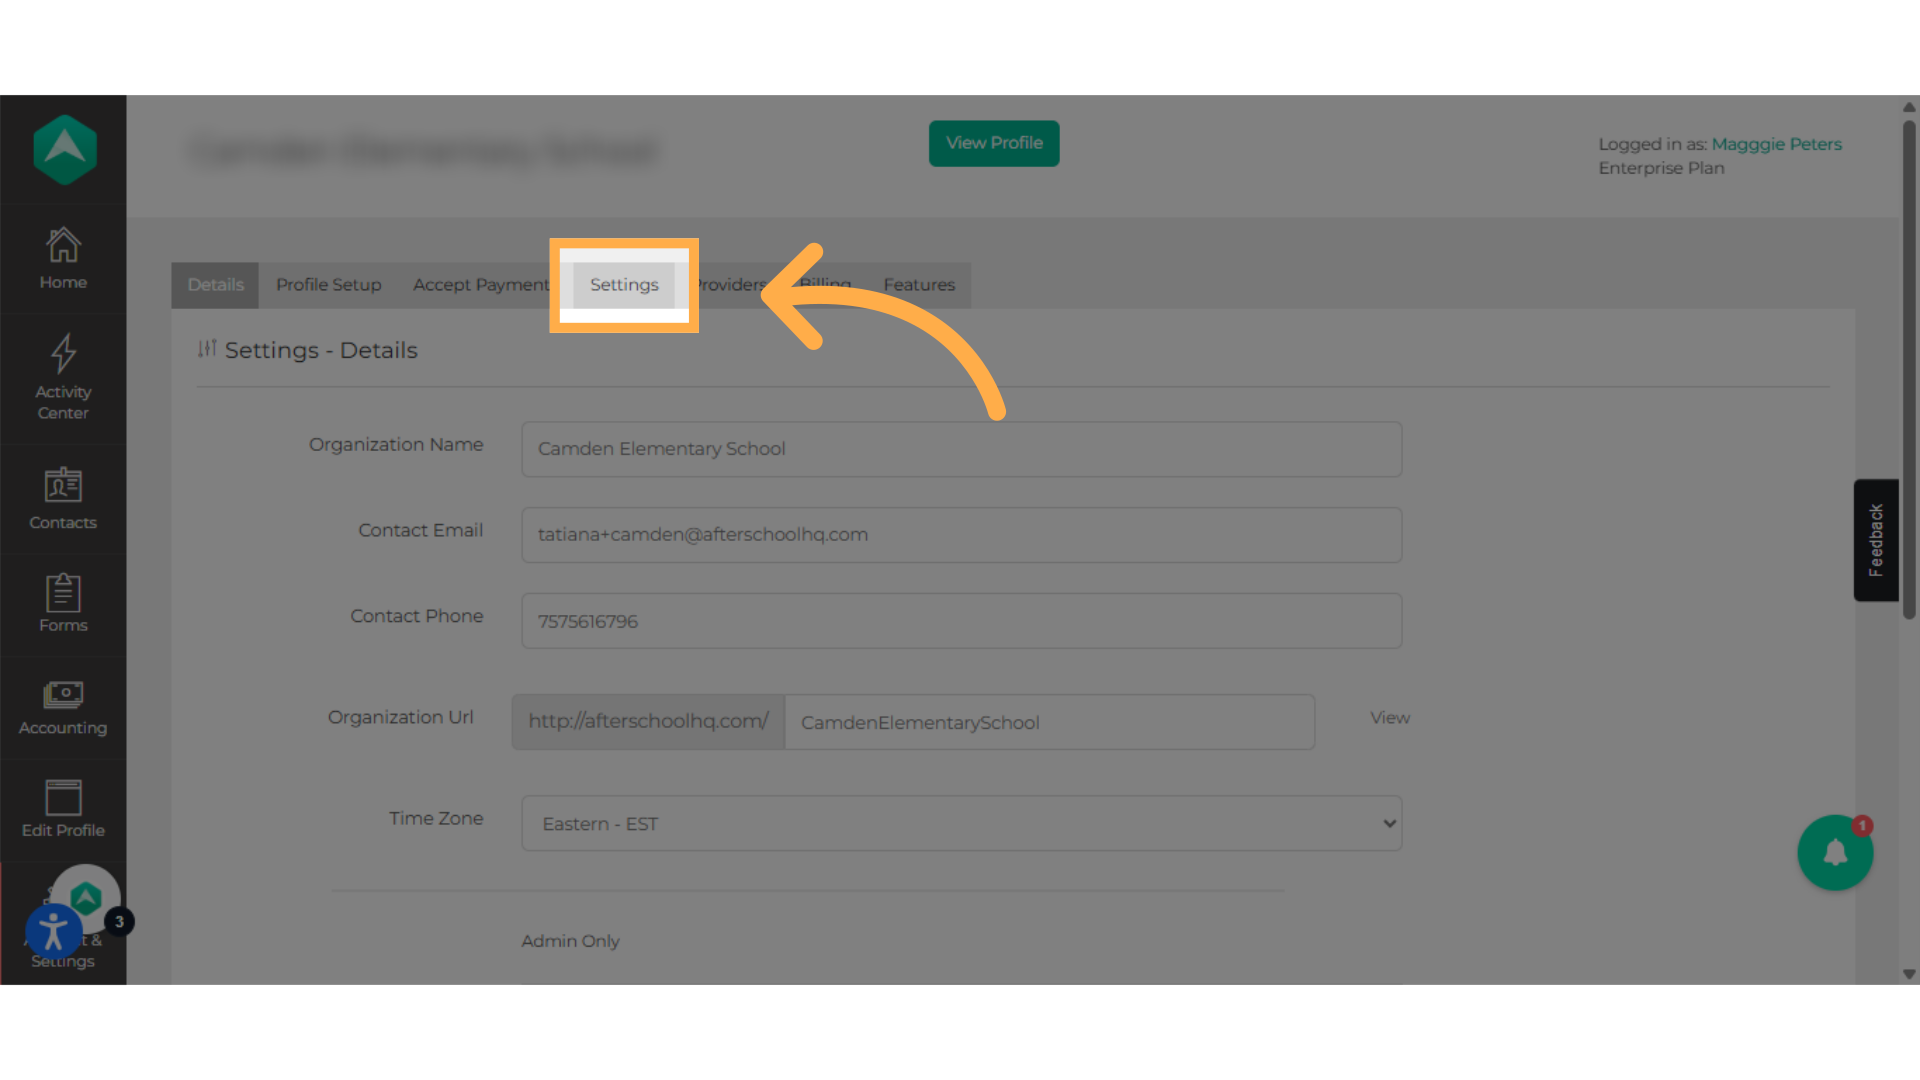
3. Click "Account & Settings"
Navigate to 'Account & Settings'.
4. Click on "Settings"
Navigate to the settings section.

5. Click "Settings"
Click on the Settings tab.
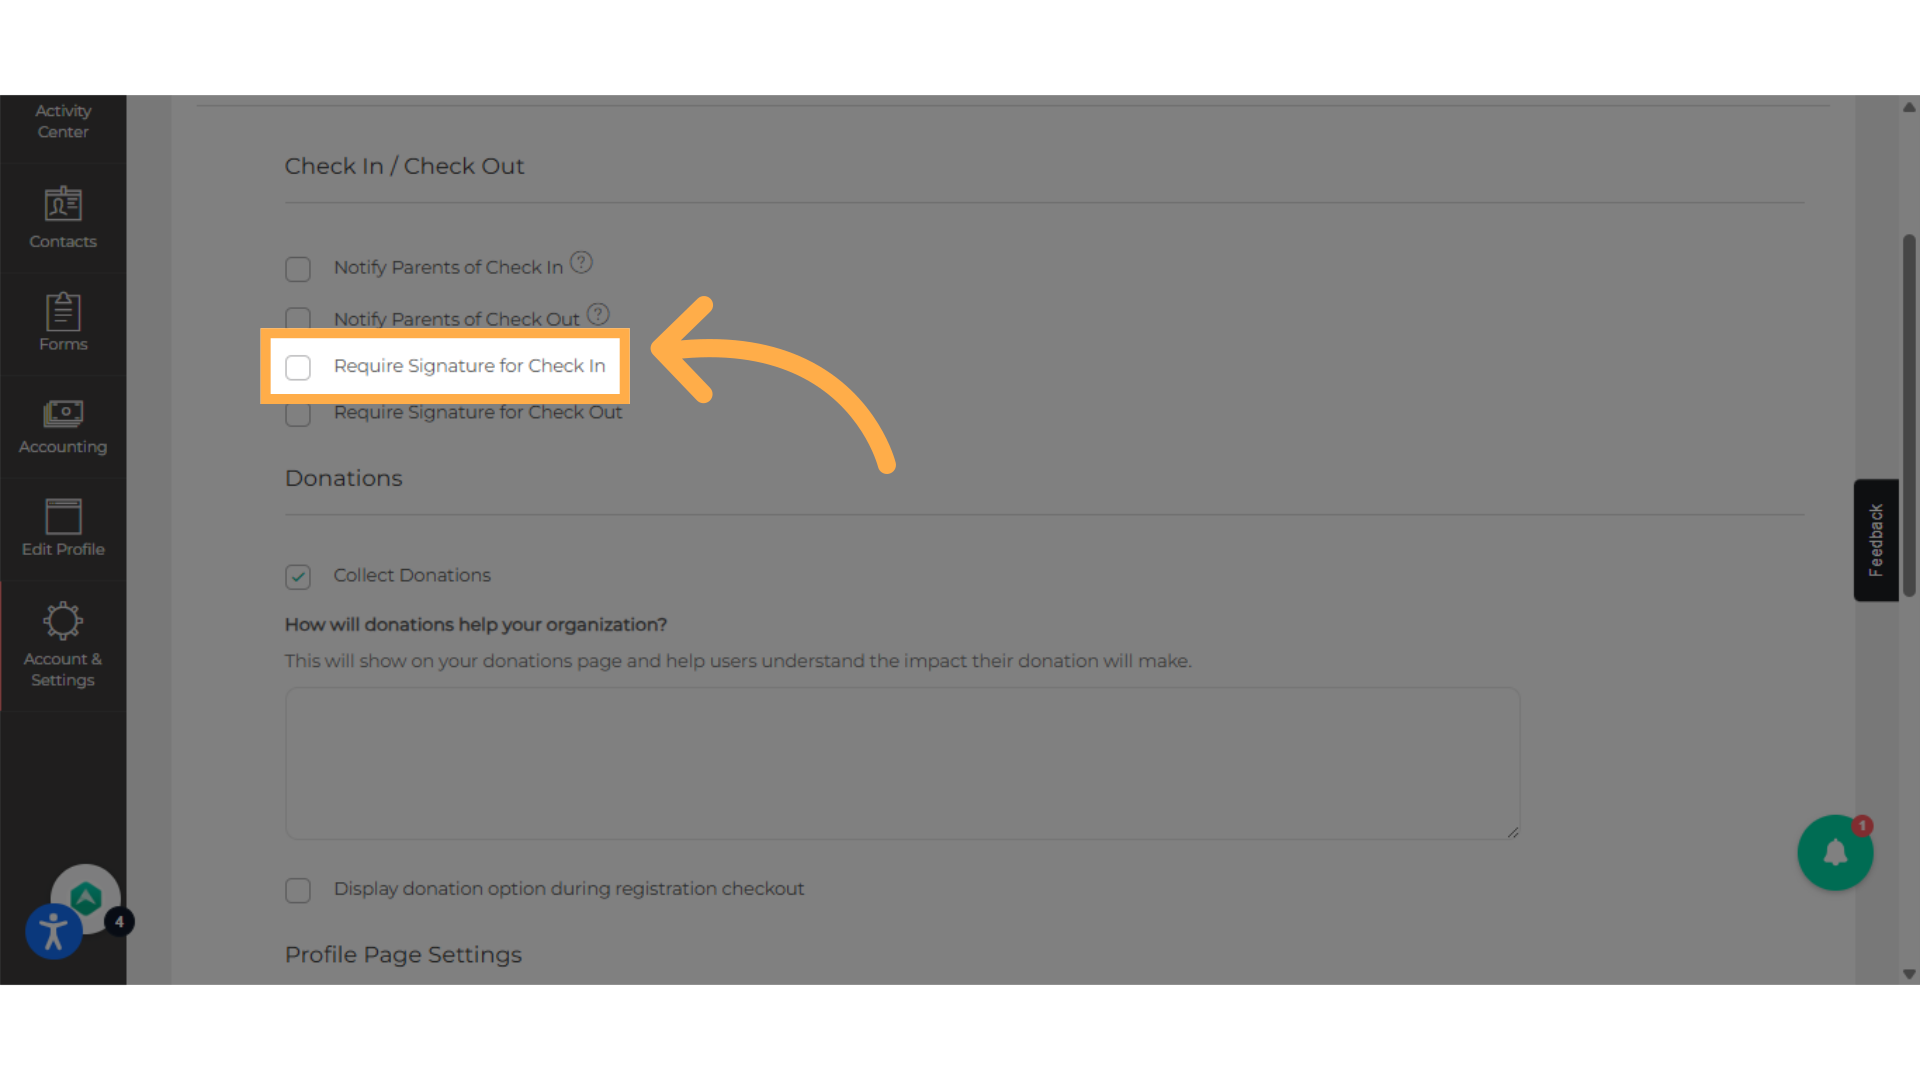
6. Click to "Require Signature for Check In"
Click here to Enable signature requirement for check-in.
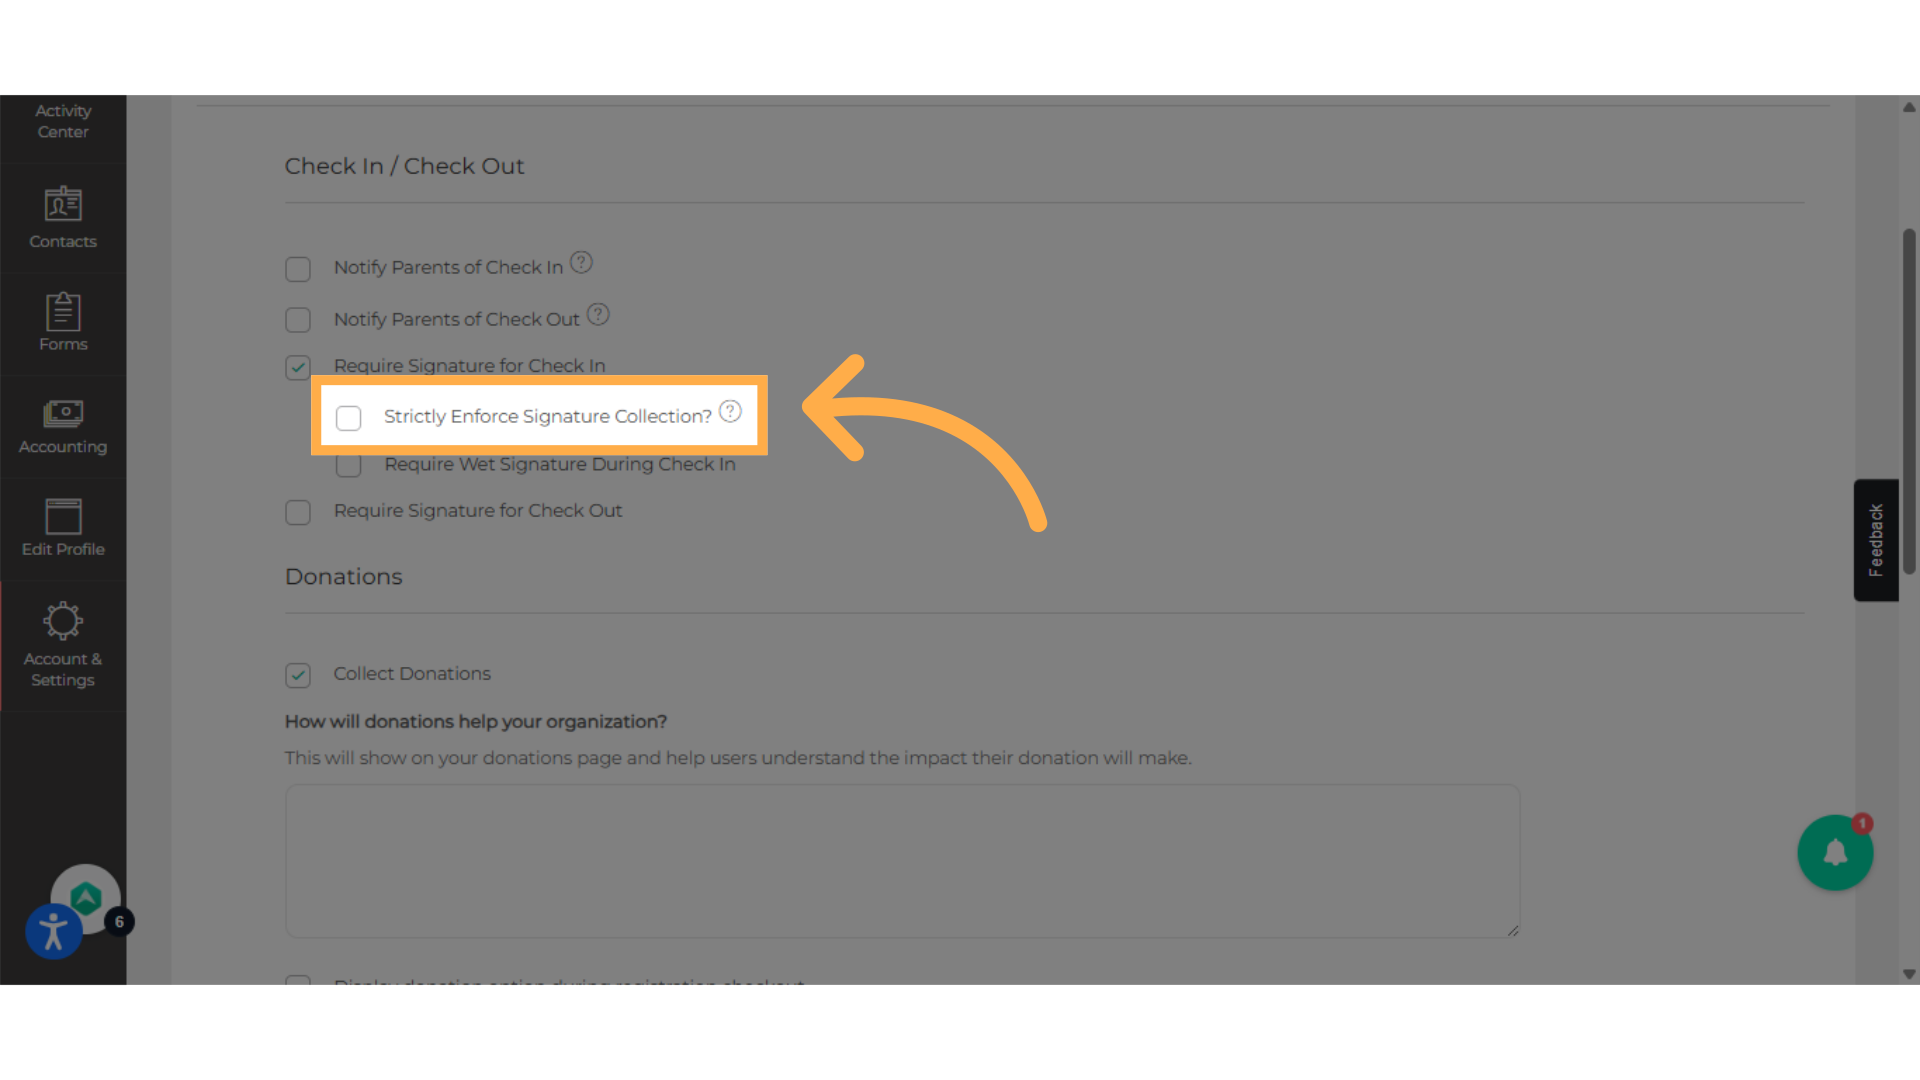
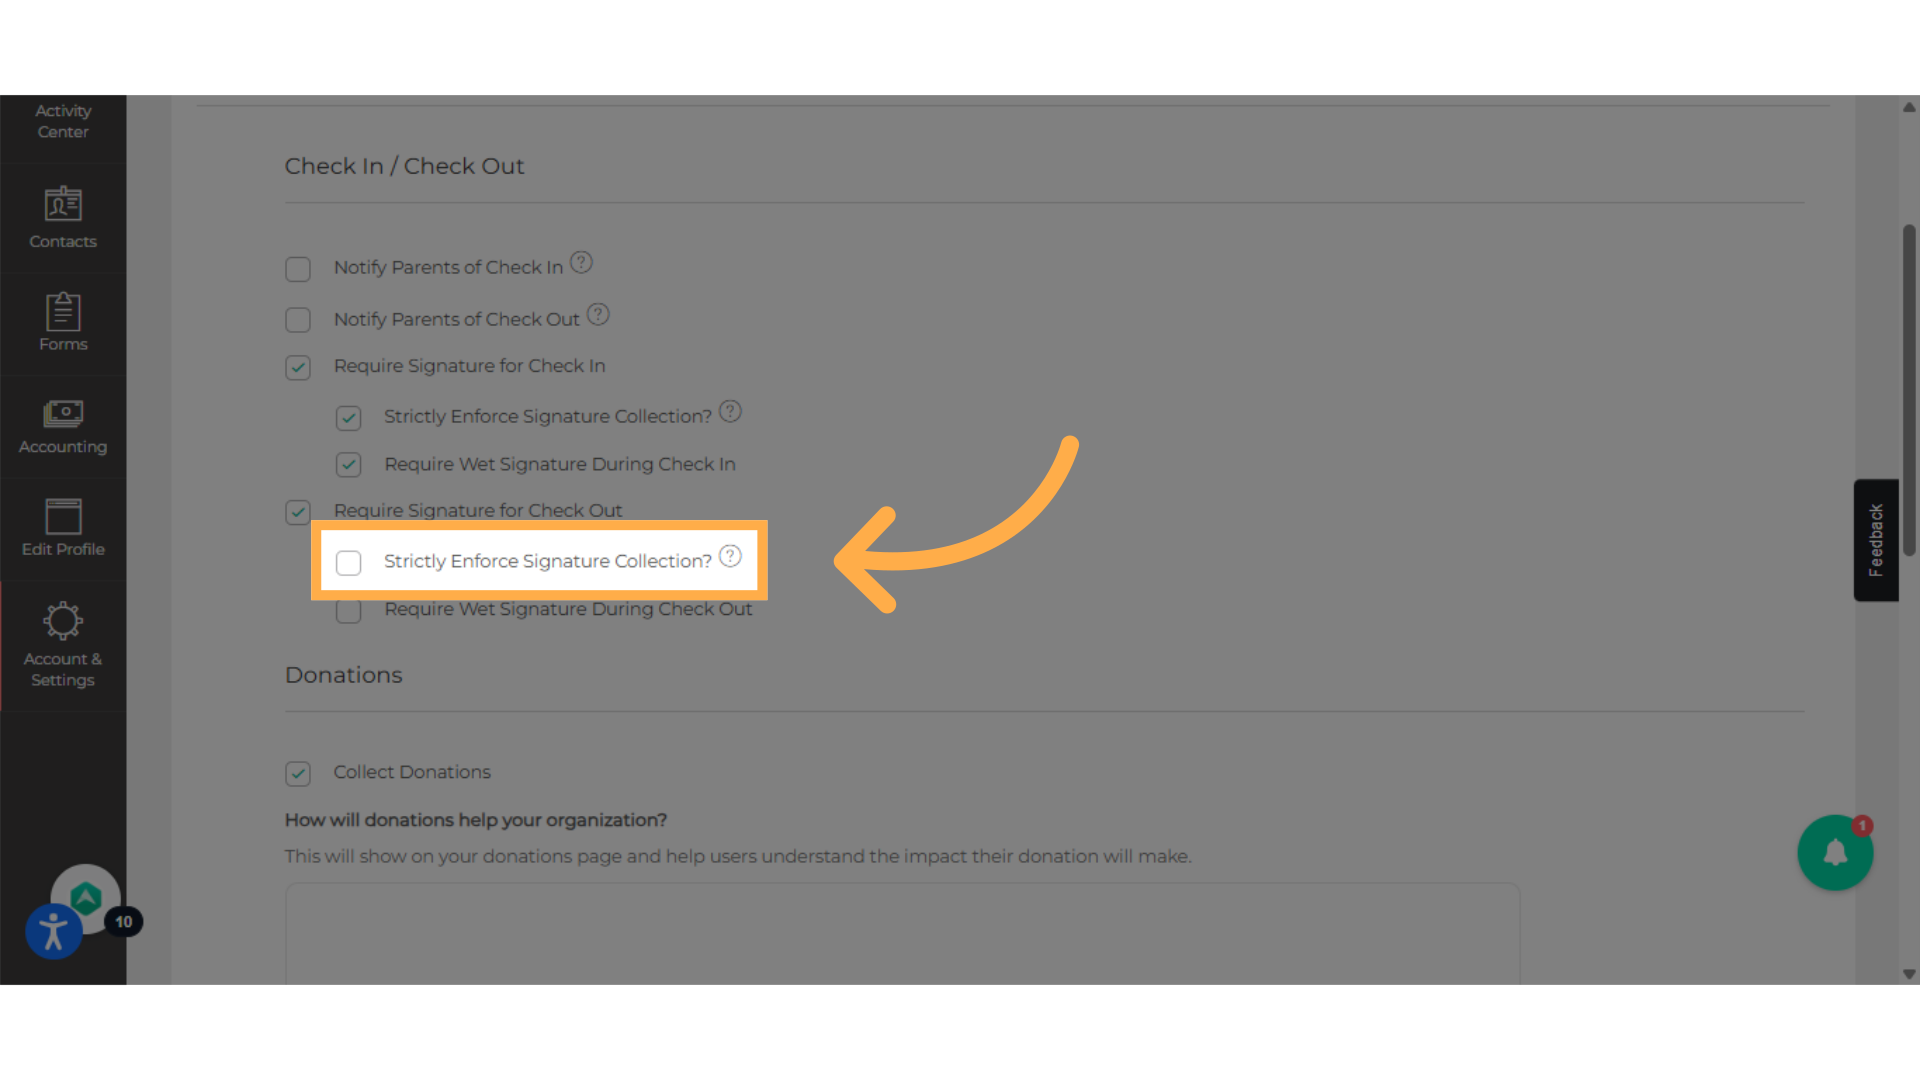
7. Select "Strictly Enforce Signature Collection?"
Select the option for strict enforcement.
8. Fill "on"
Click to Toggle "On" the selected field.
9. Click "Require Signature for Check Out"
Now, click to Enable signature requirement for check-out.
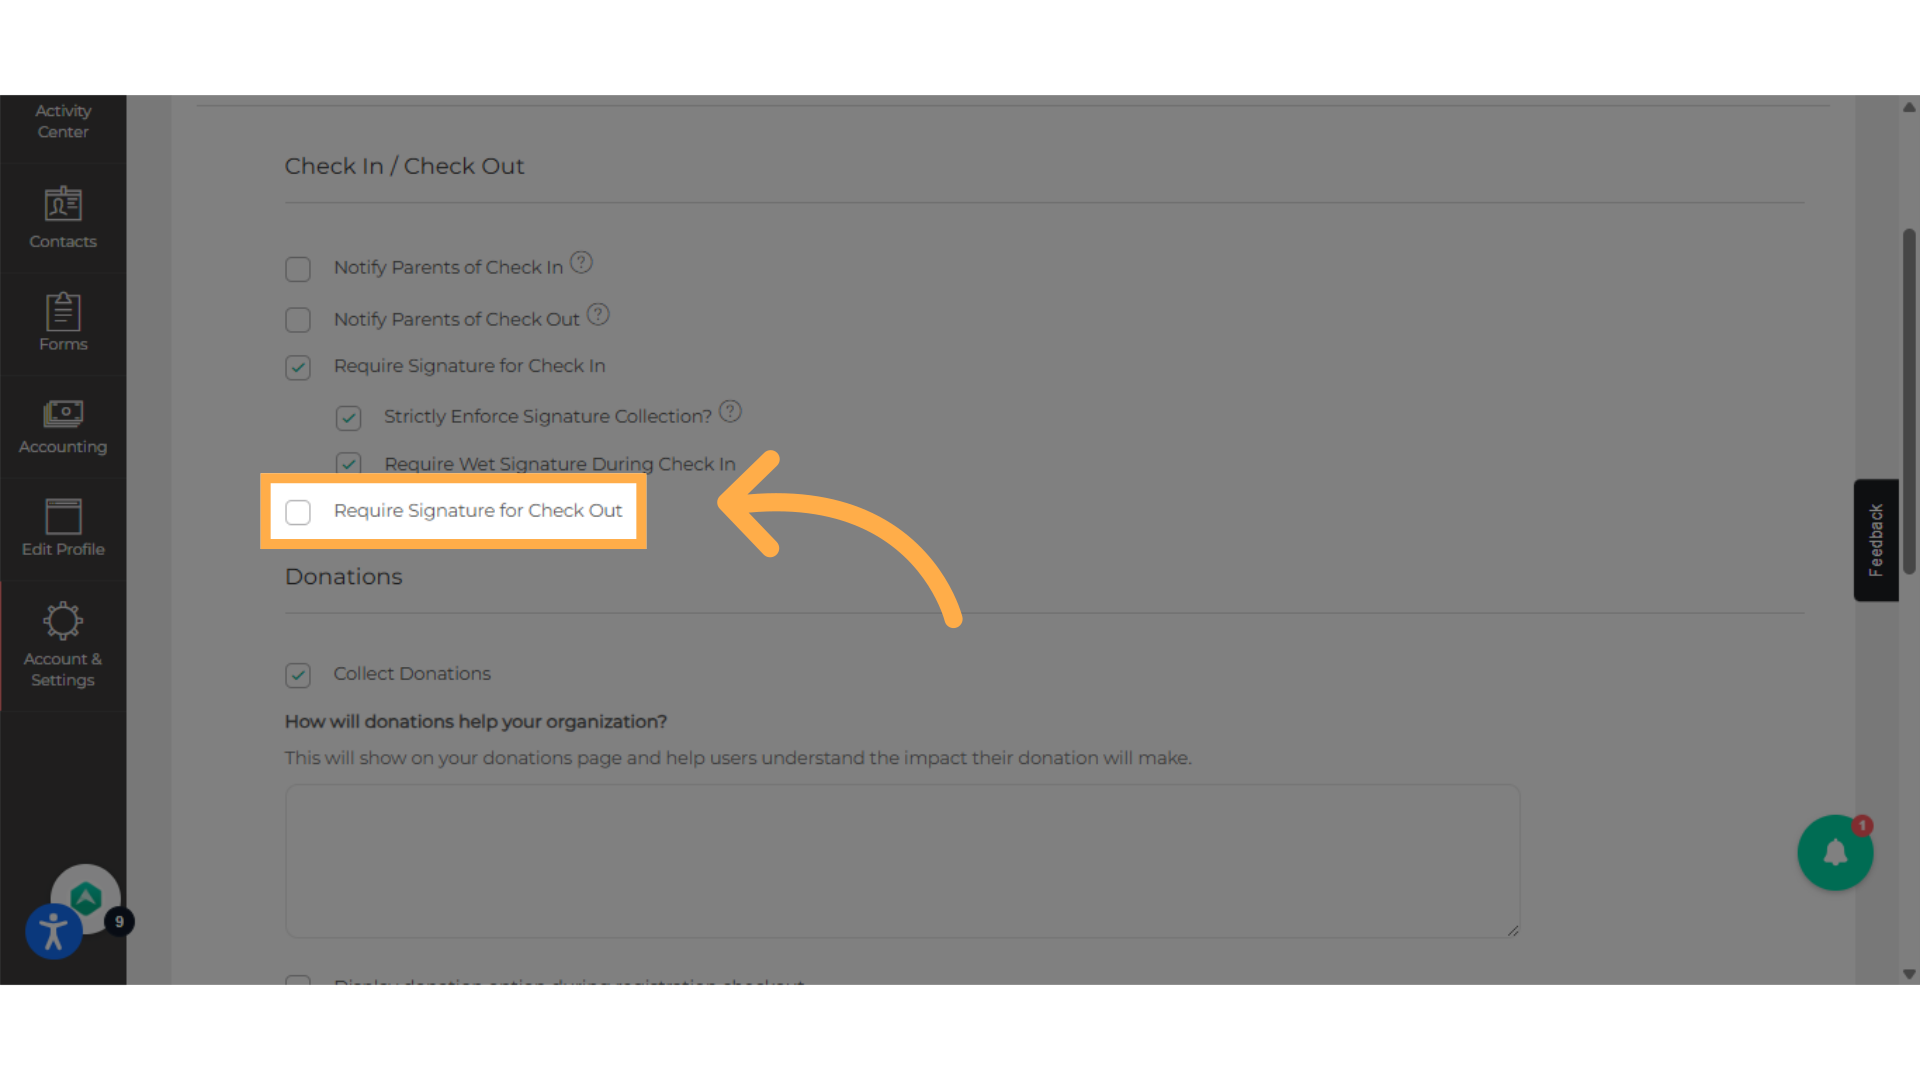
10. Click "Strictly Enforce Signature Collection?"
Select the option for strict enforcement again.
11. Click "Require Wet Signature During Check Out"
Select "Enable wet signature requirement during check-out", again.

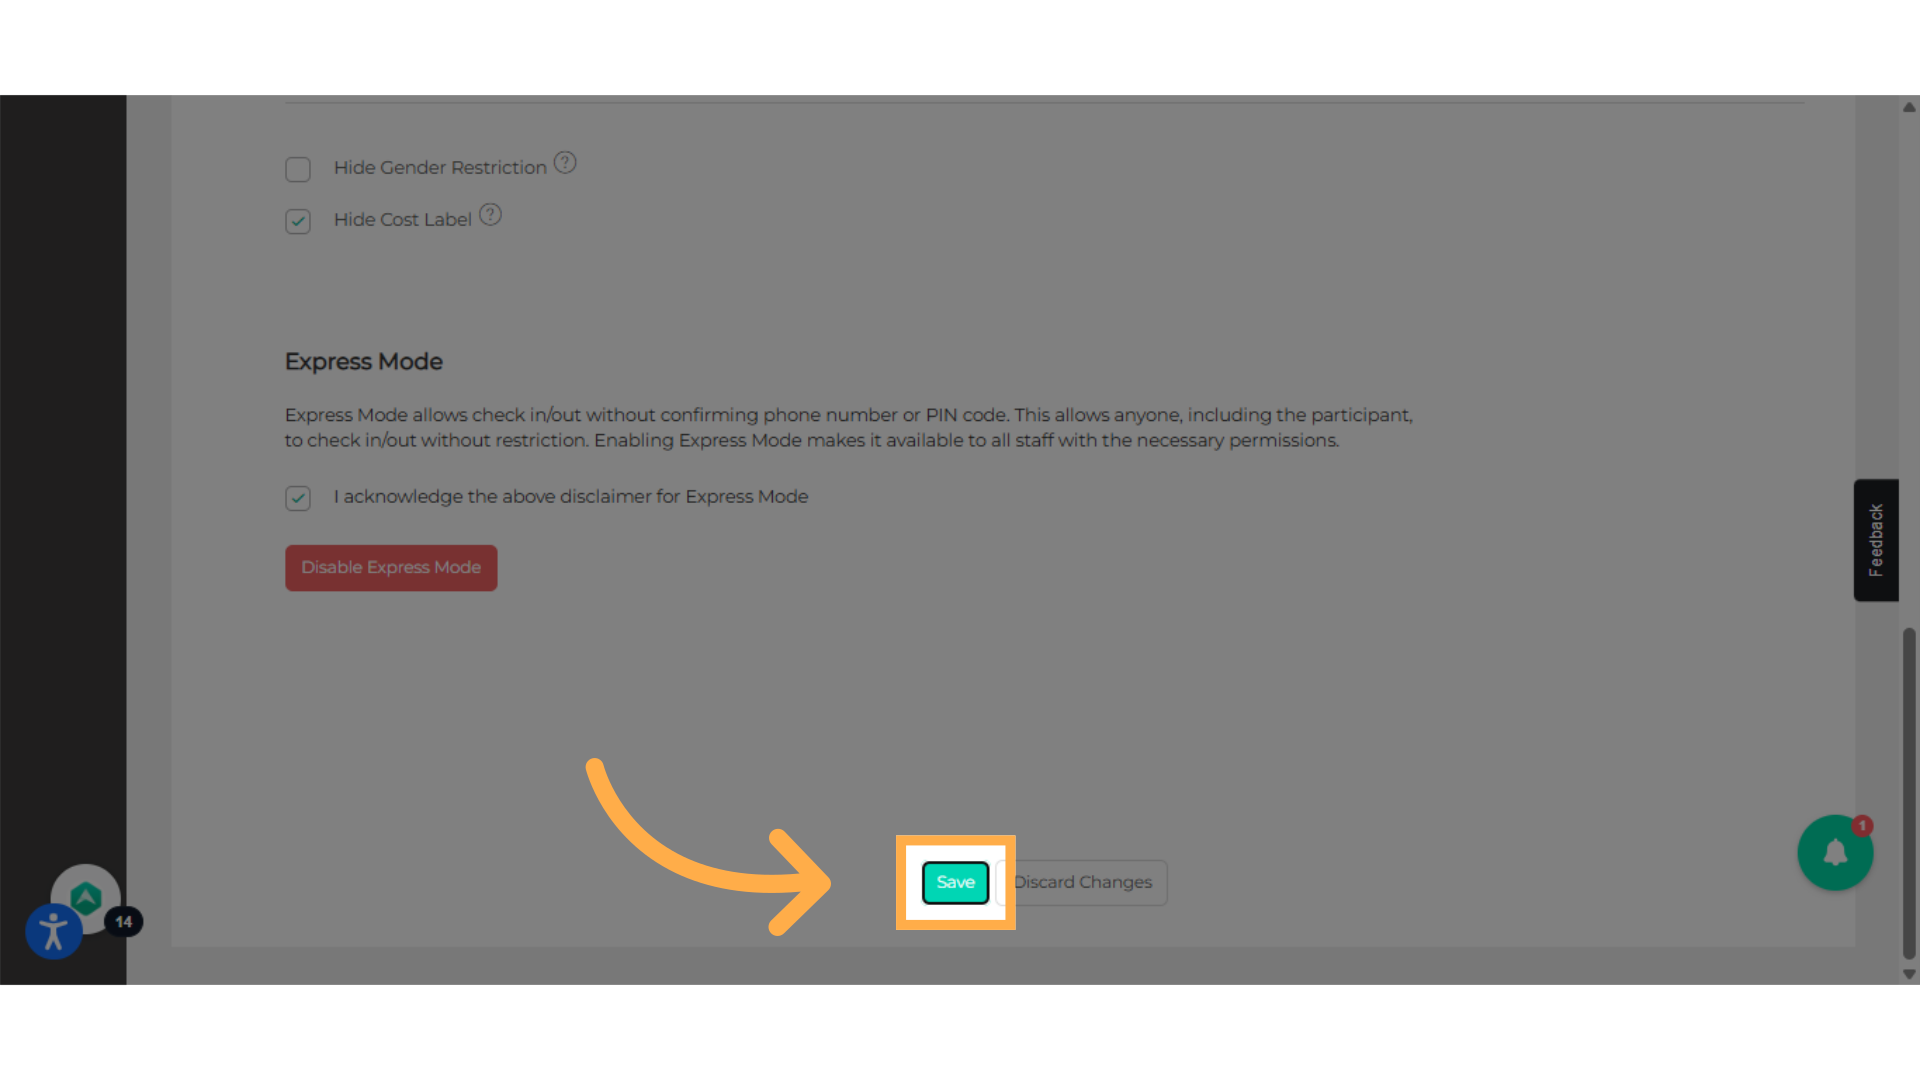
12. Click on "Save"
Scroll towards the bottom of the page and Click on "Save".
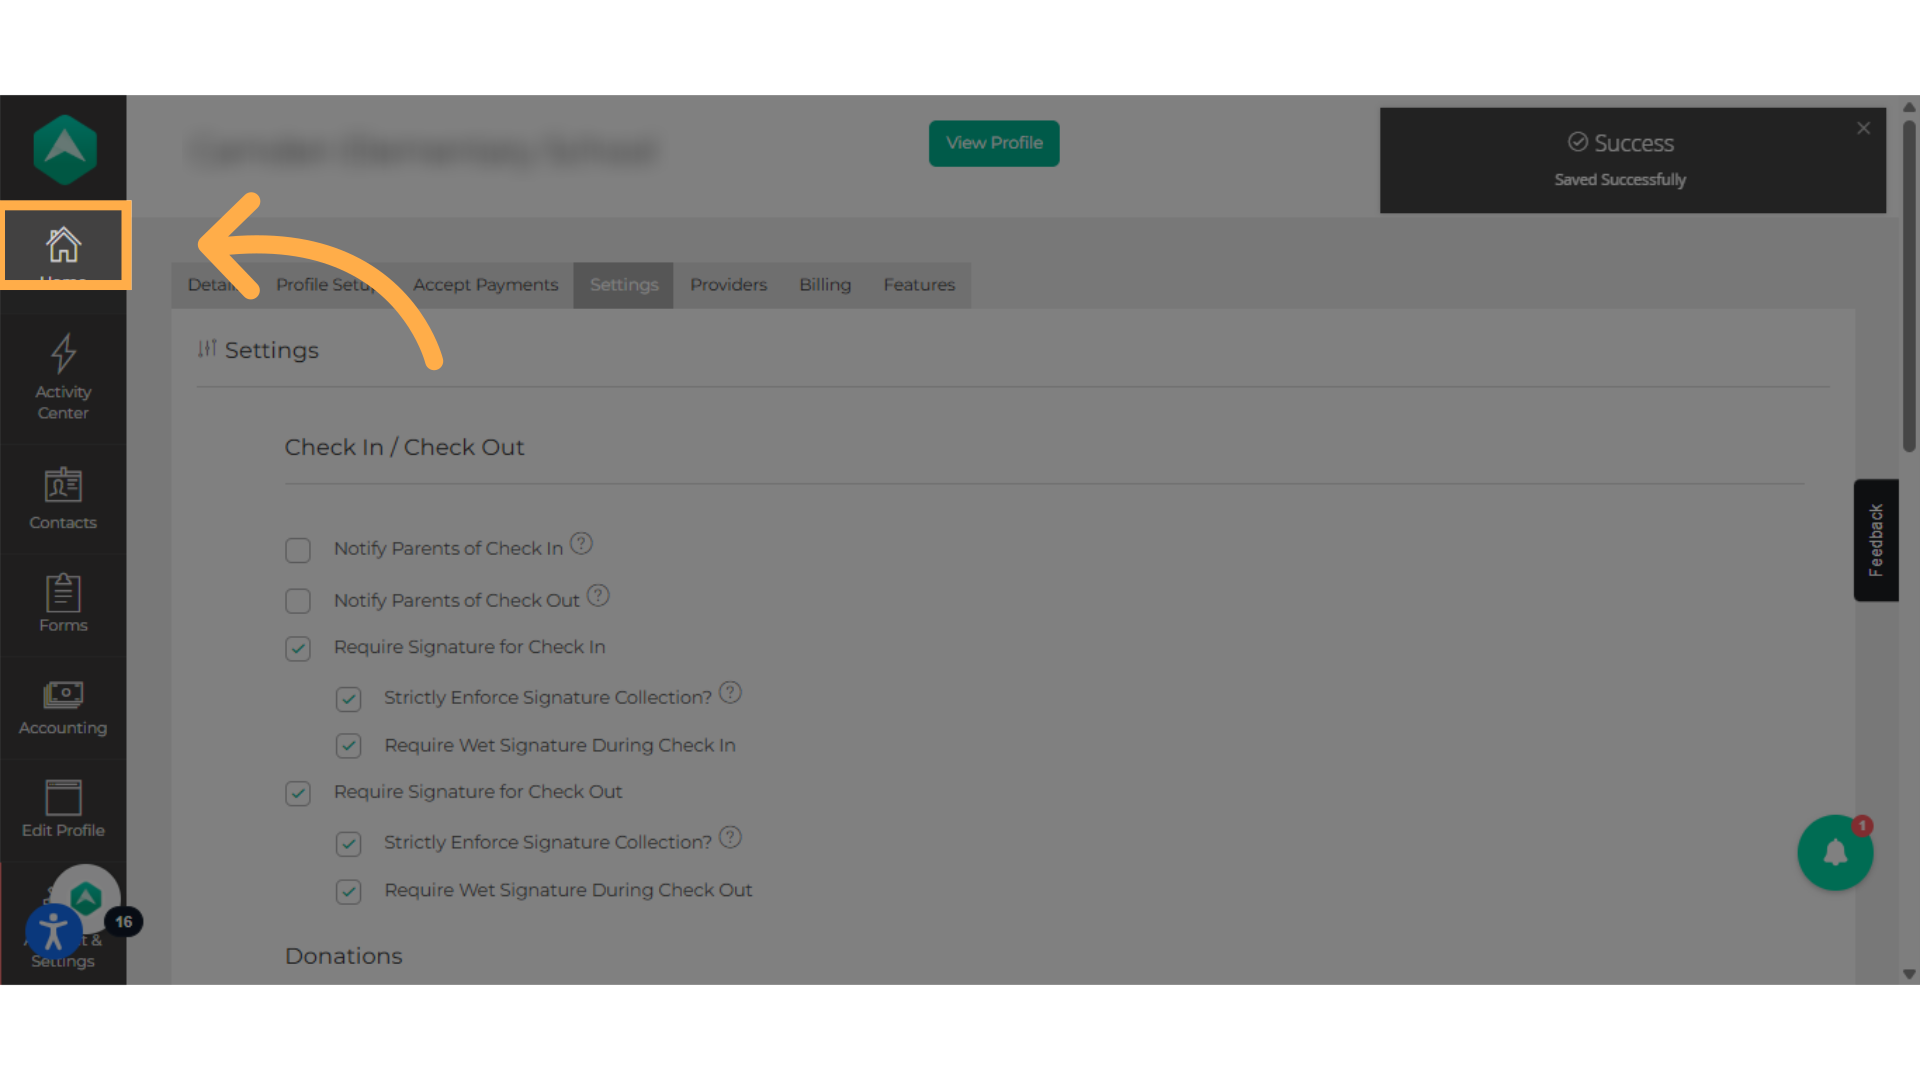
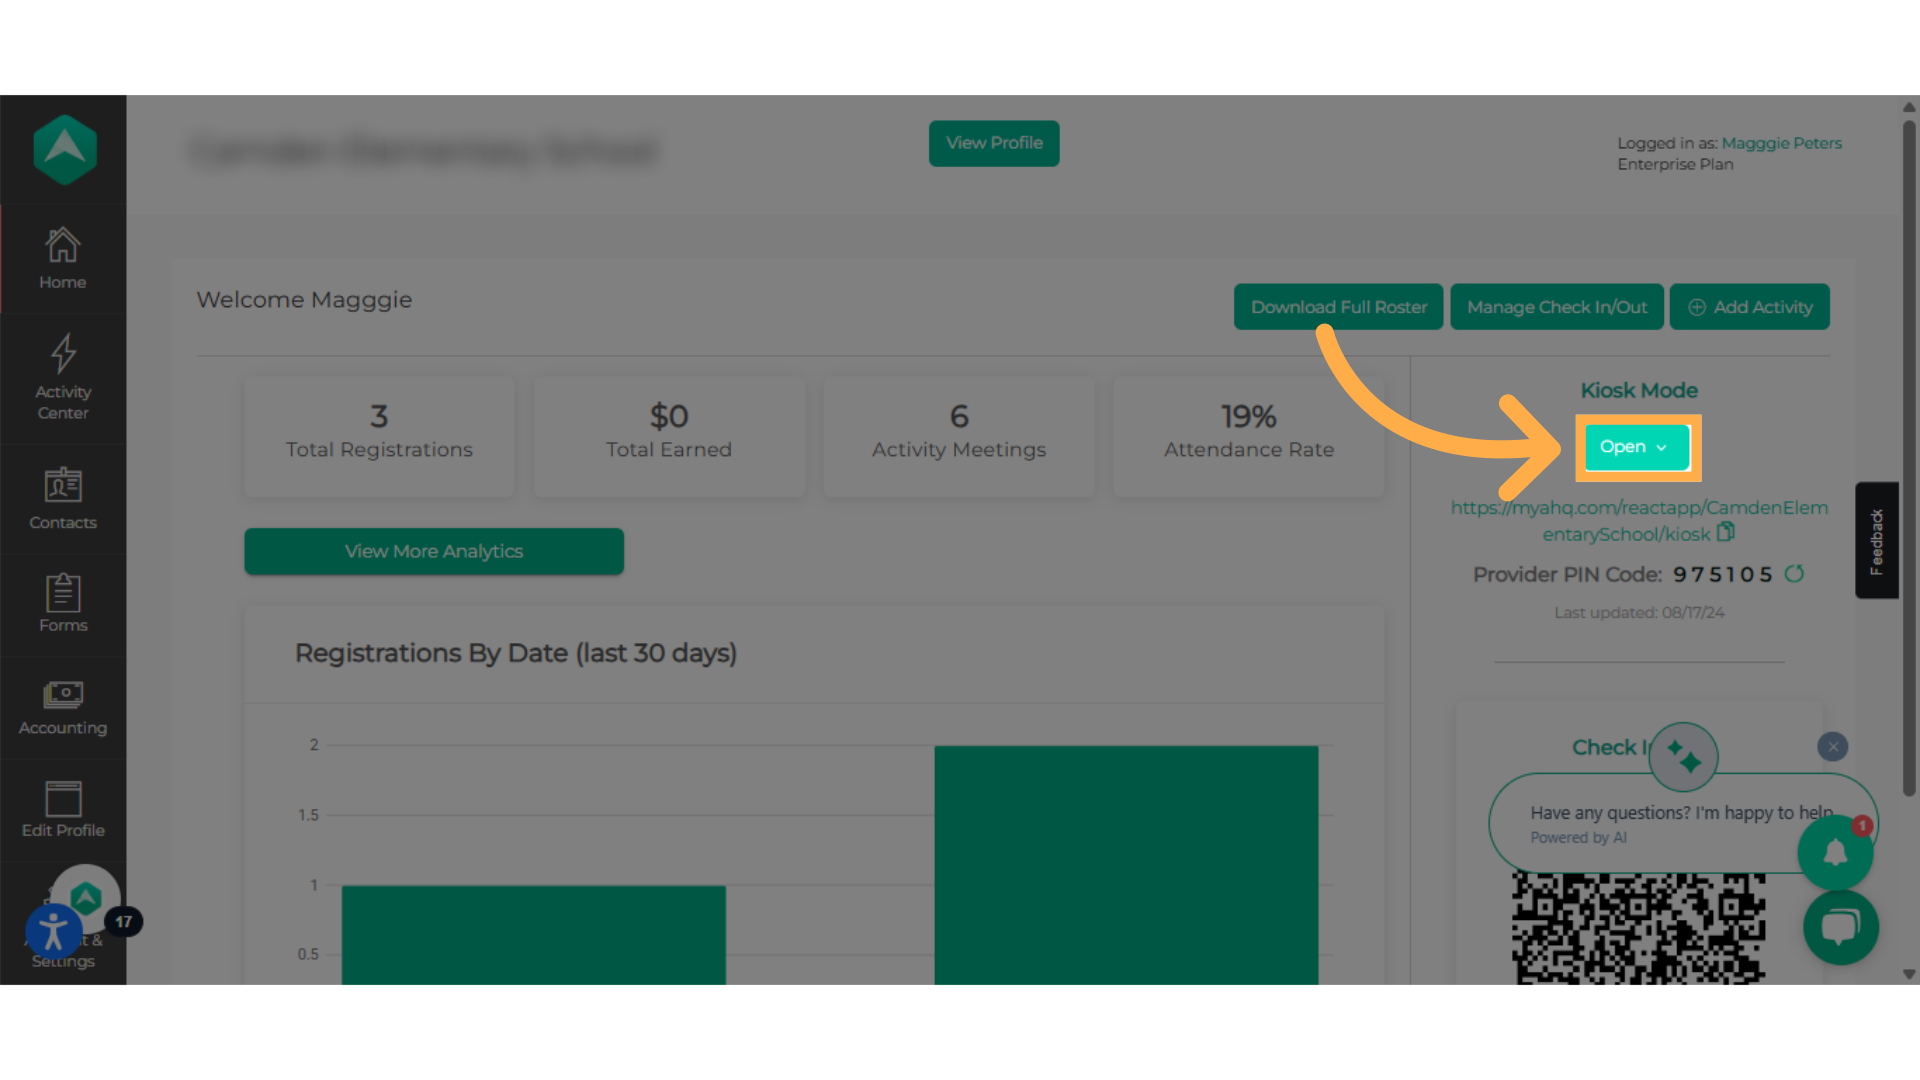
13. Click here to go to 'Home'
Navigate back to the Home Page.
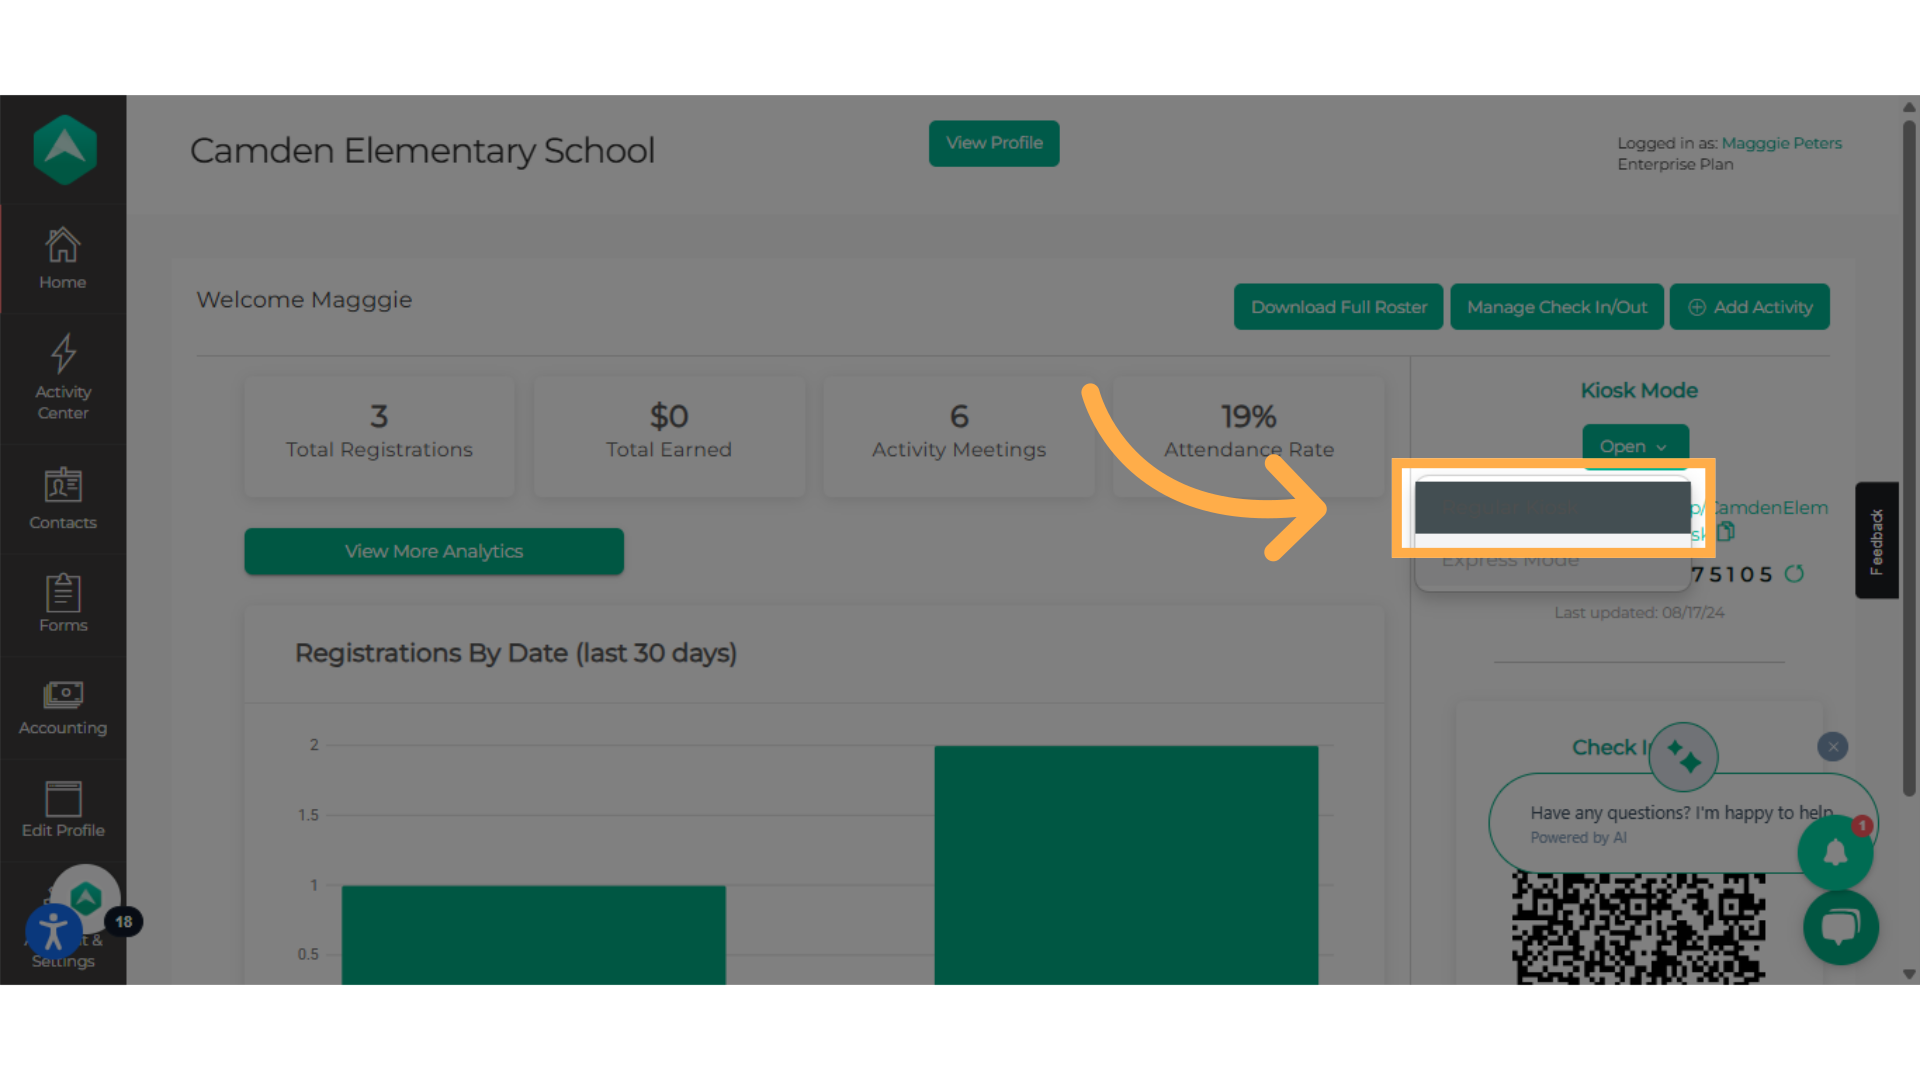
14. Click on 'Open'
Navigate to the designated option.
15. Click "Regular Kiosk"
Select the regular kiosk option.
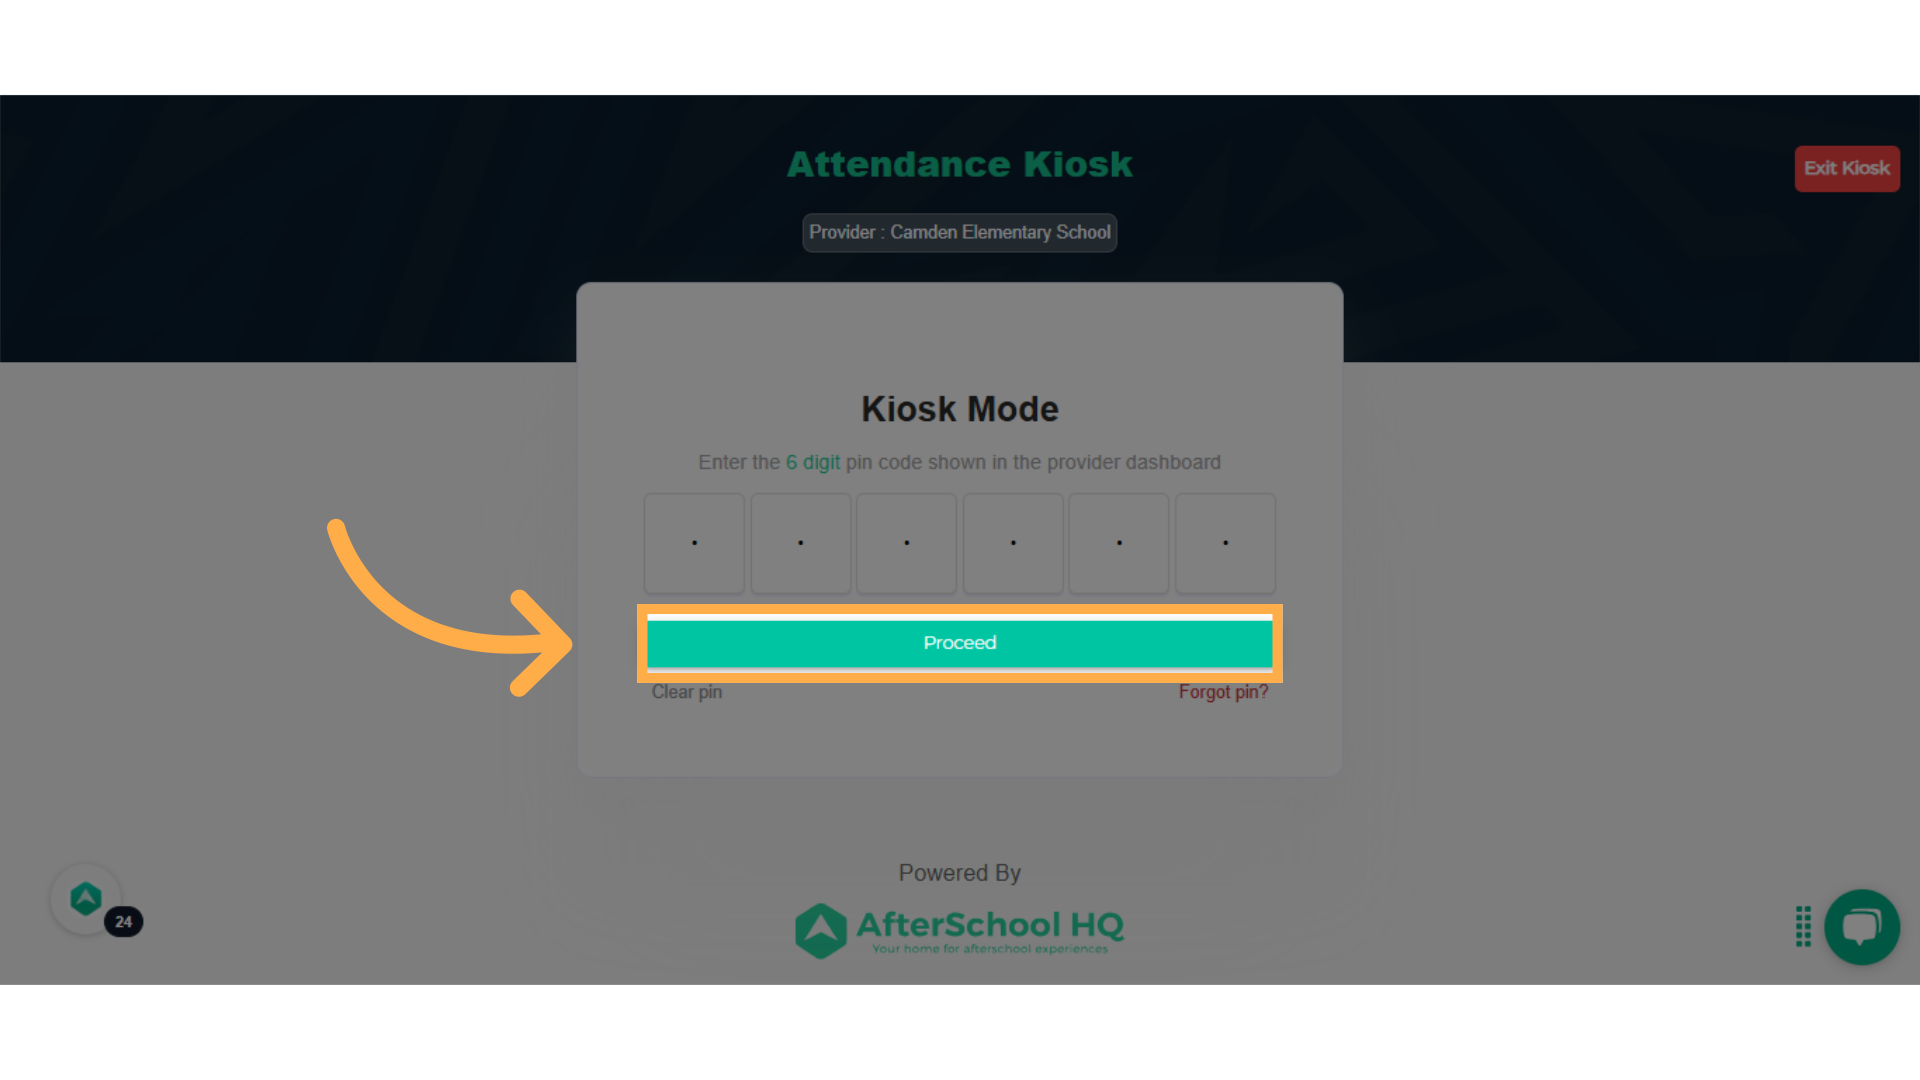
16. Enter Provider Pin Code
Enter the Provider Pin number found on the Home Page. (This will be a six digit pin code.)
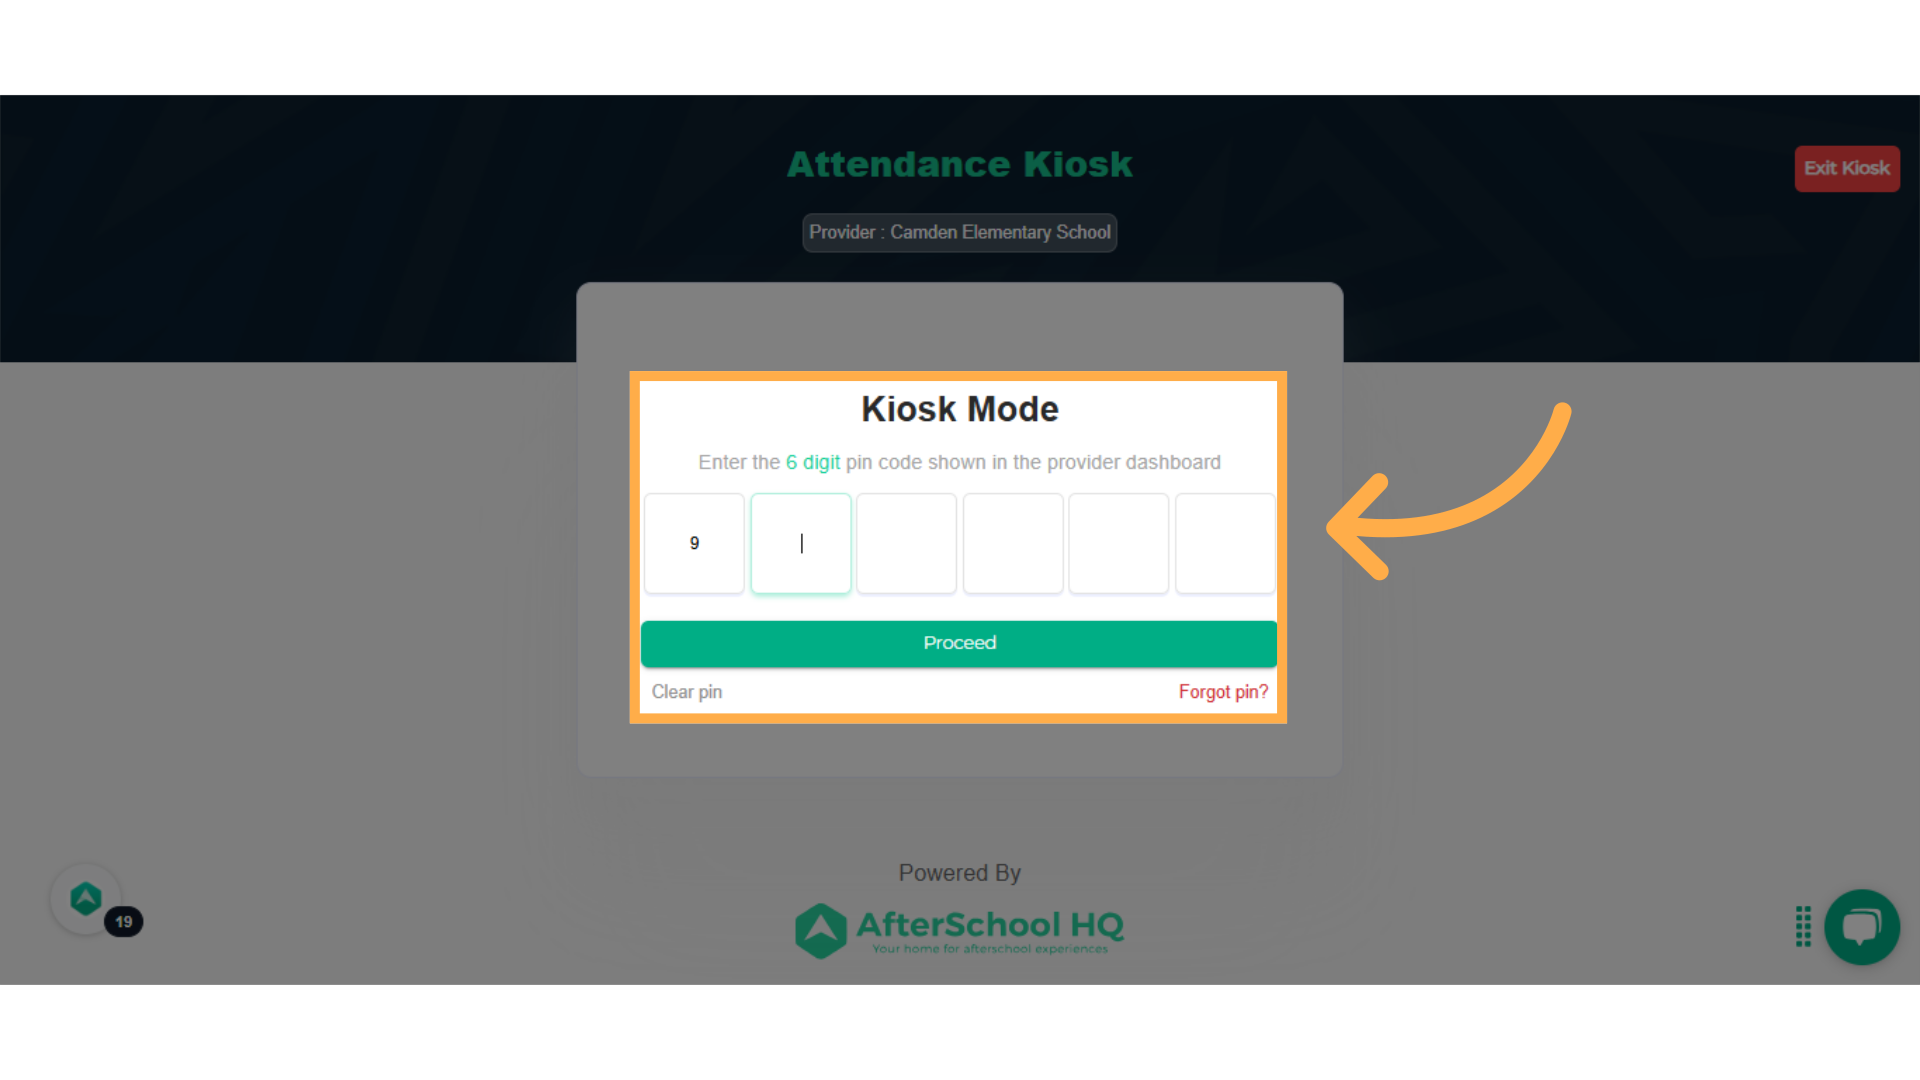
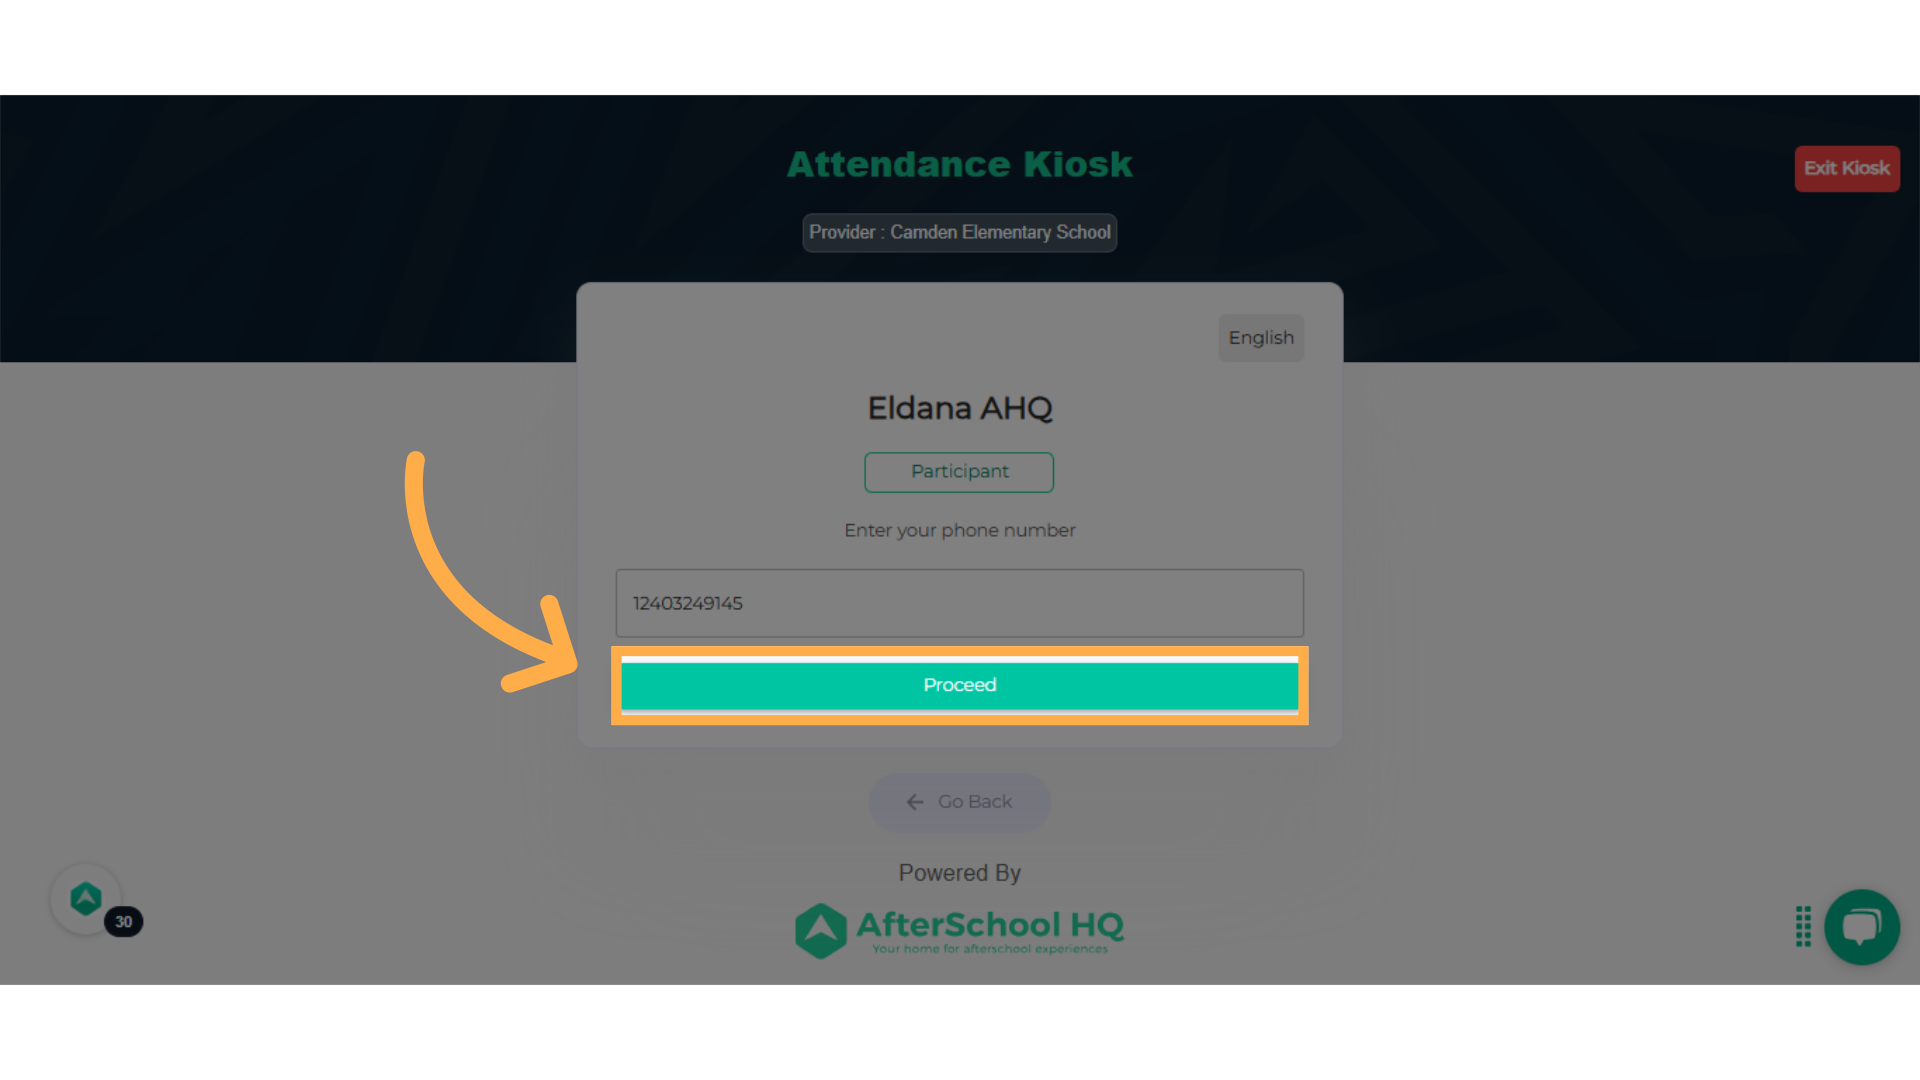
17. Click "Proceed"
Click Proceed to follow the Check In flow.
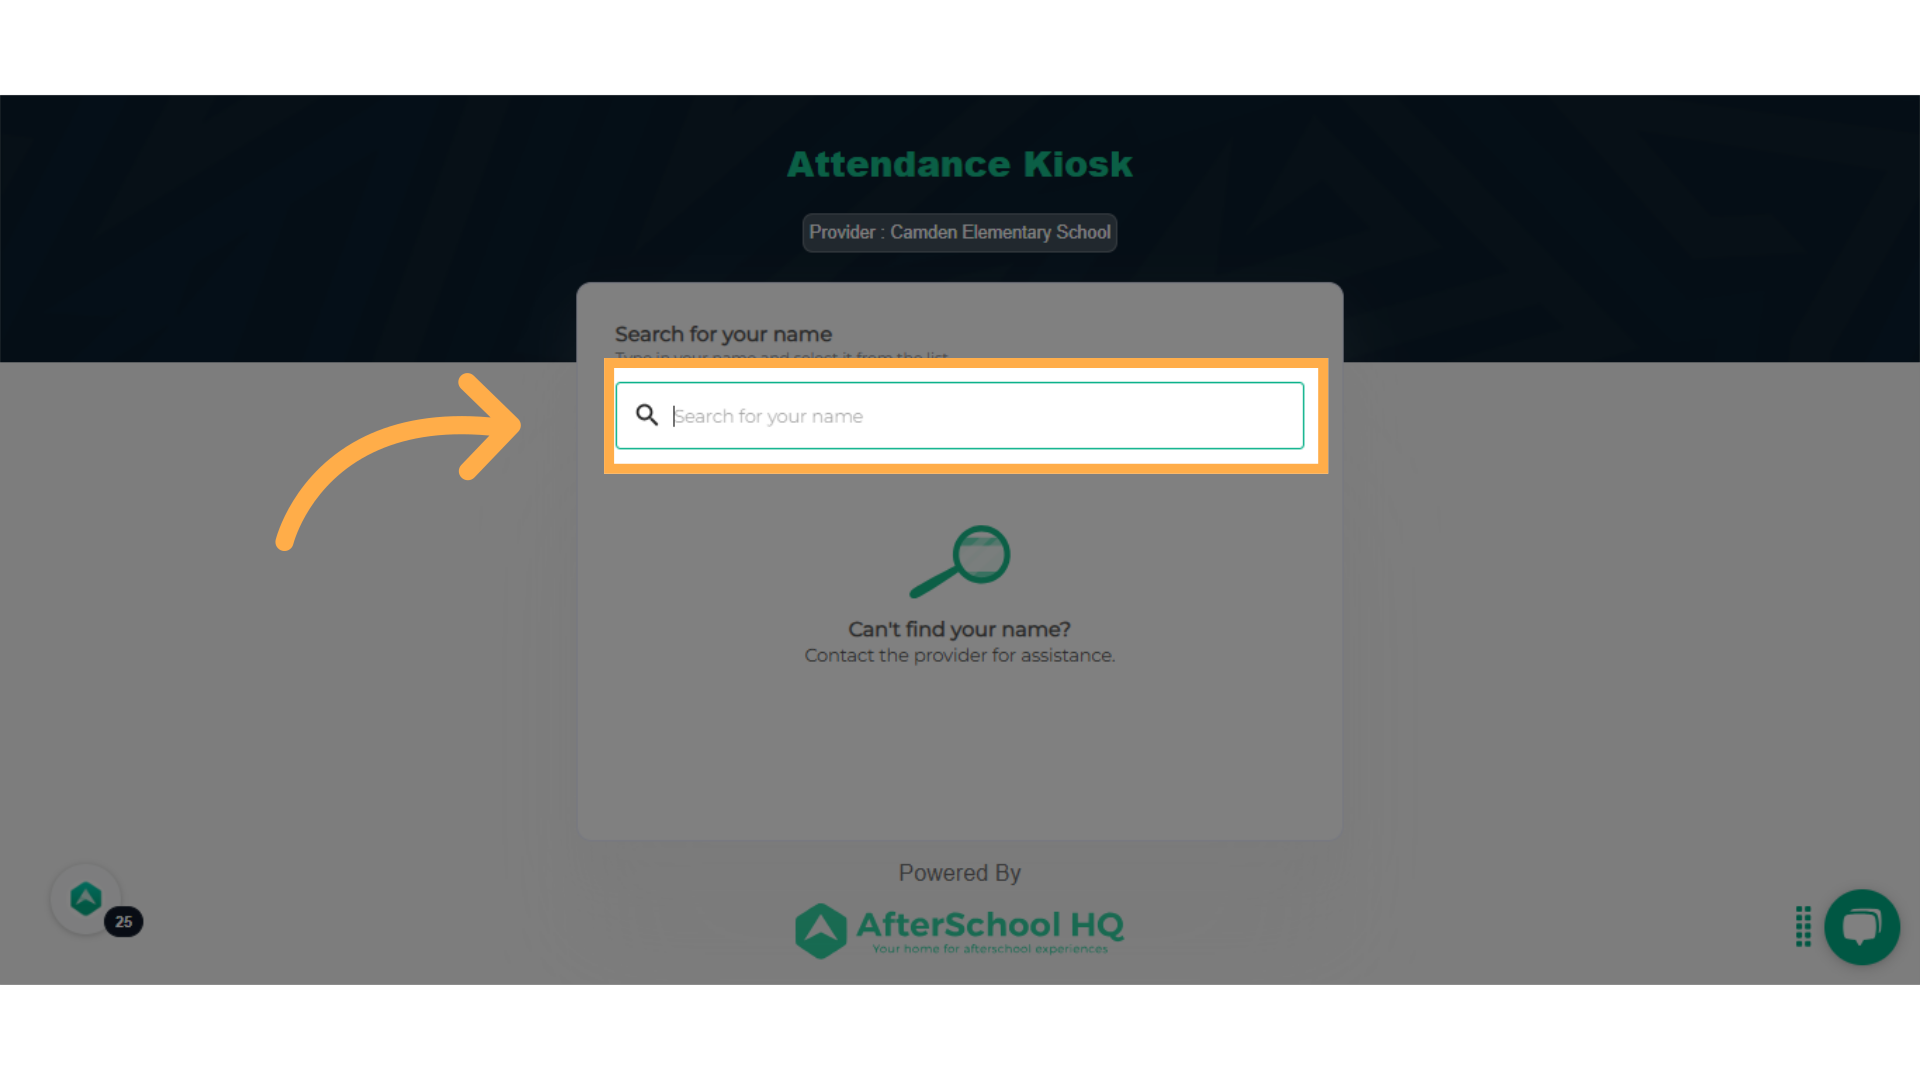
18. "Search for your name"
Type to initiate a search for your name.
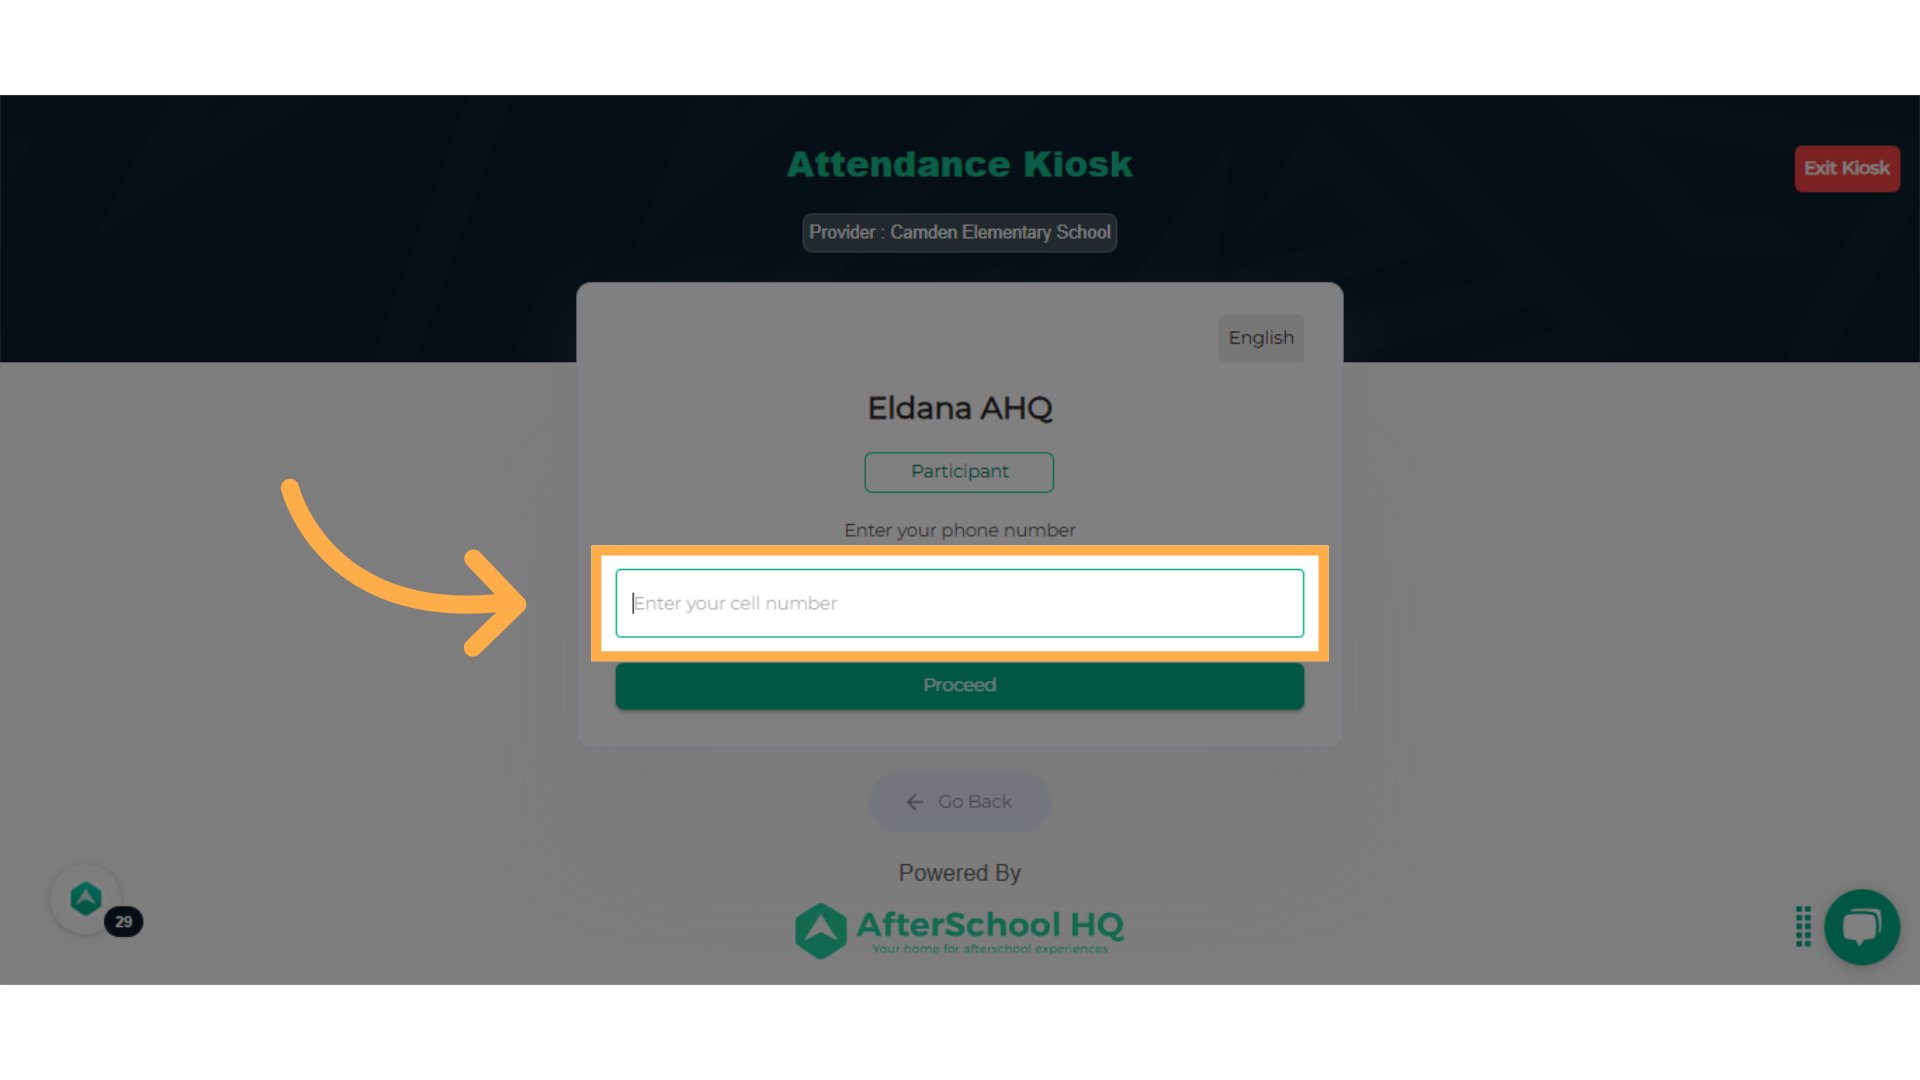
19. Click "Enter your cell number"
Once you have found and selected your name, Input your cellphone number registered with your account.
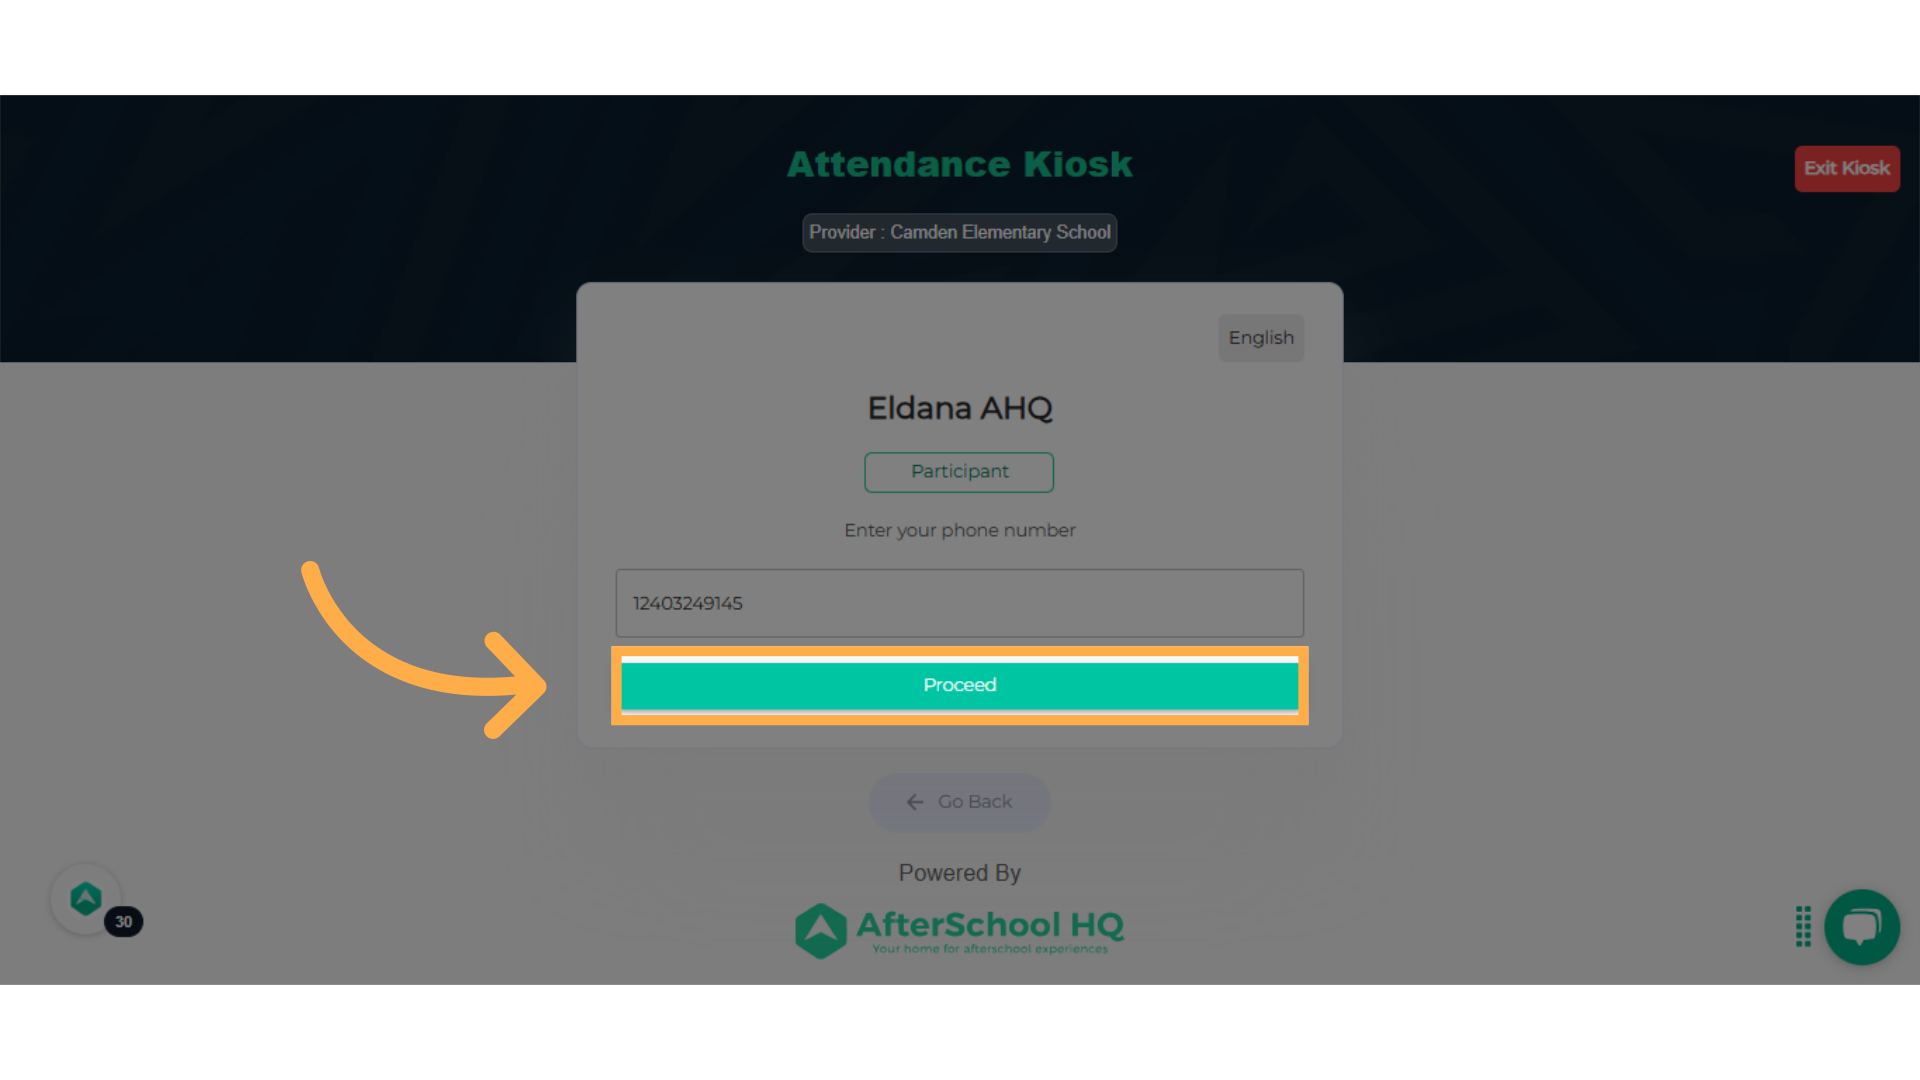
20. Click "Proceed"
Click on 'Proceed' to continue with the Check In Flow.
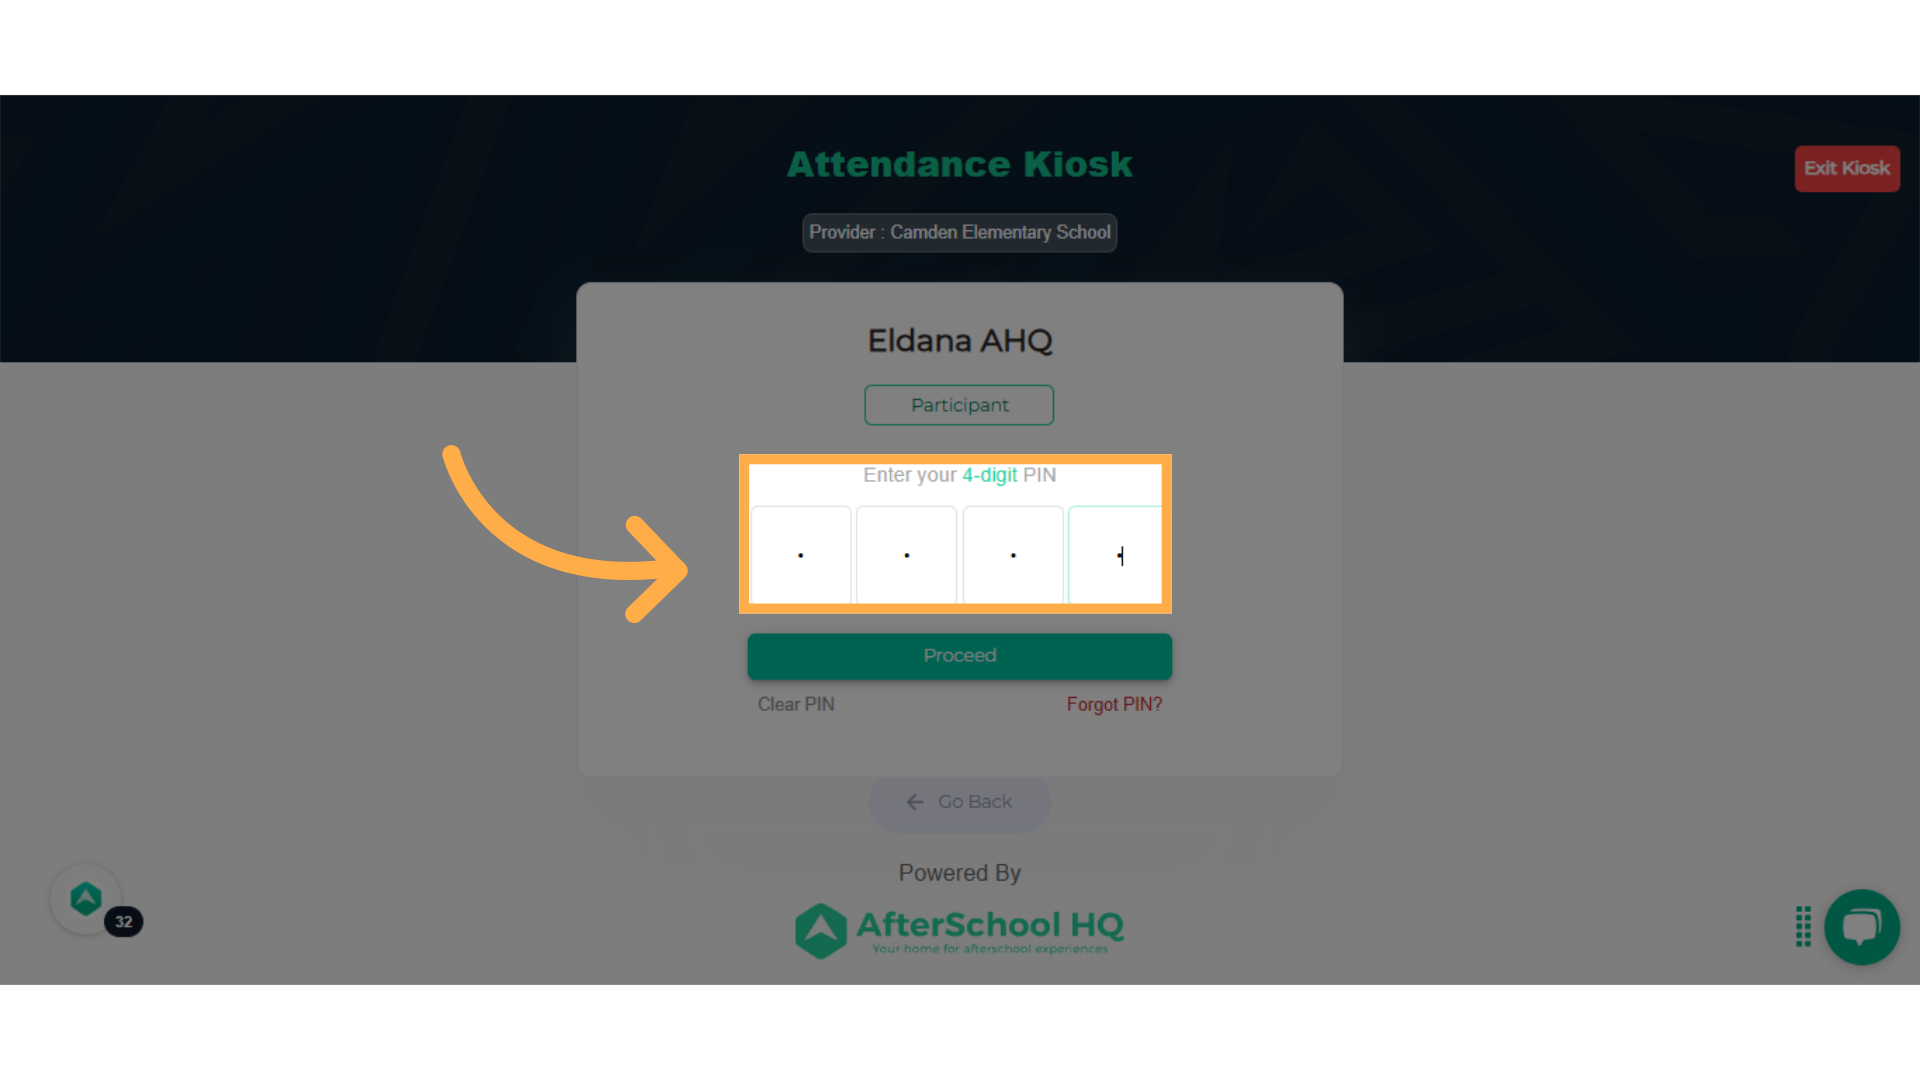
21. Enter User 4 digit Pin Code
Proceed to have participant enter in their unique 4 digit pin code.
22. Click "Proceed"
Click on 'Proceed' to continue with the Check In Flow.
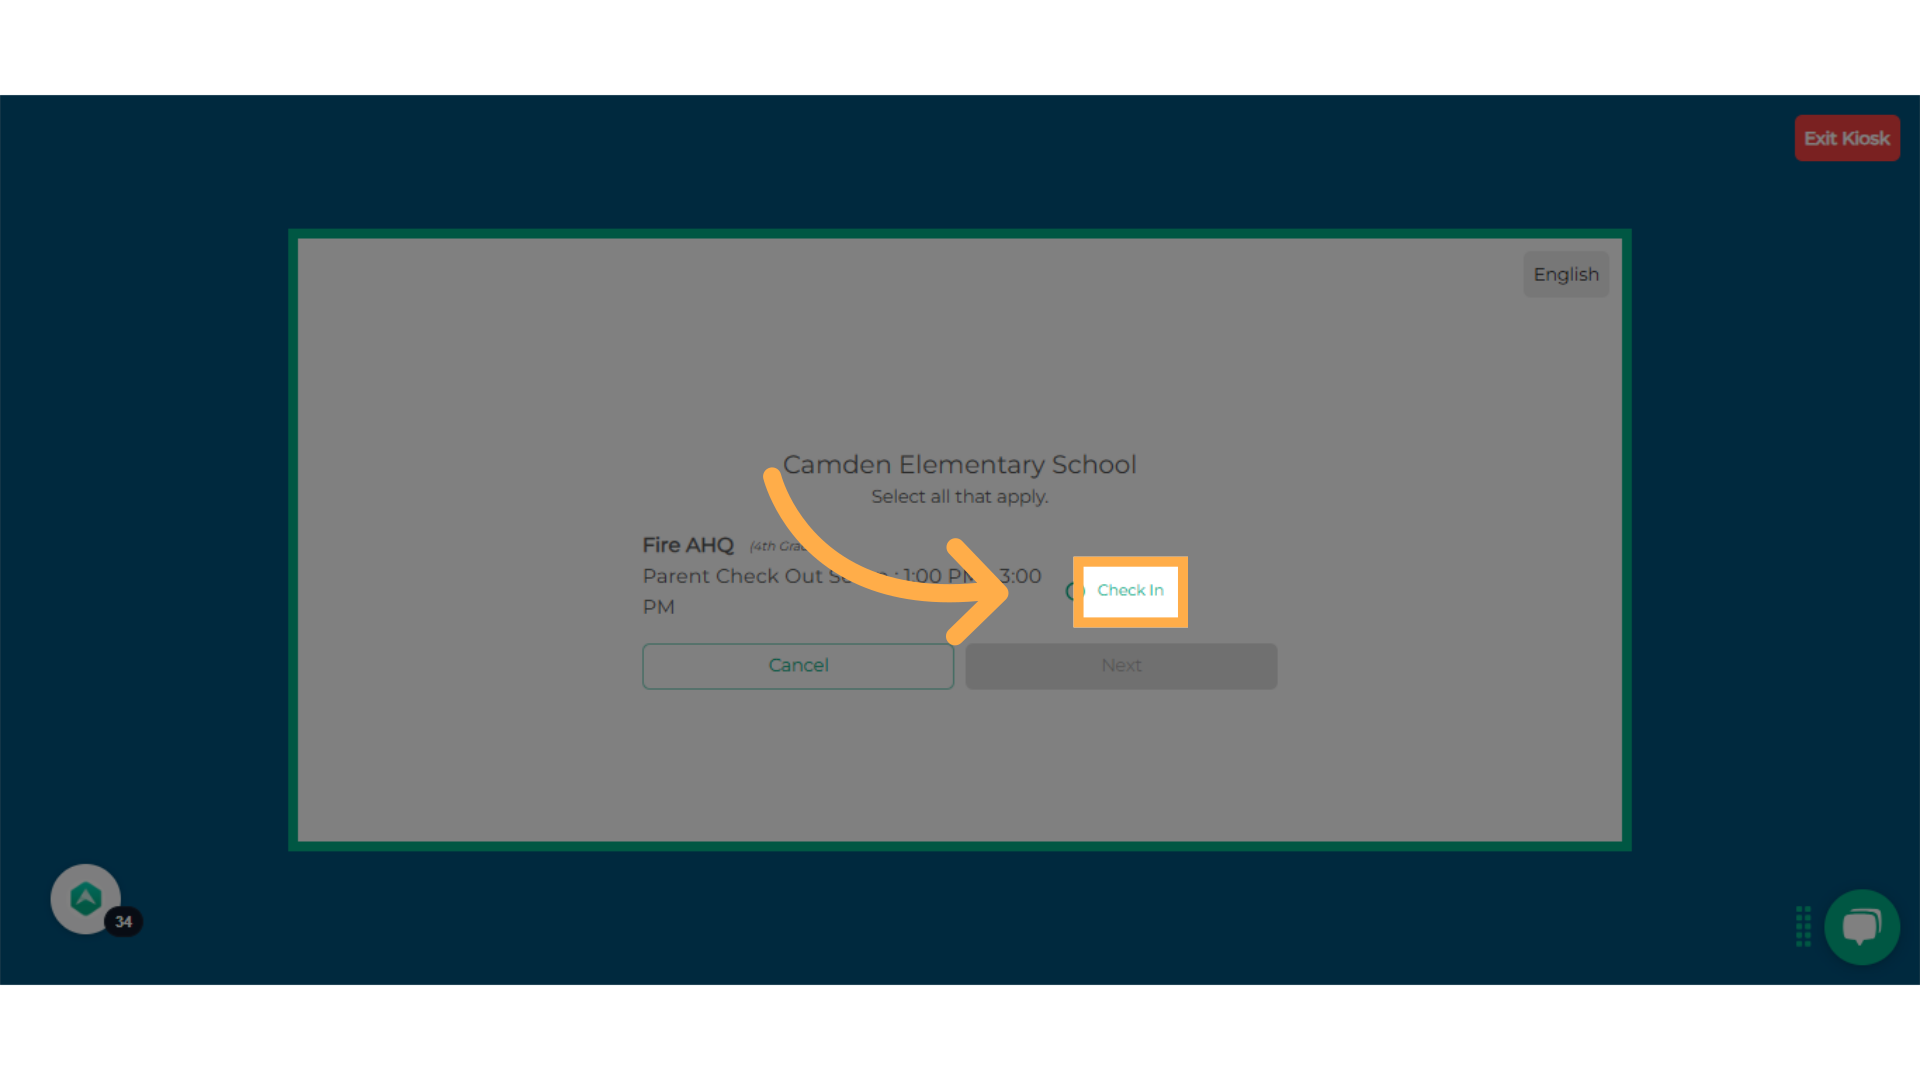
23. Click "Check In"
Click on 'Check In' to Initiate the check-in process.
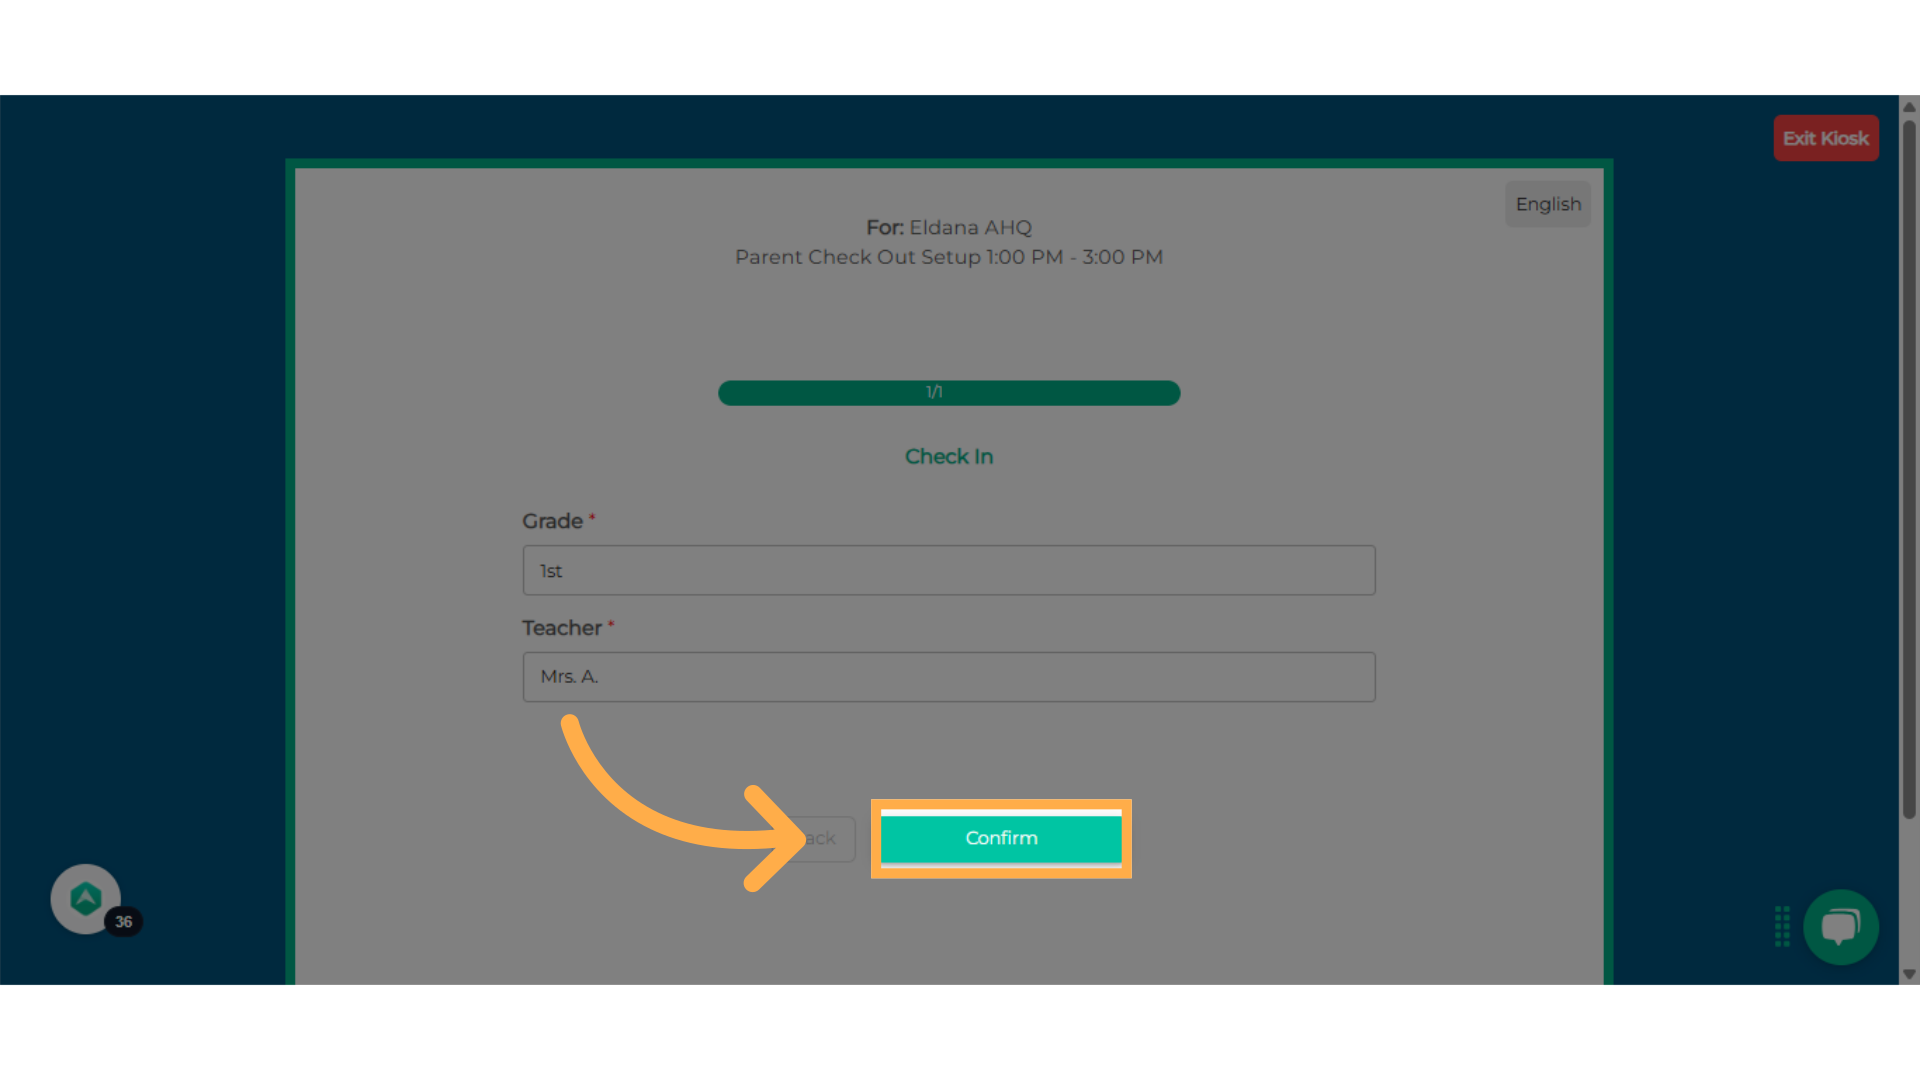
24. Click "Confirm"
Click to Confirm the action.
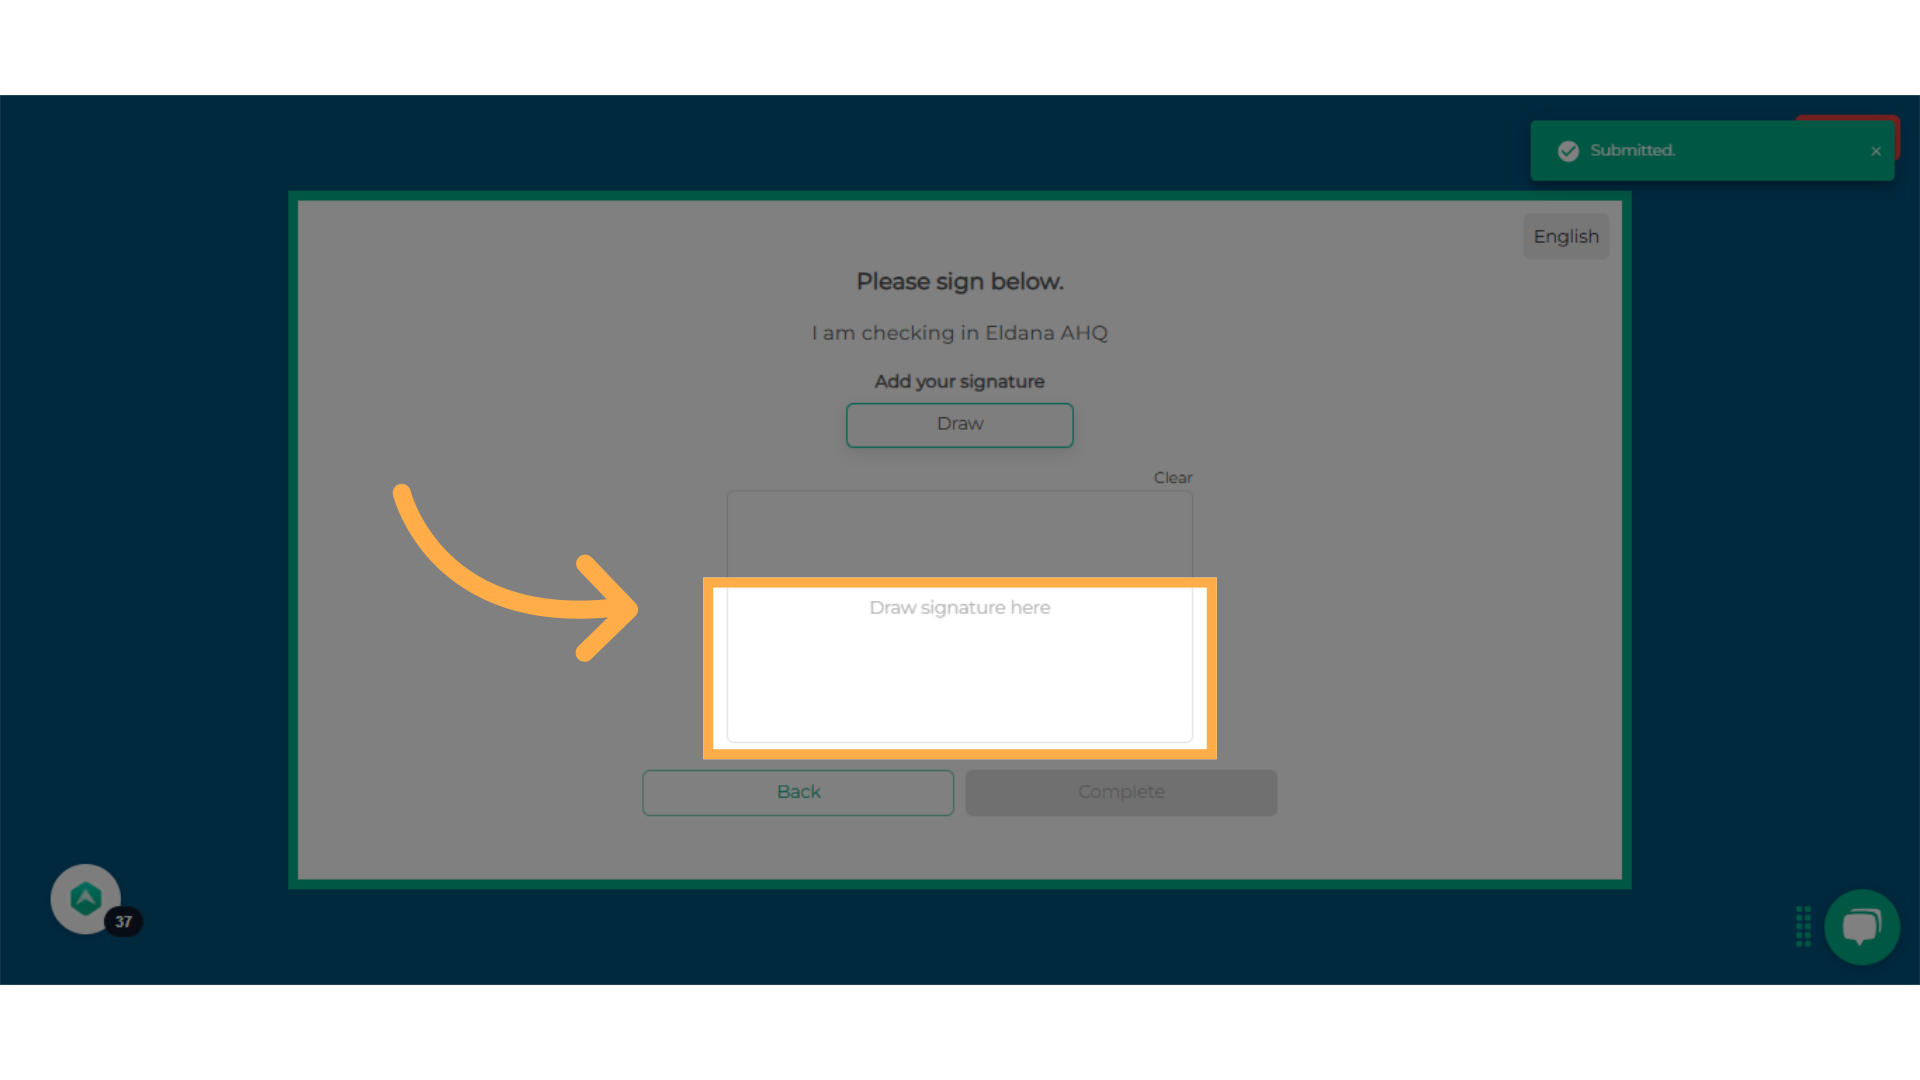
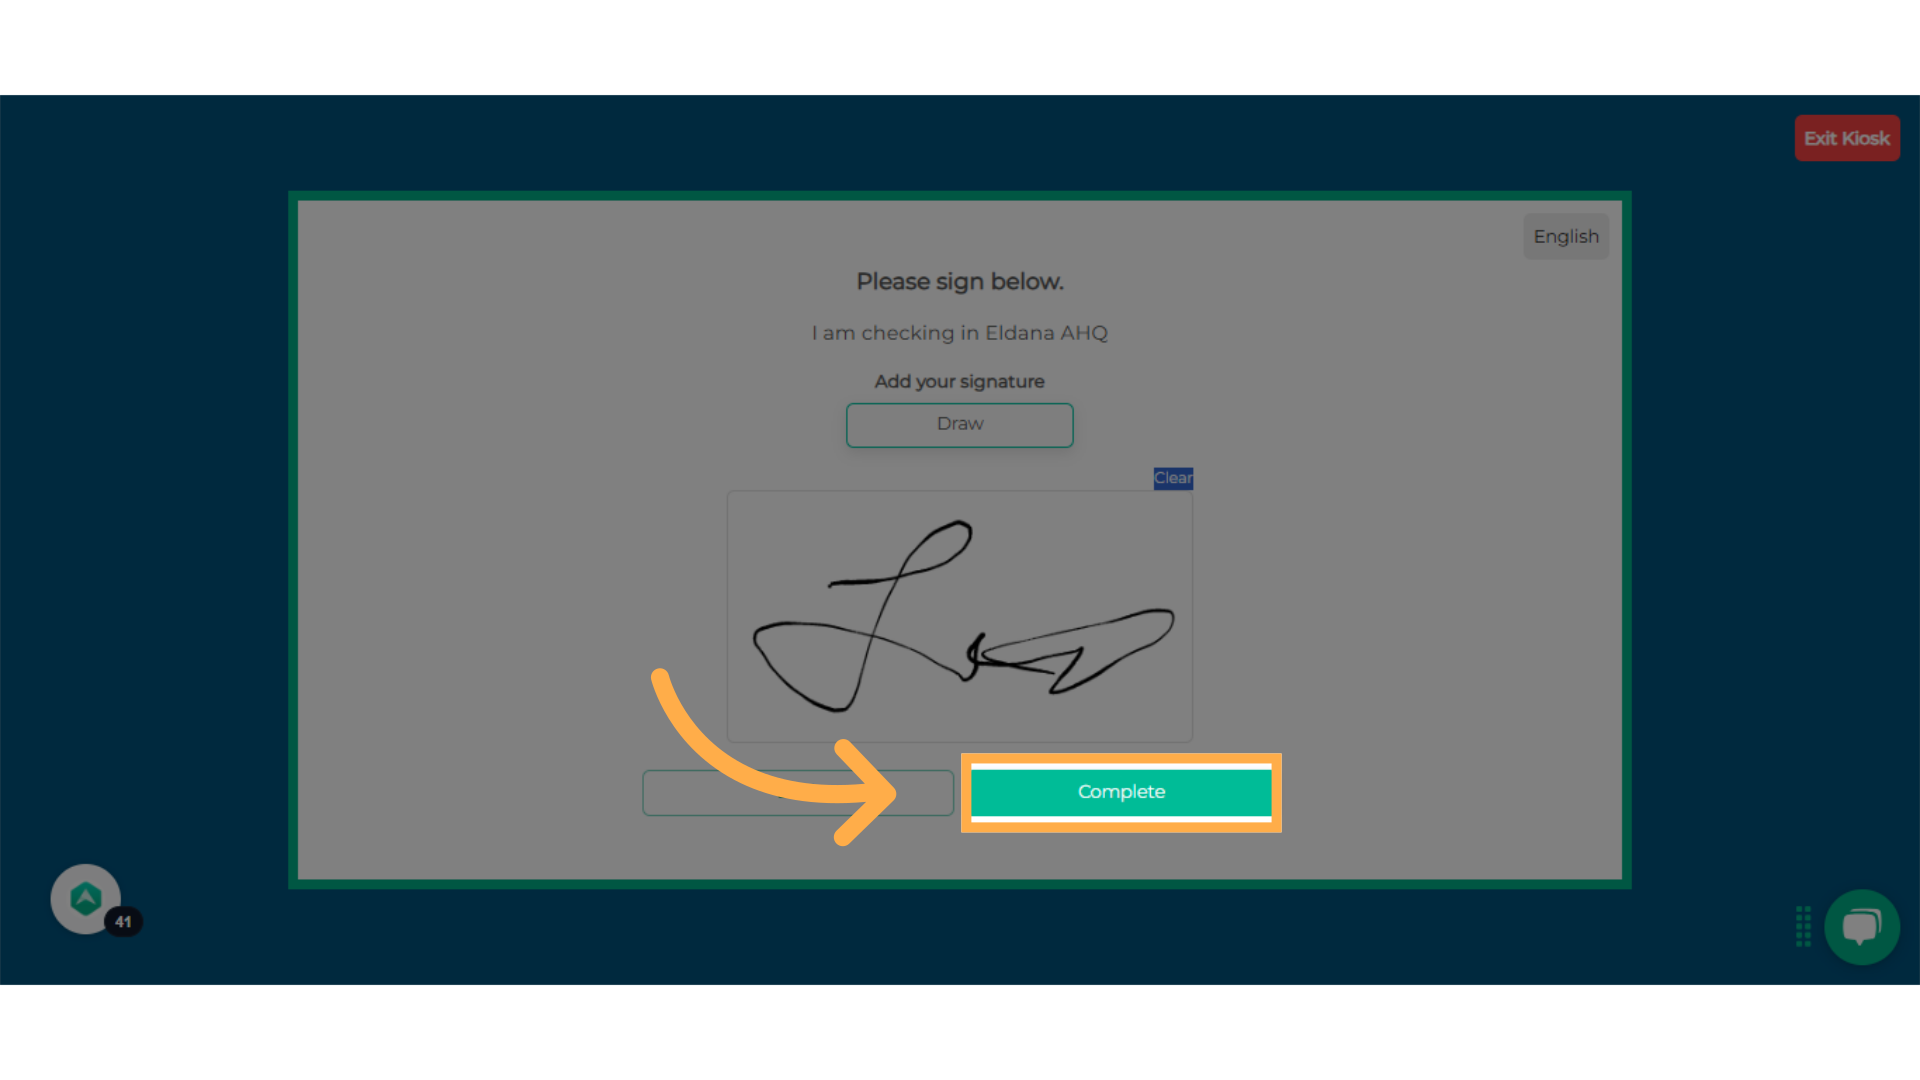
25. Click "Draw signature here"
Draw your signature in the indicated area.
26. Click "Complete"
Mark the process as complete.
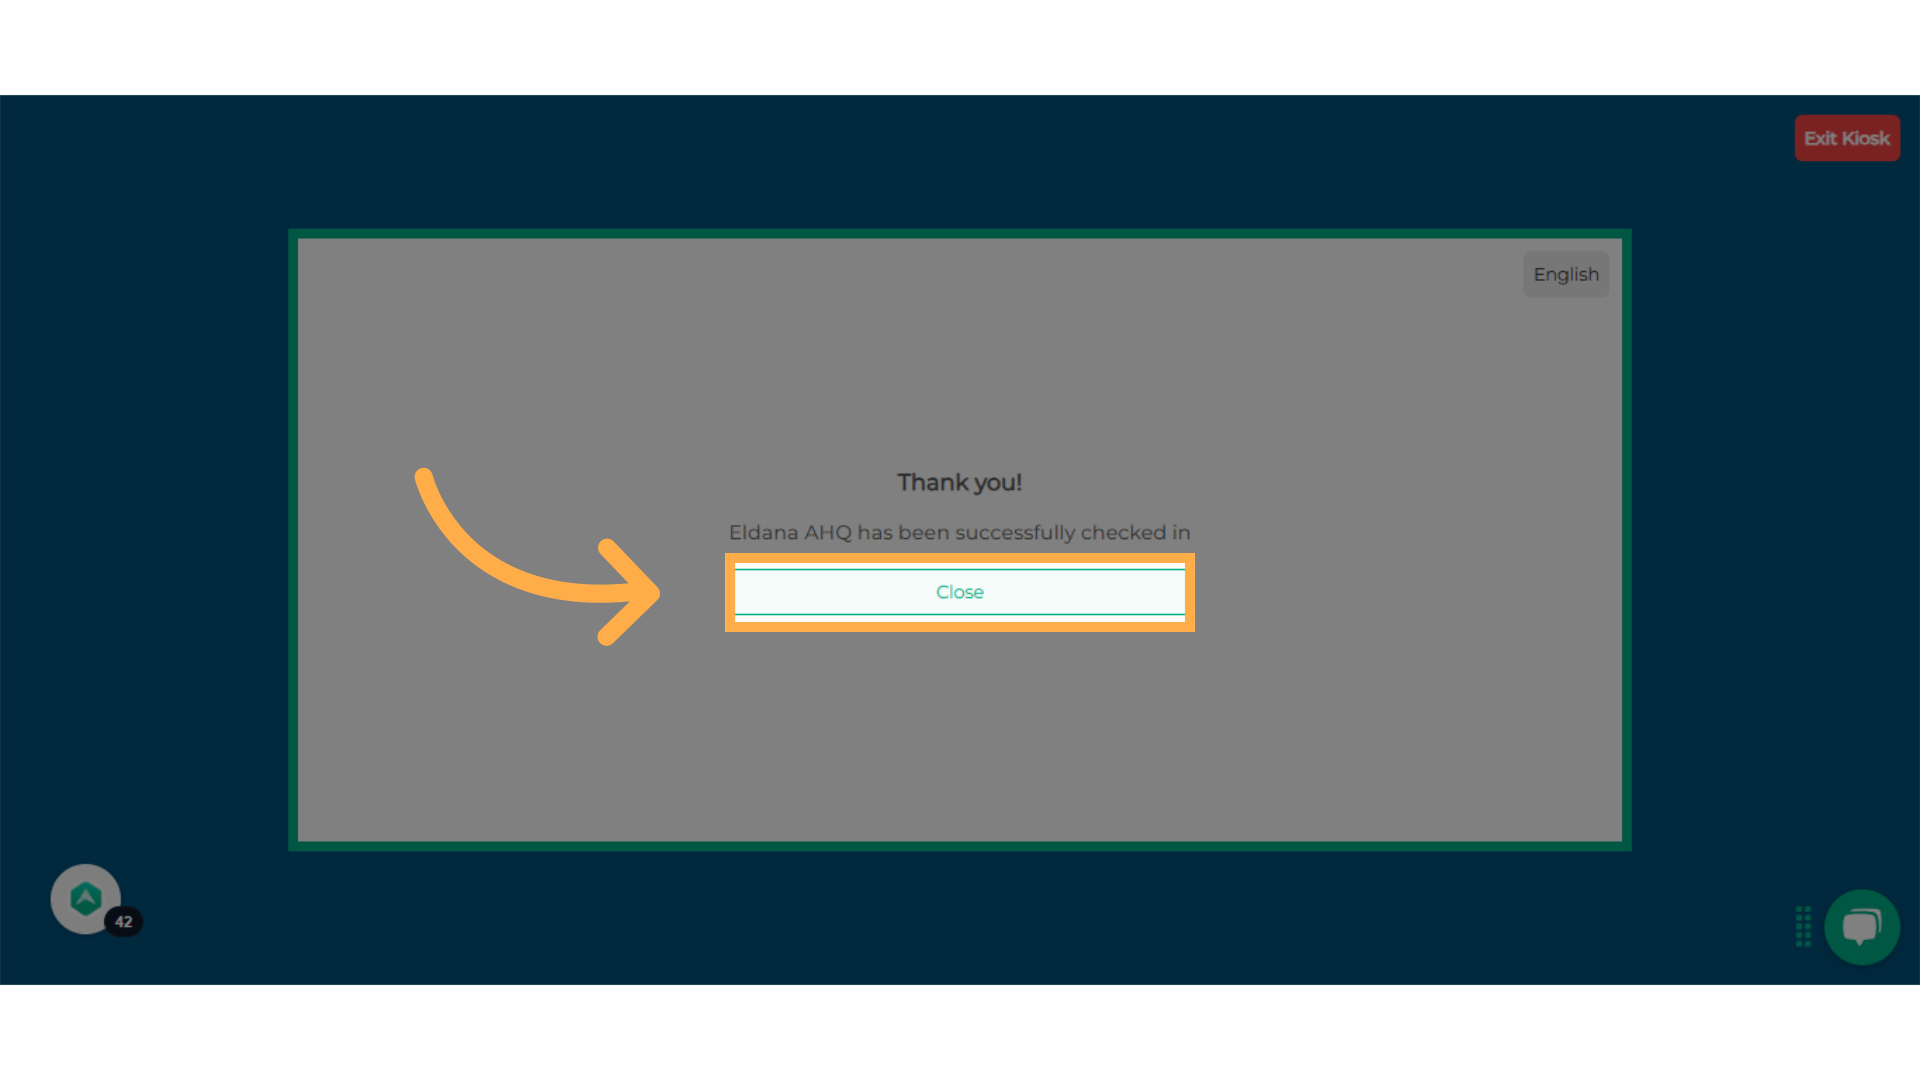
27. Click "Close"
Click on 'Close' to Close the window. To Check Out, Repeat these same steps.