![ASHQ Logo Vert Flat.png]](https://support.afterschoolhq.com/hs-fs/hubfs/ASHQ%20Logo%20Vert%20Flat.png?height=40&name=ASHQ%20Logo%20Vert%20Flat.png)
Sometimes a student may need to check in and out more than once during the same day.
AfterSchool HQ allows you to record additional check-in entries and update the corresponding check-out times while keeping each attendance entry accurately recorded.
1. Access Check-In/Out
From the main menu, open “Manage Check-In/Out” to access student attendance management.
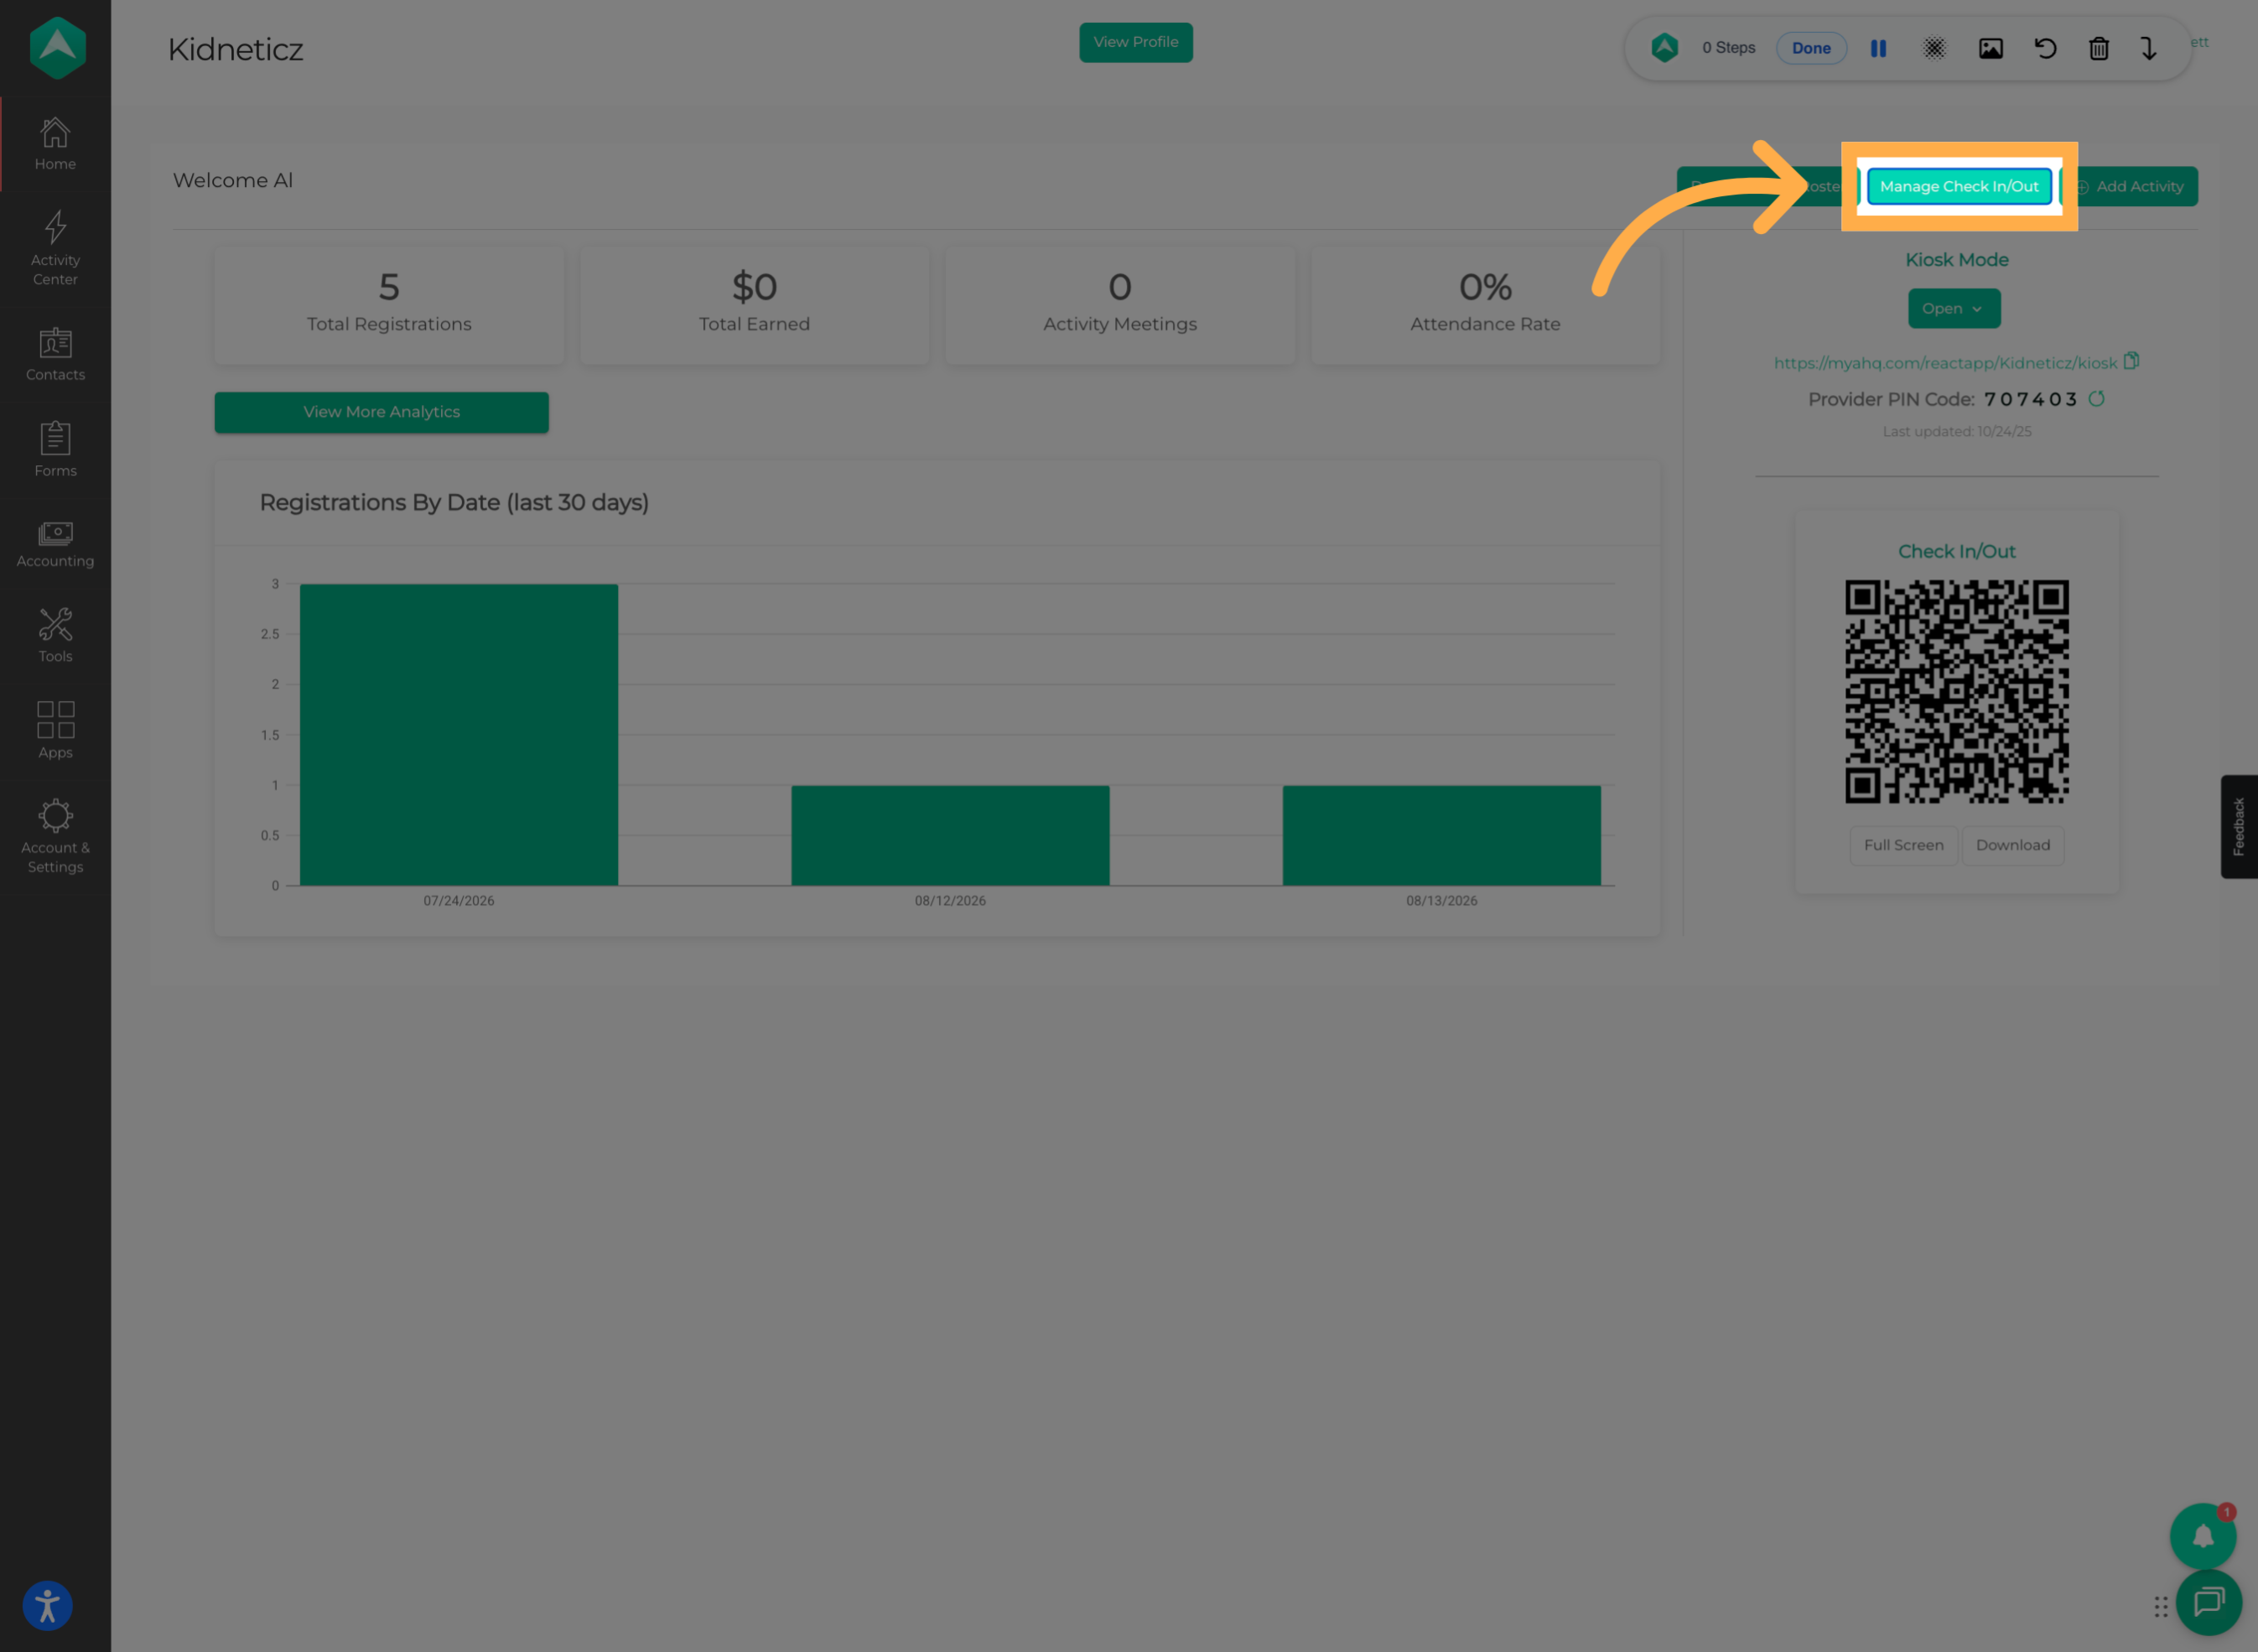
💡 Tip: Make sure you are in the correct provider account before managing attendance.
2. Open Check-In/Out Management
Click “Manage Check-In/Out” to open the attendance management section.
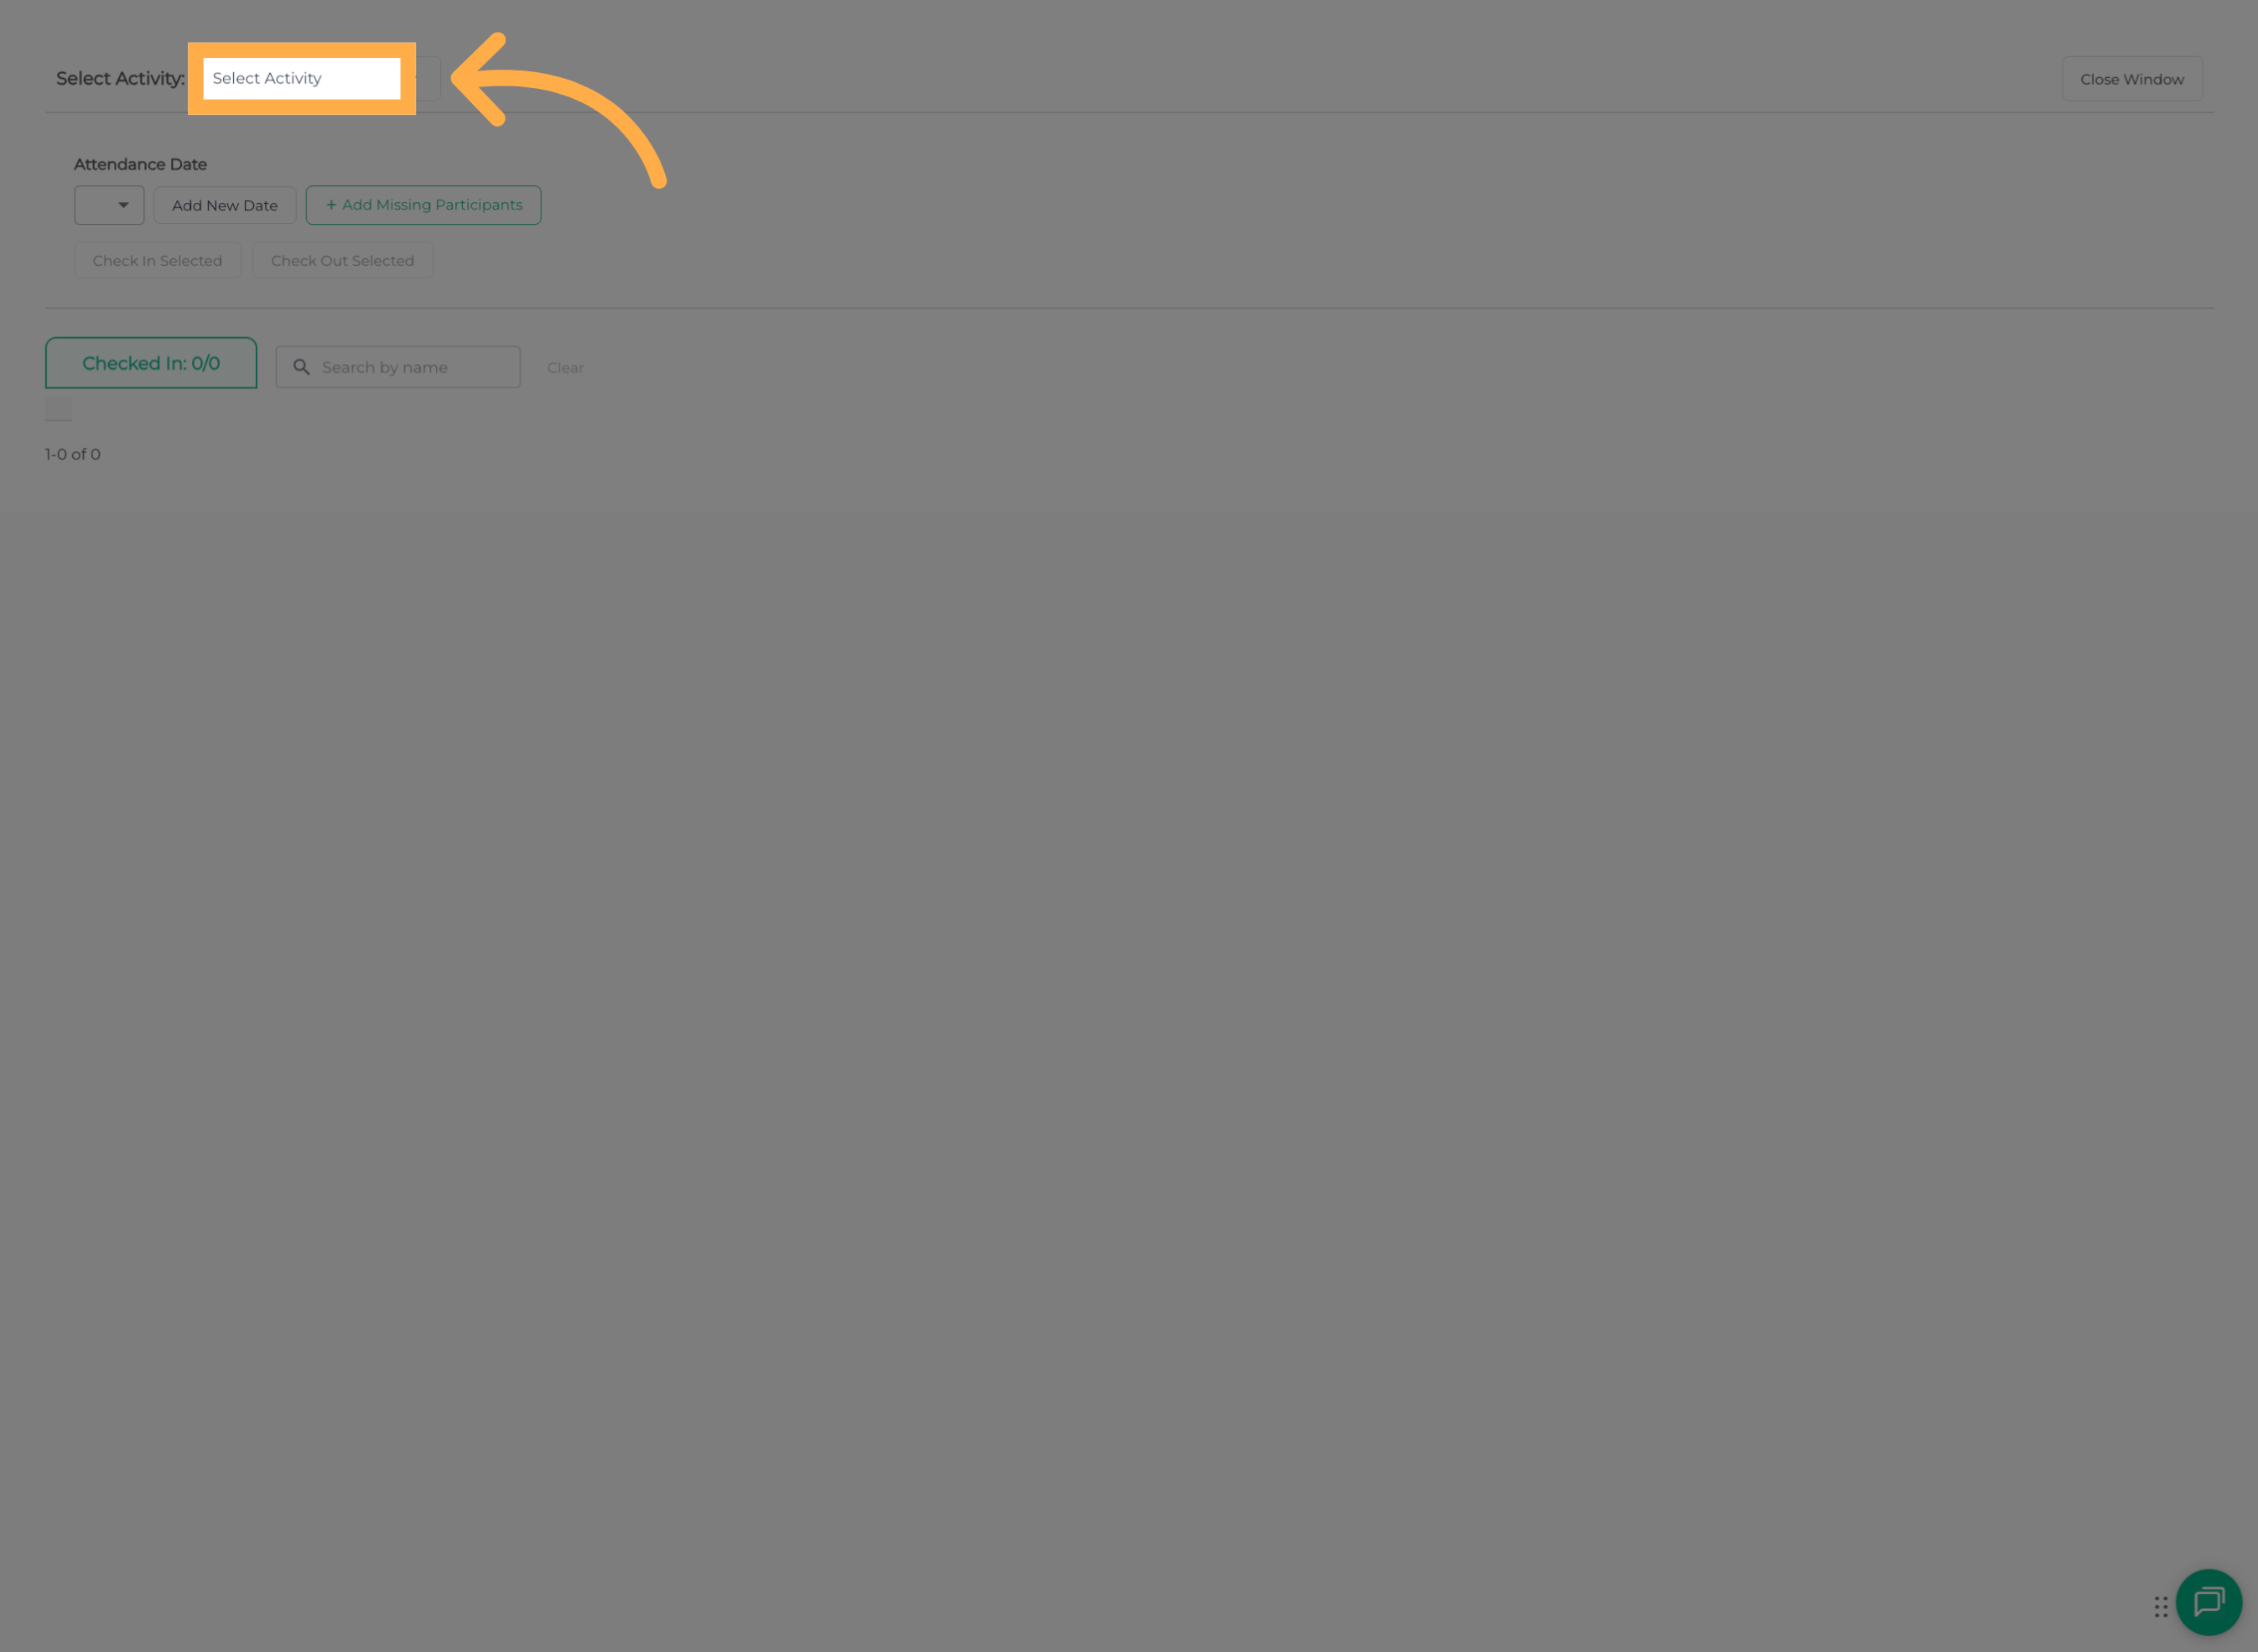
3. Open Activity Selection
Click “Select Activity” to choose the activity where you want to manage attendance.
💡 Tip: Make sure you select the activity where the student is registered.
4. Choose the Activity
Select the activity you want to manage from the list.
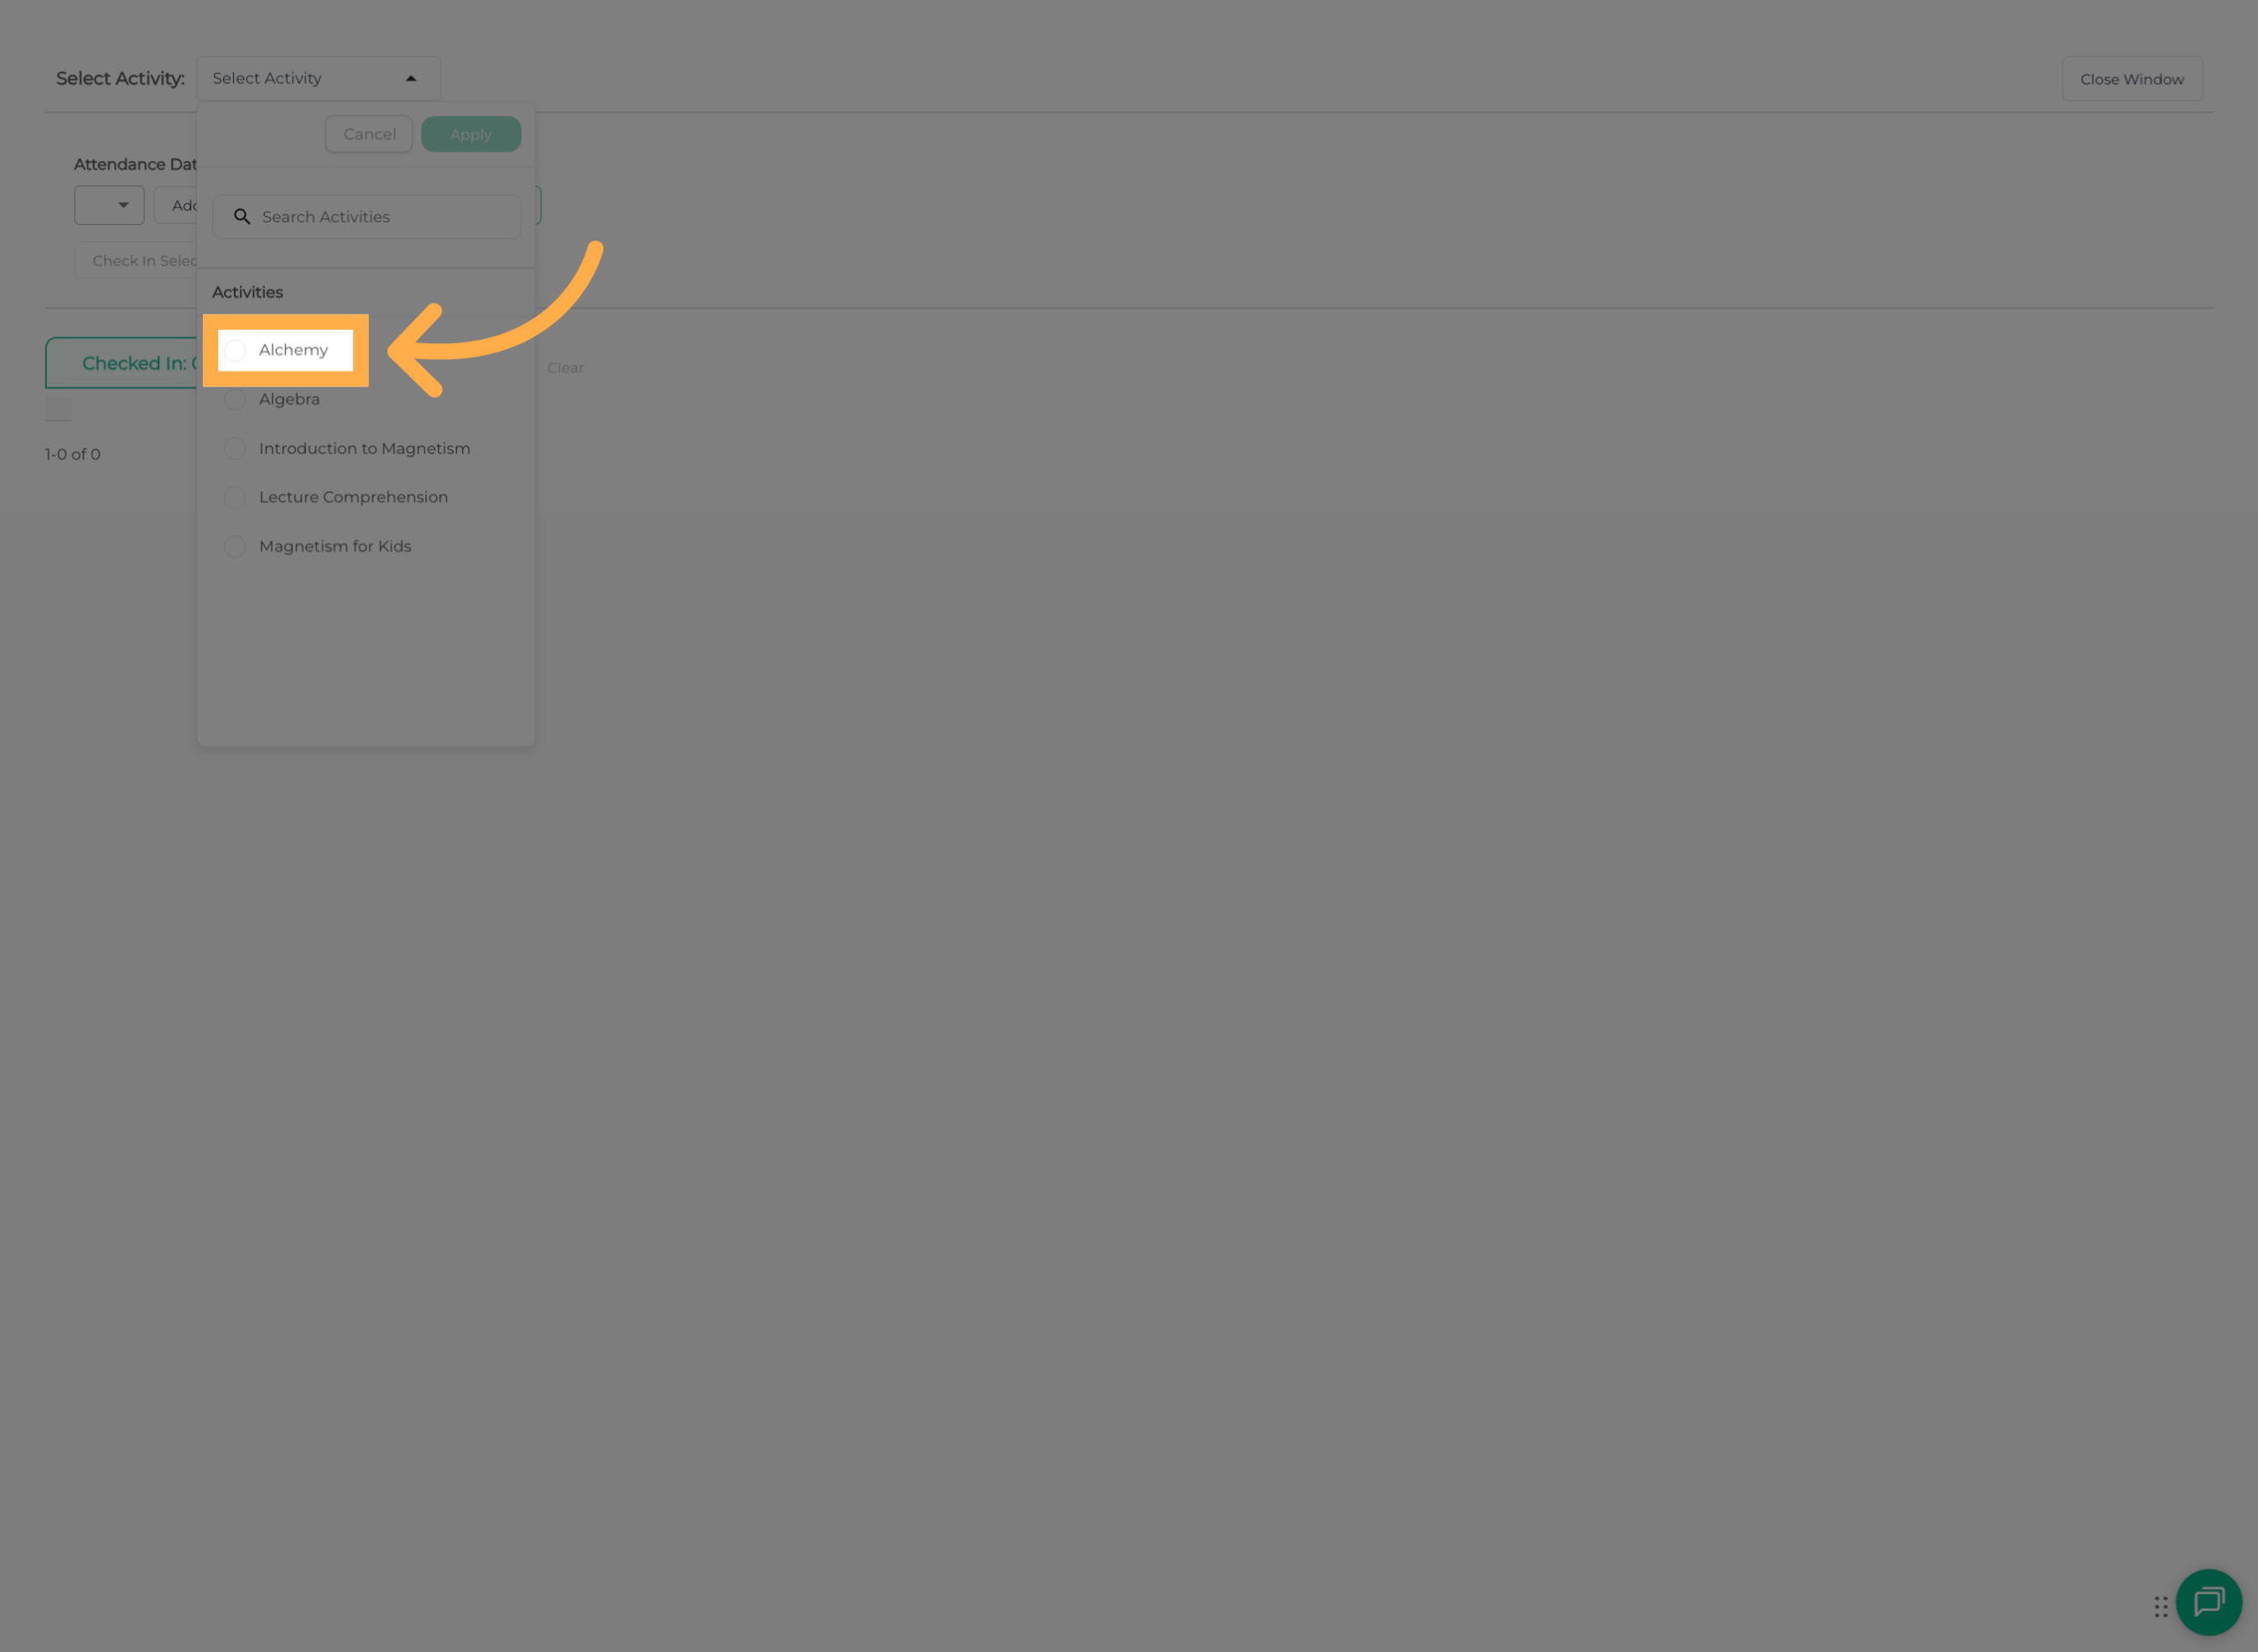
💡 Tip: If your organization has multiple activities with similar names, double-check that you selected the correct one before continuing.
5. Apply Activity Selection
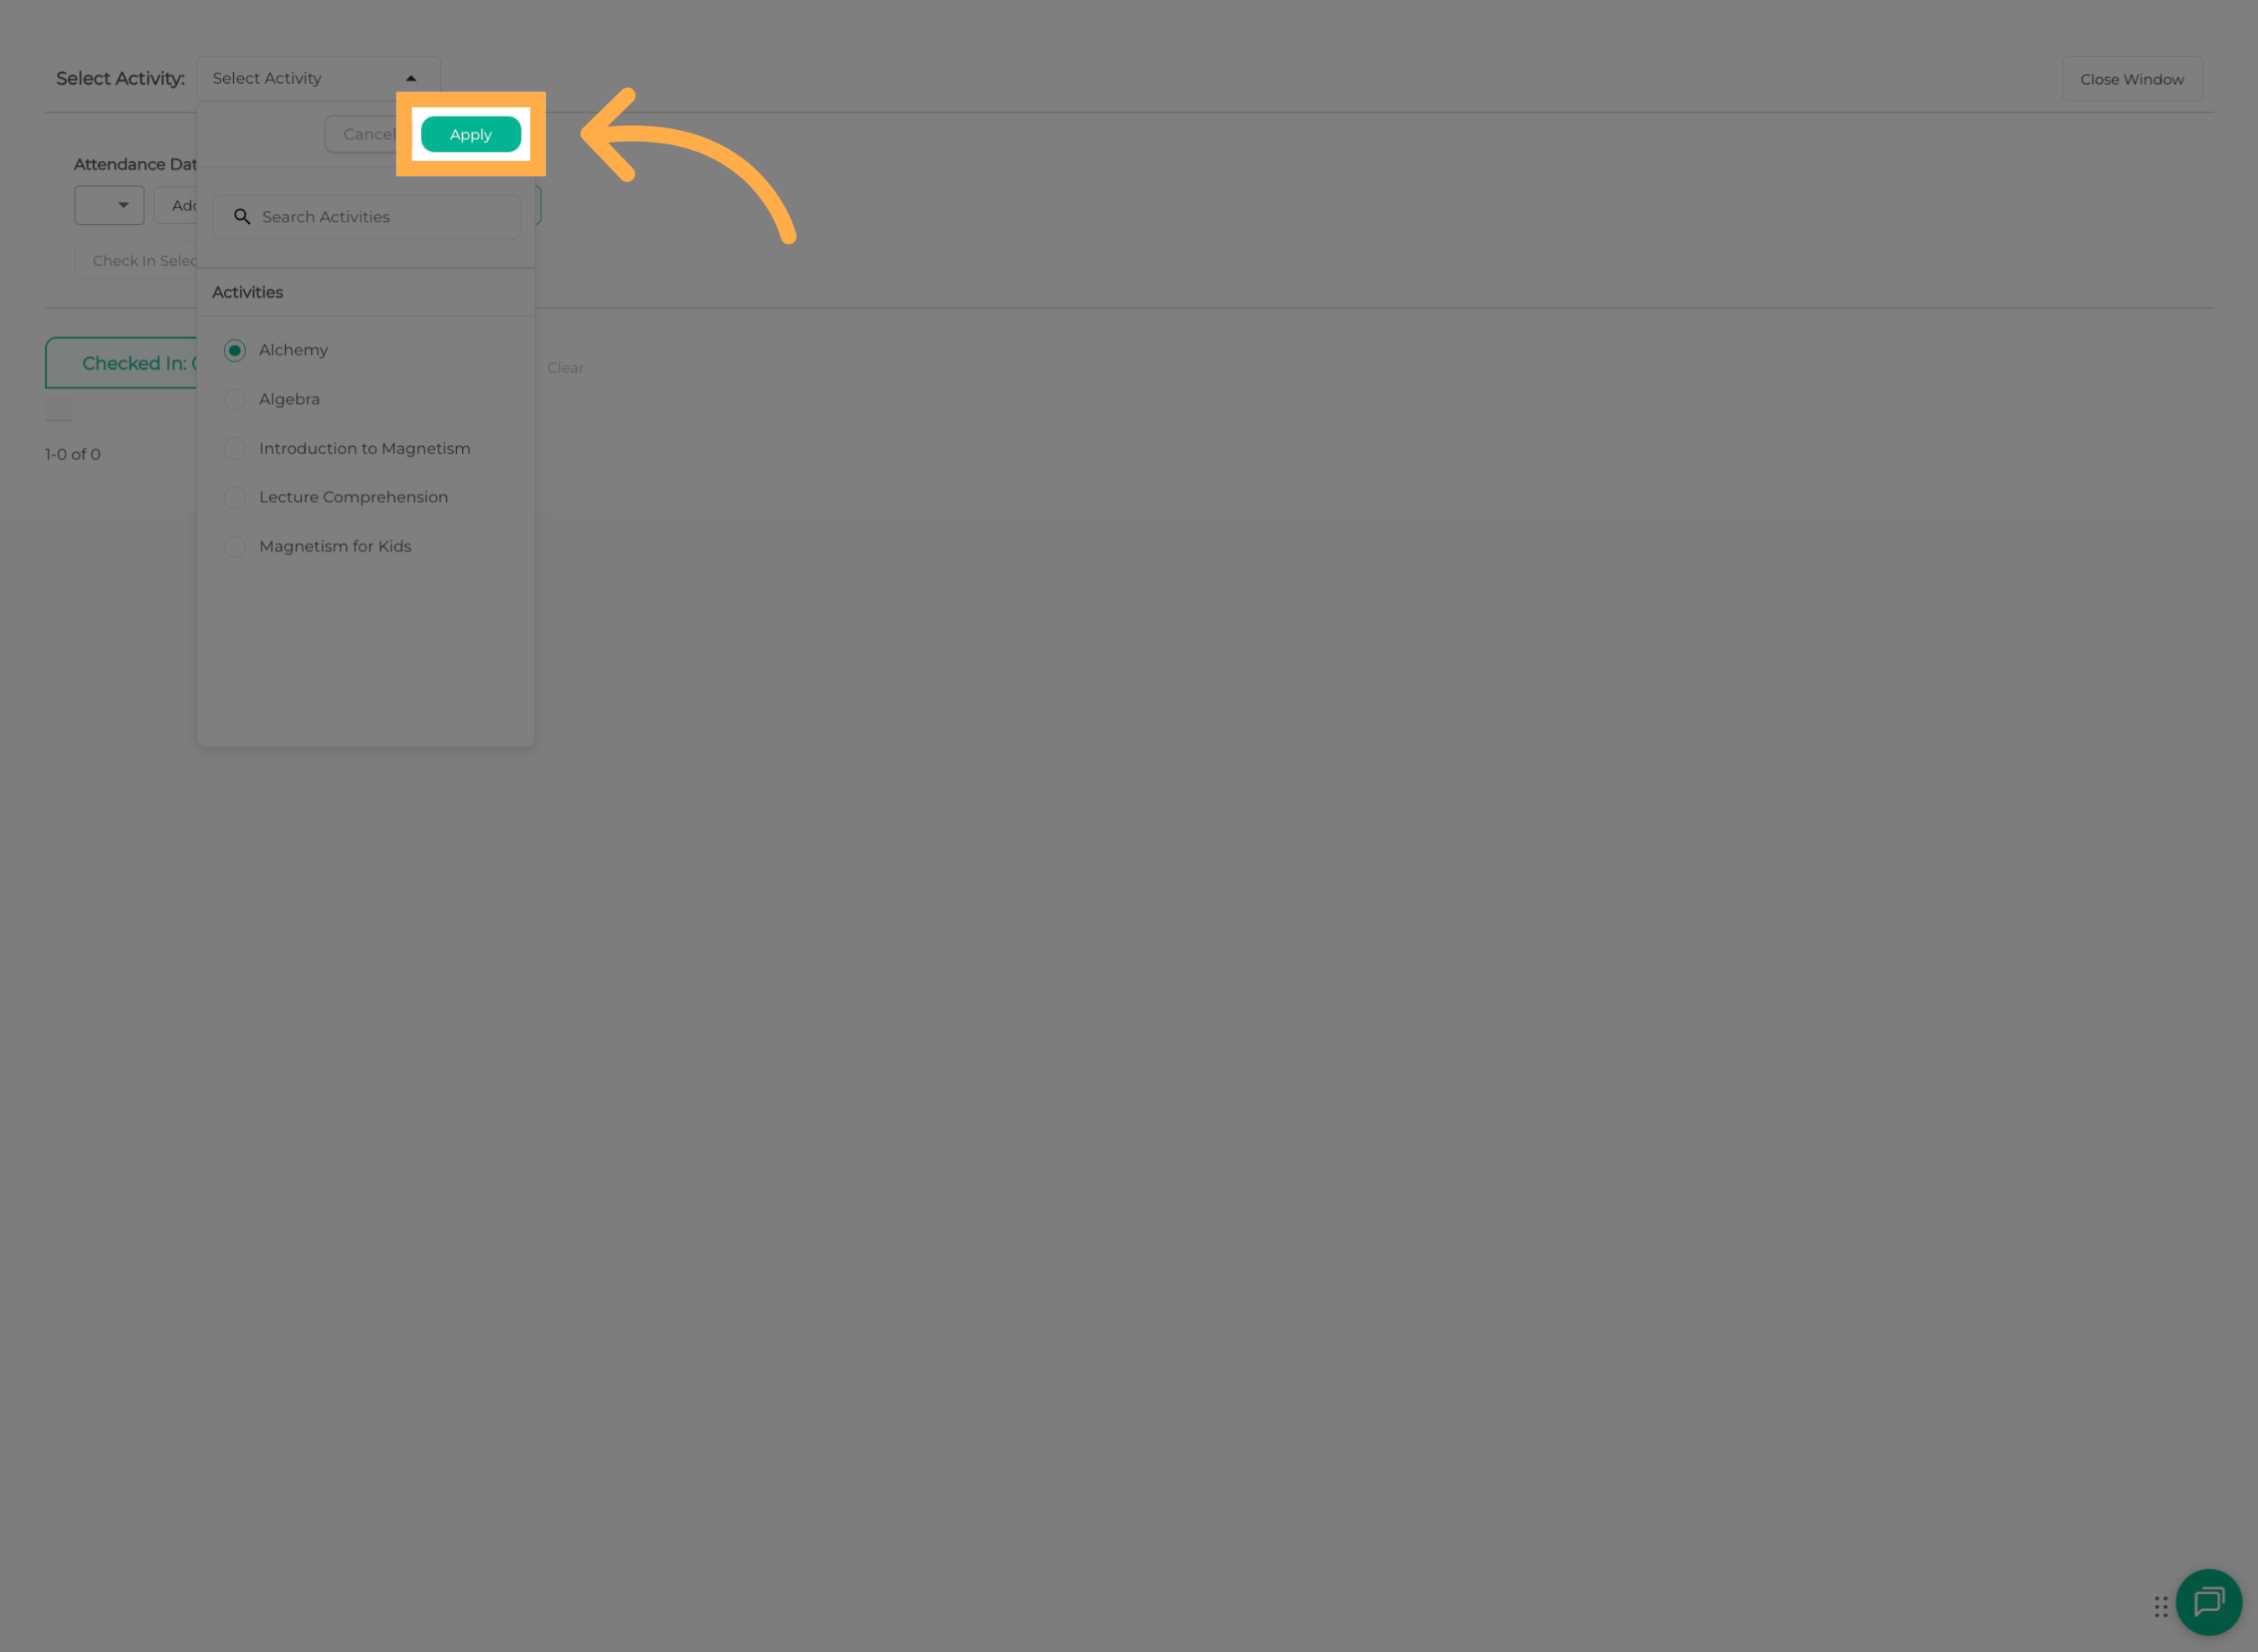
Click “Apply” to confirm your activity selection and continue to the Check-In options.
6. Select Students
Select the students you want to Check-In. You can select students individually or in bulk.
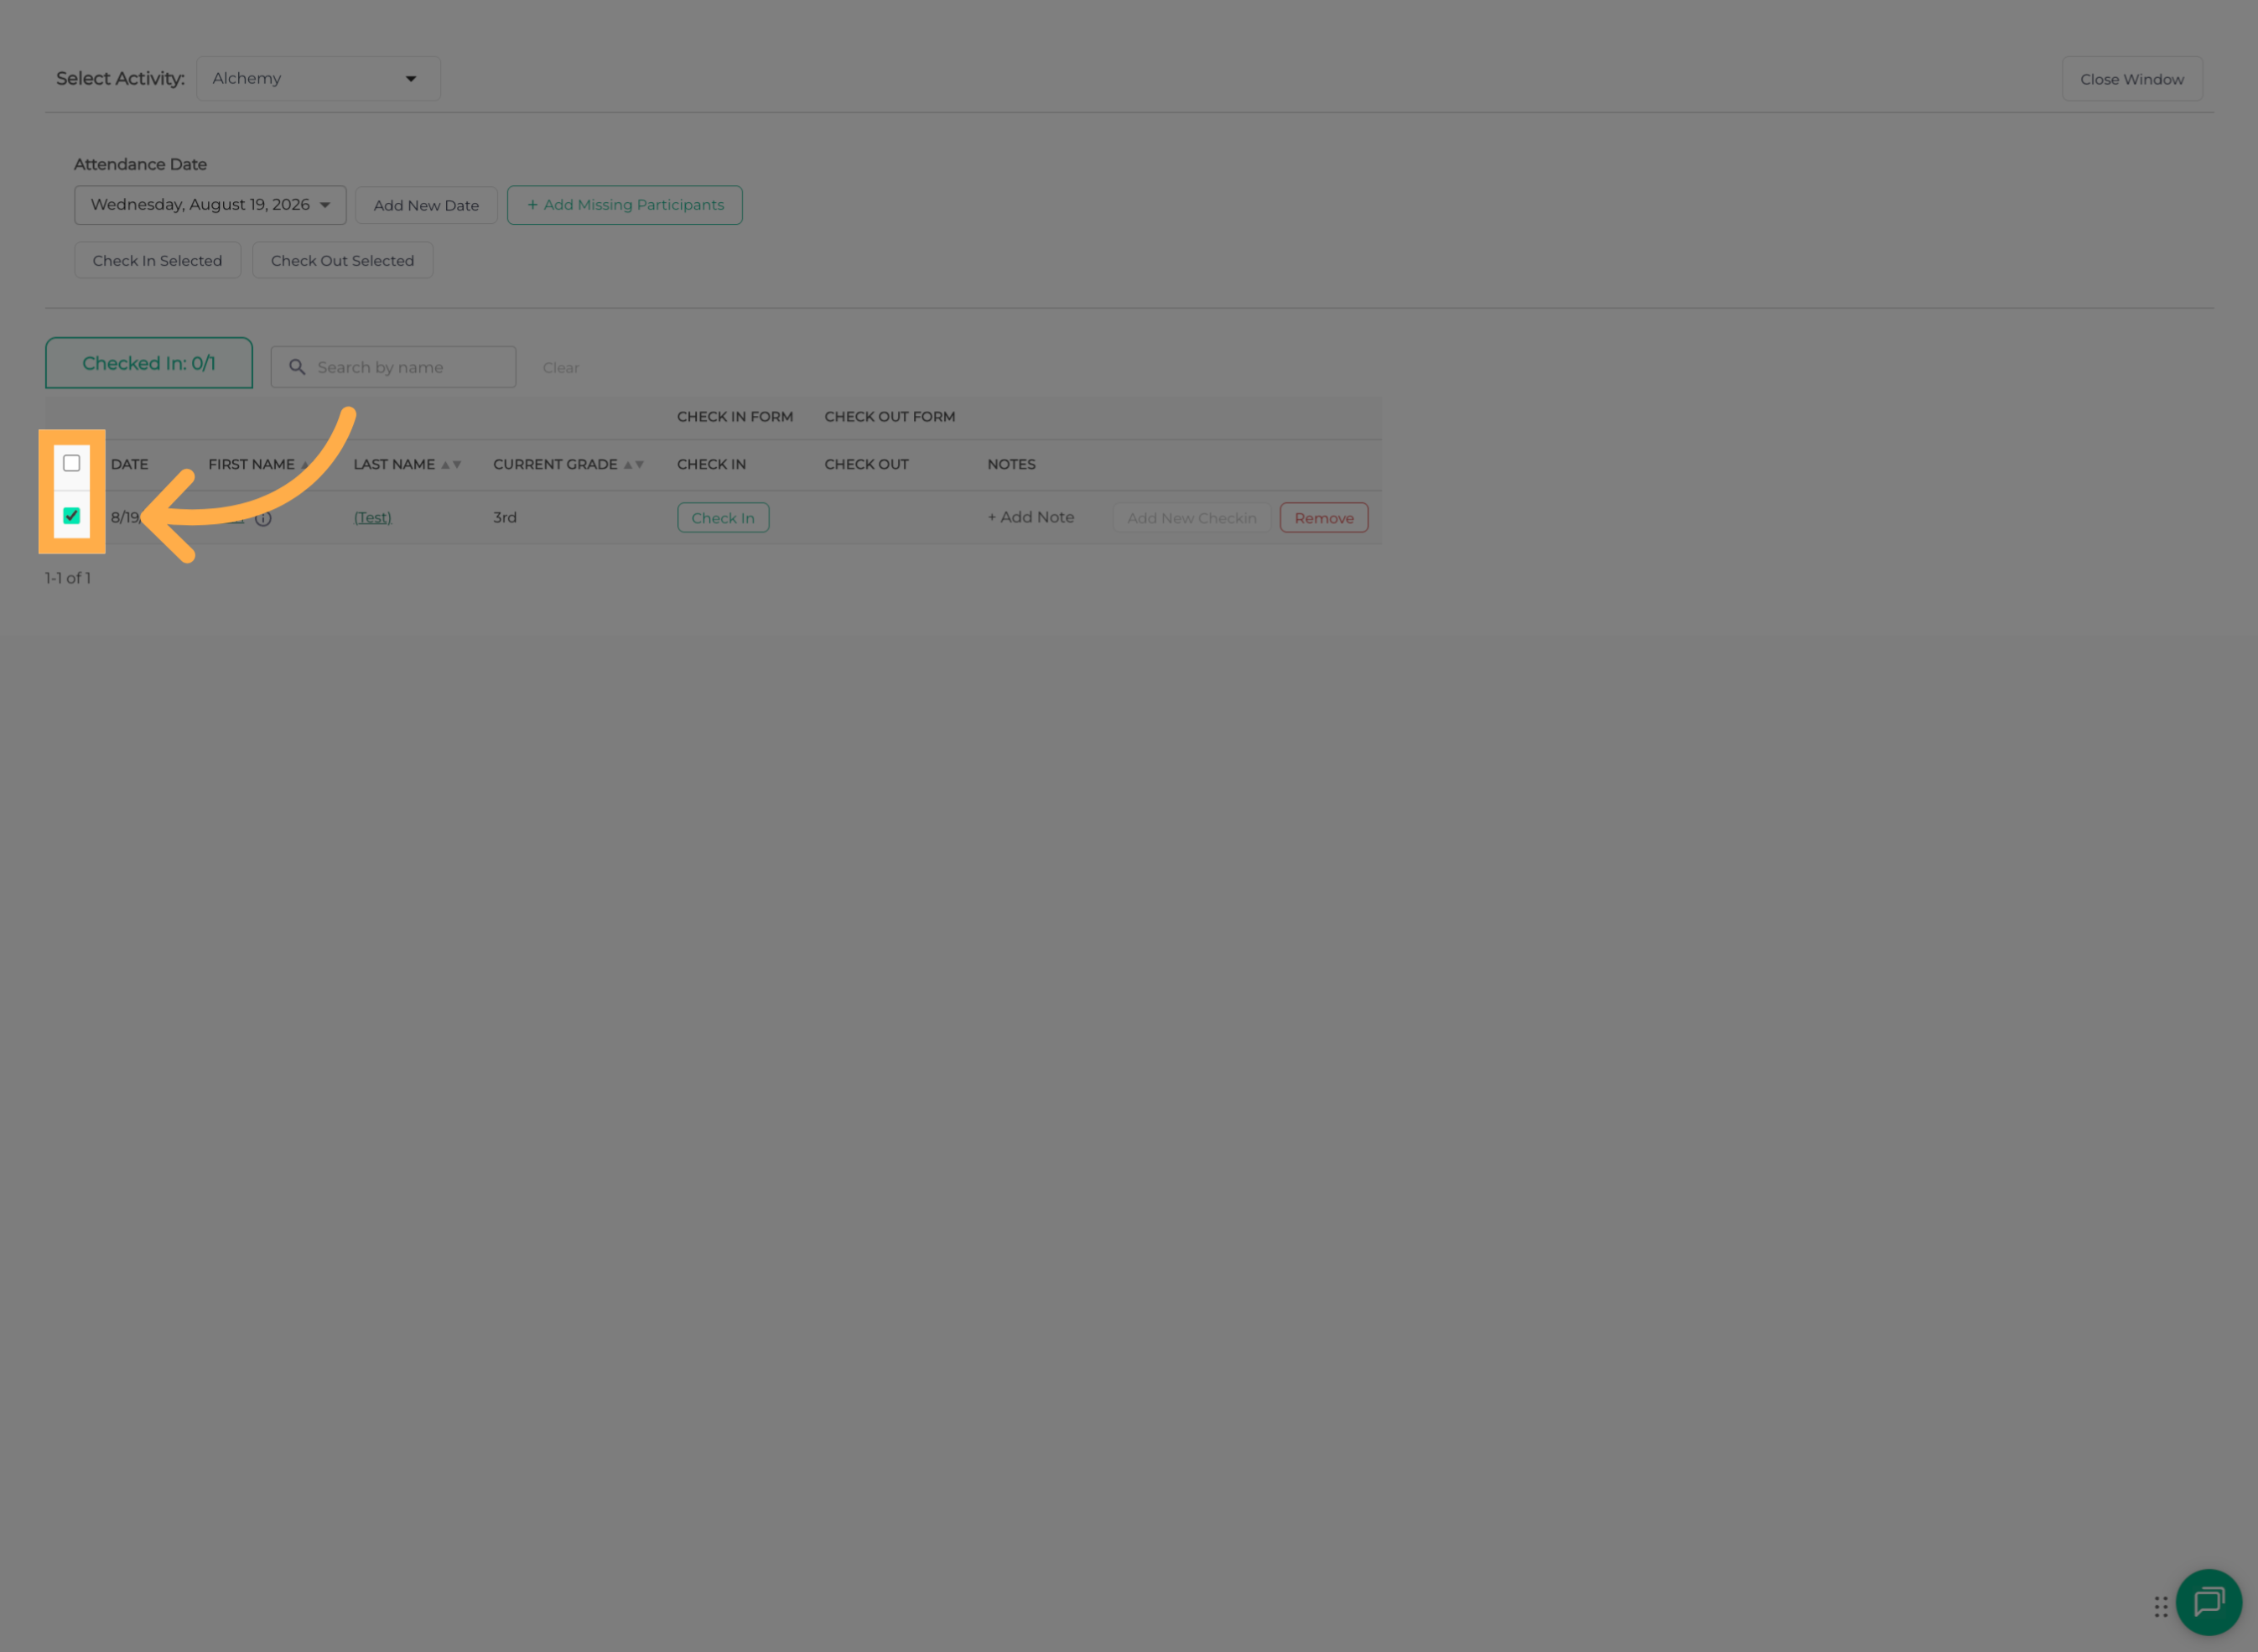
💡 Tip: You can select multiple students if you are recording attendance for more than one student at the same time.
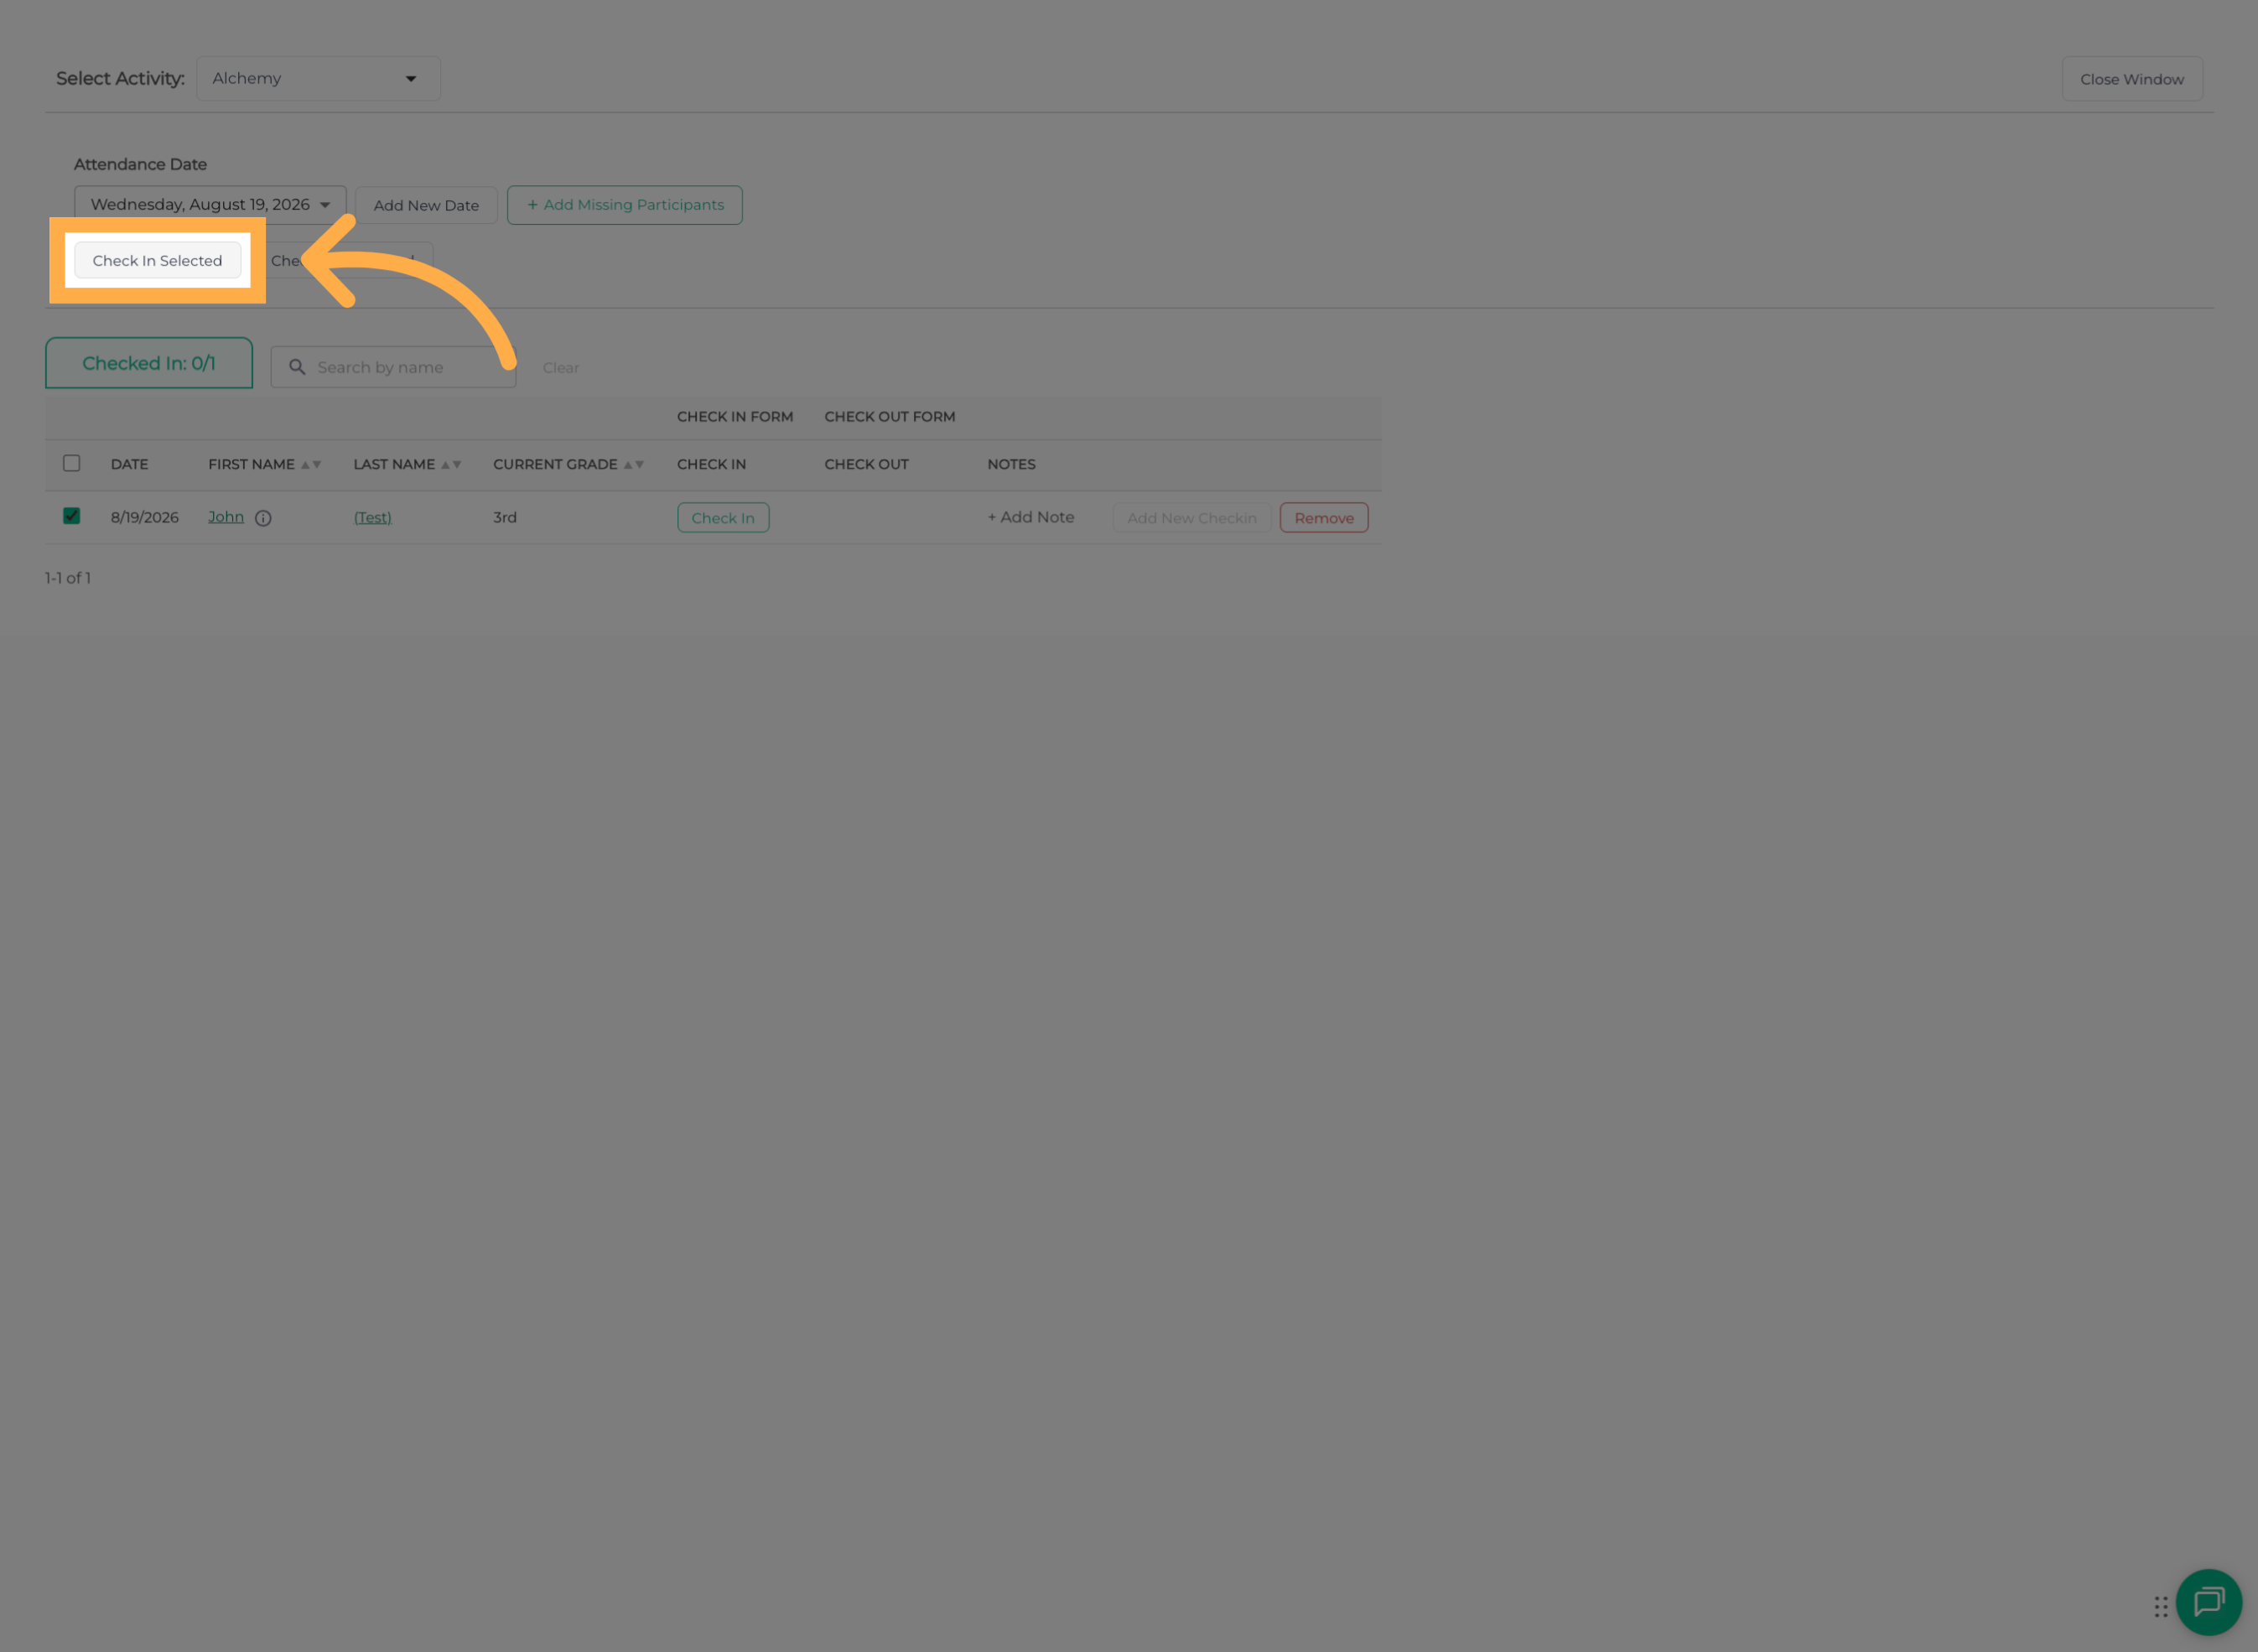
7. Initiate Check-In
Once you’ve selected the students, click “Check-In Selected” to begin the check-in process.
8. Add an Additional Check-In
Click “Now” to use the current time, or select “Custom” if you need to enter a specific Check-In time.
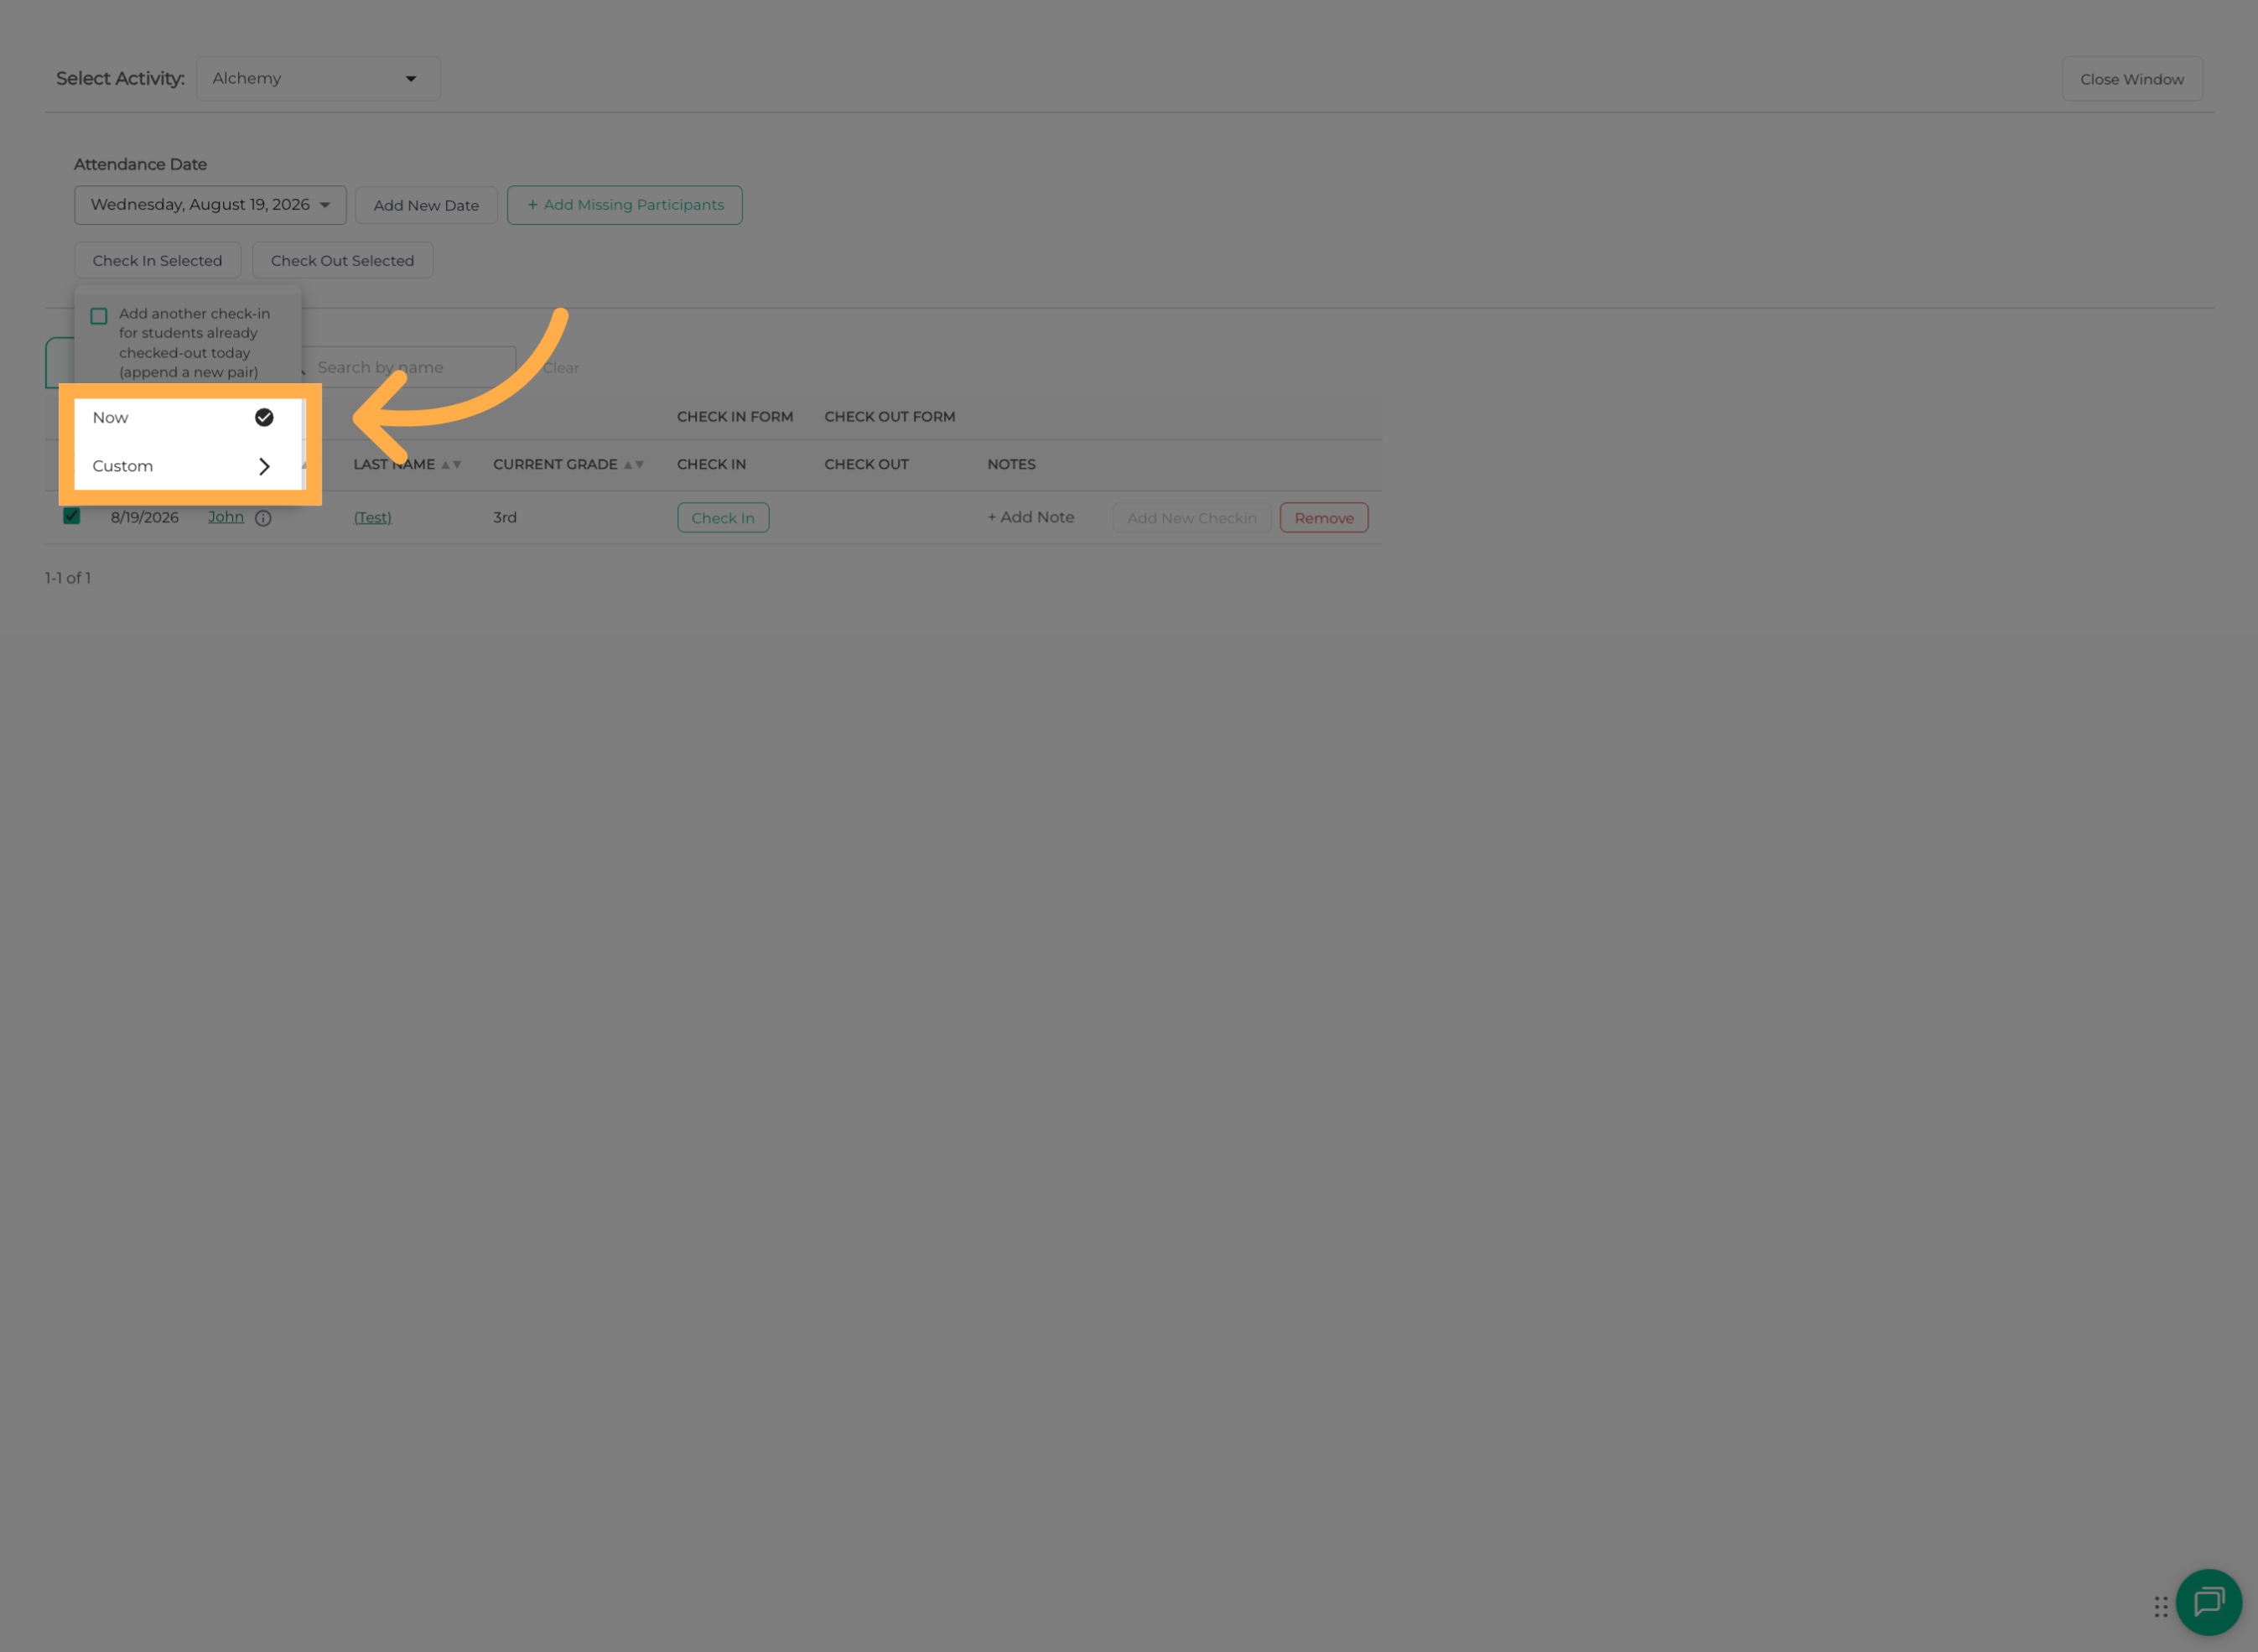
💡 Tip: Use Custom” when you are entering an attendance time that occurred earlier and you need to record the actual Check-In time.
9. Confirm Check-In
Review the Check-In details, then confirm the check-in to add the attendance entry.
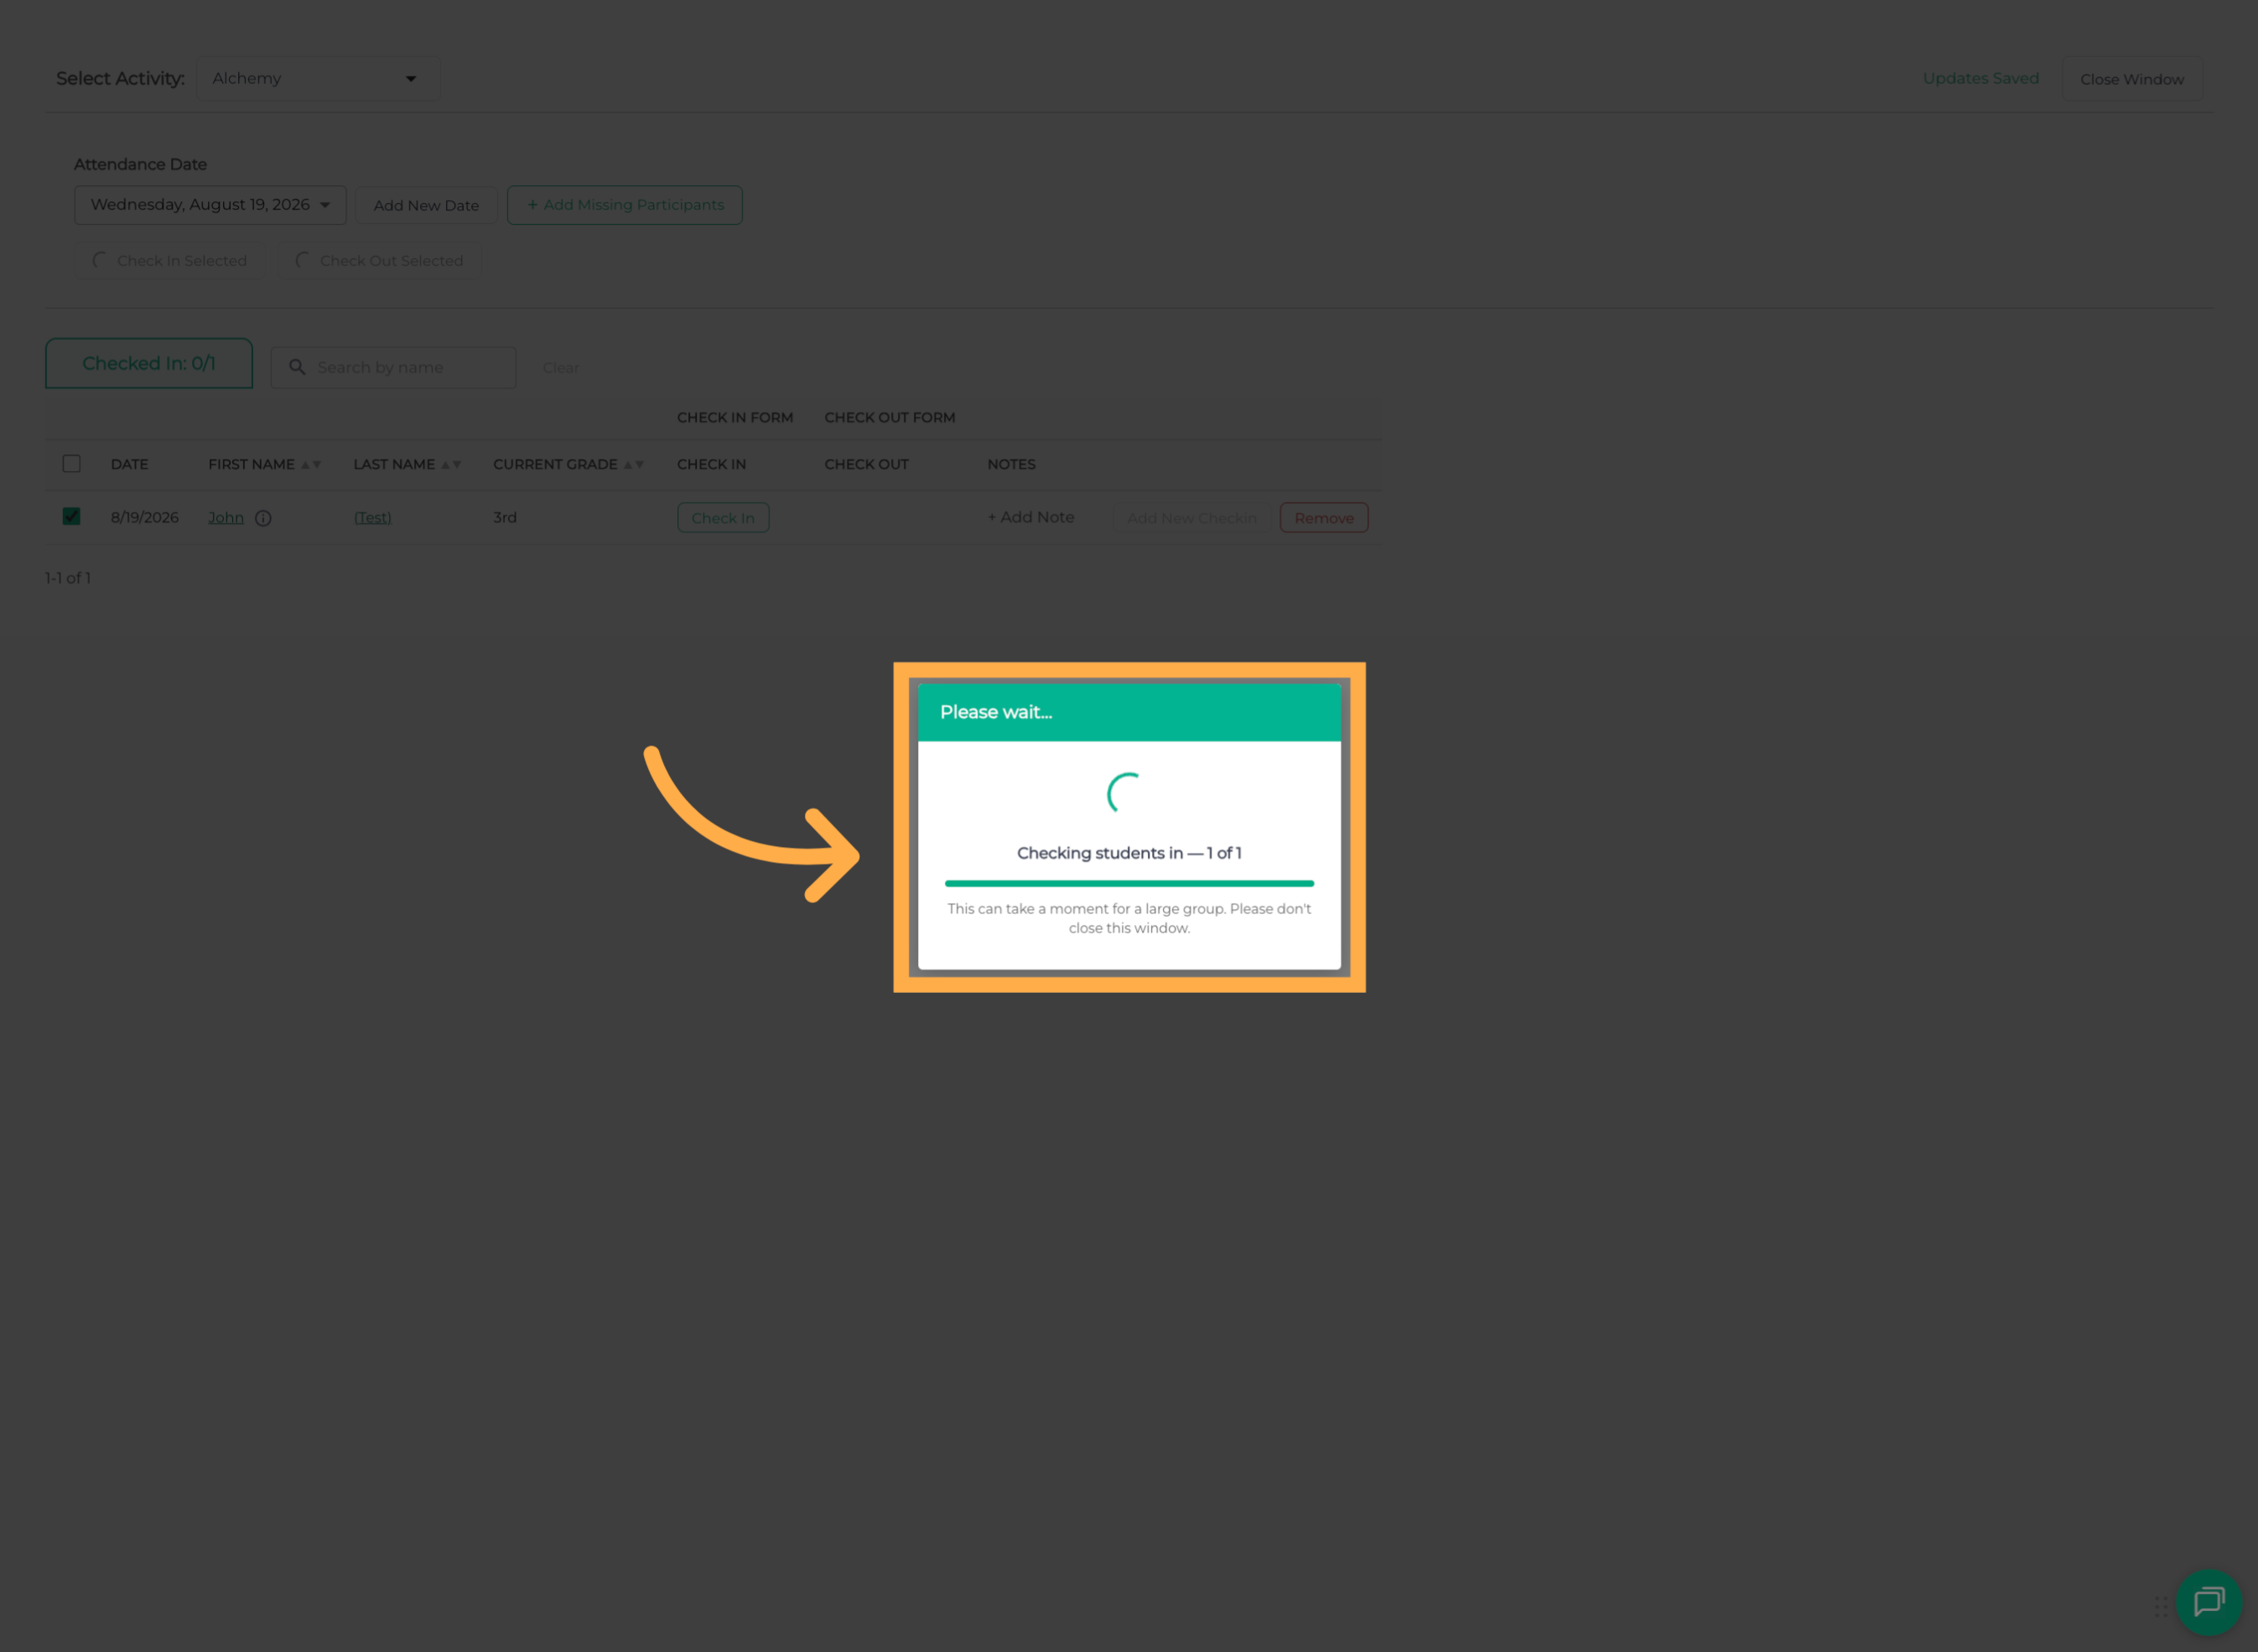
💡 Tip: Review the selected student and timestamp before confirming the entry.
10. Access Check-Out
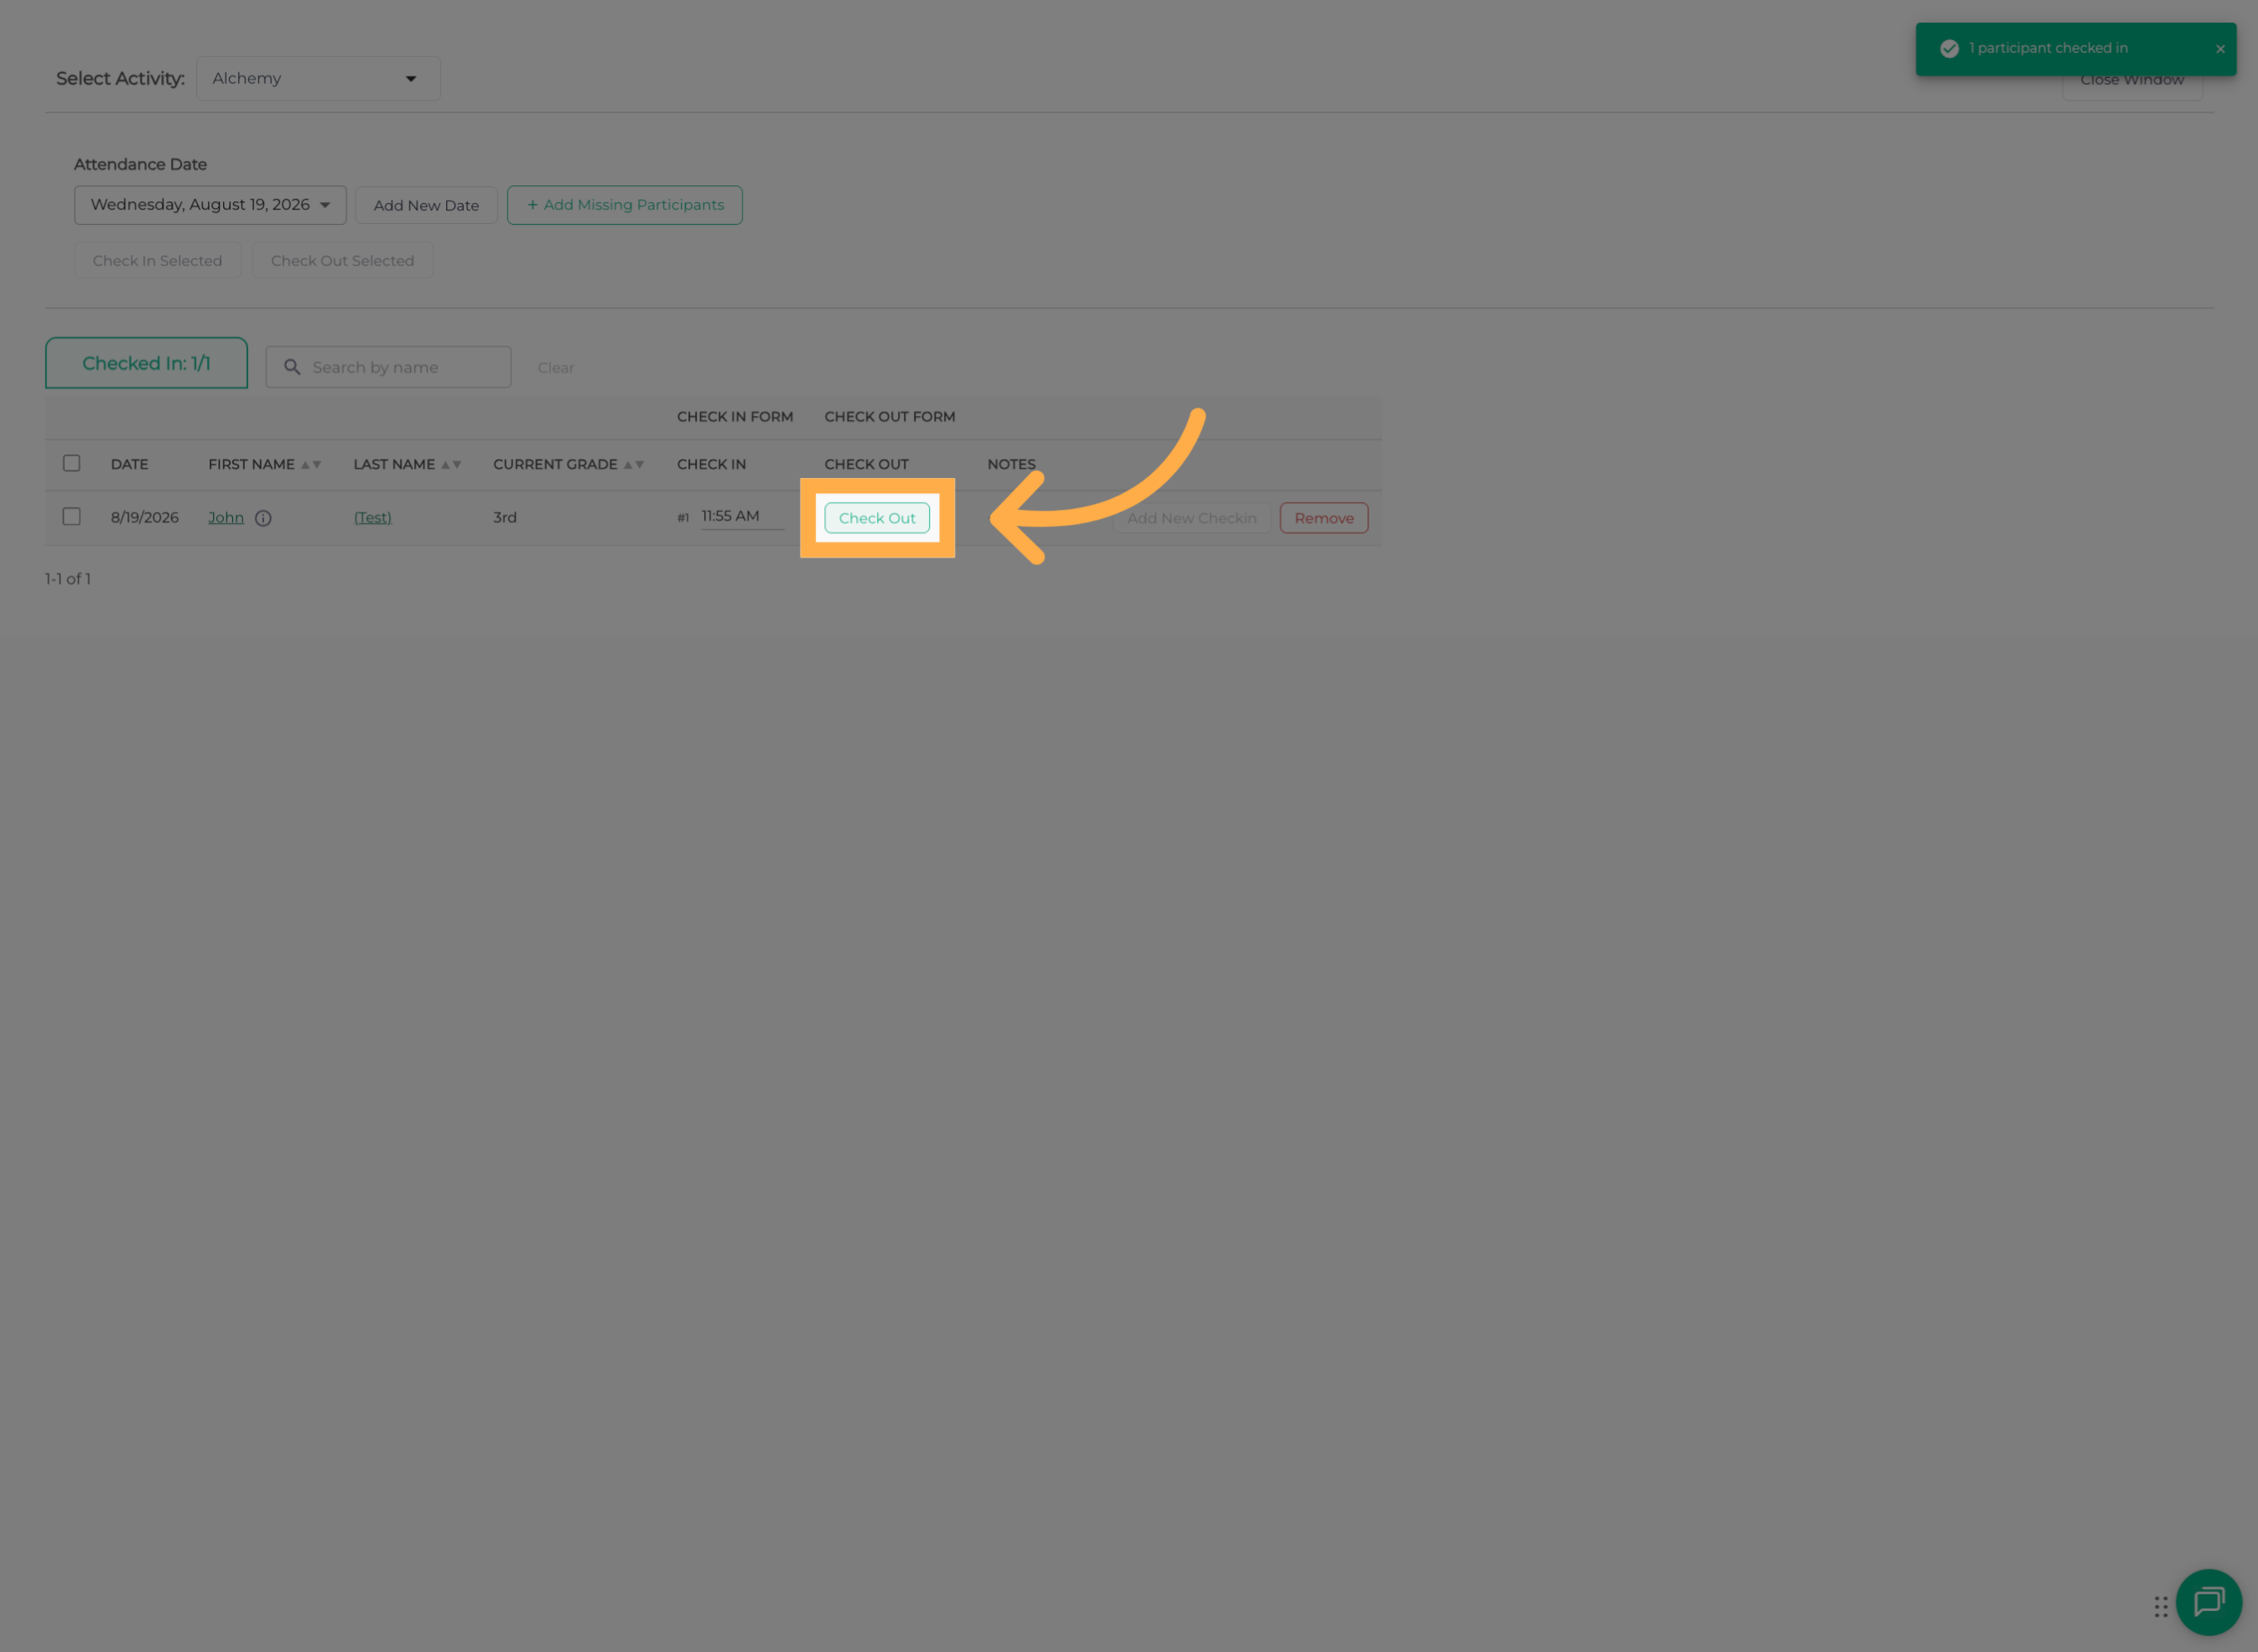
When the student is ready to leave, click “Check-Out” to record their check-out time.
11. Add Another Check-In
To record another check-in for a student who has already been checked out today, select “Check In”, then click “Add another check-in for students already checked-out today.”
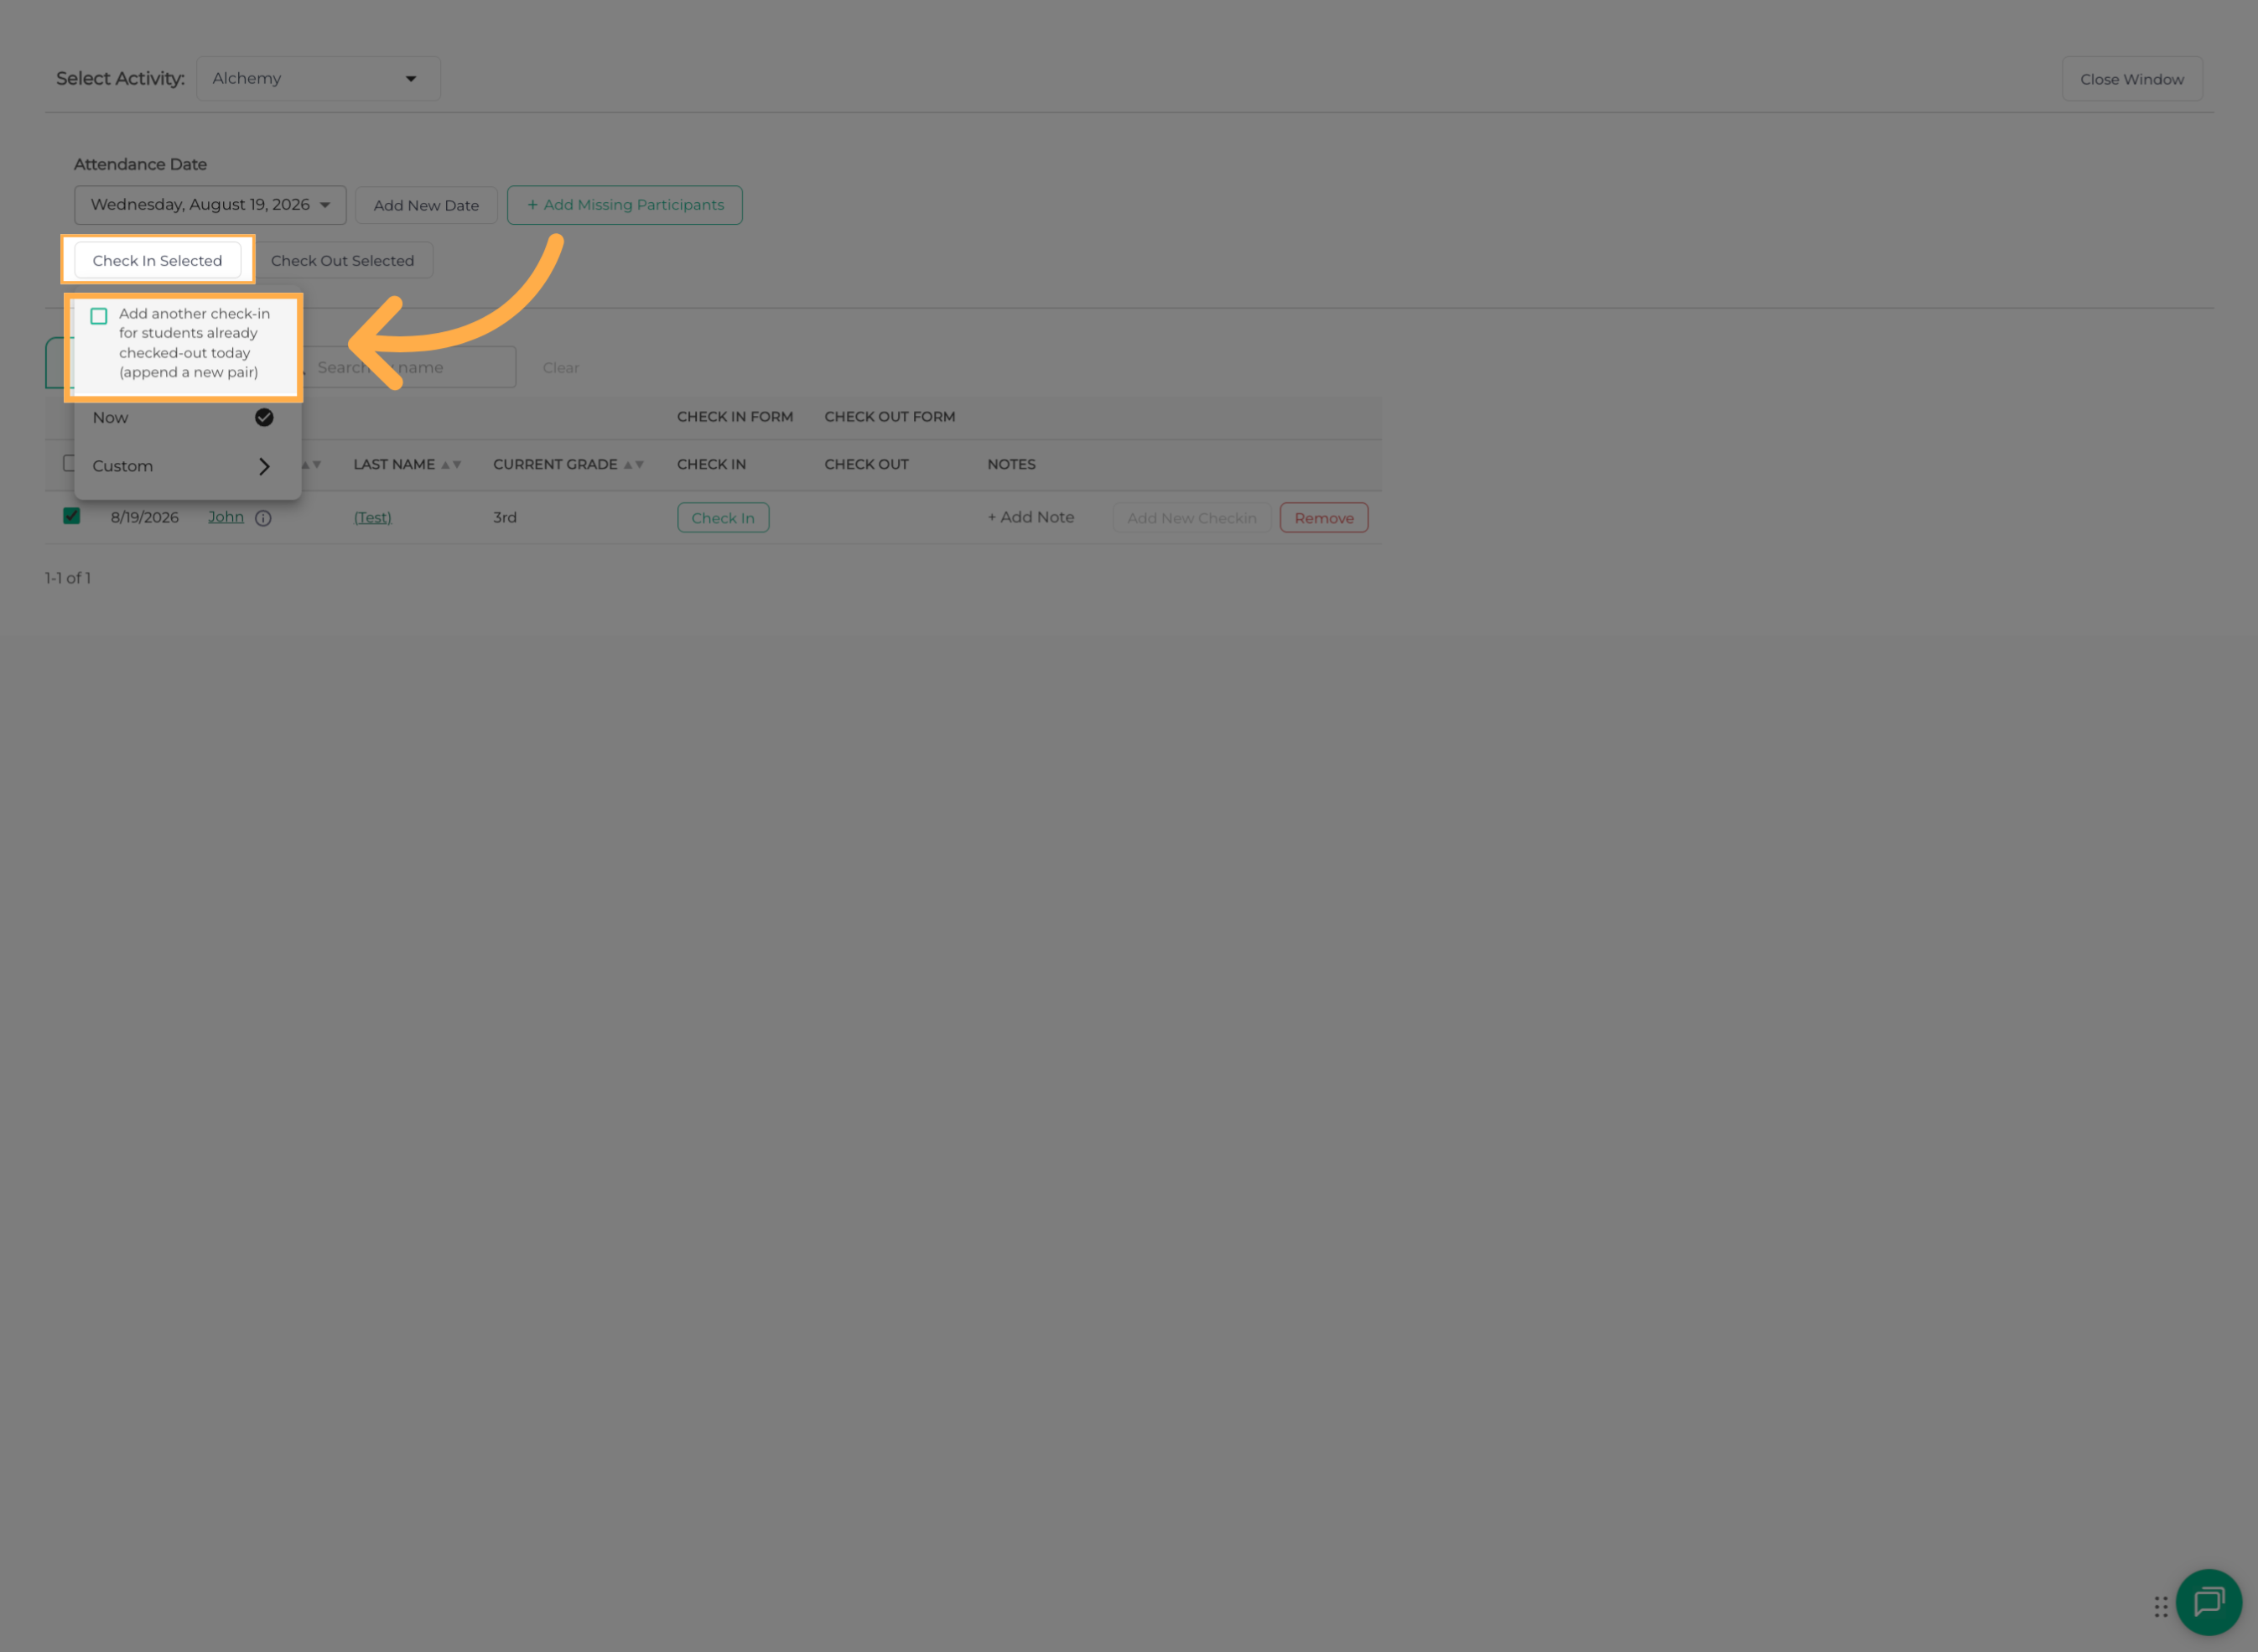
💡 Tip: Use this option when the same student returns to the activity later that same day.
12. Add a New Check-In Entry
You can also click “Add New Check-In” to create another check-in entry for the selected students.
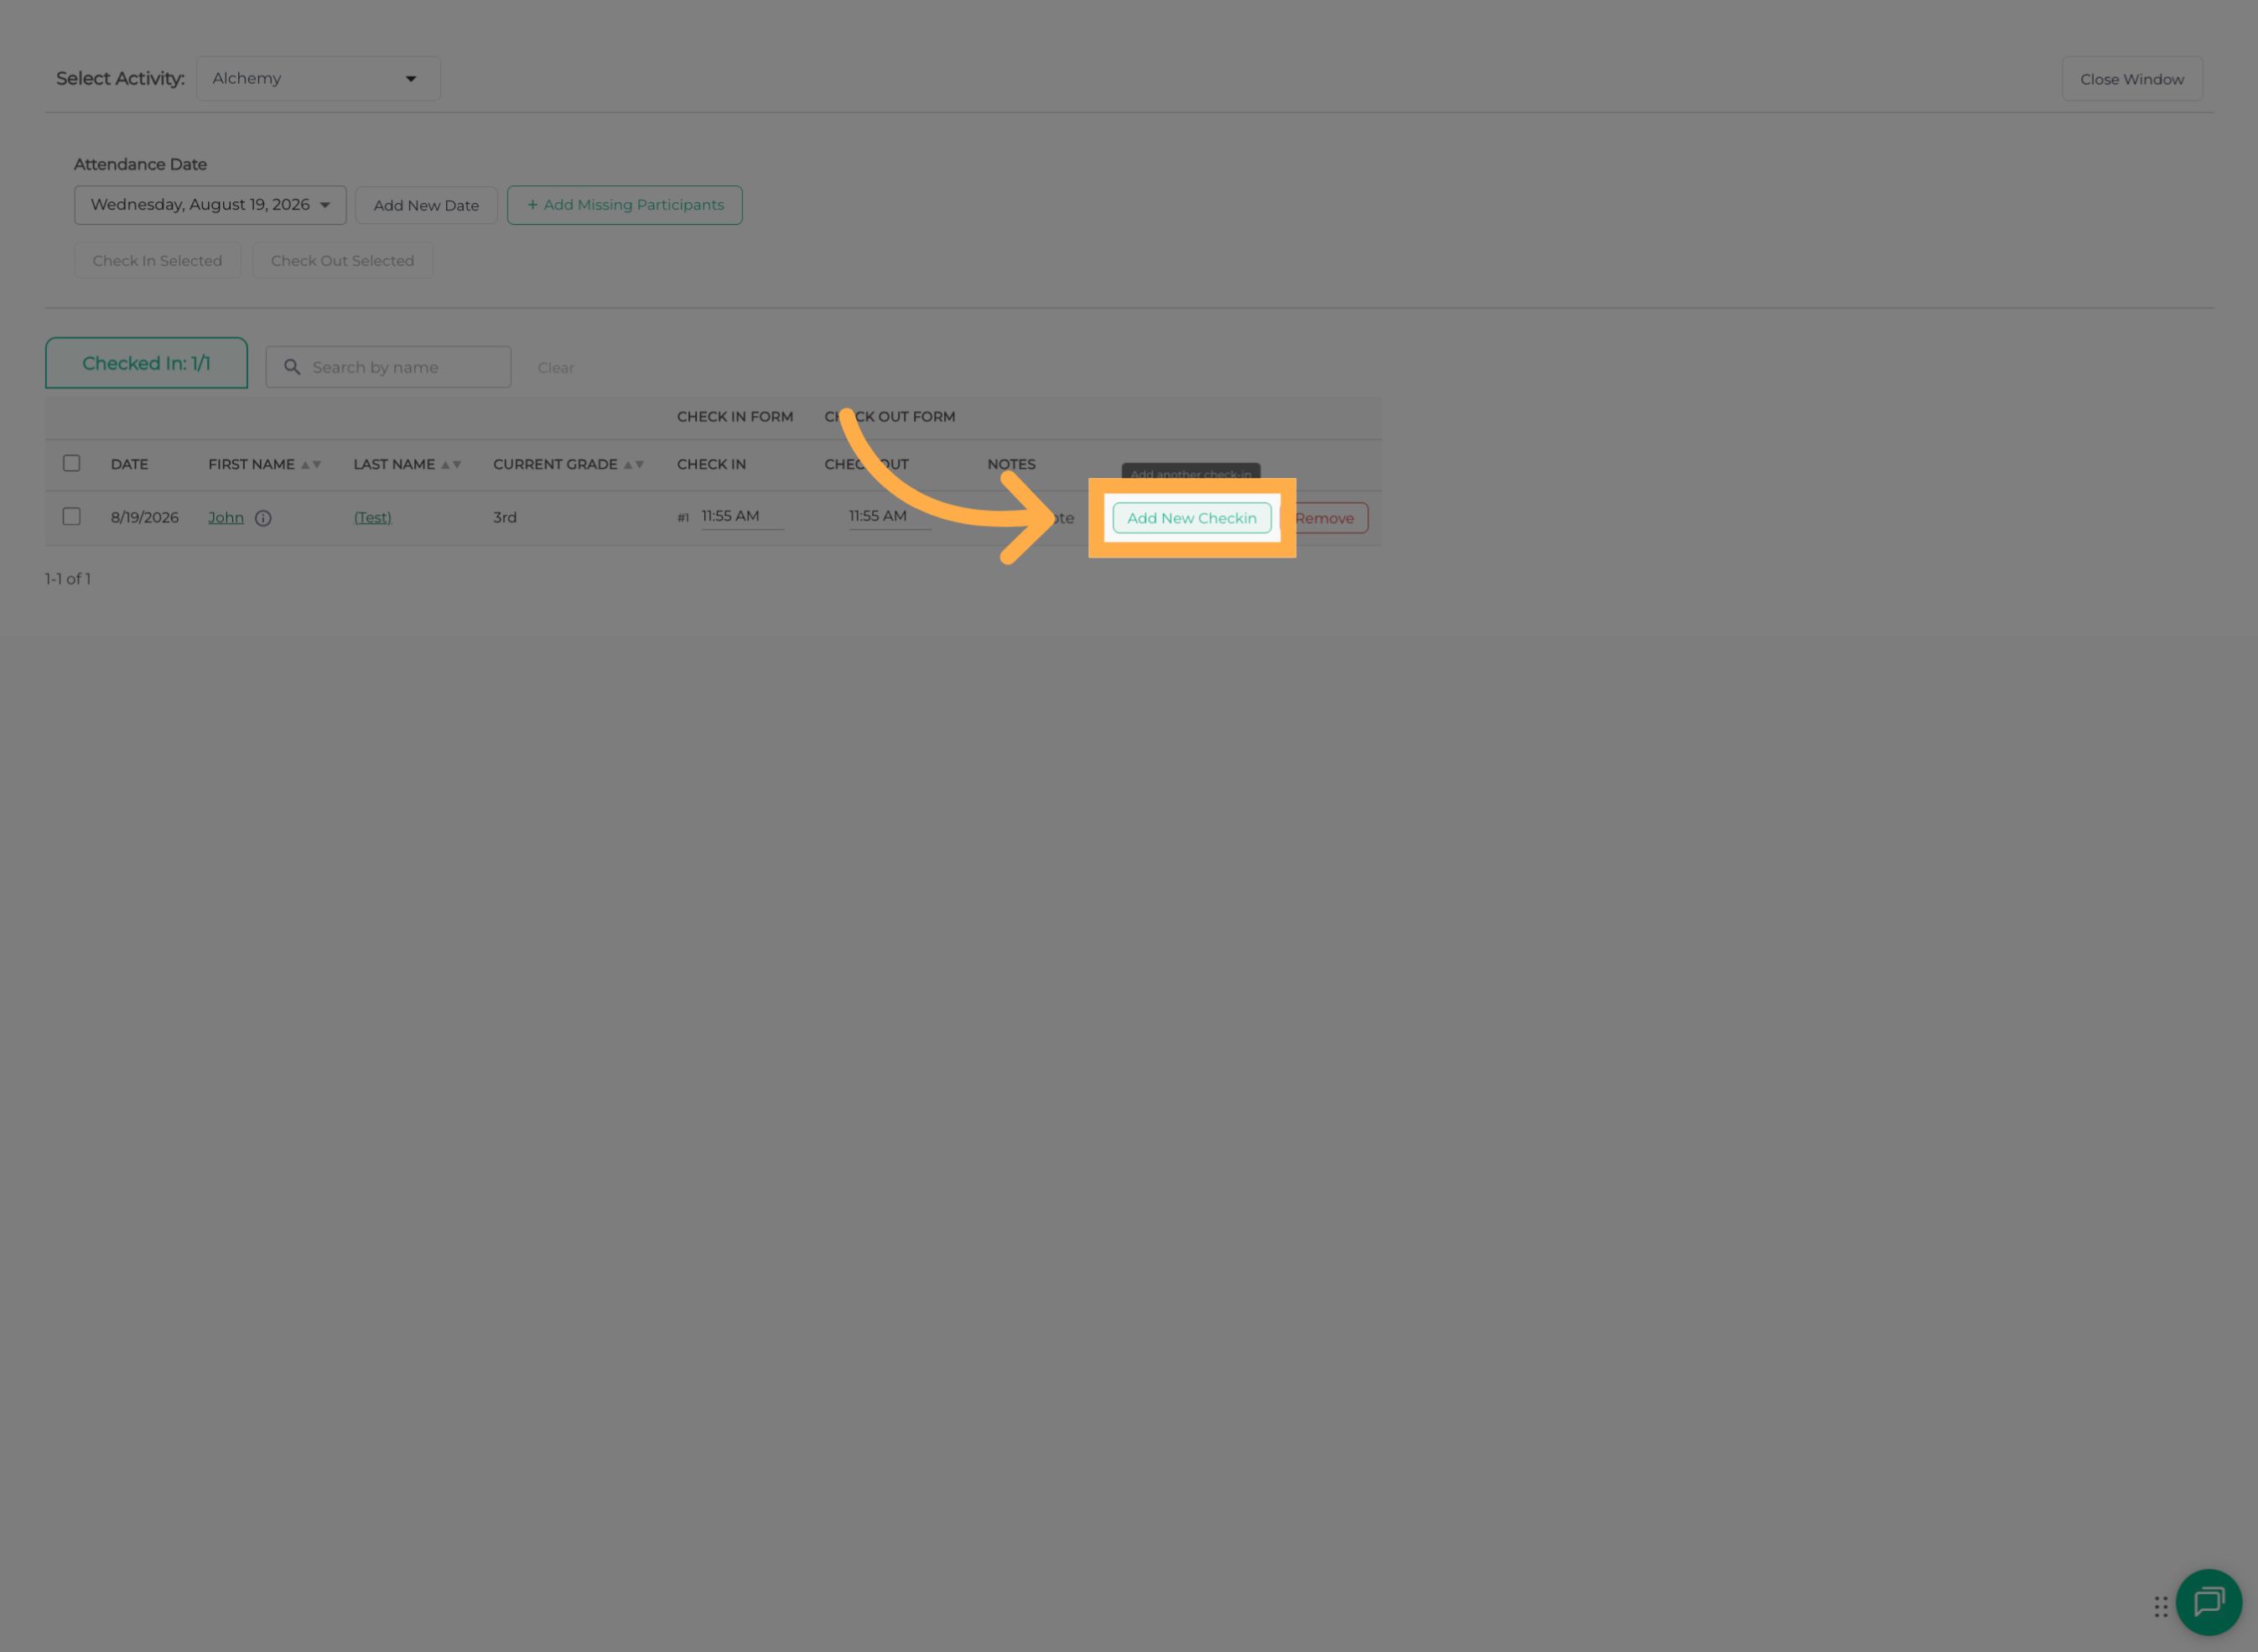
💡 Tip: Use “Add New Check-In” when you need to create a new attendance entry for the student.
13. Record the Second Check-In
Select the “Check-In” option and enter the appropriate time for the student’s second Check-In.
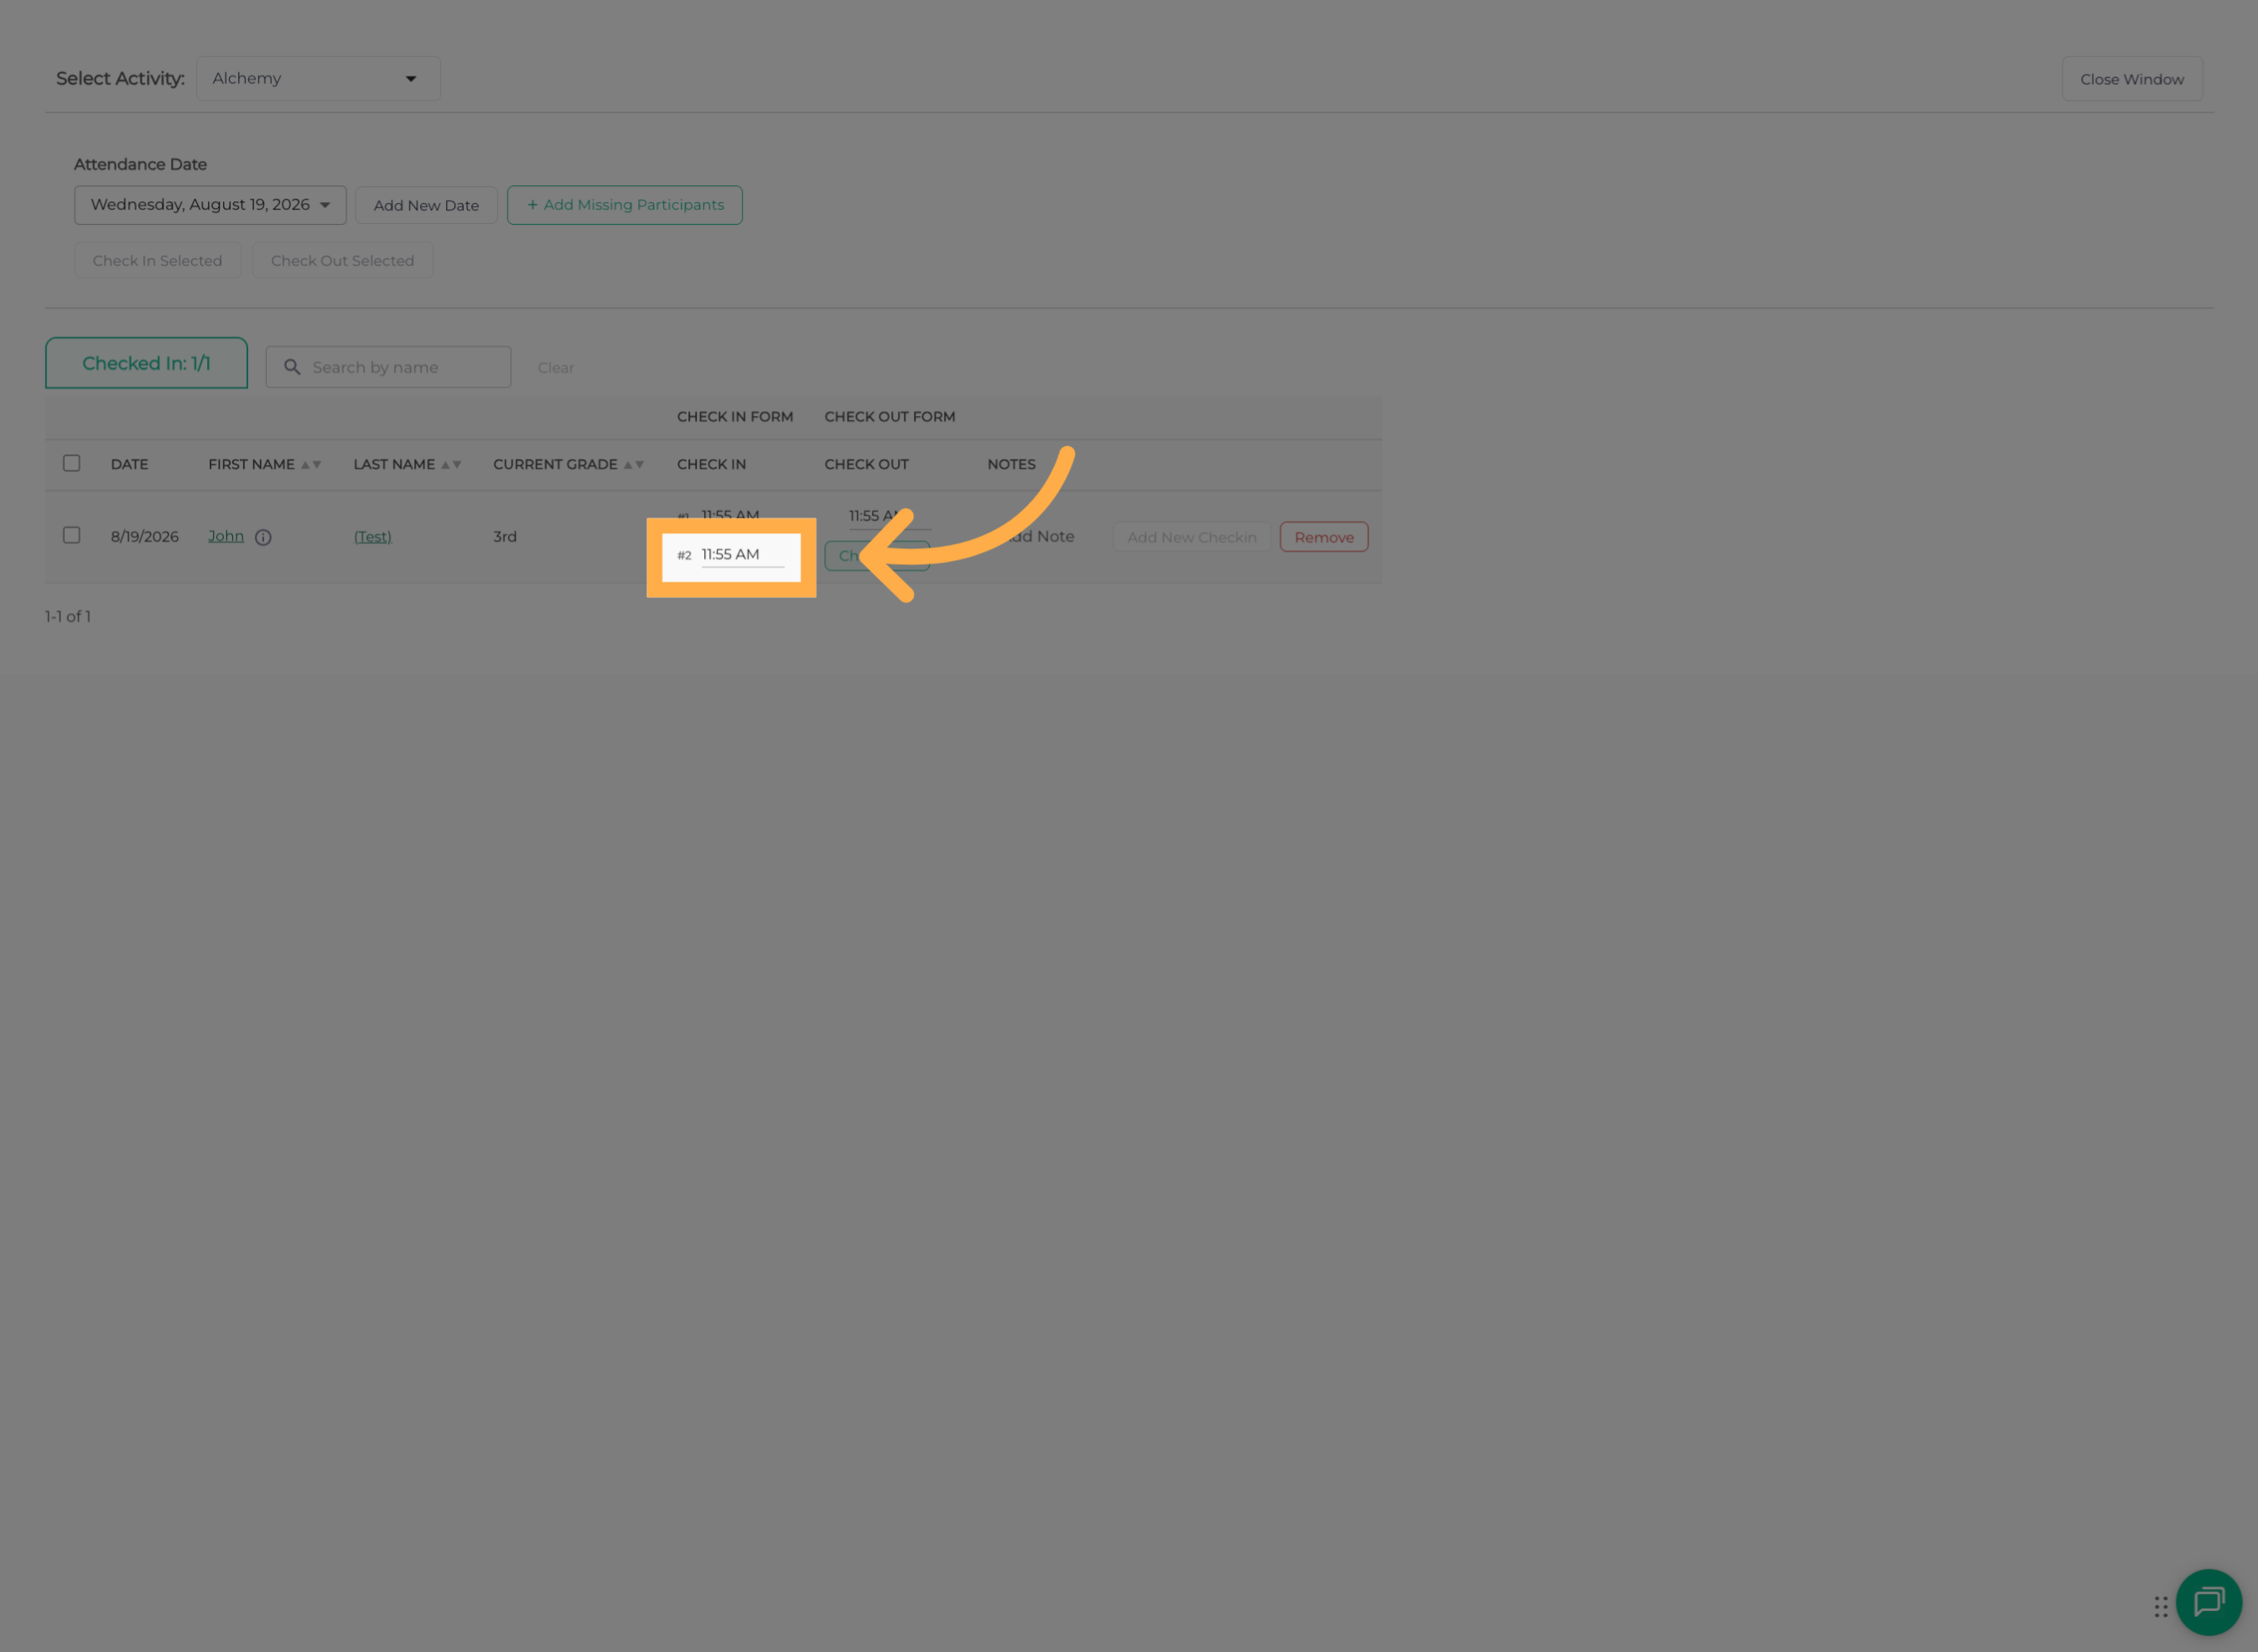
💡 Tip: Use “Custom” if you need to enter a specific time instead of the current time.
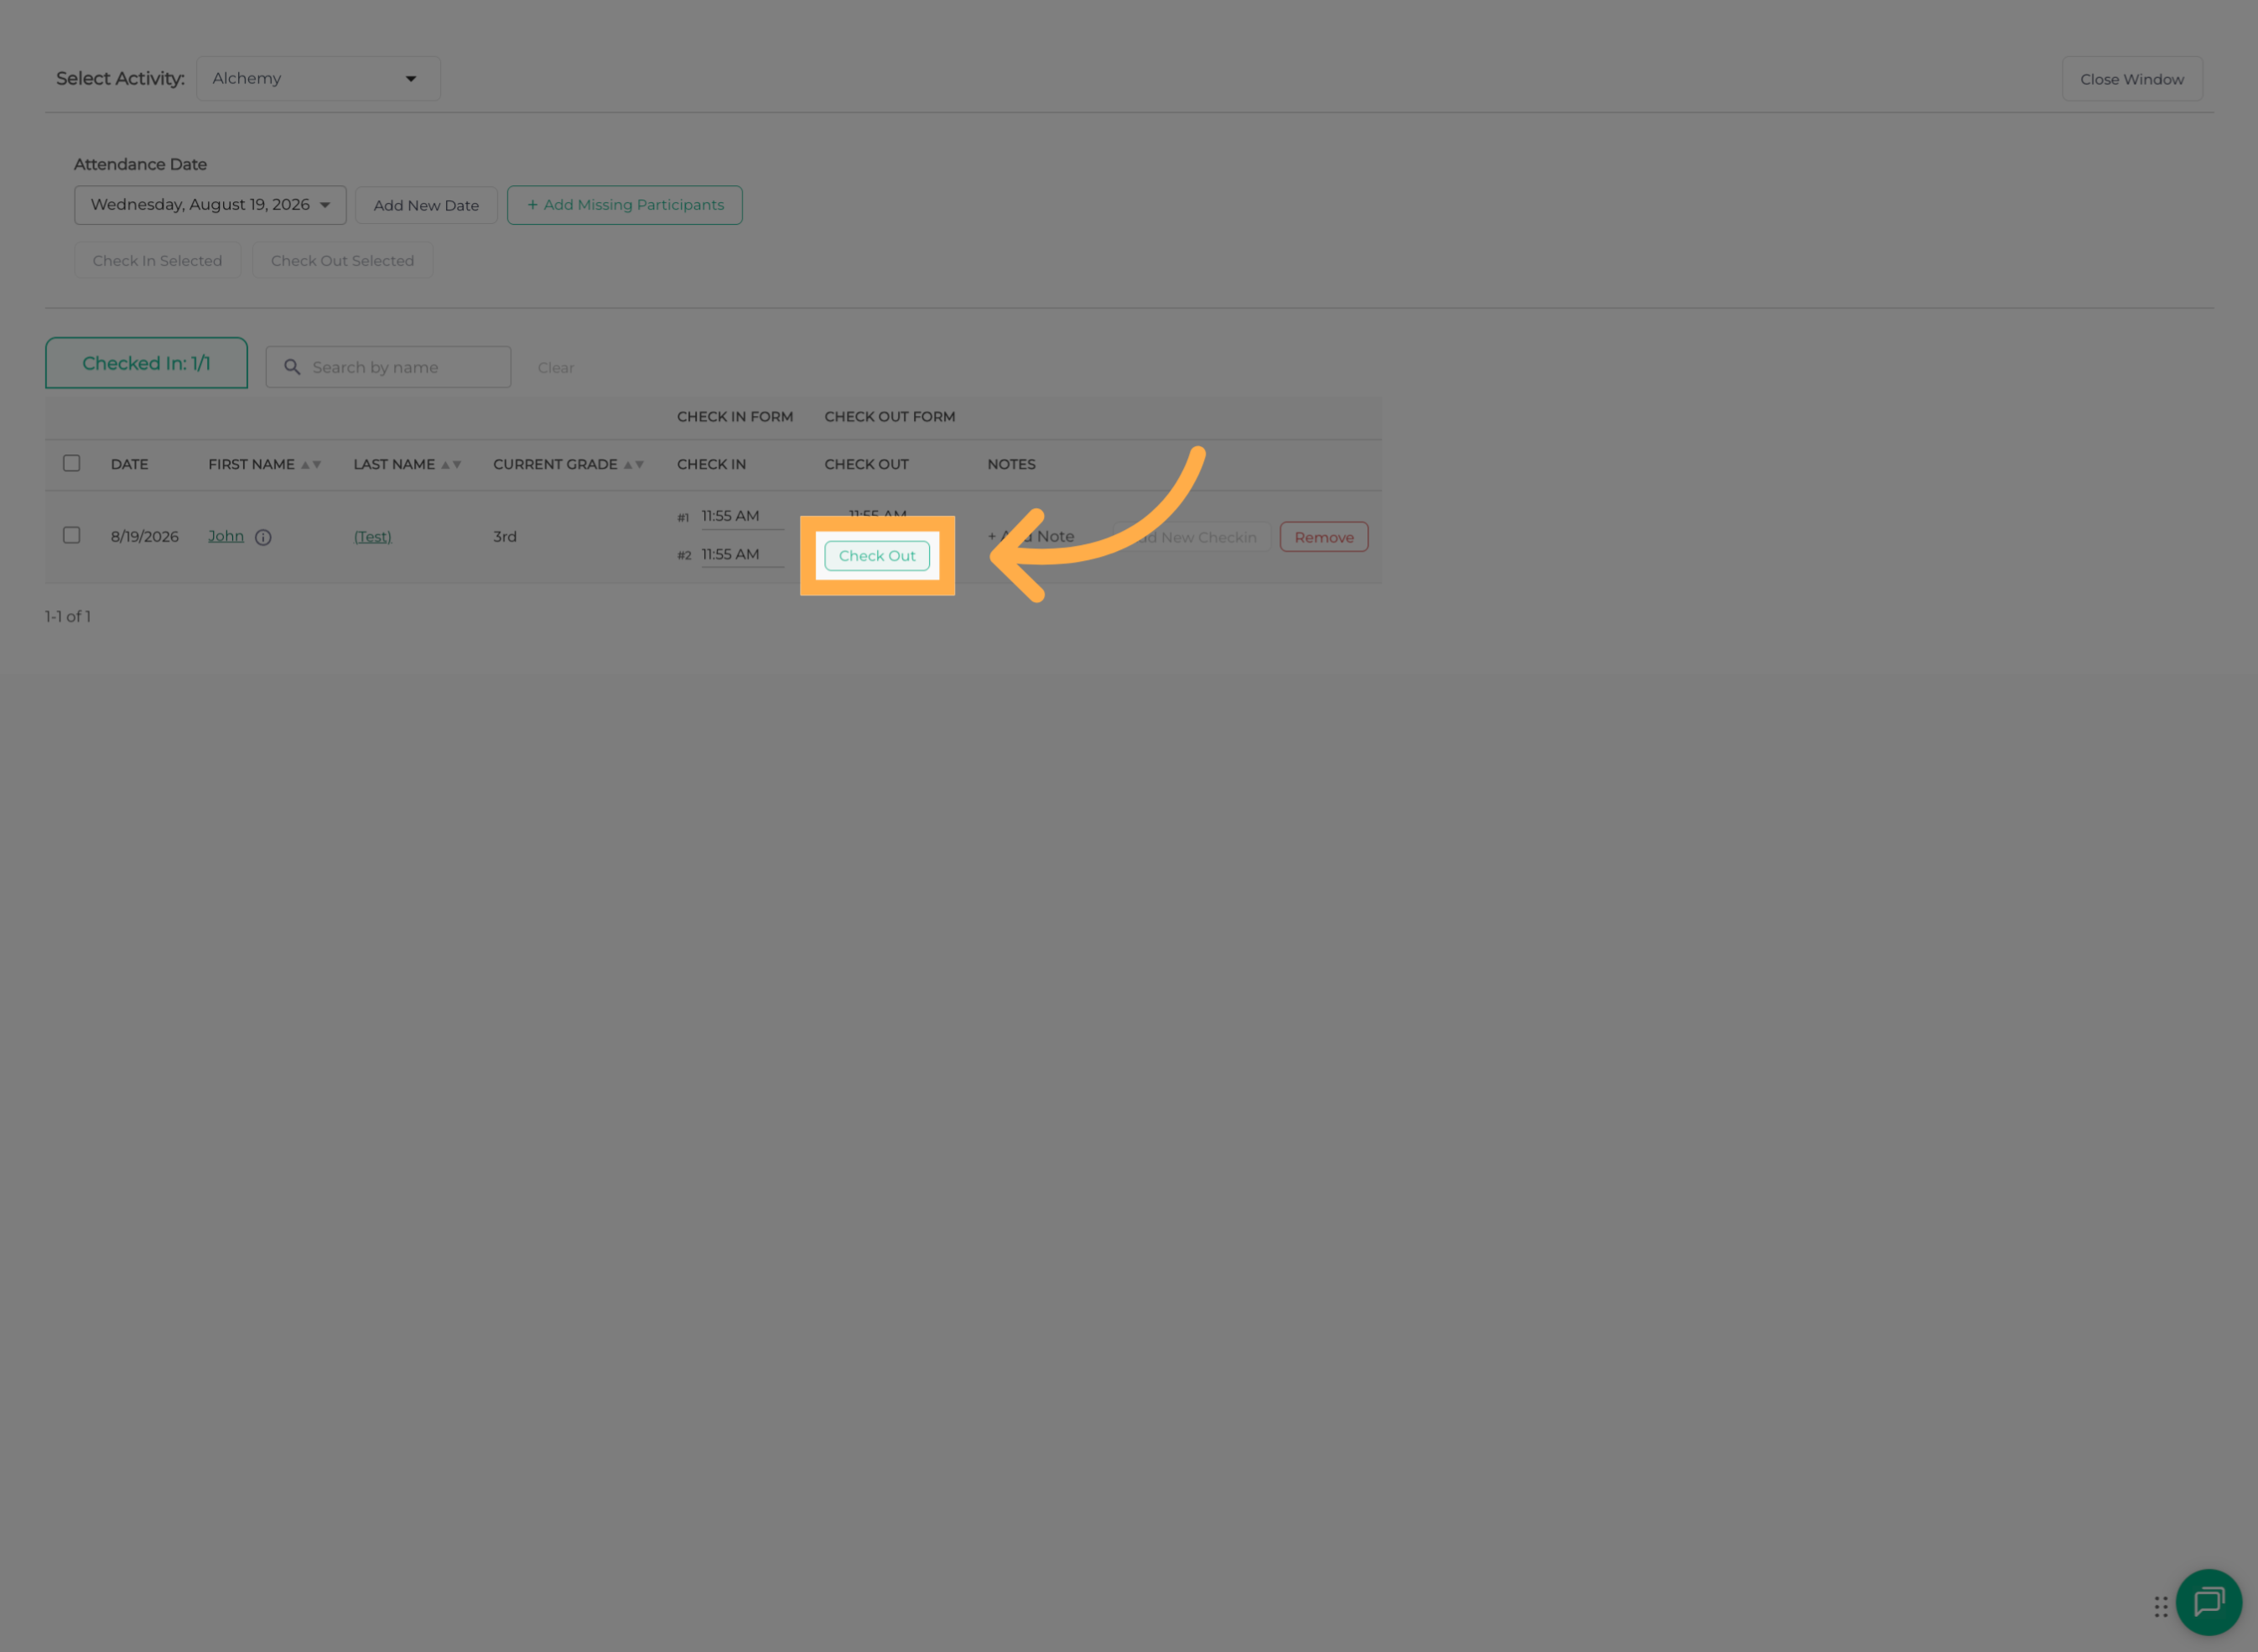
14. Return to Check-Out
When the student is ready to leave again, click “Check-Out” to record their next Check-Out.
15. Select Check-Out Time
Review the Check-Out time and adjust the timestamp if needed.
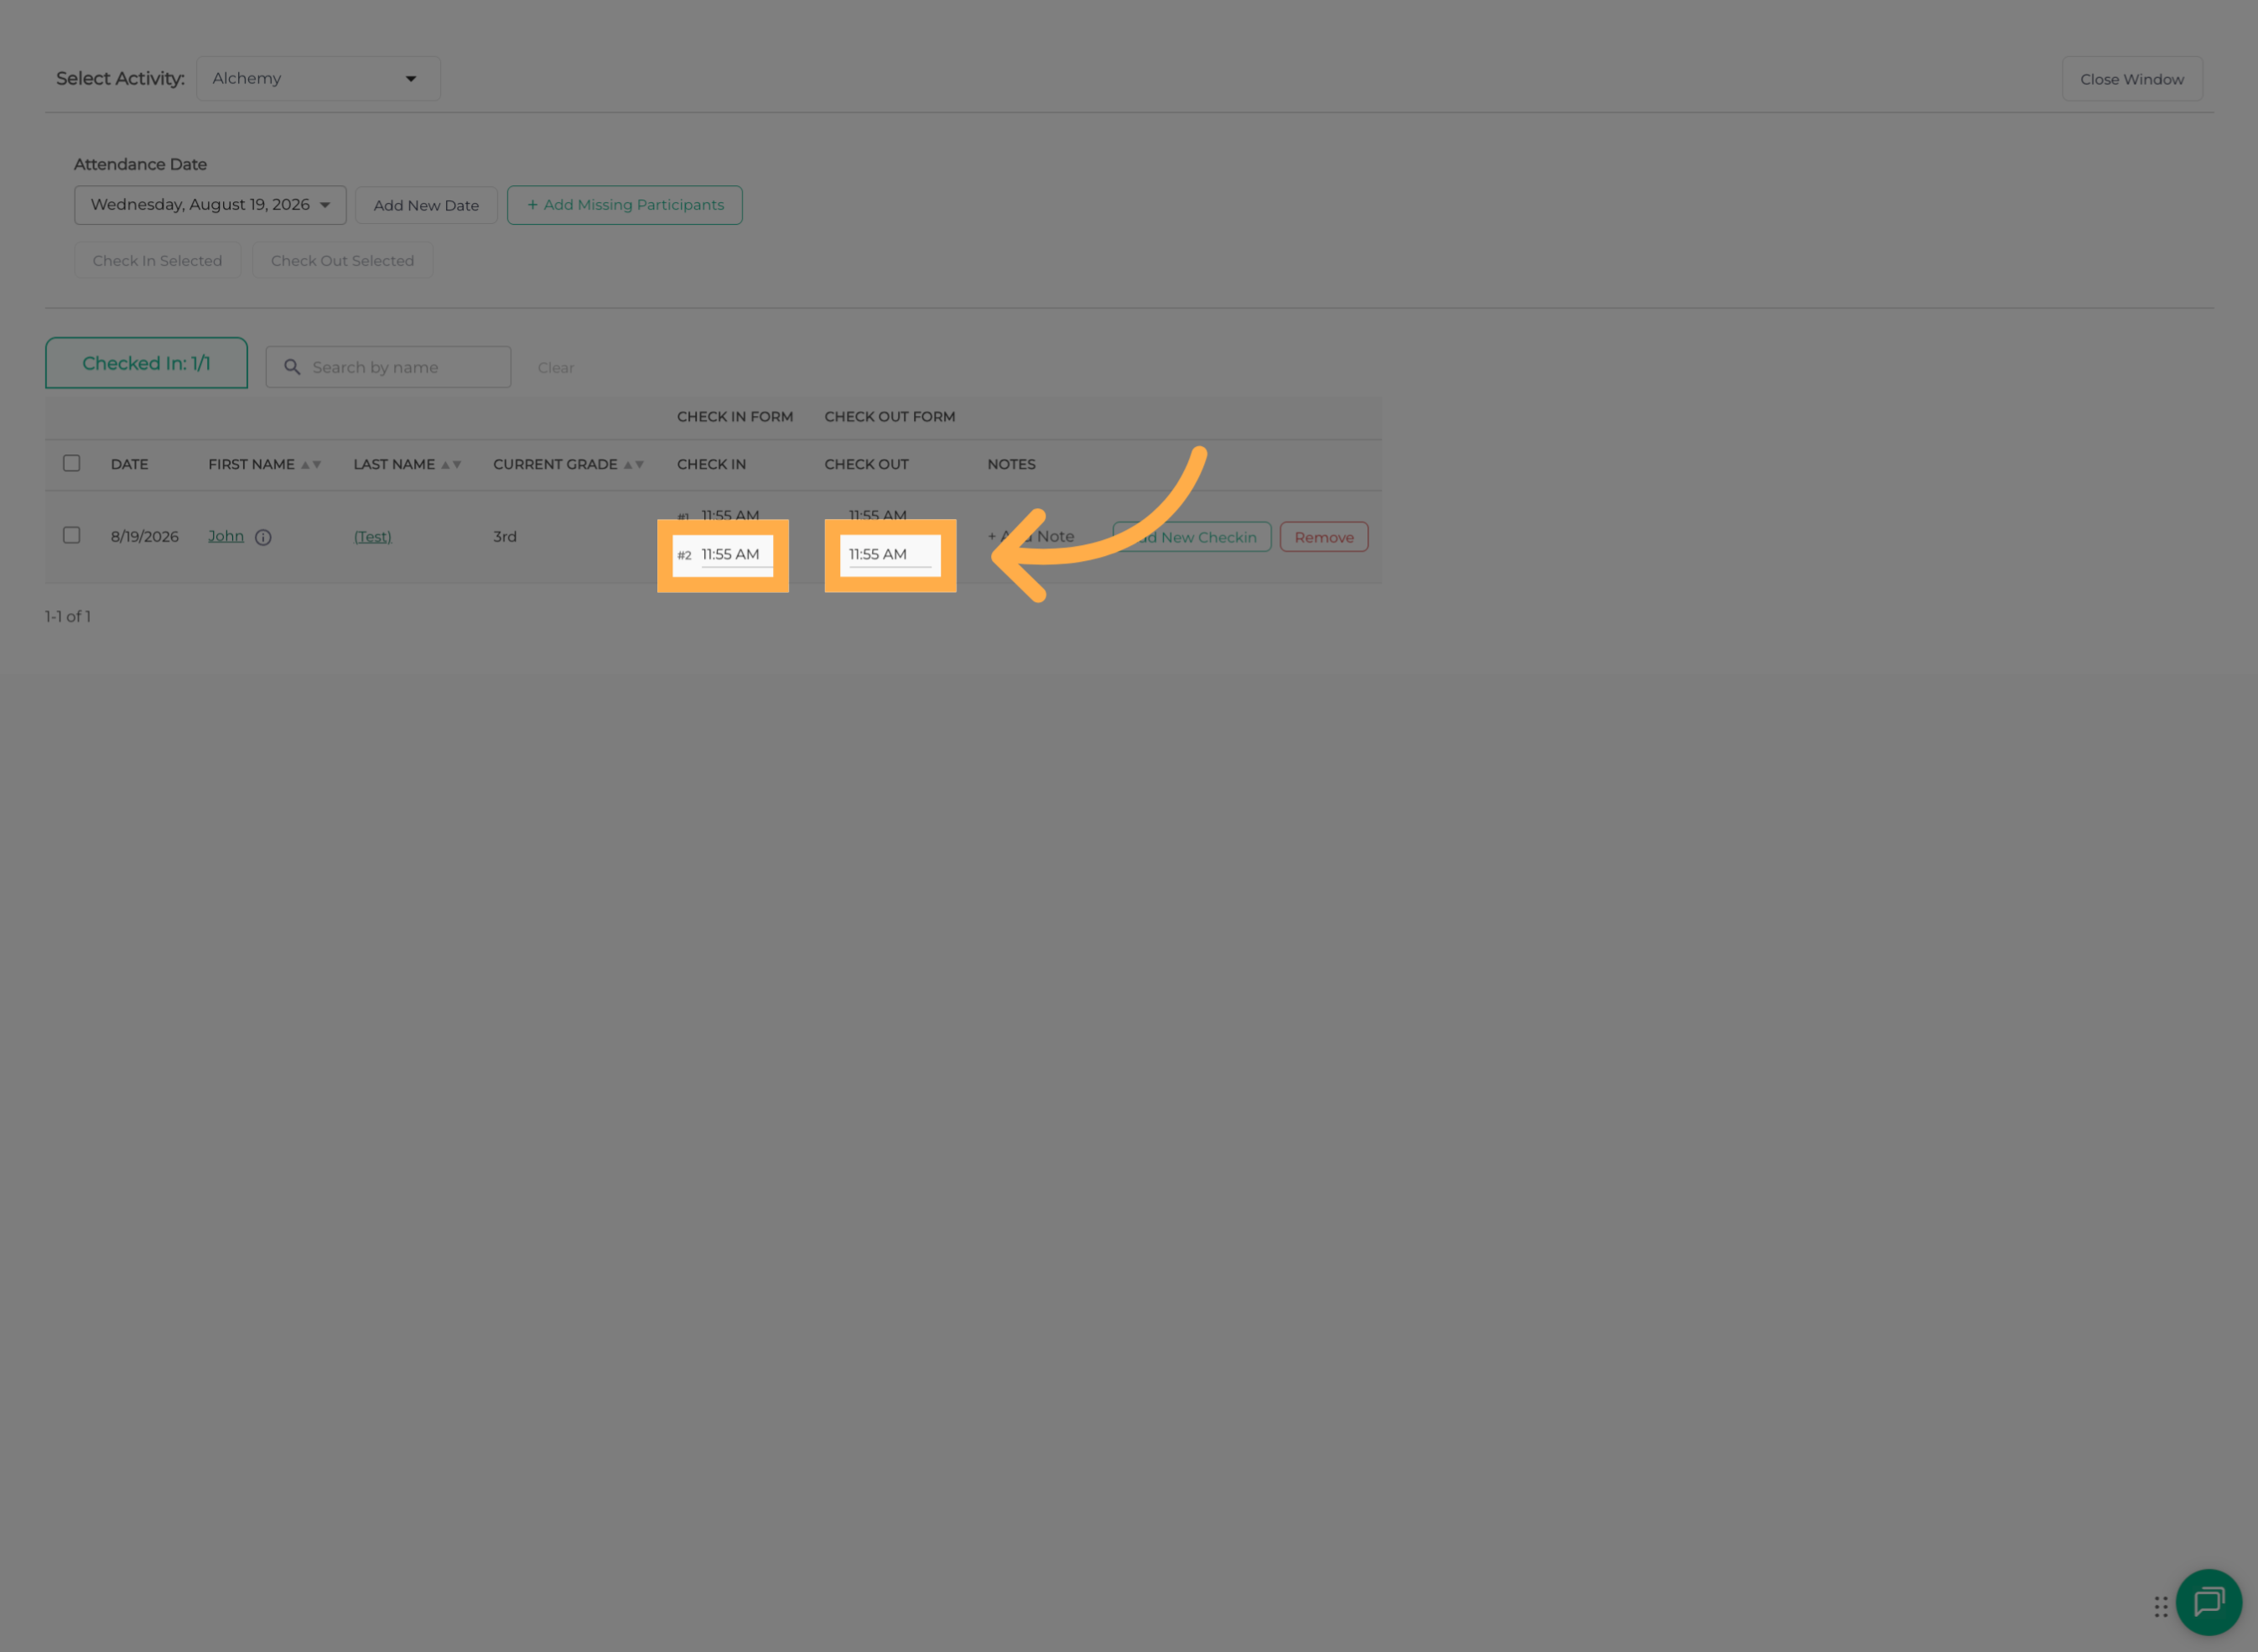
💡 Tip: Make sure the timestamp reflects the actual time the student left the activity.
16. Delete a Check-In or Check-Out
If you need to remove a Check-In or Check-Out time, simply click the “X” next to the timestamp.
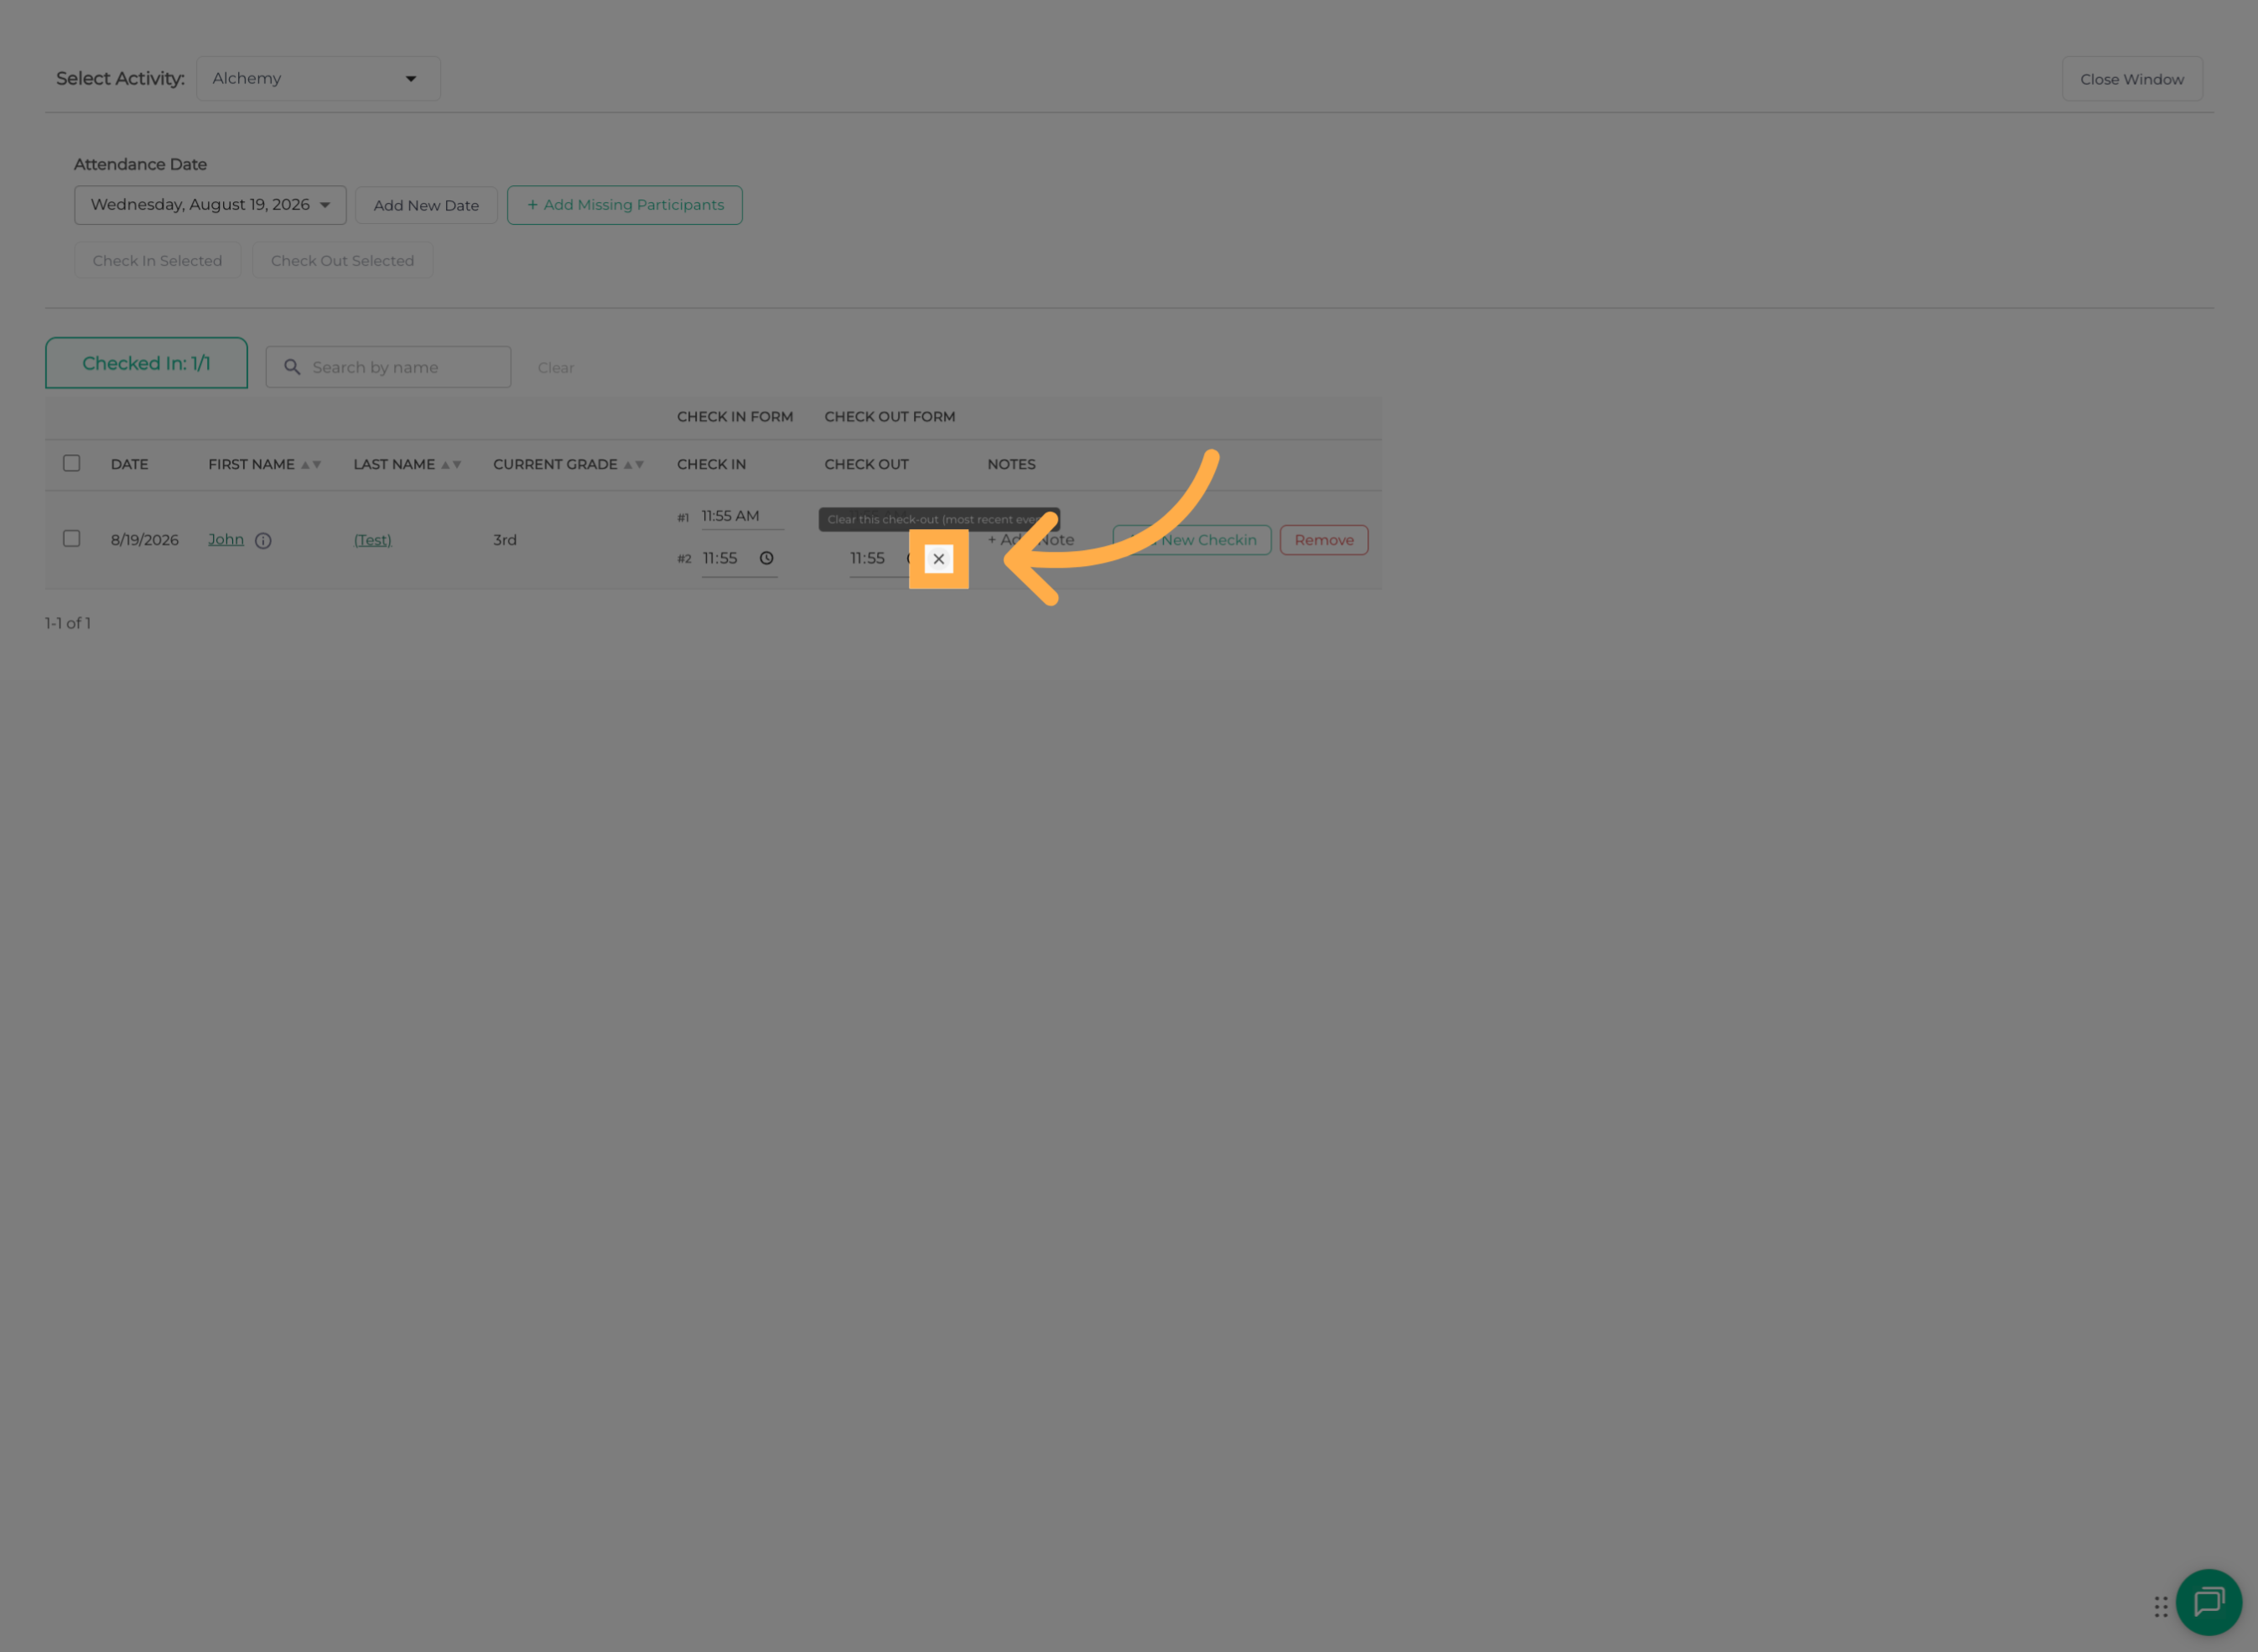
💡 Tip: Use the “X” to remove an incorrect timestamp before entering the correct attendance information.
Review all Check-In and Check-Out entries for the day to make sure the student’s attendance history is accurate.
Frequently Asked Questions
Q: Can I check in the same student more than once in one day?
A: Yes. You can add another Check-In for a student who has already been checked out that day.
Q: Can I record a different time for each check-in?
A: Yes. Select “Custom” when you need to enter a specific check-in time instead of using the current time.
Q: Can I check out the student after their second check-in?
A: Yes. After recording the additional check-in, use “Check-Out” to record the student’s next check-out time.
Q: Can I select multiple students at once?
A: Yes. Students can be selected individually or in bulk when starting the check-in process.
Q: What if I entered the wrong check-in or check-out time?
A: Click the “X” next to the timestamp to remove the incorrect entry, then add the correct Check-In or Check-Out time.
Q: Can I add another check-in after the student has already been checked out?
A: Yes. Select “Check-In”, then click “Add another Check-In for students already Checked-Out today” to create another check-in for that student.
💡If you experience any issues or have further questions with “How to Record Multiple Check-Ins and Check-Outs for a Student”, don't hesitate to get in touch with our support team at support@afterschoolhq.com.