![ASHQ Logo Vert Flat.png]](https://support.afterschoolhq.com/hs-fs/hubfs/ASHQ%20Logo%20Vert%20Flat.png?height=40&name=ASHQ%20Logo%20Vert%20Flat.png)
Scheduling messages in AfterSchool HQ allows you to prepare communications in advance and choose when they should be delivered.
Whether you're sharing program announcements, registration reminders, important updates, or other information, you can customize your message and schedule it for a future date and time.
❗Before You Begin
Before scheduling a message, make sure you have access to the Students and Messages sections in AfterSchool HQ. It's also helpful to have your message content, subject line, and any supporting attachments ready.
If you're planning to use a saved template, make sure it's available and contains the information you need.
You should also know which students or seat assignments you want to include so you can apply the appropriate filters before composing your message.
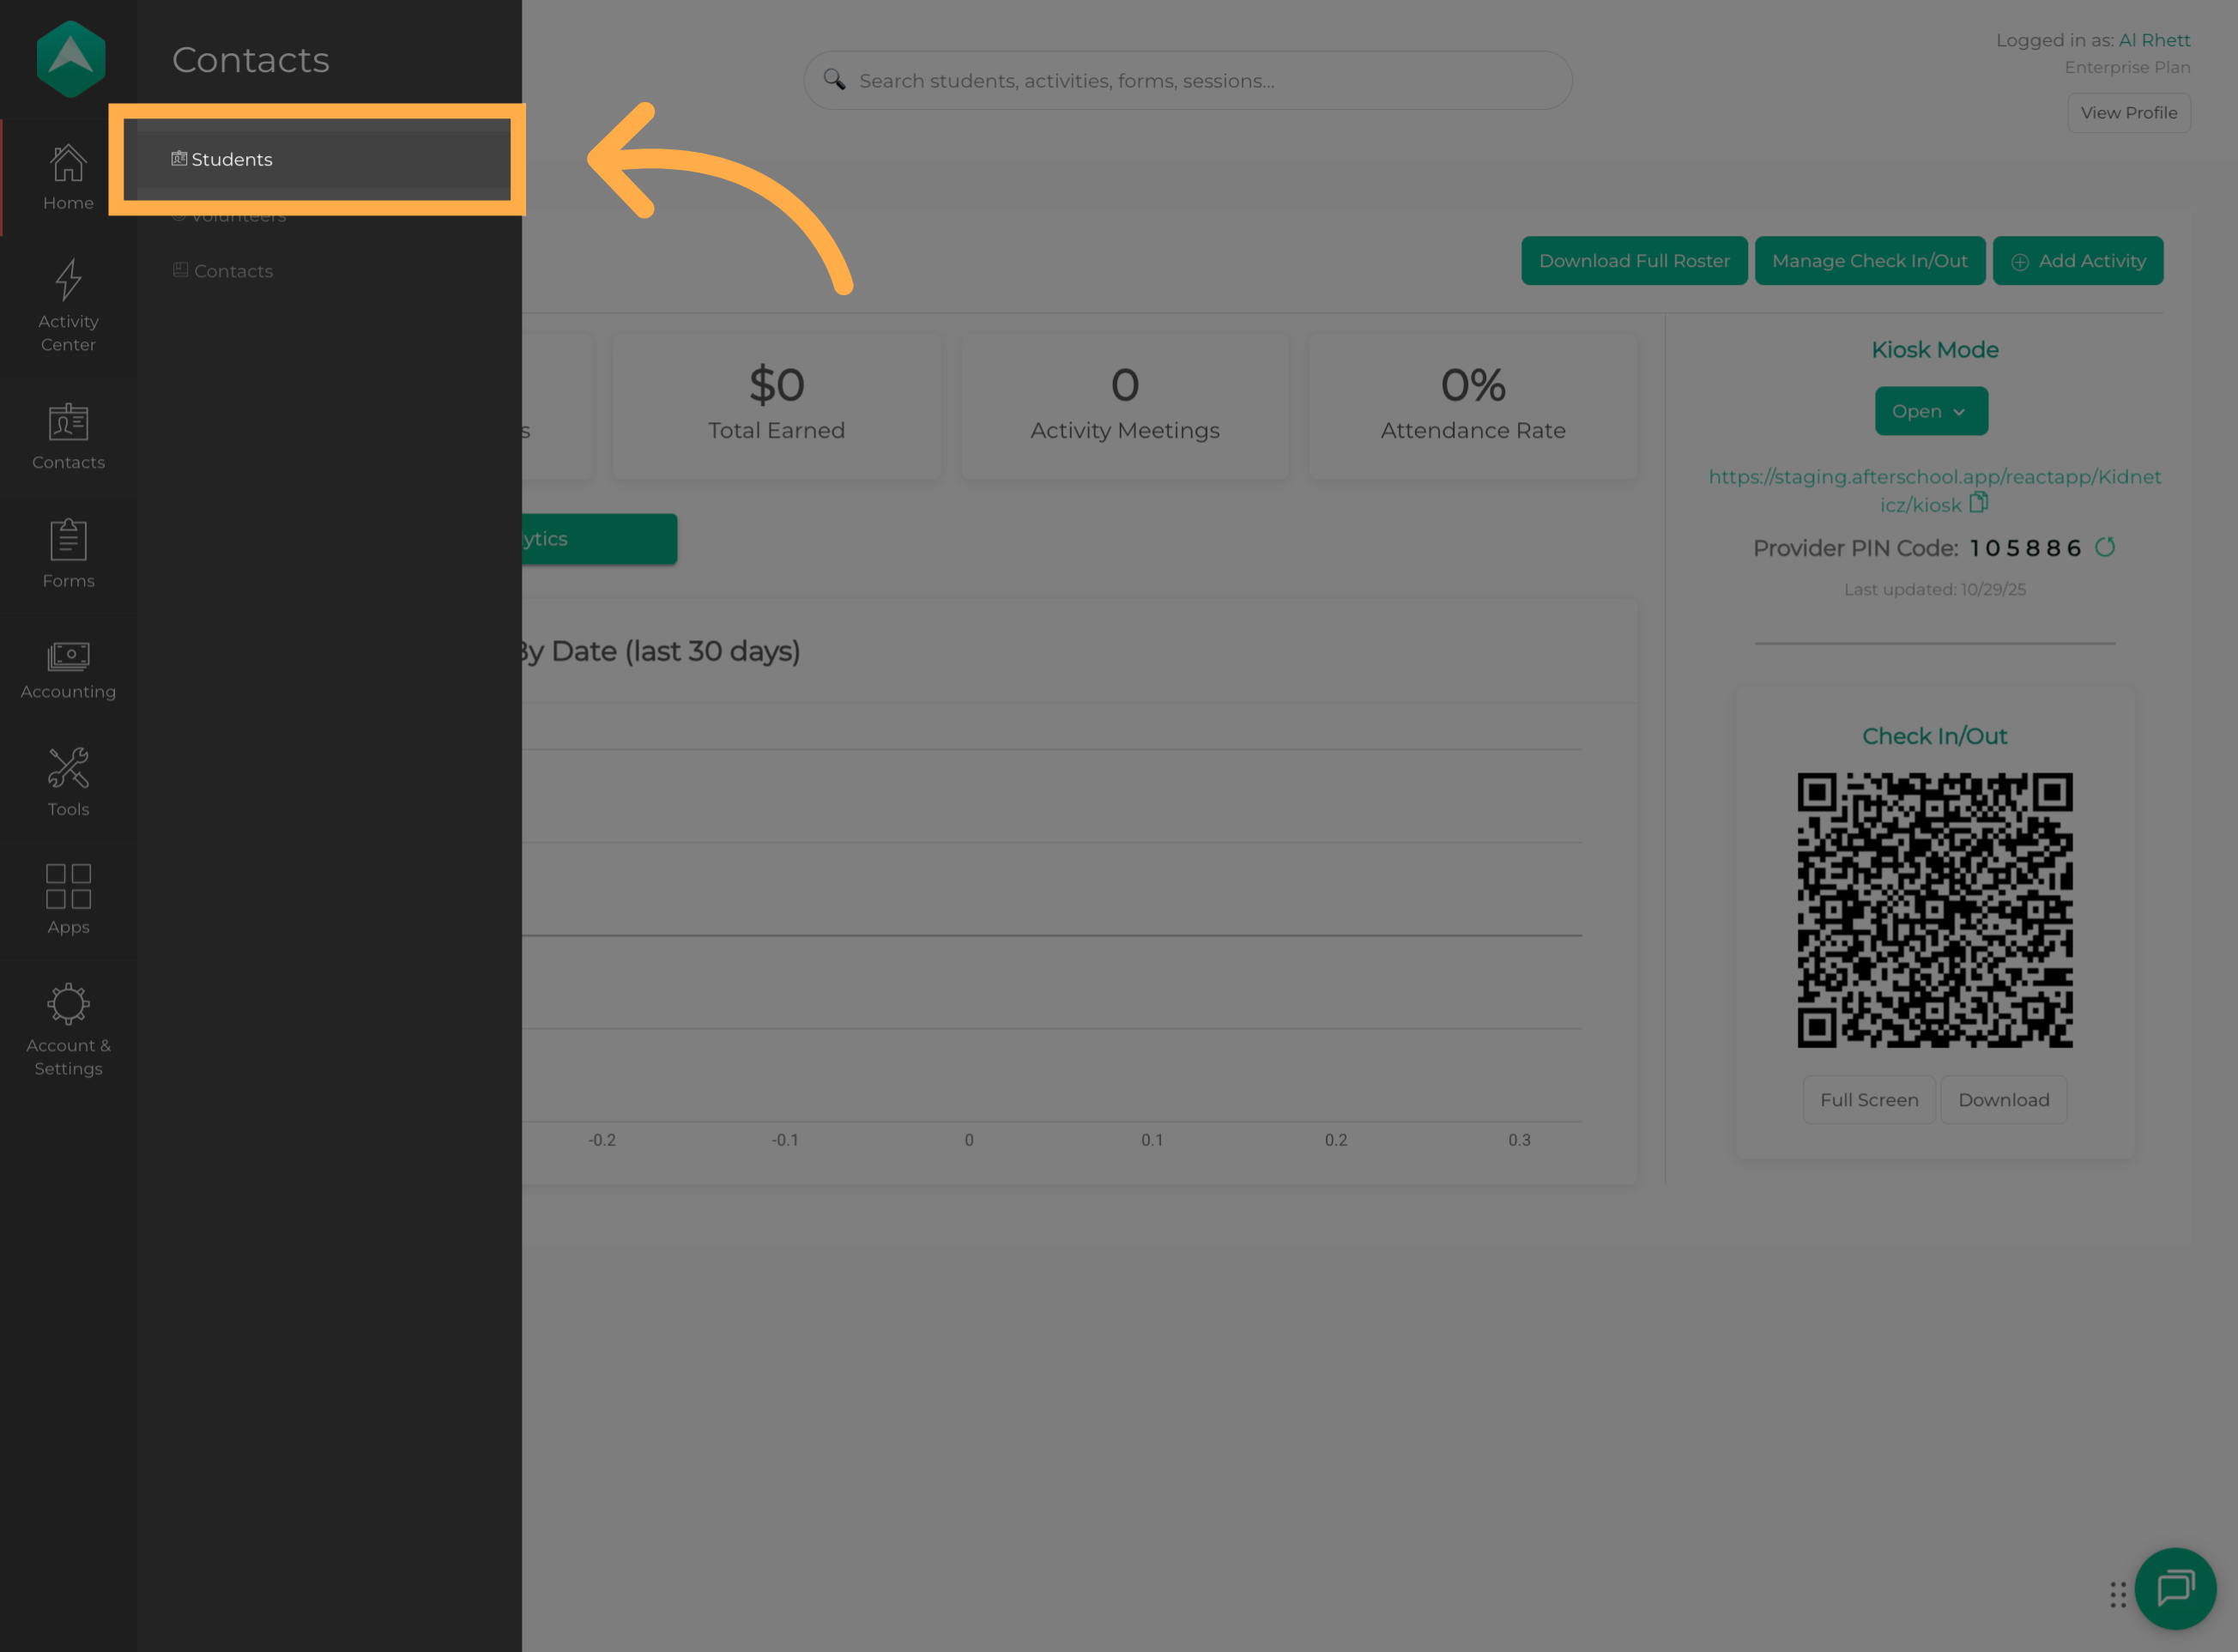
1. Open the Students Section
From the main navigation menu, click “Students” to open the student management area.
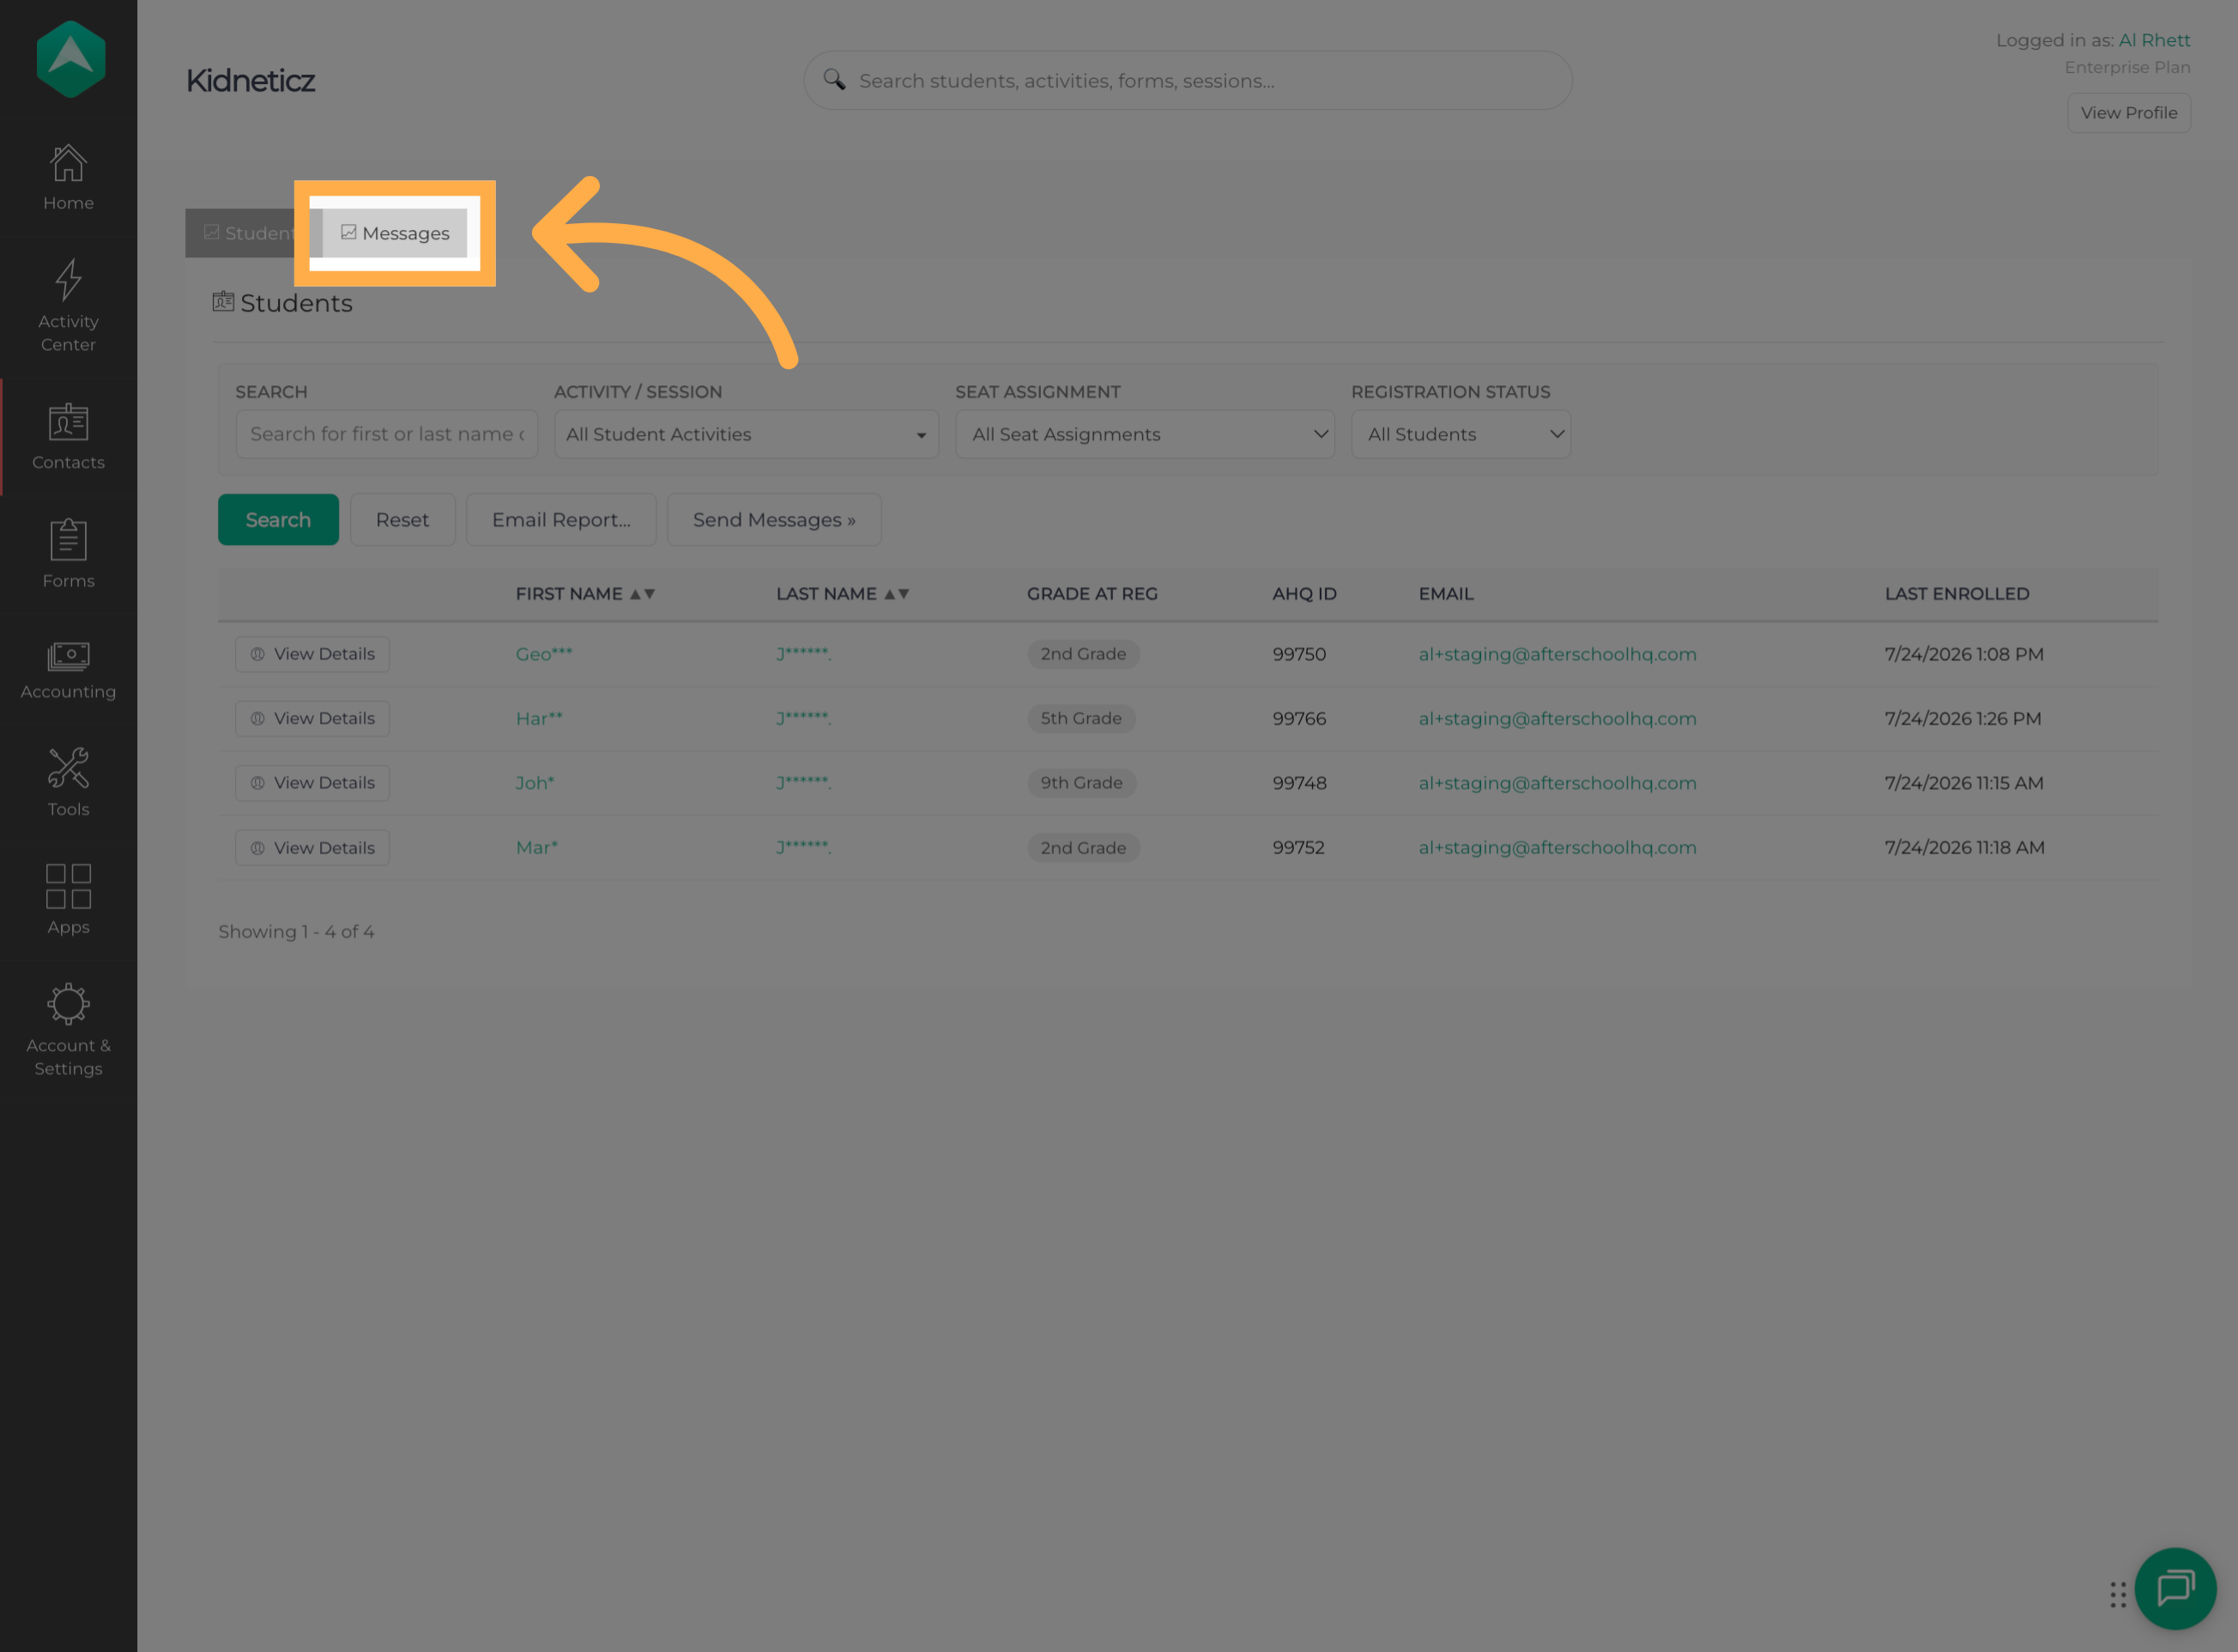
2. Open the Messages Tab
Select the “Messages” tab to view and manage communications with students and families.
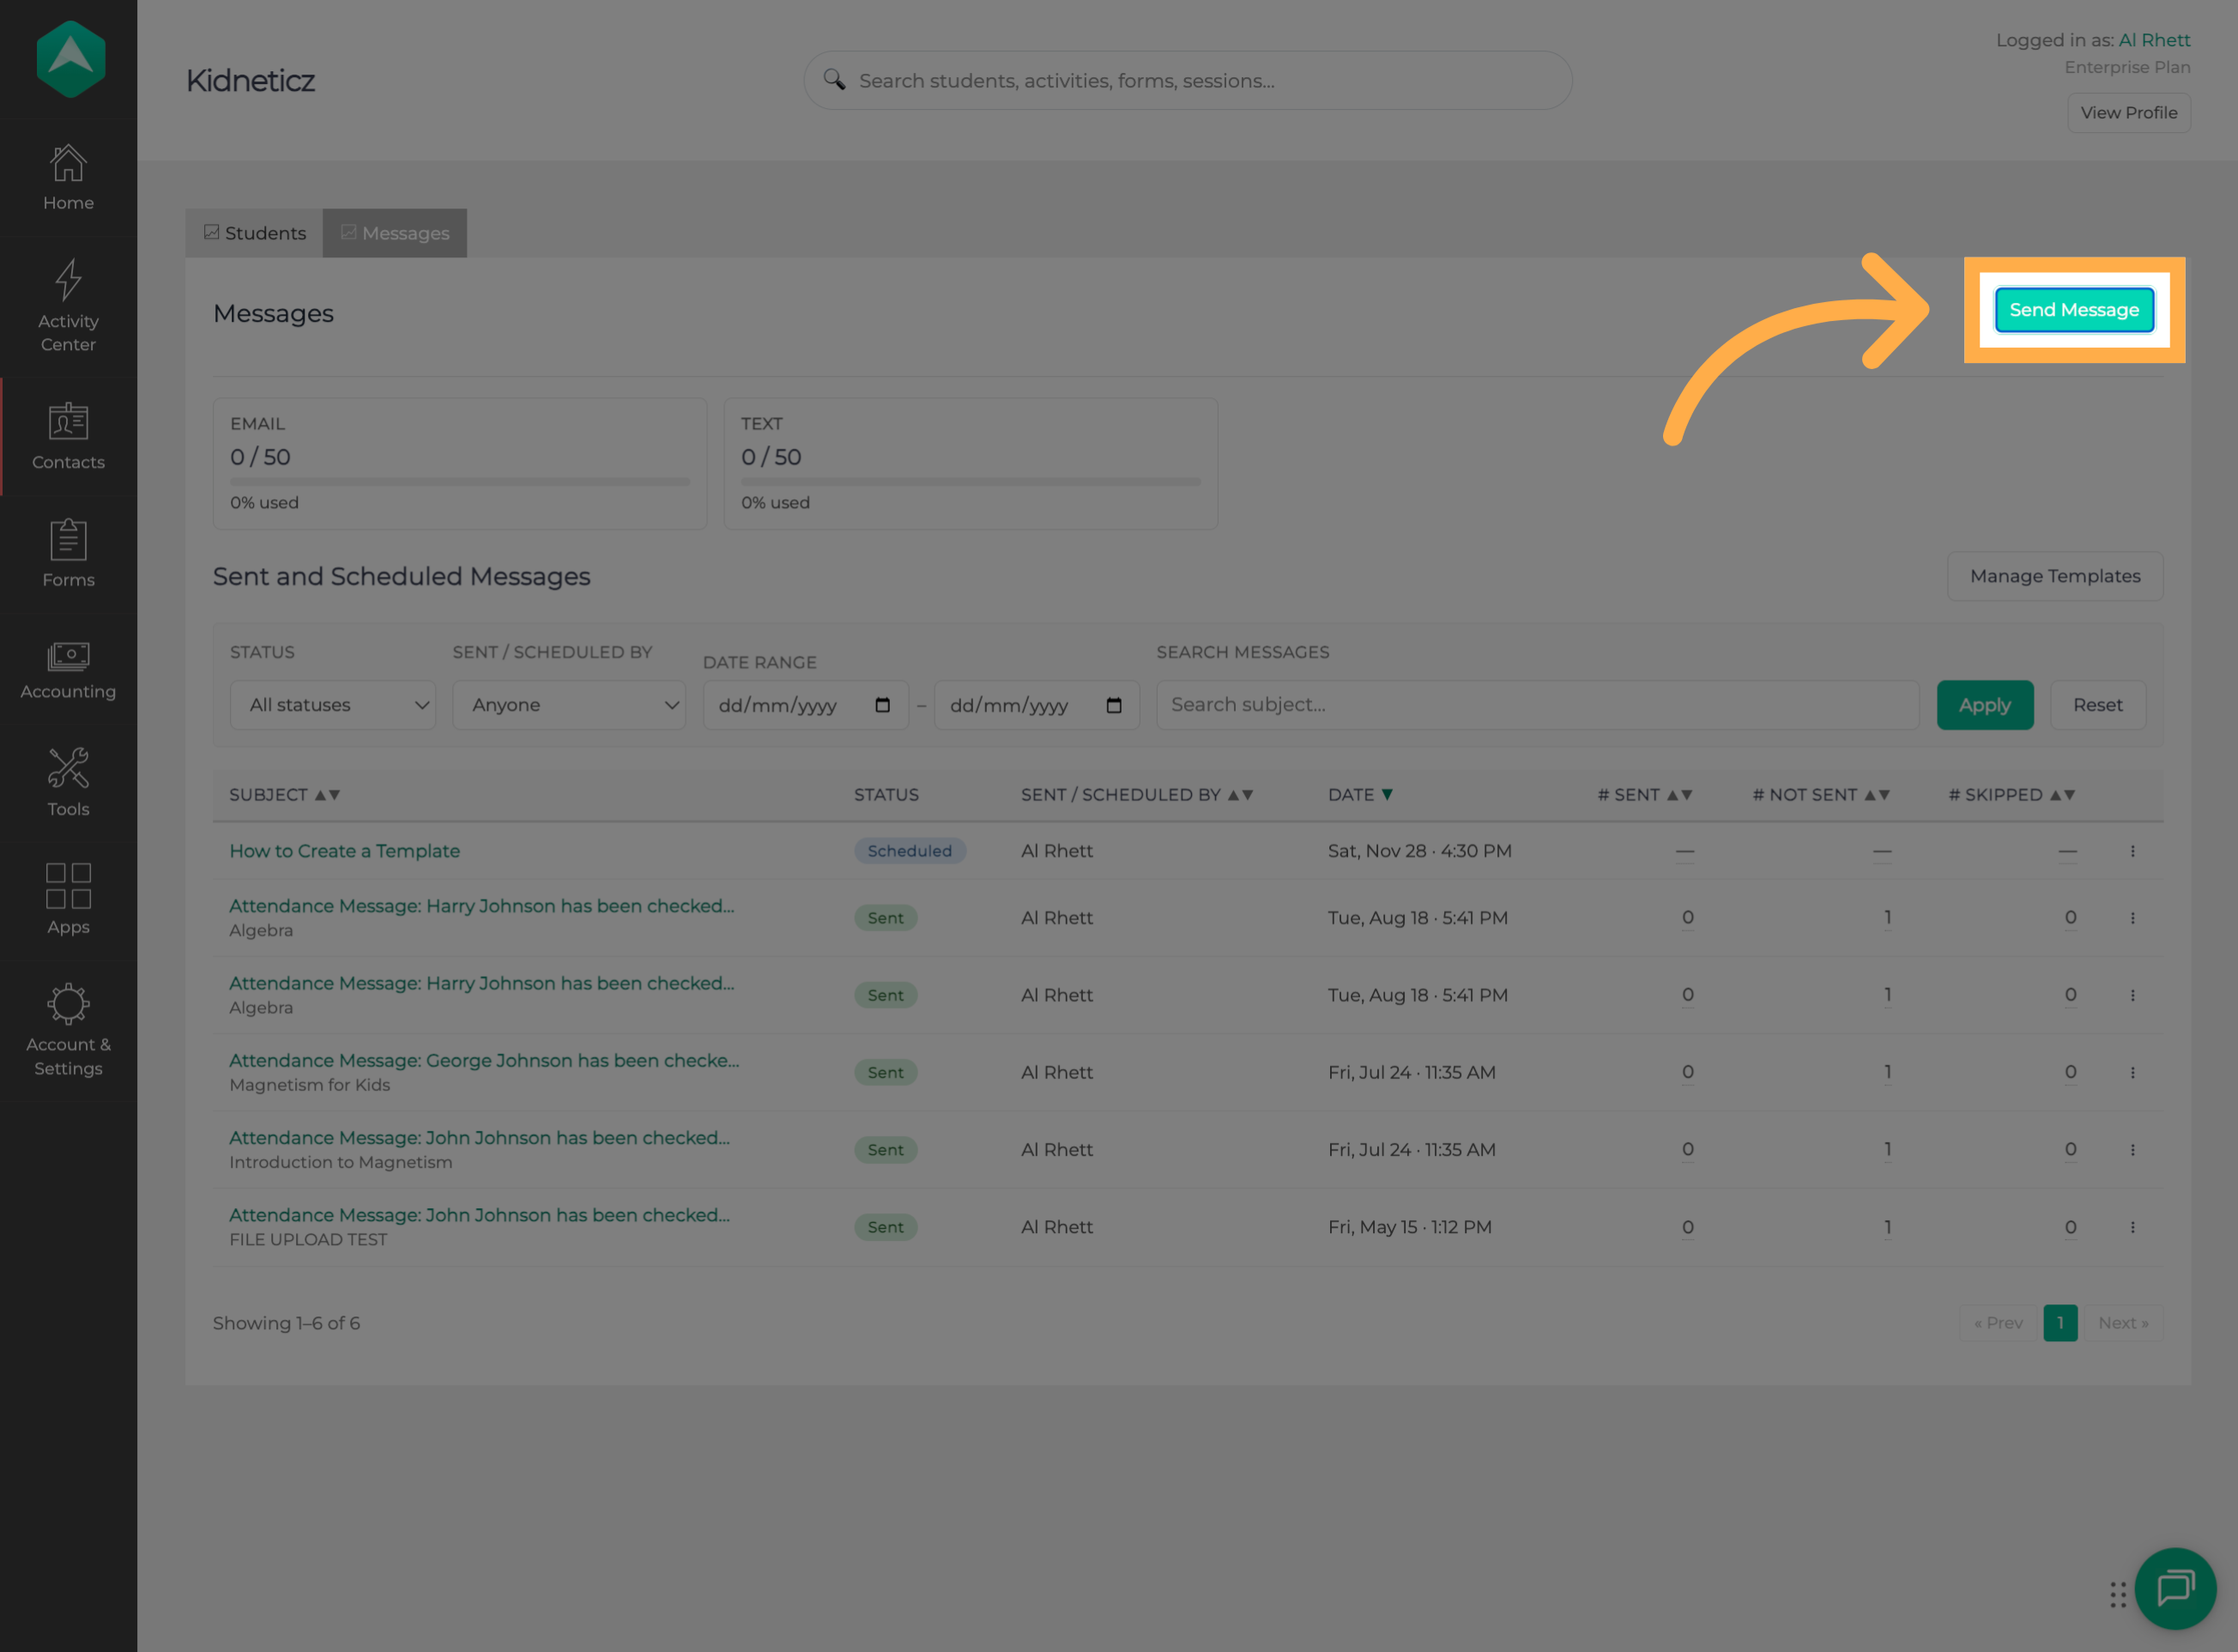
3. Start a New Message
Click the “Send Message” button to start composing a new message.
4. Proceed to the Send Messages Page
After applying your filters to select students, click “Send Messages” to move to the message composition screen.
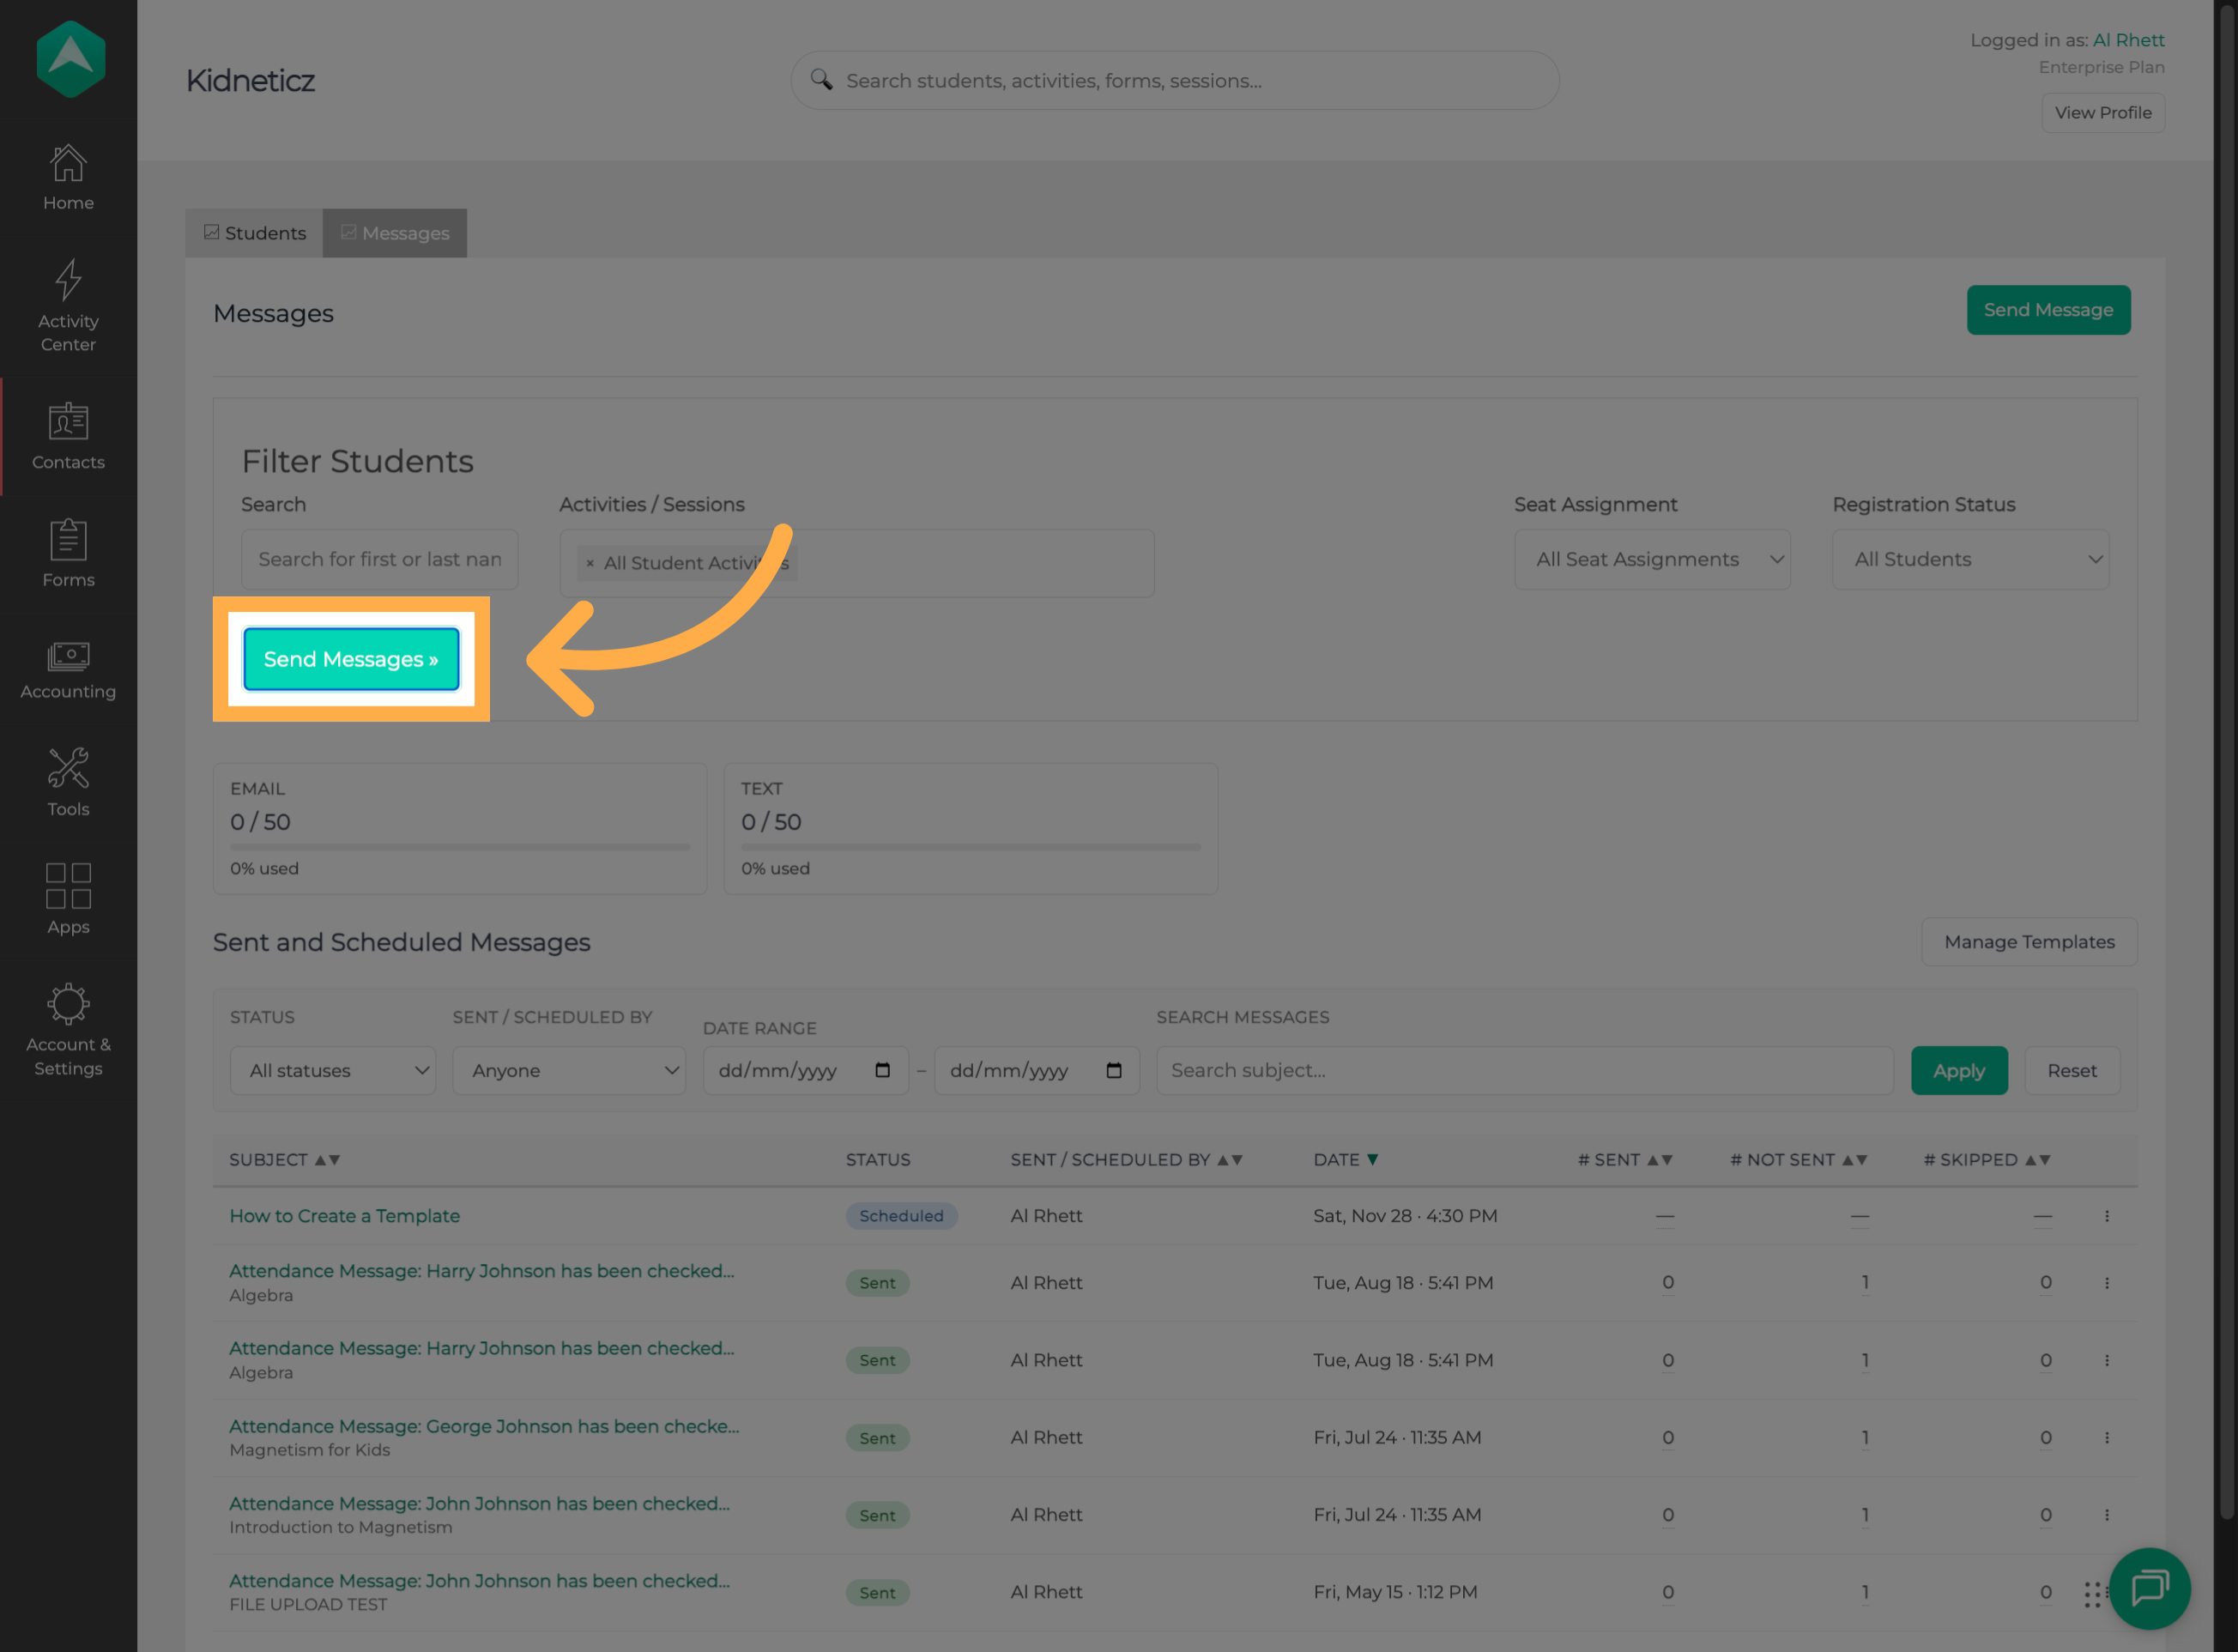
💡Tip: Before proceeding, review your filters to make sure you've selected the correct students. Starting with the right audience helps prevent messages from reaching unintended recipients.
5. Choose a Template or Start from Scratch
Choose to use a saved message template or start from scratch, depending on what you need to communicate.
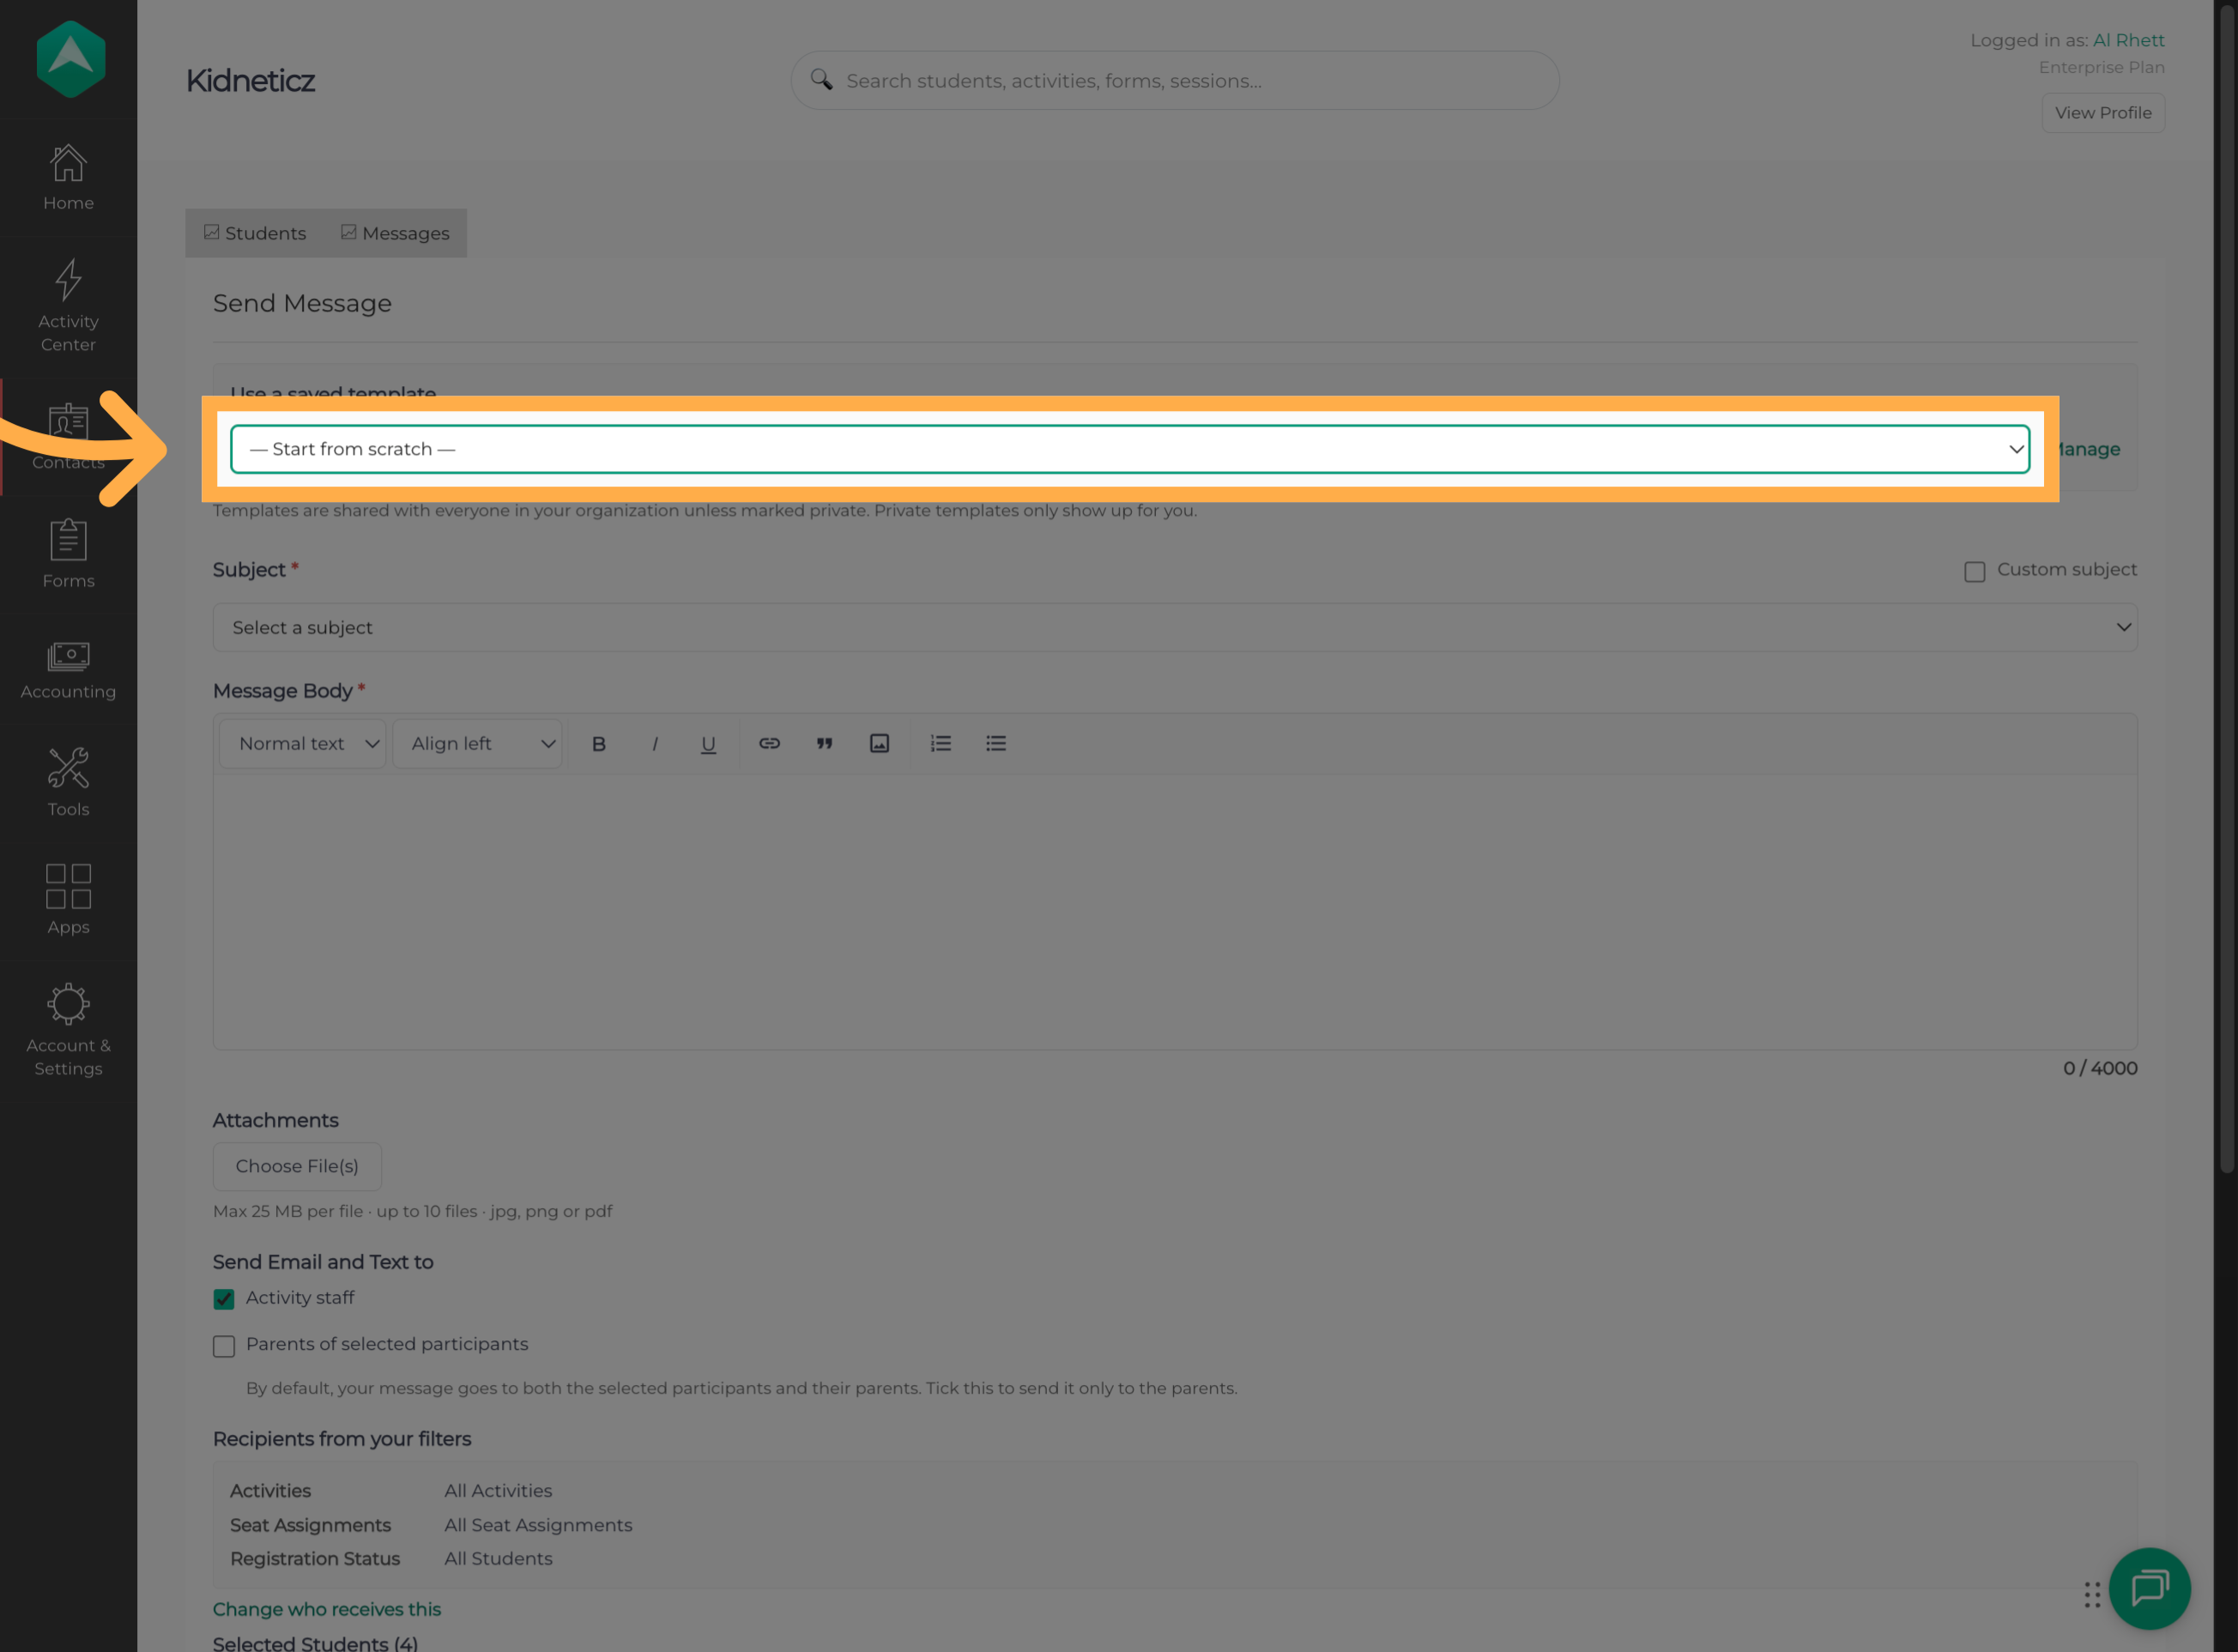
💡Tip: Saved templates are useful for recurring communications, such as registration reminders, program announcements, or general updates. Starting from scratch gives you more flexibility when creating a message for a specific situation.
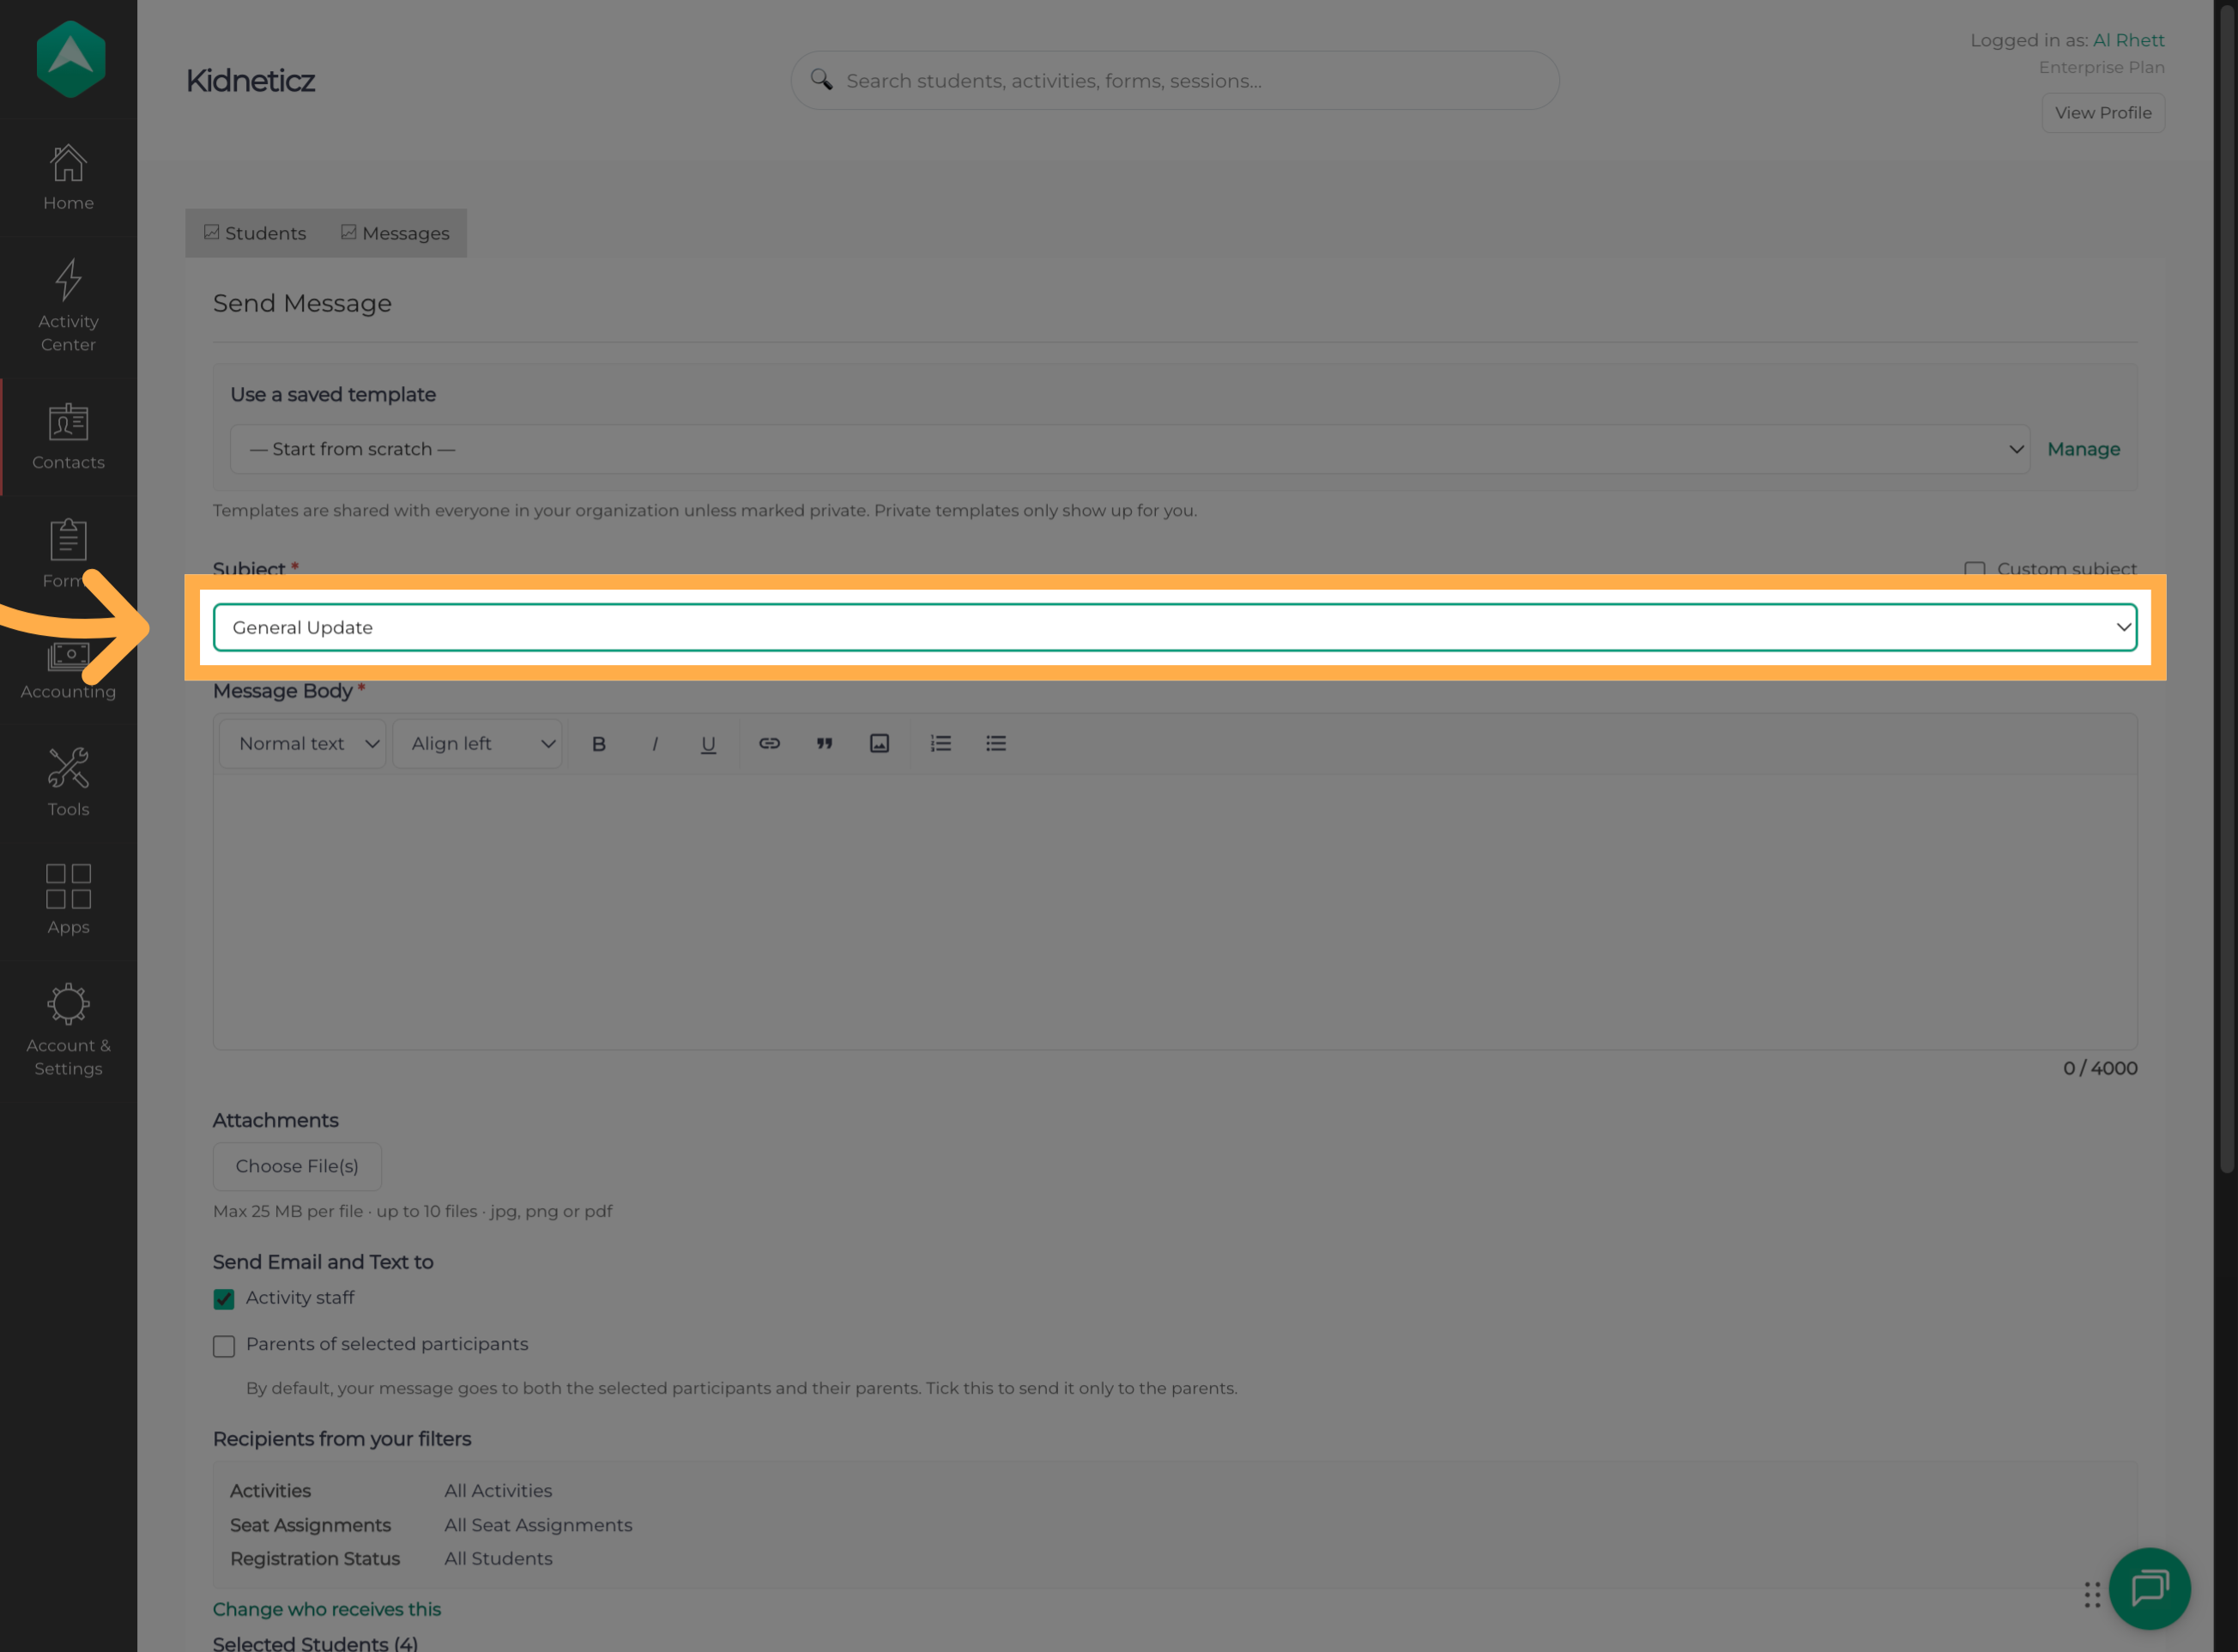
6. Add a Message Subject
Enter a subject line for your message, if applicable. Choose something clear and descriptive so recipients know what it's about.
7. Customize the Subject Line
To use a different subject, click the “Custom Subject” field and enter the subject you'd like recipients to see.
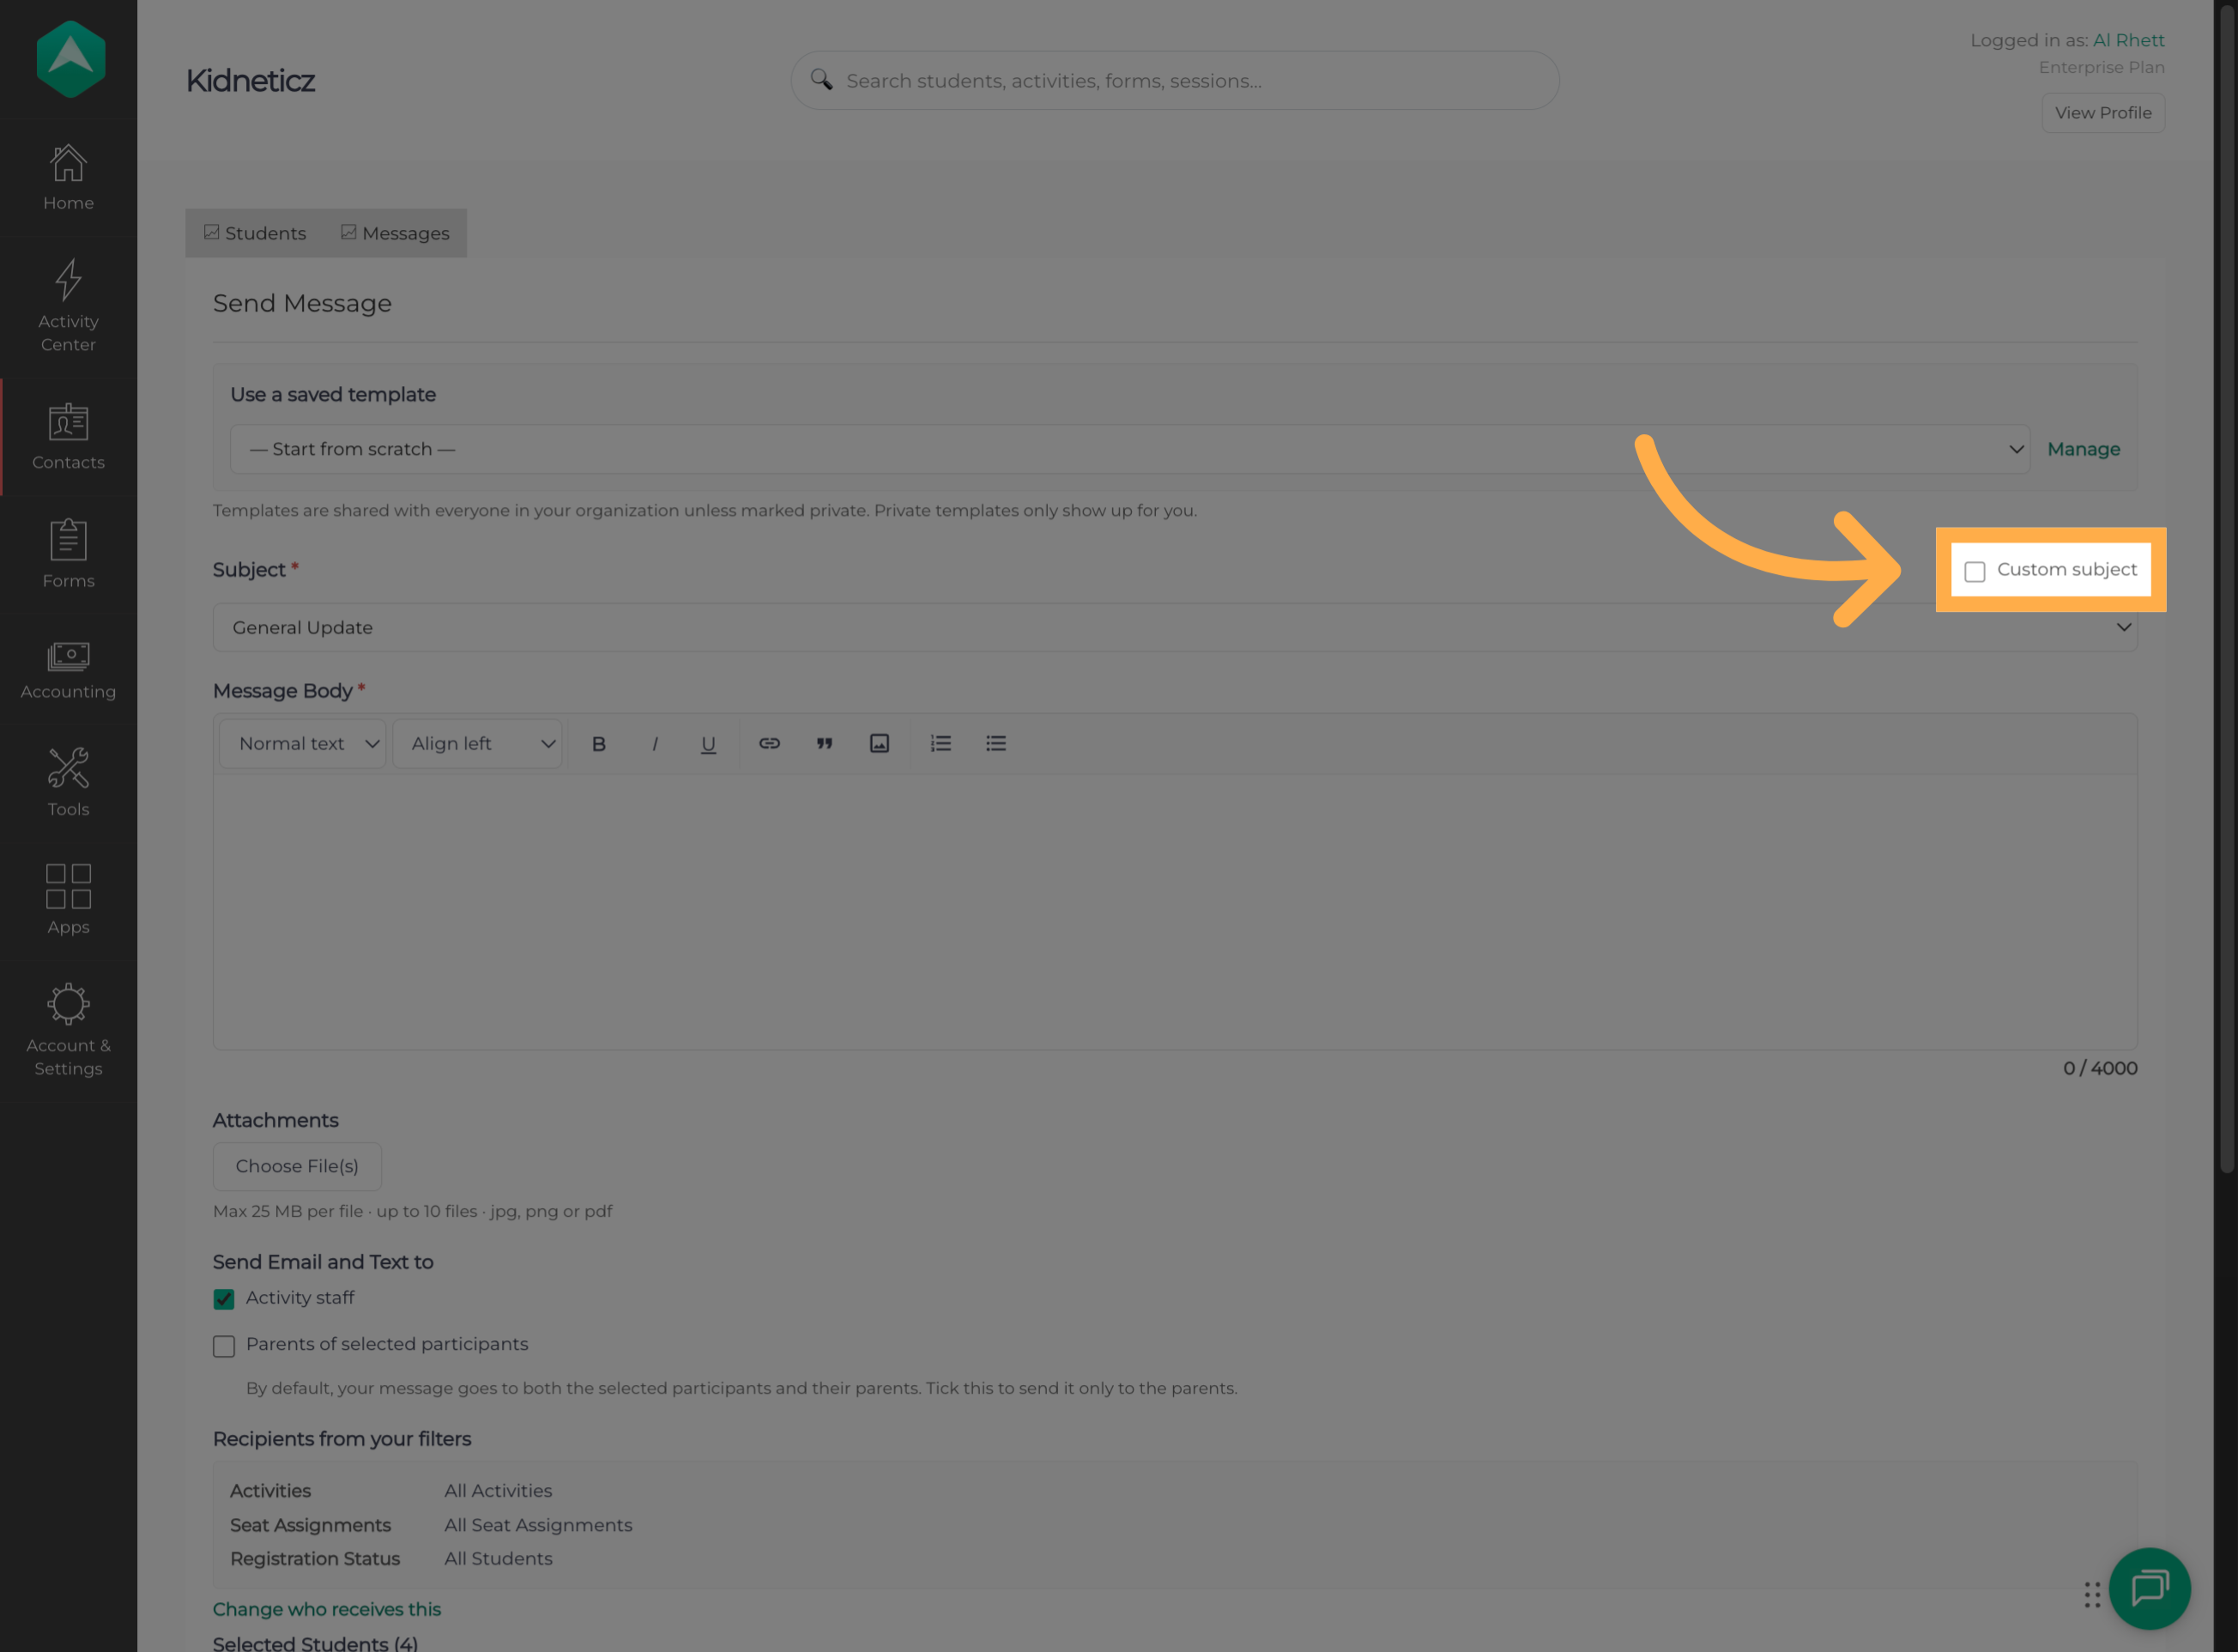
💡Tip: Keep your subject line concise and relevant. A clear subject makes it easier for families to recognize the purpose of your communication.
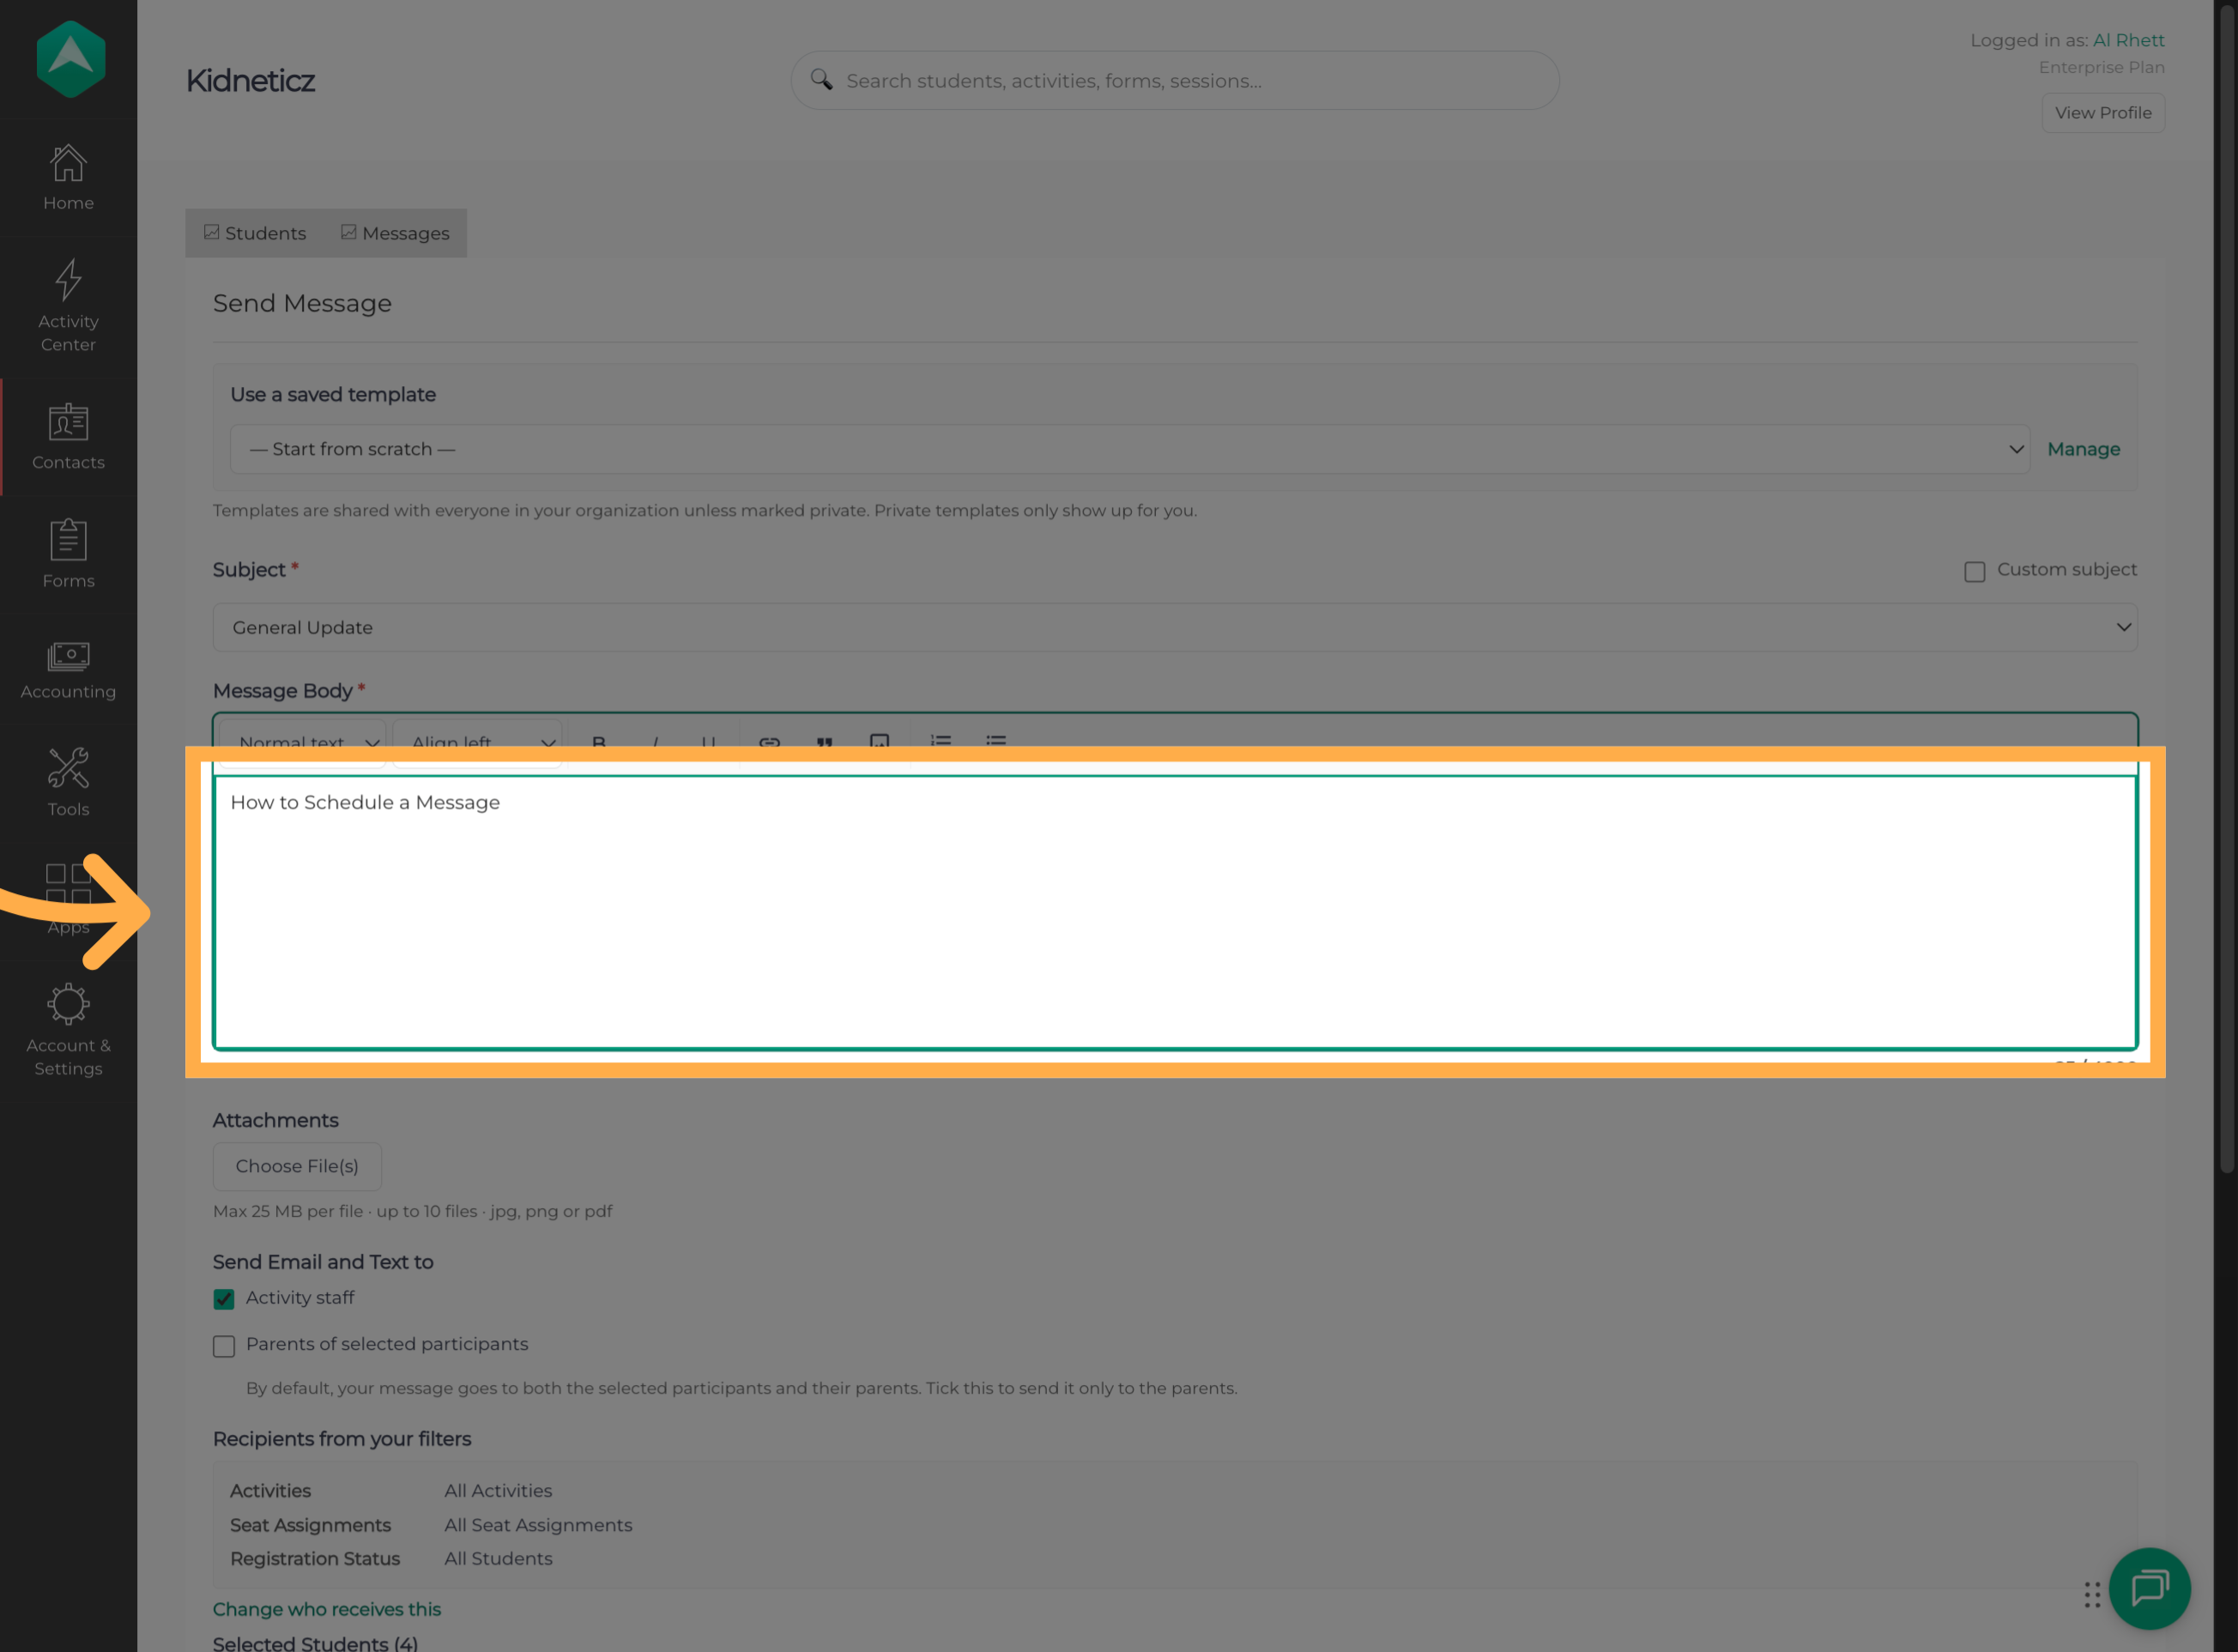
8. Write Your Message
Click inside the message body and enter your content. Keep it clear, complete, and appropriate for your audience.
- Include the most important information near the beginning of your message.
- Double-check dates, times, locations, and registration details.
- Use clear language so families can quickly understand what they need to know or do.
- Proofread your message before continuing.
9. Attach Supporting Files
To include documents or other files, click “Choose File(s)” and select your attachments.
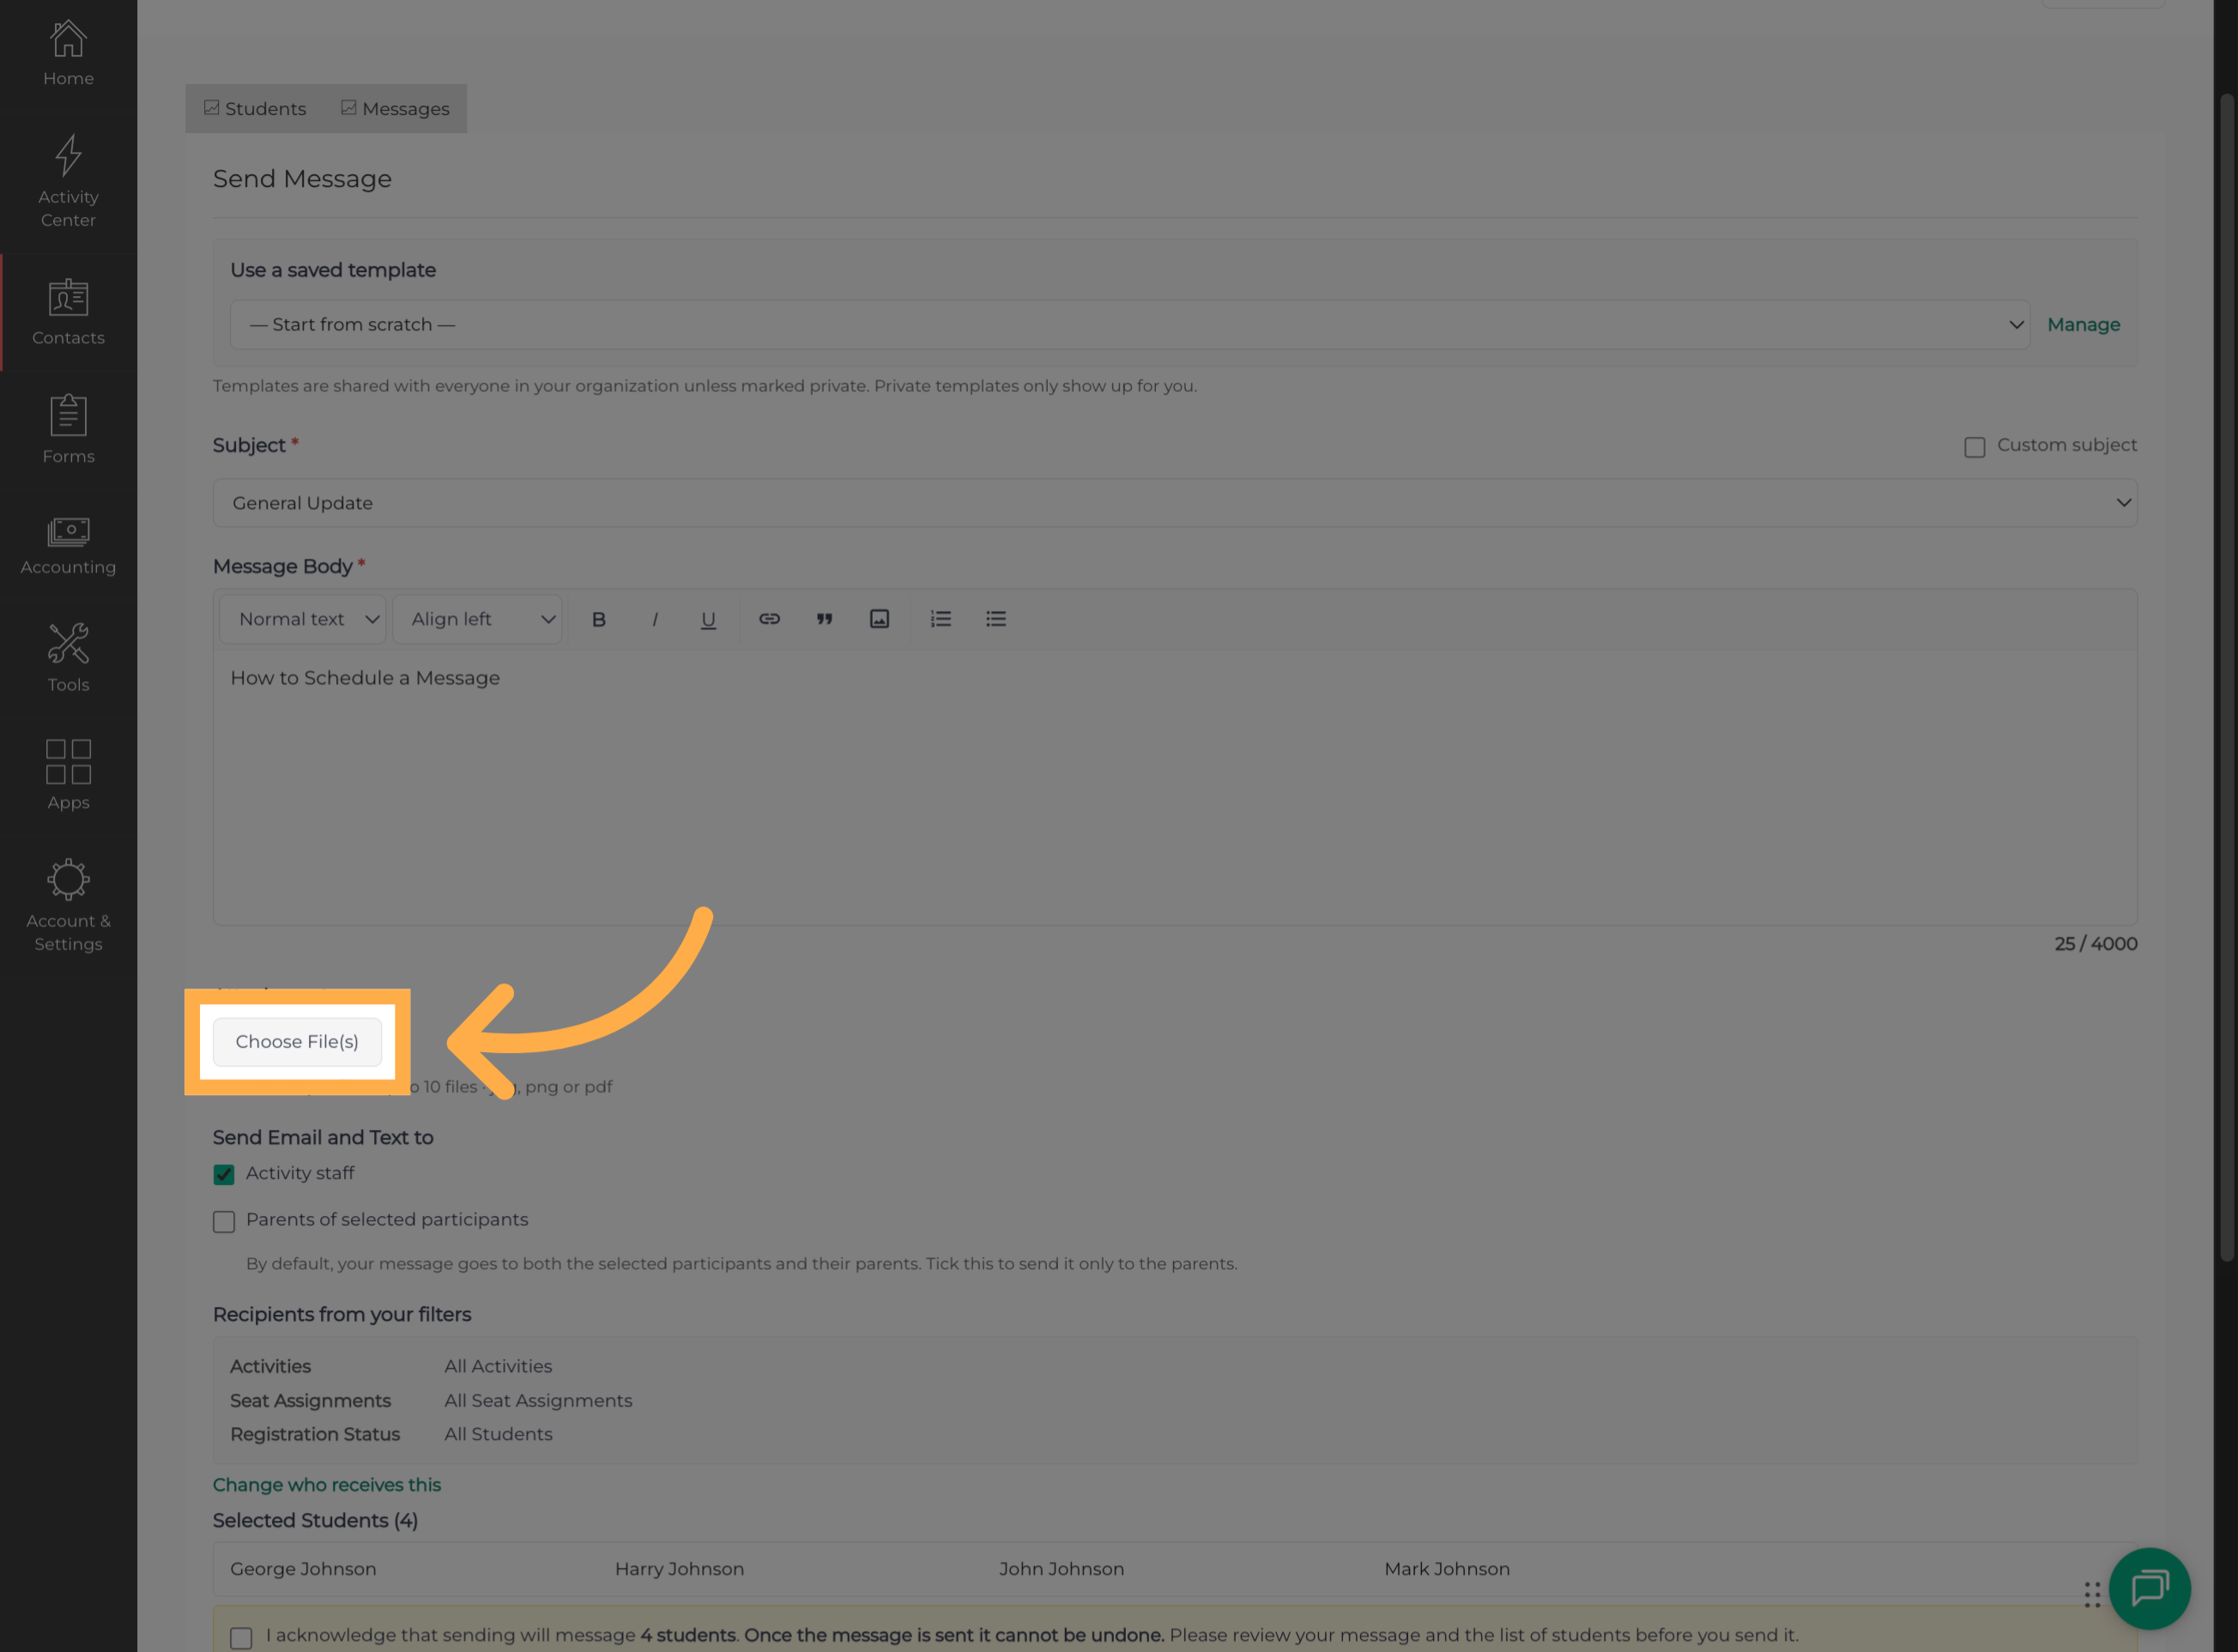
💡Tip: Make sure your attachments are relevant, up to date, and intended for the selected audience. If you're including forms, schedules, or program information, verify that you've selected the correct version.
10. Review the Recipient List
Here you can review the seat assignments included in your message audience.
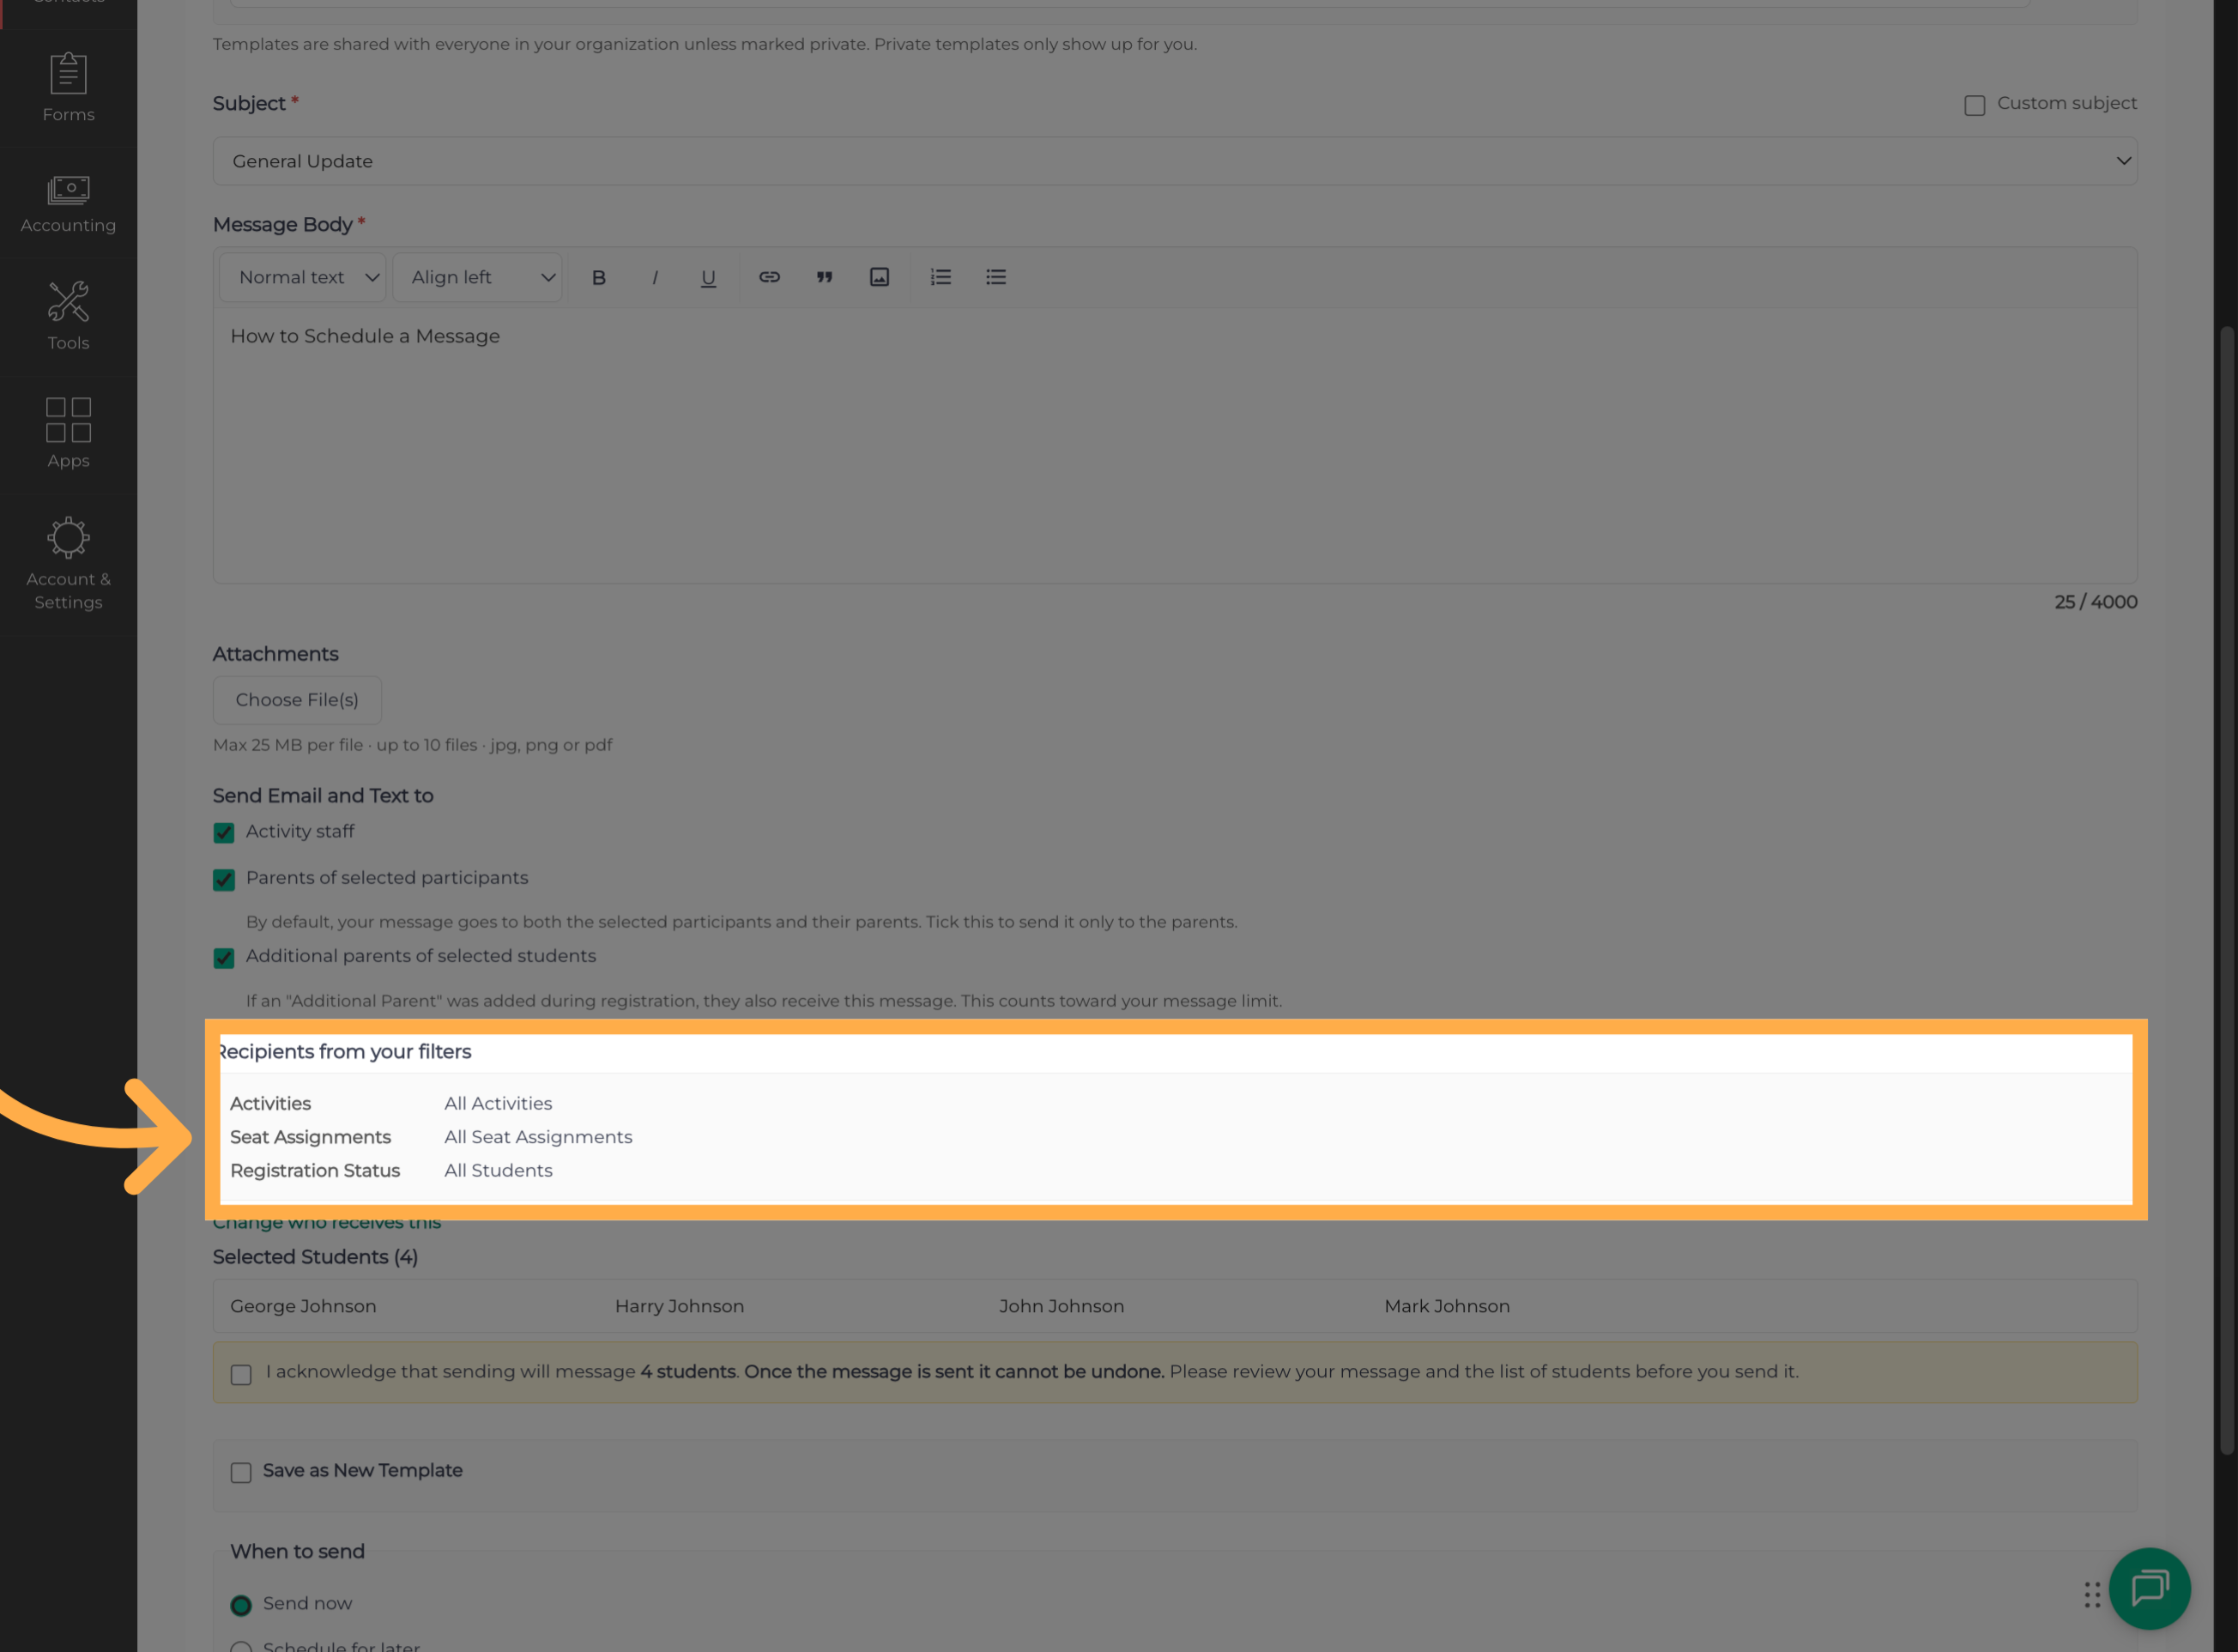
💡Tip: Take a moment to confirm that the selected seat assignments match the students you intended to reach. This is especially important when communicating with multiple programs or groups.
11. Change Who Receives This
To adjust your audience, click “Change Who Receives This” to review and update the selected recipients.
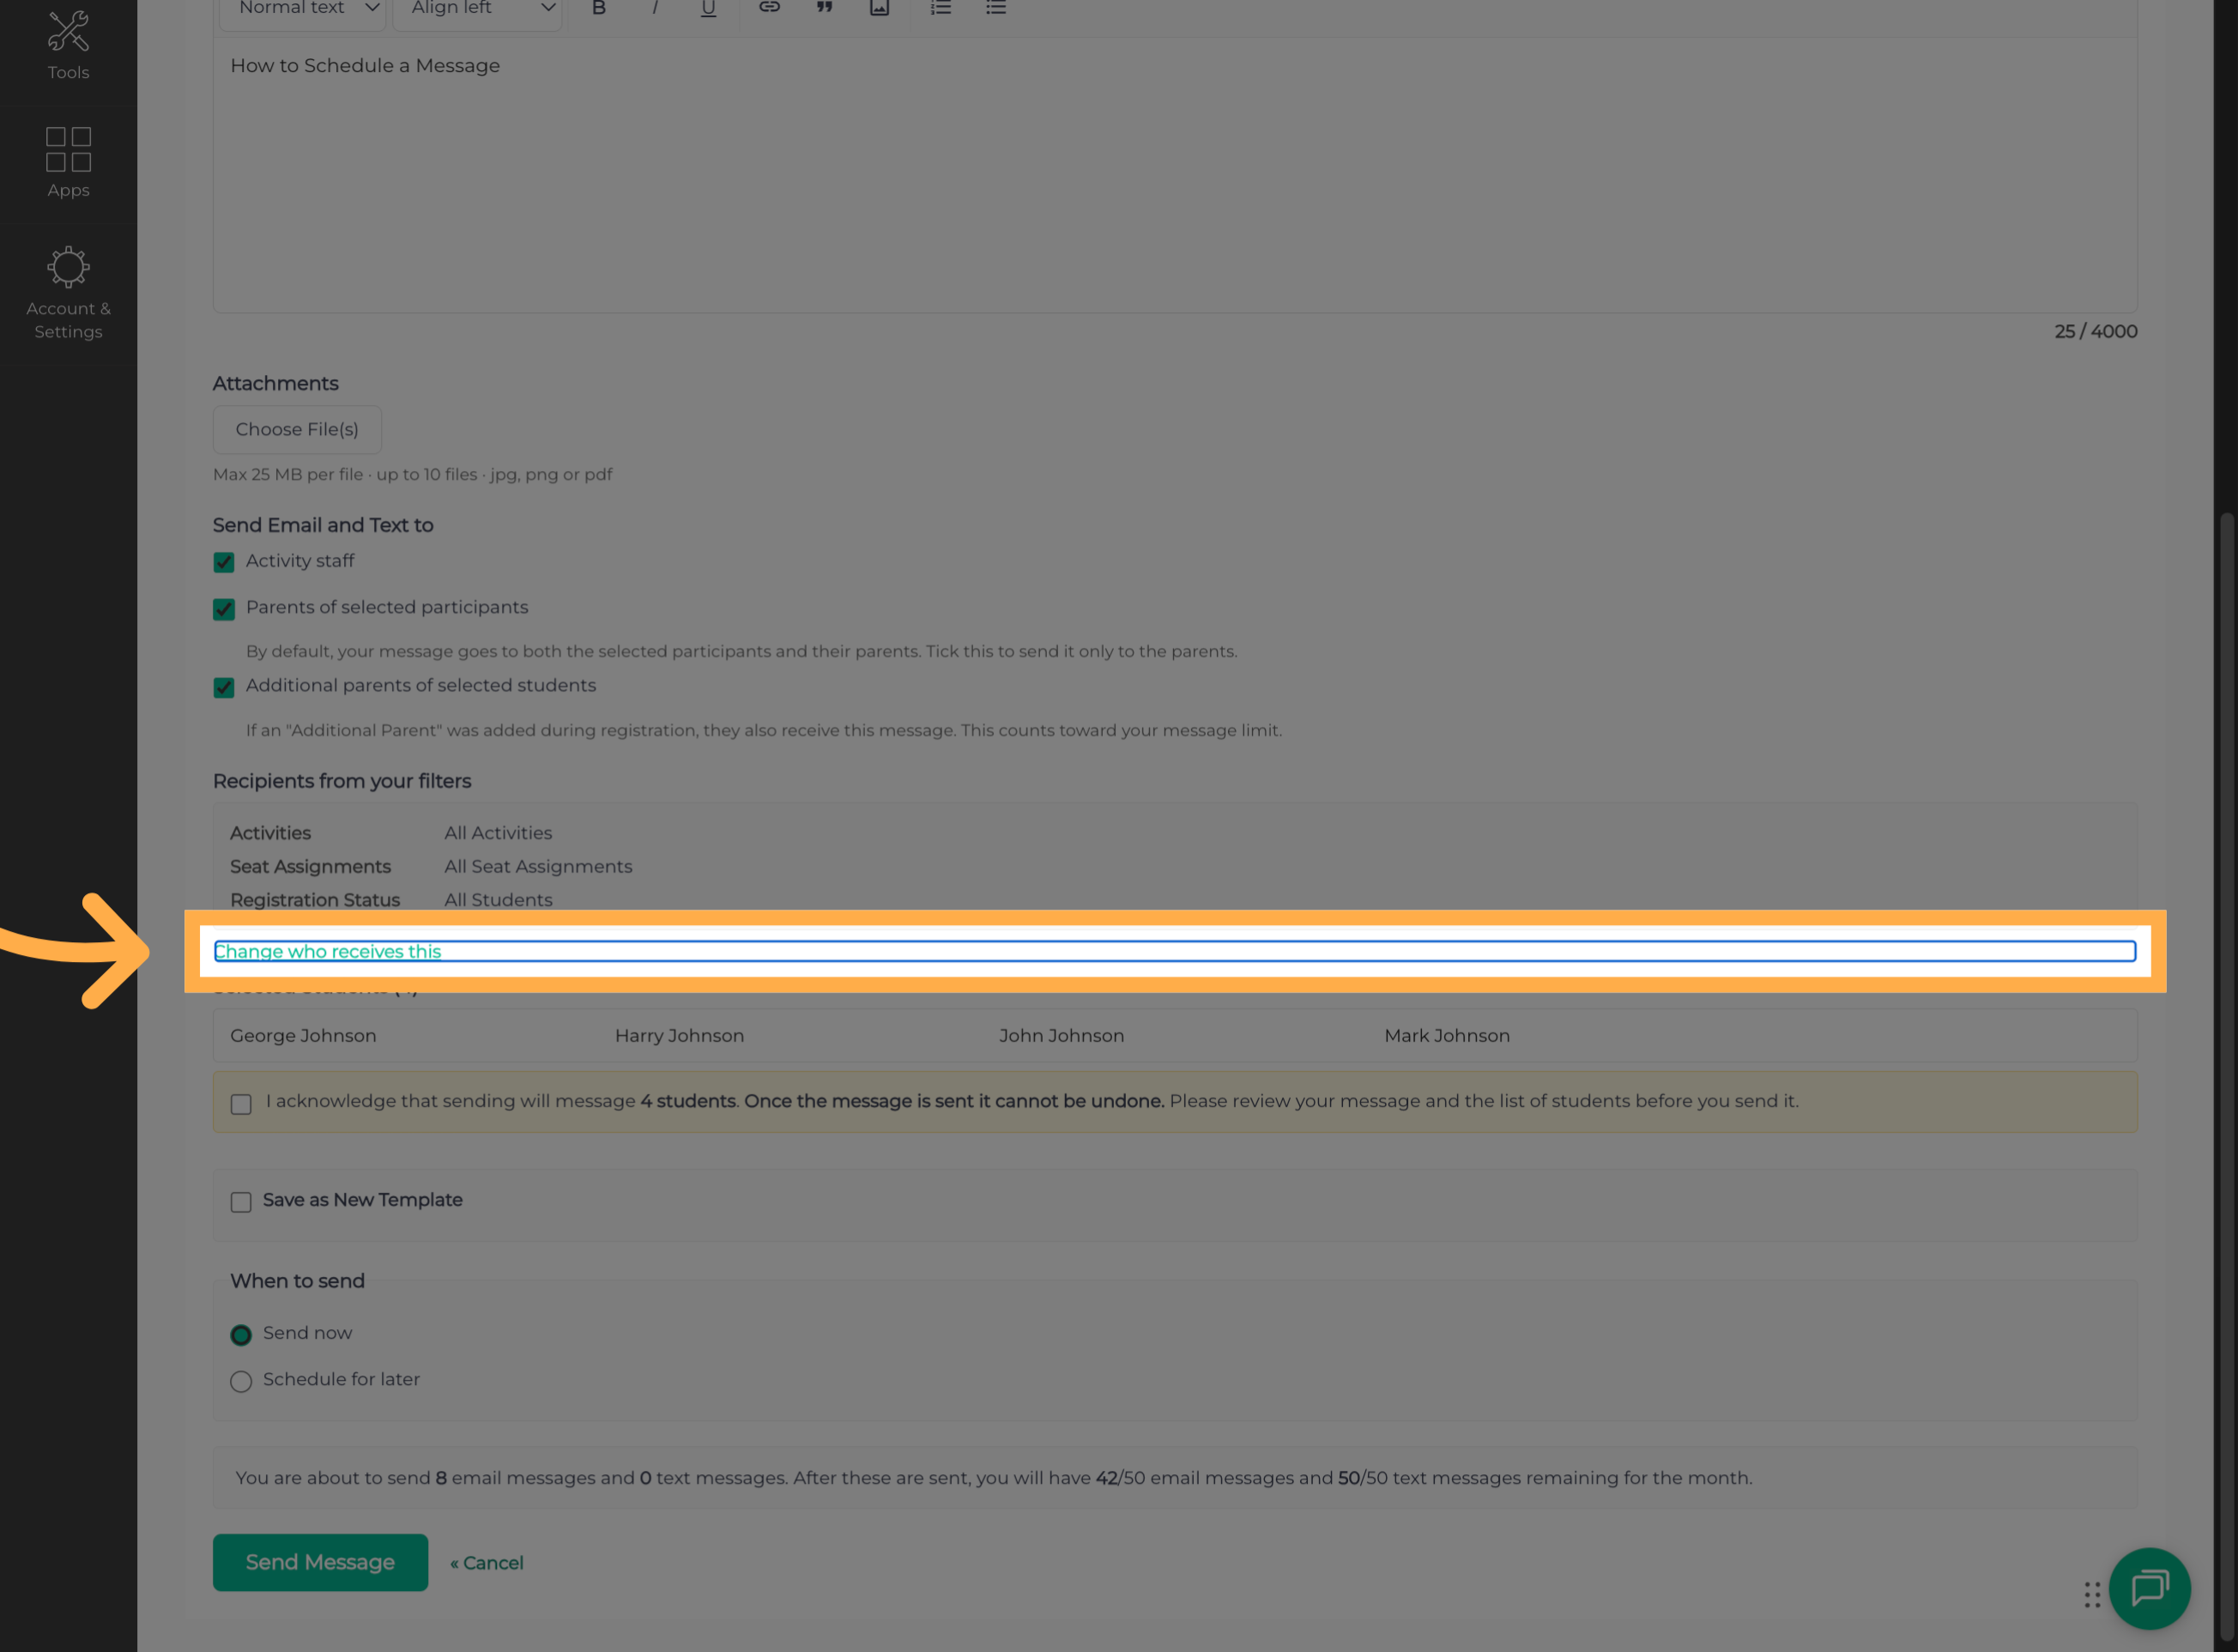
💡Tip: If you modify your recipient selection, review the updated audience before scheduling. This helps ensure that no intended recipients are accidentally excluded or unintended recipients included.
12. Save as a Template
Want to reuse this message later? Save it as a new template, give it a descriptive name, and set who should be able to access it.
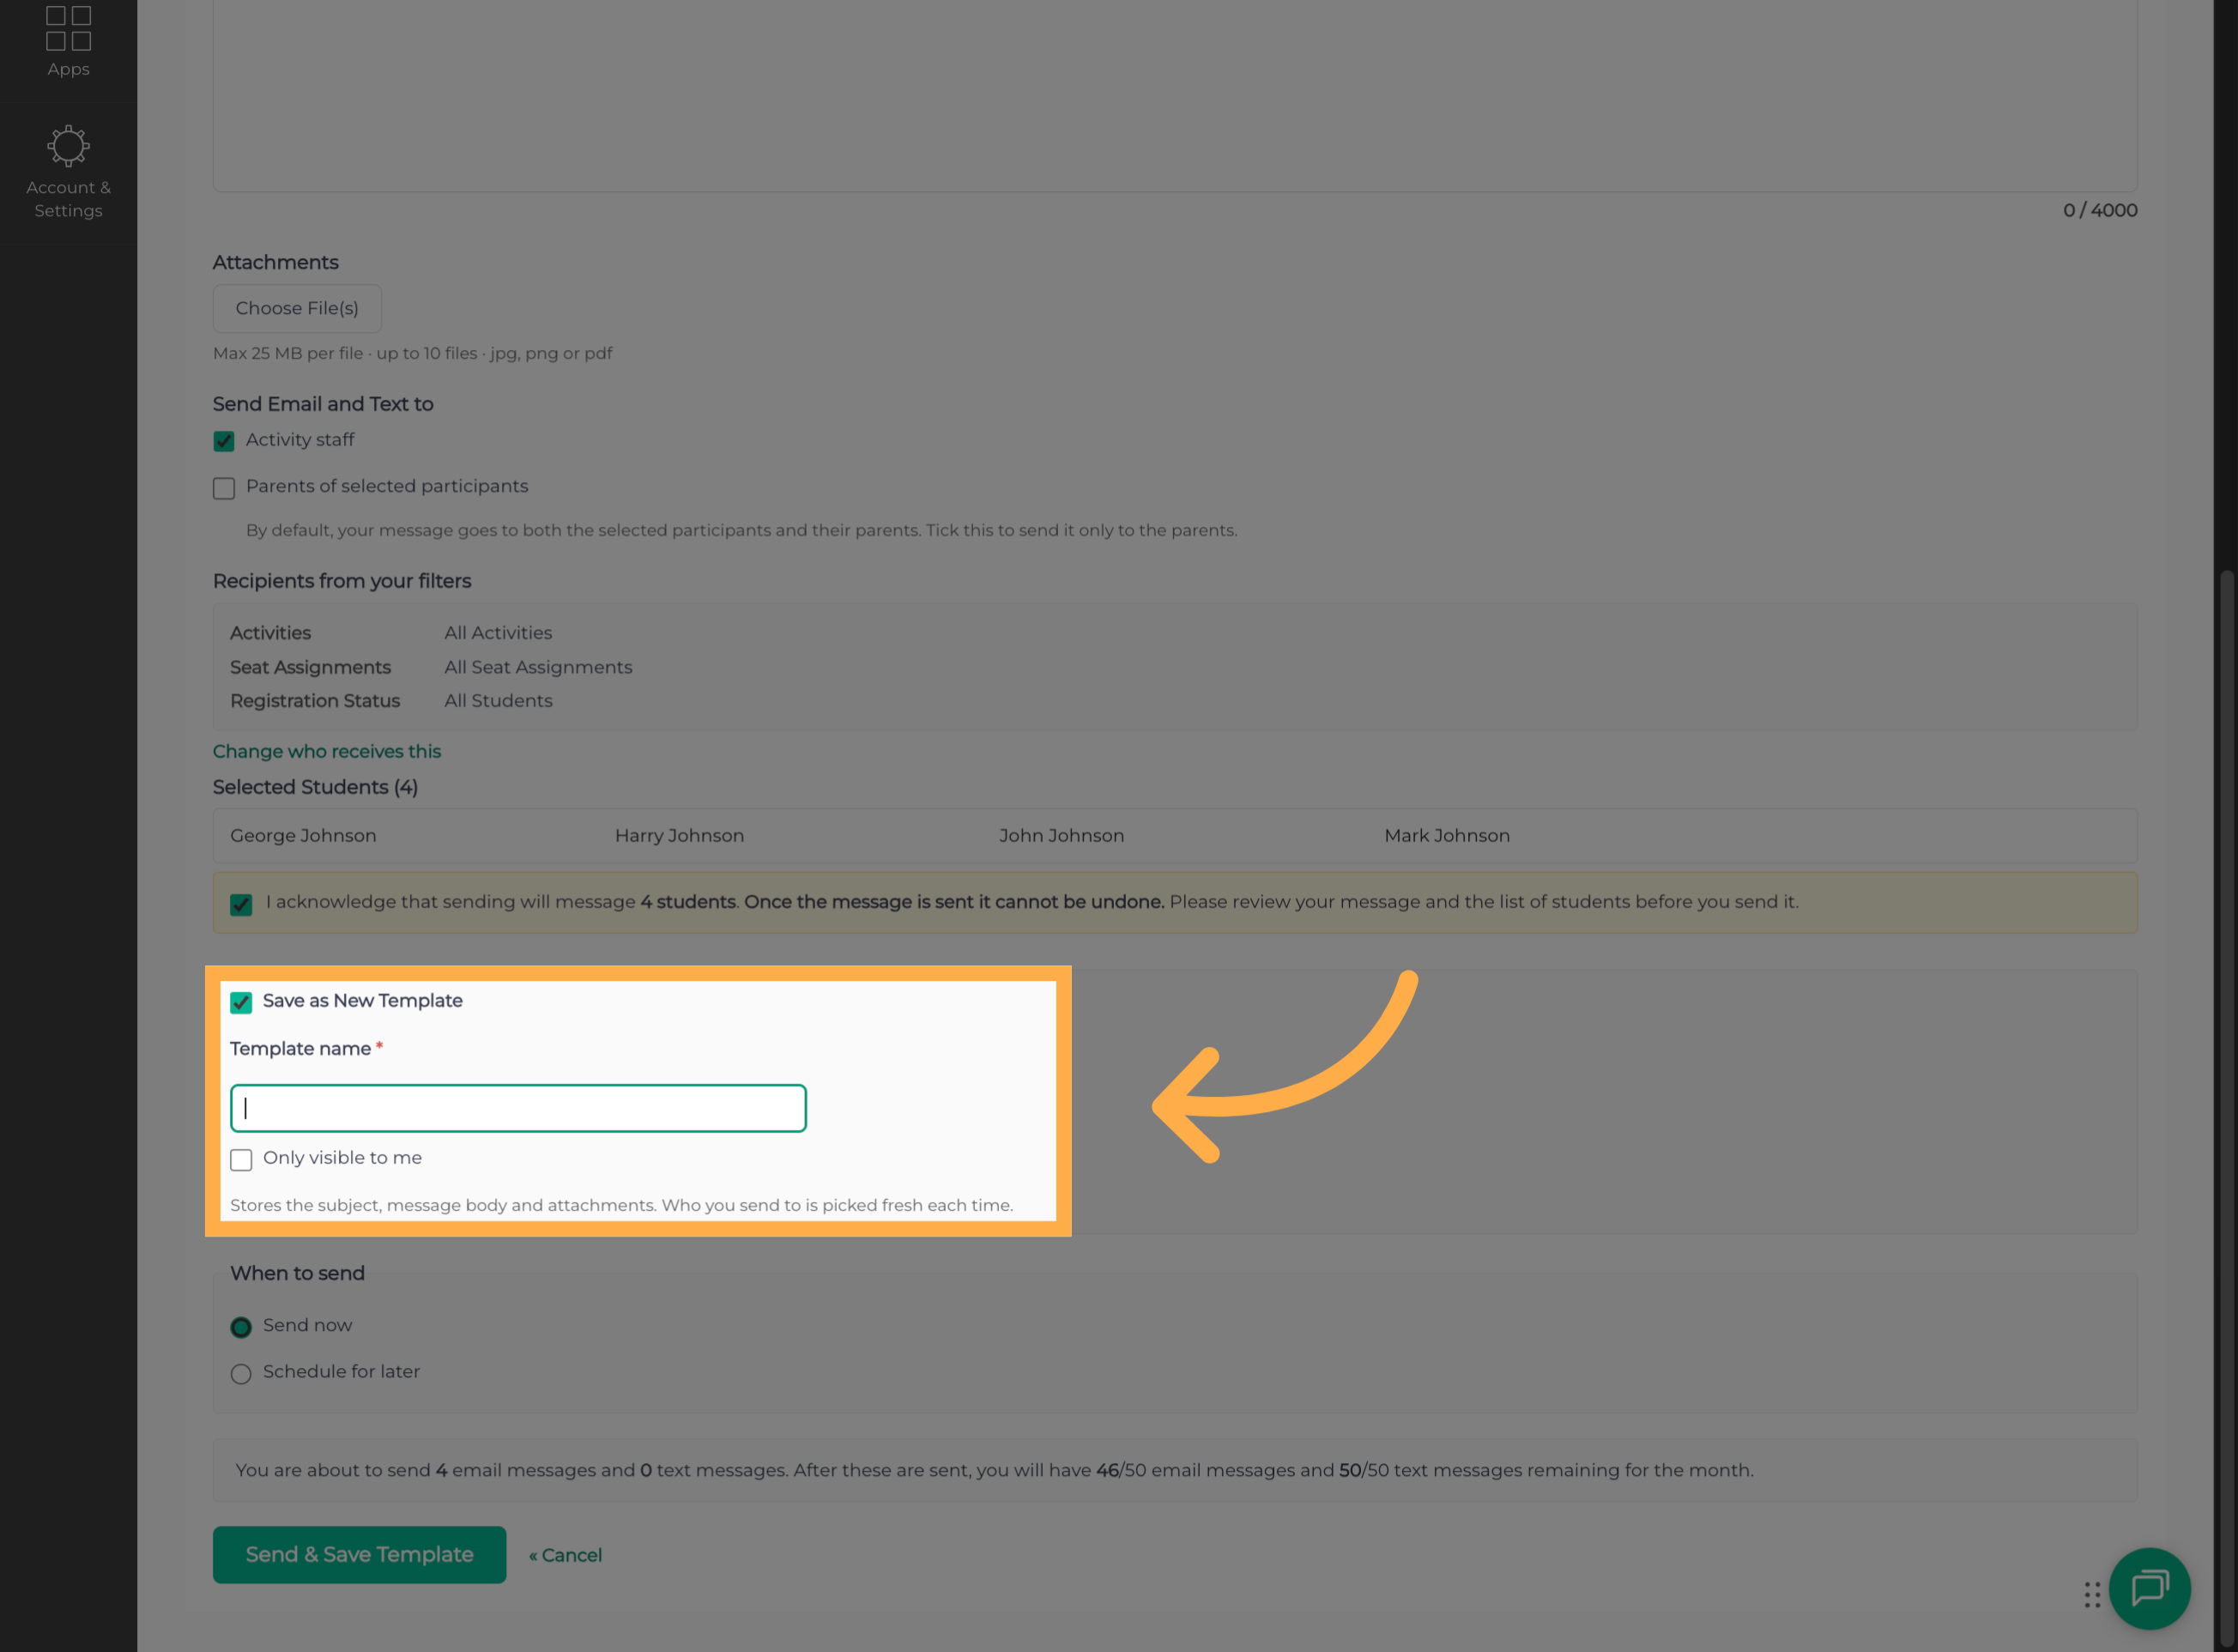
💡Tip: Consider saving messages that you'll send regularly as templates. Choose a name that clearly identifies the message's purpose, such as "Program Reminder" or "Upcoming Event Update." Review the visibility setting to make sure the template is accessible to the appropriate people.
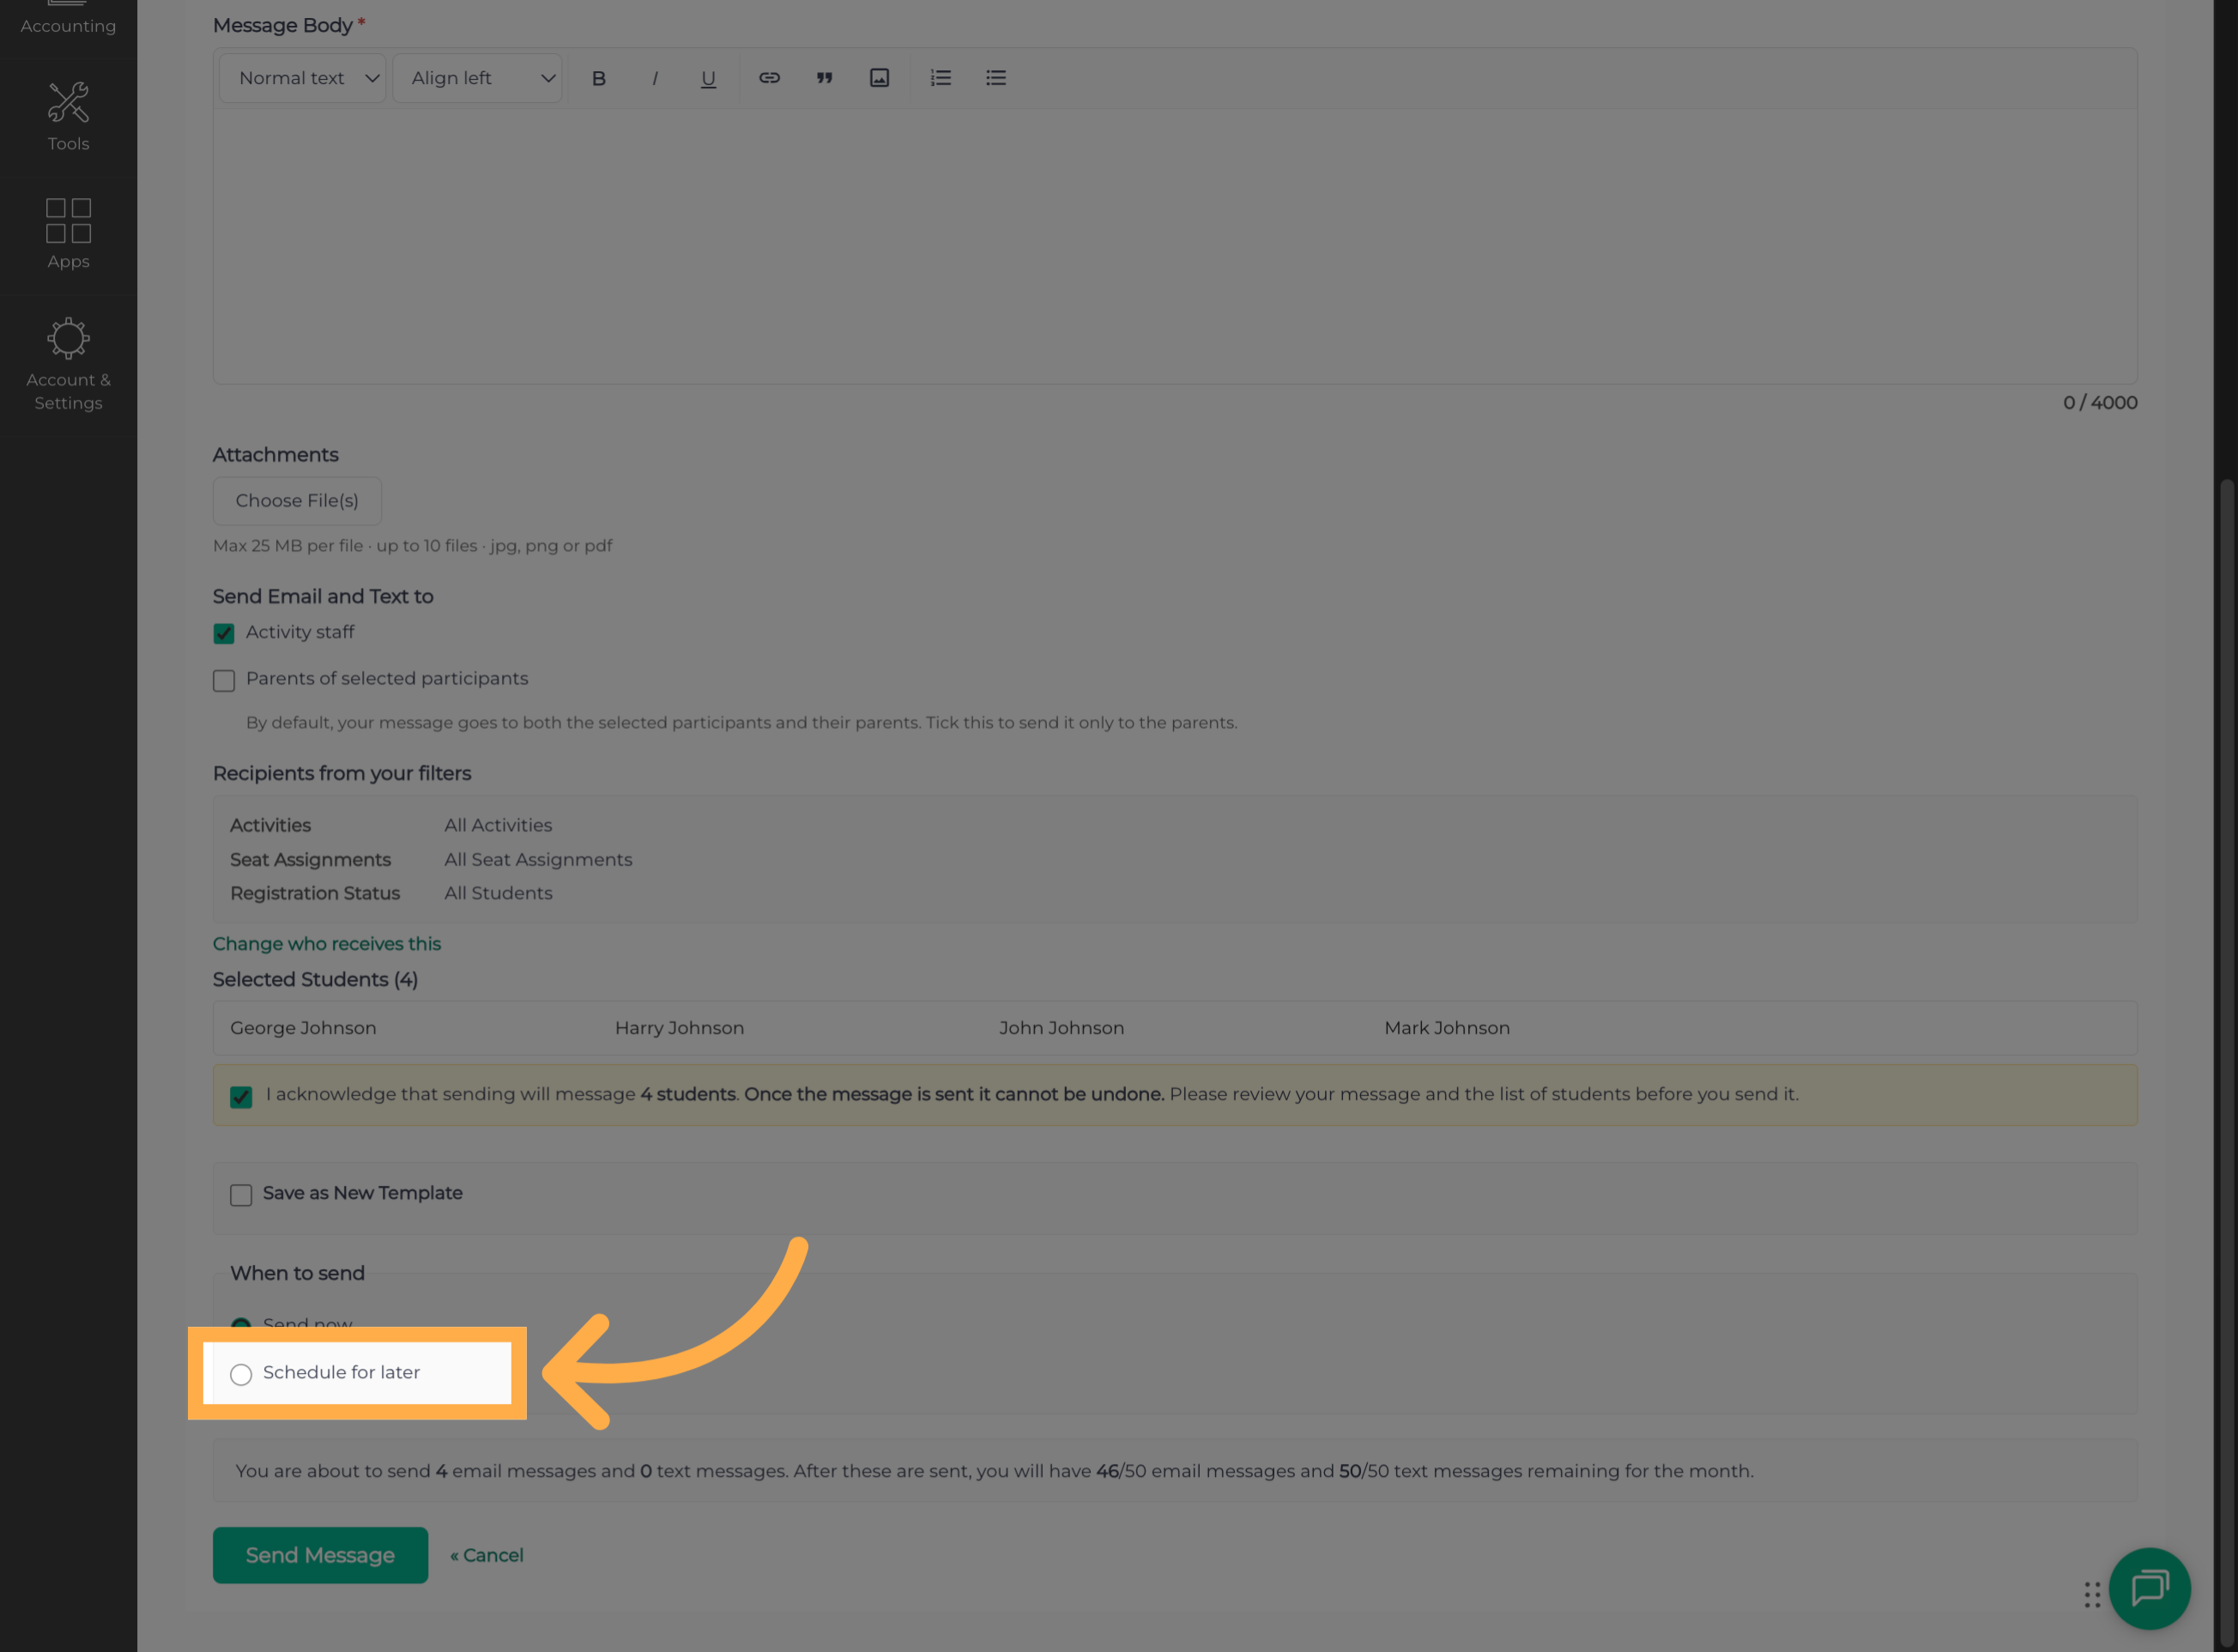
13. Select Schedule for Later
When your message is ready, click “Schedule for Later” to set a future delivery time instead of sending it right away.
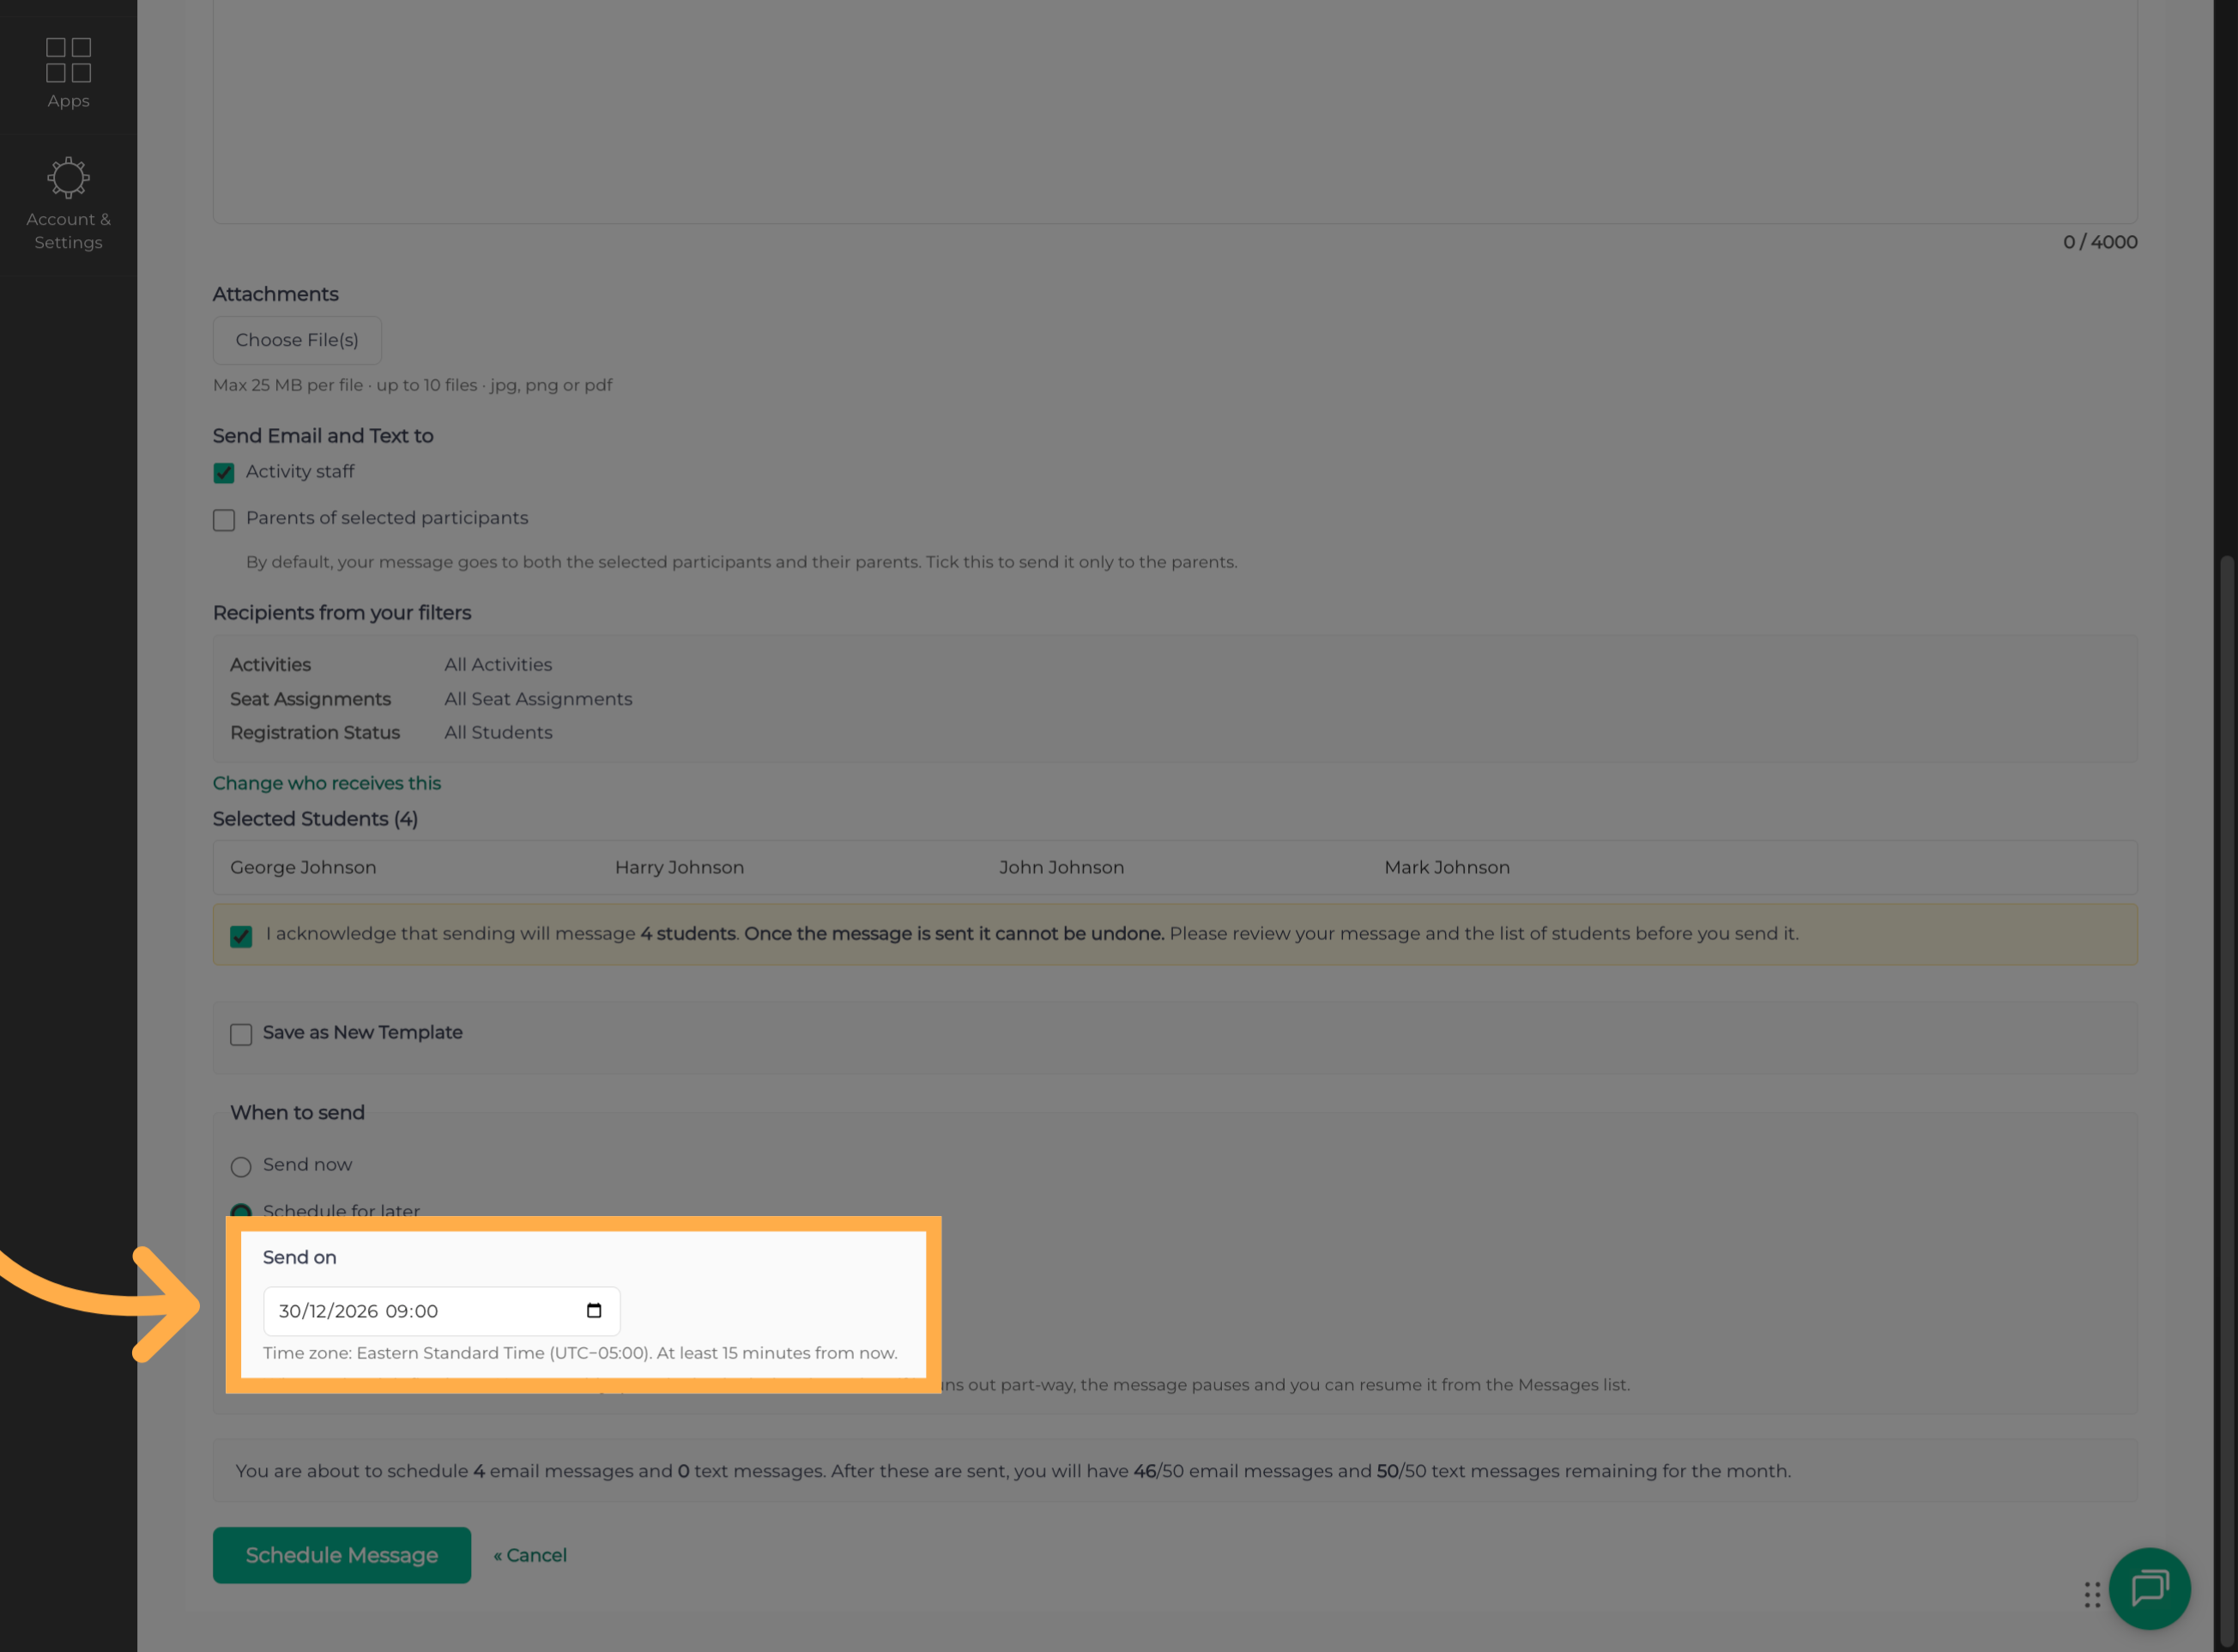
14. Set the Delivery Date and Time
Choose the date and time you want your message delivered.
- Consider your audience when choosing a delivery time.
- Allow families enough time to review important announcements or complete requested actions.
- Double-check the selected date and time before continuing.
15. Schedule the Message
Once you've selected your date and time, click “Schedule Message” to confirm and finalize the delivery.
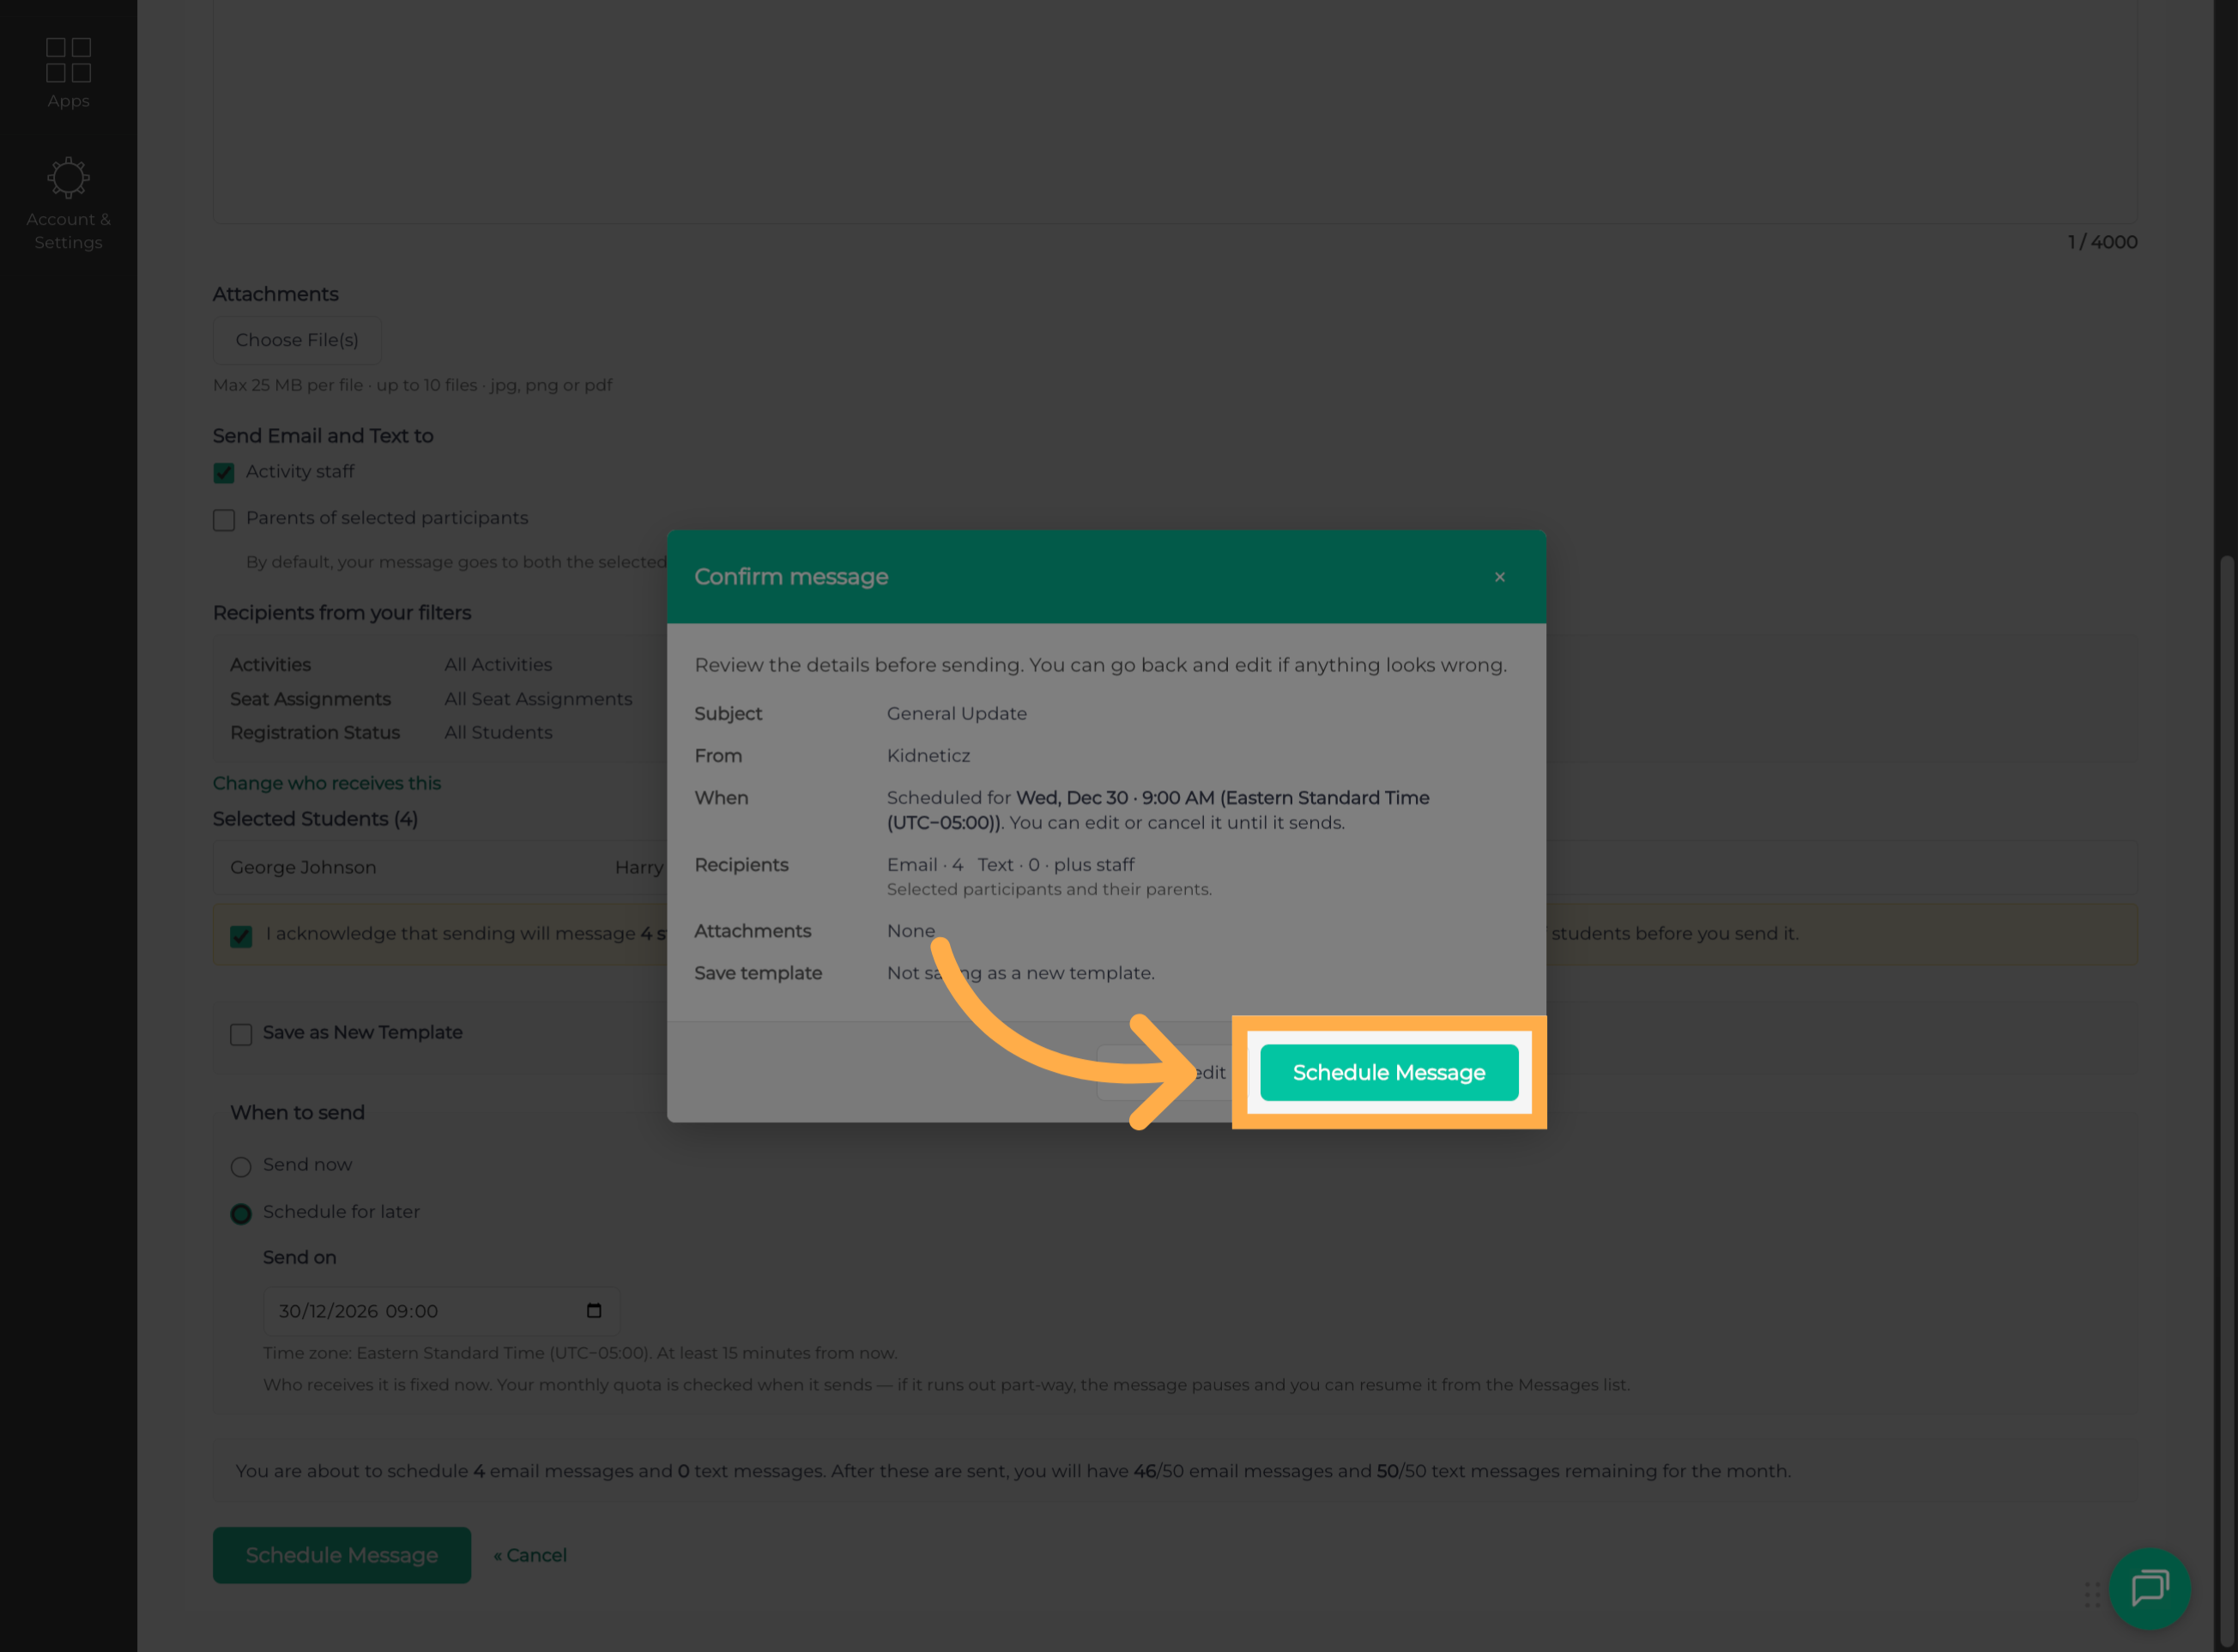
💡Tip: Before confirming, review your message one last time. Make sure the content, subject, recipients, attachments, and scheduled delivery details are all correct.
16. Locate Your Scheduled Message
Your scheduled message now appears in the messages list. Locate it to review its details.
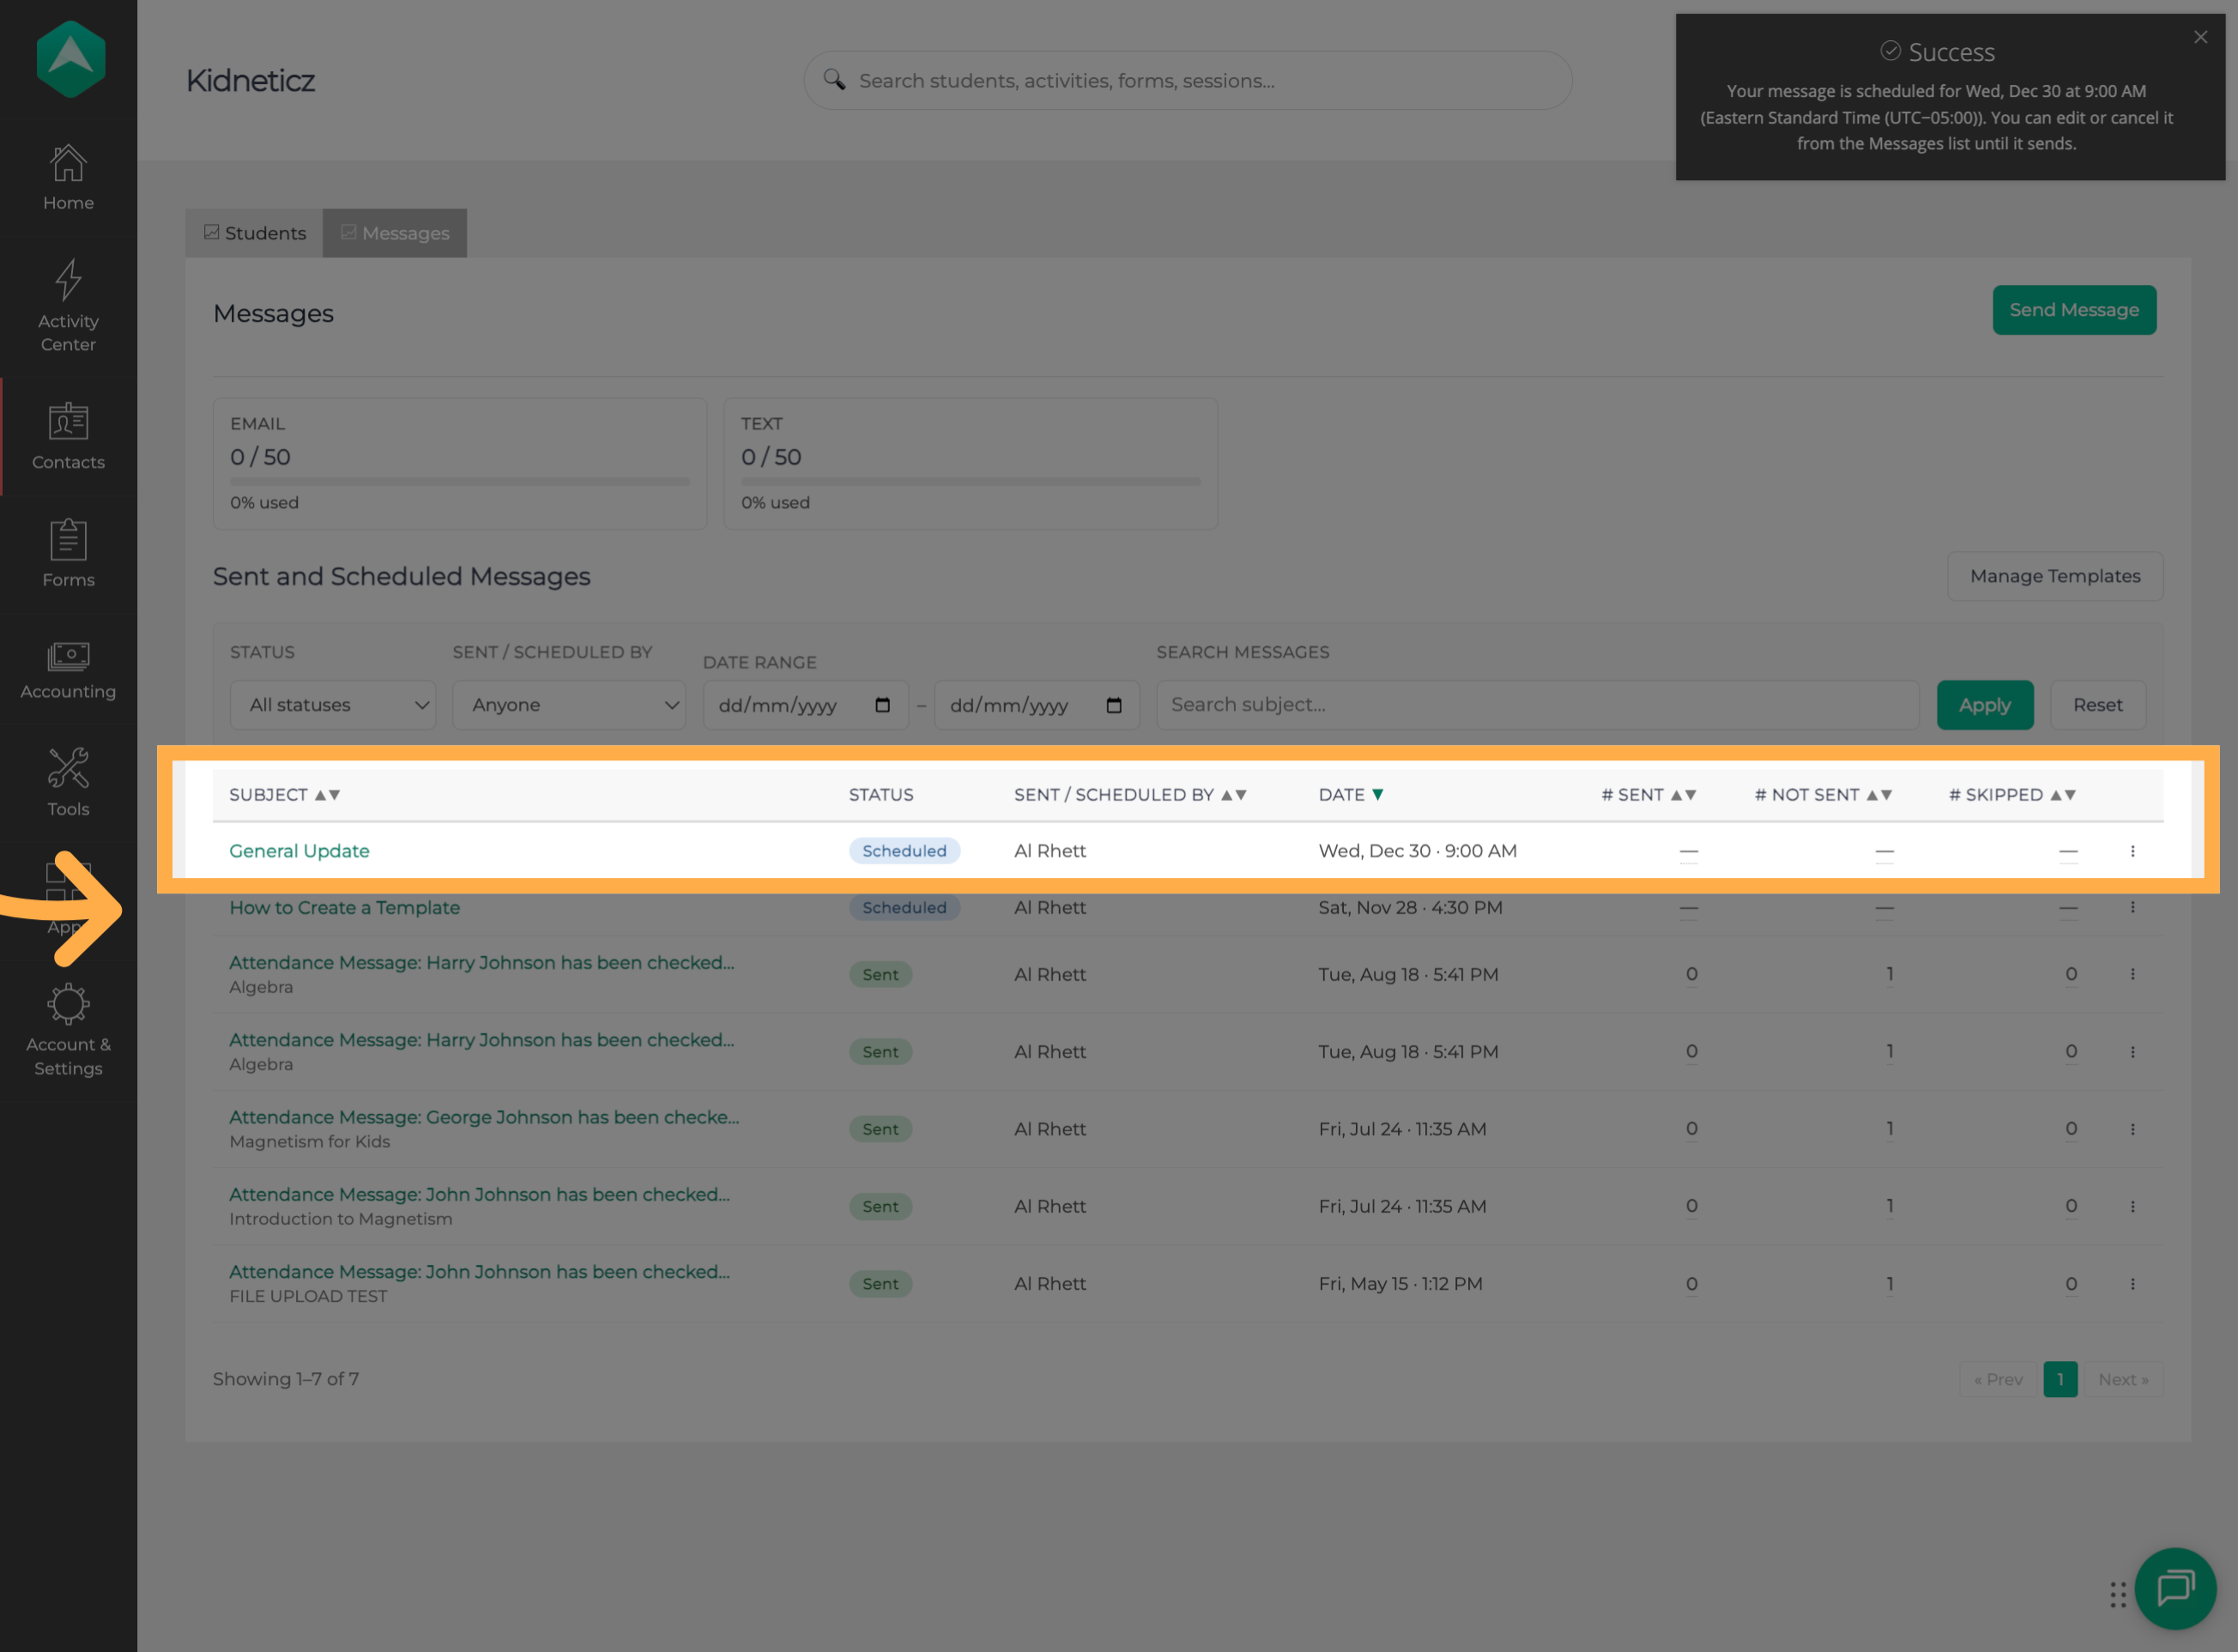
17. Review Scheduled Message Details
Here you can see the message's status, who scheduled it, and its planned delivery date and time.
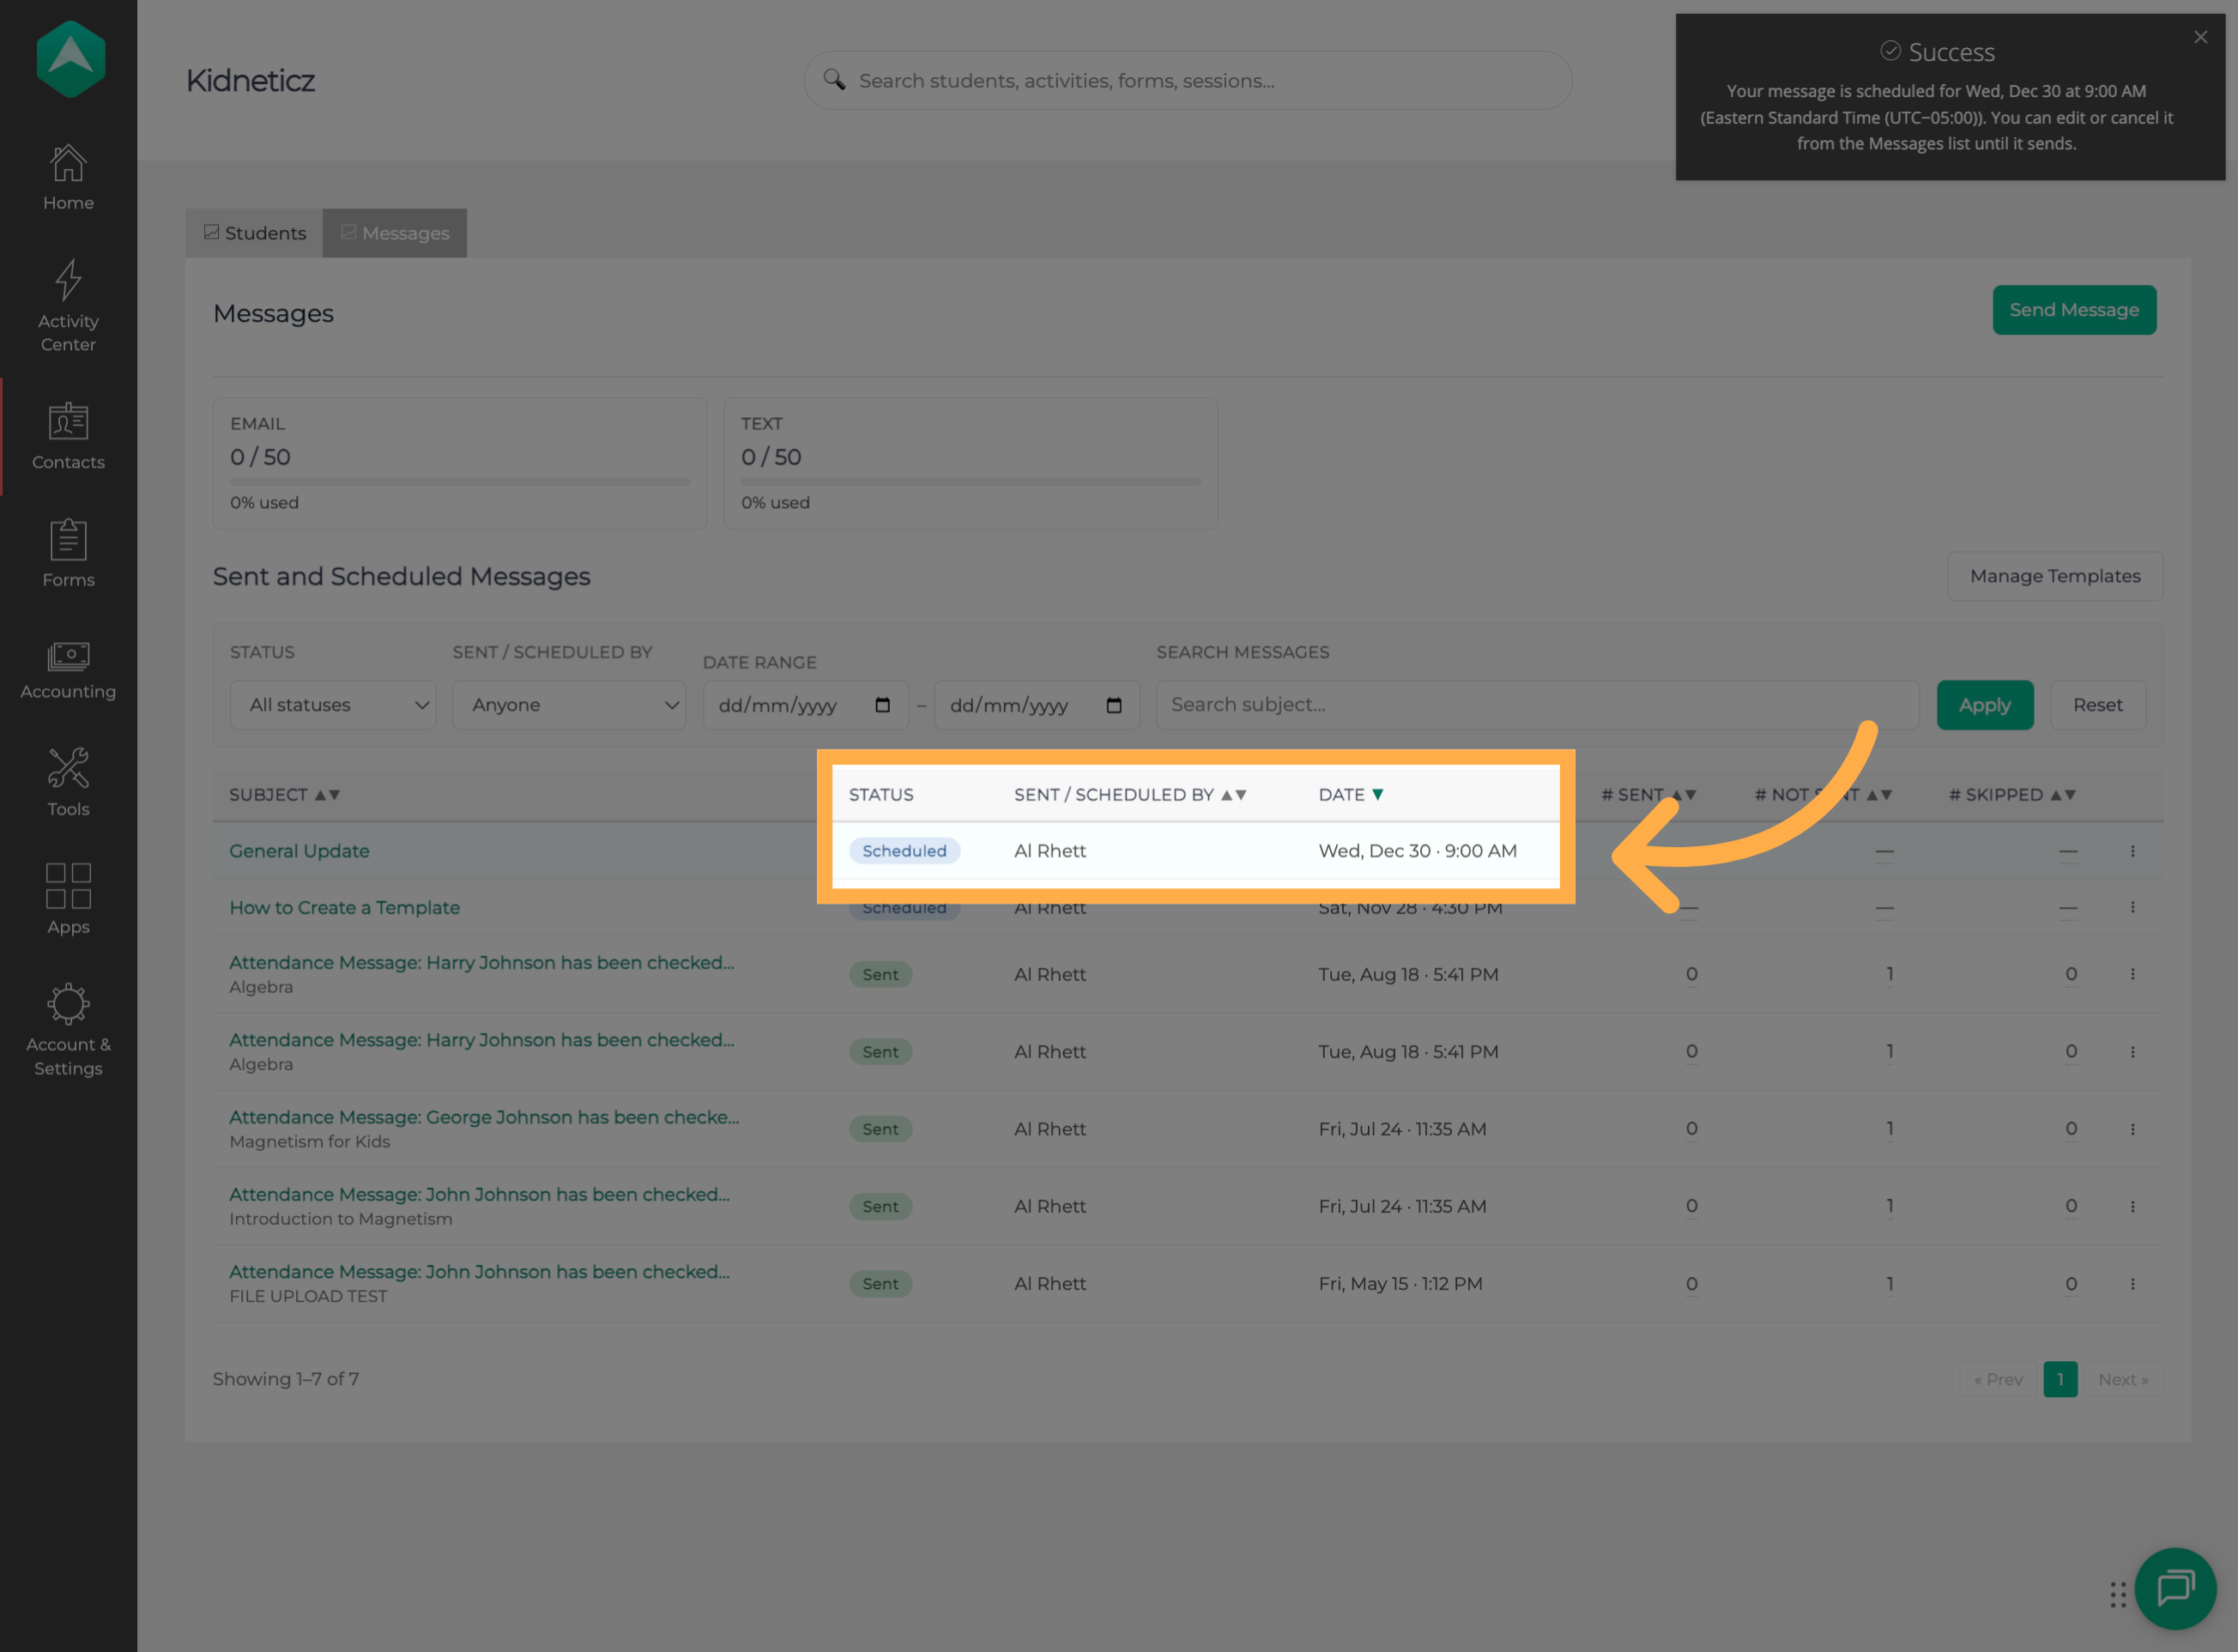
💡Tip: Check the scheduled message list periodically to keep track of upcoming communications and confirm that your messages are scheduled as expected.
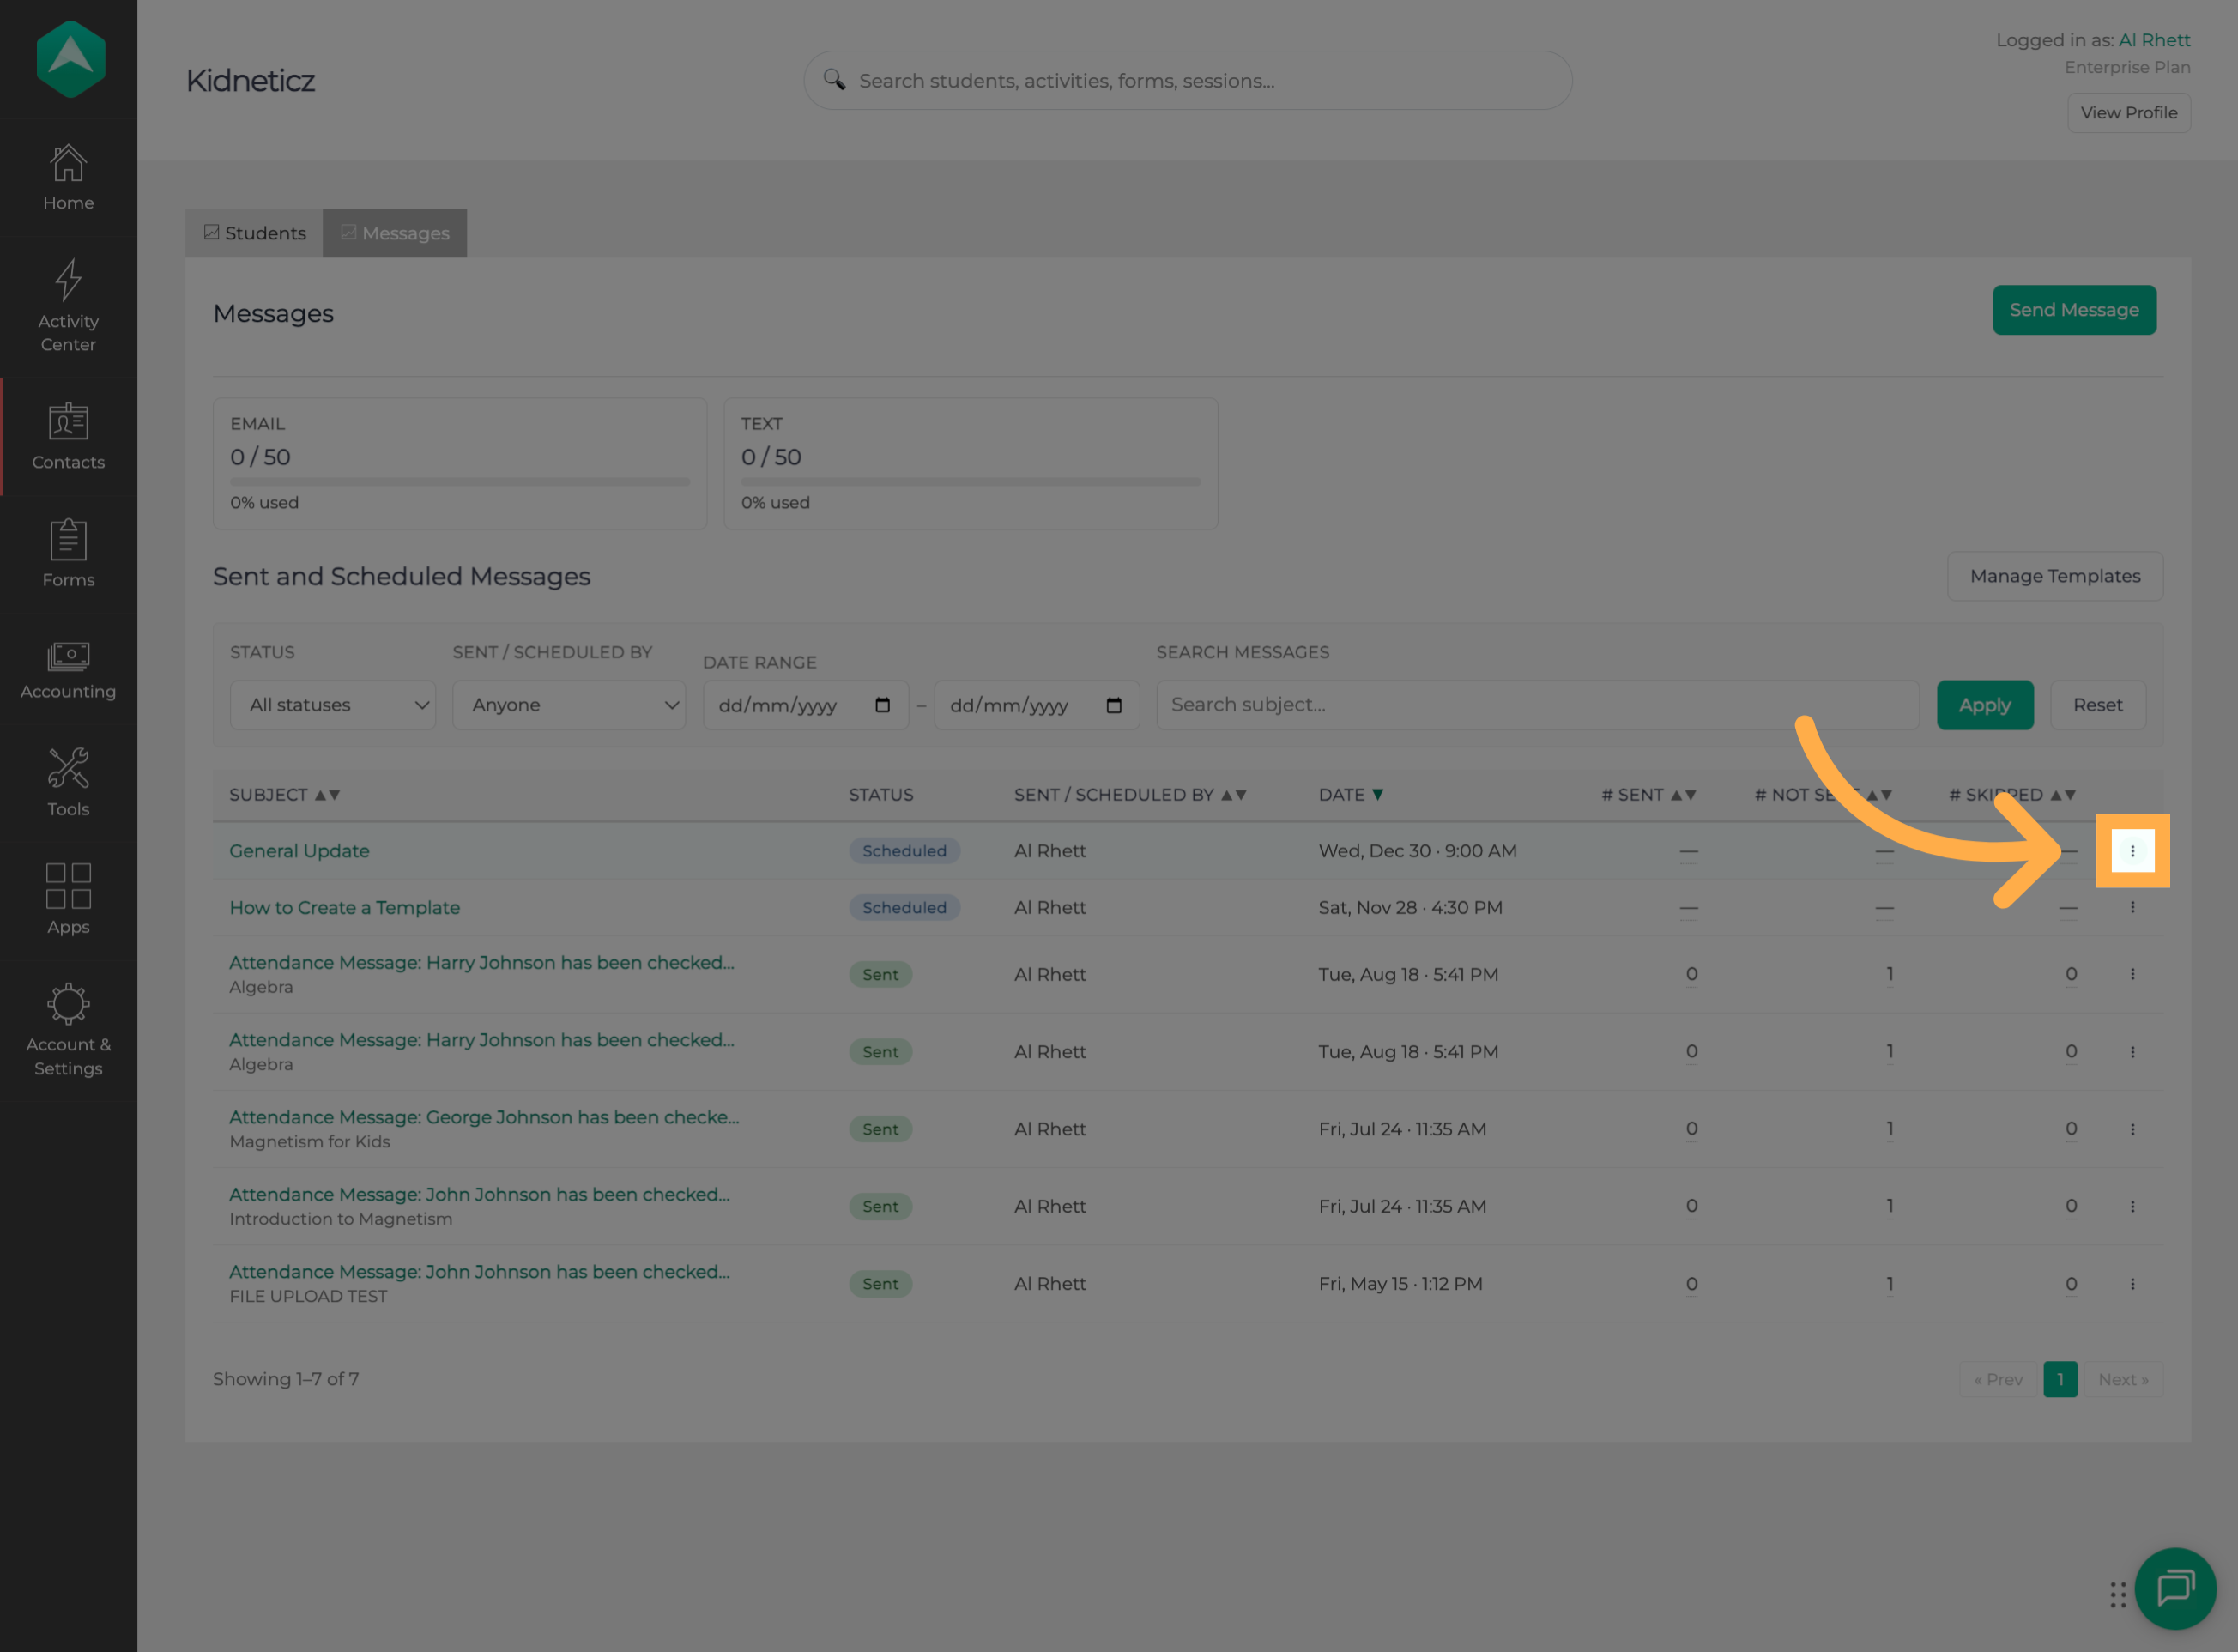
18. Open Edit Options
To manage a scheduled message, open its “Edit” menu.
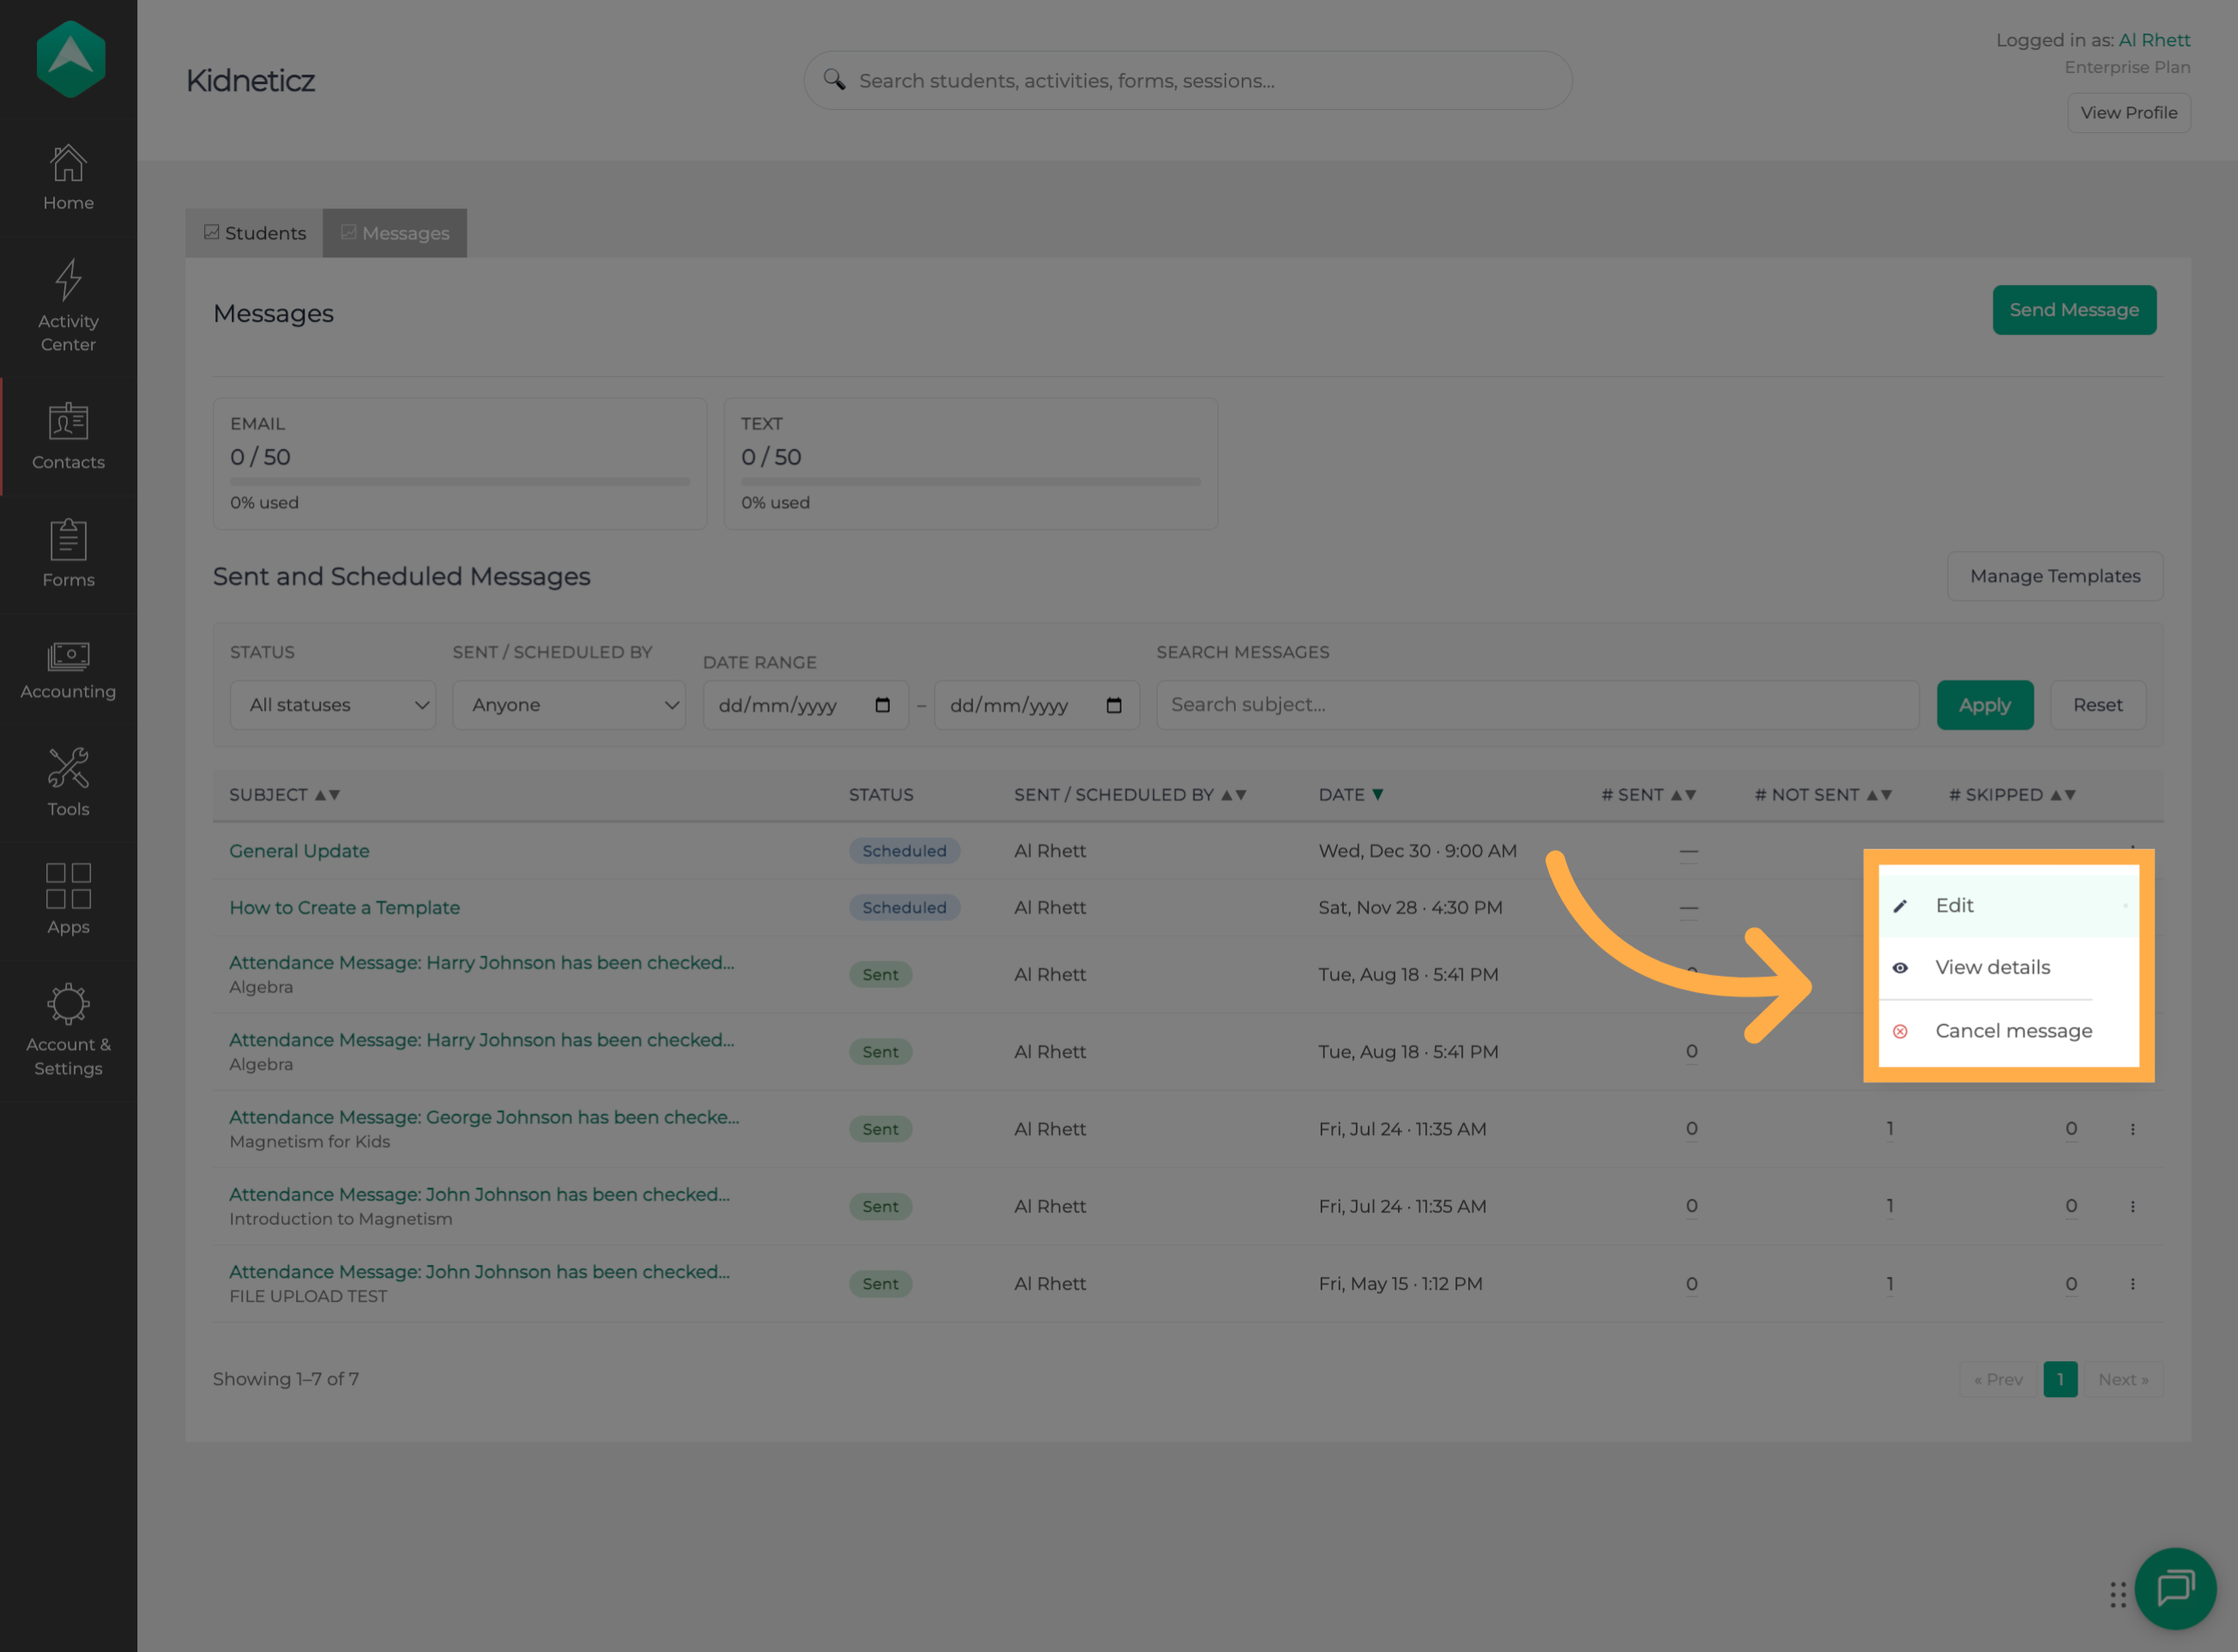
19. Edit, View, or Cancel the Message
From here, you can edit the message, view its details, or cancel it. Choose the action that best fits what you need to do.
Frequently Asked Questions (FAQs)
Q: Can I schedule a message instead of sending it immediately?
A: Yes. When composing your message, select “Schedule for Later” and choose the date and time you'd like it to be delivered.
Q: Can I use a saved message template when scheduling a message?
A: Yes. You can select a saved template when composing your message. You can also start from scratch and create a new message.
Q: Do I have to use a saved template to schedule a message?
A: No. You can compose a message from scratch and schedule it without using an existing template.
Q: Can I customize the subject line when using a saved template?
A: Yes. You can use the “Custom Subject” field to enter the subject you'd like recipients to see.
Q: Can I attach files to a scheduled message?
A: Yes. Use “Choose File(s)” to include supporting documents or other files when composing your message.
Q: Can I change who receives a scheduled message?
A: You can review and adjust your audience using Change Who Receives This during the message composition process. Make sure to verify your recipient list before scheduling.
Q: Can I save a message as a template while composing it?
A: Yes. You can save your message as a new template, enter a name, and configure its visibility for future use.
Q: Where can I find my scheduled messages?
A: After scheduling a message, you can locate it in the messages list and review its status, the person who scheduled it, and its planned delivery date and time.
Q: Can I edit a message after scheduling it?
A: Yes. Open the scheduled message's “Edit” menu and select the edit option to make changes.
Q: Can I cancel a scheduled message?
A: Yes. Open the message's “Edit” menu and select the cancel option if you no longer want it to be delivered.
Q: Can I see who scheduled a message?
A: Yes. The scheduled message details display who scheduled the message along with its status and planned delivery date and time.
Q: What should I do if I cannot access the messaging or scheduling options?
A: Your available options may depend on your account permissions. If you believe you should have access, contact your organization's administrator or reach out to the AfterSchool HQ Support Team for assistance.
💡If you experience any issues or have further questions with “How to Schedule Messages in AfterSchool HQ”, don't hesitate to get in touch with our support team at support@afterschoolhq.com.