In this walkthrough, you’ll learn how to create a drop-in form, customize required questions, assign the form to an activity, and manage student drop-in attendance and check-in records.
Before You Start: What is Drop-In?
Drop-In is designed for one-day attendance tracking and quick student check-ins.
Important Things to Know
- ✅ Drop-In is intended for one-time or occasional attendance
- ❌ Drop-In does not replace your normal registration process
To use Drop-In, you must:
- Create a Drop-In form
- Attach the Drop-In form to the activity where Drop-Ins will be allowed
If a student plans to continue attending the activity regularly, we recommend having the parent or guardian complete the standard registration process to ensure all required information is collected.
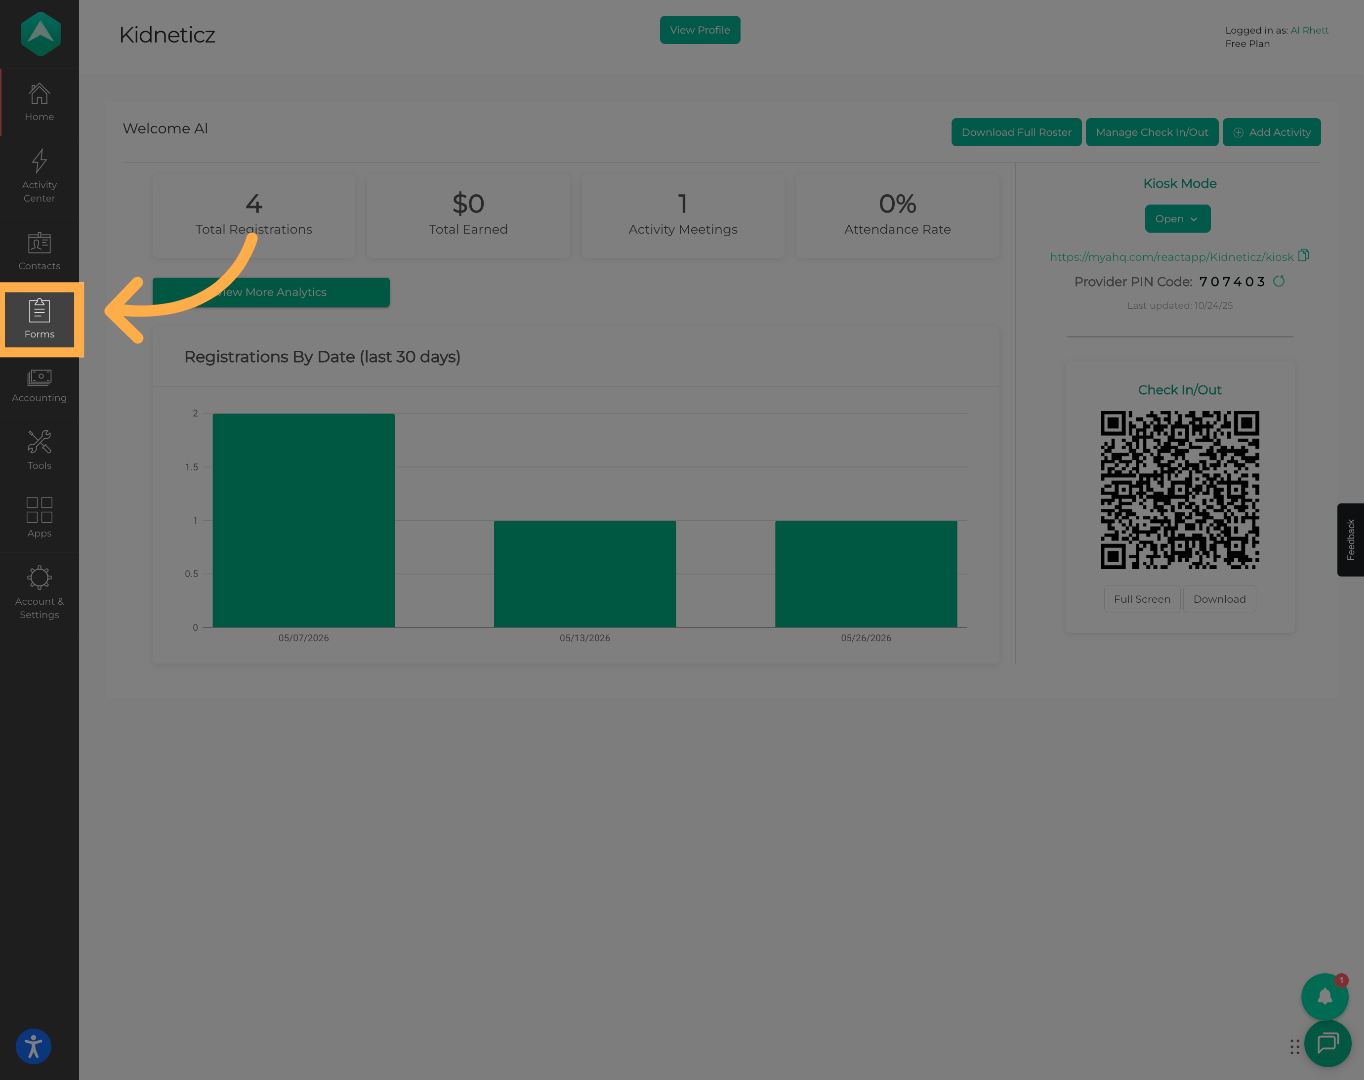
1. Open Forms Management
Click “Forms” to access your organization’s form management section.
💡 Tip: Forms are used to collect registration, attendance, and participant information throughout the platform.
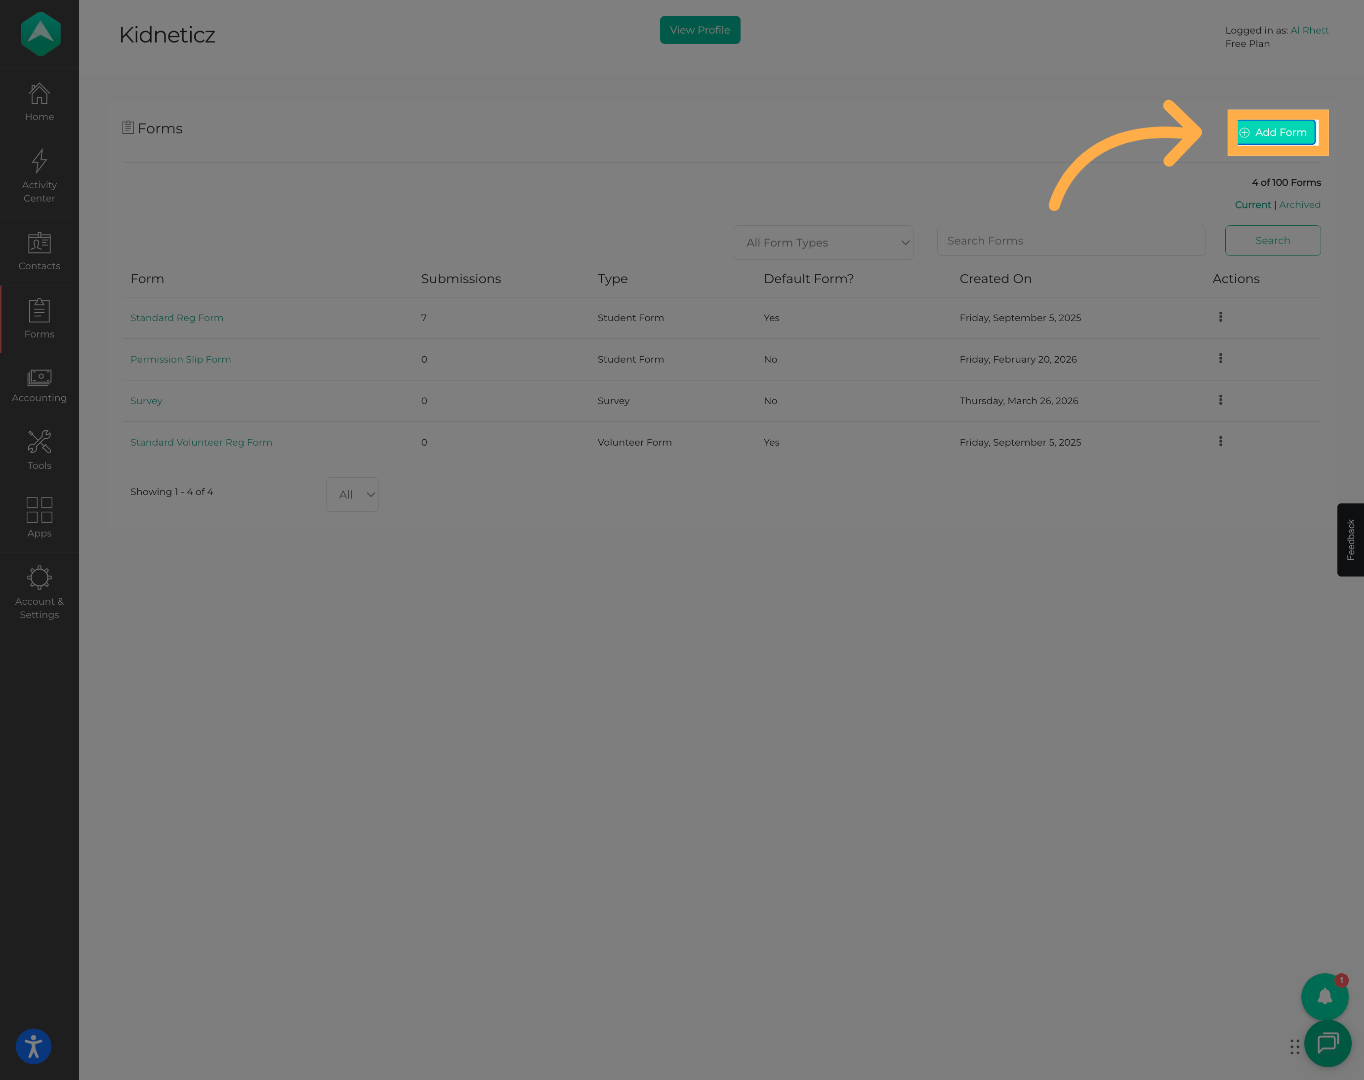
2. Create a New Form
Click “Add New Form” to begin creating a new form.
💡 Tip: You can create multiple Drop-In forms for different programs or attendance workflows.
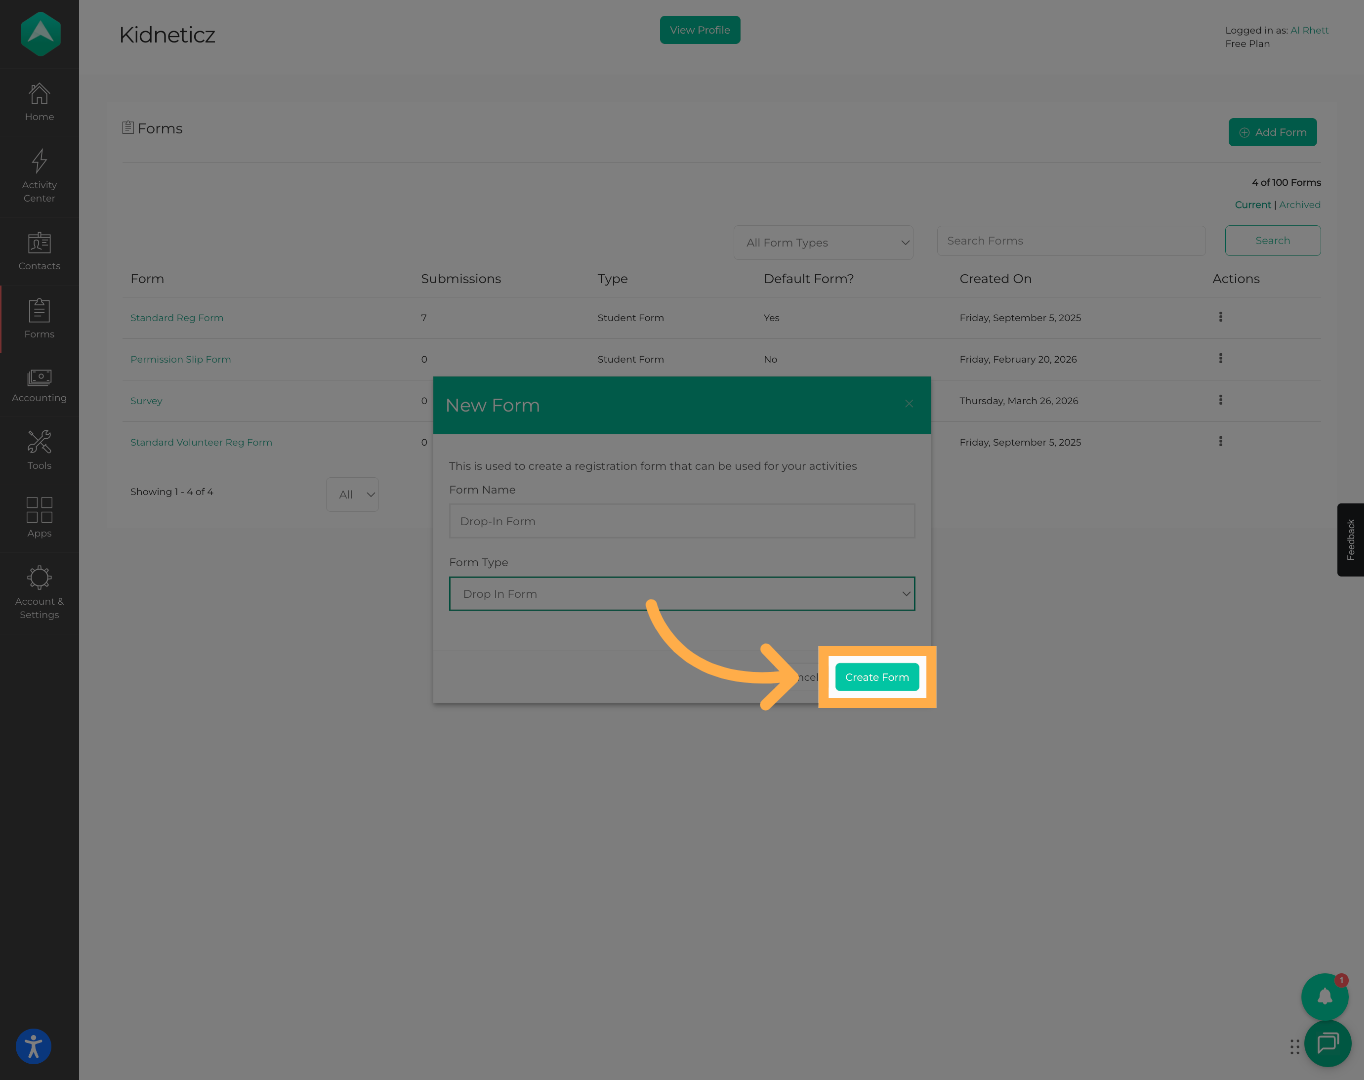
3. Name the Drop-In Form
Enter a name for your new drop-in form.
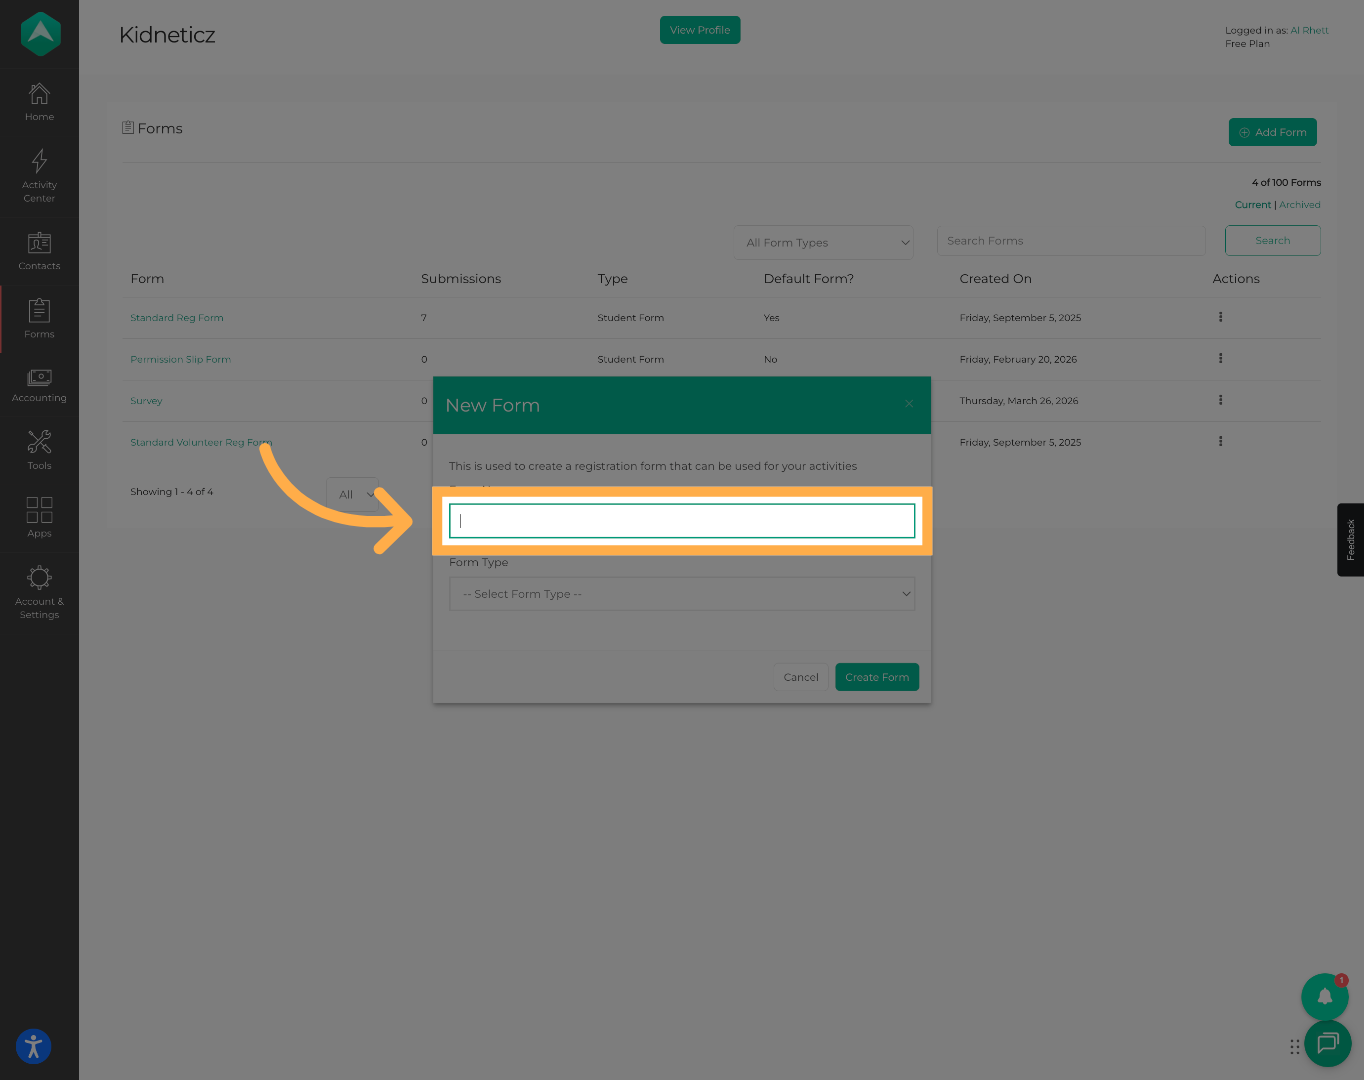
💡 Tip: Use clear naming conventions such as “2026 Drop-In Form” to help staff identify the correct form later.
4. Select the Form Type
Choose “Drop-In Form” from the form type dropdown menu.
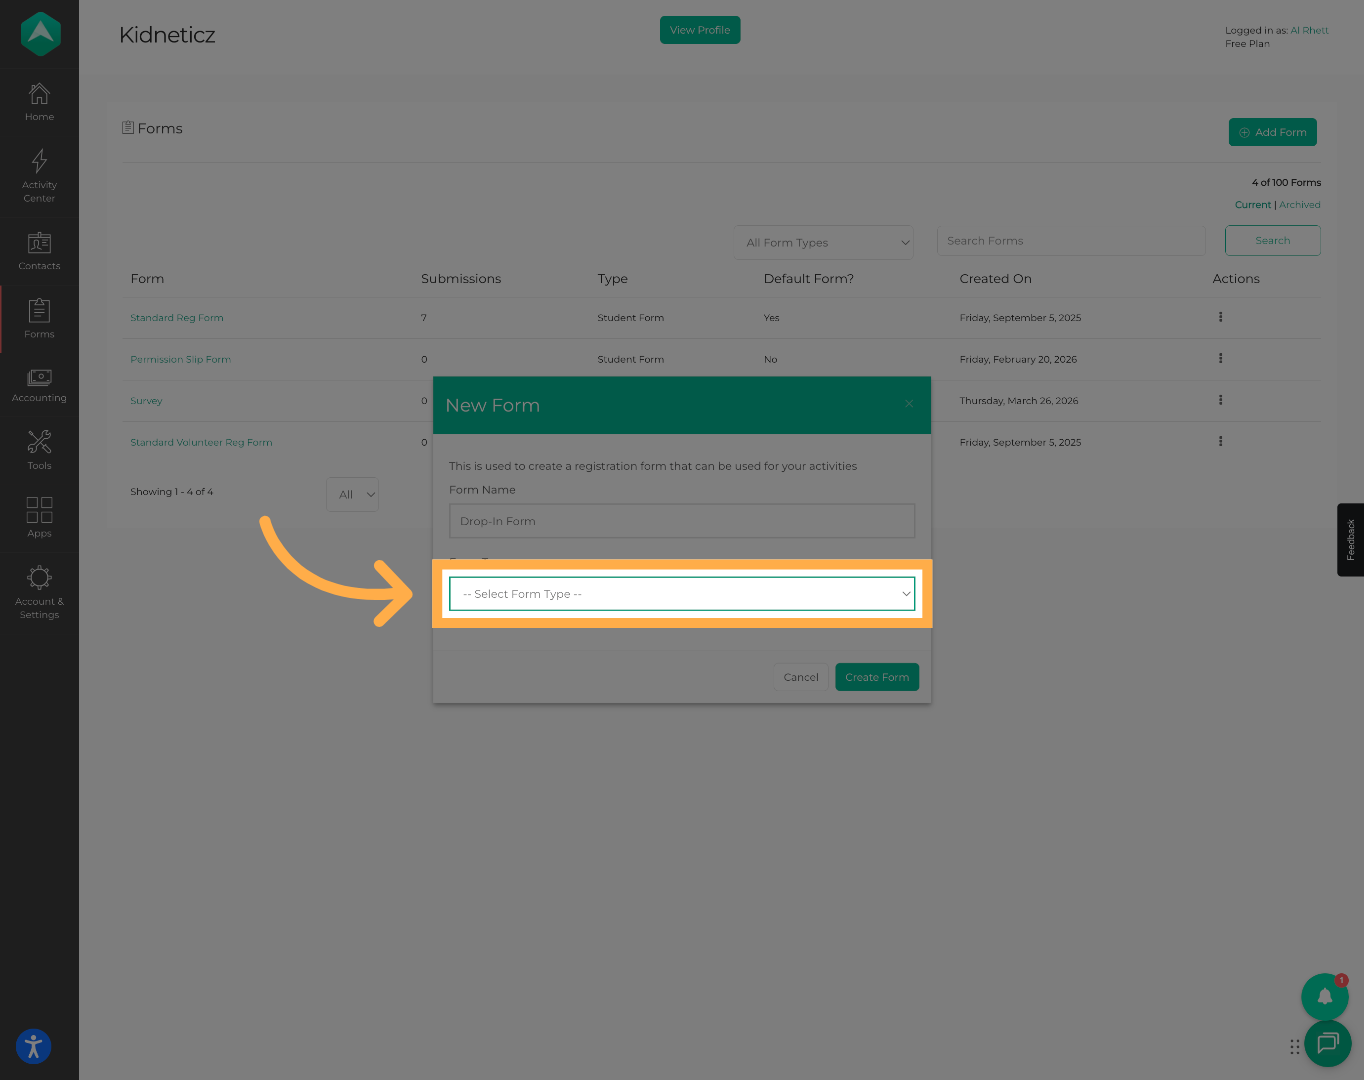
💡 Tip: Selecting the correct form type is required for the Drop-In feature to function properly during attendance.
5. Create the Form
Click “Create Form” to generate the new drop-in form.
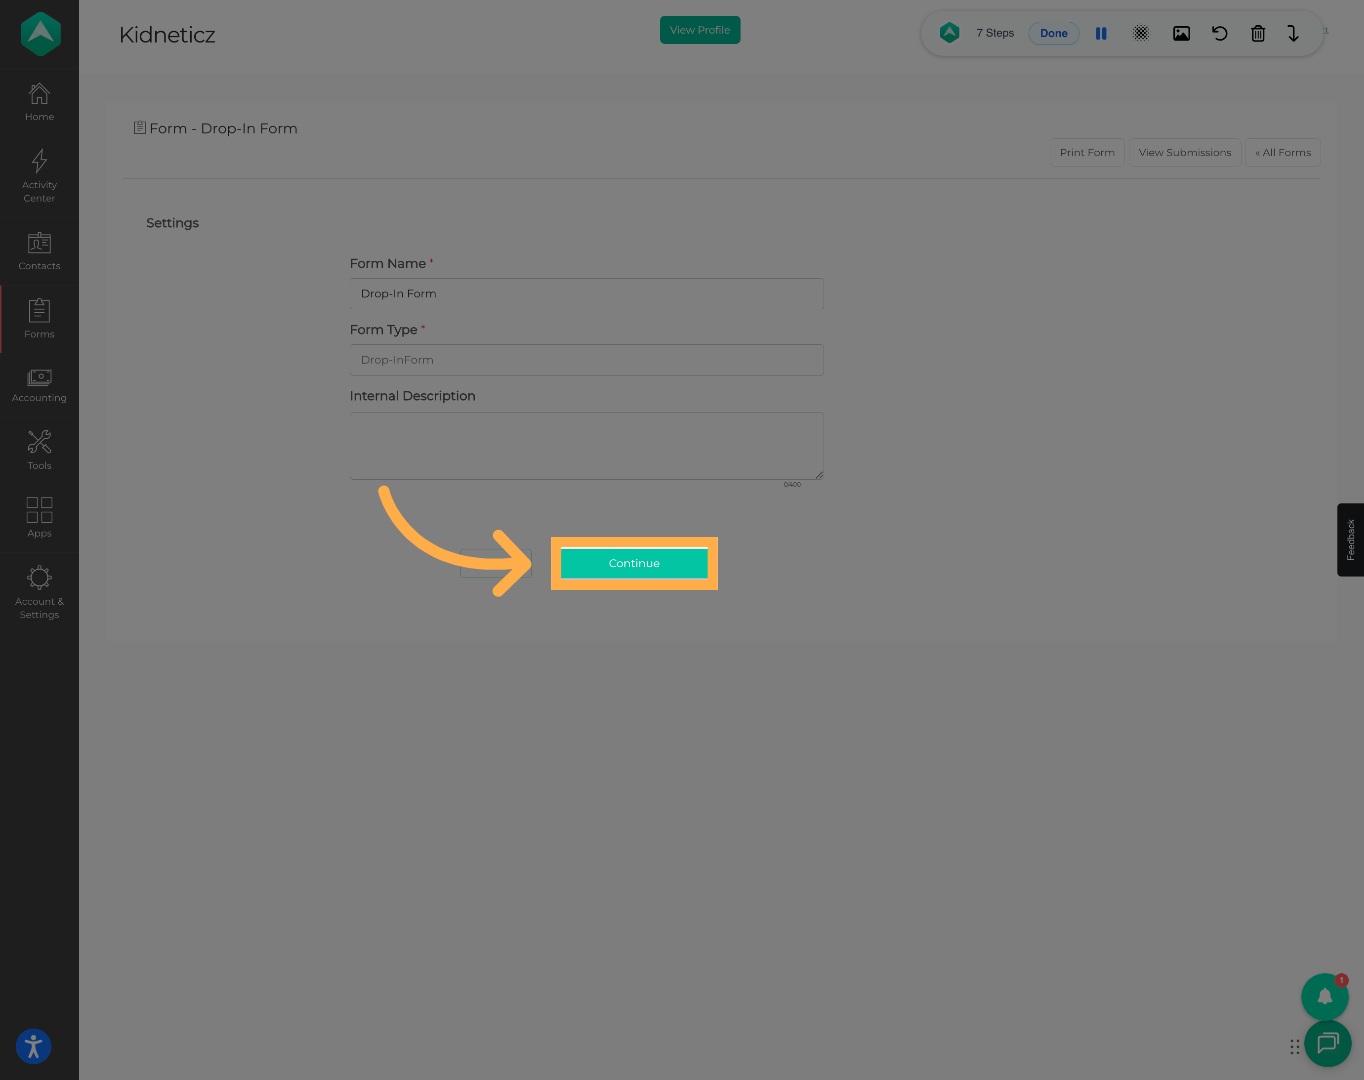
6. Continue to Form Setup
Click “Continue” to begin configuring the form settings and questions.
7. Review Default Drop-In Questions
Review the default drop-in questions included with the form. Some required fields are locked and cannot be removed because they are necessary for attendance tracking and roster management.
Required fields include:
- First Name
- Last Name
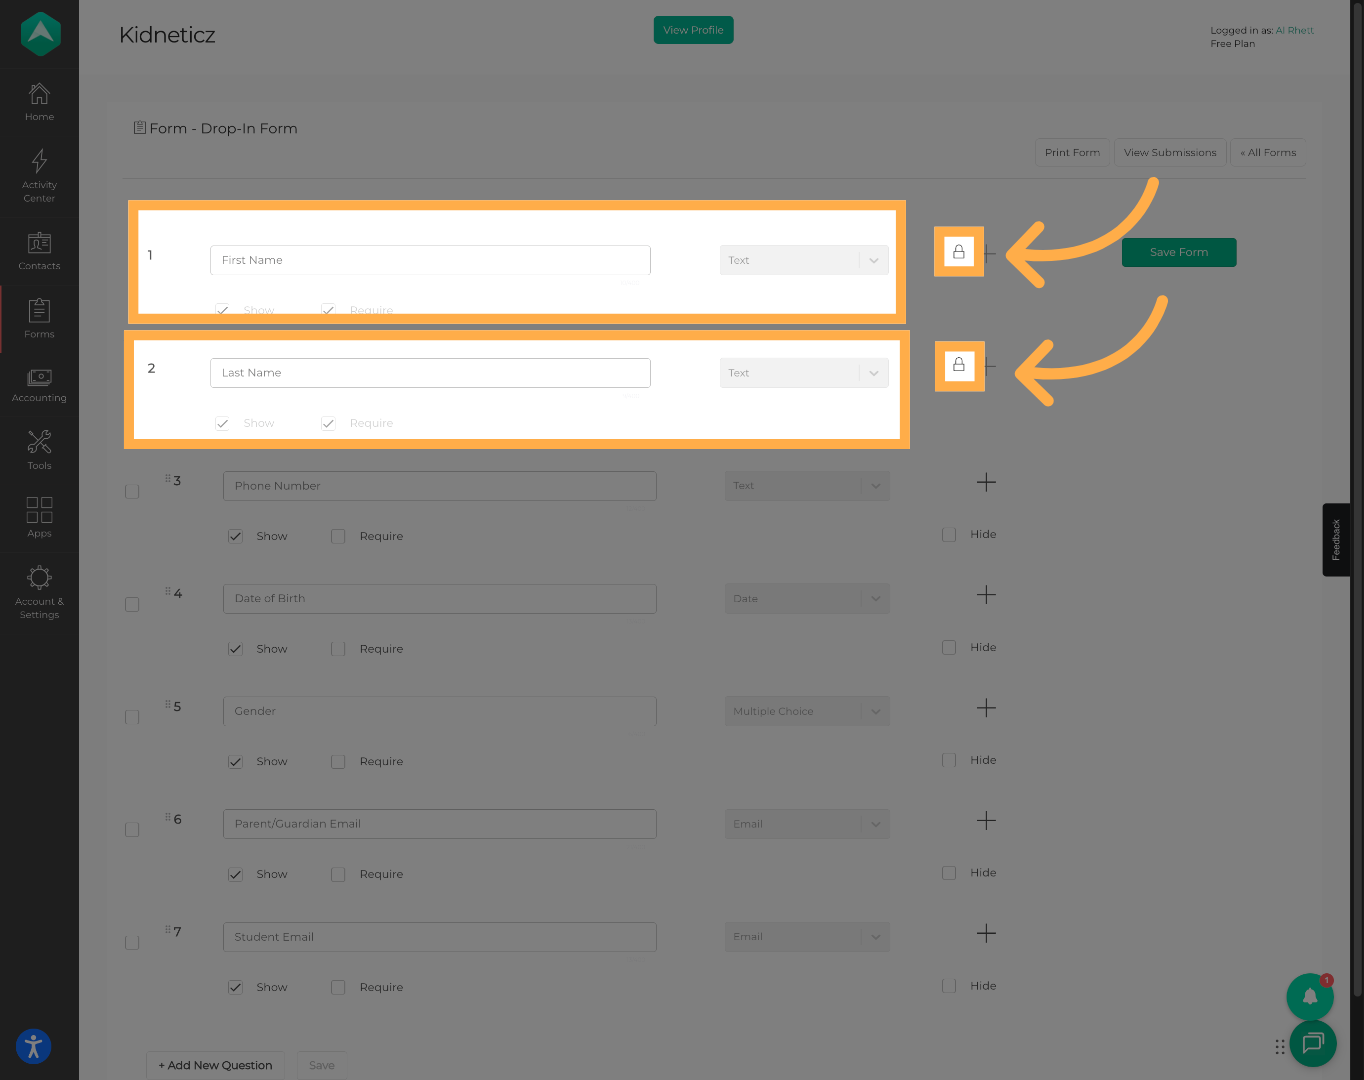
💡 Tip: Required fields cannot be removed because they are necessary for creating attendance records.
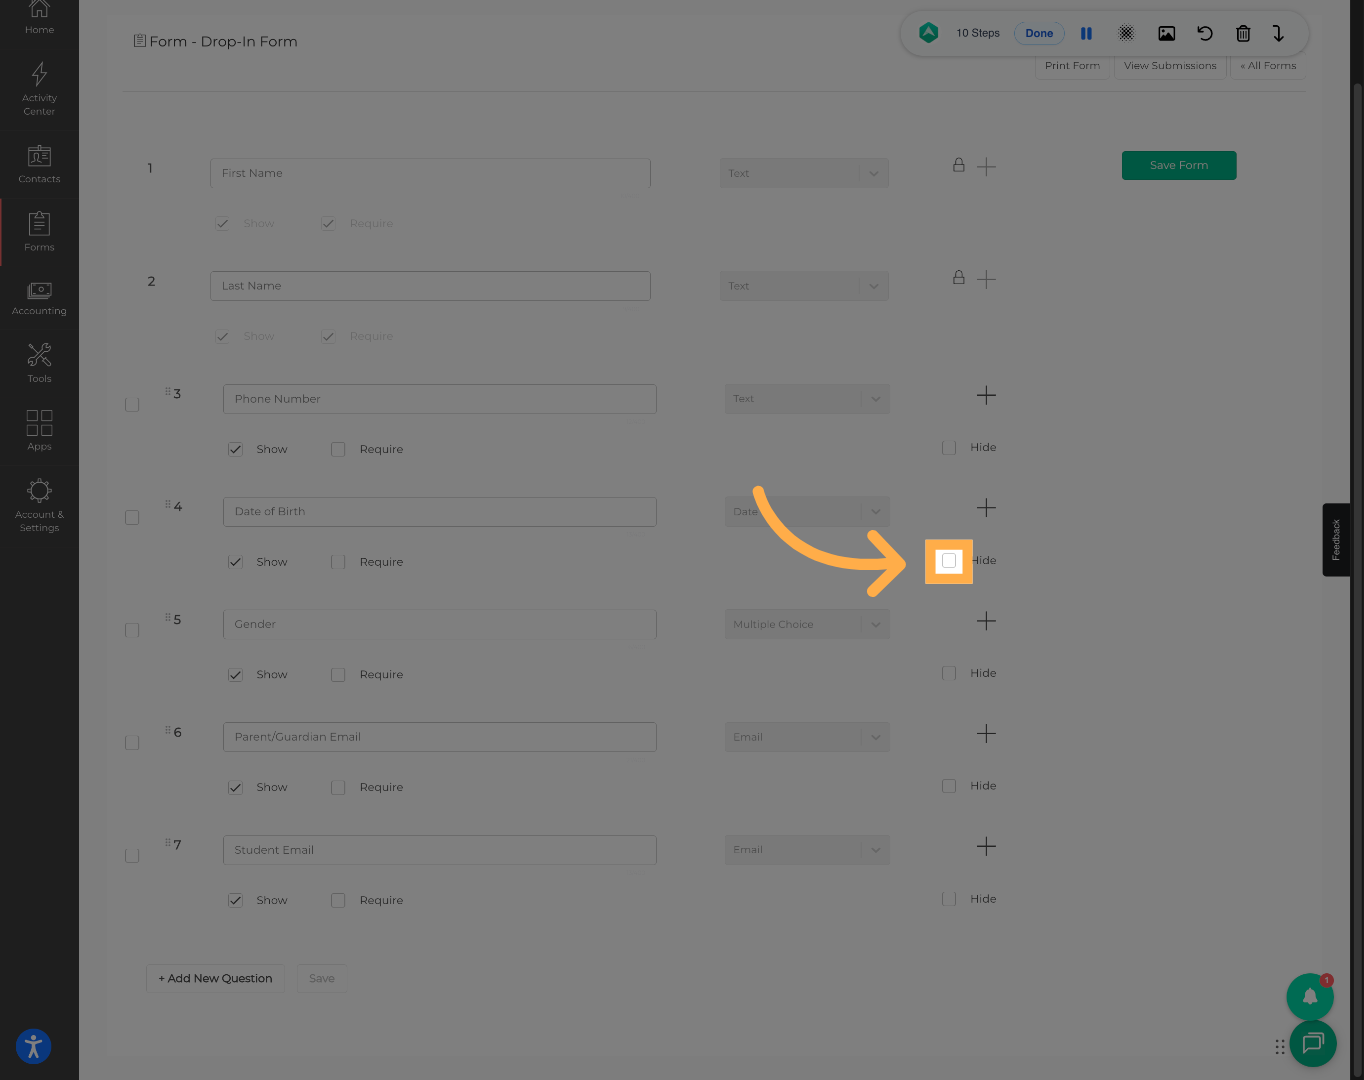
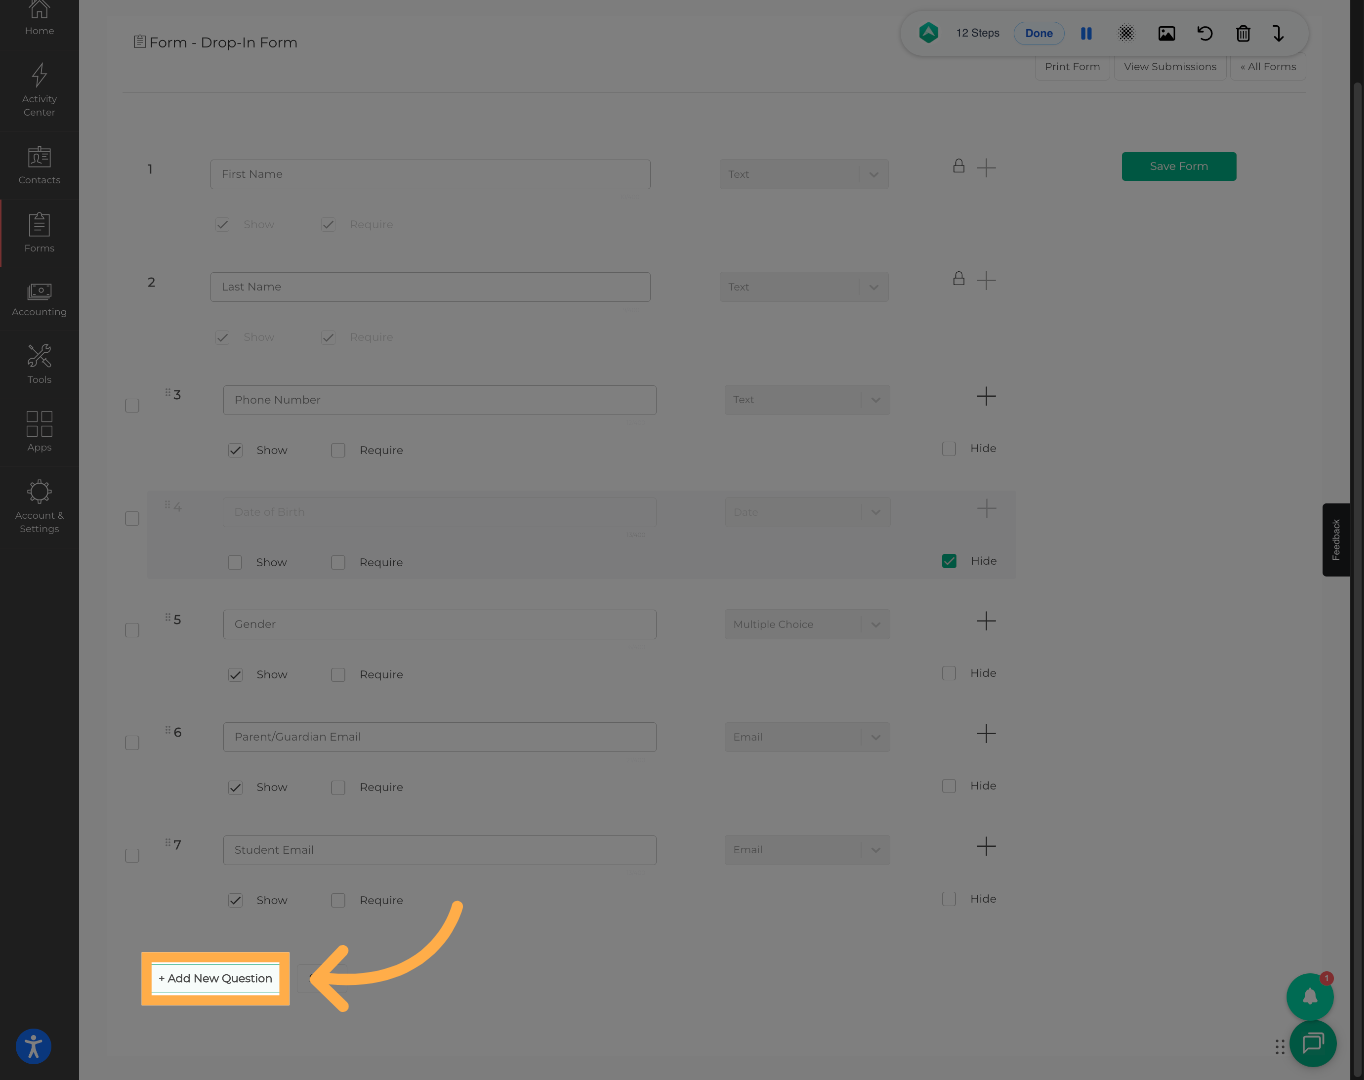
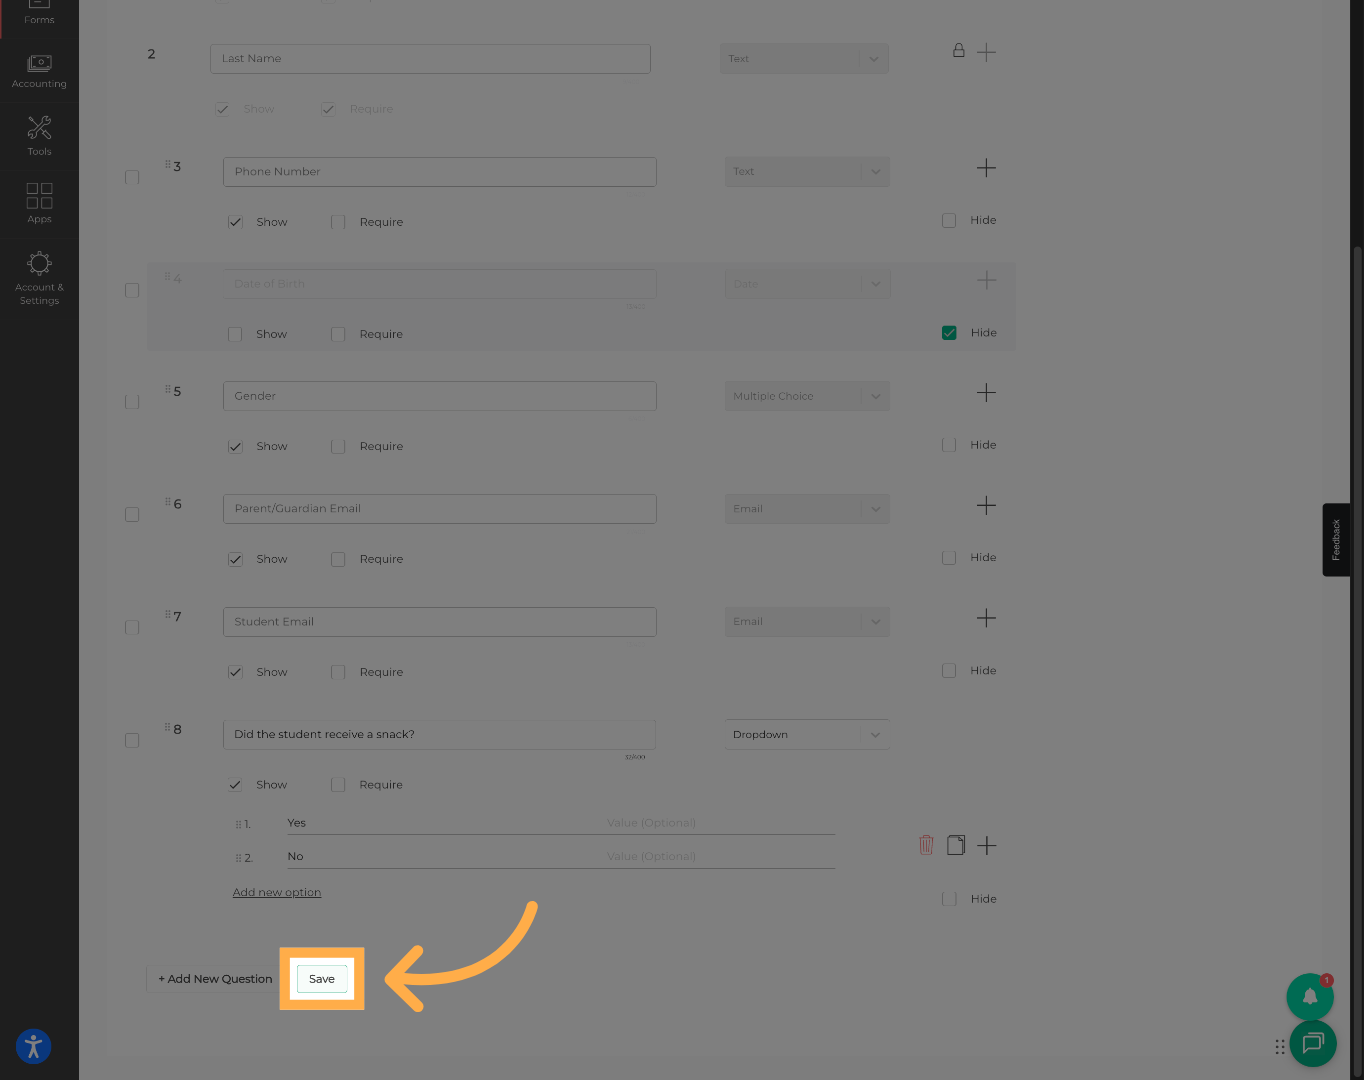
8. Customize the Form
Hide optional questions and add any additional fields you would like families or staff to complete during drop-in registration.
For example:
- Did the student receive a snack?
- Pickup authorization
- Medical notes
We recommend using simple field types like drop-downs or yes/no selections to help staff complete check-in quickly.
💡 Tip: Drop-In works best when forms are kept short and simple for faster attendance processing.
9. Add Additional Questions
You can add custom questions to collect additional information specific to your program or attendance process.
💡 Tip: Dropdowns and Yes/No questions are recommended for faster completion.
10. Save Form Changes
Click “Save” once you finish updating the form questions and settings.
11. Open Extracurricular Activities
Hover over “Activity Center” and click “Extracurricular Activities”.
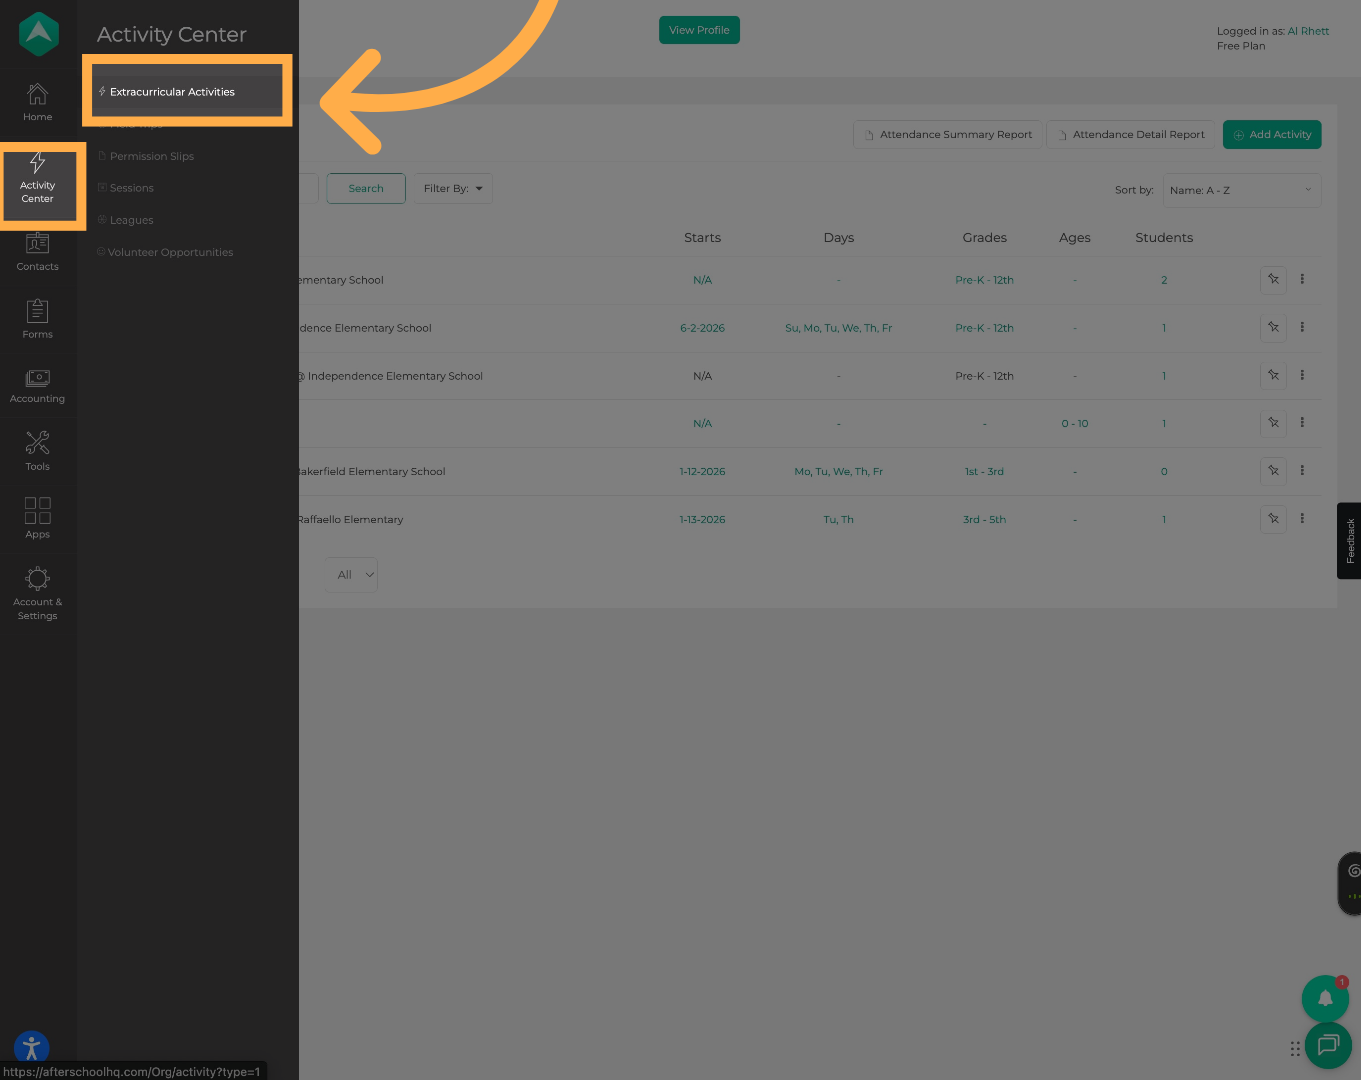
💡 Tip: Drop-In functionality is only available for activities with a drop-in form attached.
13. Select an Activity
Open the activity where you would like to enable drop-in attendance.

💡 Tip: Drop-In settings are configured separately for each activity.
14. Enable Check In and Check Out
Turn on the “Require Check In and Check Out” setting for the activity.
Once enabled, additional attendance form settings will appear, including the option to assign your Drop-In form.
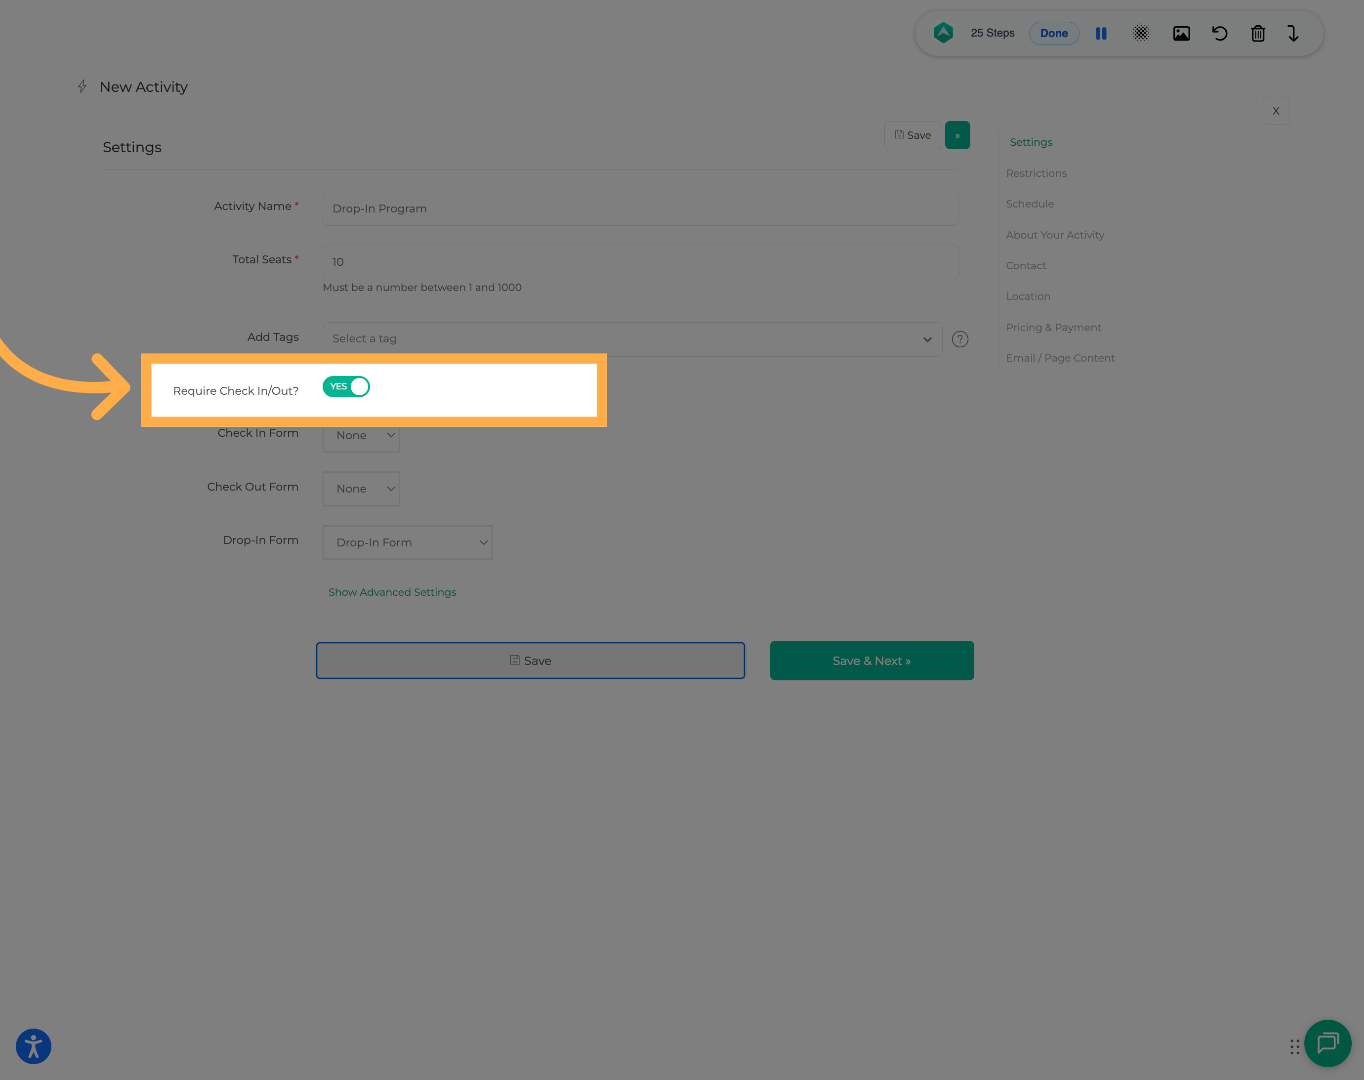
💡 Tip: The Drop-In feature will not appear unless Check In/Out is enabled.
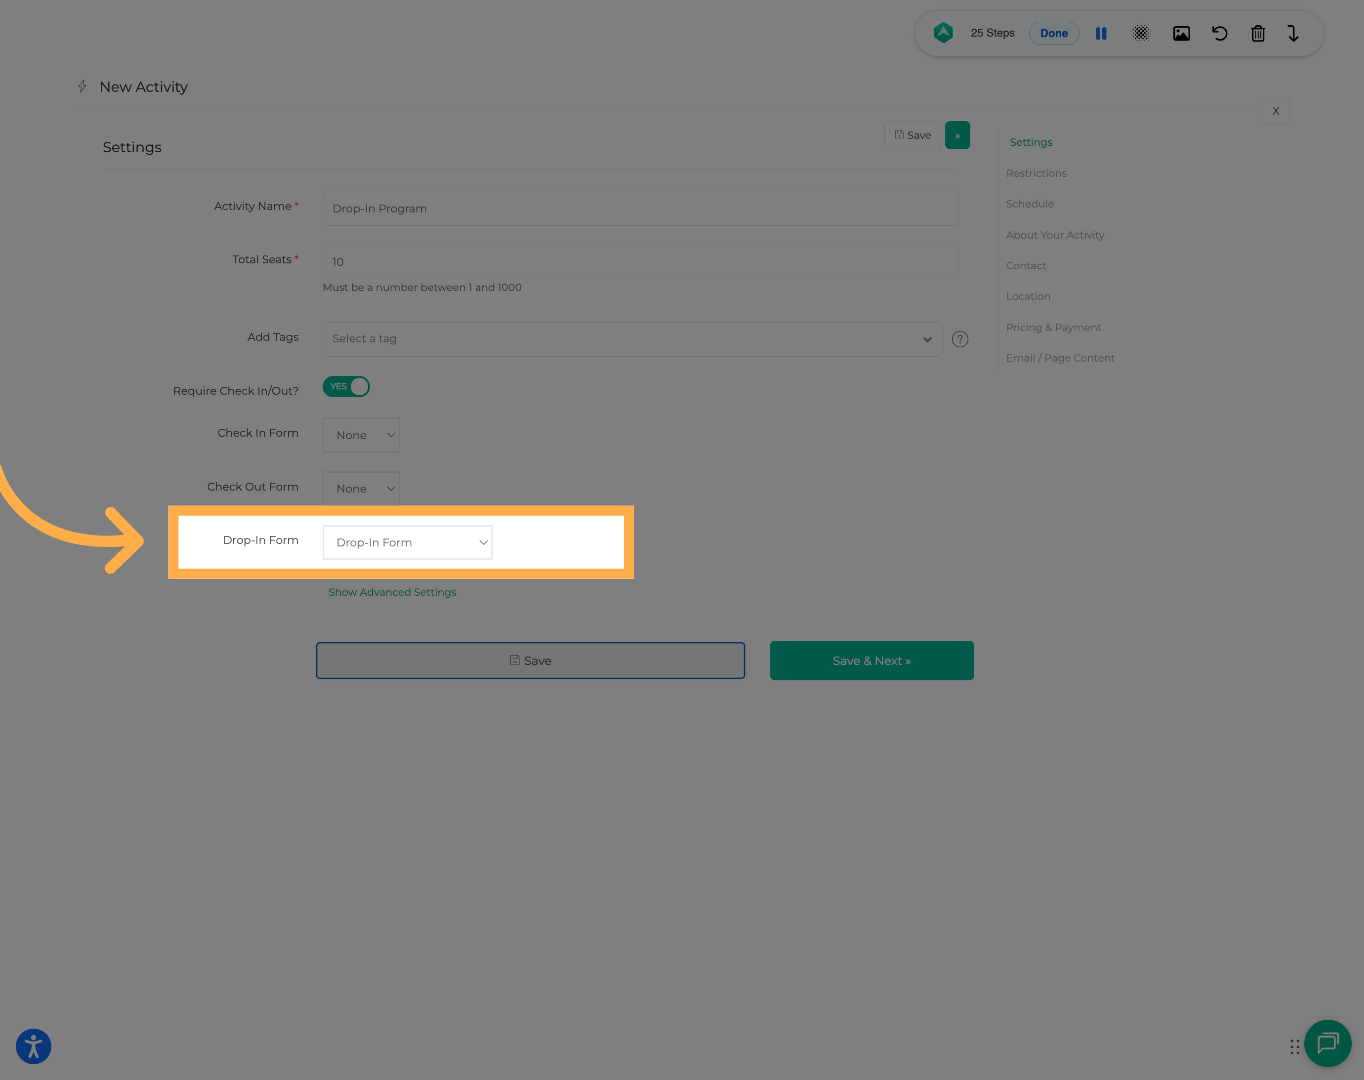
15. Assign the Drop-In Form
Select the drop-in form from the dropdown menu to attach it to the activity.
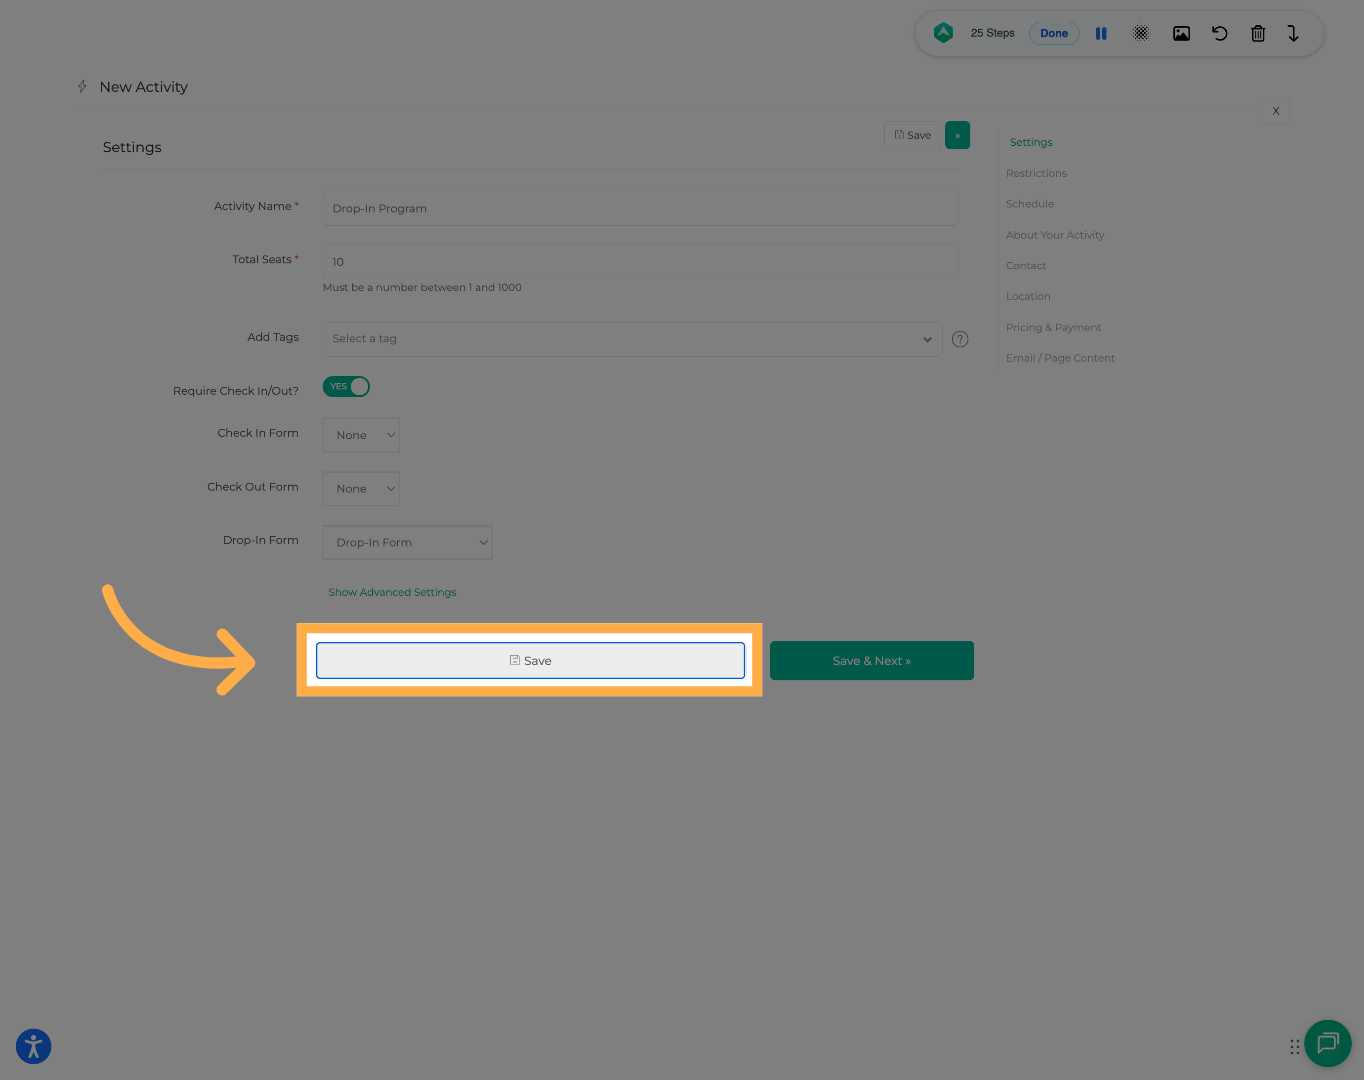
16. Save Activity Updates
Click “Save” to apply the updated activity settings.
Frequently Asked Questions
Q: Why don’t I see the “Add Drop-In” button?
A: The “Add Drop-In” option will only appear if:
- A Drop-In form has been created
- The Drop-In form is attached to the activity
- Check In/Out is enabled for the activity
If you still do not see the option, please contact our AfterSchool HQ support team.
Q: Can I use Drop-In without creating a Drop-In form?
A: No. A Drop-In form must be created and attached to the activity before the Drop-In feature becomes available.
Q: Can I customize the Drop-In form for different activities?
A: Yes. You can create multiple Drop-In forms and assign different forms to different activities.
Q: Can I remove the required student fields?
A: No. Required fields such as First Name and Last Name are necessary for attendance tracking and cannot be removed.
Q: Can I add custom questions to the Drop-In form?
A: Yes. You can add additional questions such as snack participation, pickup notes, allergies, or medical information.
Q: Can I edit the Drop-In form later?
A: Yes. Drop-In forms can be updated at any time through the Forms section.
Q: Can multiple activities use the same Drop-In form?
A: Yes. A single Drop-In form can be assigned to multiple activities if needed.
Q: Does Drop-In create duplicate student profiles?
A: The system searches for existing students first to help prevent duplicates. We recommend searching carefully before creating new students.
Q: Can I check a Drop-In student out later?
A: Yes. Drop-In students can be checked out through the attendance screen just like standard attendees.
Q: Will Drop-In students appear in attendance reports?
A: Yes. Drop-In students are included in attendance tracking and reporting.
Q: Can Drop-In students be charged or billed?
A: Drop-In is designed for attendance tracking only and does not replace registration or payment workflows.
If payment collection is required, we recommend having the family complete the standard registration process.
💡If you experience any issues or have further questions with “How to Set Up and Manage the Drop-In Feature”, don't hesitate to get in touch with our support team at support@afterschoolhq.com.