Looking to collect donations through AfterSchool HQ? This guide will show you how to configure your donation settings, share your donation page, and allow families to contribute during registration or directly through your organization's donation link.
1. Open Account Settings
Open “Account & Settings” from the main navigation menu.

💡 Tip: Only users with the appropriate administrative permissions can modify donation settings.
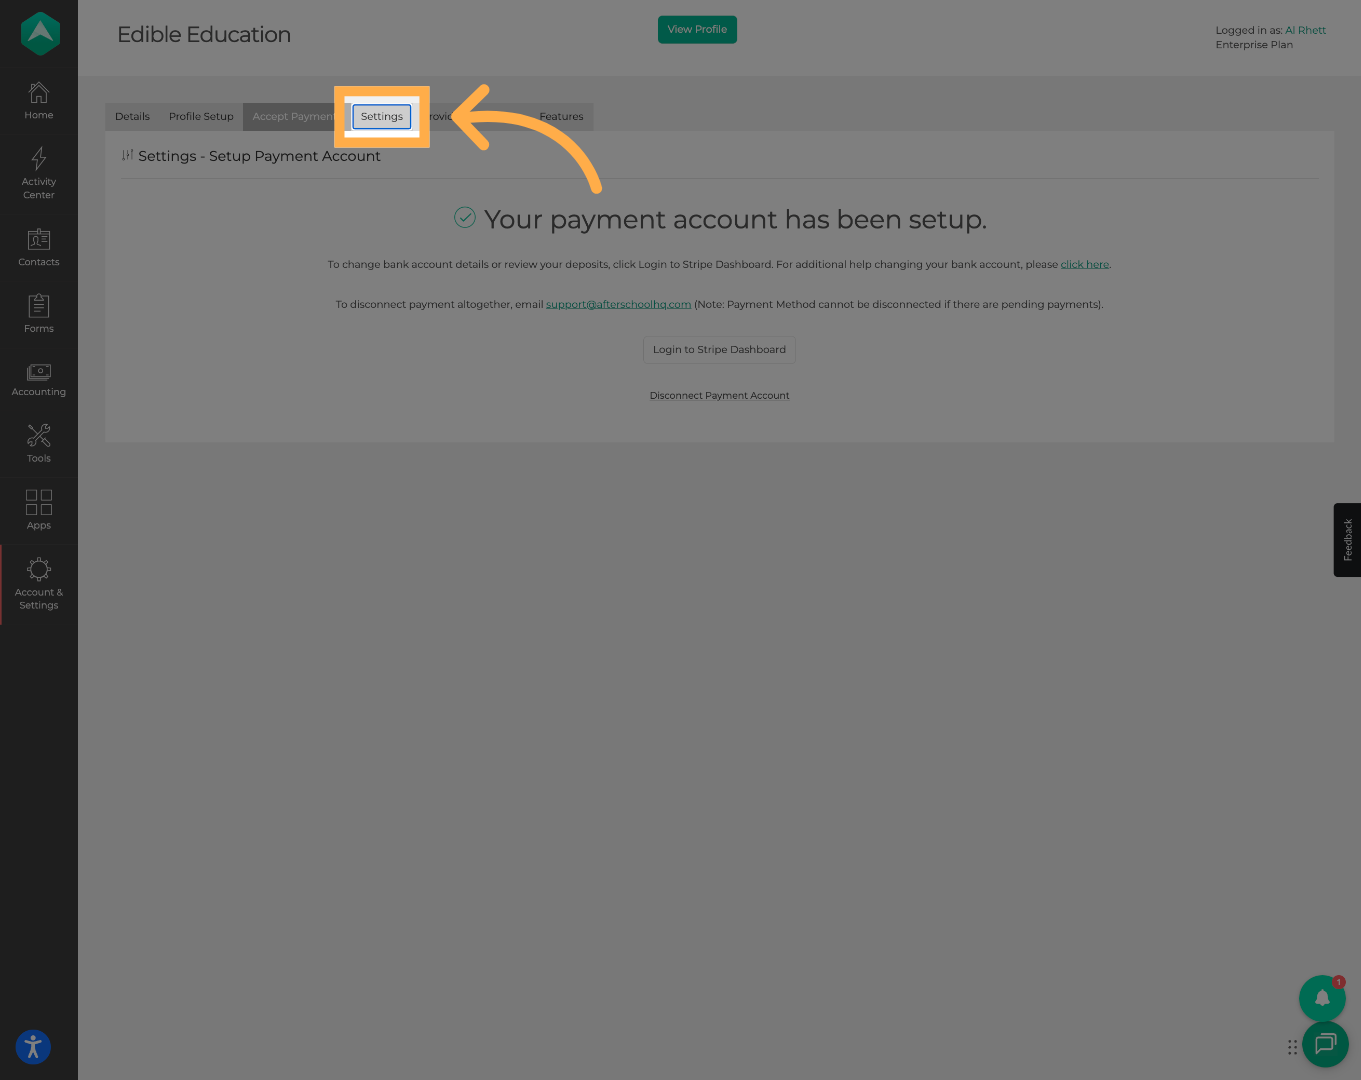
2. Open Payment Settings
Select “Settings” to access your organization's payment and donation configuration options.
3. Enable Donations
Enable the “Collect Donations” option to allow your organization to accept donations through AfterSchool HQ.
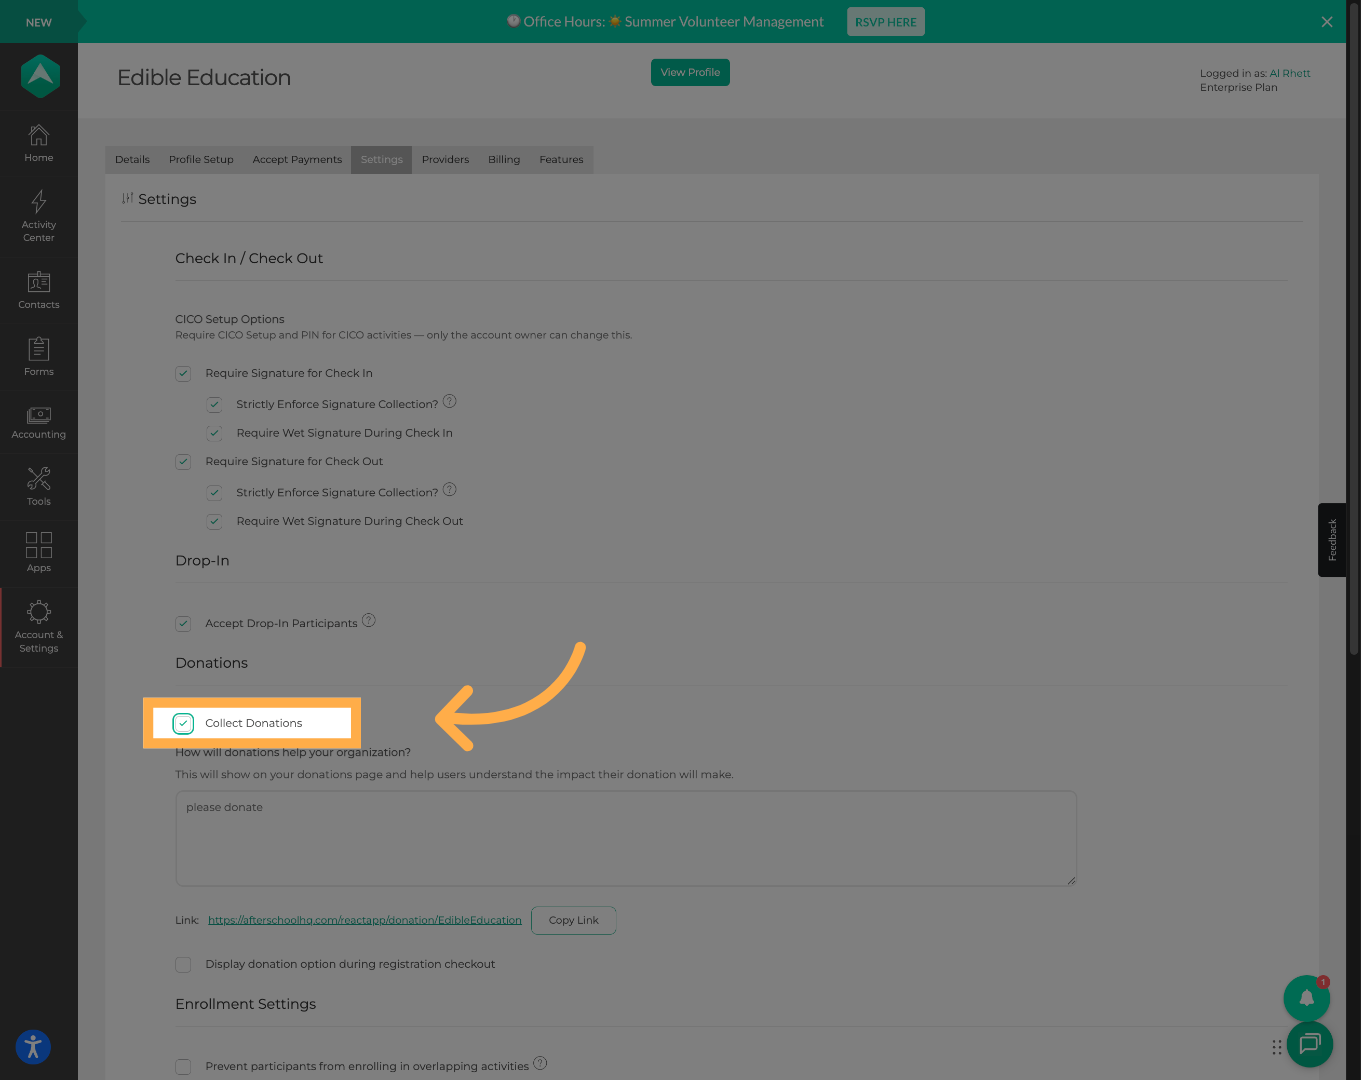
💡Tip: Donations must be enabled before your donation page becomes available to families.
4. Customize Your Donation Message
Enter the message or description you would like families to see when making a donation.
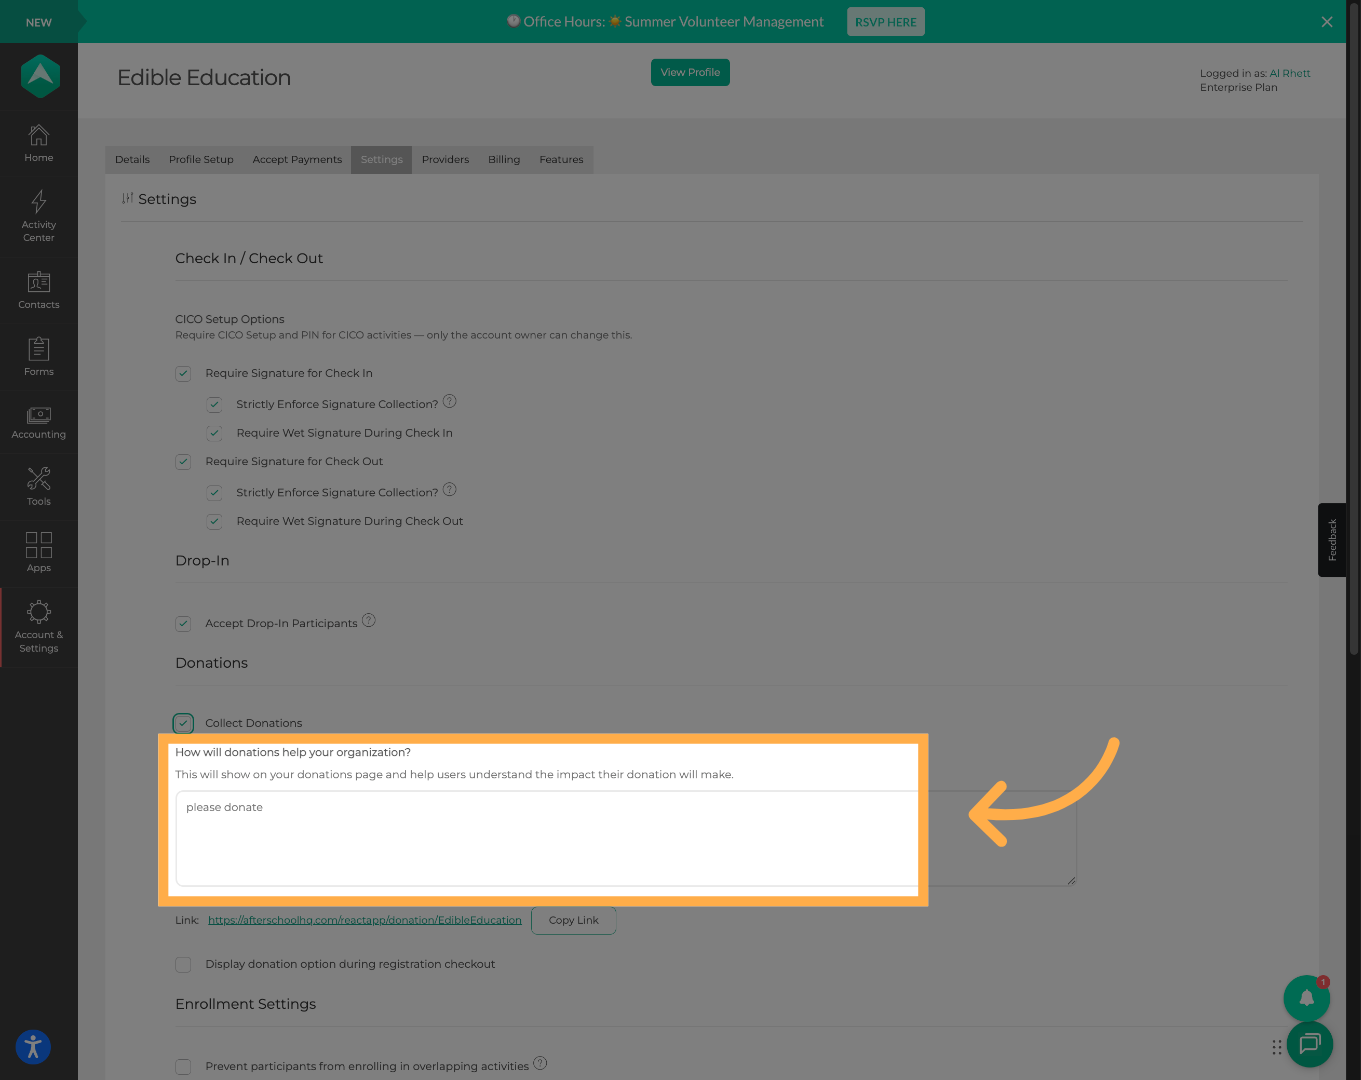
💡Tip: Explain how donations support your programs to encourage participation.
5. Copy Your Donation Link (Optional)
Click “Copy Link” to copy your organization's donation page and share it with families, donors, or your community.
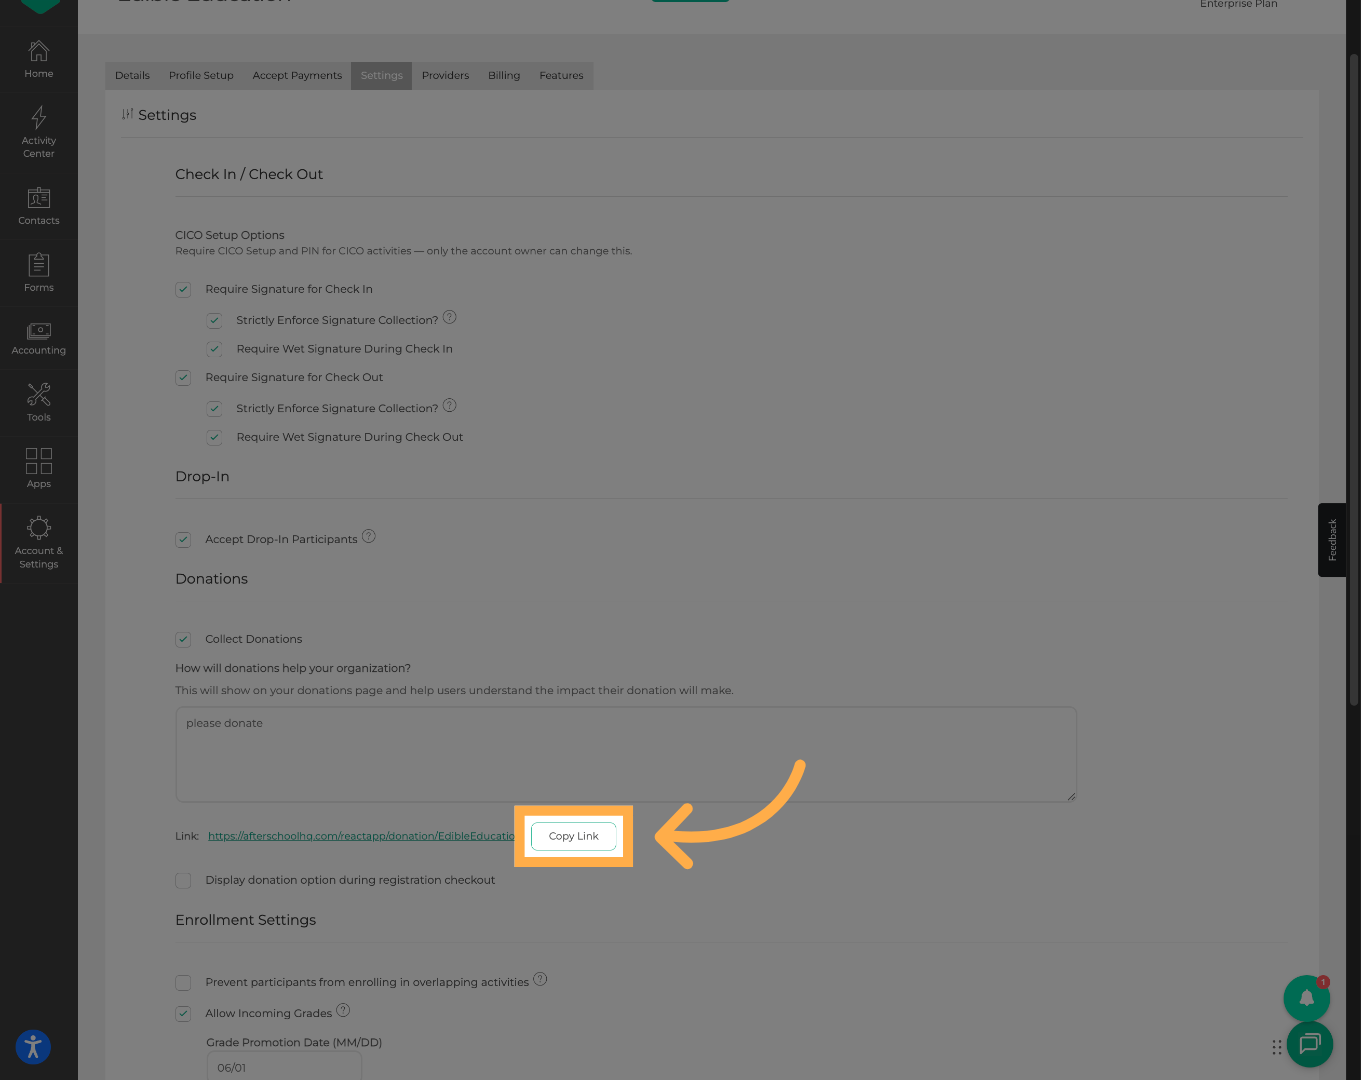
💡 Tip: You can include this link on your website, newsletters, emails, or social media pages.
6. Display Donations During Registration
Enable the option to display donation requests during the registration checkout process.
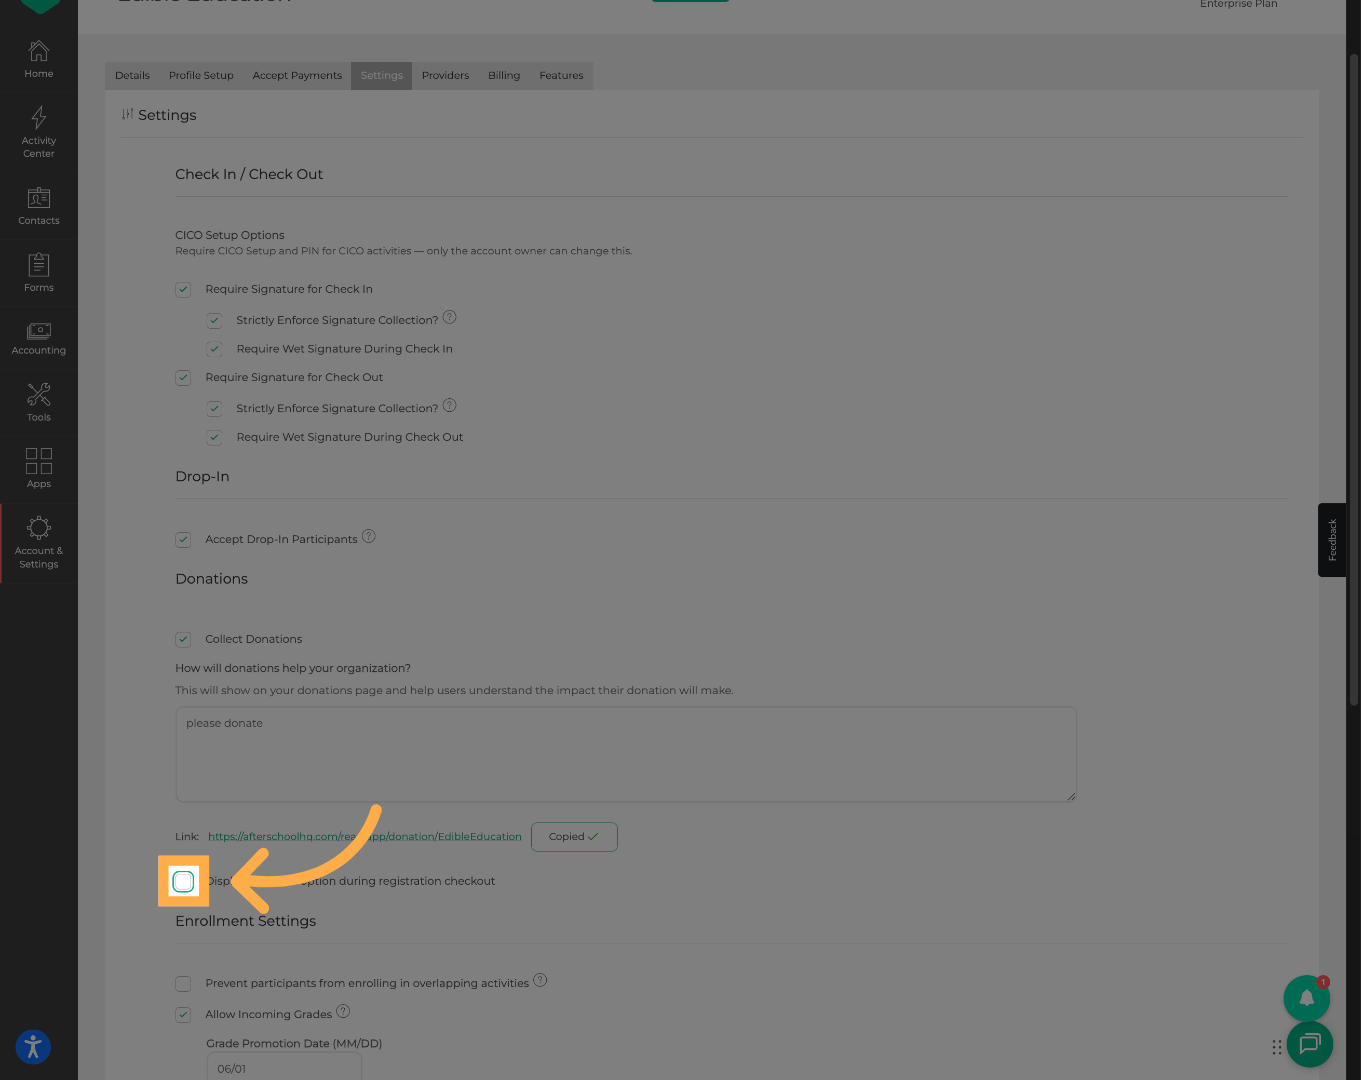
💡Tip: This gives families an additional opportunity to support your organization while registering for activities.
7. Set the Donation Purpose
Enter a description explaining how donated funds will be used.
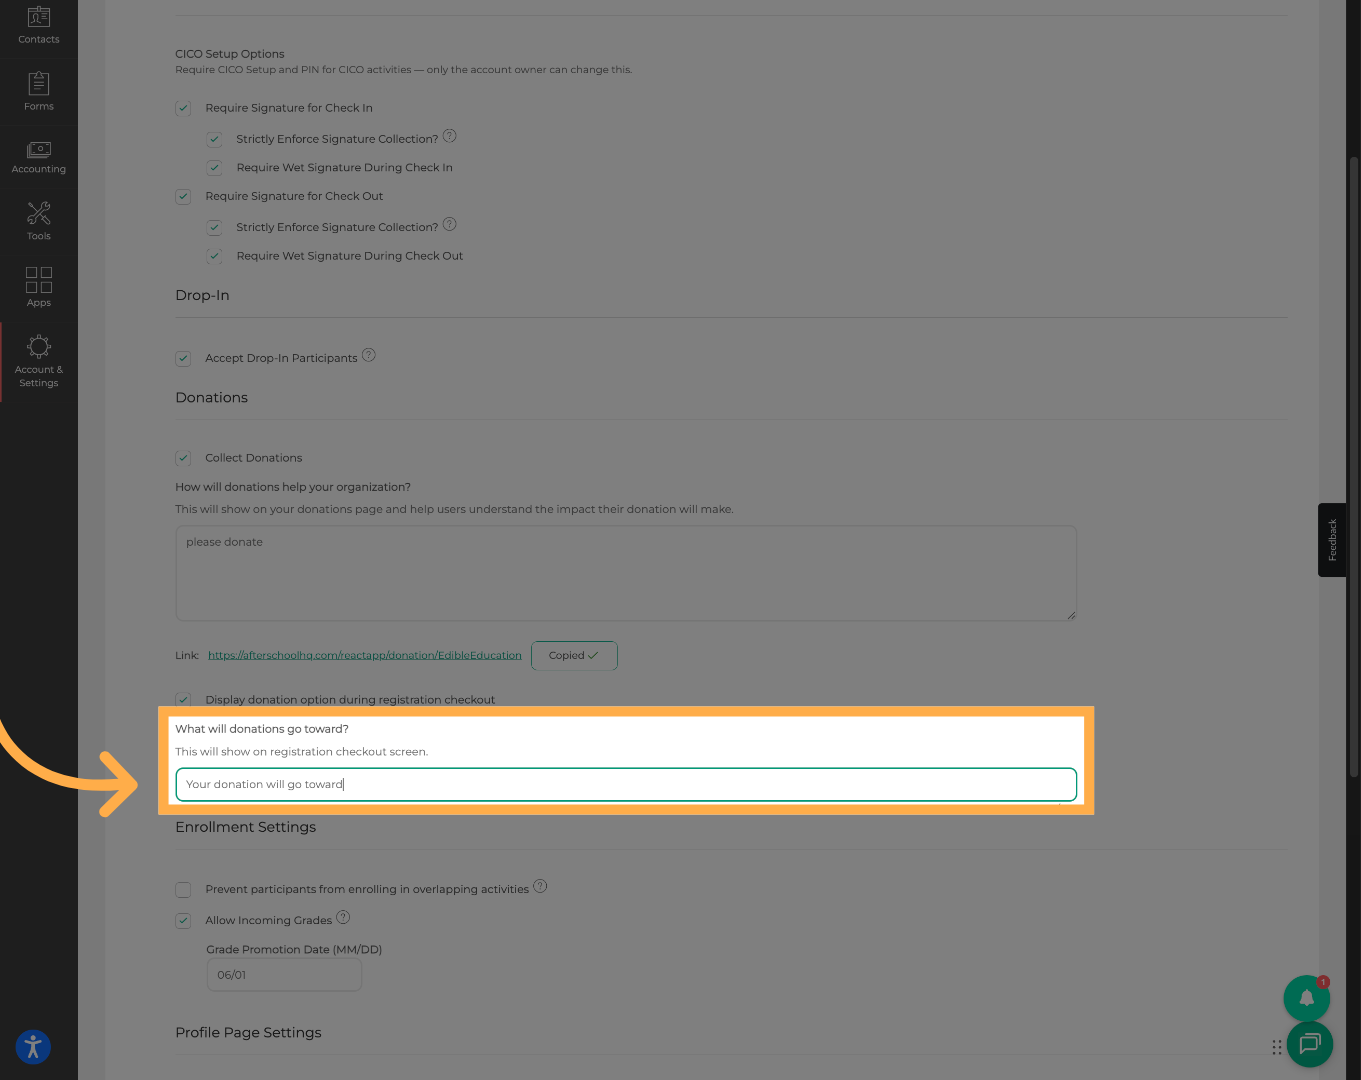
💡 Tip: Being transparent about the purpose of donations helps build trust and encourages contributions.
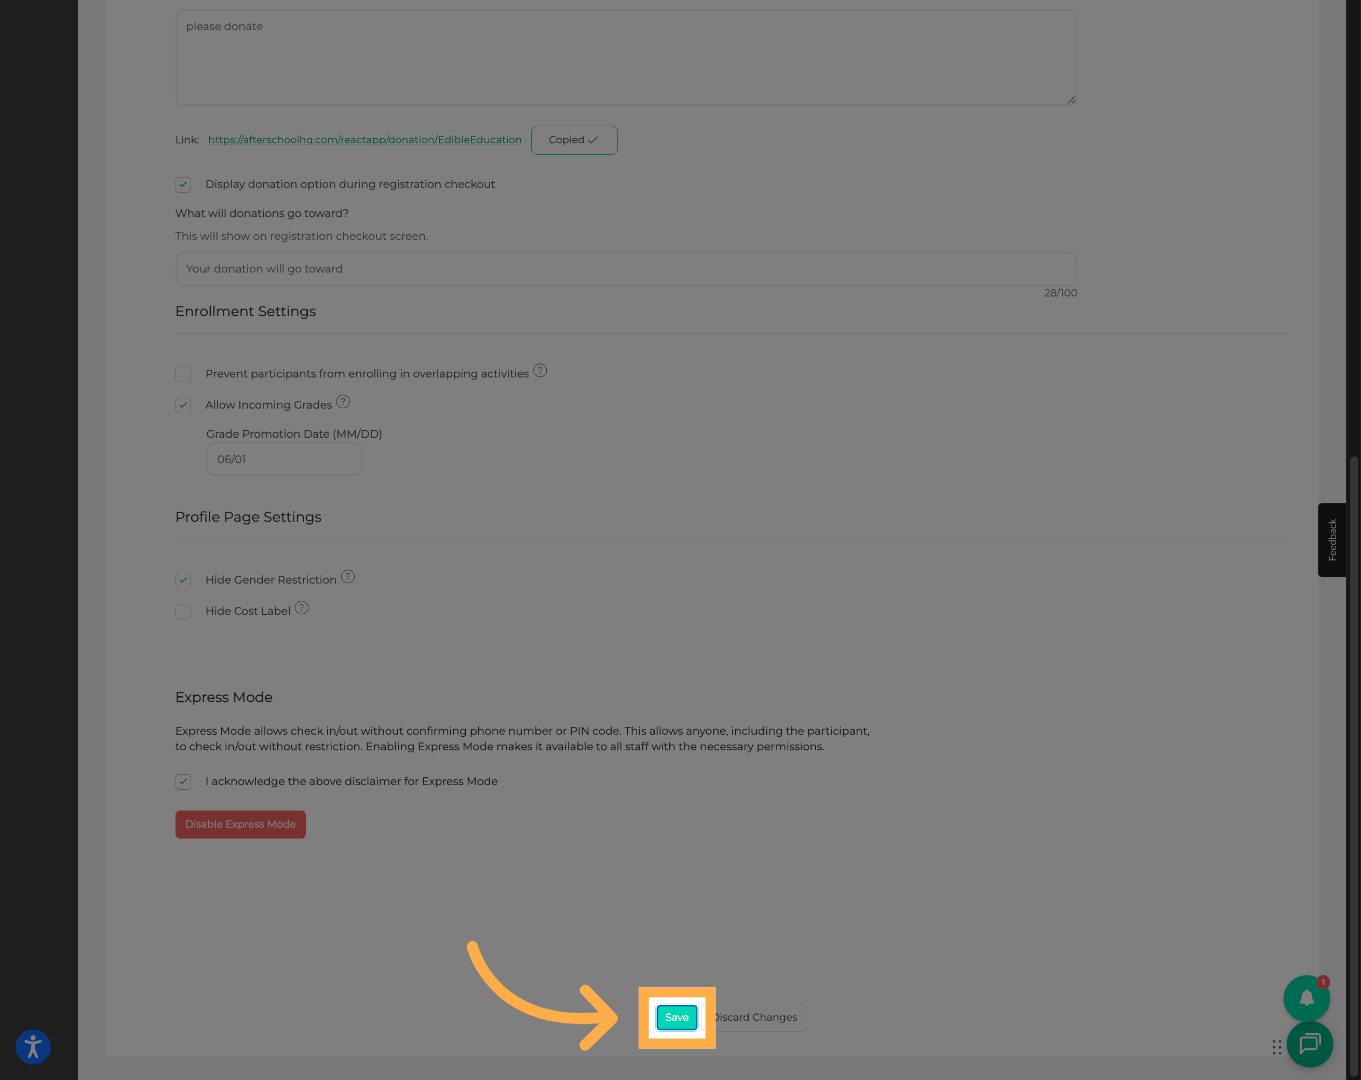
8. Save Your Changes
Click “Save” to apply your donation settings.
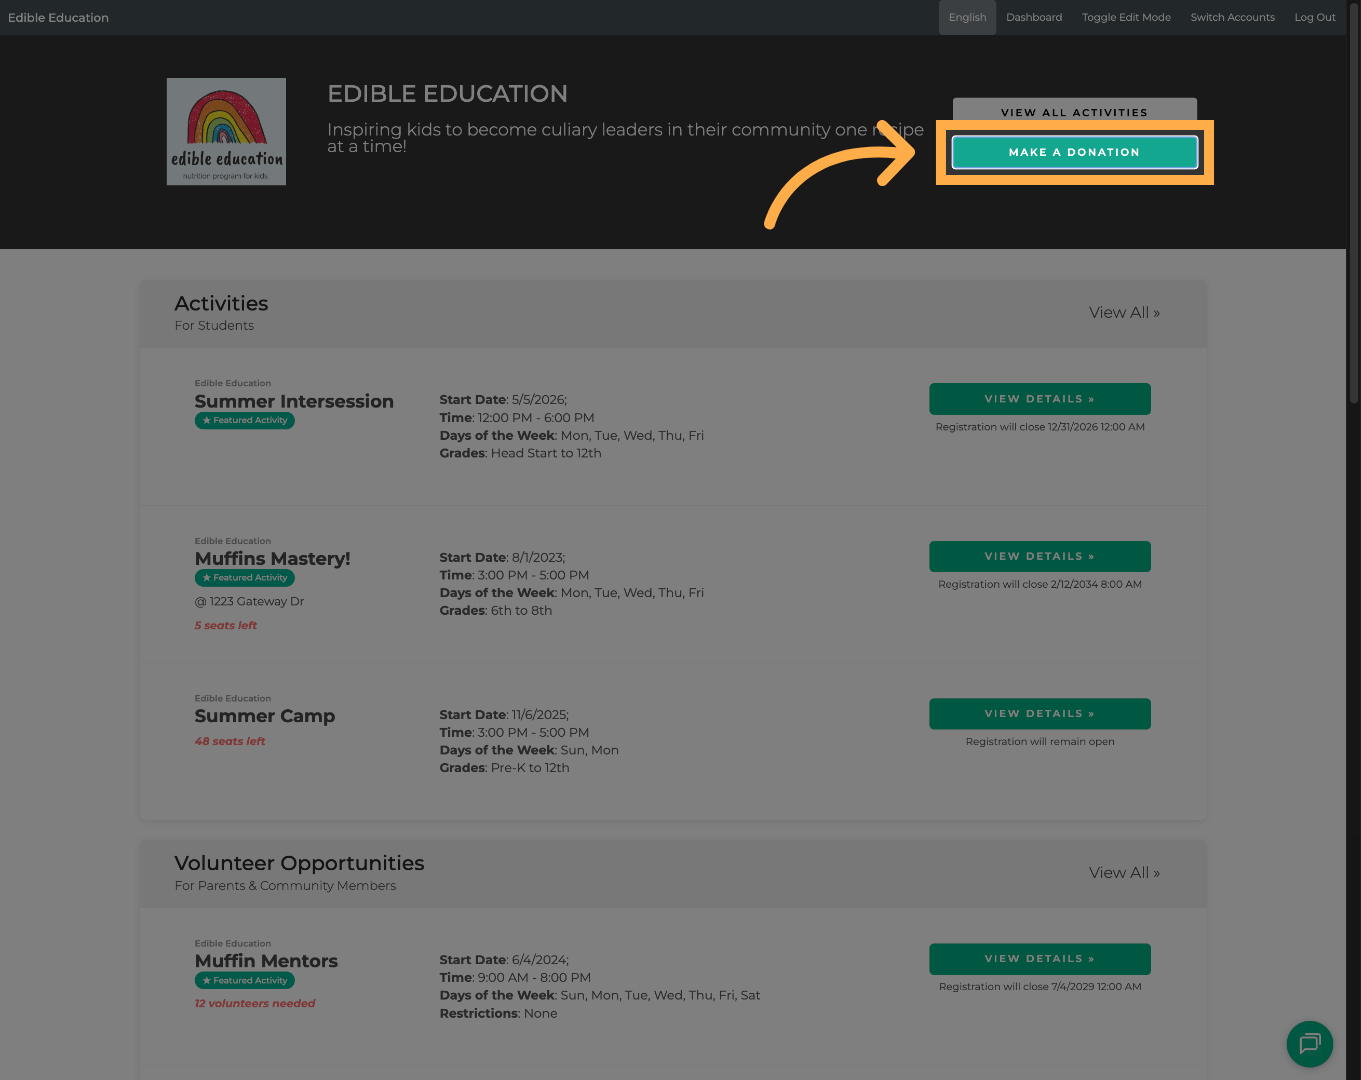
9. Open the Donation Page
Families can visit your donation page and click “Make a Donation” to begin the donation process.
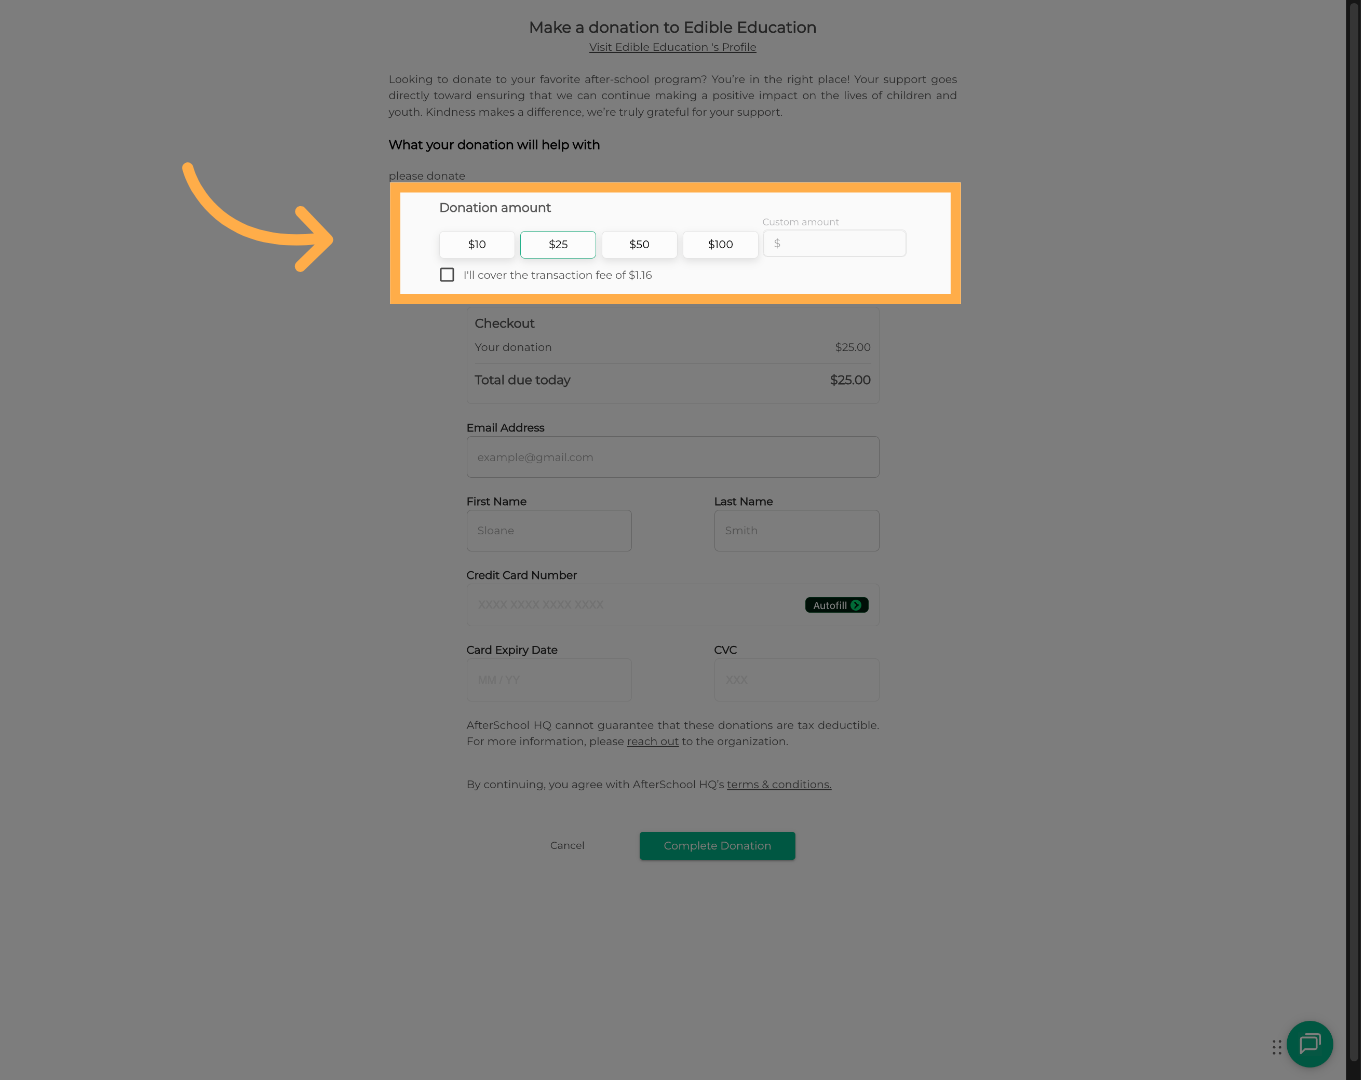
10. Parents Select a Donation Amount
They can choose one of the preset donation amounts or enter a custom contribution, if available.
11. Needed Contact Information
The donor's email address and additional information must be added before completing the donation.
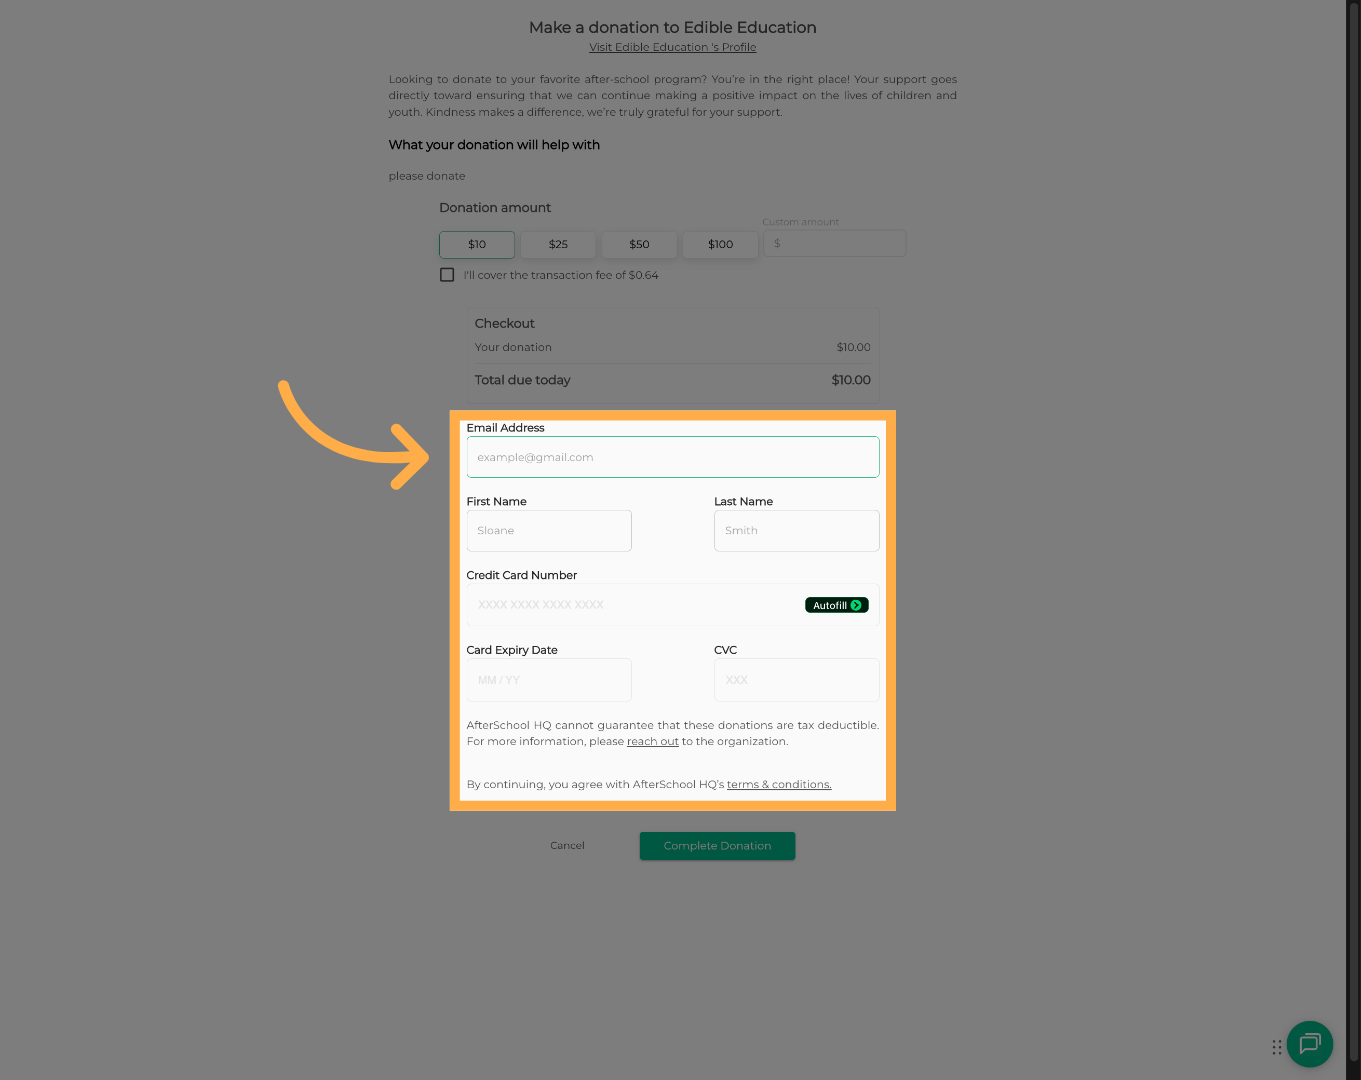
💡 Tip: The email address may be used to send donation confirmations or receipts.
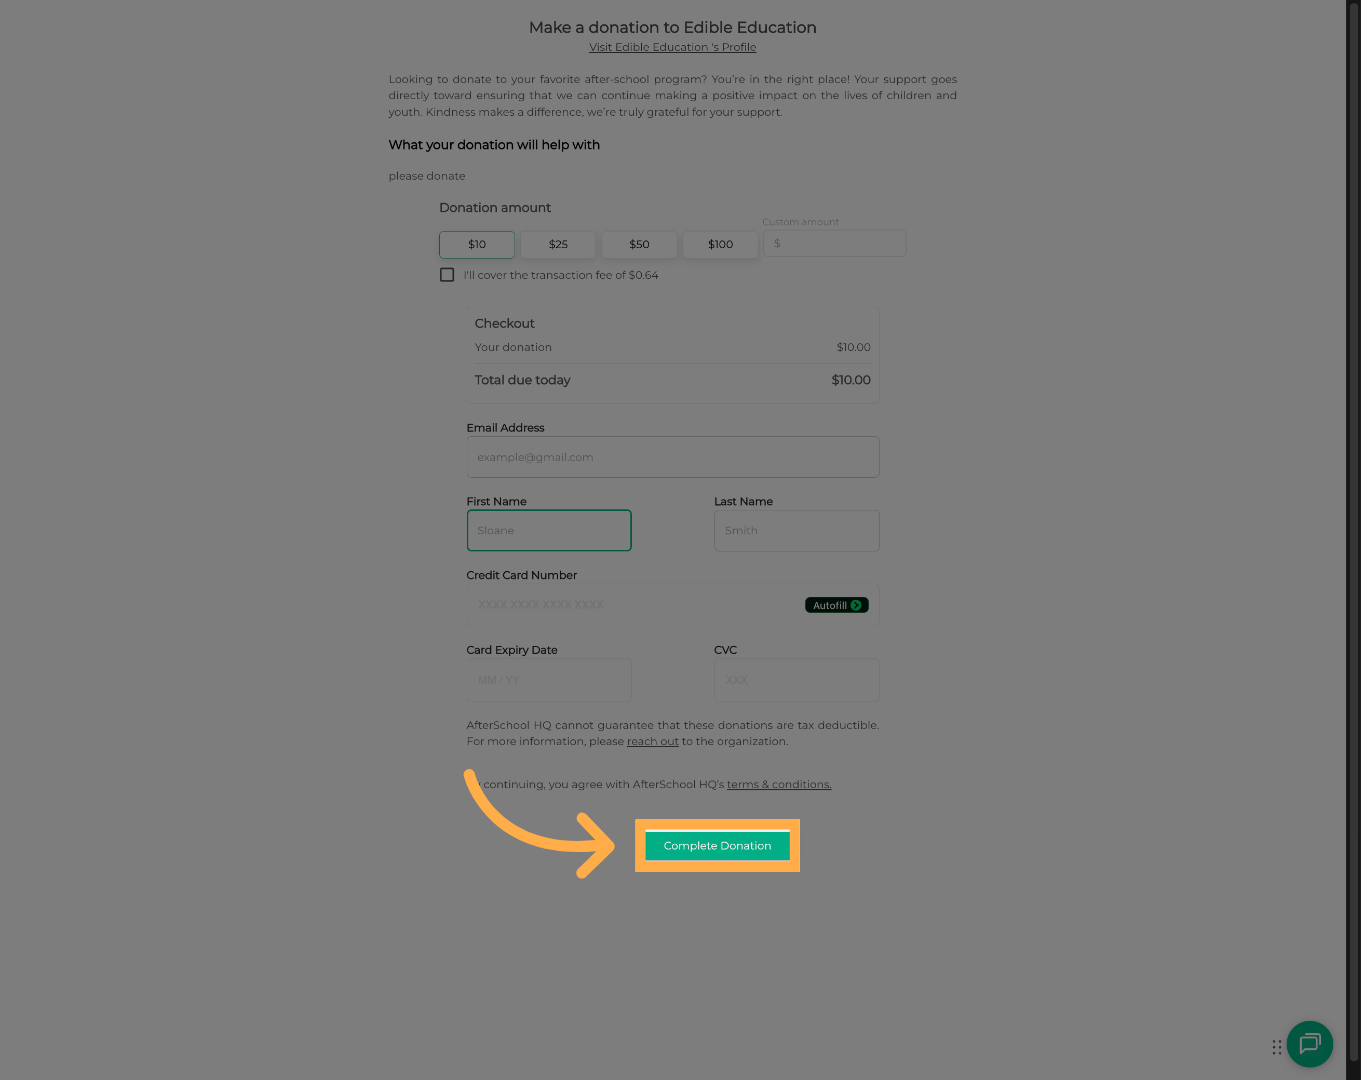
12. Complete the Donation
They can click “Complete Donation” to securely submit the contribution.
Frequently Asked Questions
Q: Where can families make a donation?
A: Families can donate through your organization's donation page or during the registration checkout process if donation prompts are enabled.
Q: Can I share the donation page outside of AfterSchool HQ?
A: Yes. You can copy and share your donation link through your website, email campaigns, newsletters, or social media.
Q: Can I explain what donations will be used for?
A: Yes. The donation purpose and message can be customized within your donation settings.
Q: Do I have to enable donations during registration?
A: No. Displaying donation requests during registration is optional and can be turned on or off at any time.
Q: Can donors choose their own donation amount?
A: Depending on your configuration, donors can select a preset amount or enter a custom contribution.
Q: Who can manage donation settings?
A: Users with the appropriate administrative permissions can enable and manage donation settings.
💡If you experience any issues or have further questions with “How to Collect Donations”, don't hesitate to get in touch with our support team at support@afterschoolhq.com.