Follow the steps below to configure attendance-based billing for your activity.
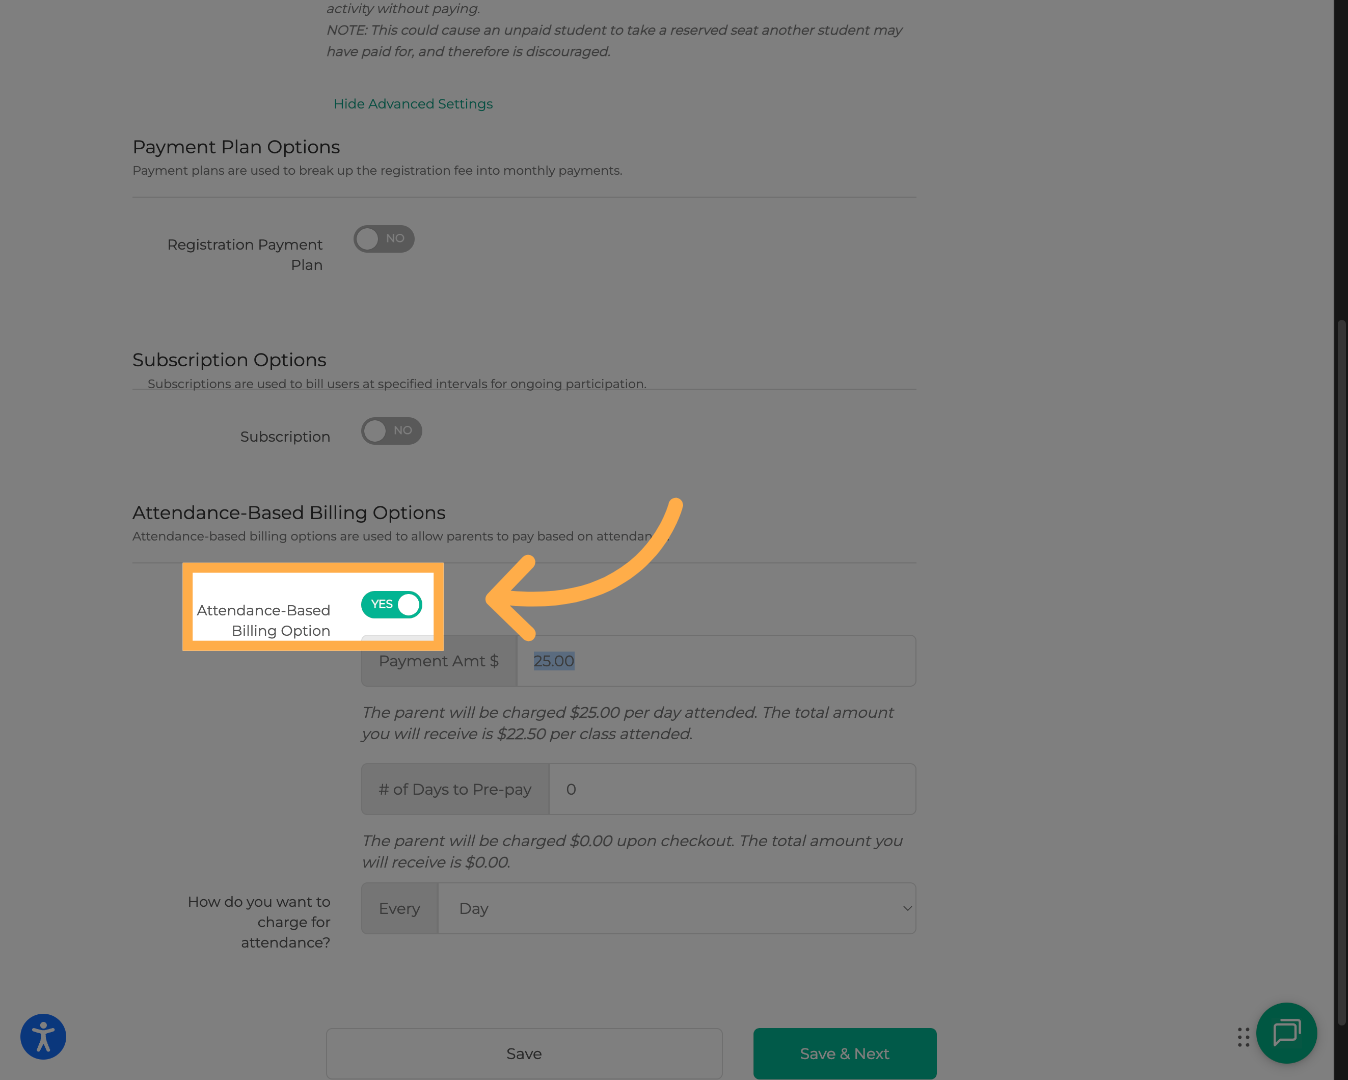
1. Enable Attendance-Based Billing
Navigate to your billing settings and locate the Attendance-Based Billing Option toggle.
Switch it to YES to enable it. This will reveal the configuration fields below.

2. Set Your Payment Amount
In the Payment Amt $ field, enter the amount you want to charge per day attended.
A summary will appear below the field confirming how much the parent will be charged per day, and how much you will receive after the processing fee.
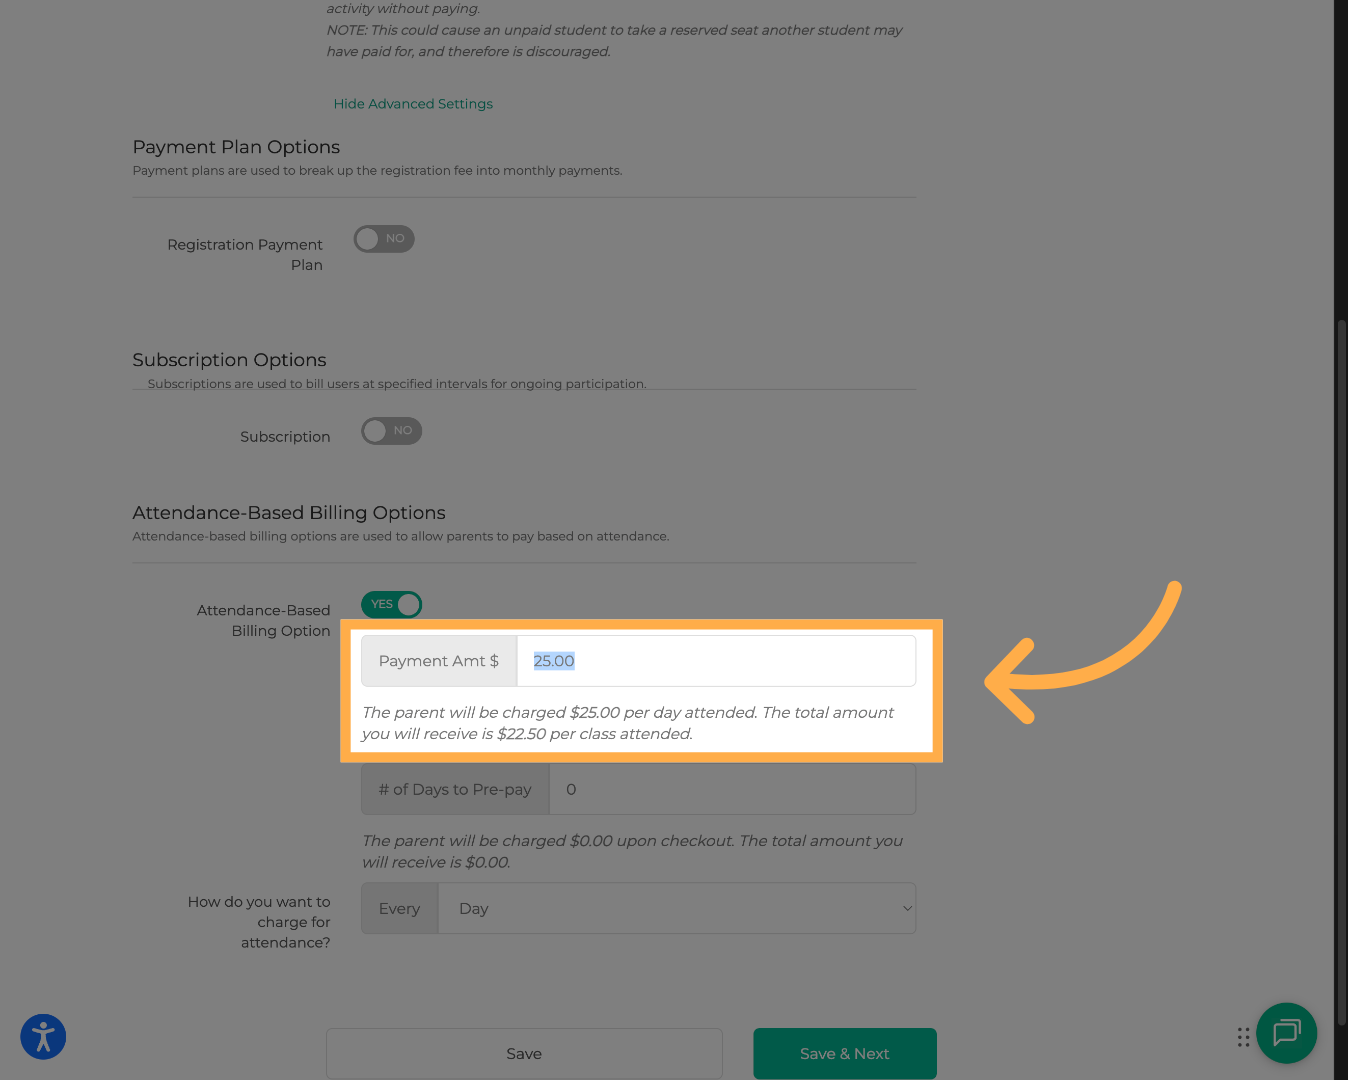
💡Tip: Factor the processing fee into your rate if you want your net payout to match a specific target amount.
3. Set the Number of Days to Pre-pay (Optional)
In the # of Days to Pre-pay field, enter the number of days you'd like to collect payment for upfront at checkout.
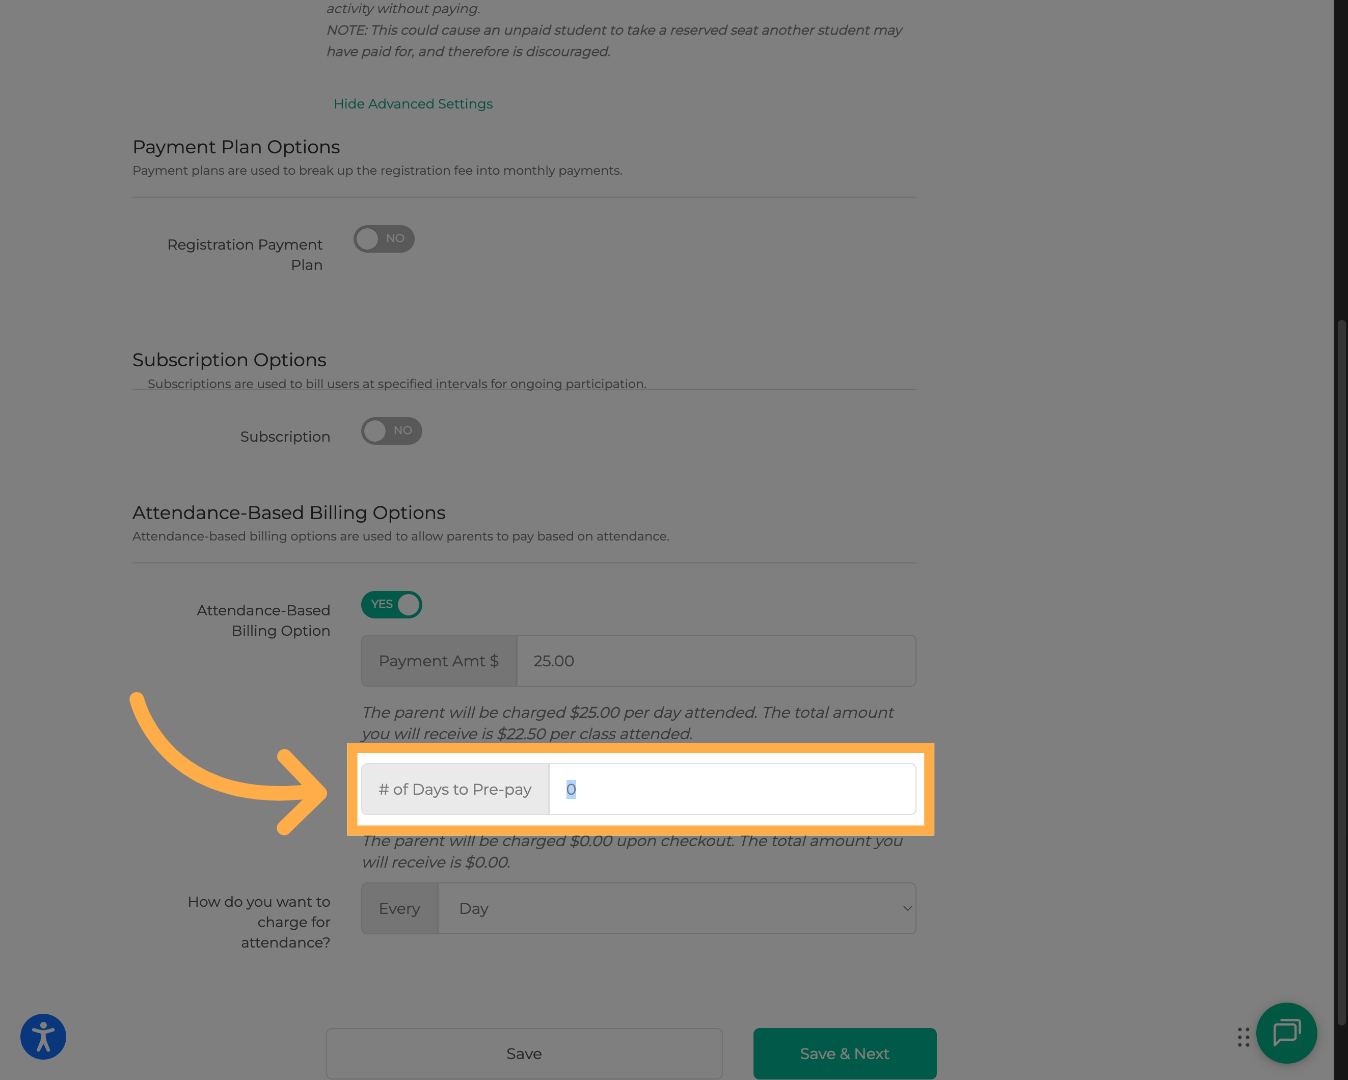
If you prefer to charge after attendance is recorded, leave this set to 0. The summary below the field will show the total amount charged at checkout and your net amount after fees.
4. Choose Your Billing Frequency
Use the “How do you want to charge for attendance?” dropdown to select how often parents are charged.
You have two options:
- Every Day — the parent is charged each day their student attends
- Every Week — attendance is totaled for the week and the parent is charged once weekly
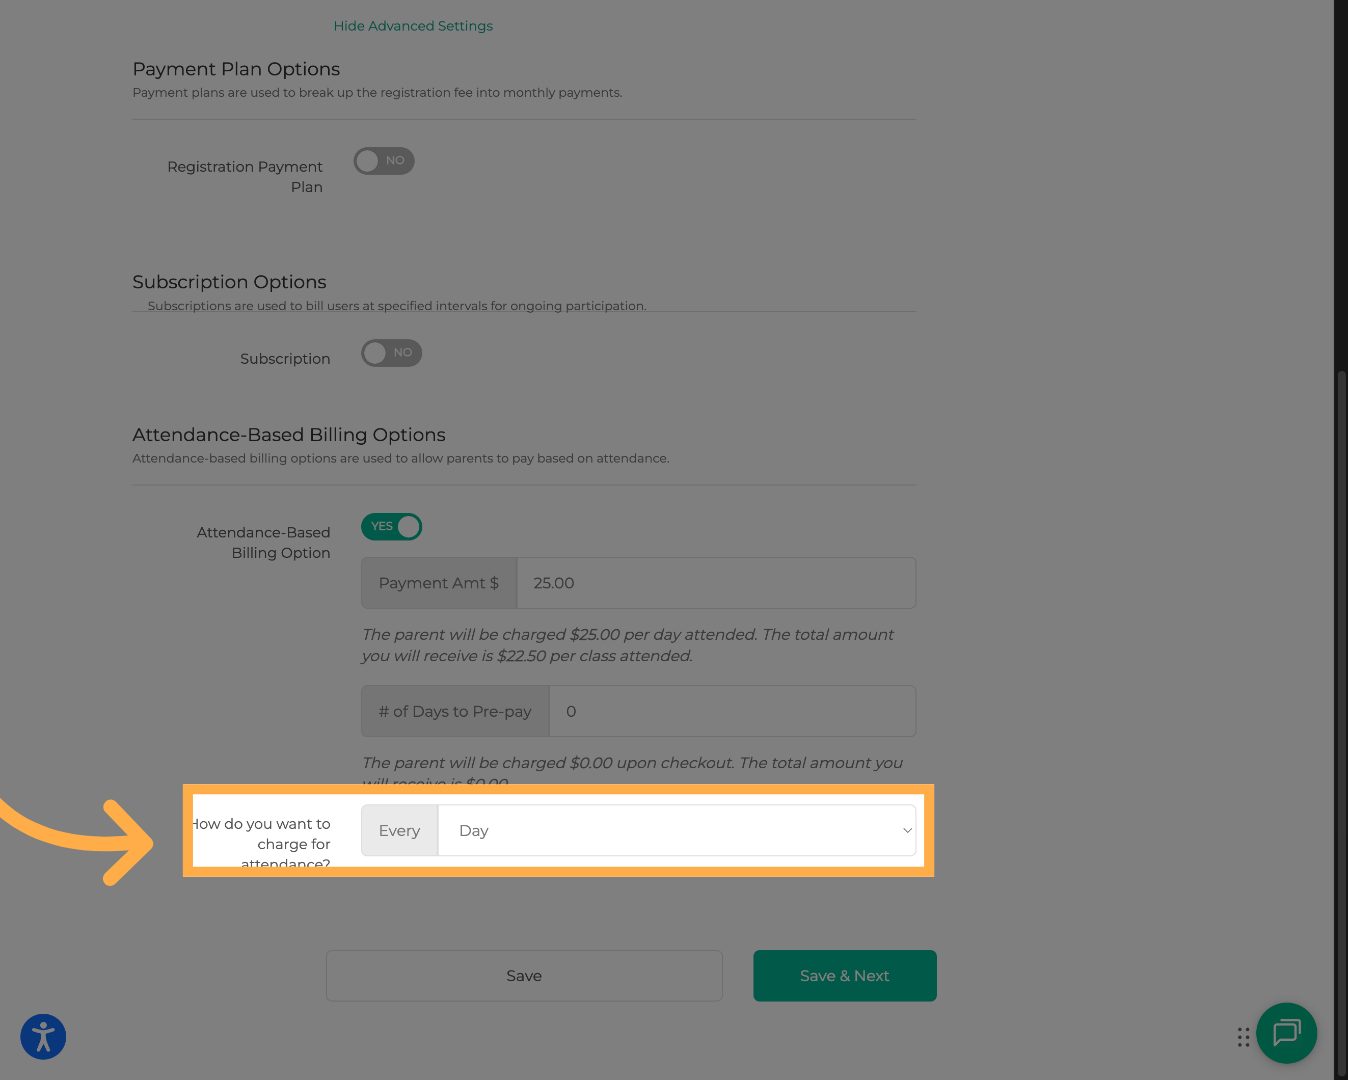
💡 Tip: Weekly billing tends to feel less disruptive for parents since they see fewer individual charges on their account.
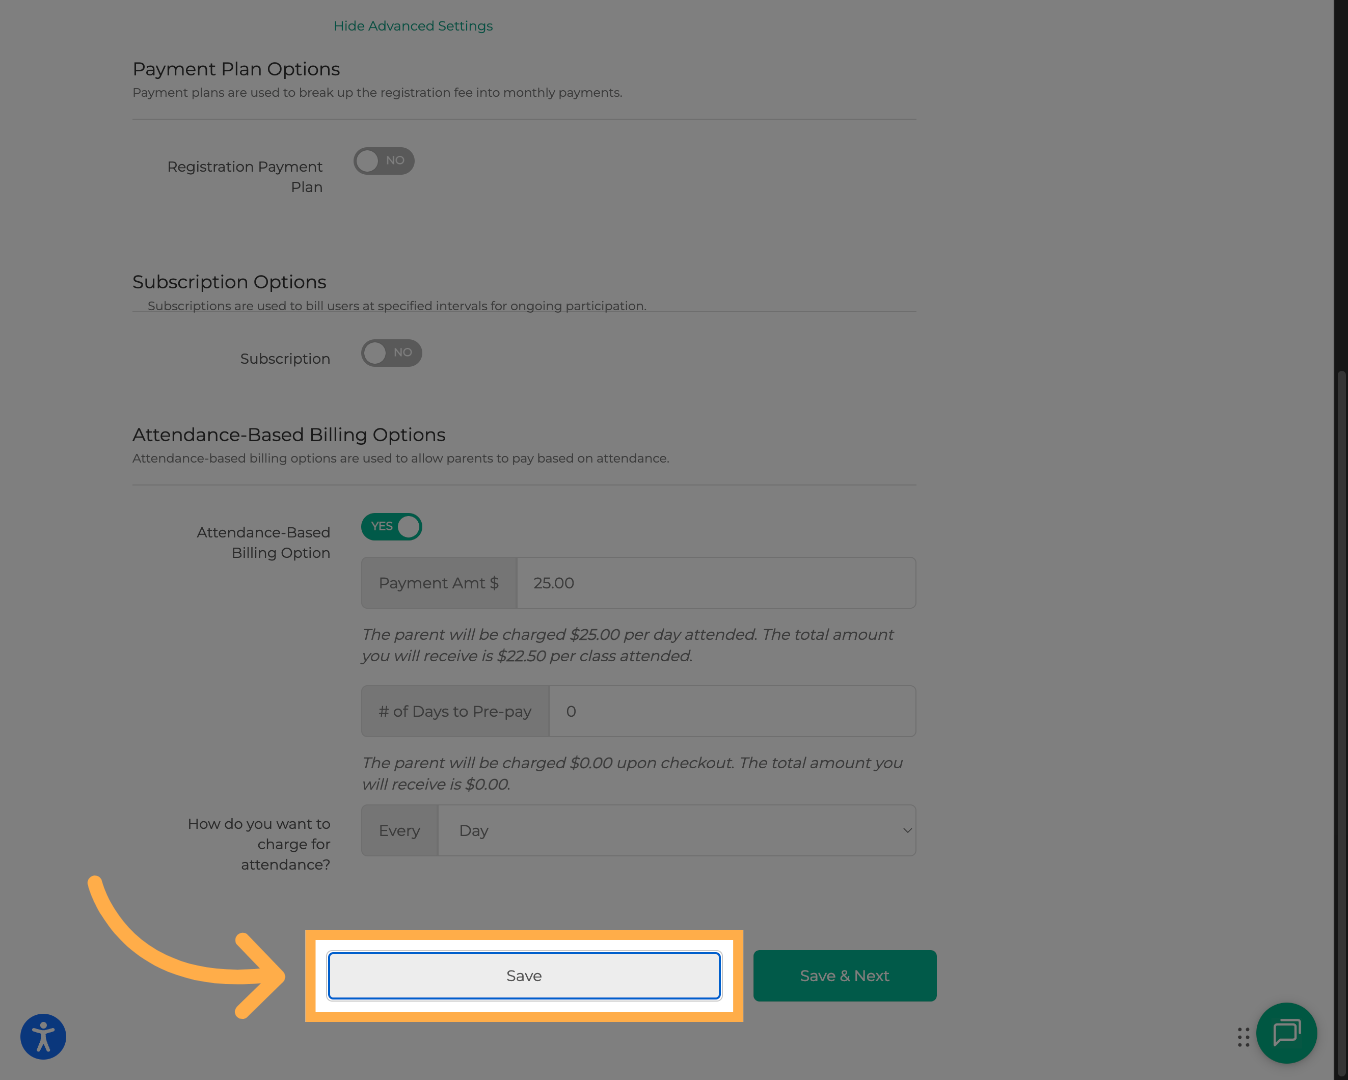
5. Save Attendance Settings
Click "Save" to save the attendance settings you configured.
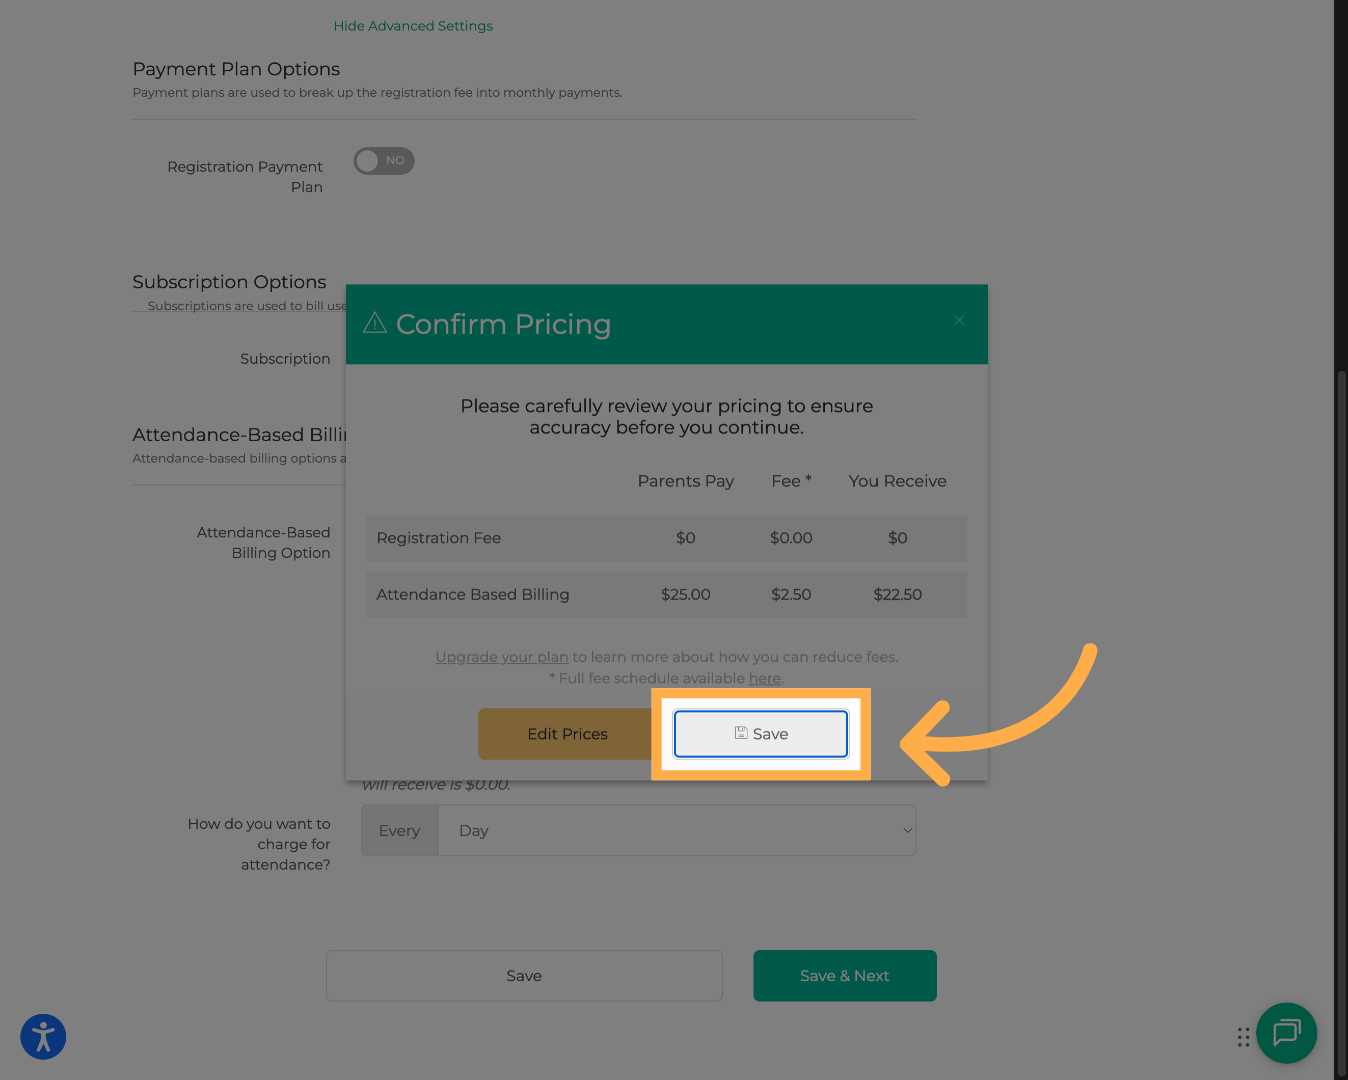
6. Confirm Settings Save
Click "Save" again to confirm and apply the changes.
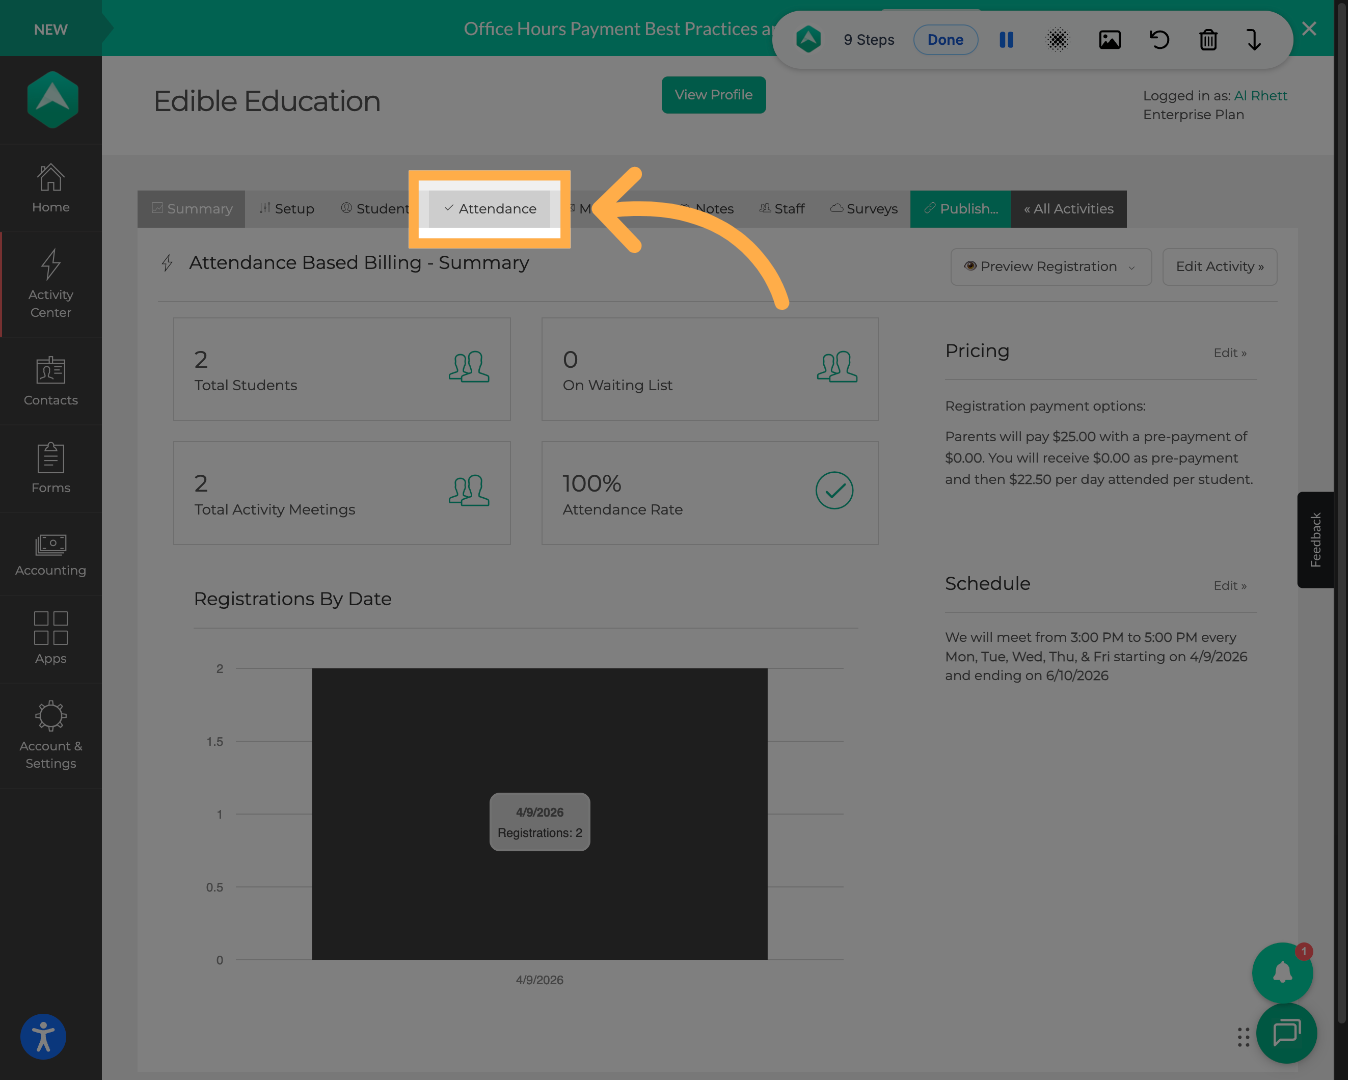
6. Charging Attendance Fees from the Attendance Tab
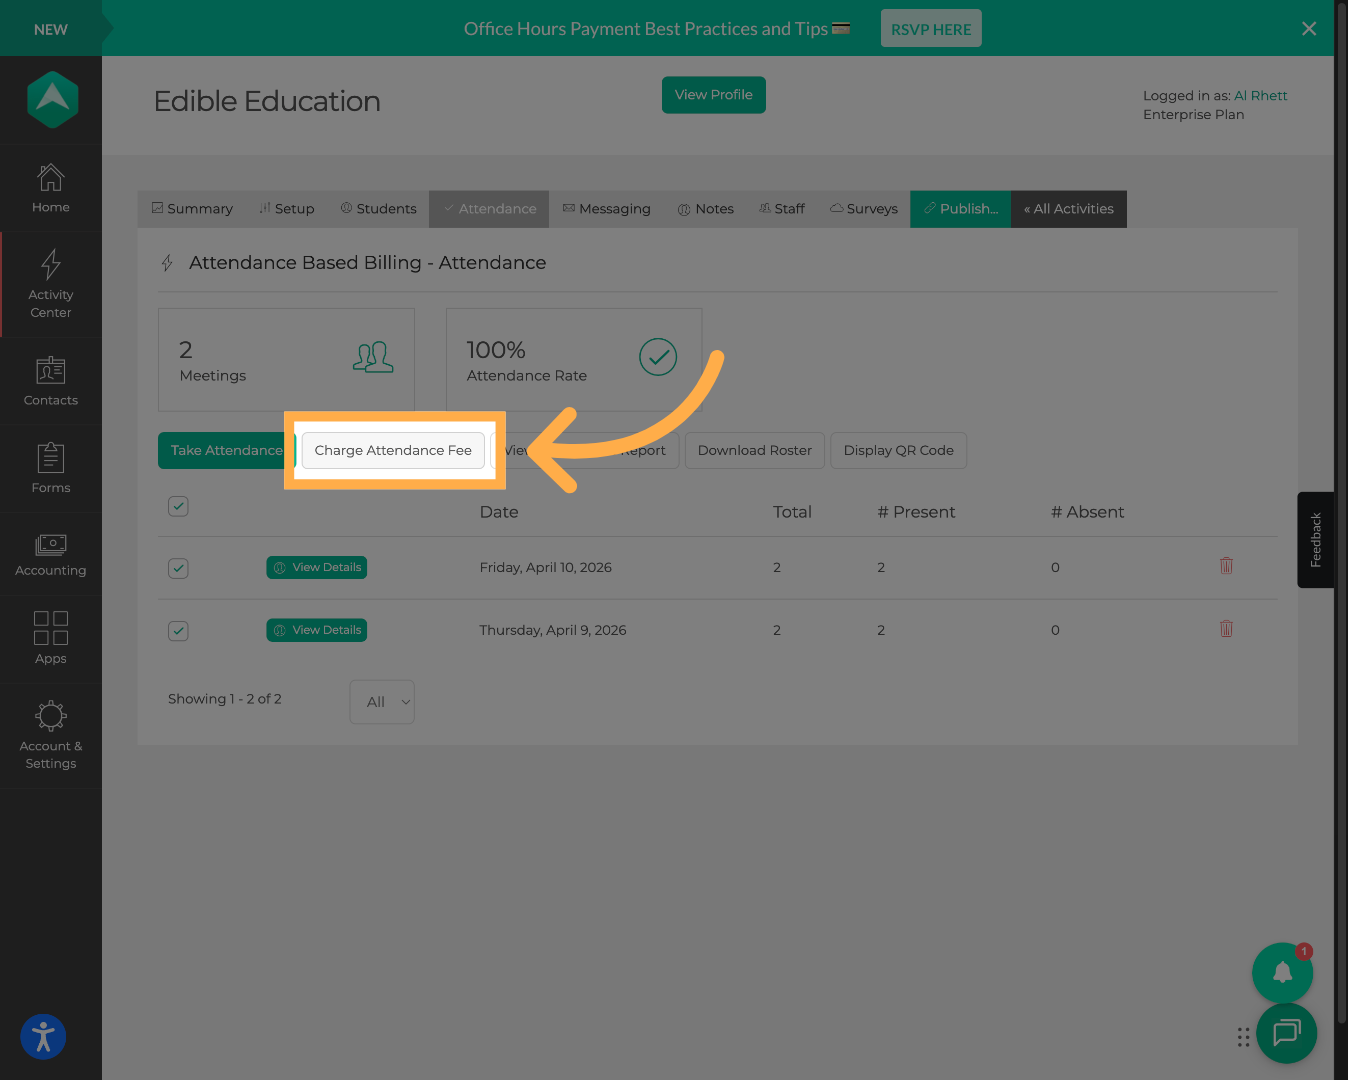
Once attendance has been recorded for an activity, you can charge parents directly from the “Attendance” tab.
Check the box next to each date you want to charge for.
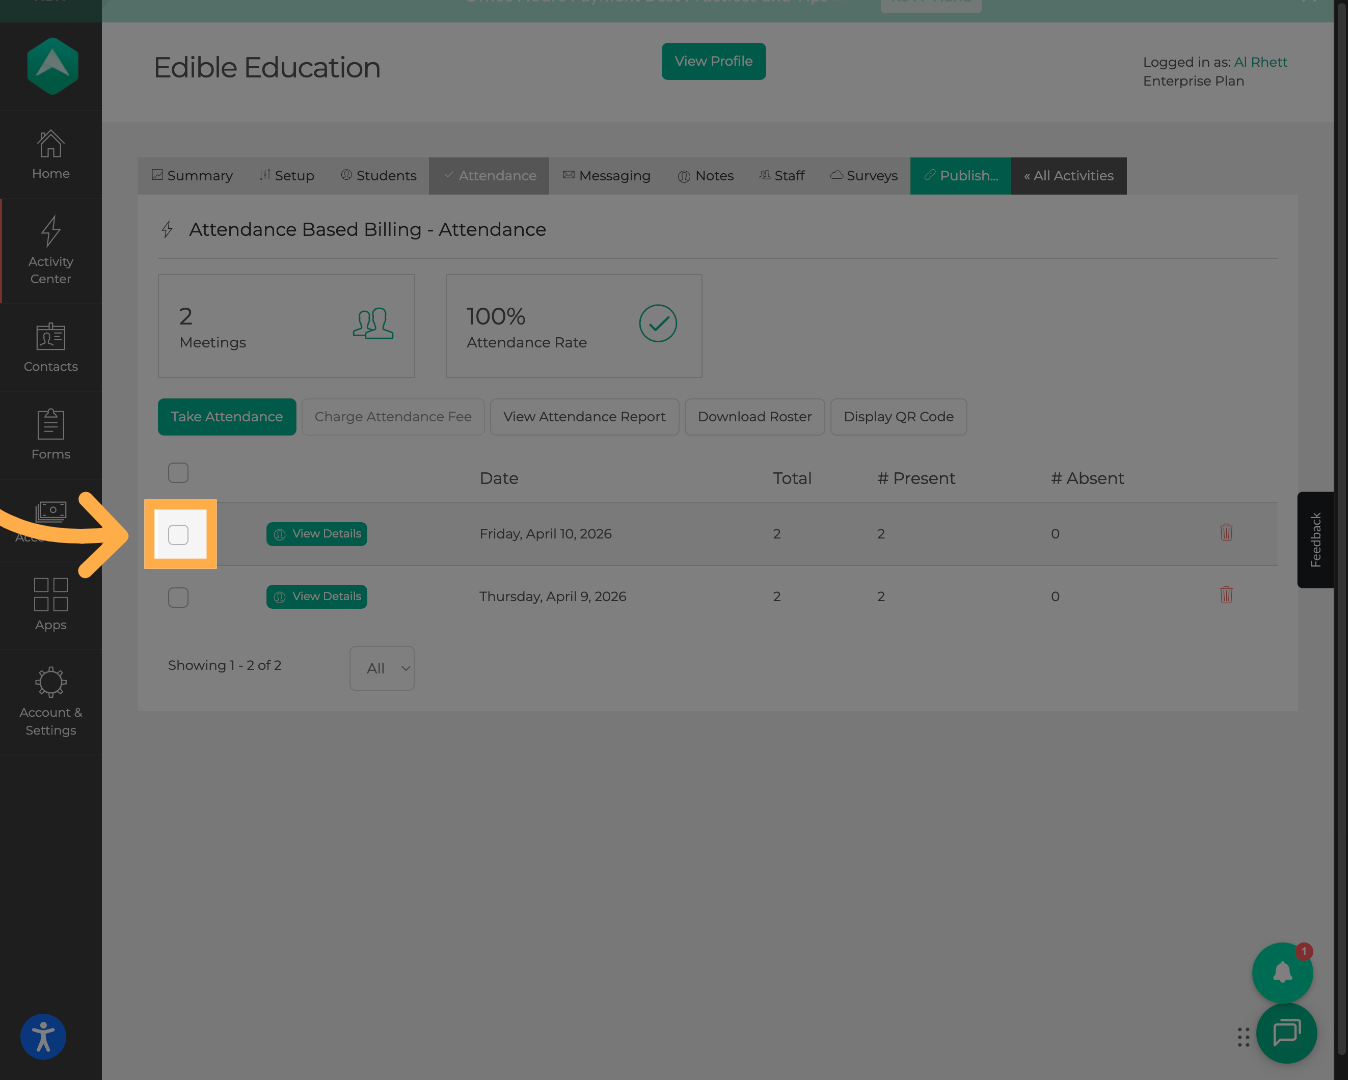
Click “Charge Attendance Fee” at the top of the page to process the charges for the selected dates.
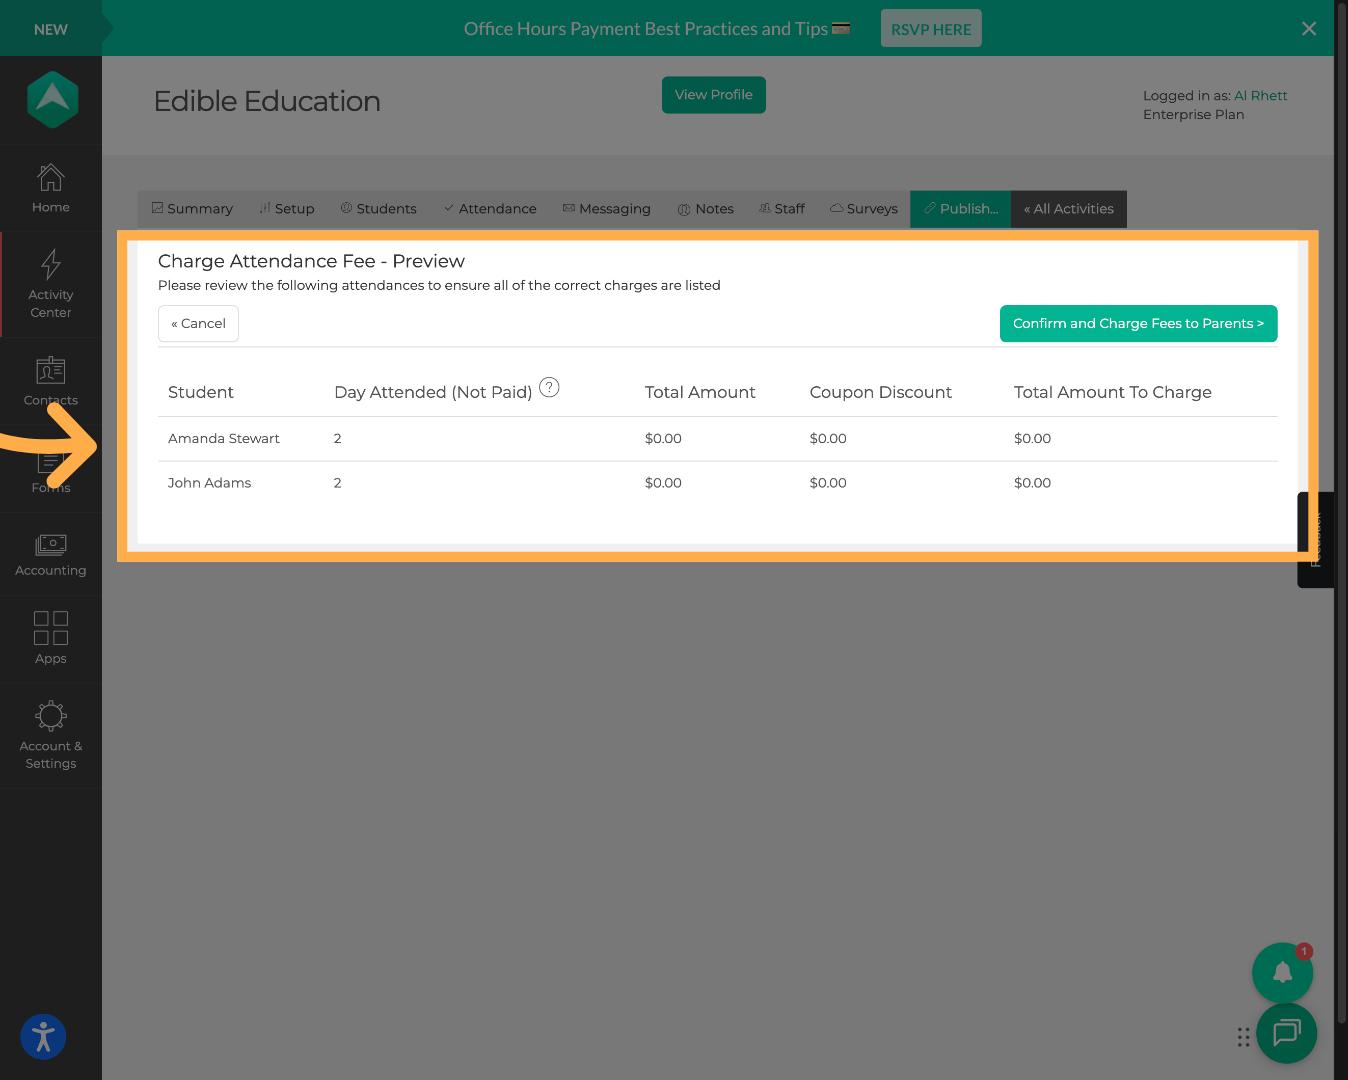
A preview screen will appear showing a breakdown of all pending charges, including each student's unpaid days attended, total amount, any coupon discounts applied, and the final total amount to charge.
Review the list to make sure everything looks correct, then click “Confirm and Charge Fees to Parents” to process the payments.
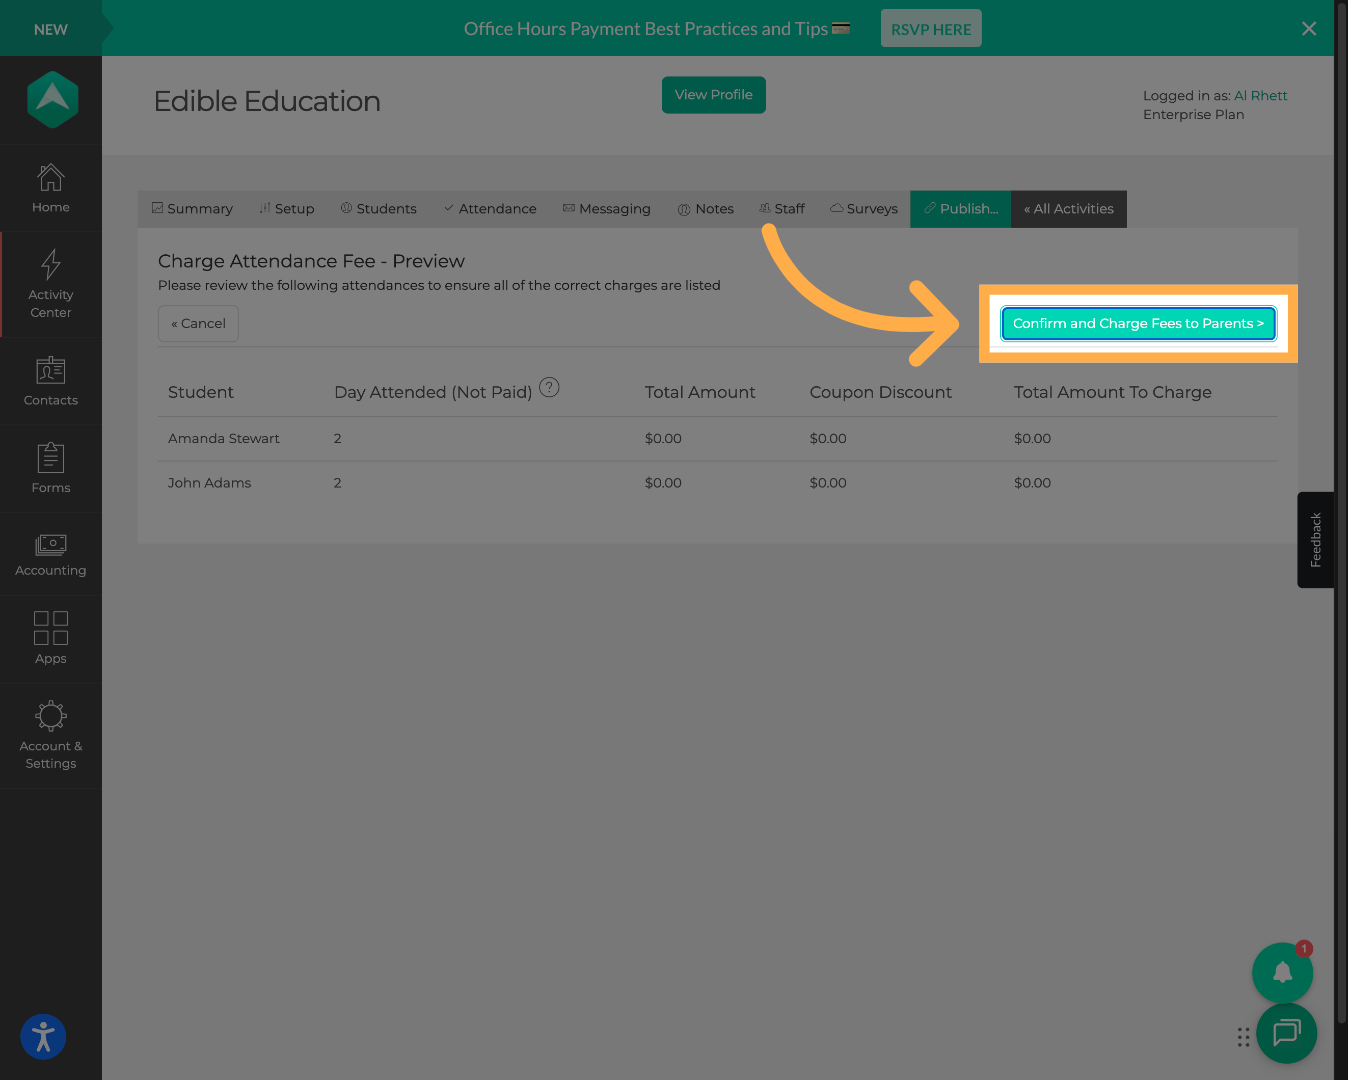
If anything looks off, click “Cancel” to go back.
💡Tip: You can select multiple dates at once to batch-charge several sessions in one click.
Frequently Asked Questions
Q: What is the processing fee and how does it affect my payout?
A processing fee is deducted from each payment collected. When you enter your per-day rate, you'll see your estimated net payout displayed directly below the Payment Amt field.
Q: Should I charge every day or every week?
It depends on your program. Daily billing gives you faster, more granular payment collection. Weekly billing consolidates charges into a single weekly transaction, which many families prefer.
Q: Can I use a pre-pay amount and a billing frequency at the same time?
Yes. You can collect a pre-pay amount at checkout and still charge for ongoing attendance on a daily or weekly basis.
Q: Can I turn attendance-based billing off after enabling it?
No. Once attendance-based billing is enabled on an activity, it cannot be turned off. This is to maintain data integrity and prevent modifications to an activity that already has payments associated with it.
Q: What happens if a student doesn't attend on a given day or week?
Parents are only charged for days their student is marked as attended. If no attendance is recorded, no charge is applied for that period.
💡If you experience any issues or have further questions about “How to use Attendance Based Billing”, don't hesitate to get in touch with our support team at support@afterschoolhq.com.