
FREQUENTLY ASKED QUESTIONS
1. Can I enable Check in and out for all my activities at once?
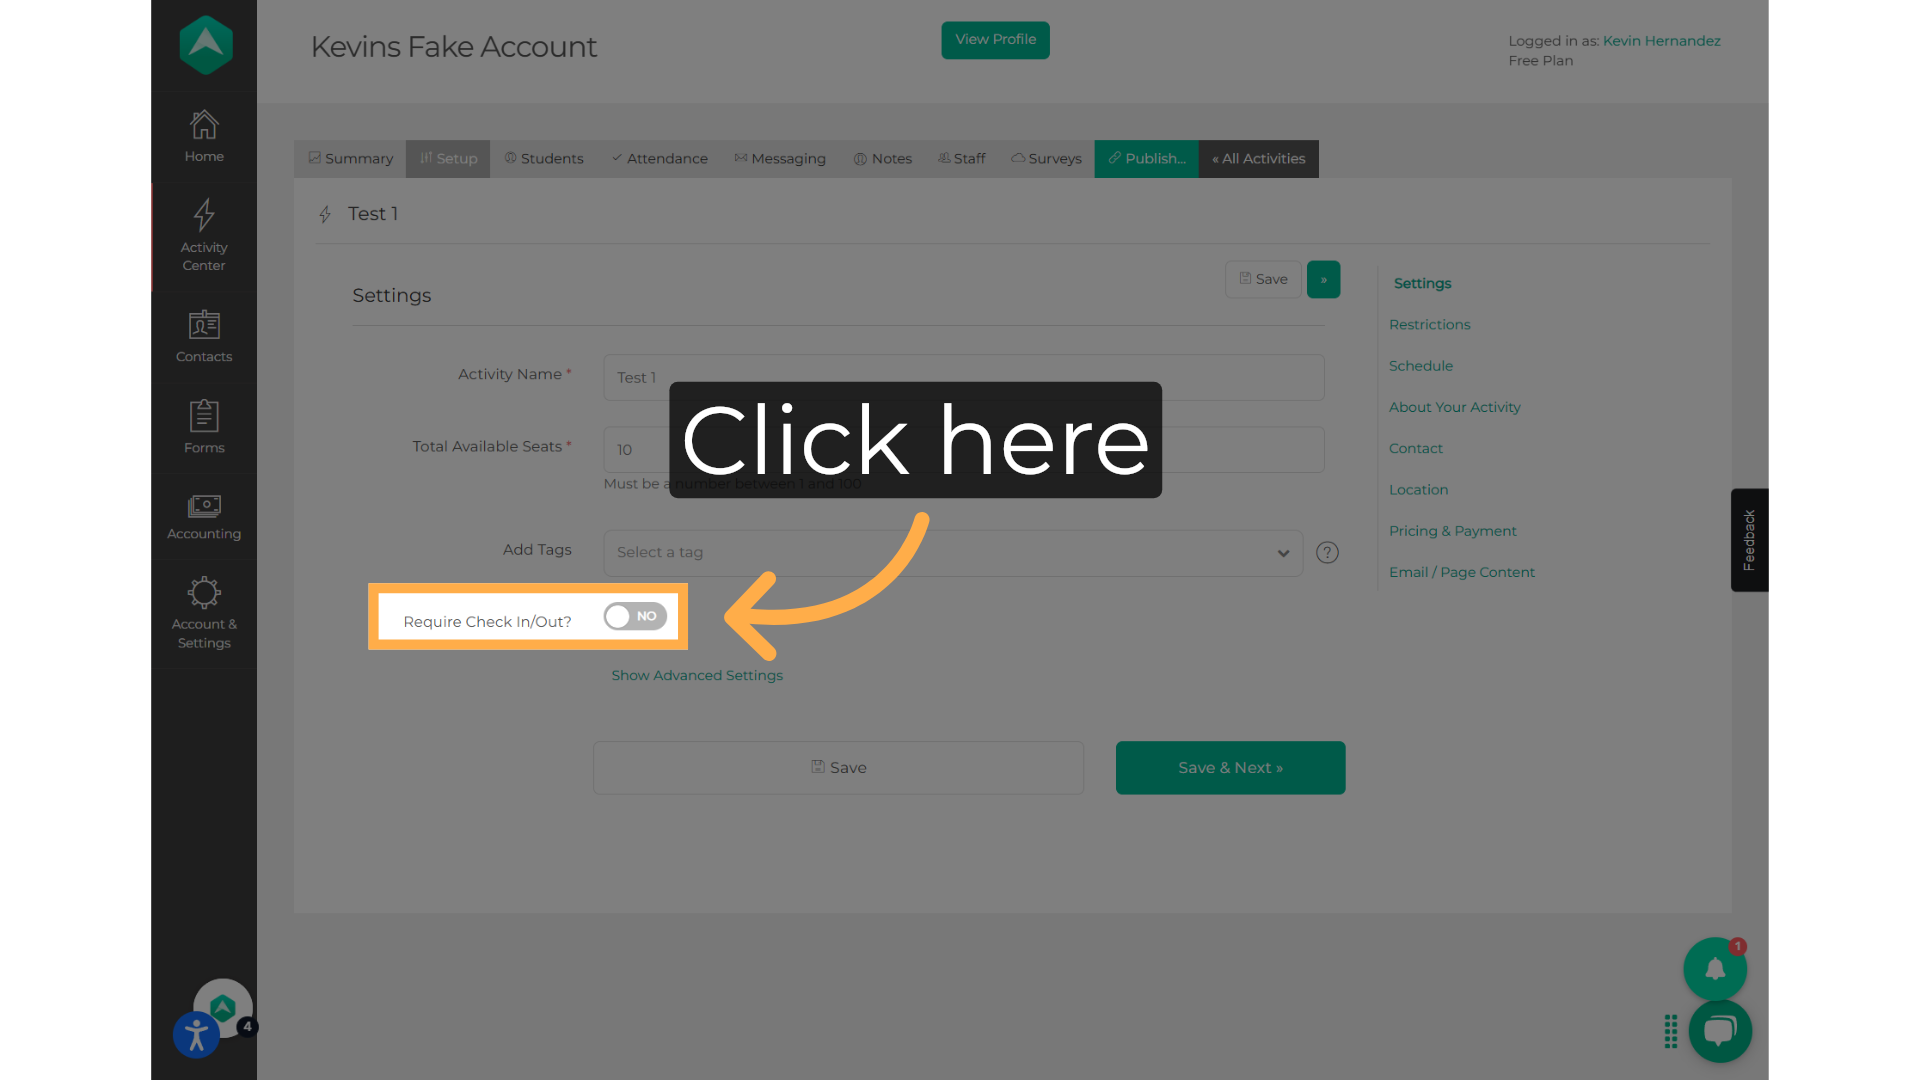
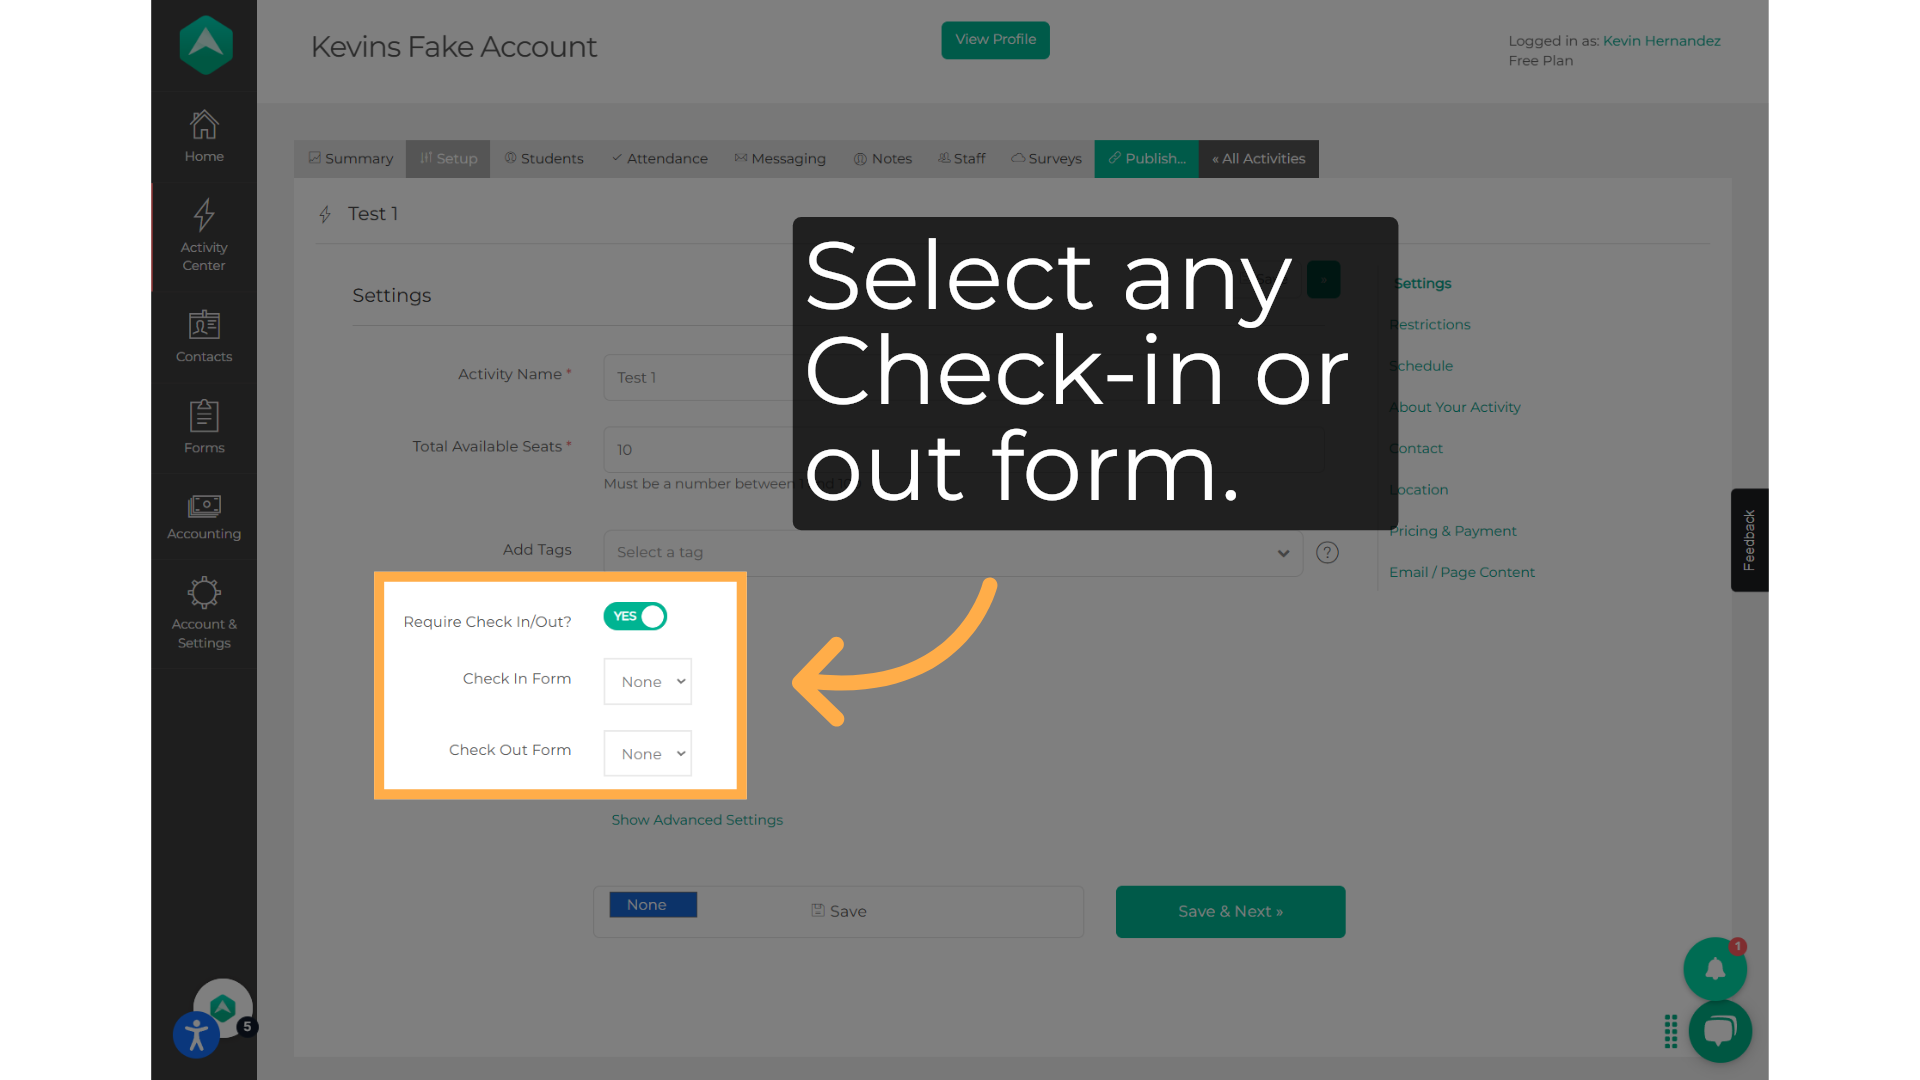
No, you will need to enable it one by one and make sure this is enabled when you create an activity. Always make sure to review all the options you need from the beginning, in this case, you can go back and change it later.
2. Why is in and out not working even though I enabled it as the guide says?
Make sure your activity is scheduled to take place today, this is something that you will be able to start from your home page as long as there is an activity that's going to take place the day you use it.
3. I don't see the option available for me. What can I do about it?
Only some subscription plans have this option available. Please get in touch with us at support@afterschoolhq.com in order to learn about the possible options we havefor you.
4. Is this available for all subscribers?
To learn if you are eligible for Check In & Check Out, contact us at support@afterschoolhq.com.
Resources For Providers:
• Provider: Check In & Check Out QR Code Display Ideas
• Provider: Manual Check In/Out
Resources For Parents:
• Parents: Enabling Check In & Check Out
• Parents: Using Check In & Check Out
• Parents: How to Remove and Restore Access to Check In & Check Out
• Parents: How to Rest Your PIN for Check In & Check Out
💡If you have any questions or experience any technical difficulties with Provider: Enabling Check In & Check Out, don't hesitate to get in touch with our support team at support@afterschoolhq.com