Skip to content
English
  • There are no suggestions because the search field is empty.

How to Create a Session and Add Activities

Learn how to create a session and add activities so families can register for multiple programs at once.

Need help setting up a session? No worries — follow the steps below or watch the video tutorial for a quick walkthrough on how to create a session and add activities in AfterSchool HQ.
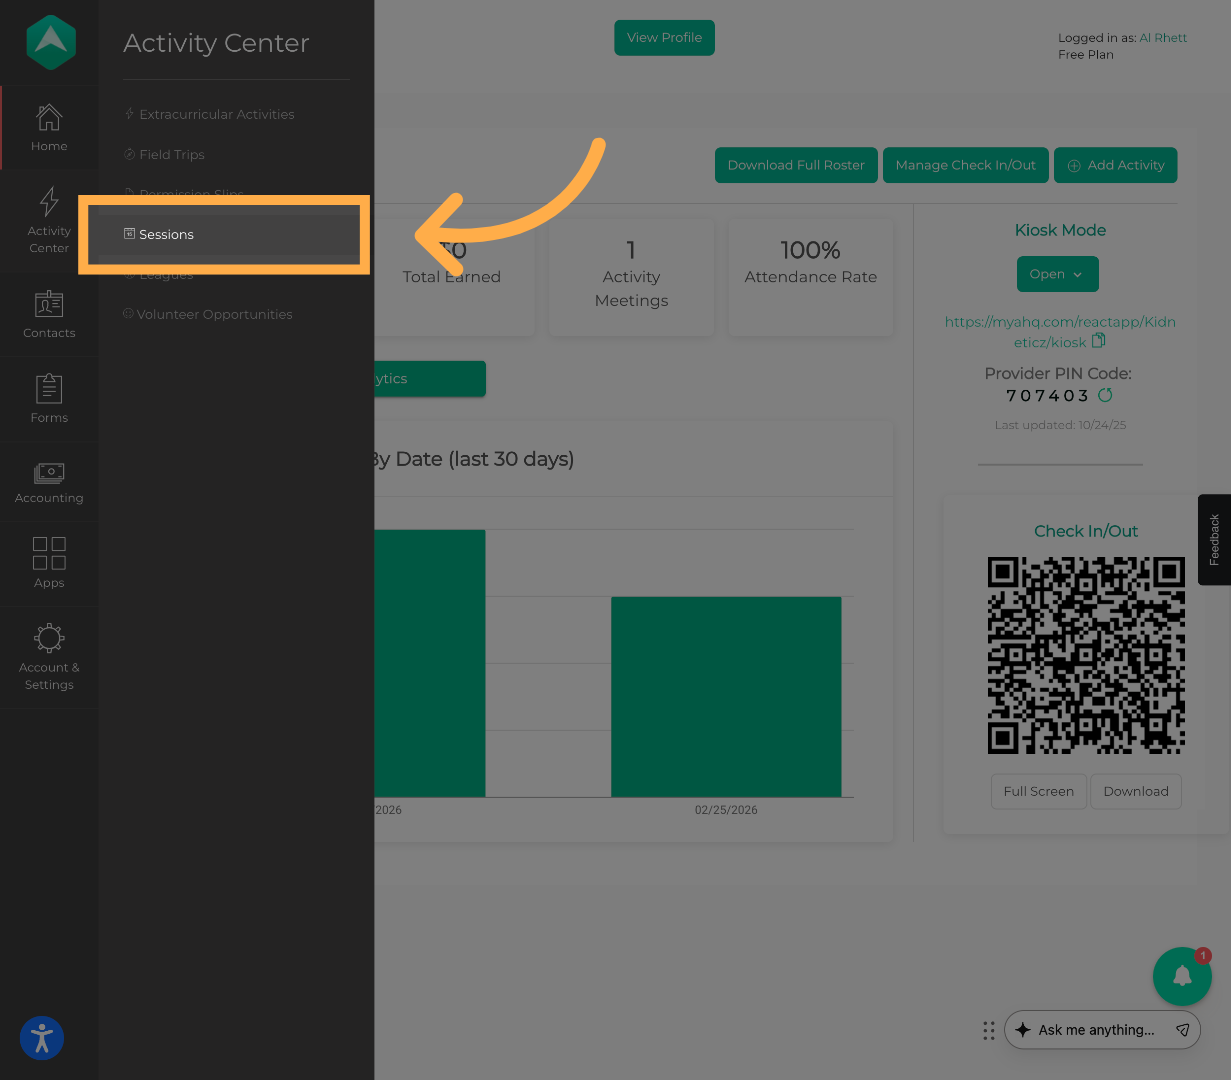
00:05: This article explains how to create and configure a session in AfterSchool HQ.

00:10: You will learn how to set up session details, registration periods, and content to manage your activities effectively.

00:17: This article explains how to create and configure a session in AfterSchool HQ.

00:22: You will learn how to set up session details, registration periods, and content to manage your activities effectively.

00:30: Click sessions to view and manage existing sessions or create new ones.

00:36: Click Create Your First Session to begin setting up a new session.

00:40: If you've already created sessions, click Add Session to create another one.

00:46: Click the Session Name field and enter the name of your session.

00:50: Add Session Details

00:52: Click select registration form to choose or create a registration form for the session.

00:58: Click the toggle to set the session as ''Invite Only''

01:02: Choose a Registration Mode

01:04: Click save to store all session settings and registration details.

01:09: Click content to manage the sessions content and messaging.

01:13: Customize the registration or applicatio confirmation message.

01:18: Click here to edit the confirmation message content.

01:21: Click save to apply changes made to the session content and messages.

01:27: Click registration periods to manage the time frames for session registration.

01:32: Click create a new registration period to define a new registration timeframe.

01:37: Click create a new registration period to begin setting up the period details.

01:43: Click Add Registration Period to add another new registration period to the session.

01:49: set the start date for the registration period.

01:52: Click the 7th of March 2026 to set. The end date for the registration period.

01:58: Click save registration period to confirm and save the registration time frame.

02:04: Click activities to view and manage your activities.

02:08: Click here to access details of the selected activity.

02:12: Click your activity name, 75 characters to edit the activity title.

02:18: Click here to set the participant limit for the activity.

02:22: Click select a tag to categorize your activity with relevant tags.

02:26: Click save and next to save your changes and continue to the next step.

02:31: Click save. And next again to proceed further in the session setup.

02:36: Click save. And next again to proceed further in the session setup.

02:41: Click show advanced settings to access additional configuration options.

02:46: Click Send to select Sunday for scheduling purposes.

02:50: Click date one to manage session dates.

02:54: Click save and next to save date, settings and proceed.

02:58: Click here to enter detailed information about your activity.

03:02: Click save and next to save activity, details and continue.

03:07: Click test test to choose the test activity for editing a review.

03:12: Click show advanced settings to reveal more configuration options.

03:16: Click save and next to save changes and proceed to the next step.

03:21: Click virtual to select the virtual session type.

03:25: Click save and next to save capacity, settings and continue.

03:30: Click https colon slash slash myq.com slash kidnetics to access the sessions public URL.

03:38: click https colon slash slash myacu.com slash kidnetics / session / after school HQ session to view the specific session page

03:49: You have successfully created and configured a session in after-school HQ including setting session, details, registration periods, content and participant limits.

03:59: for more information, explore related articles on managing sessions and activities within after-school, HQ


1. Access Sessions

Navigate to Activity Center, then click Sessions”.

Access the Activity Center

2. Create a Session

Click Create Your First Session” to begin.

Start Creating First Session

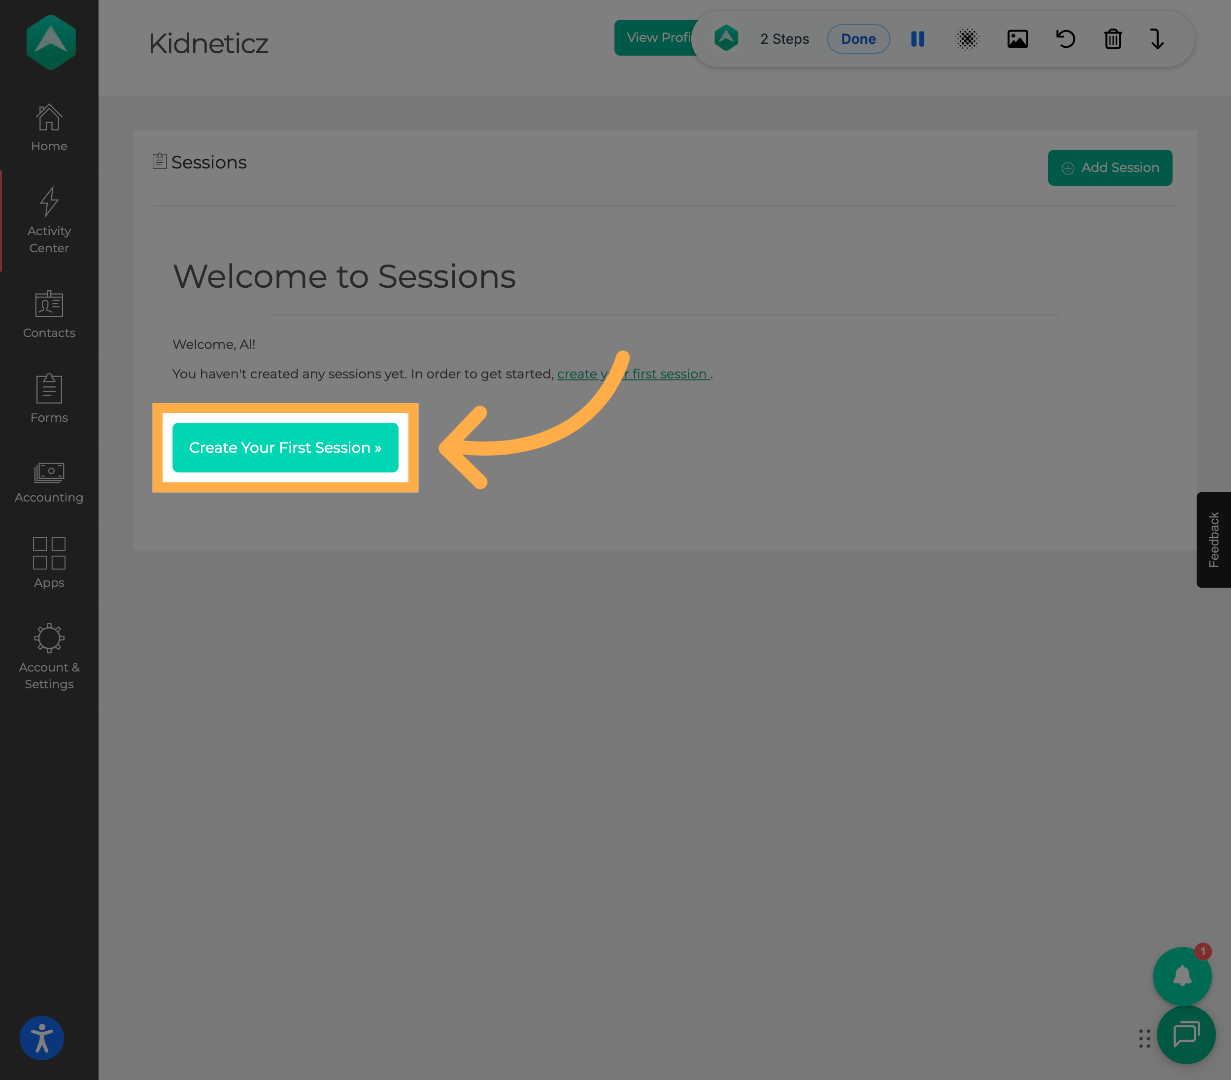
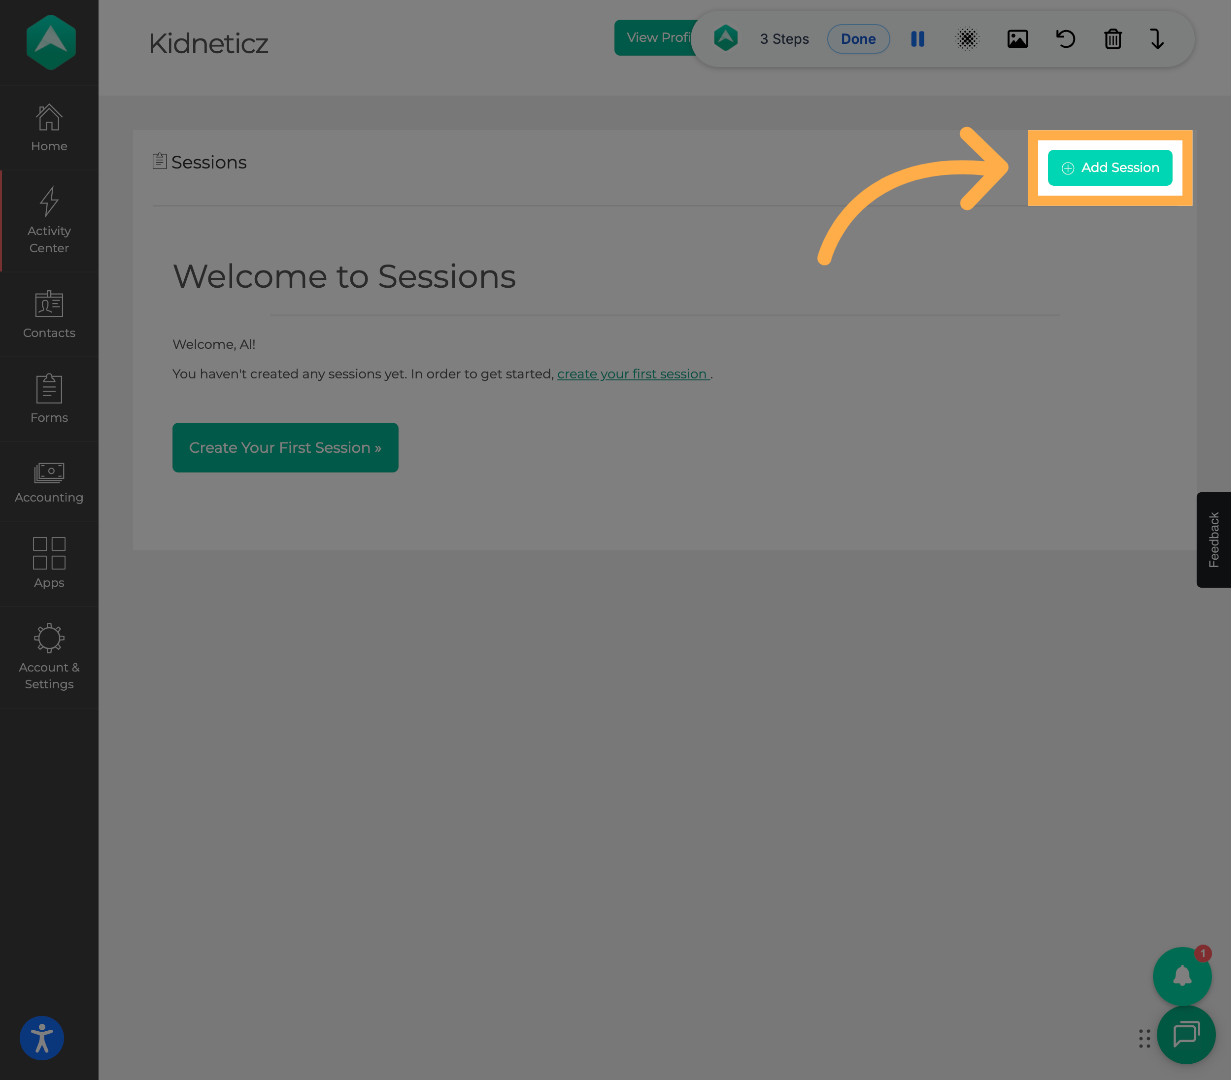
If you already have sessions created, click Add Session” instead.

Add New Session

💡Tip: Activities created inside a Session cannot collect payments.

If you need to charge fees or tuition, you must create the activity under Extracurricular Activities instead.

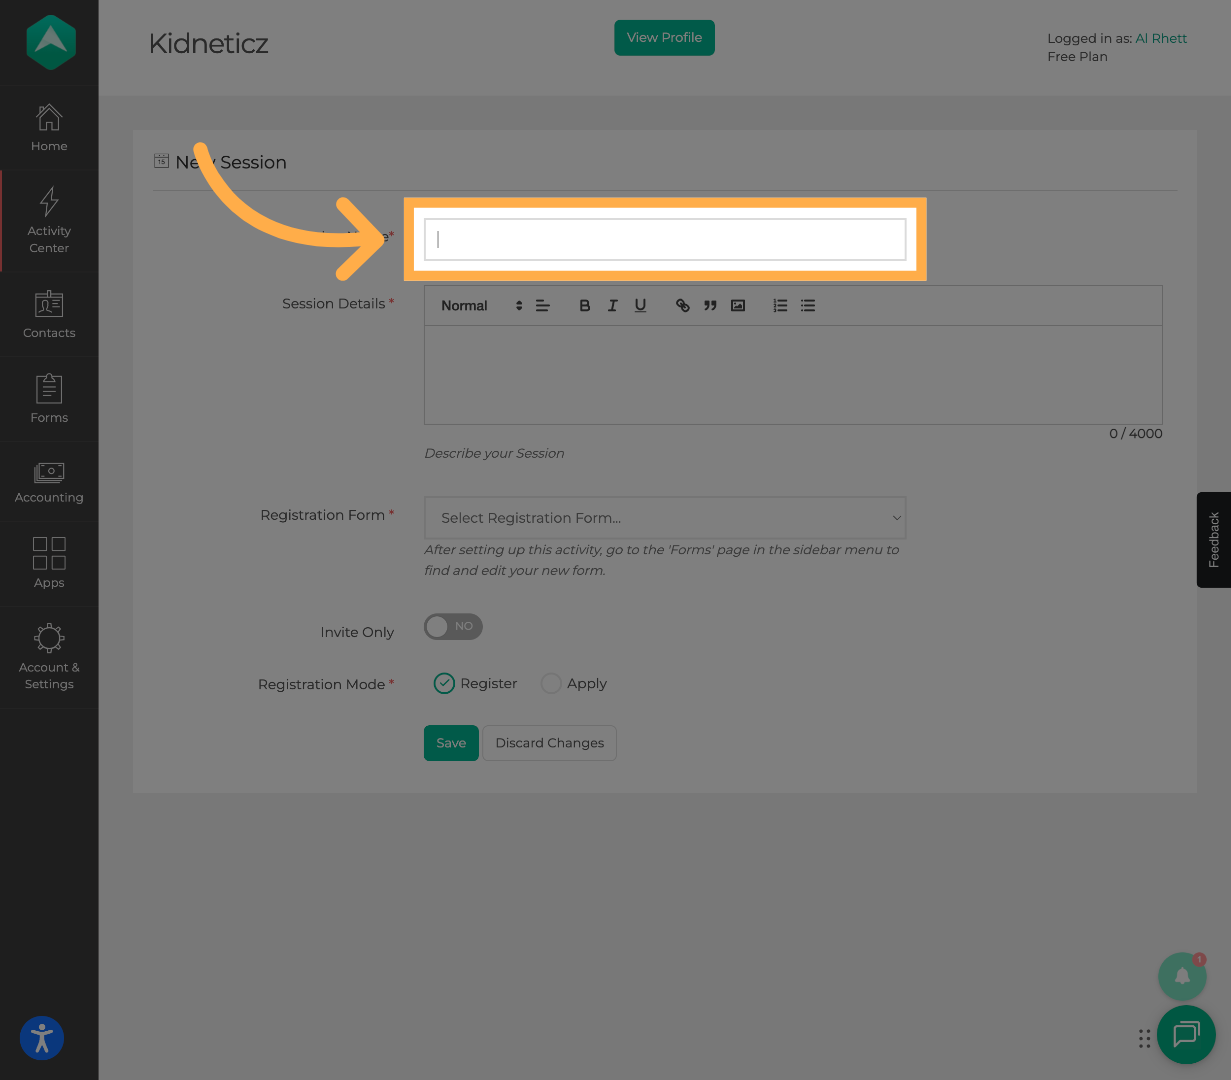
3. Enter Session Name

Enter the Session Name and complete the session details.

Enter Session Name

Enter Session Details
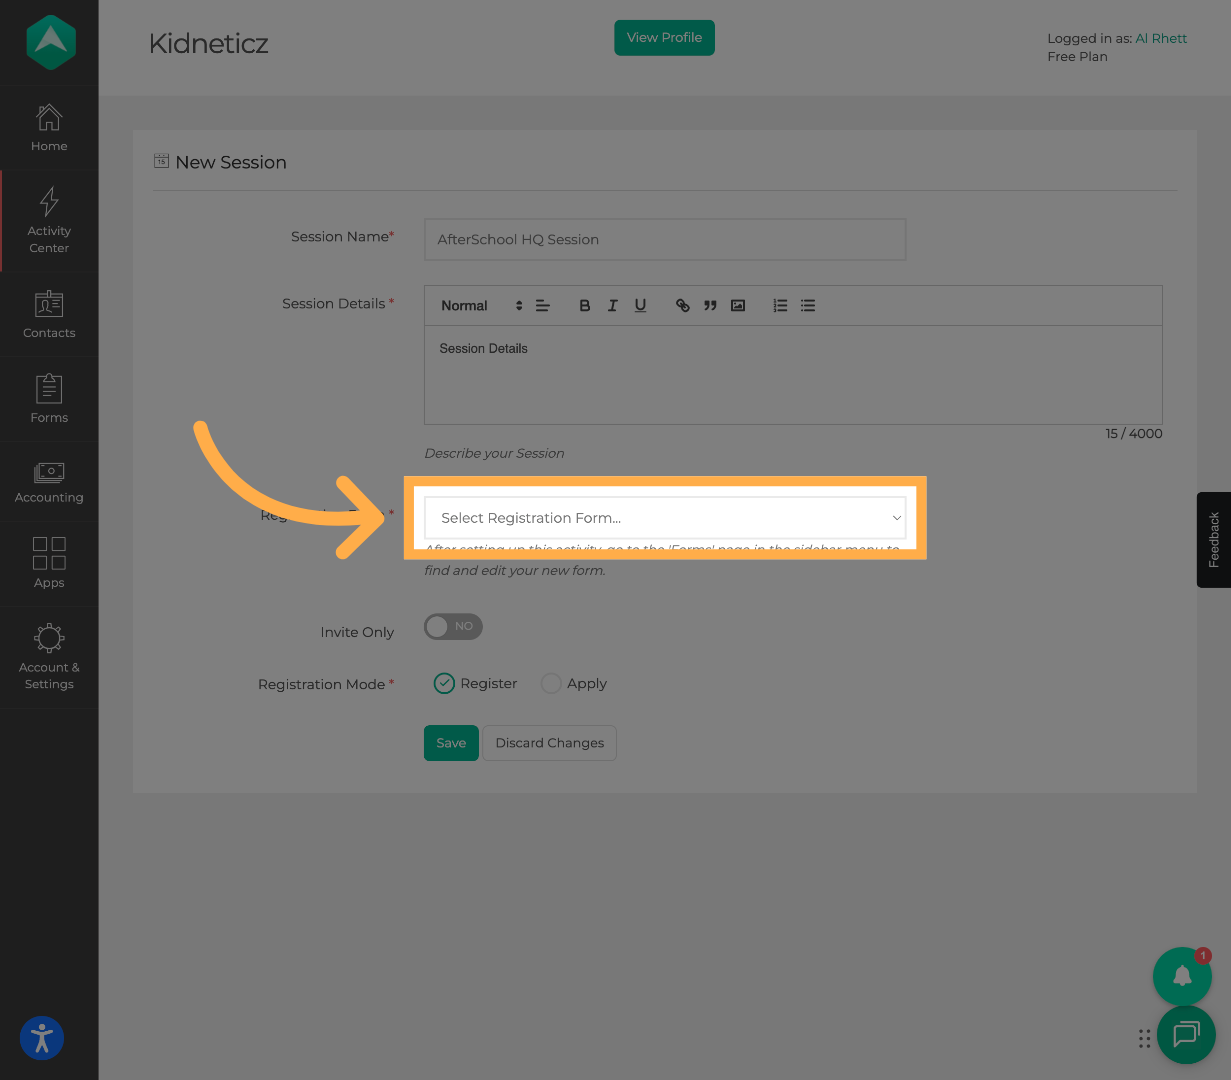
4. Select a Registration Form

Choose the registration form participants will complete.

Select a Registration Form

5. Set Invite-Only Access (Optional)

Enable the Invite Only toggle if you want the session to remain private. When enabled, only invited participants will be able to access the session.

Make your Session Private

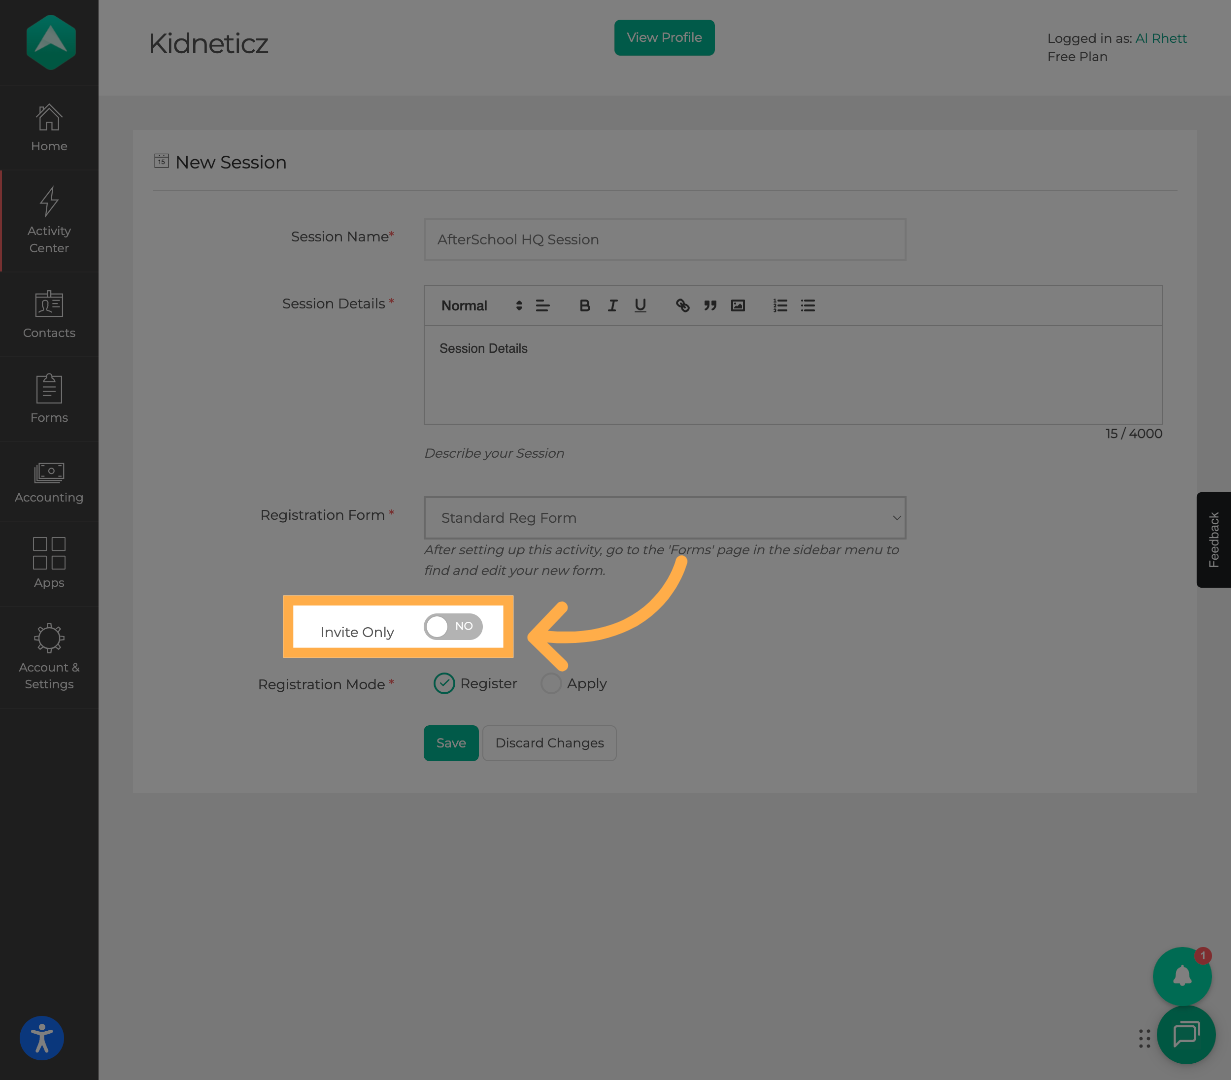
💡Tip: Enable the Invite Only toggle if you want the session to be accessible only to invited participants.

Please note, this setting applies to the entire session, not individual activities.

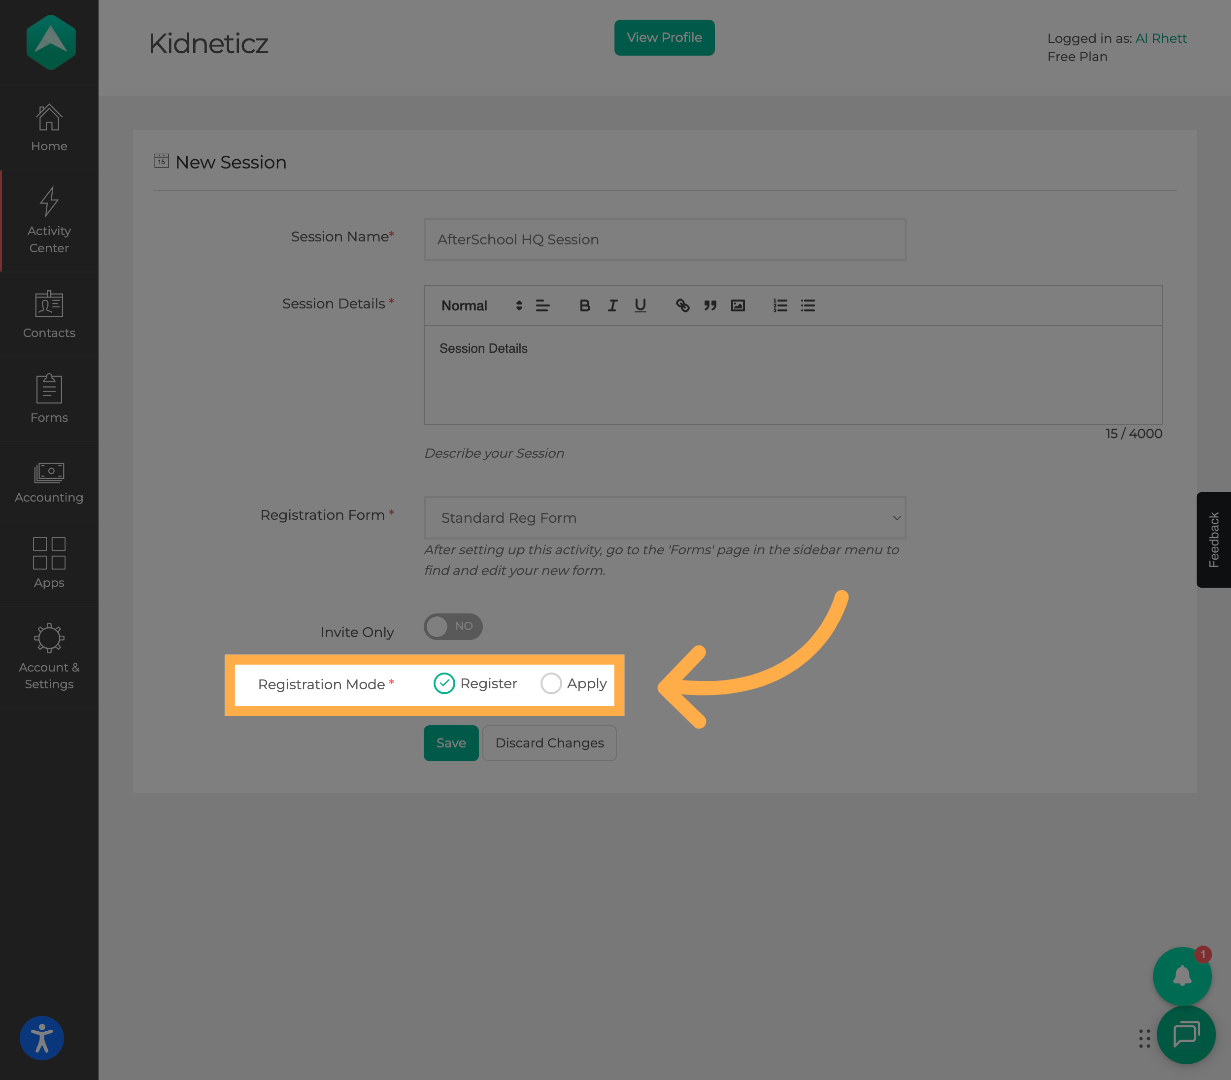
6. Choose a Registration Mode

Select how participants will register for the session.

Registration Modes

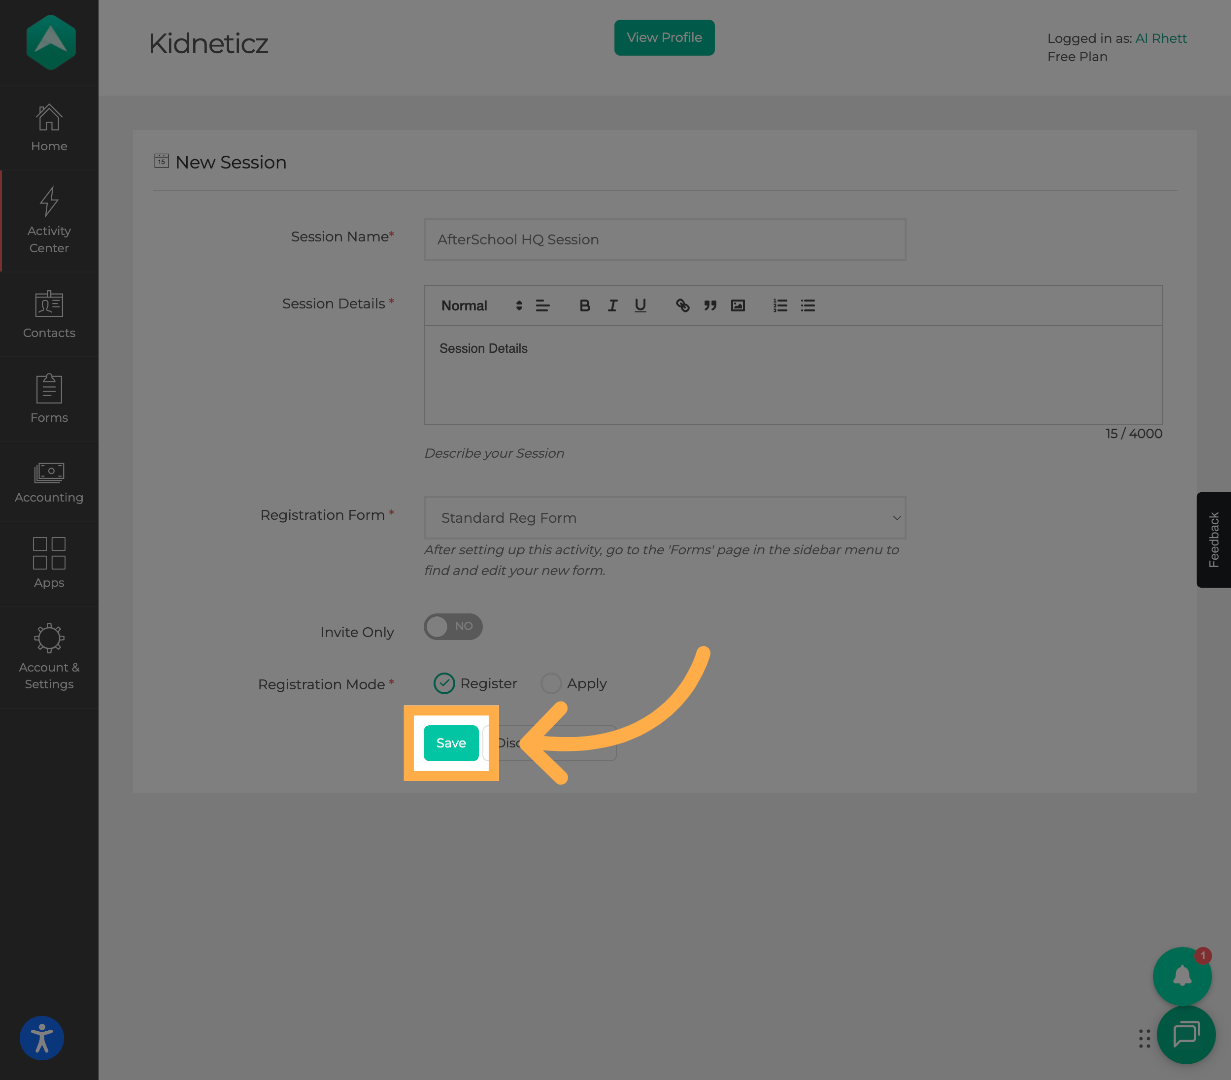
7. Save Your Session

Click Save” to store the session settings.

Save Session Settings

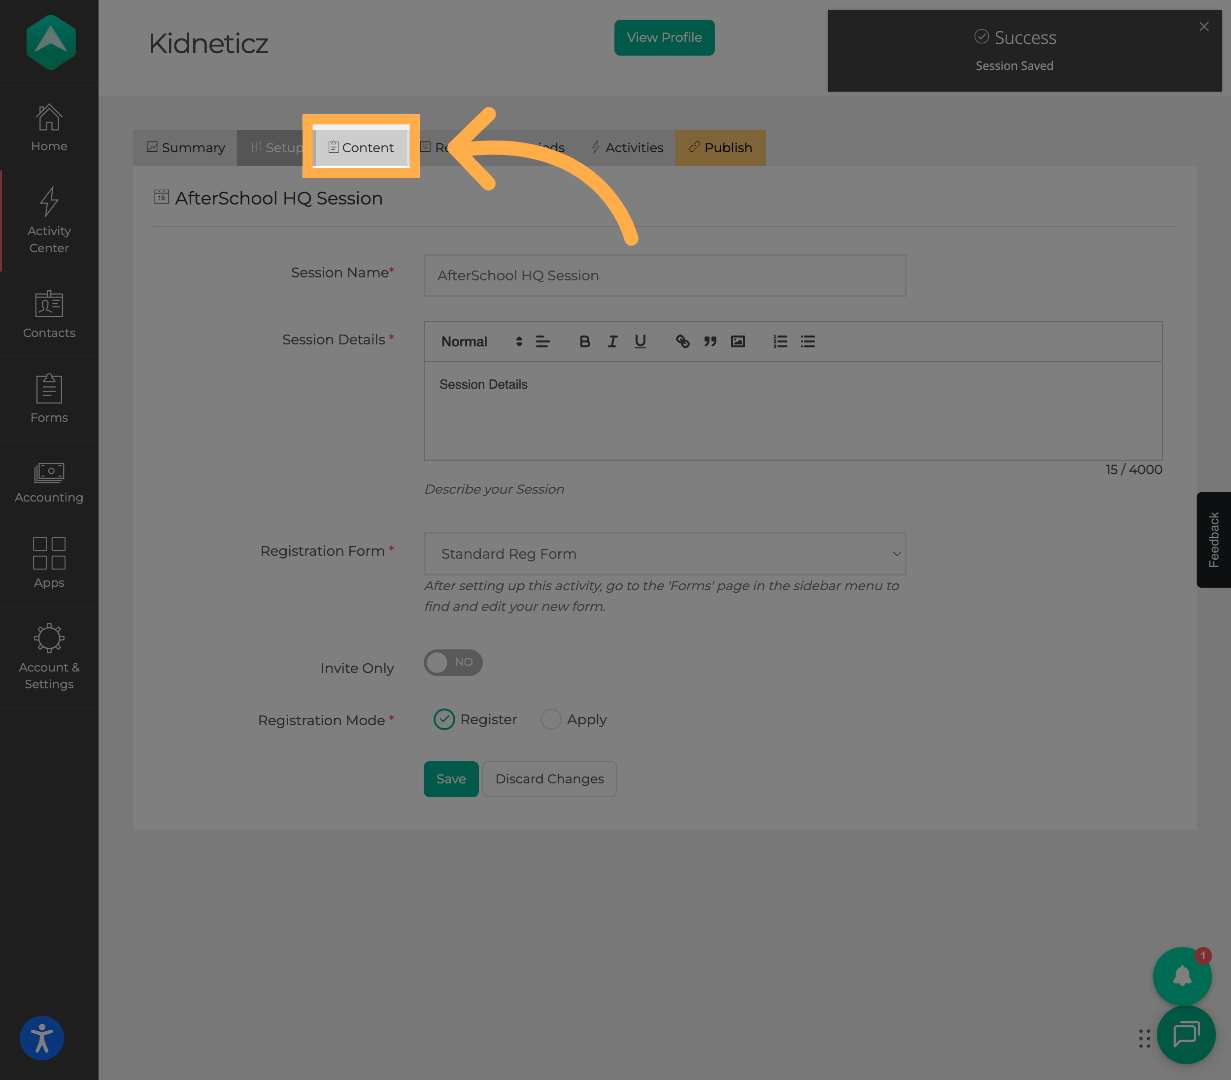
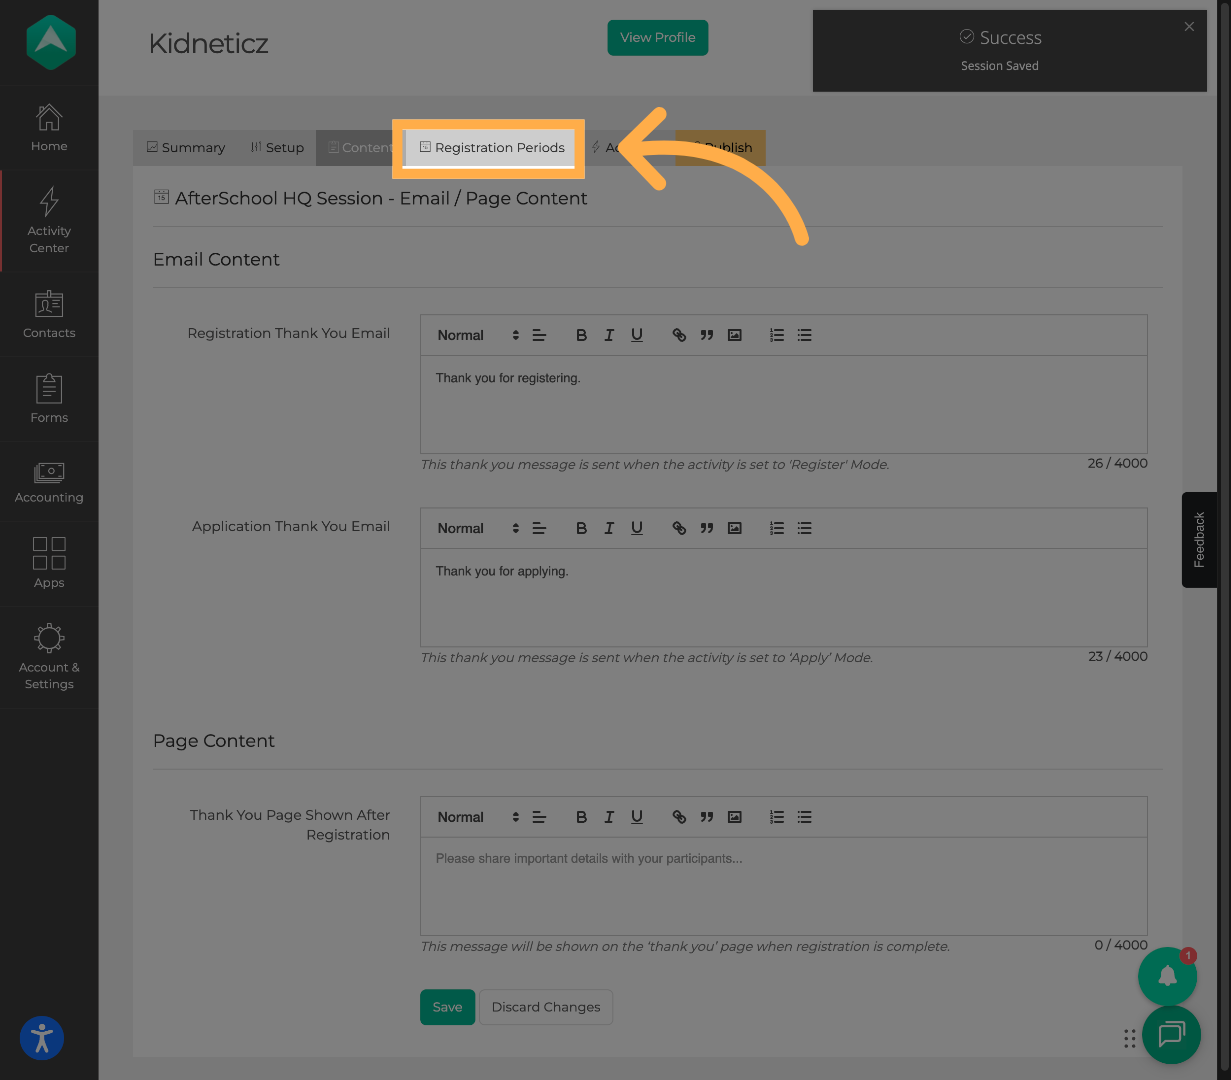
8. Open the Content Tab

Click Content” to manage messaging for the session.

Access Content Tab

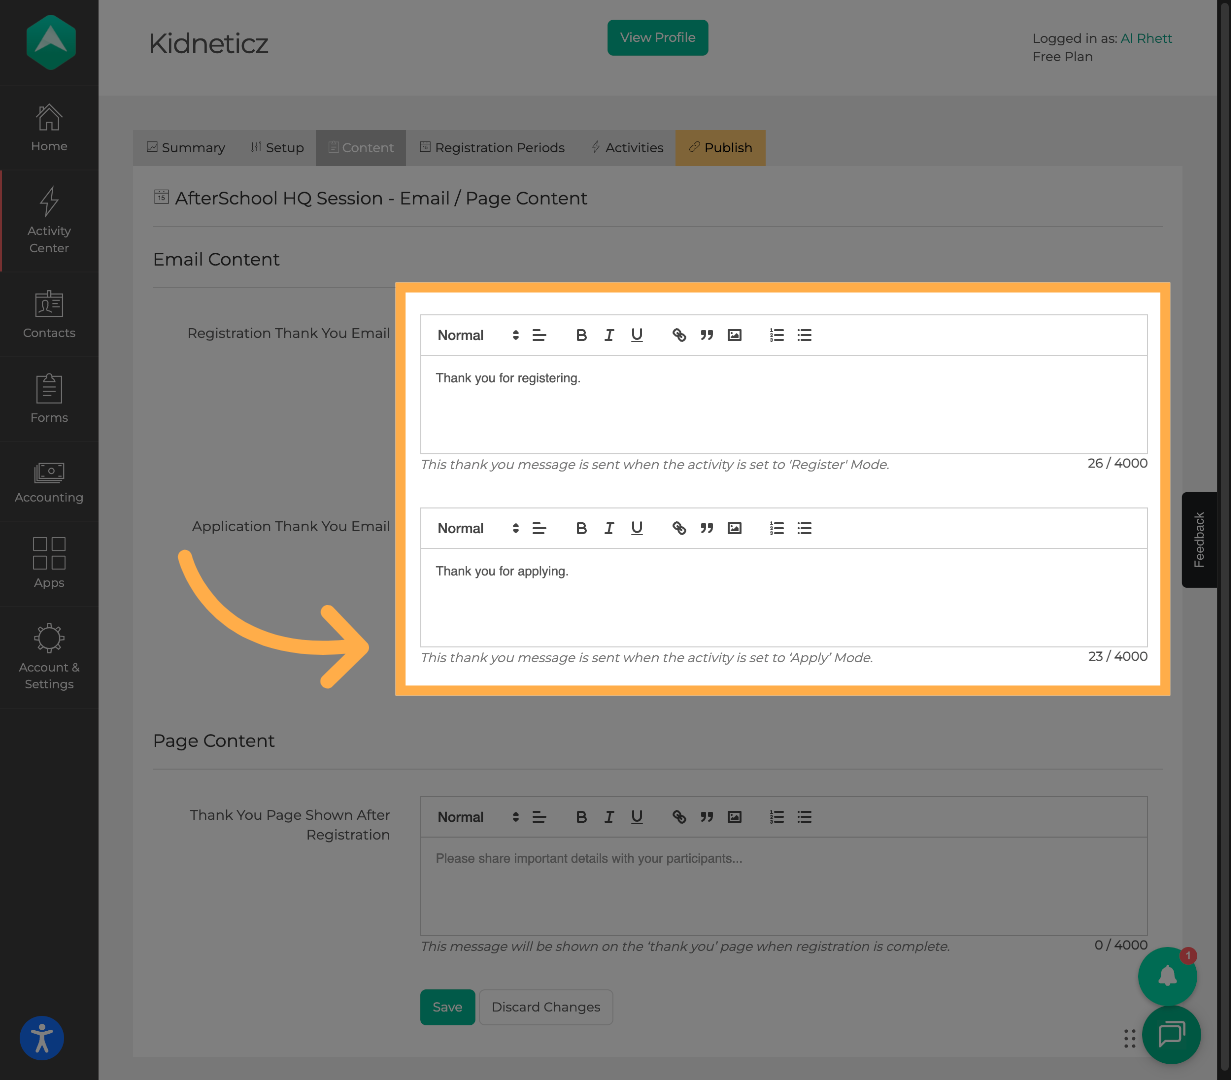
9. Edit Confirmation Message

Customize the message participants receive after registering or applying.

Edit Confirmation Message

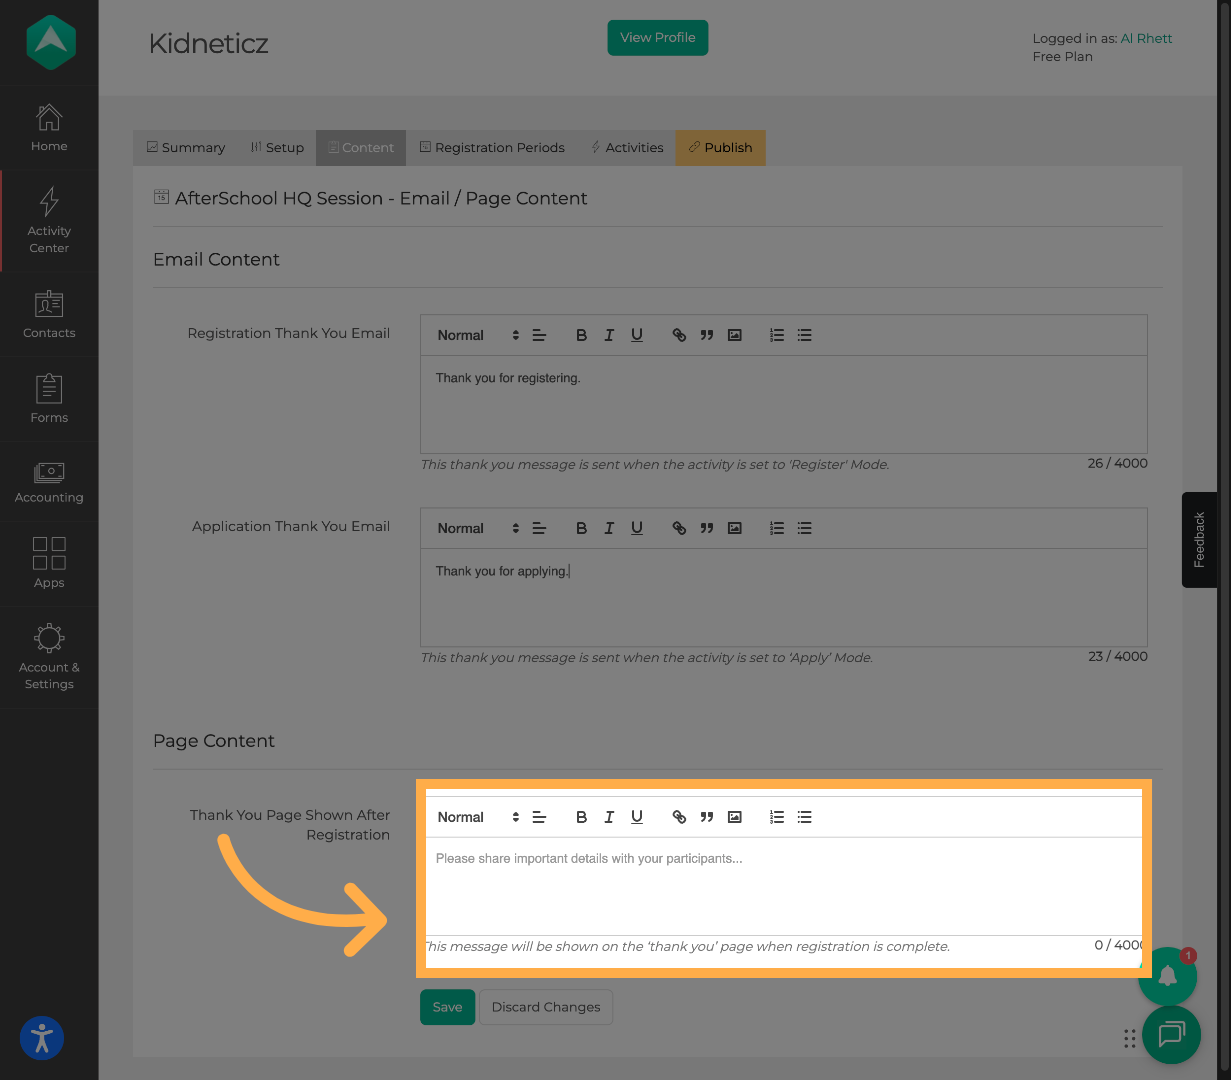
10. Update Page Content

Edit the confirmation page content that appears after registration.

Edit Page Content

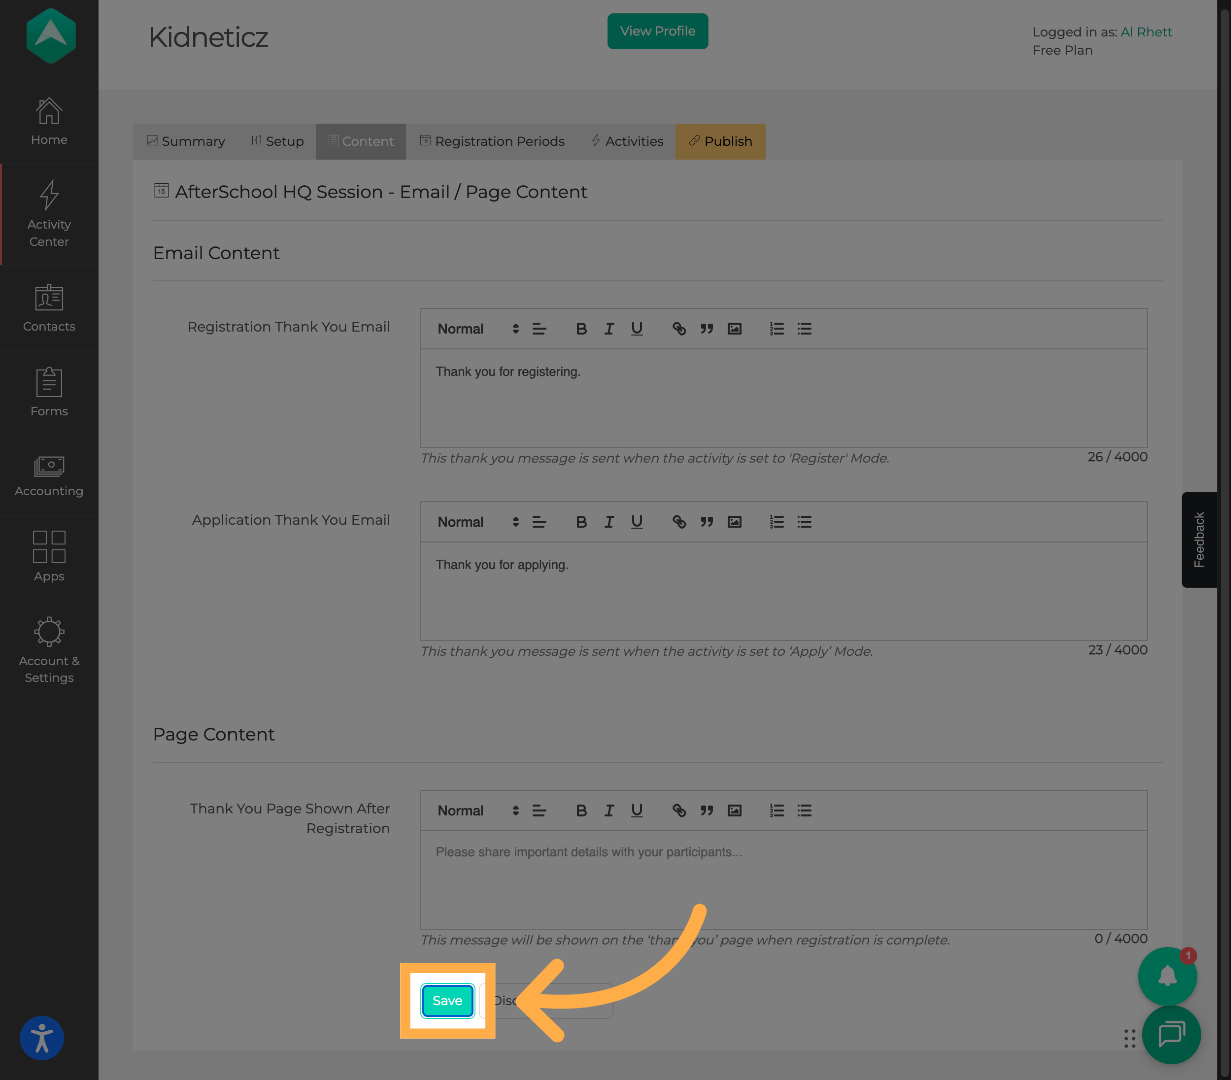
11. Save Content Changes

Click Save” to apply your updates.

Save Content Changes

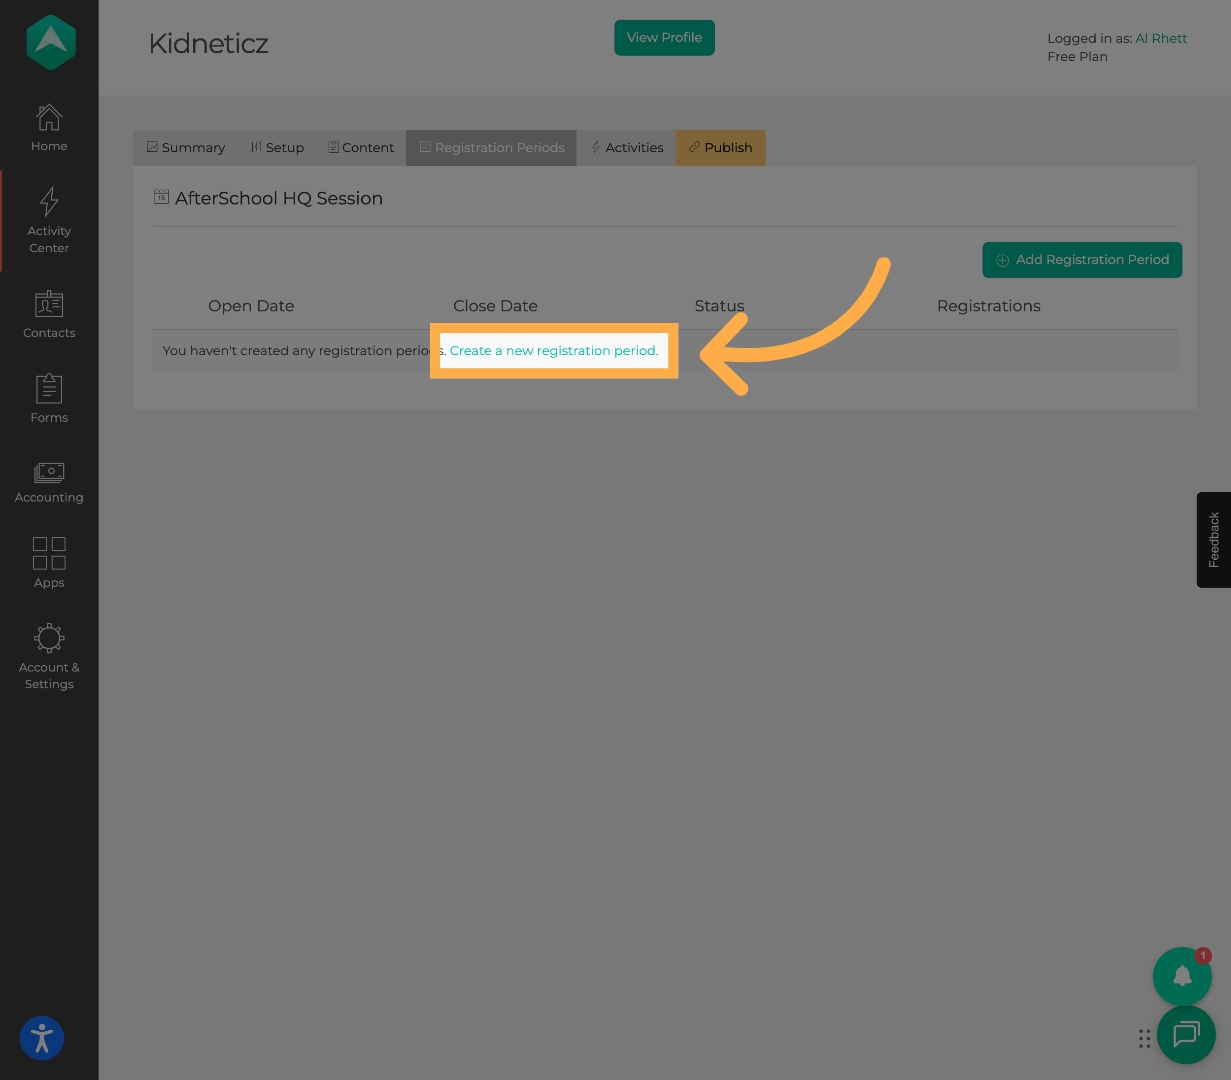
12. Open Registration Periods

Click Registration Periods” to manage registration timeframes.

Open Registration Periods

💡Tip: Make sure the registration period is active so families can see and register for the session activities.

13. Create a Registration Period

Click Create a New Registration Period”.

Create New Registration Period

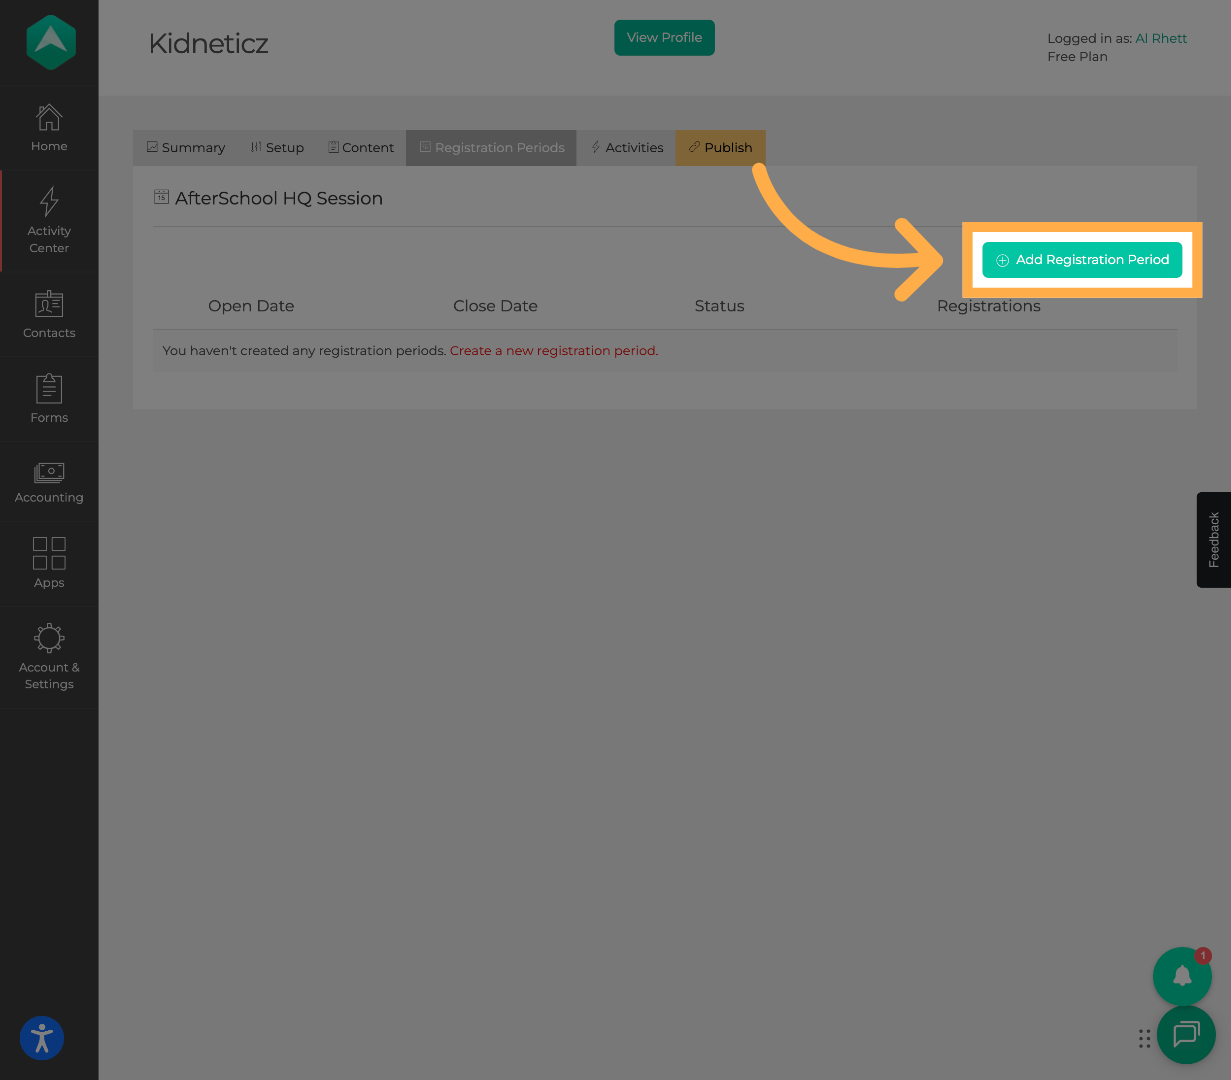
14. Add an Existing Registration Period (Optional)

If one already exists, click Add Registration Period”.

Add Registration Period

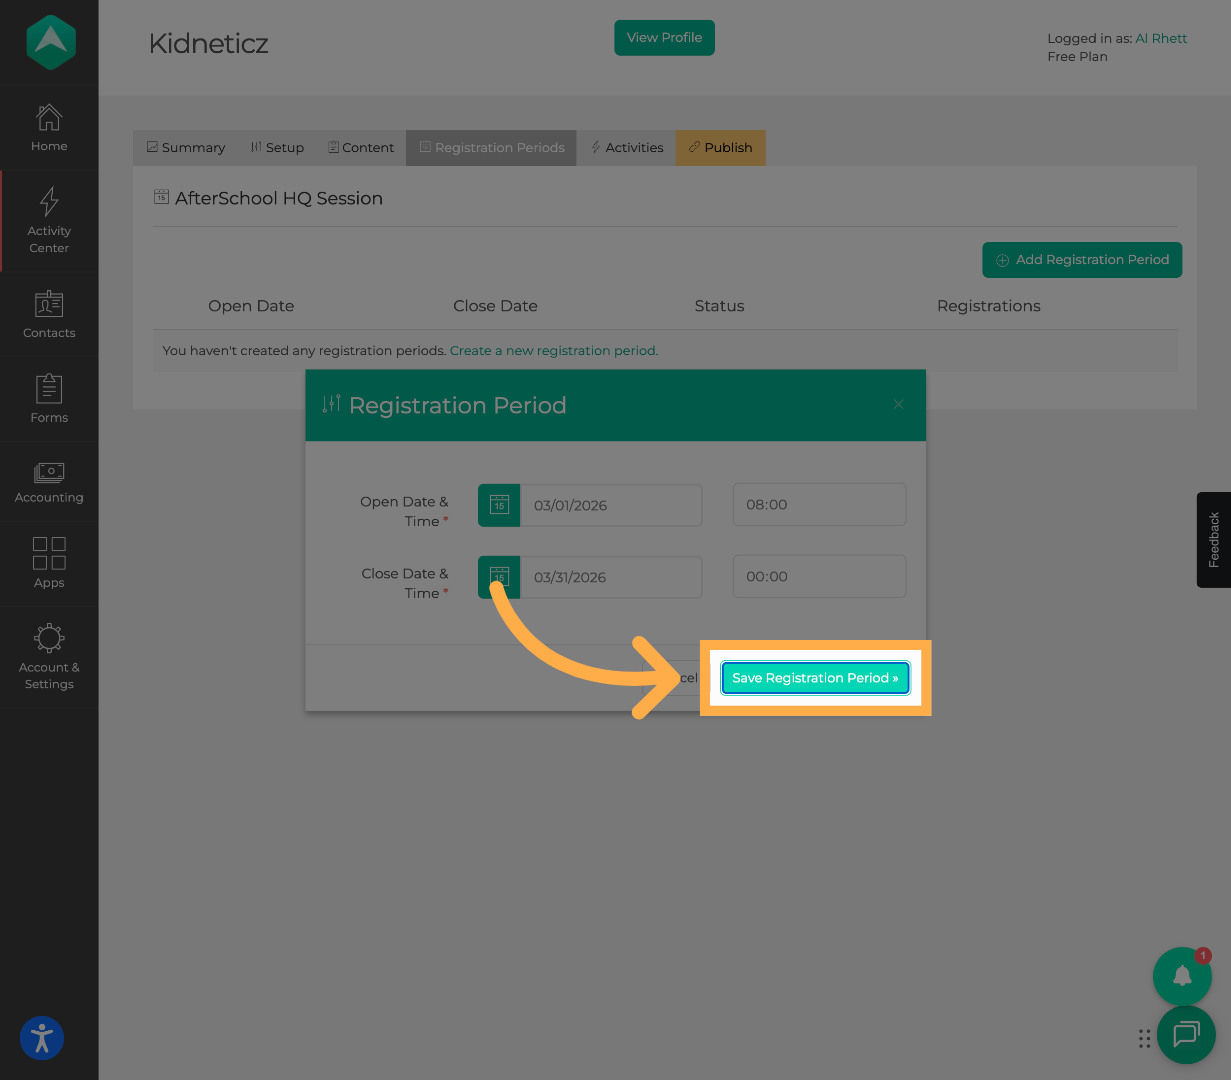
15. Select Registration Dates

Set the start and end dates for registration.

Select Start and End Date

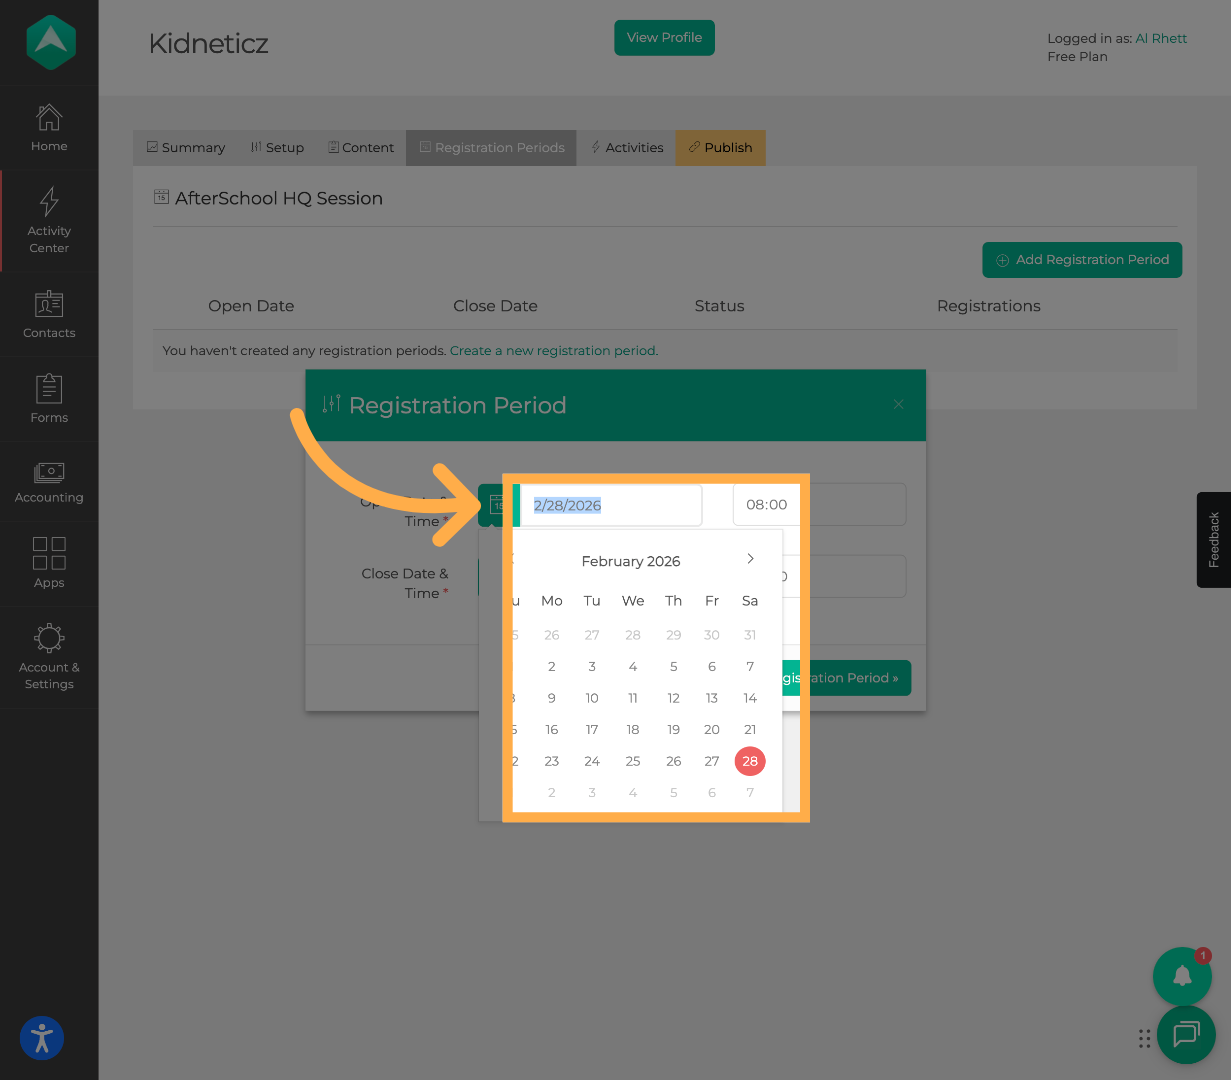
16. Save Registration Period

Click Save Registration Period”.

Save Registration Period

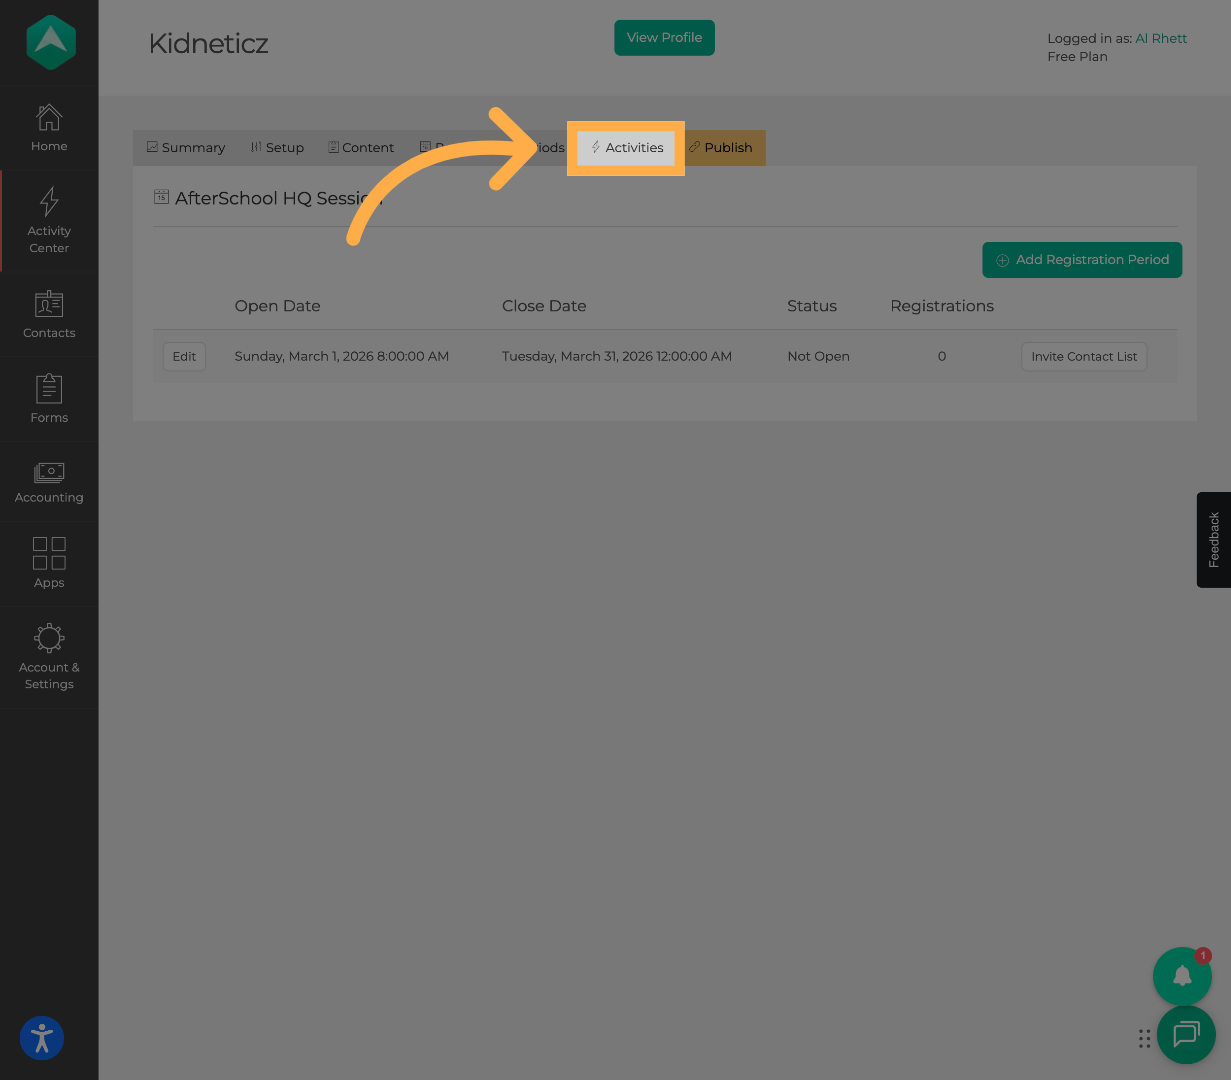
17. Open the Activities Tab

Click Activities” to manage activities in the session.

Open Activities Tab

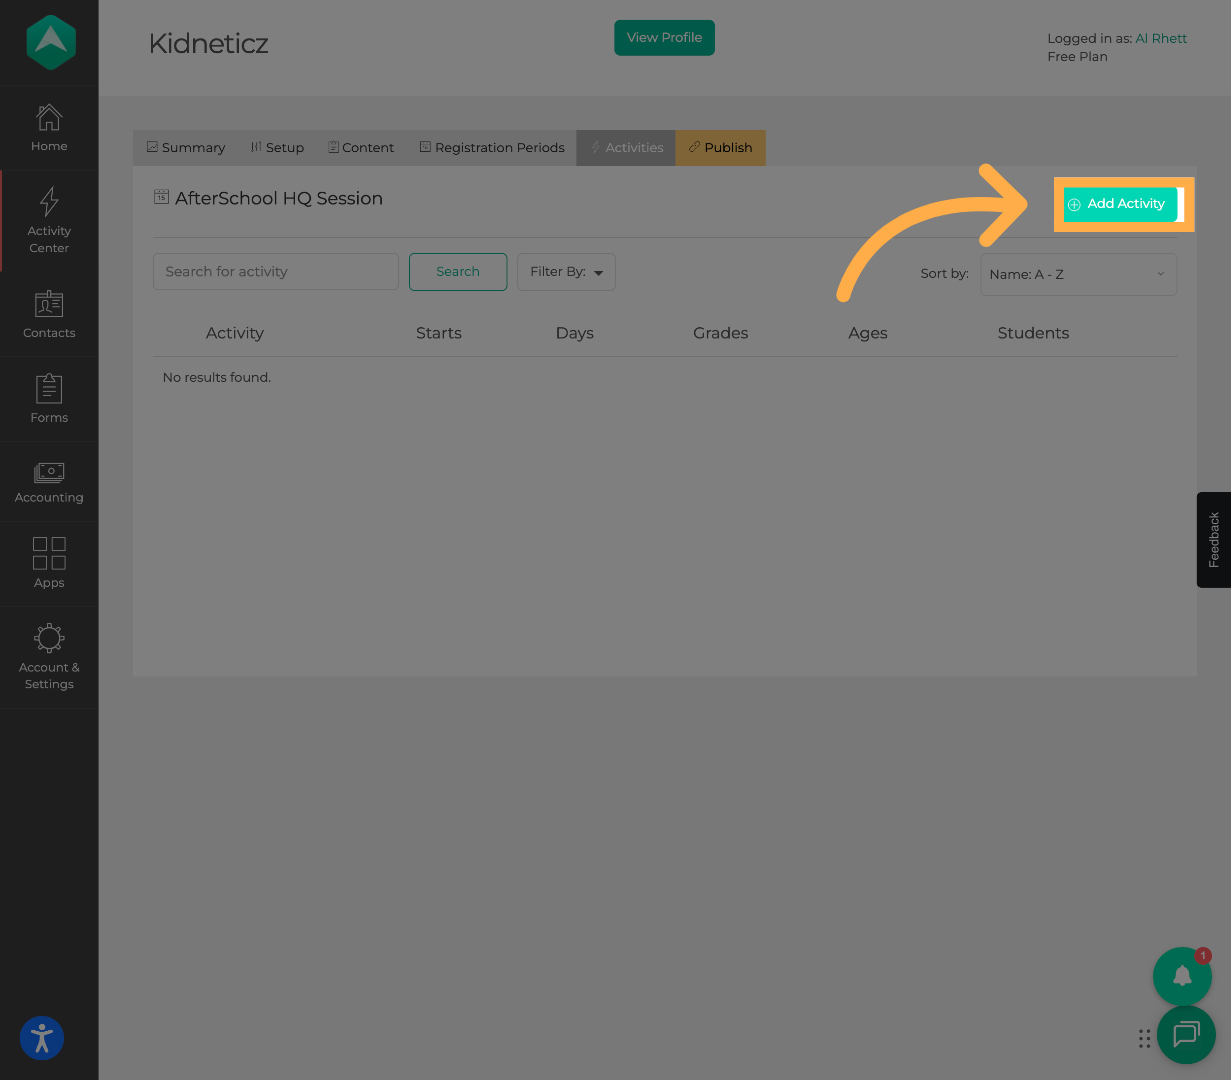
18. Add a New Activity

Click Add Activity”.

Add an Activity to your session

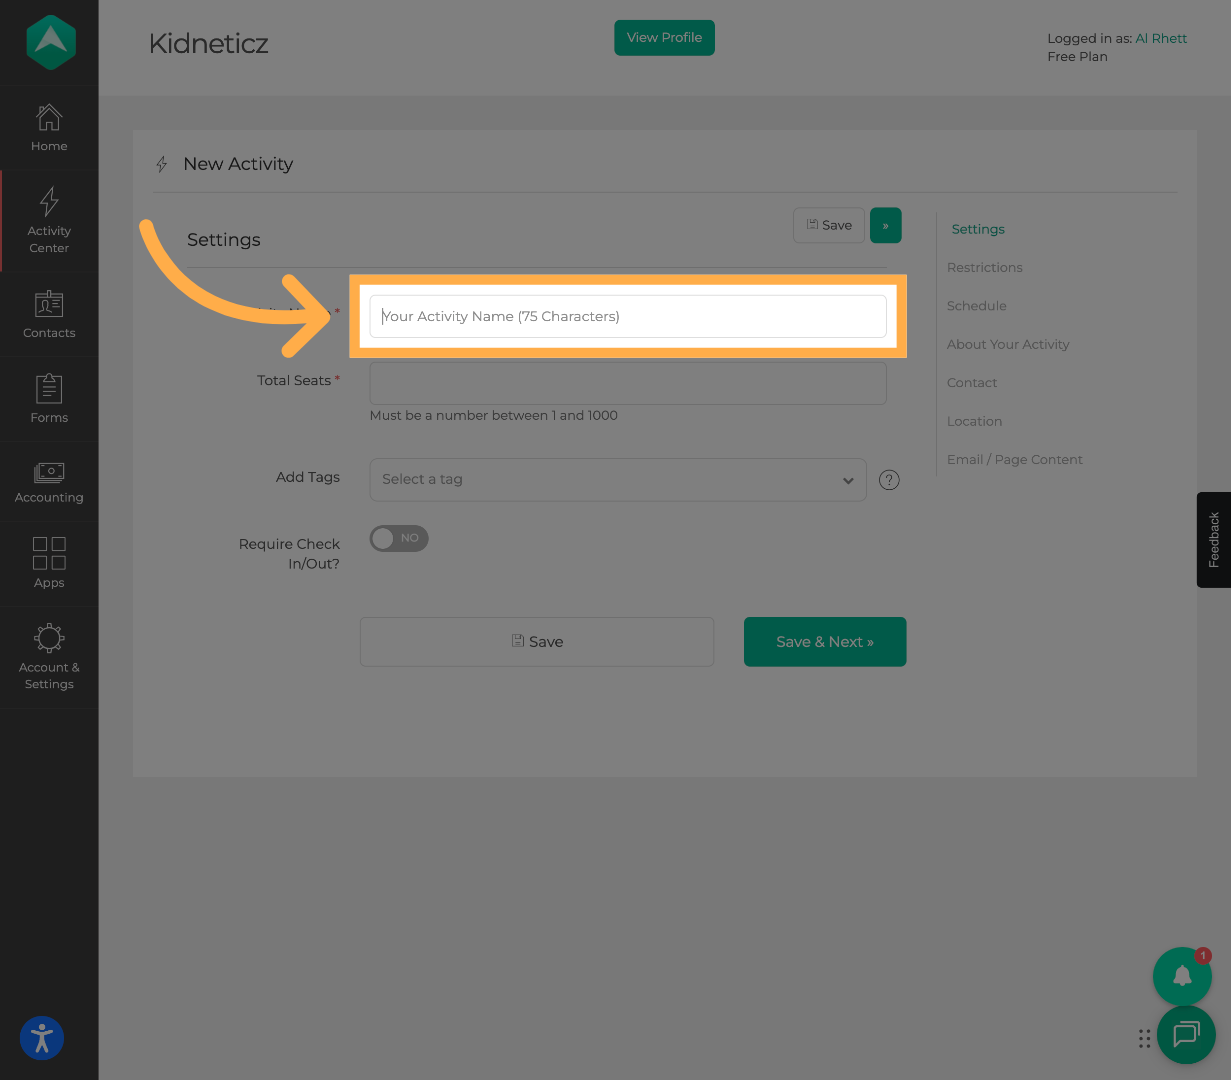
19. Enter Activity Information

Add the Activity Name and configure the participant limit.

Add Activity Name

Participant Limit Settings

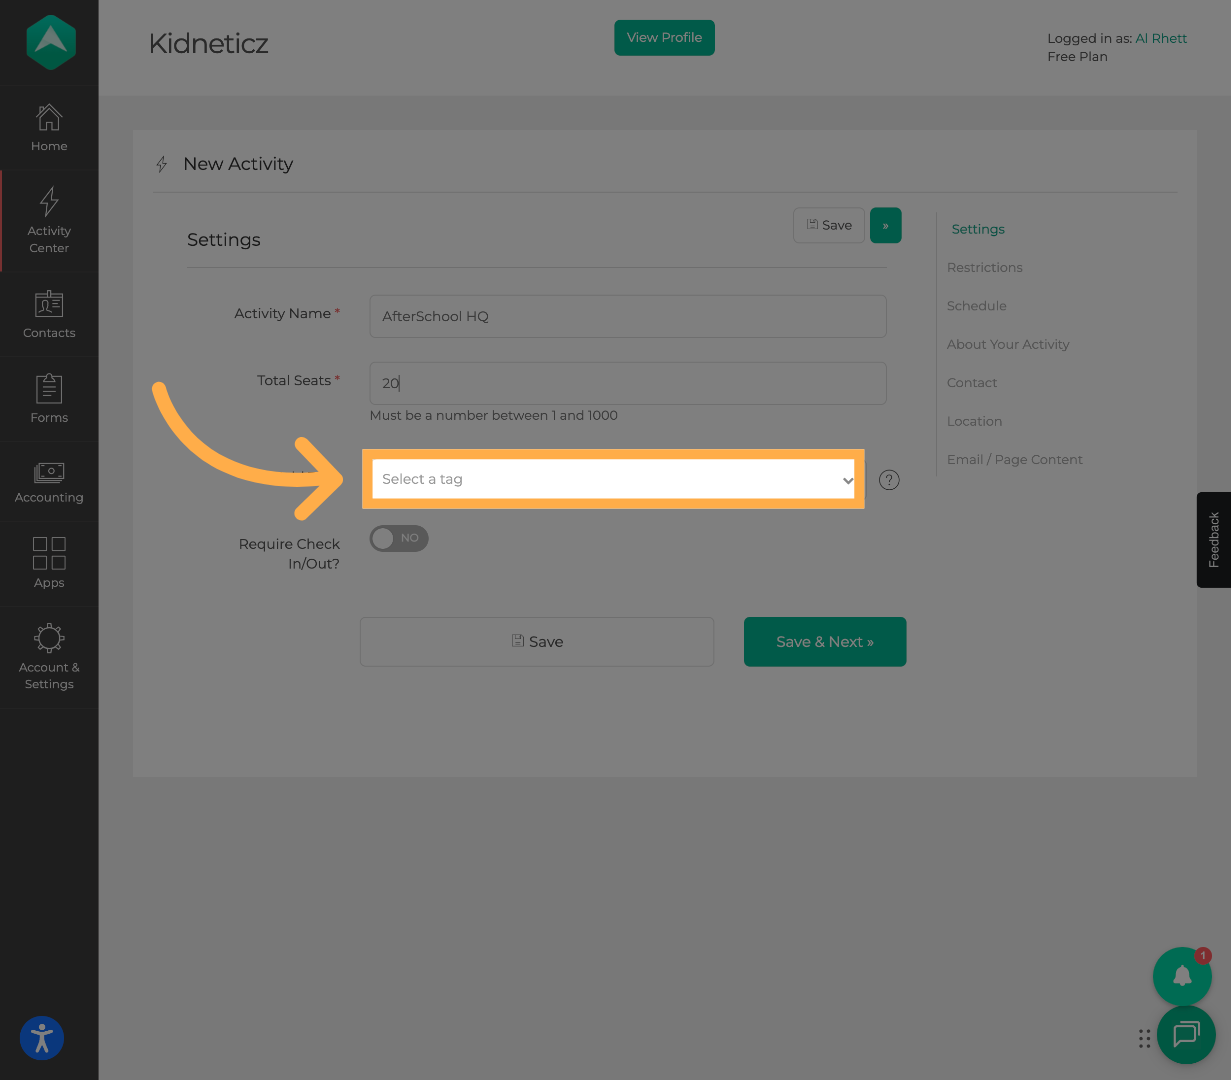
20. Select Activity Tags

Choose tags to categorize the activity.

Tag Selection

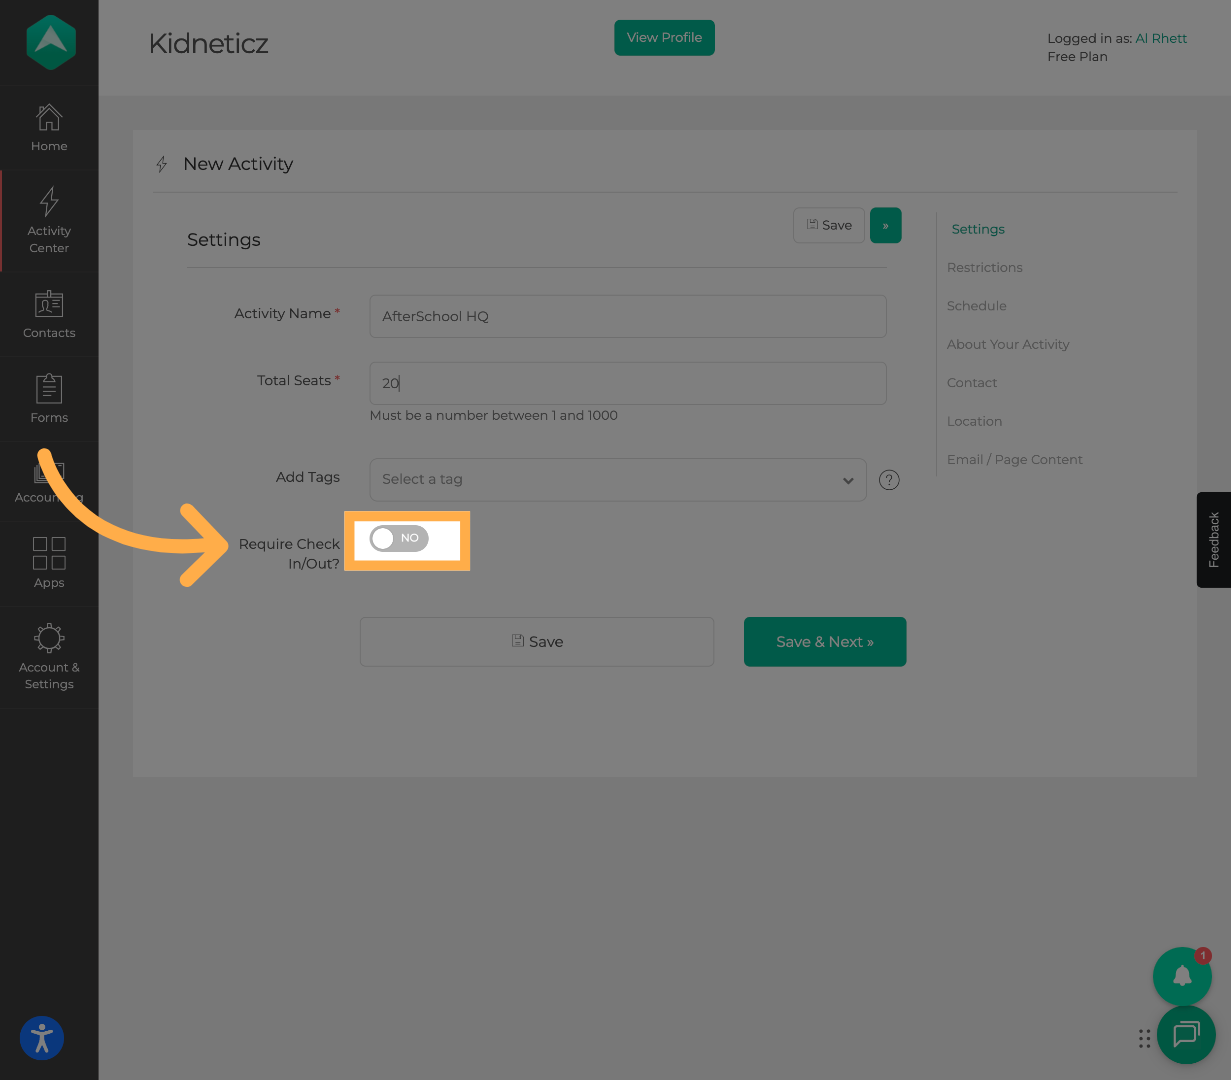
21. Enable Attendance Tracking (Optional)

Turn on the toggle if you want to track attendance with timestamps.

Otherwise, Attendance mode will be Present/Absent.

Attendance Mode

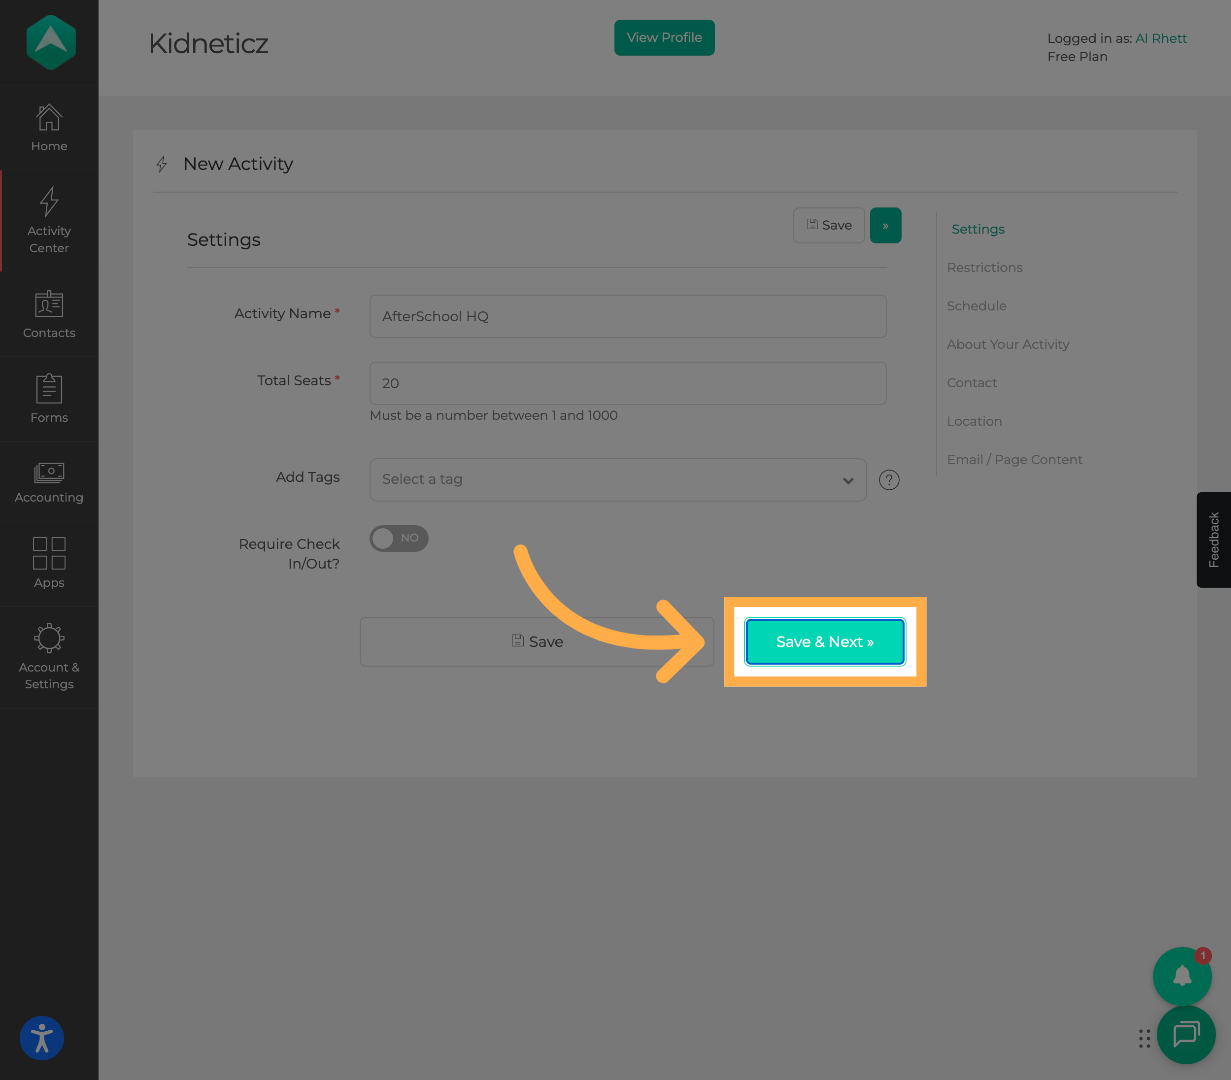
22. Save and Continue

Click Save & Next”.

Save and Proceed

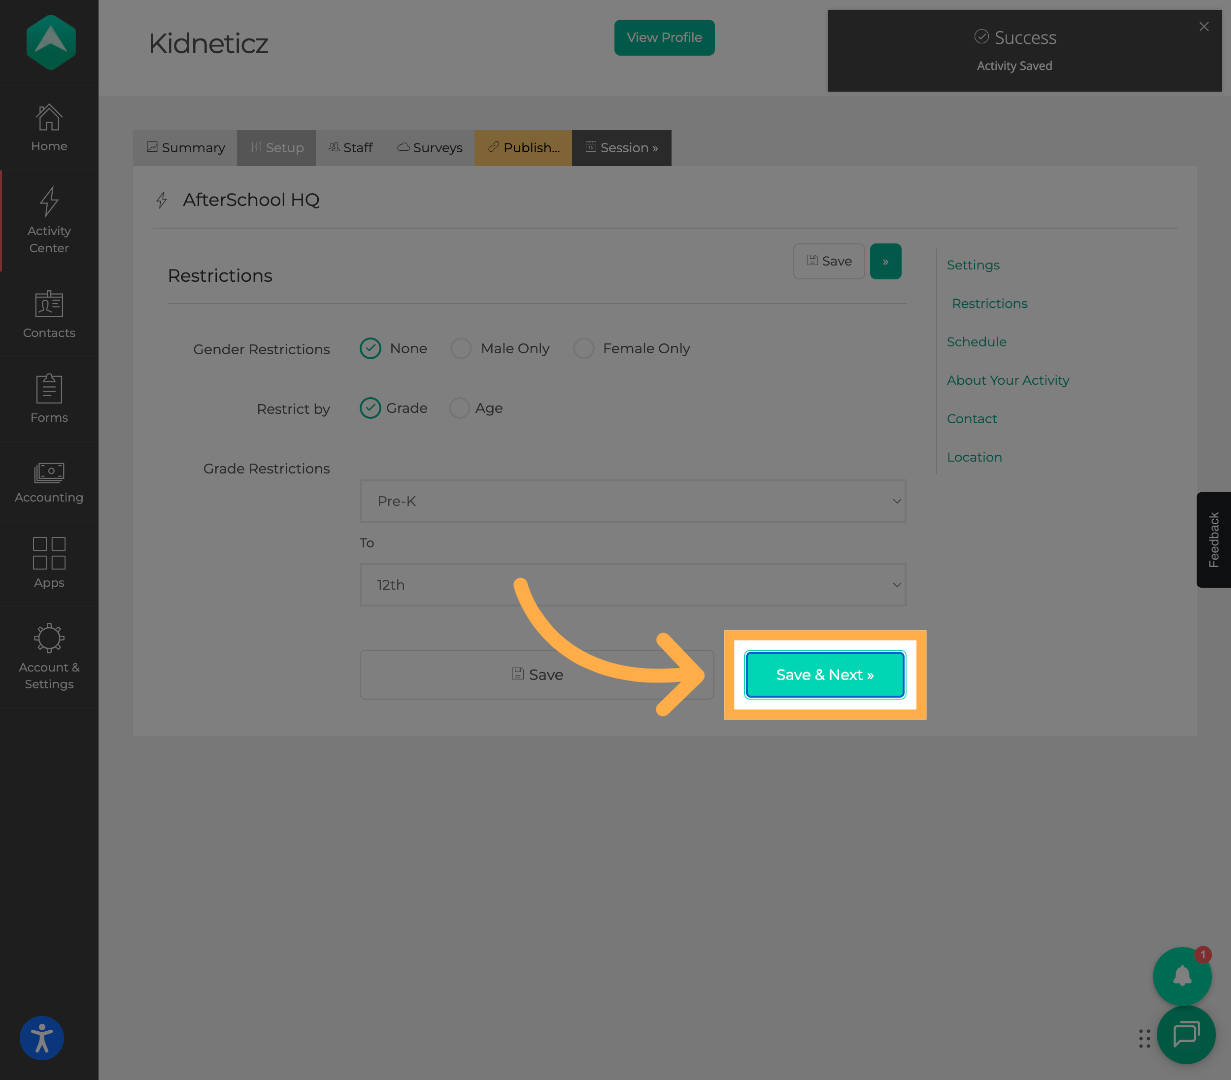
23. Add Participant Restrictions (Optional)

Set participant restrictions such as age, grade, or gender, if applicable.
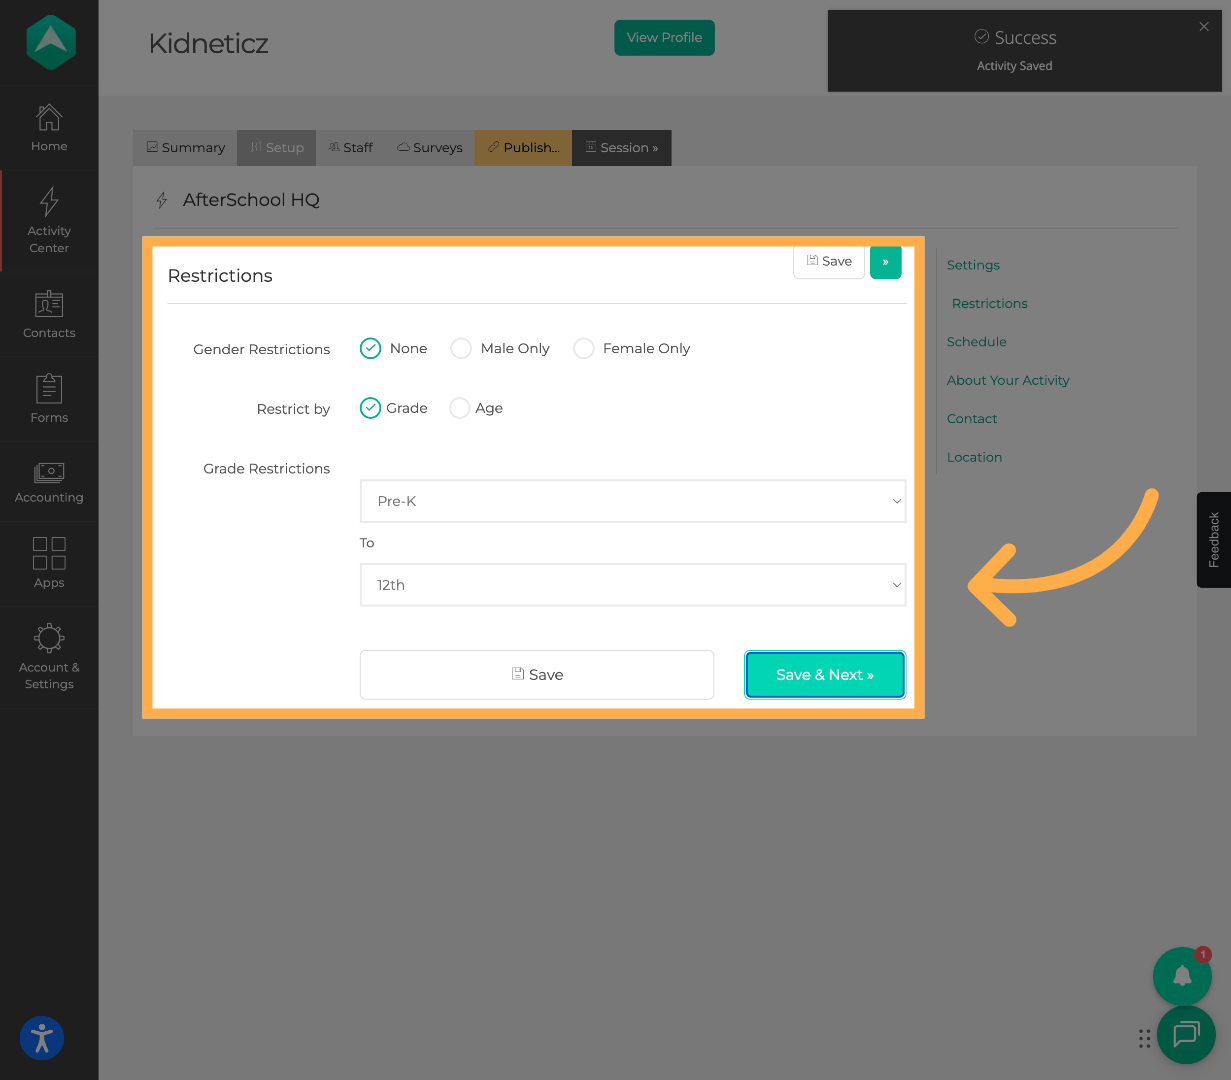
Restrictions by Age or Gender

Click Save & Next” to continue.

Continue to Next Step

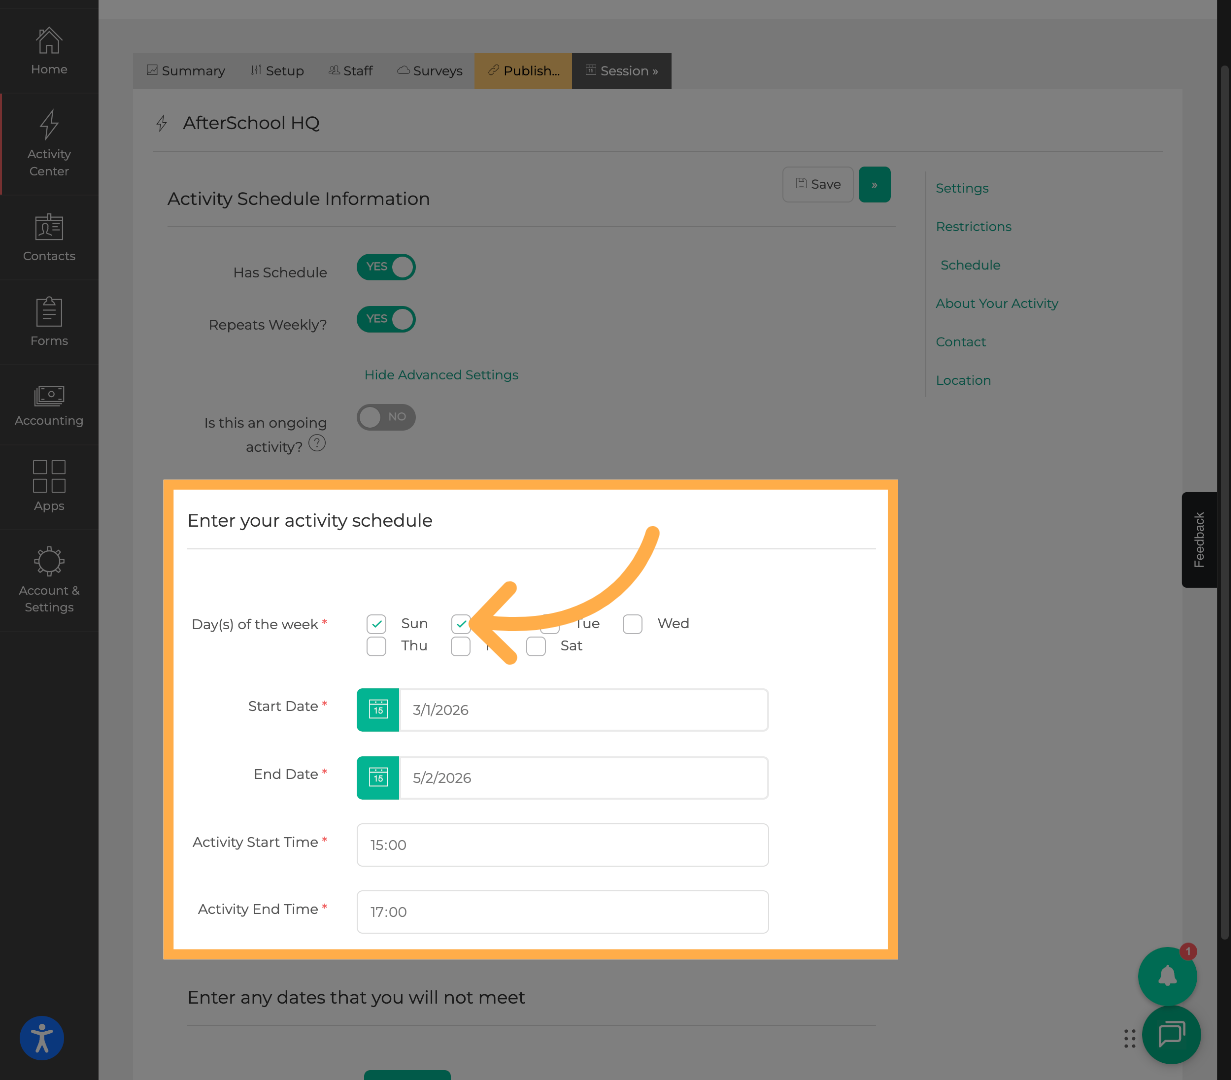
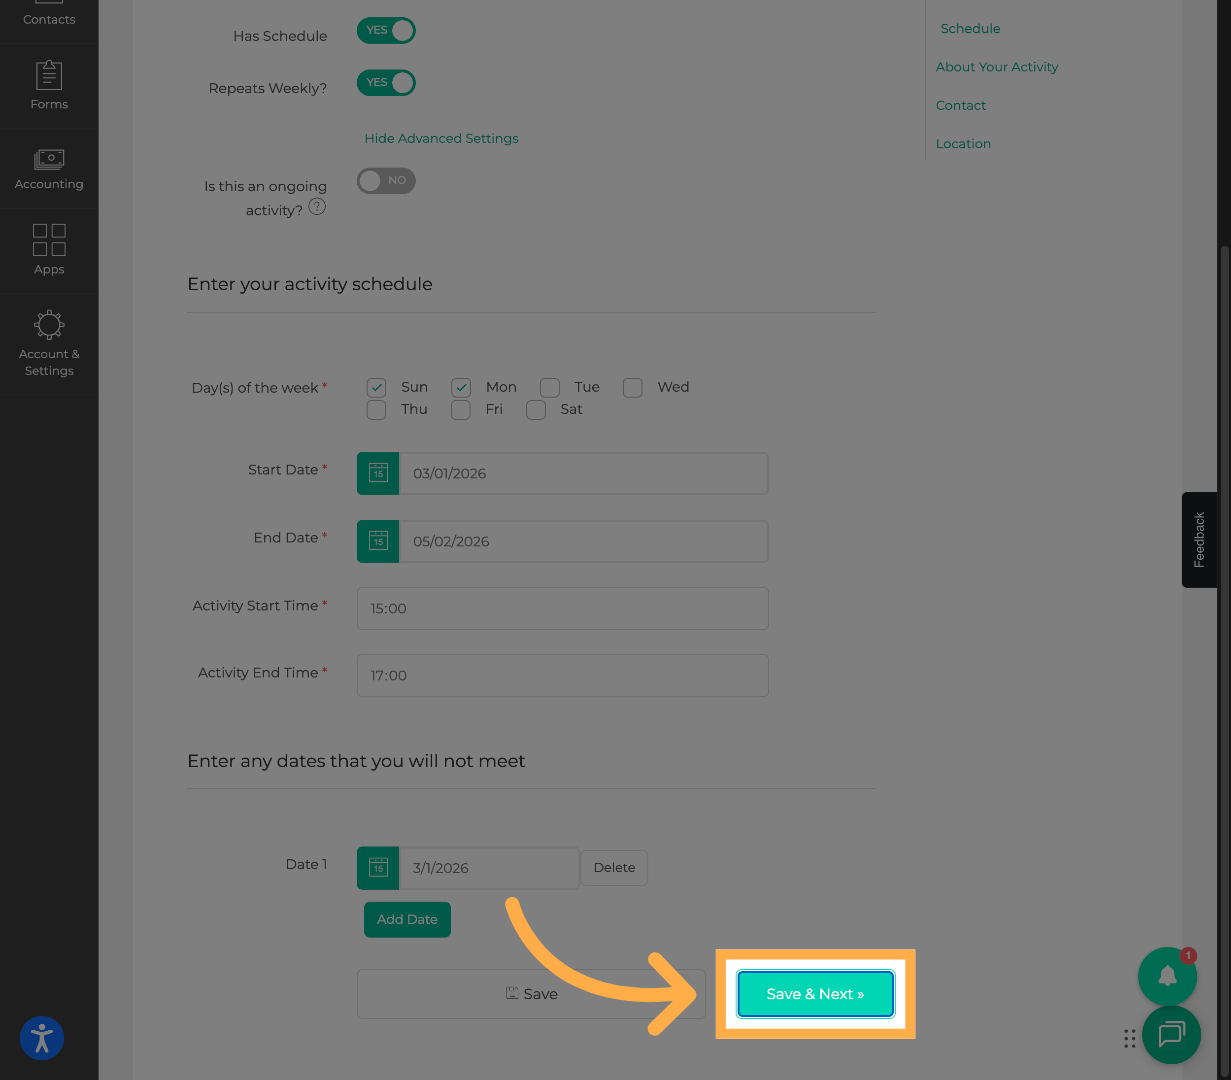
24. Configure Activity Schedule

Enter the activity schedule. You can also add dates when the activity will not meet, such as holidays.
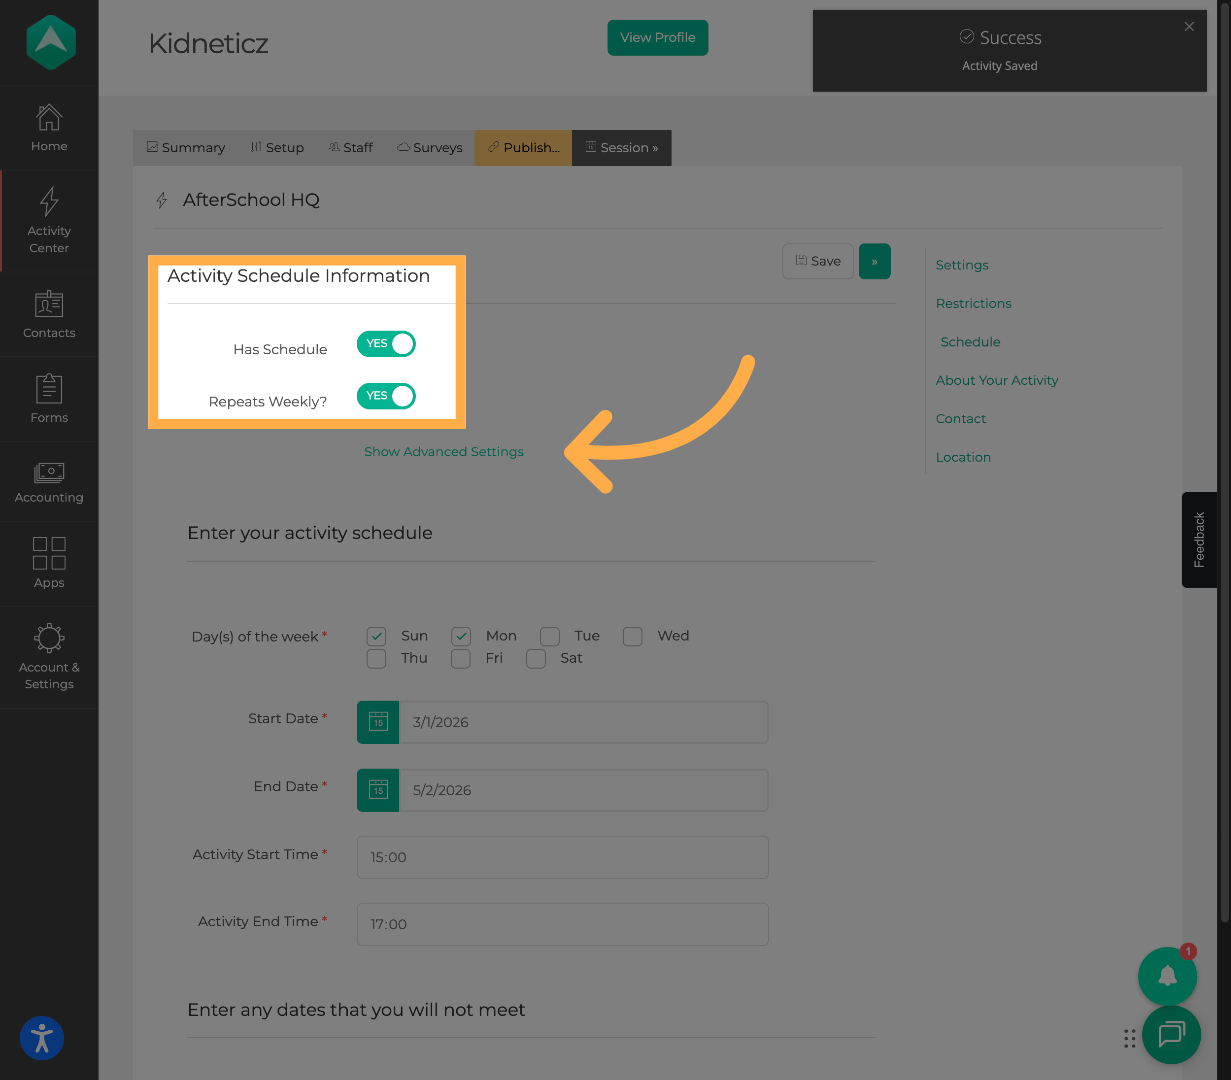
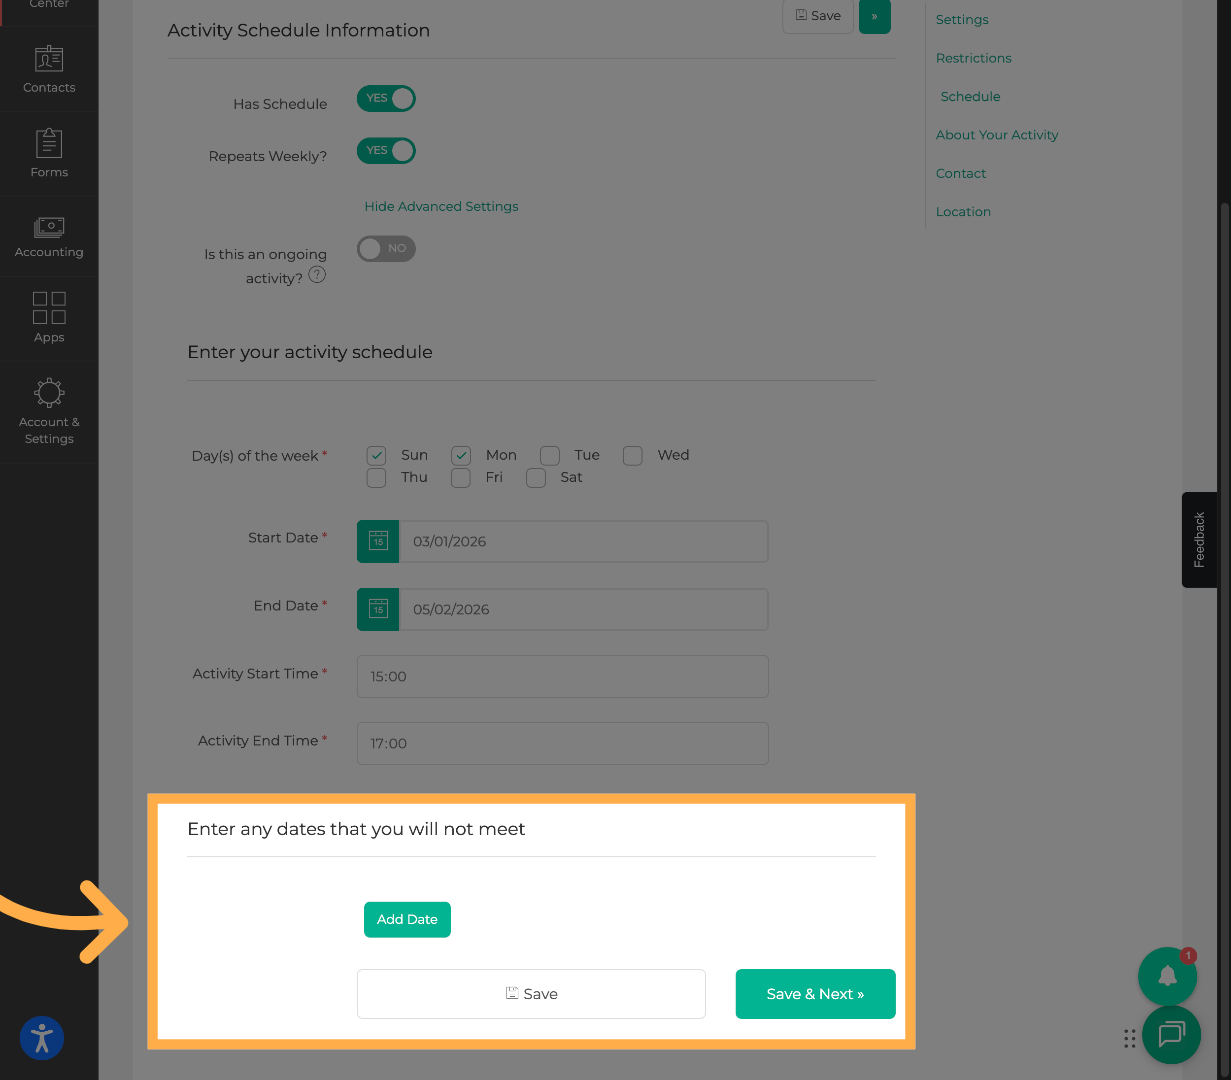
Show Advanced Settings

Choose your Schedule

Date Selection

Click Save & Next”.

Save and Continue

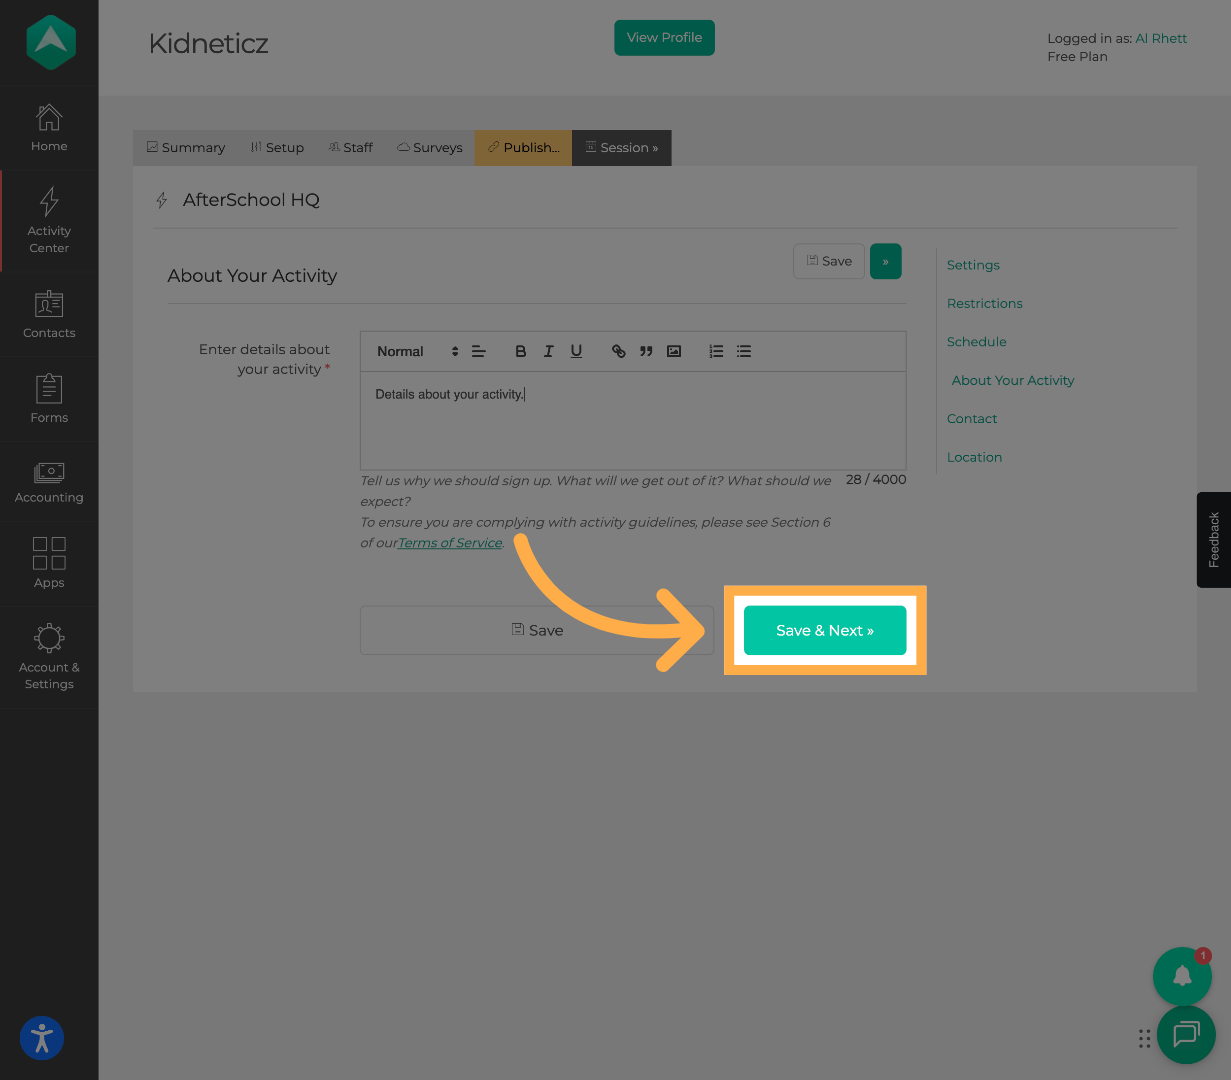
25. Add Activity Details

Enter detailed information about the activity.
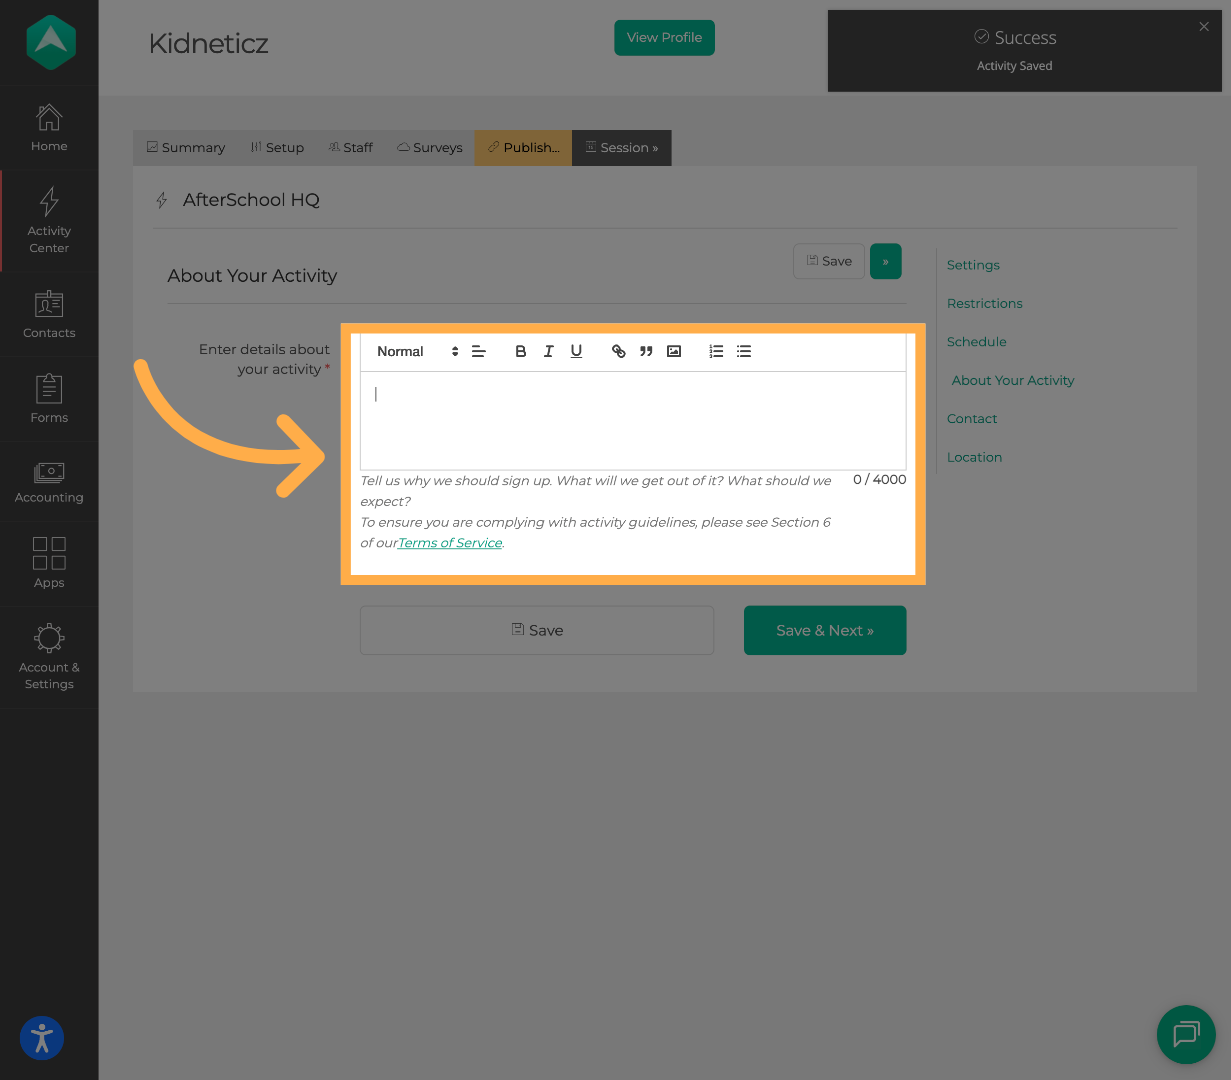
Add Activity Details

Click Save & Next”.

Save and Proceed

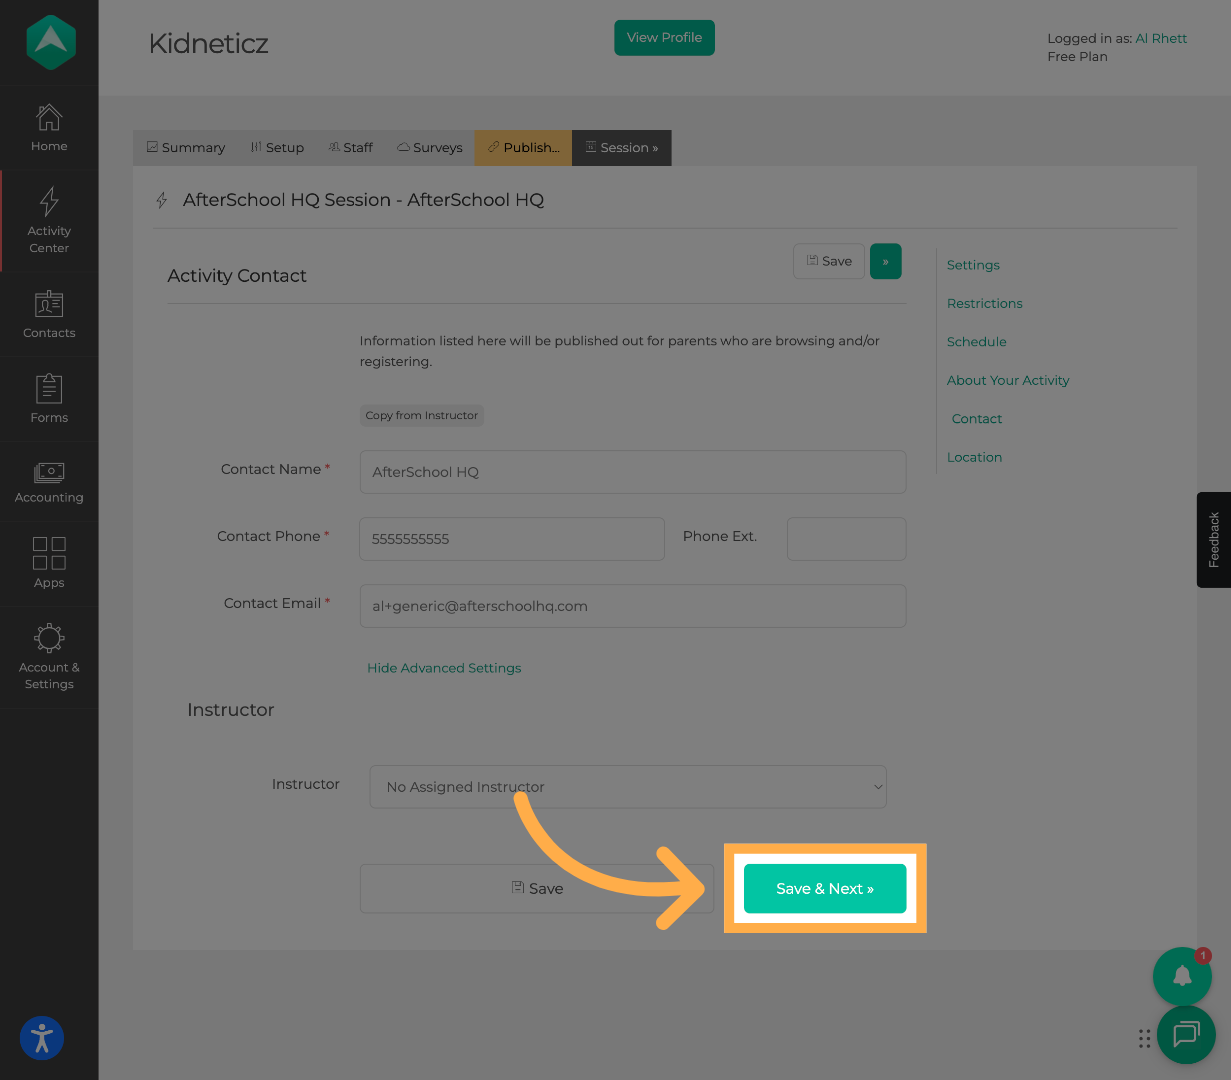
26. Add Contact Information

Enter contact details for the activity.
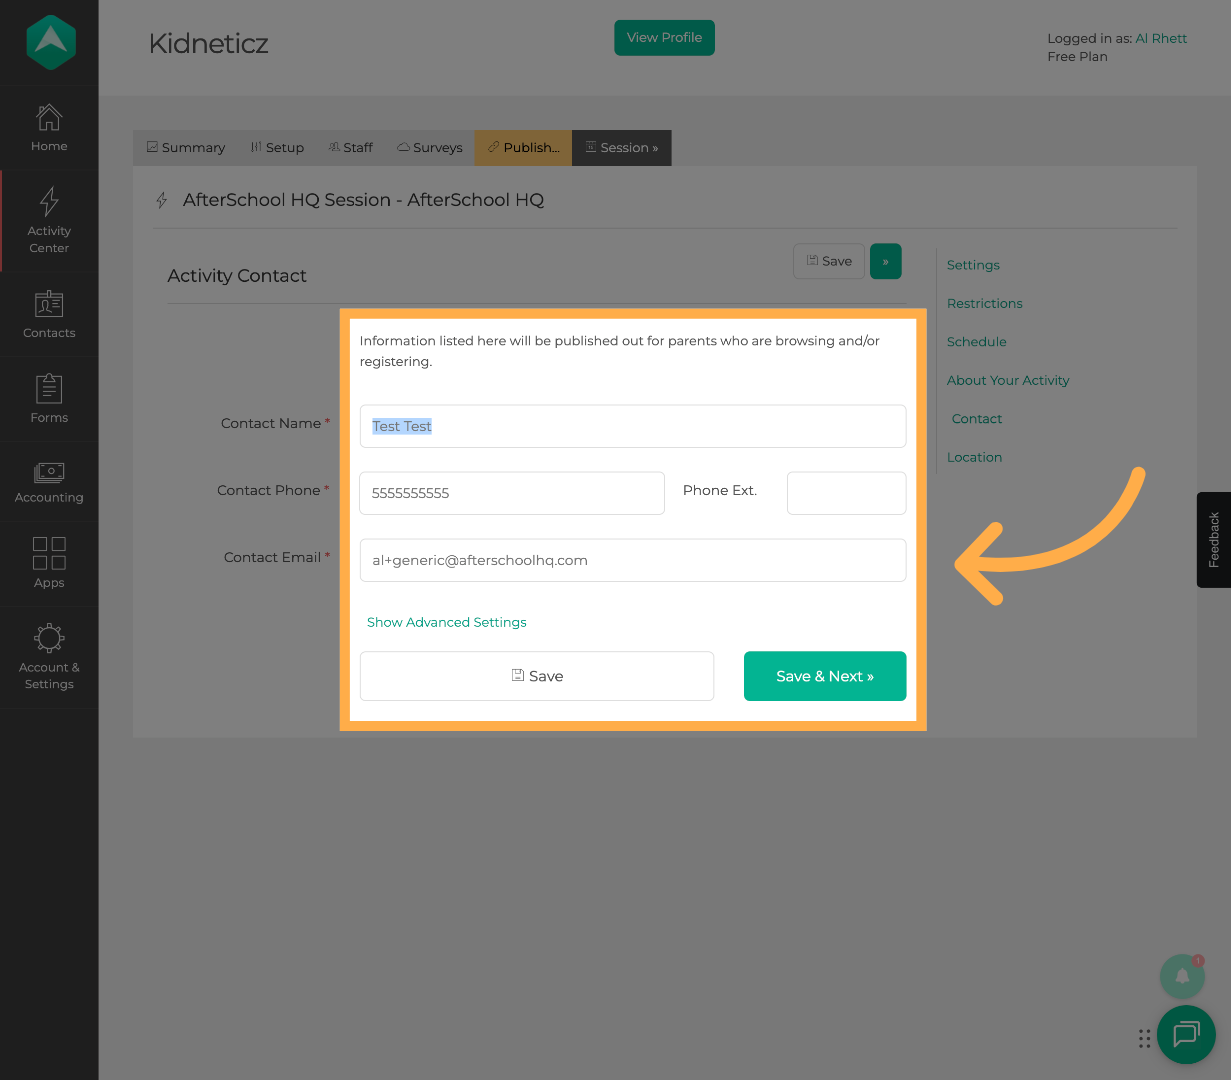
Contact for Inquiries

Click Save & Next”.

Save and Continue

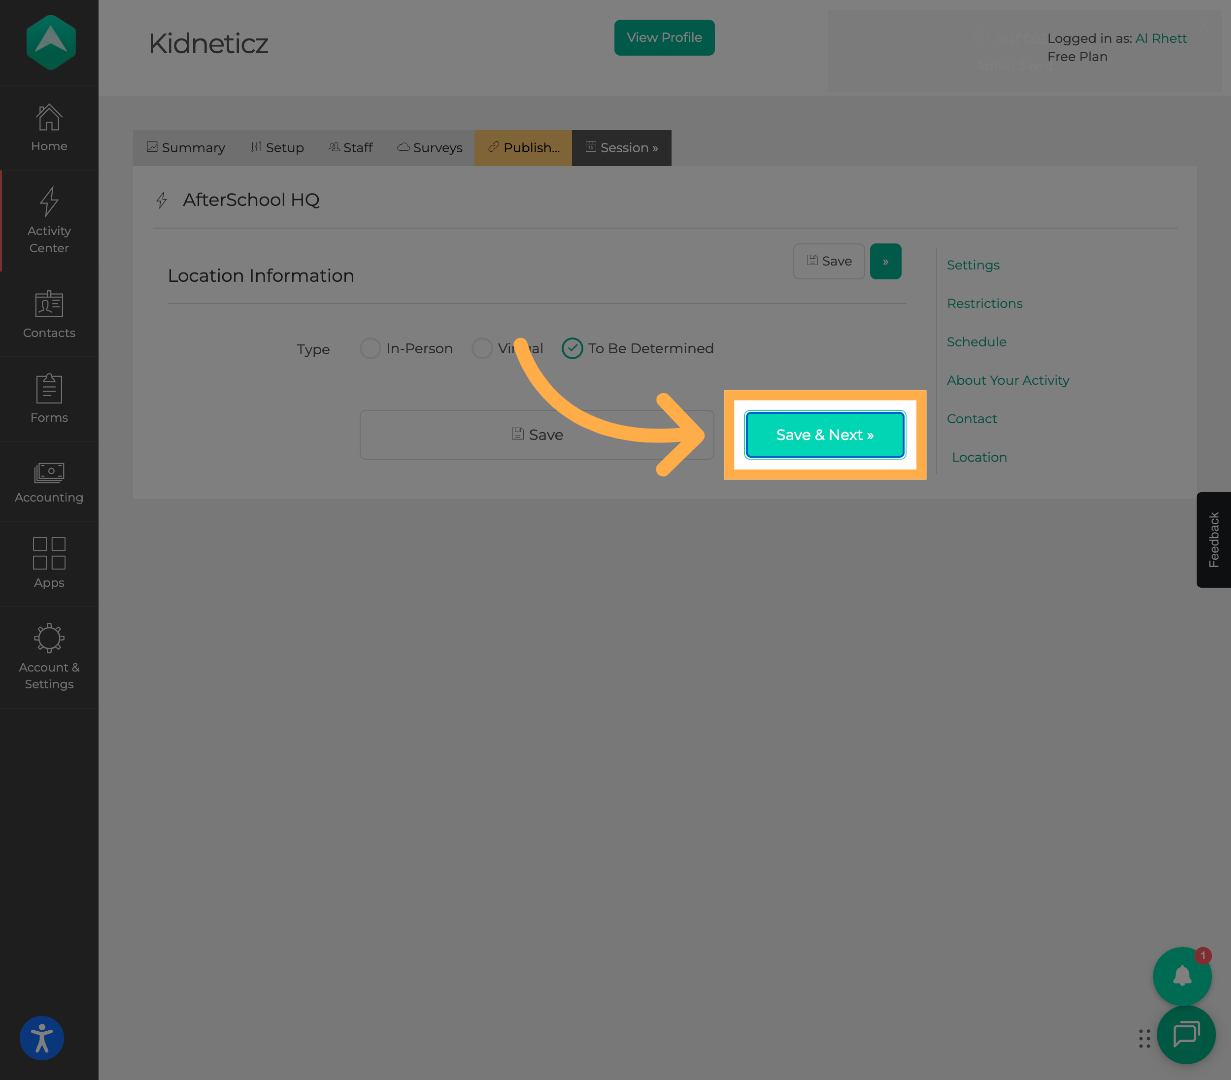
27. Add Activity Location

Enter the location details for the activity.
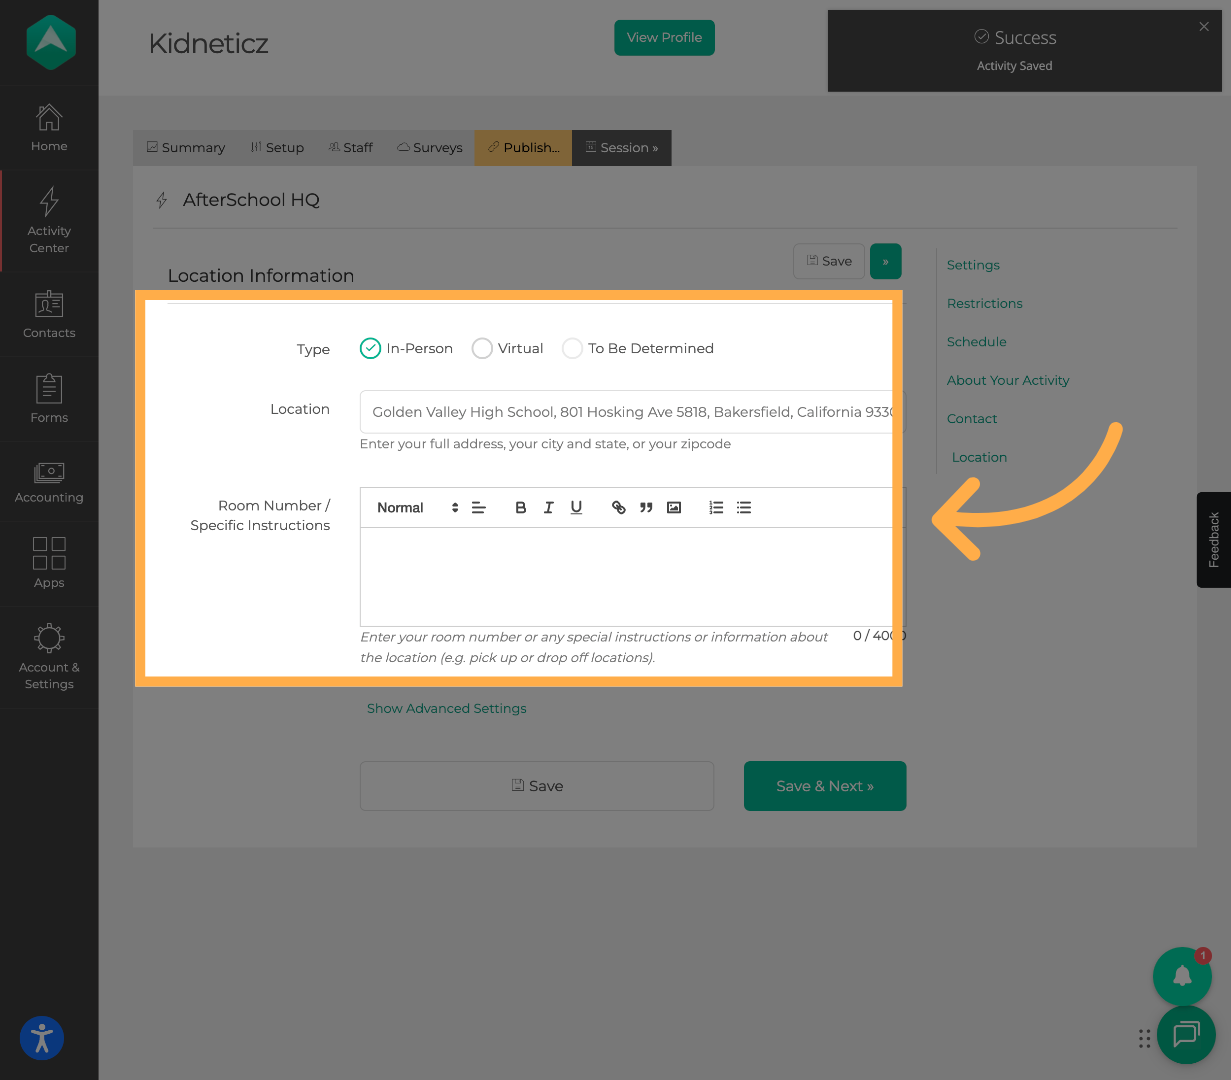
Choose a Location

Click Save & Next”.

Save and Proceed

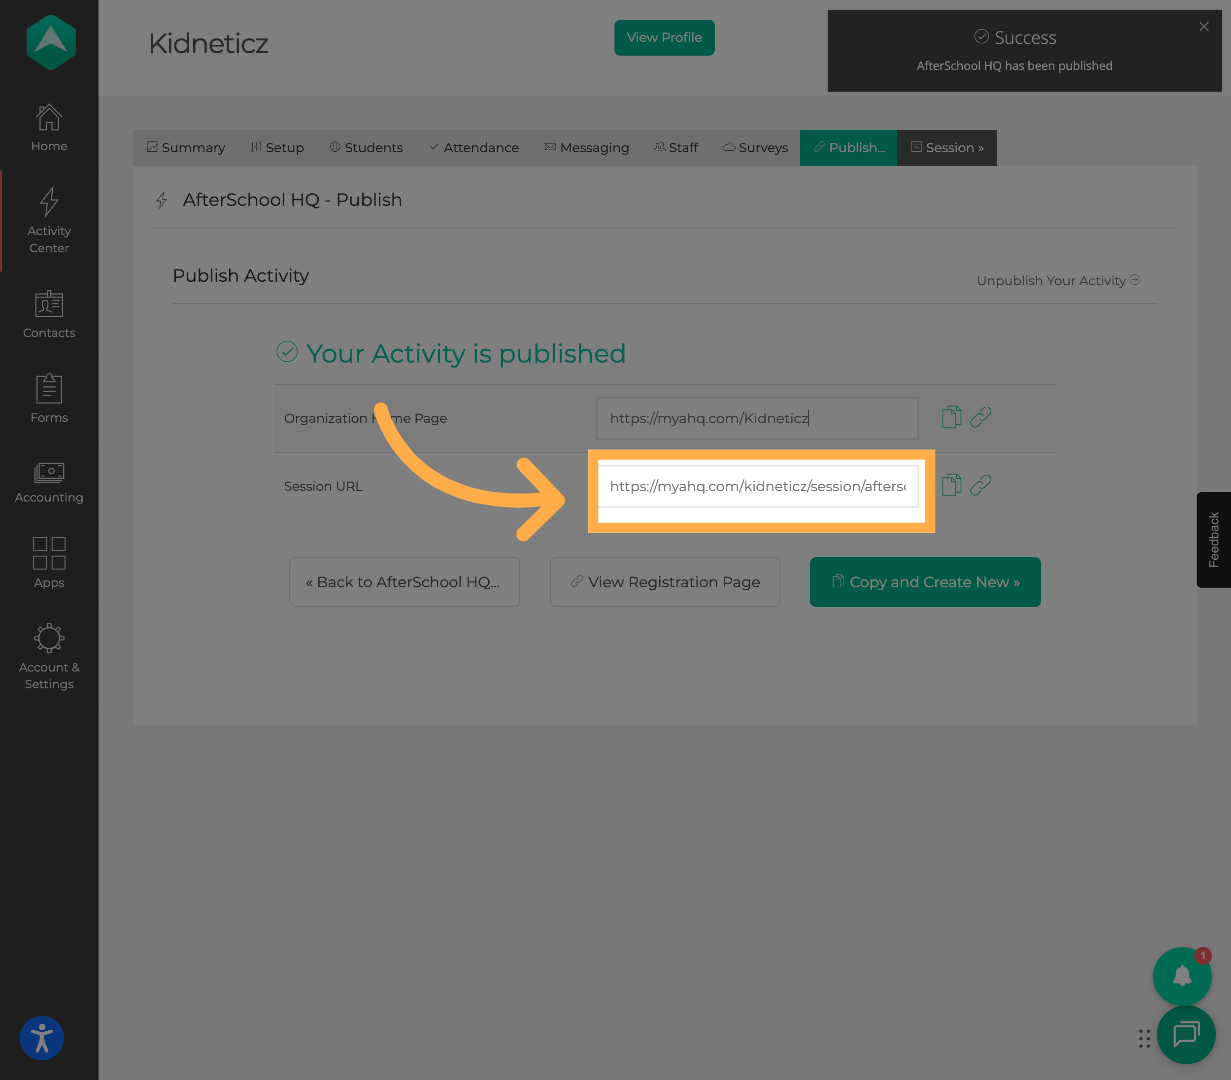
28. Access the Publish Section

From the Publishsection, you can access your Offerings Page Link.

AfterSchool HQ Publish Section

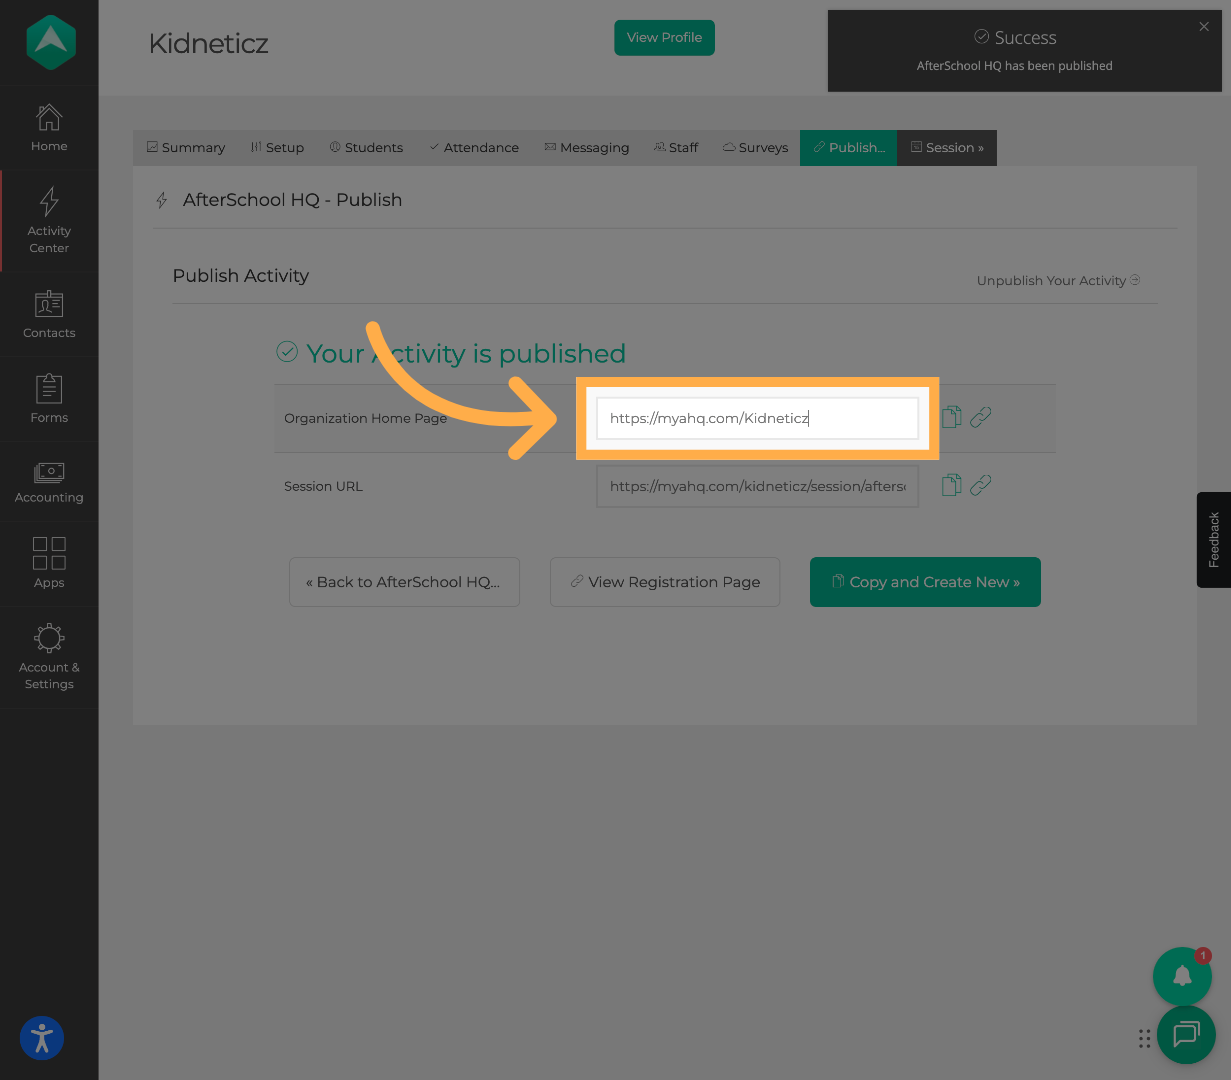
The Session URL is the Session Link. It will take families directly to the session details for registration when shared.

AfterSchool HQ Publish Section


Frequently Asked Questions

Q: Can activities inside a session accept payments?

A: No. Activities within a Session do not support payment collection. If your program requires payment, create the activity under Extracurricular Activities” instead.

Q: What is the purpose of a session?

A: Sessions are used to organize multiple activities under a single program or timeframe and allow families to register for them together.

Q: Why should I use sessions instead of individual activities?

A: Sessions allow families to add multiple activities to their cart and complete registration one time, making the process faster and easier.

Q: Can I make a session private?

A: Yes. Enable the Invite Only setting when creating the session to restrict access to invited participants only.

Q: Can sessions be used for adult participants?

A: No. Sessions are designed for student registrations only.

Q: Can I edit a session after creating it?

A: Yes. You can return to Activity Center → Sessions at any time to update the session settings, activities, or registration periods. 


💡If you experience any issues or have further questions with “How to Create a Session and Add Activities”, don't hesitate to get in touch with our support team at support@afterschoolhq.com