Sometimes, there can be misunderstandings when registering students for an activity, and they do the wrong registration. In that case, you as a provider can easily switch your students from one activity to another.
In this article, we will be going through the process you have to follow in order to change your student’s activity registration.
Add your student into the new activity
Step 1: Log into your AfterSchool HQ account.
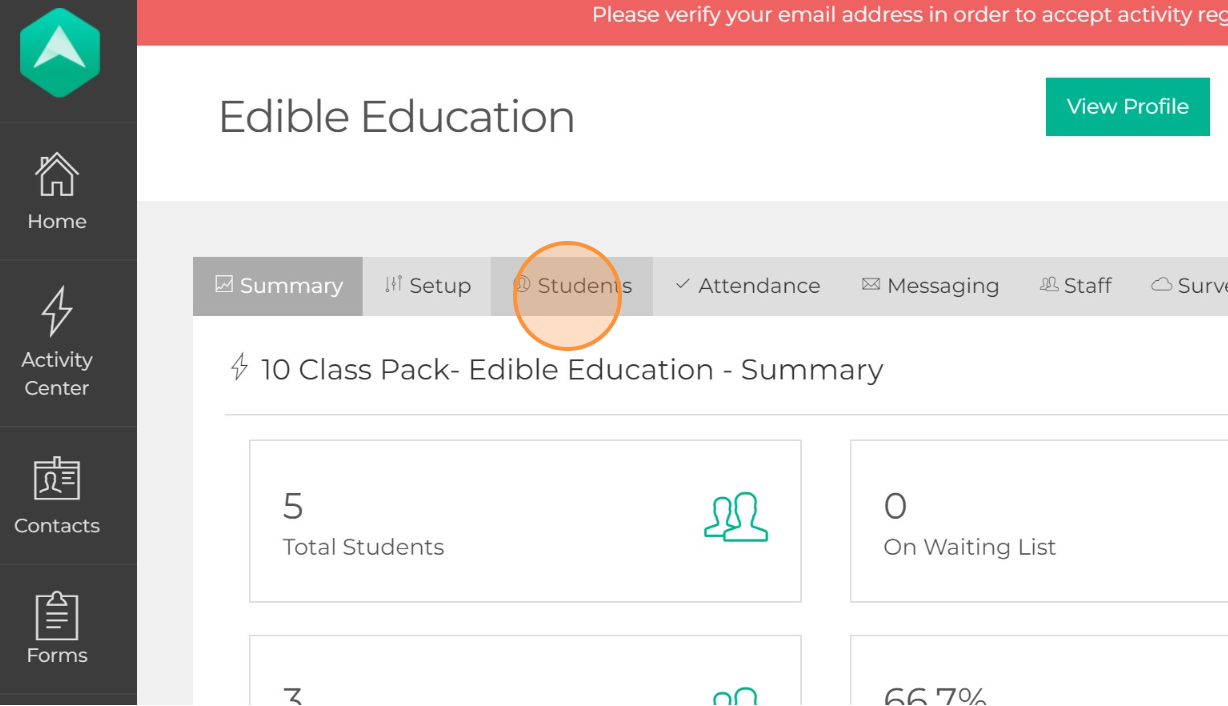
Step 2: Go to your Extracurricular Activity section:

Step 3: Click the “Manage” button on the left side of the activity where your student is currently registered

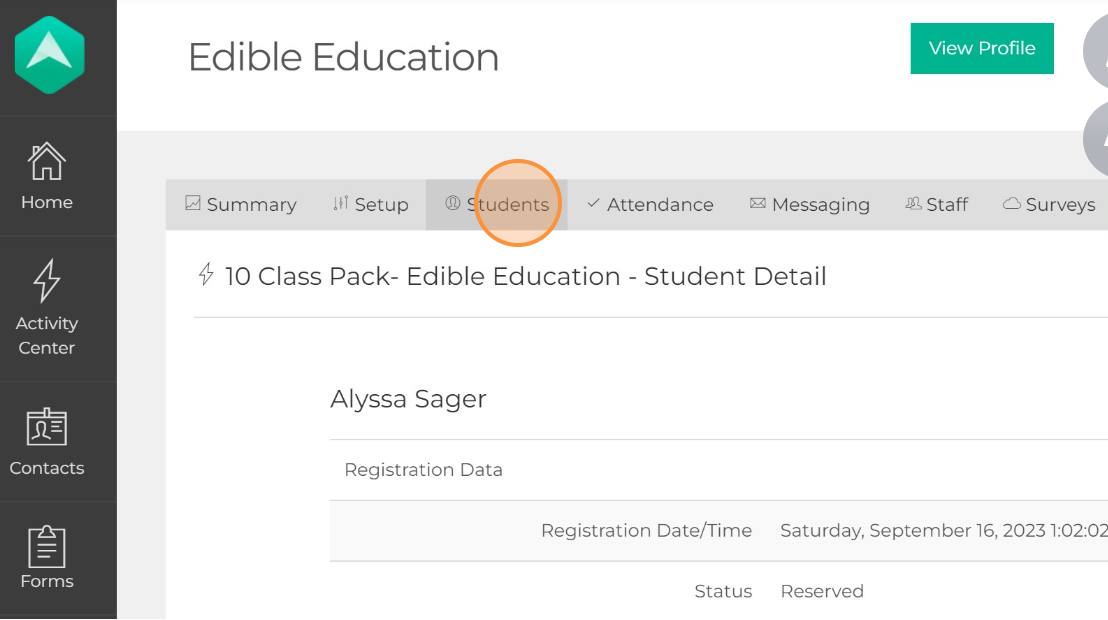
Step 4: Go to the Student section
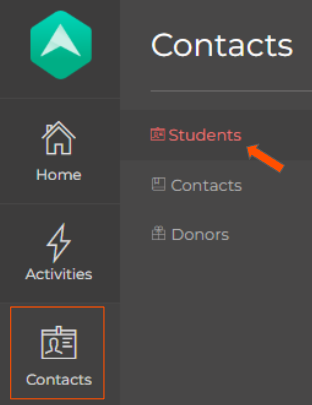
Note: You can also locate a student through the Contacts section.
• Hover your mouse over Contacts and click Students:
• Enter a student's First Name, Last Name or Email Address, and then click Search: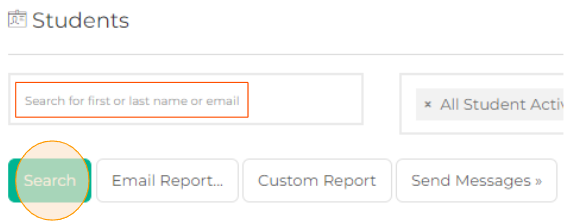
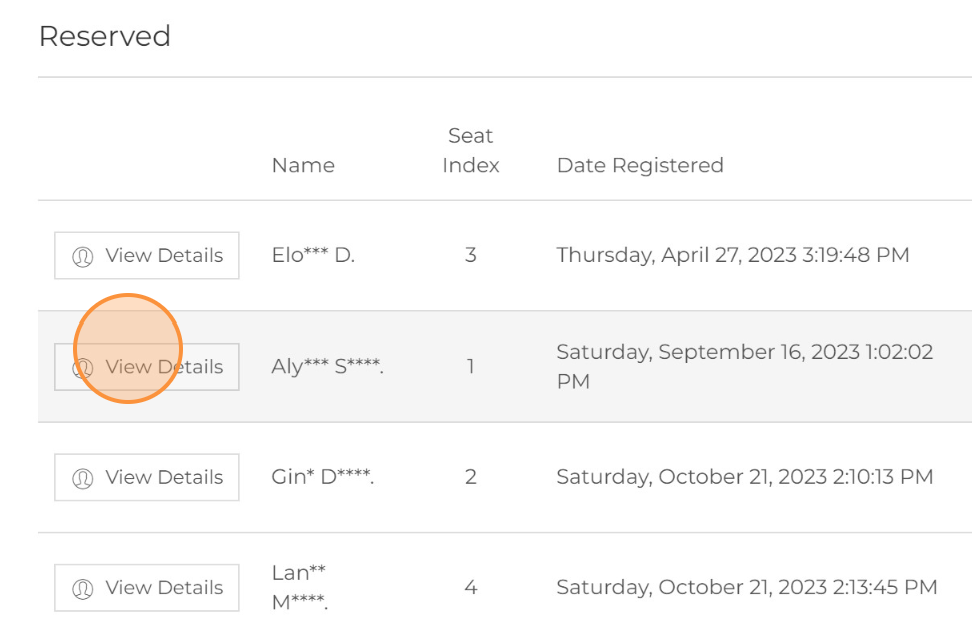
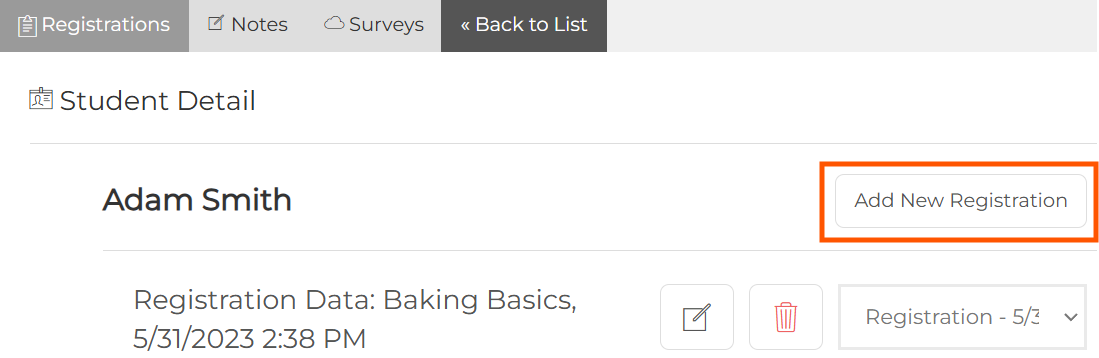
Step 5: Click on the “View Details” button located on the left side of the name of the student you would like to change
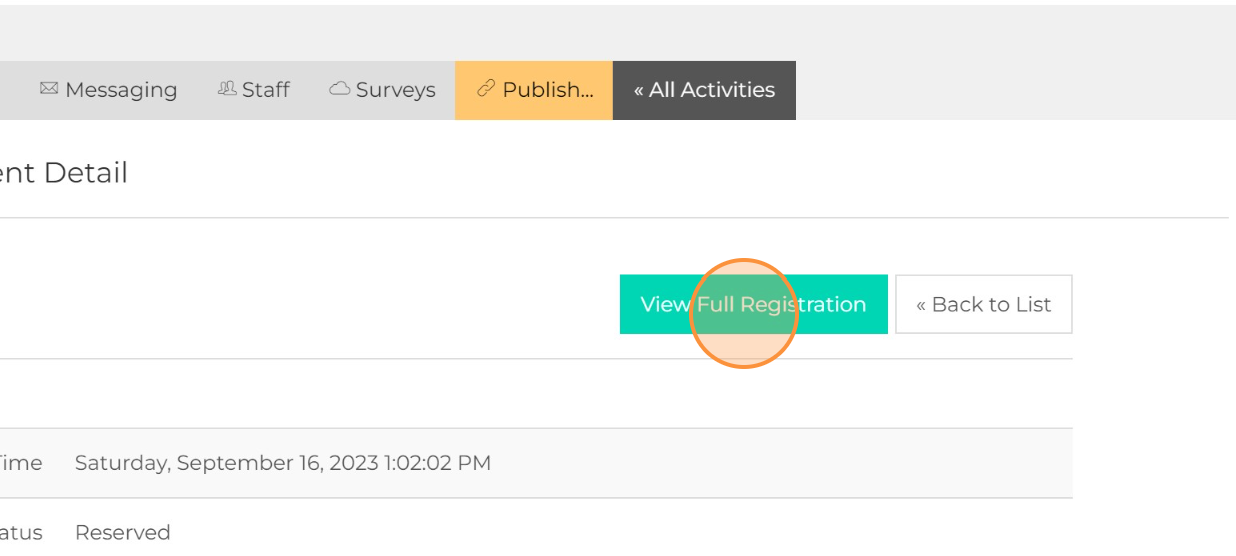
Step 6: Click on “View Full Registration”
Step 7: Click on “Add New Registration”
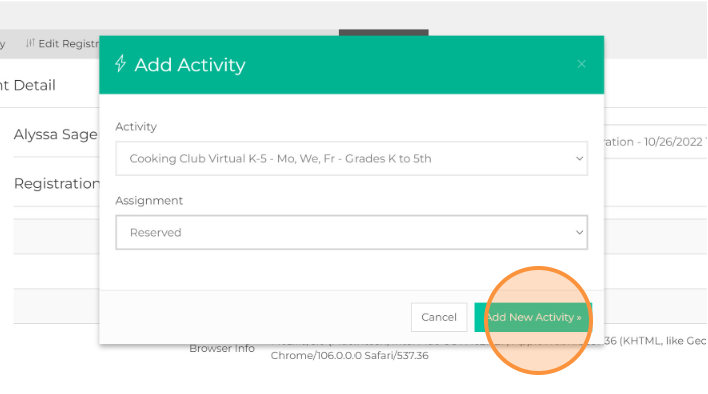
Step 8: Finally, select the activity in which you want to locate your student and the status of registration of your student.
Remove your student from the activity
Step 9: Go back to “Students”
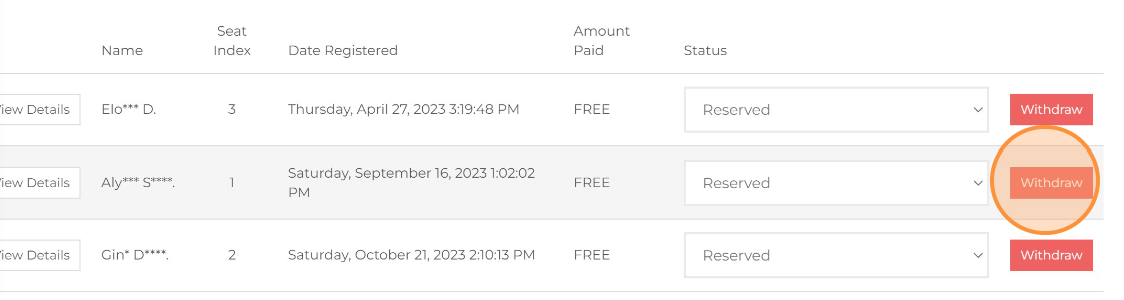
Step 10: Click on “Withdraw” to remove your student from the activity
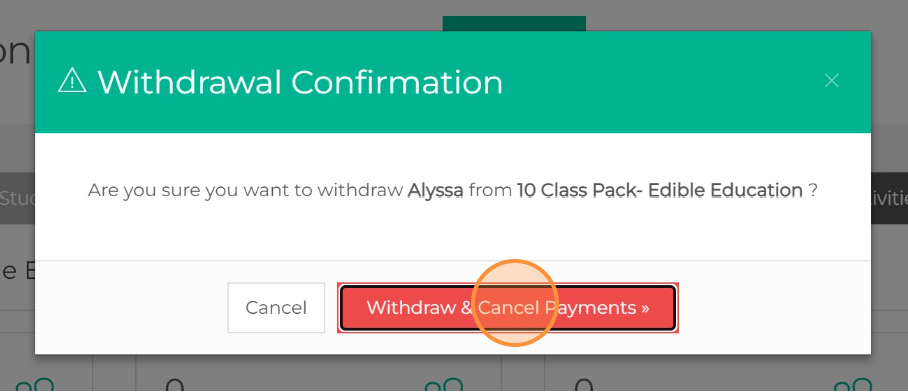
Step 11: Confirm to cancel the payments
And that is how you can change your student's registration!
💡If you have any questions or experience any technical difficulties with How to Move a Student From One Activity to Another, don't hesitate to get in touch with our support team at support@afterschoolhq.com.💡