In this guide, we will be covering how to add a student to an Activity and invite their parent or guardian to create their AfterSchool HQ Family Account.
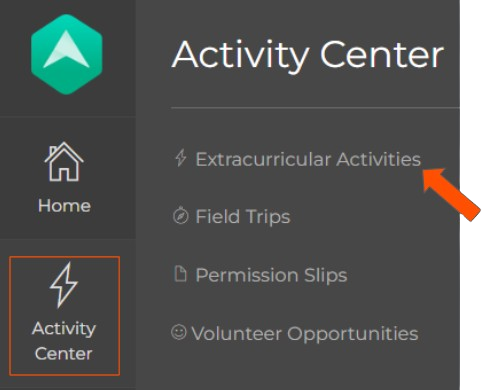
Step 1. After logging in, hover your mouse over Activity Center and click Extracurricular Activities:
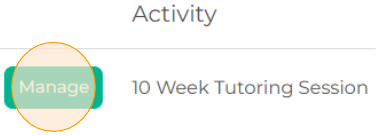
Step 2. Locate the Activity you want to add the student to and click Manage:
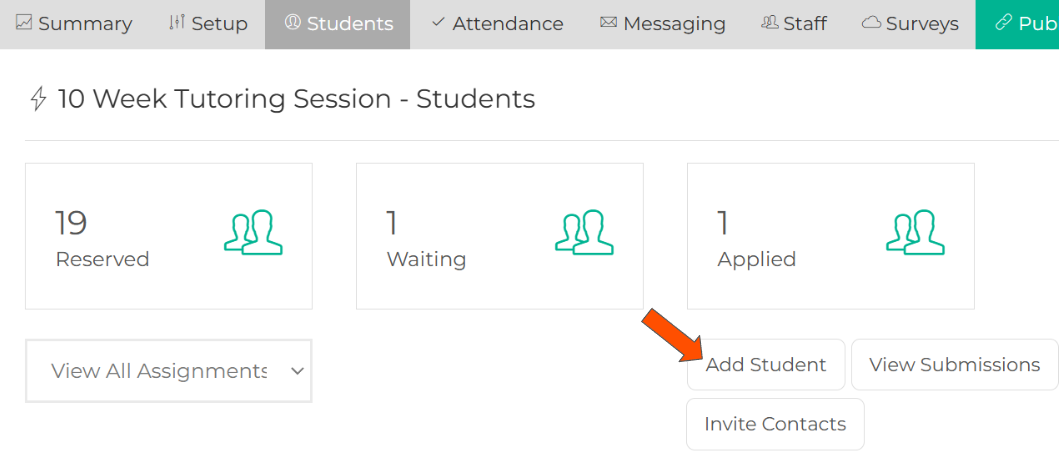
Step 3. Click on the Students tab located at the top of the page:

Step 4. Click Add Student:
Step 5. You can start to enter the student information you have: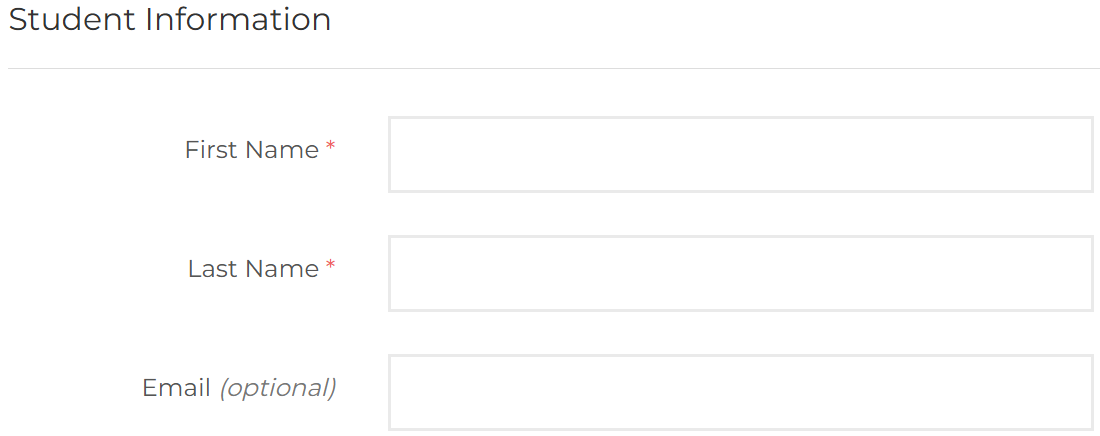
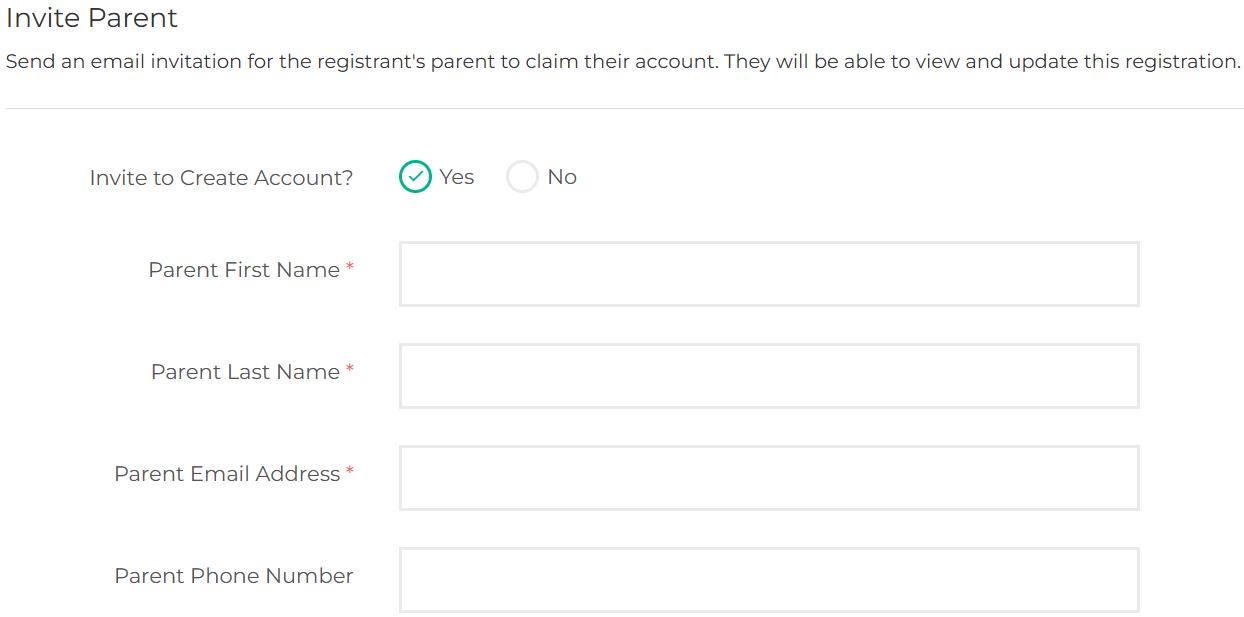
Step 6. At the bottom of the page, you will have the option to invite the student's parent or guardian.
• You will need to first select Yes for Invite to Create Account?
• Then you will need to enter the Parent/Guardian's First Name, Last Name & Email Address.
• Adding a Phone Number is optional:
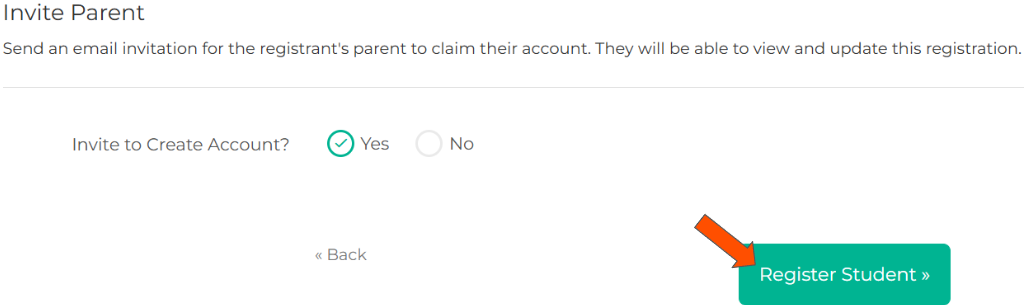
● If you have already entered this information in the Parent/Guardian Information section, you will only need to select Yes for Invite to Create Account:
Step 7. To add the student to the Activity's roster list and to send the account creation invite, click Register Student:
● The invited parent/guardian will receive an email stating their student has been registered for your Activity and are prompted to create their AfterSchool HQ account: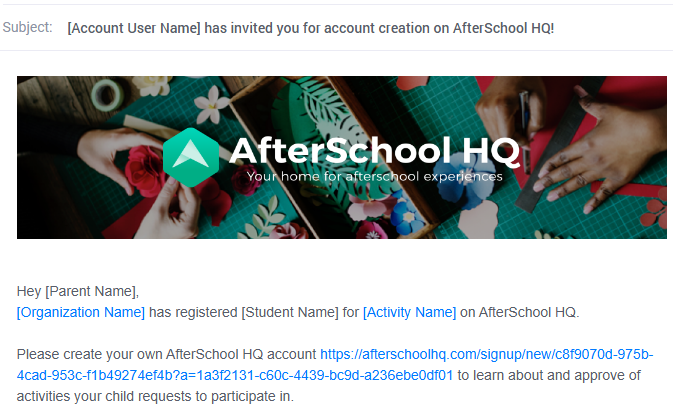
● After they click on the link, they will be directed to a page where they will need to create a password and click Sign Up:
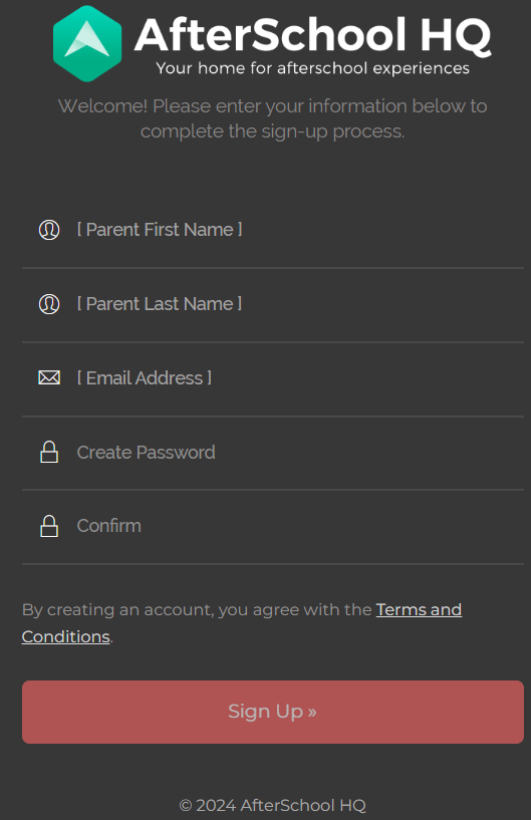
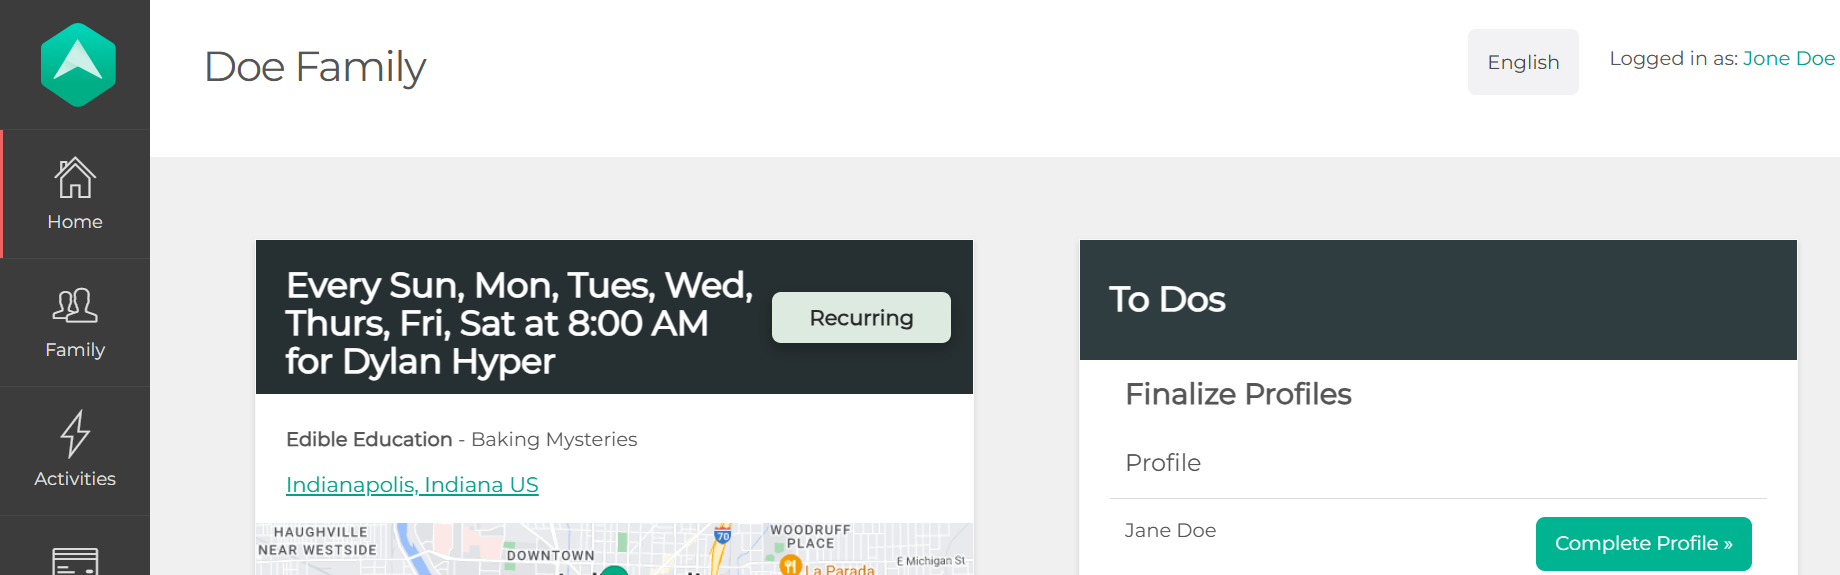
● After signing up, the parent will have access to their AHQ Family Account. Here, they will be able to keep track of the activities their student is enroll for, activity schedules, billing, be able to now register their student to future activities on their own, and more!
💡If you have any questions or experience any technical difficulties with How to Manually Add a Student & Invite Their Parent to Create an Account, don't hesitate to get in touch with our support team at support@afterschoolhq.com.