
Frequently Asked Questions
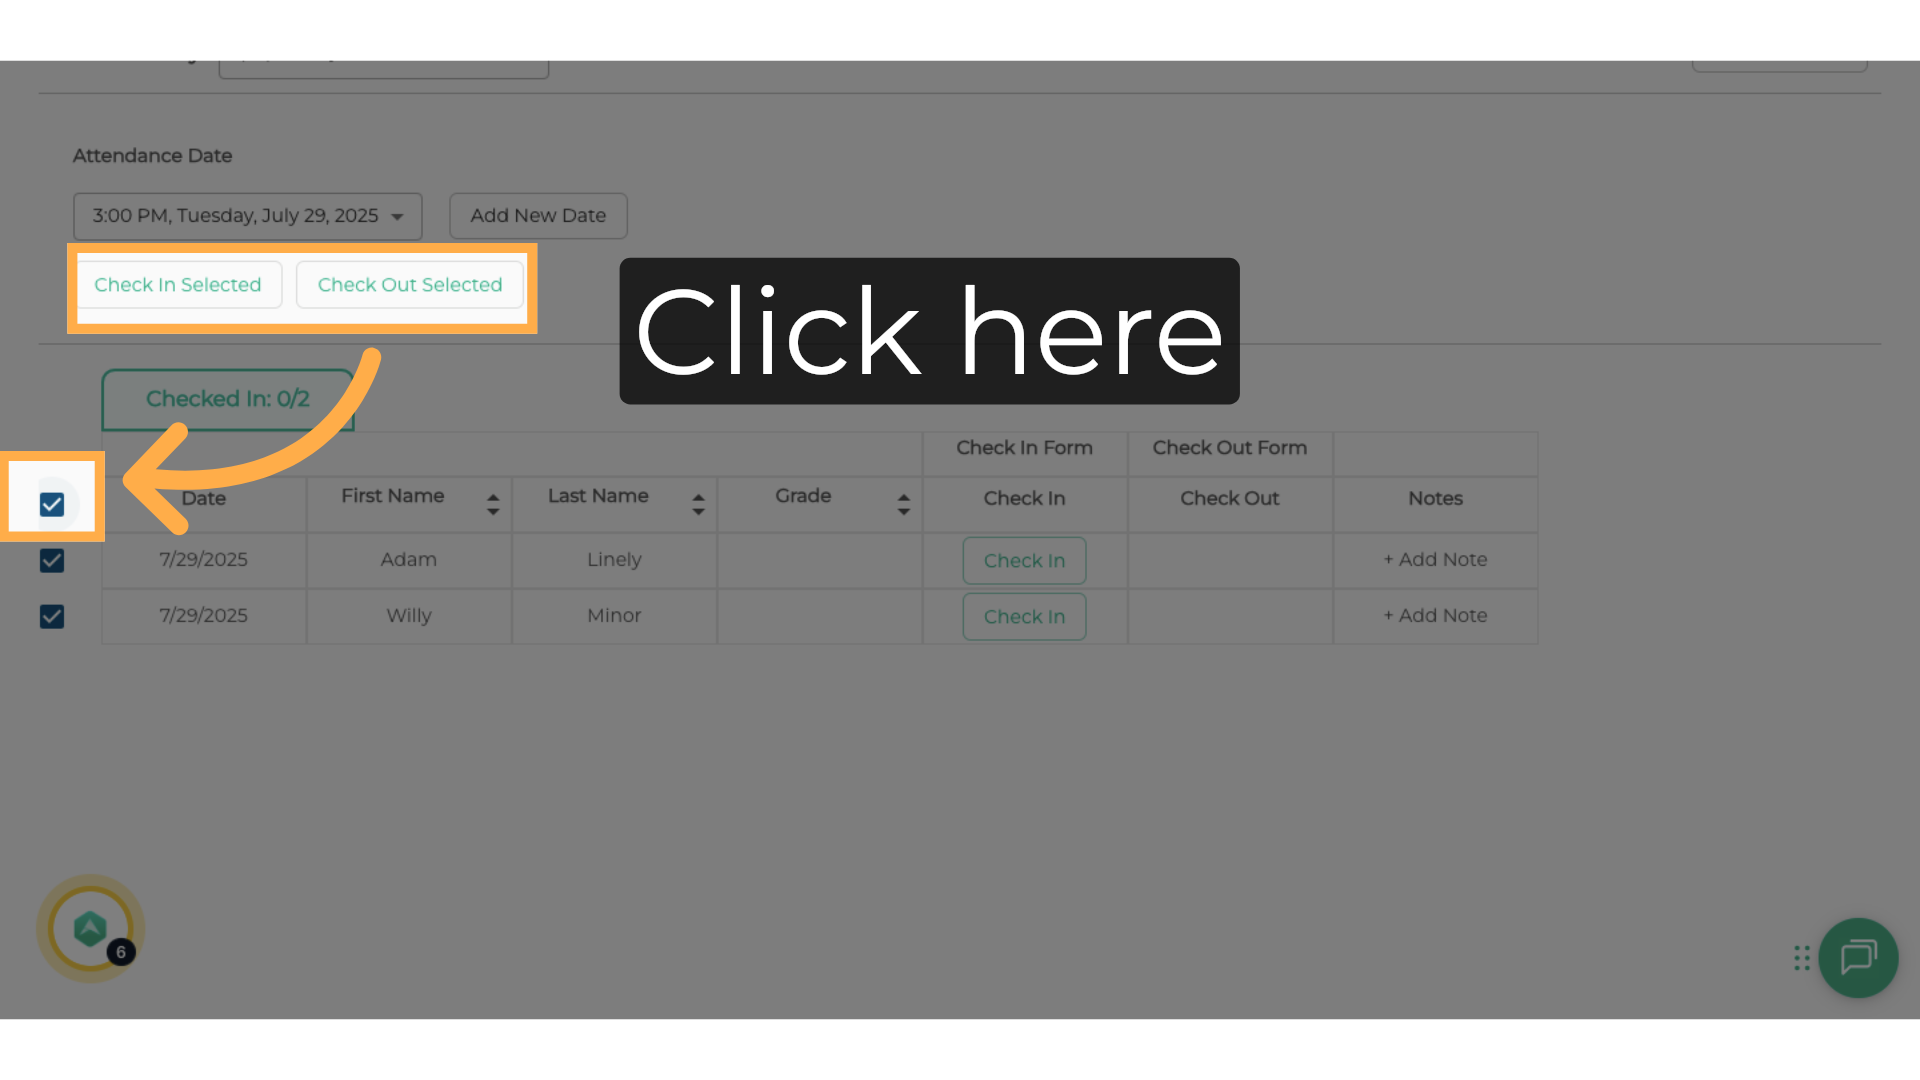
1. Can I check in or out multiple students at the same time?
Yes! Select the students you want to check in or out, then click “Check In Selected” or “Check Out Selected.”
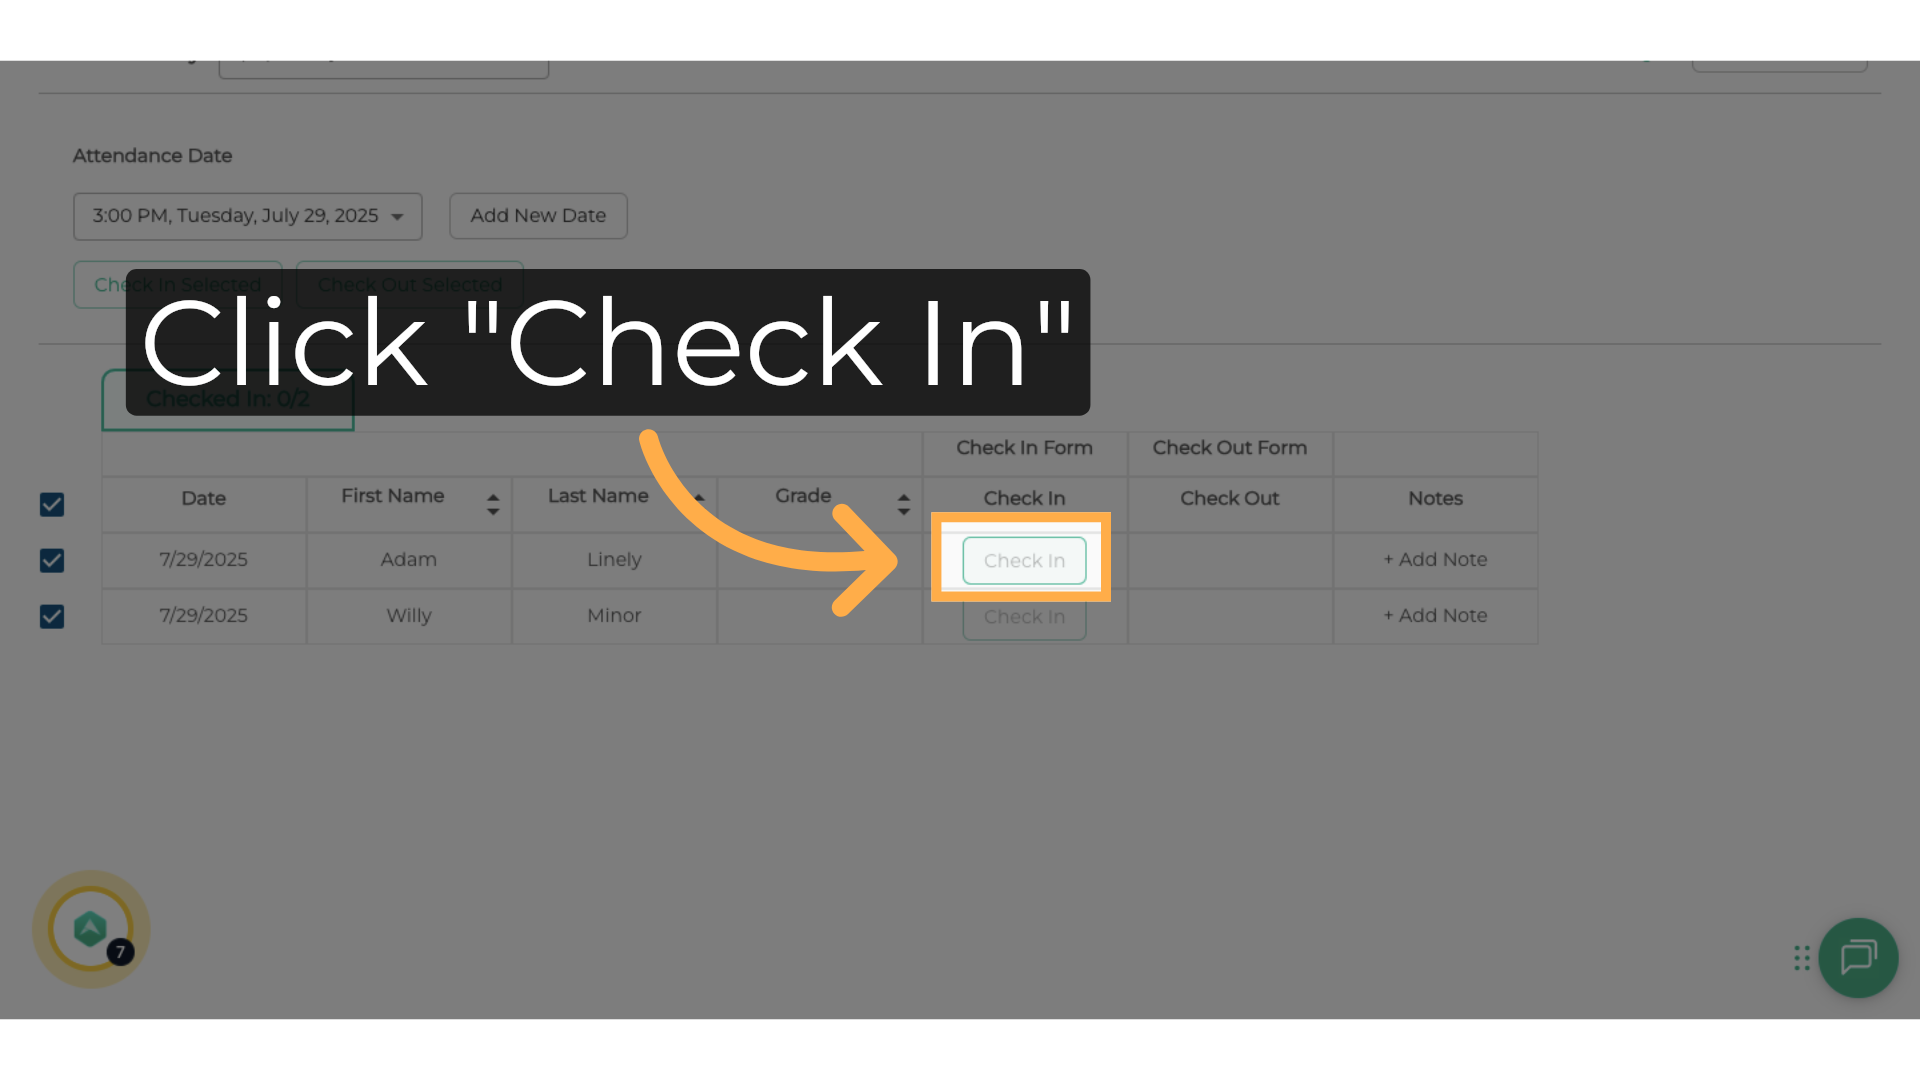
2. Can I check in/out individual students?
Yes, click the “Check In” or “Check Out” button next to the student to record their attendance individually.
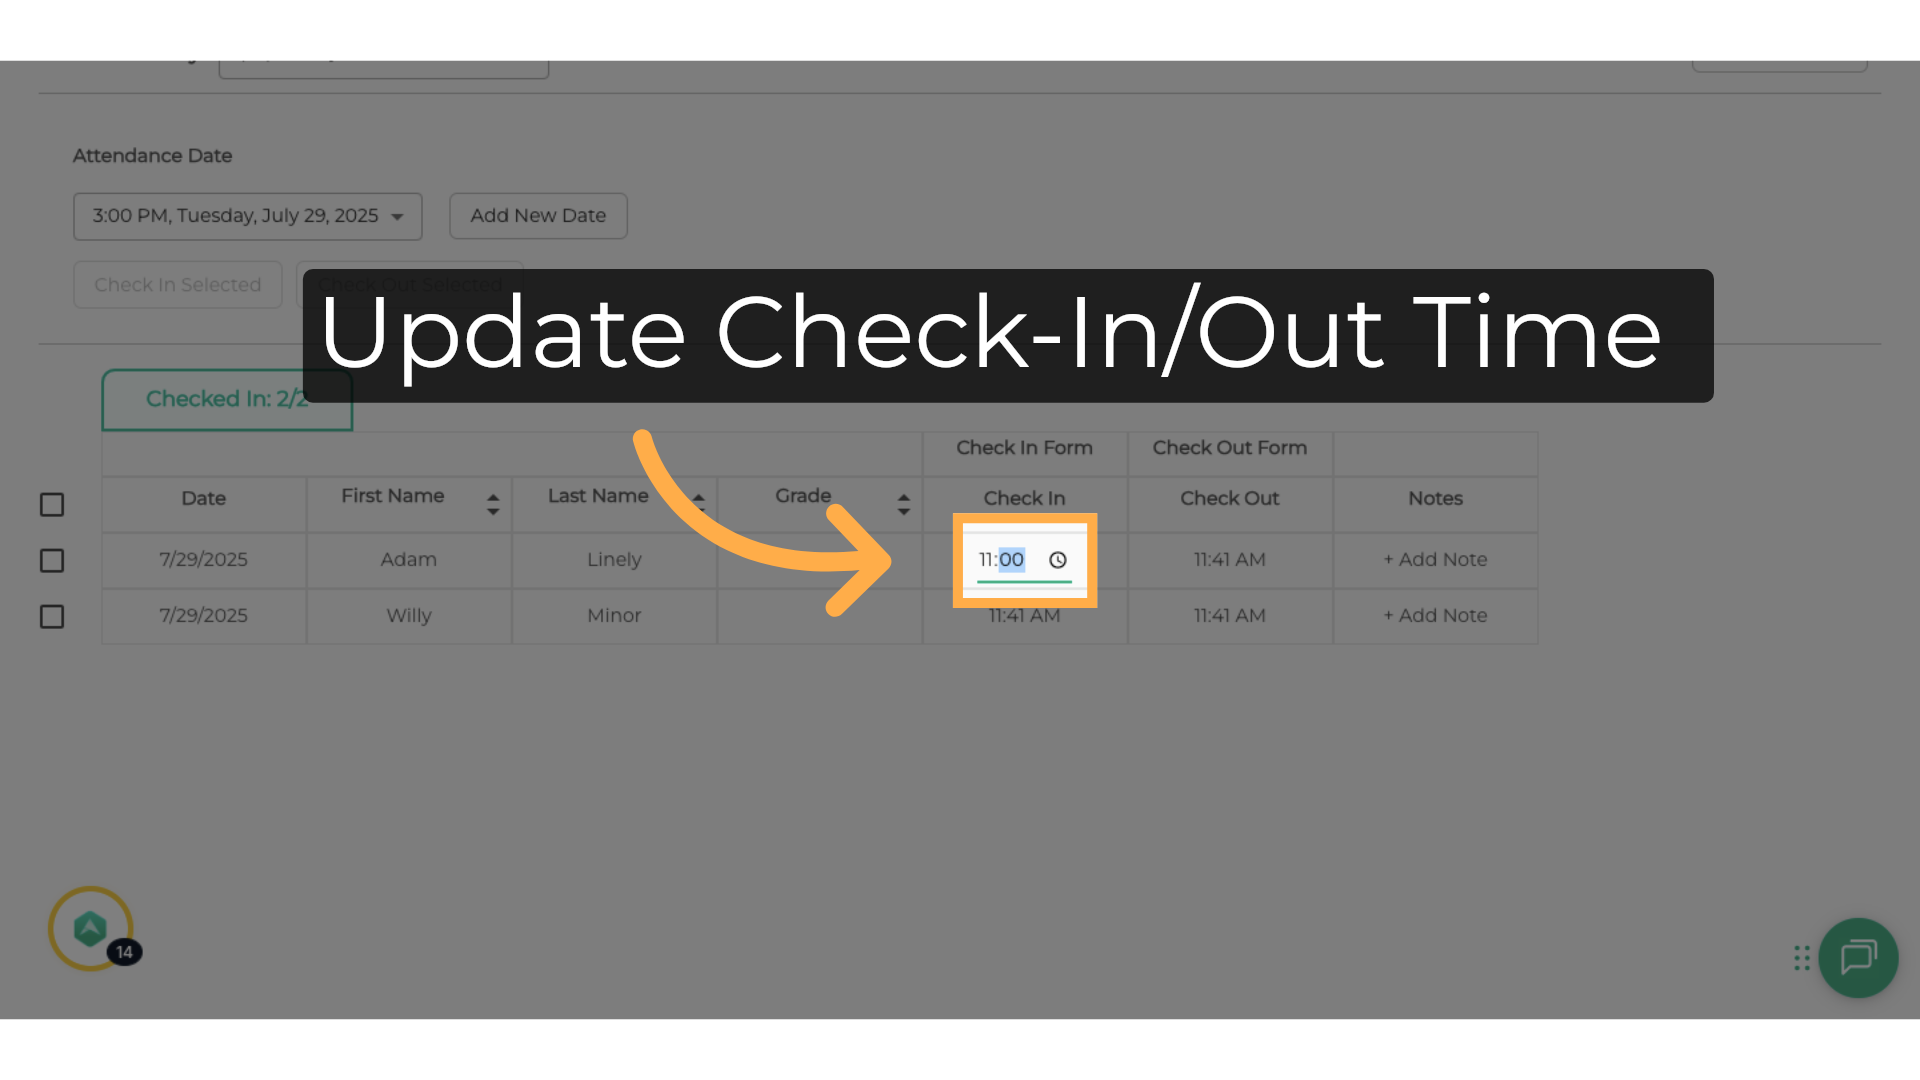
3. Can I edit check-in/out times?
Yes, click on the currently displayed check-in/out time to modify it.
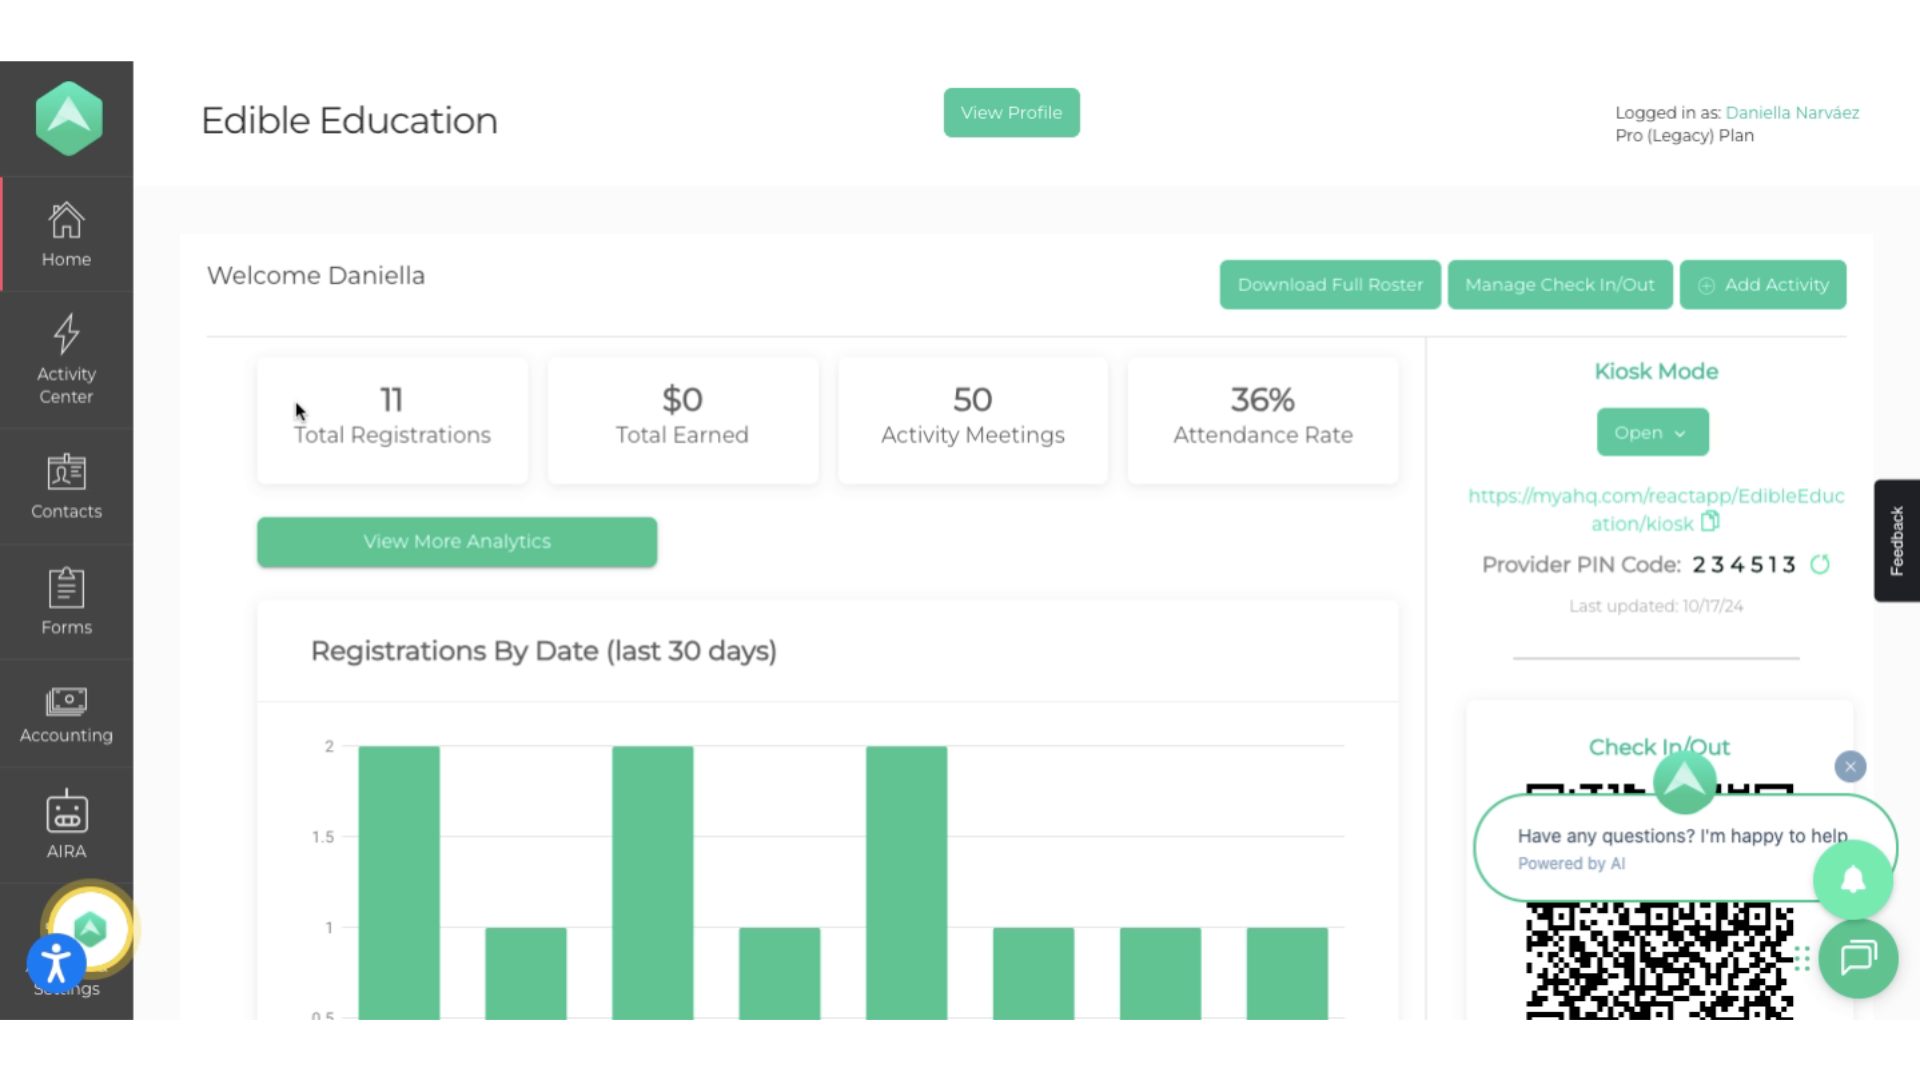
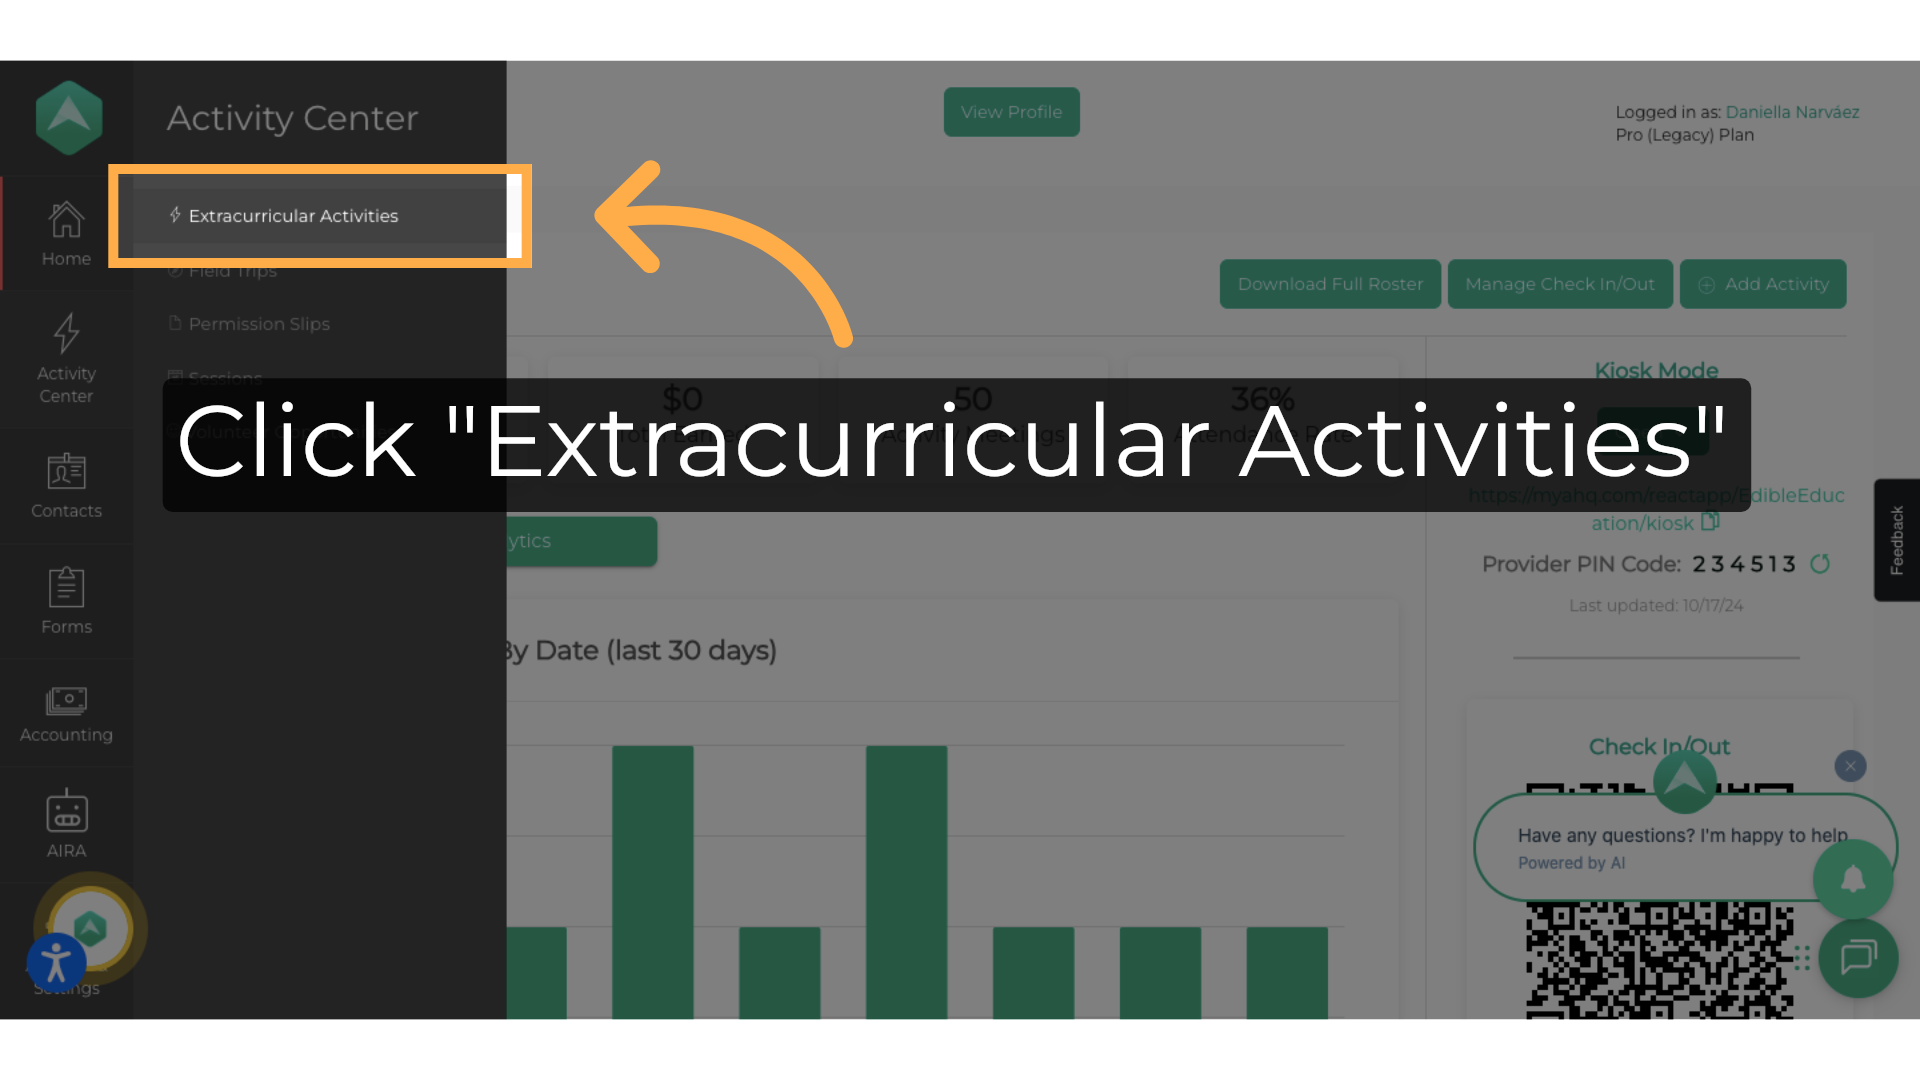
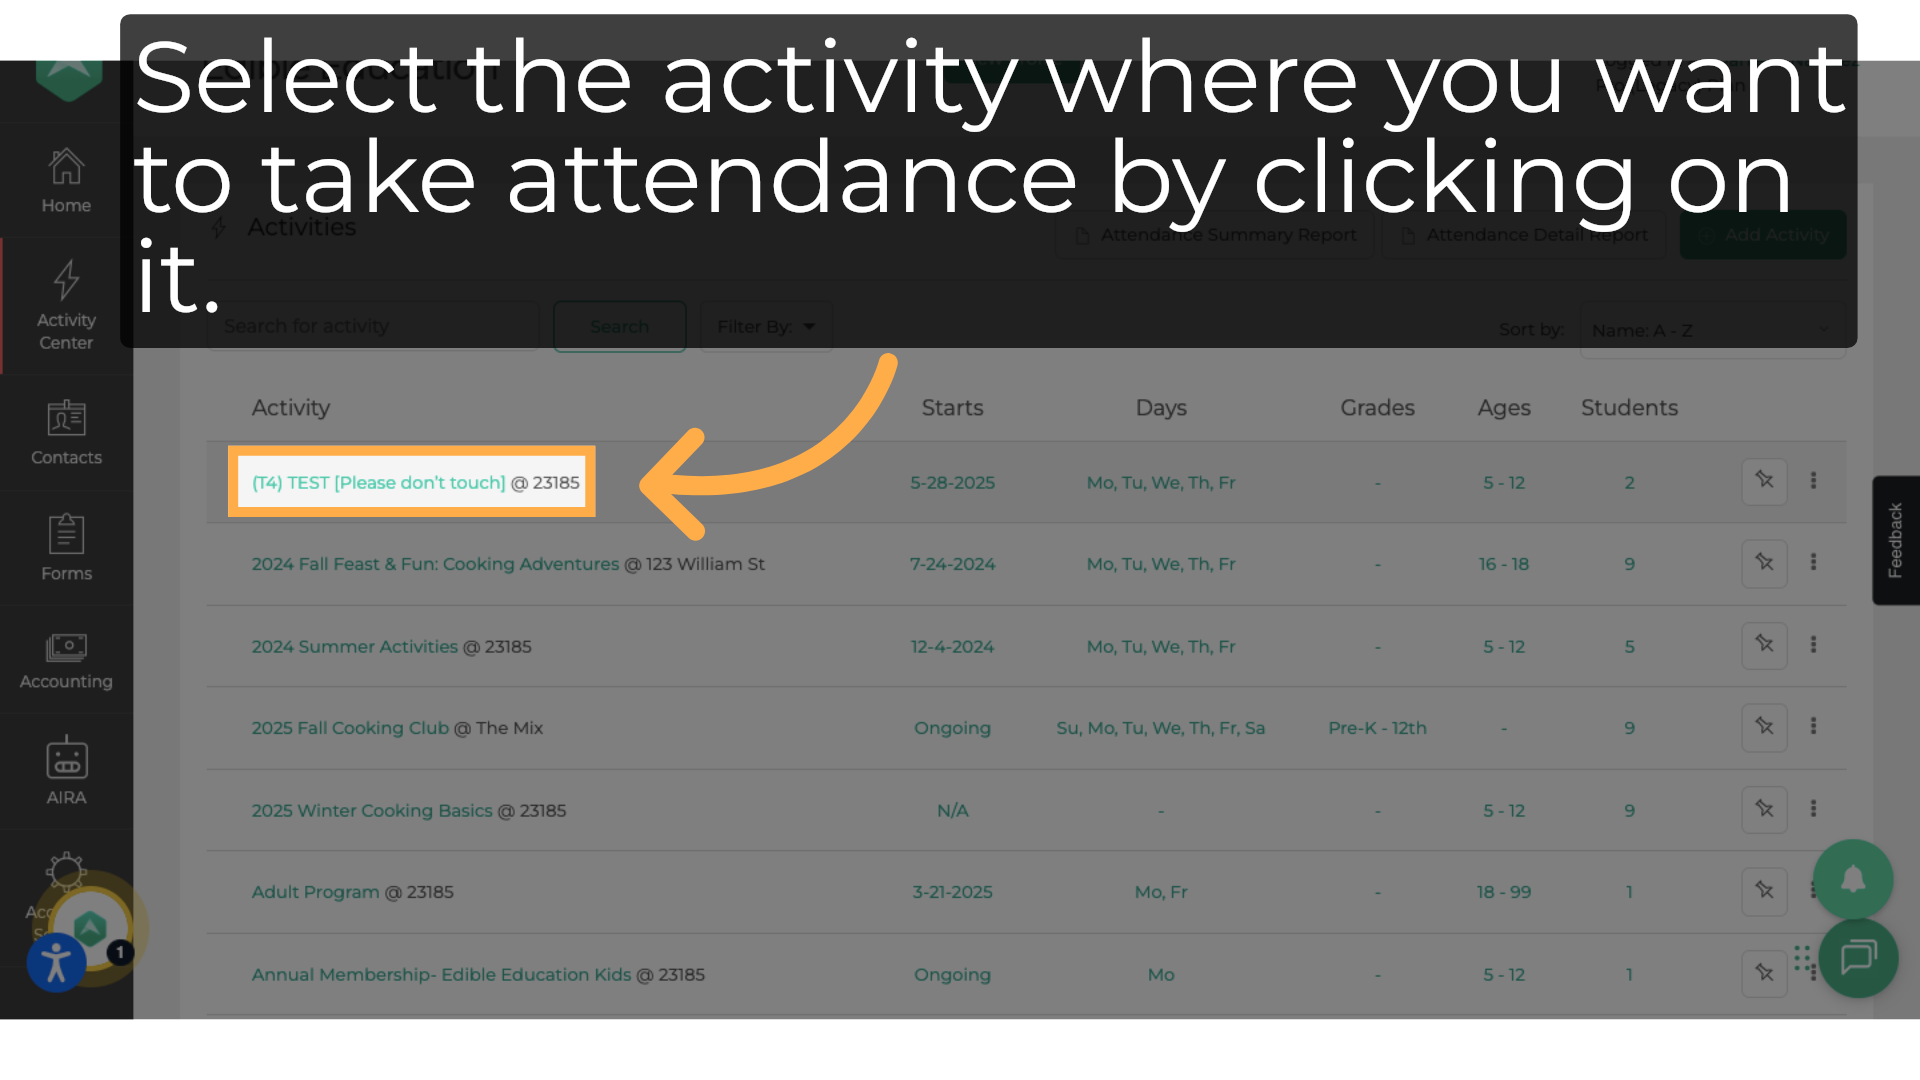
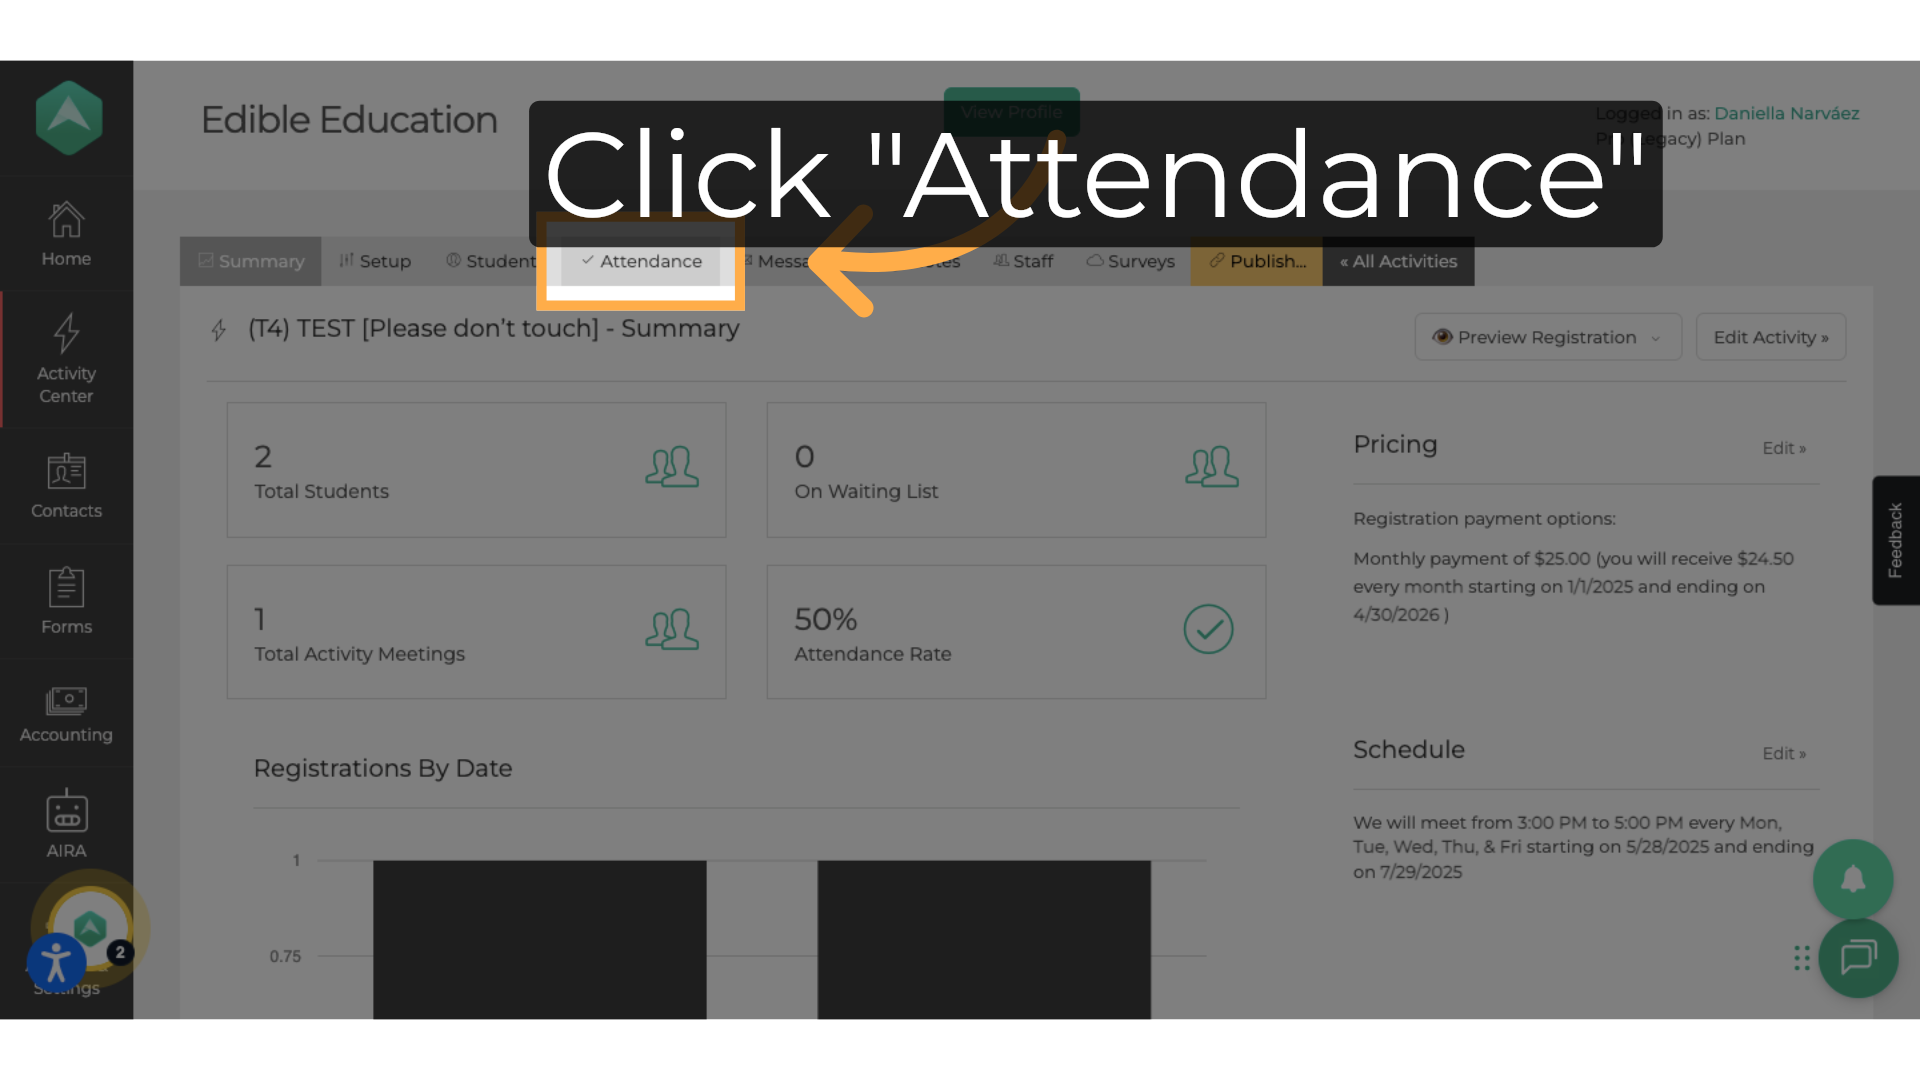
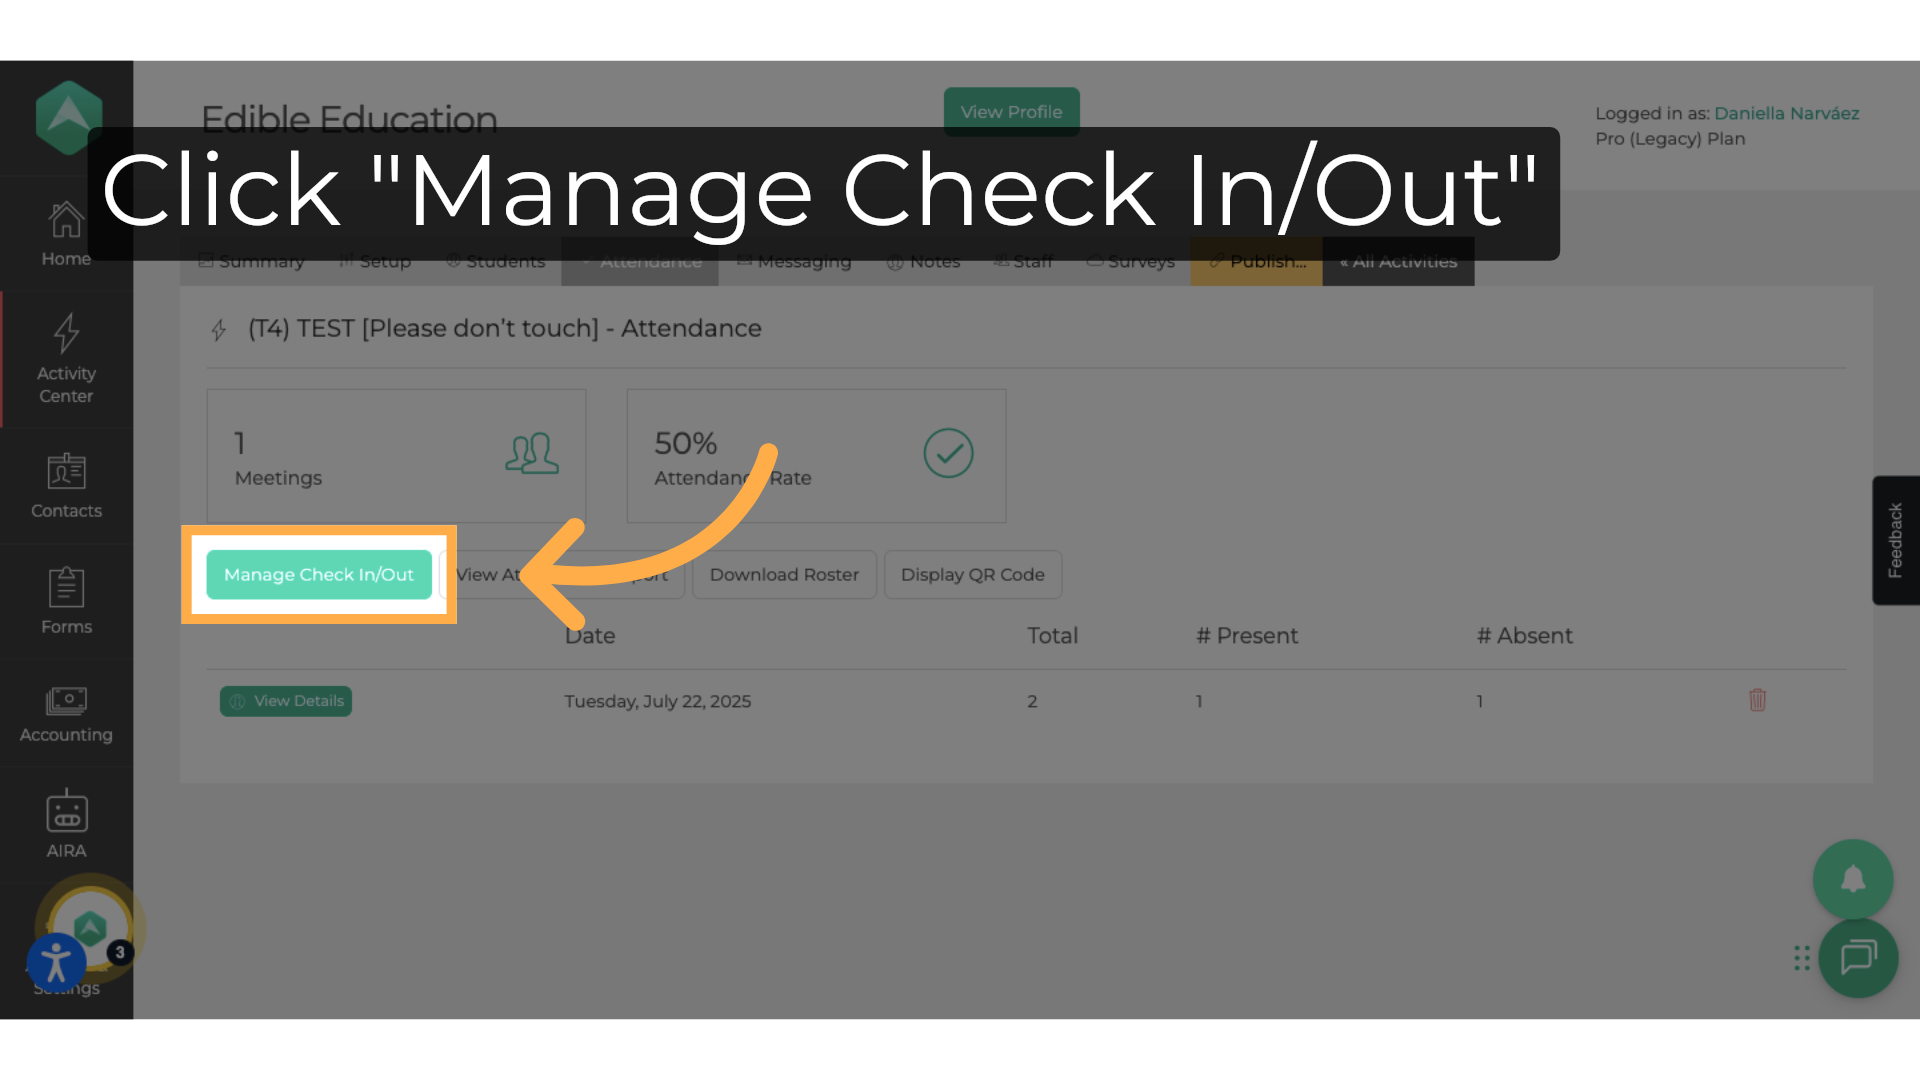
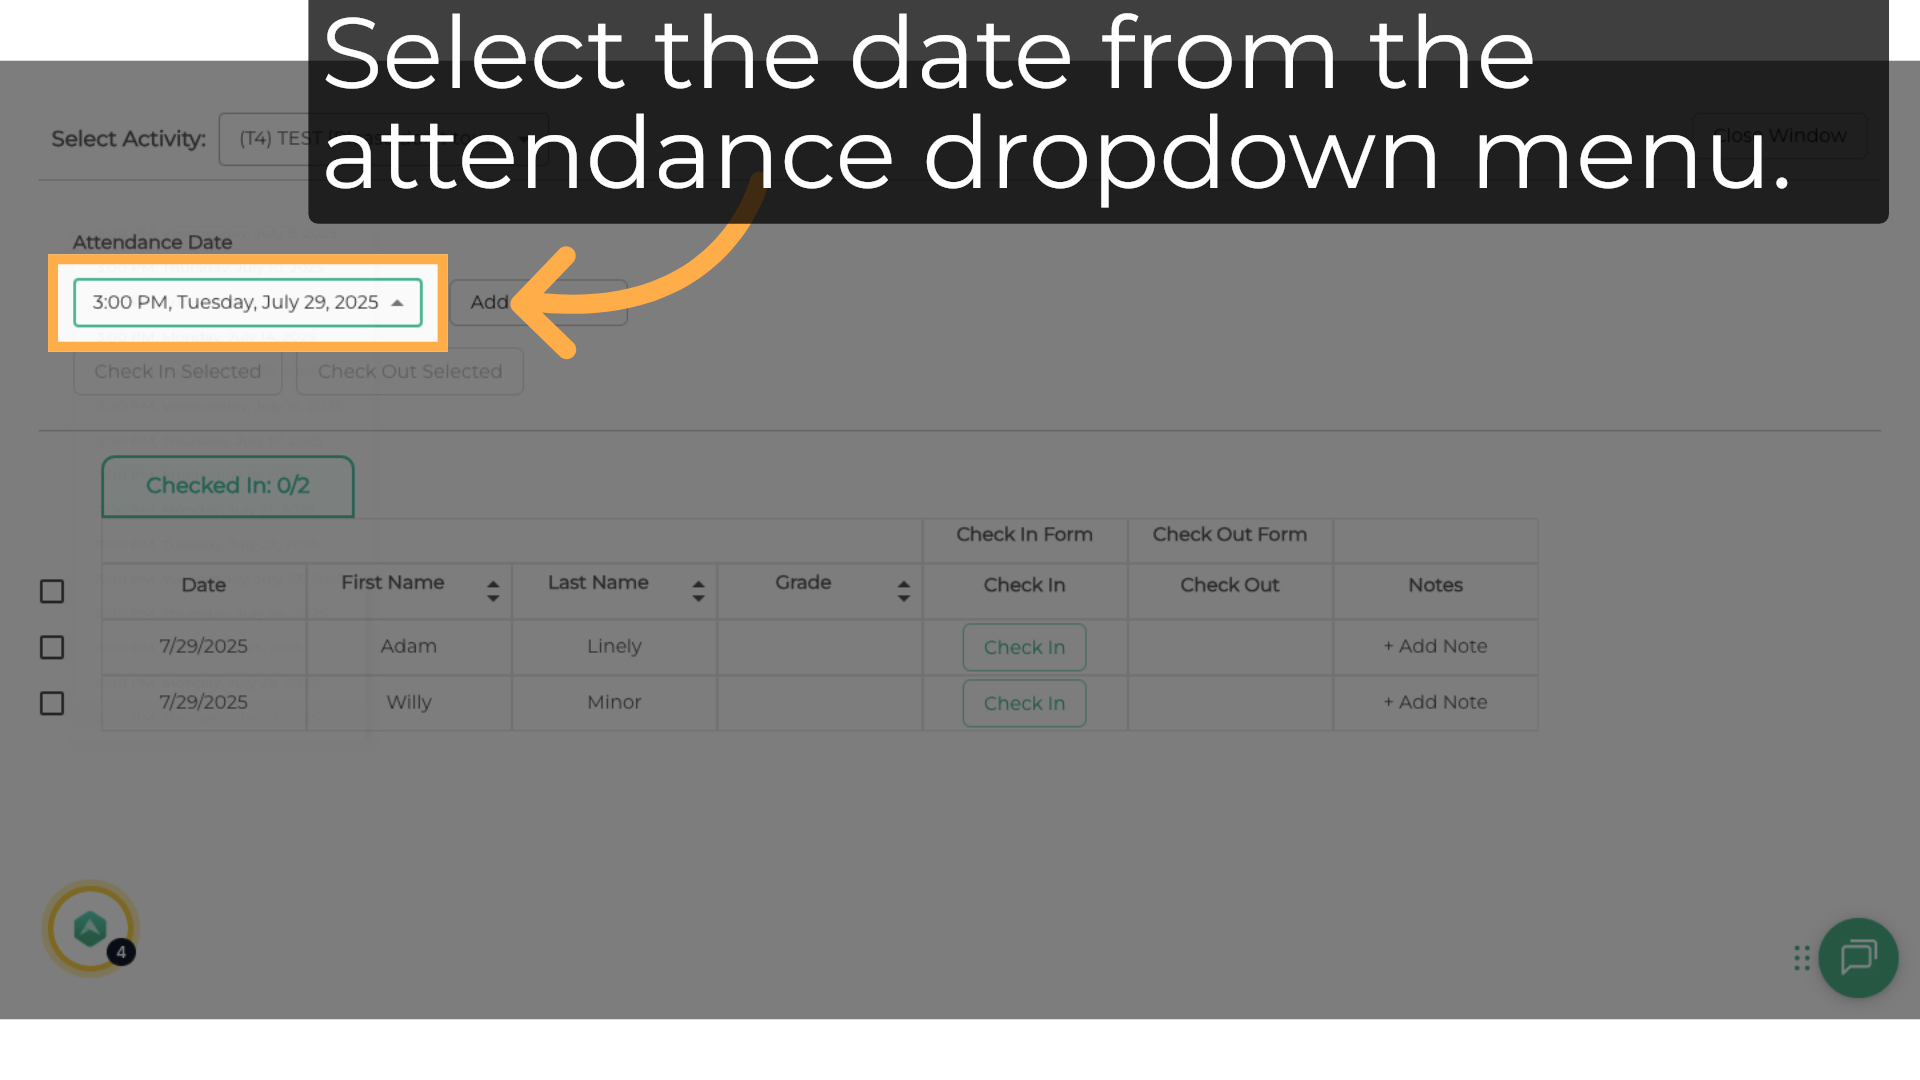
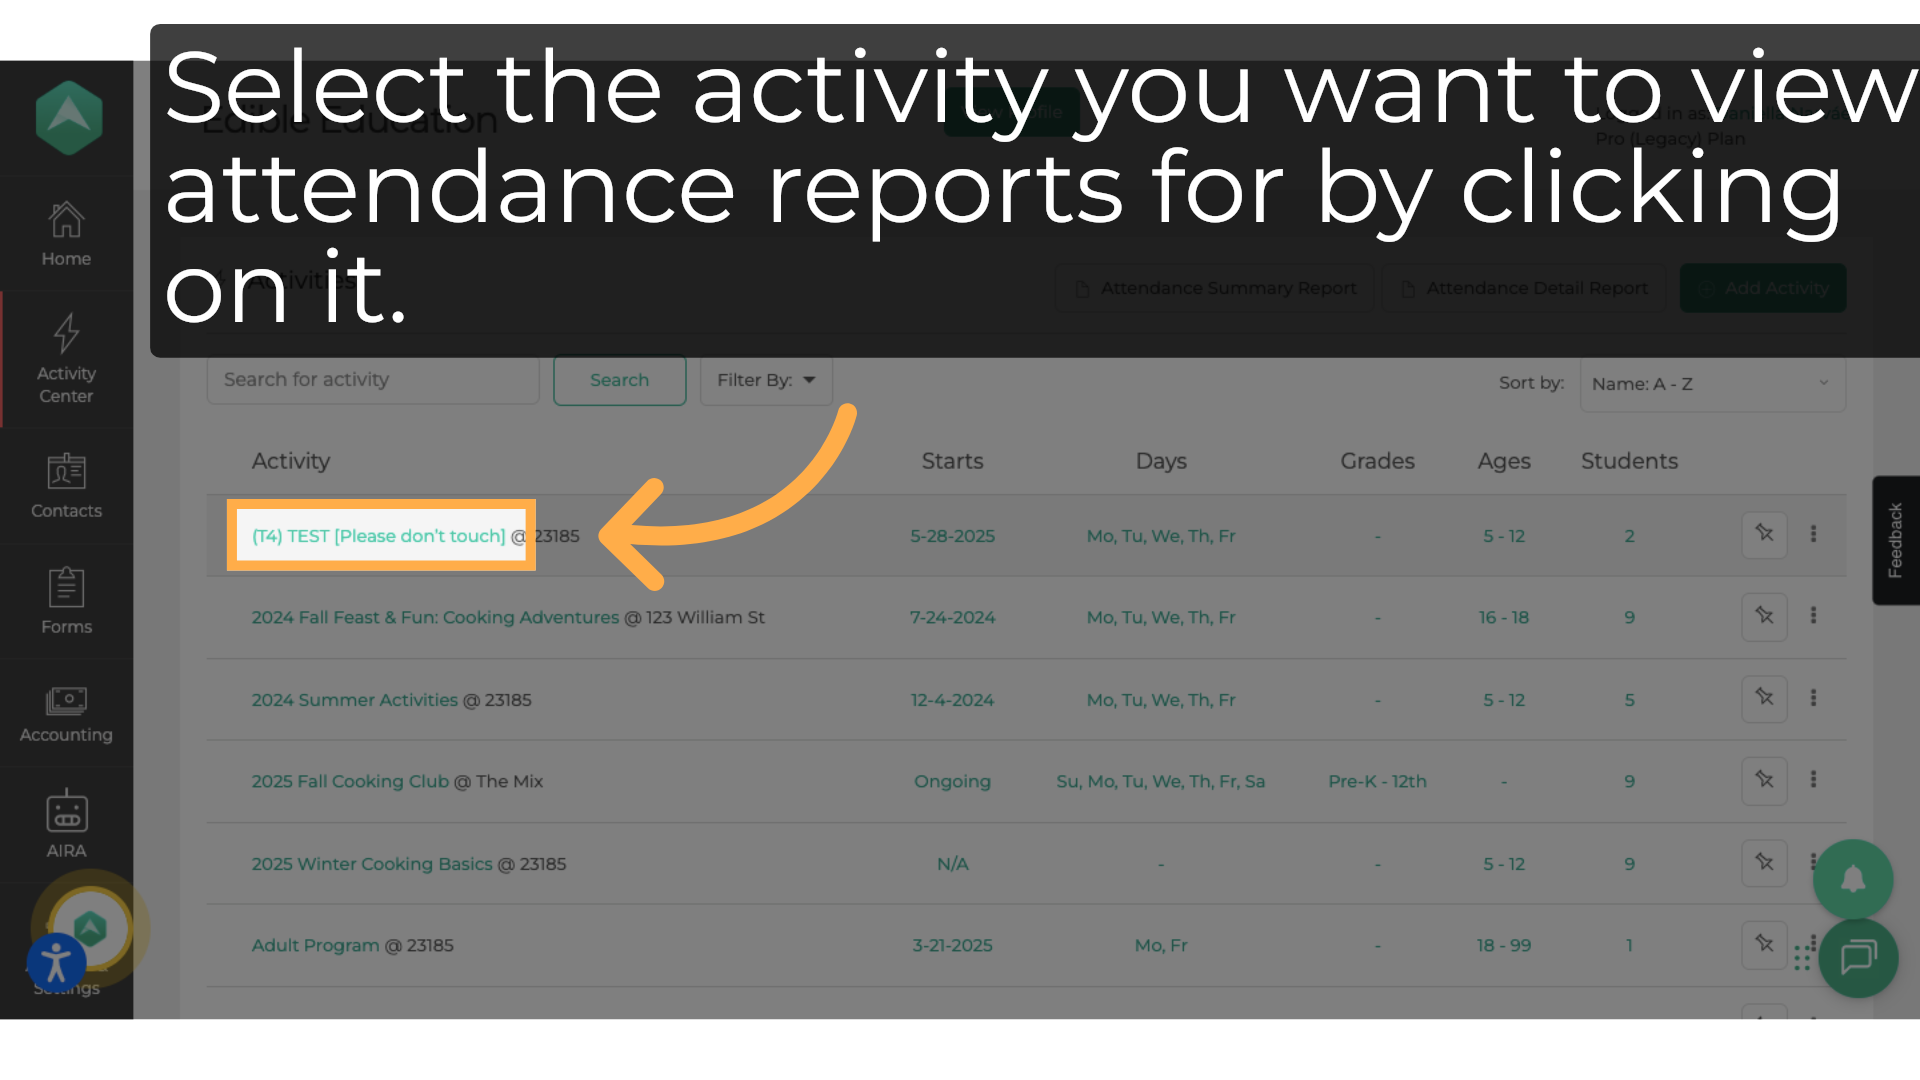
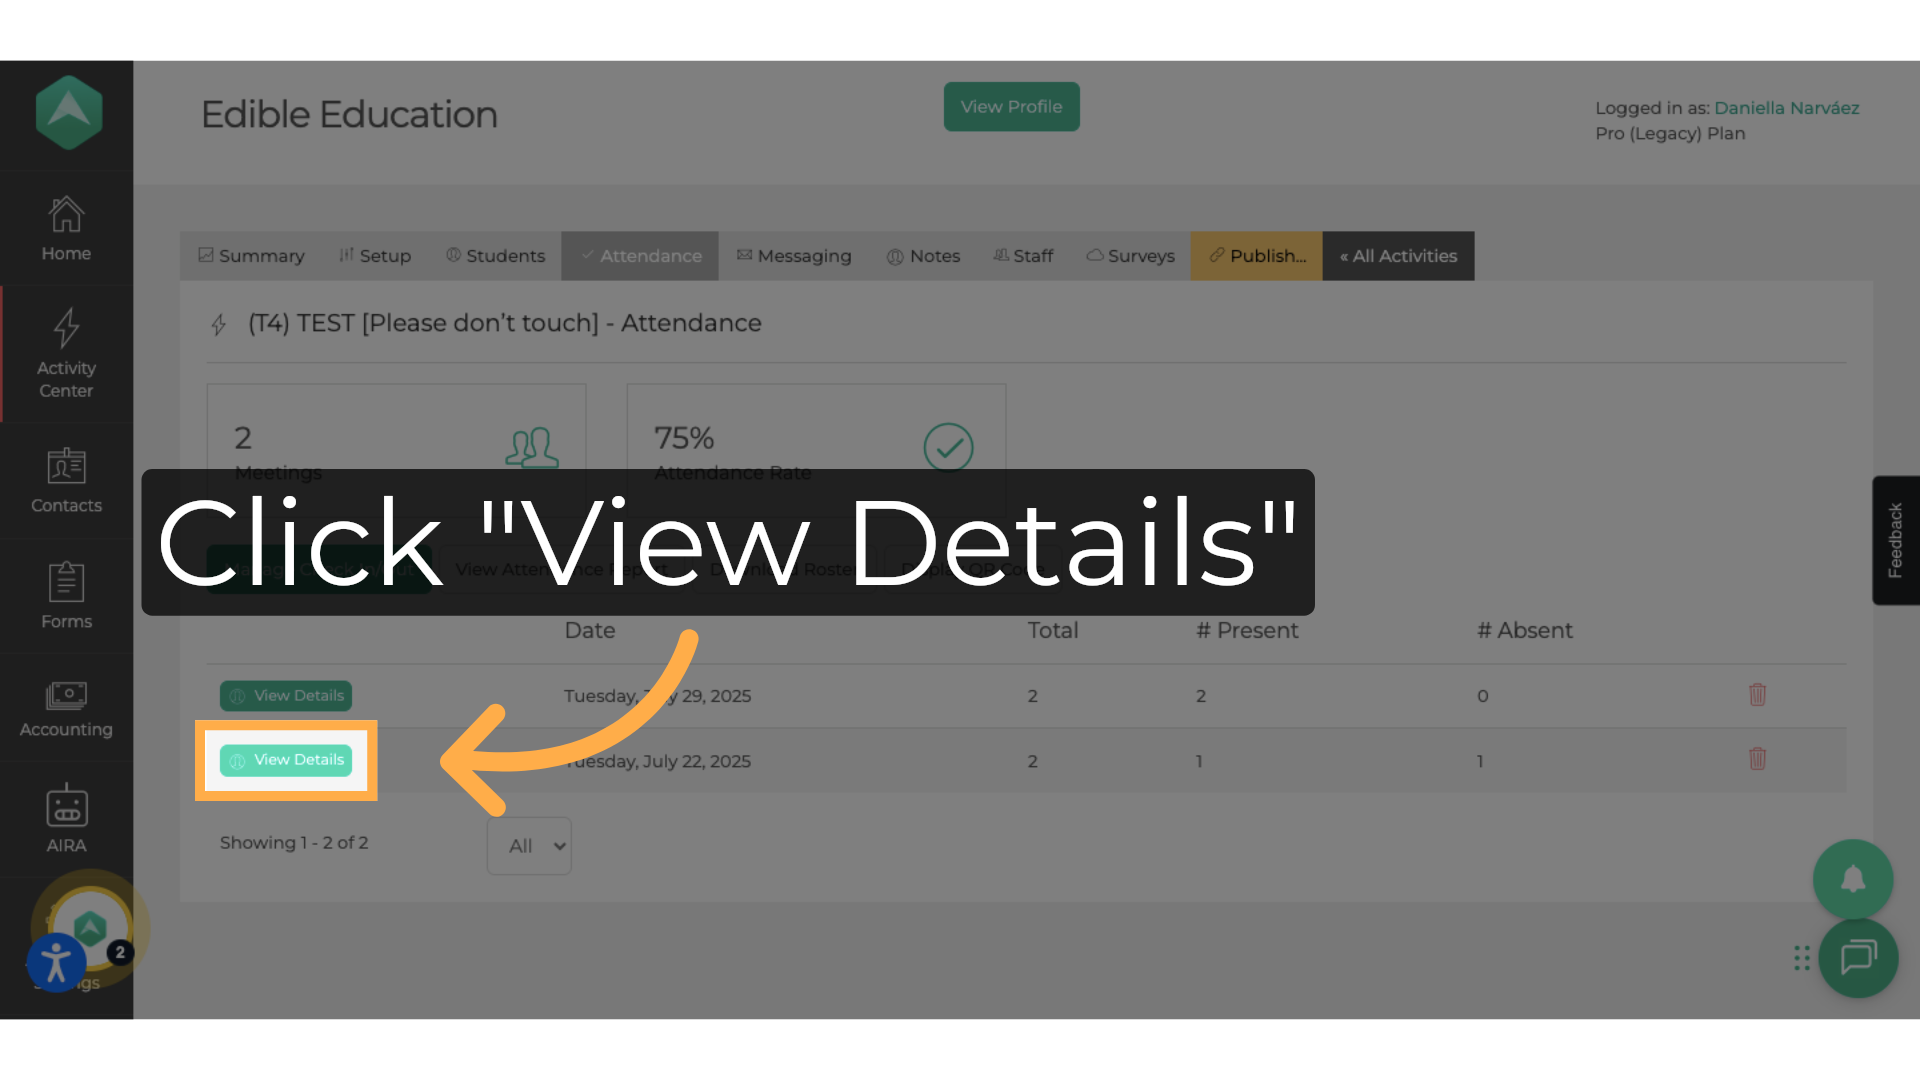
4. How do I view attendance reports for a specific activity?
Select the activity from the list of activities to view its attendance reports. Then click “View Details” to see detailed information.
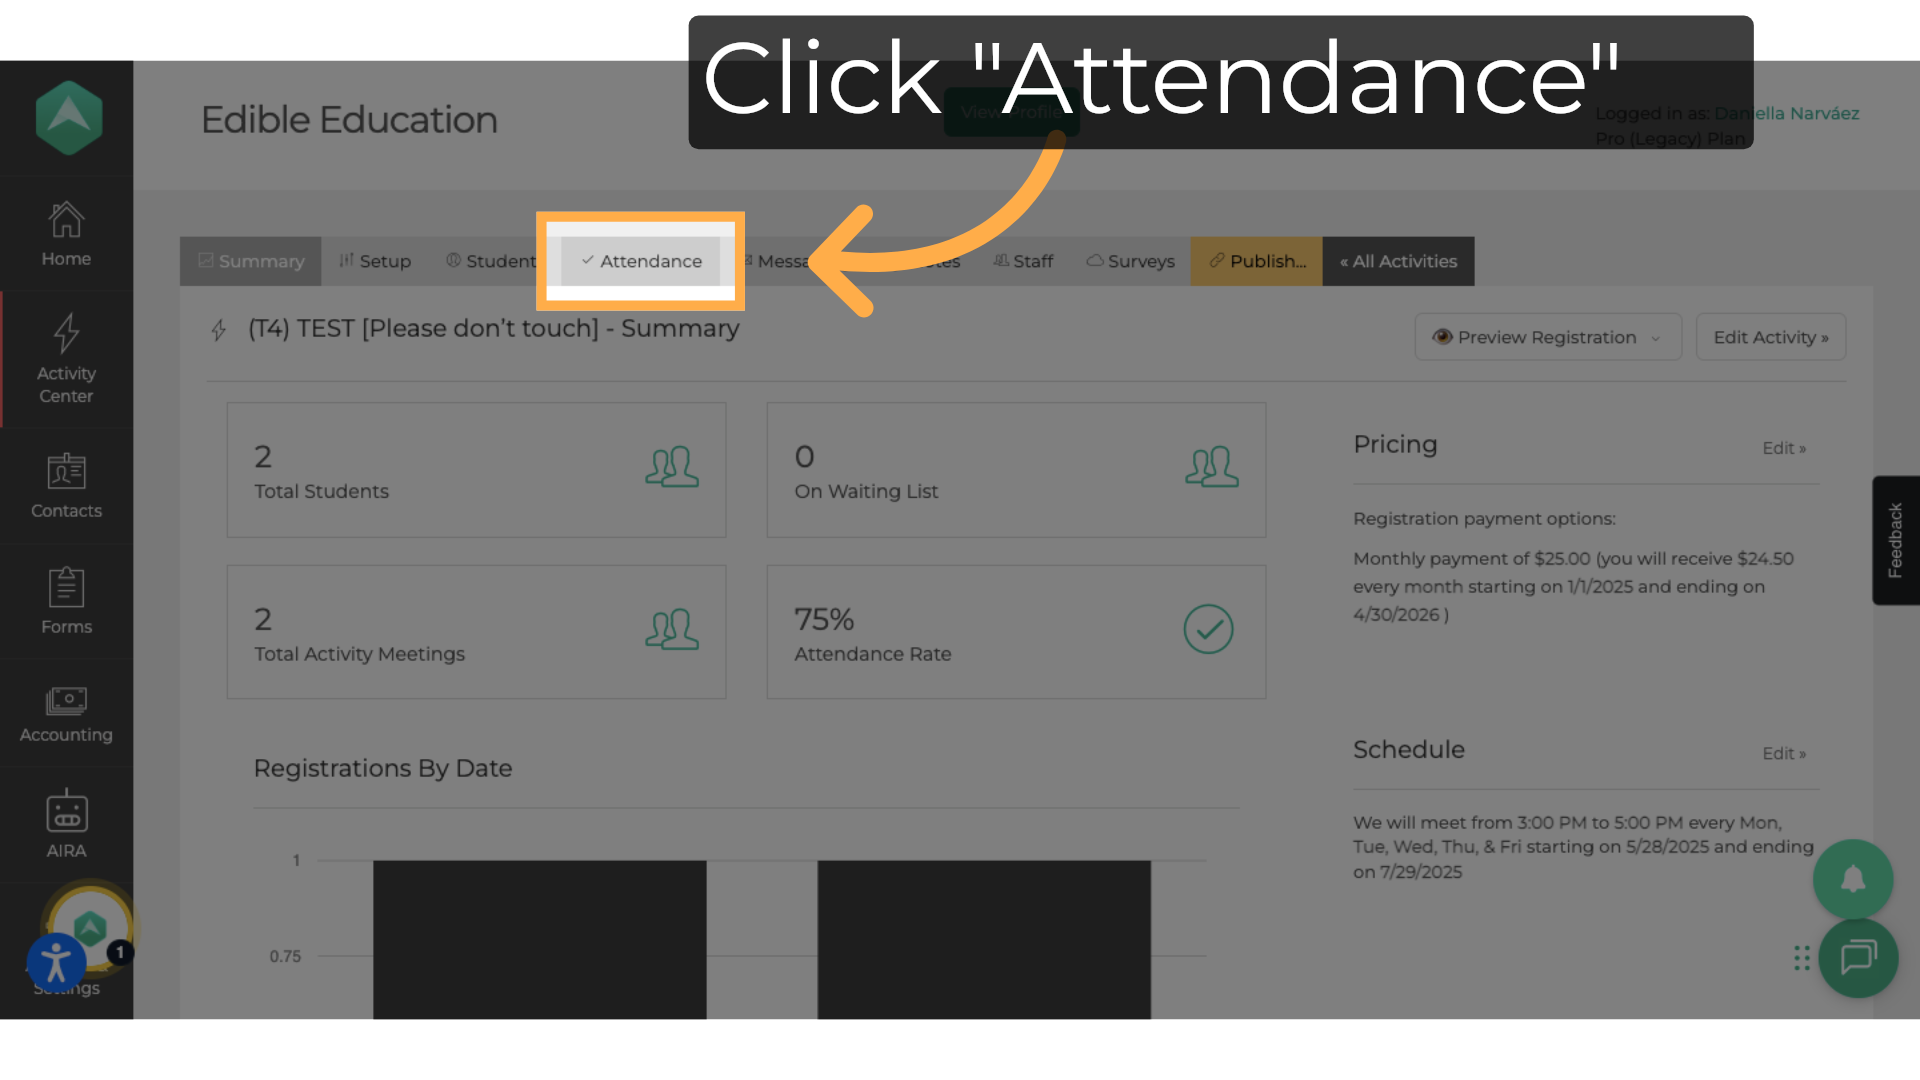
5. Can I edit attendance from the reports page?
Yes, when viewing detailed attendance in “View Details,” you can edit check-in and check-out times directly.
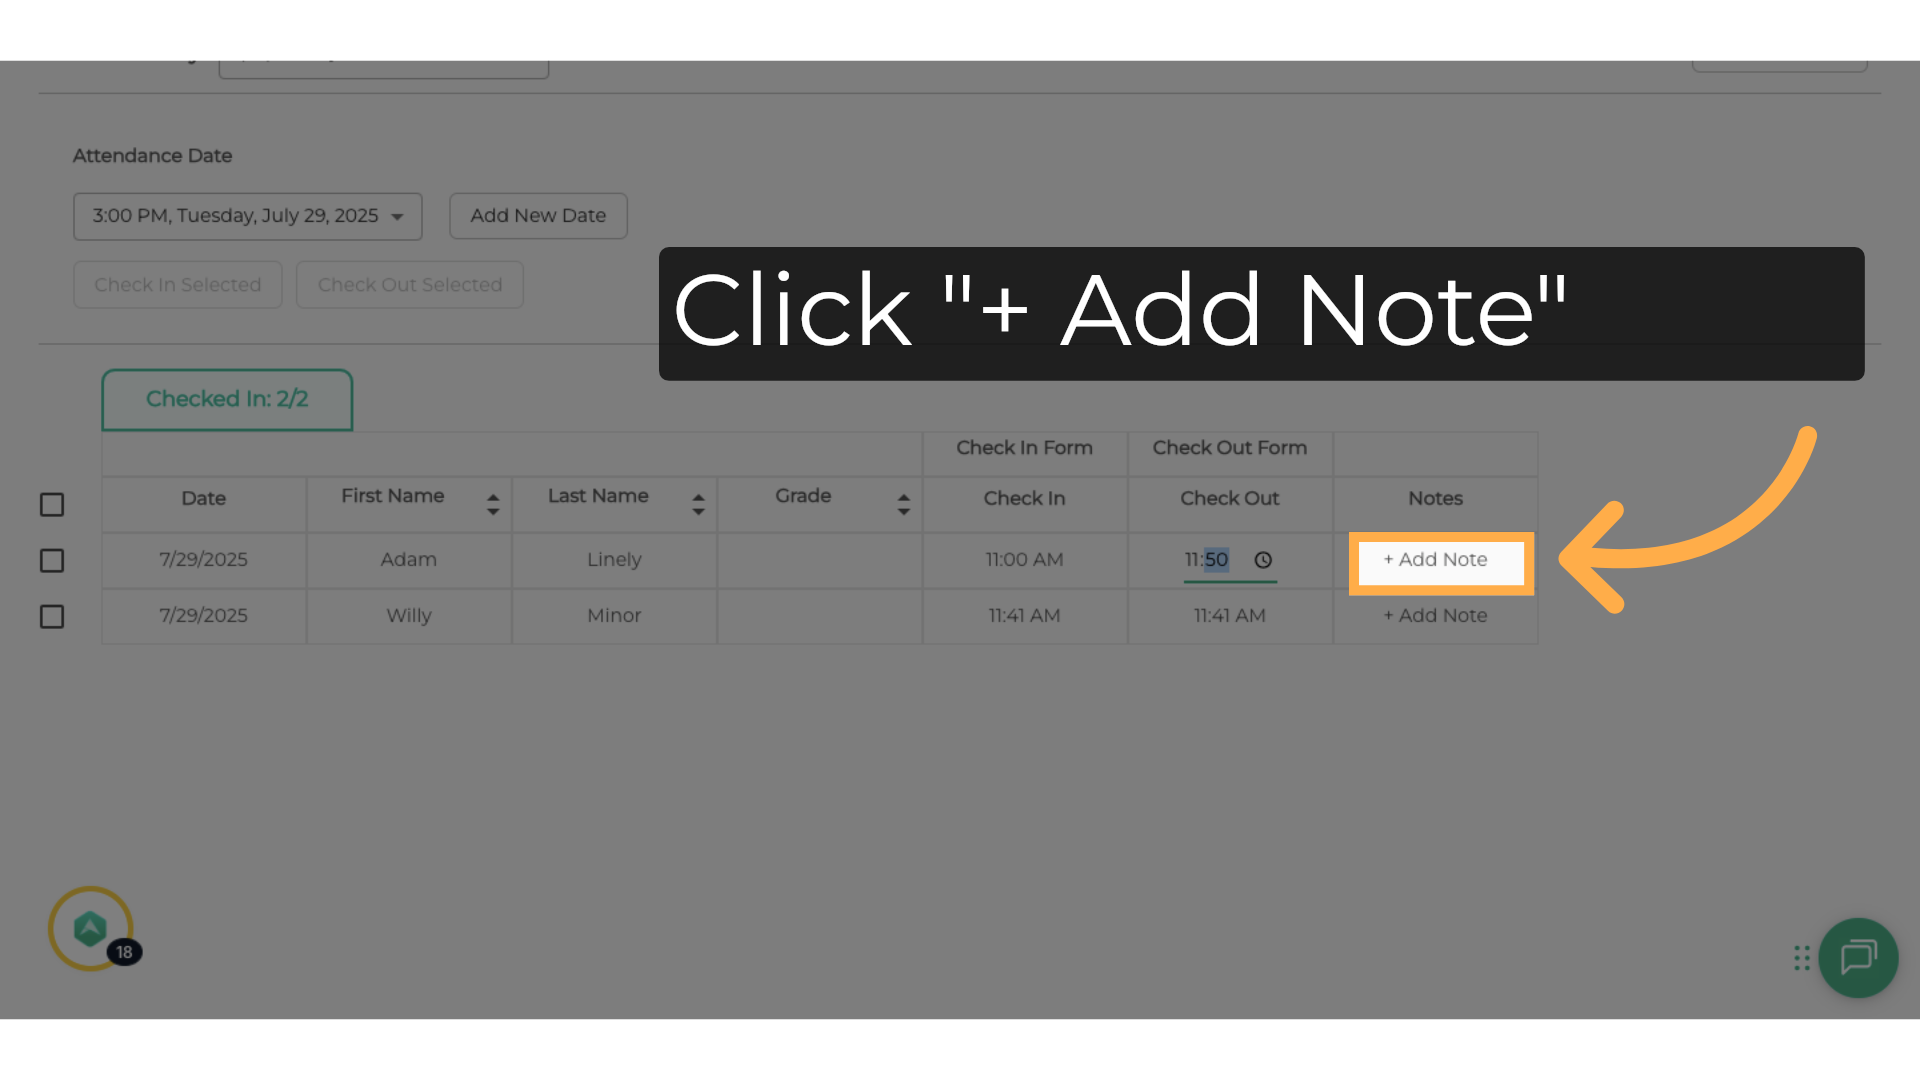
6. Will parents see the notes I add to attendance?
No, attendance notes are internal and for staff reference only.
7. What if a student is not showing in the attendance list?
Ensure the student is registered for the activity. Only students with a reserved or active status will appear in the attendance list.
💡If you have any questions or technical difficulties with Viewing and Editing Attendance, we want to hear from you. Contact us at support@afterschoolhq.com.