(keywords: check, in, out, tracking, student, child, information, activities)
The Check In & Check Out Forms feature is designed to improve the efficiency and accuracy of the check-in and check-out processes in your afterschool program. These customizable forms allow staff to gather essential information about each child, ensuring better communication and tracking.
In this guide, we will cover how to set up these forms, provide example questions for check in and check out, and explain how to use them.
Setting Up the Forms
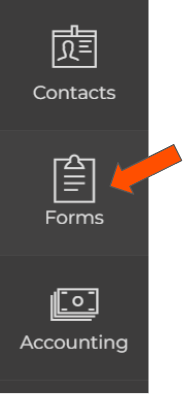
● Step 1. After logging in, click Forms:
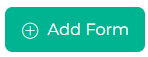
● Step 2. Click Add Form located on the upper right hand side of the screen:
● Step 3. A pop-up window will appear. Under Form Name, name the form. Next, click on the Form Type dropdown menu and select Survey.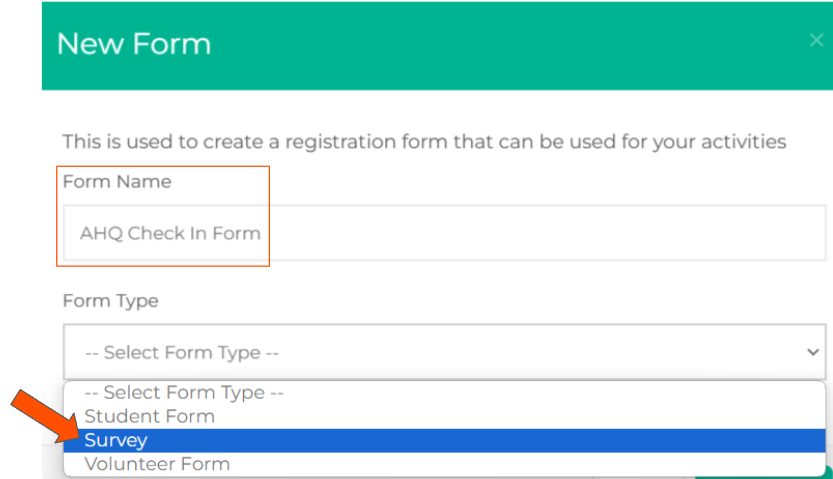
• Note: If you need to gather different information for Check-Ins and Check-Outs, you must create two separate forms.
● Step 4. Once you have named the form and selected the correct Form Type, click Create Form: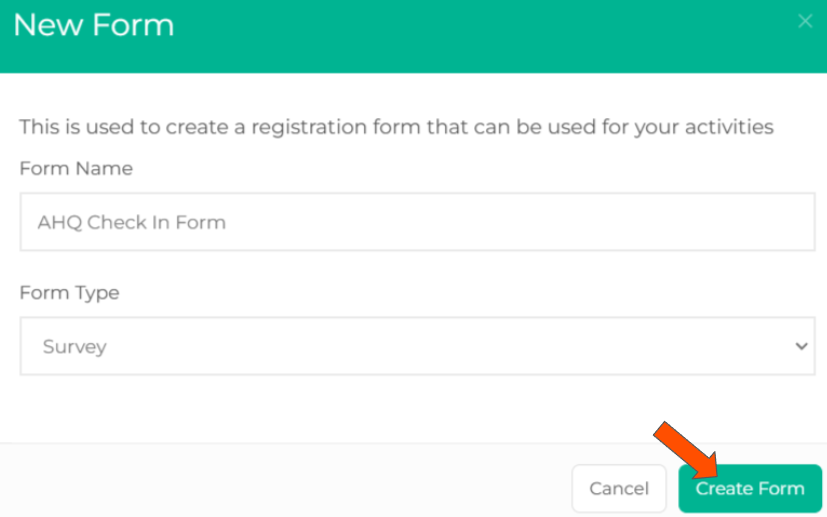
● Step 5. Click +Add New Section located on the right hand side of the screen: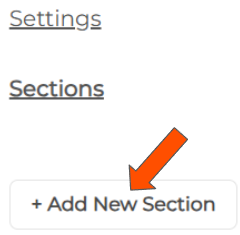
● Step 6. Enter a name for the section and click on the green check mark: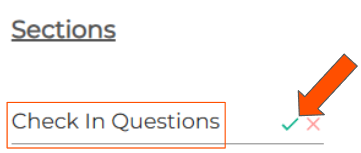
● Step 7. Click on the section name you entered: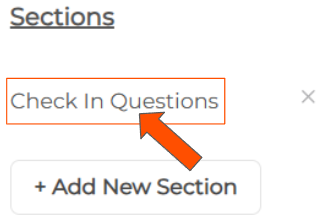
● Step 8. Here, you can tailor these forms to include any questions that are pertinent to your program's operations. Click +Add New Question to begin: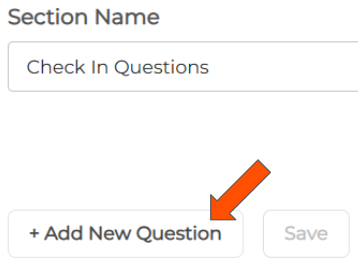
![]() Supported question types:
Supported question types:
- Dropdown
- Single line Text
- Checkbox
- Date
- Number
⭐ Add the specific questions you want staff to answer during the check-in or check-out process ⭐
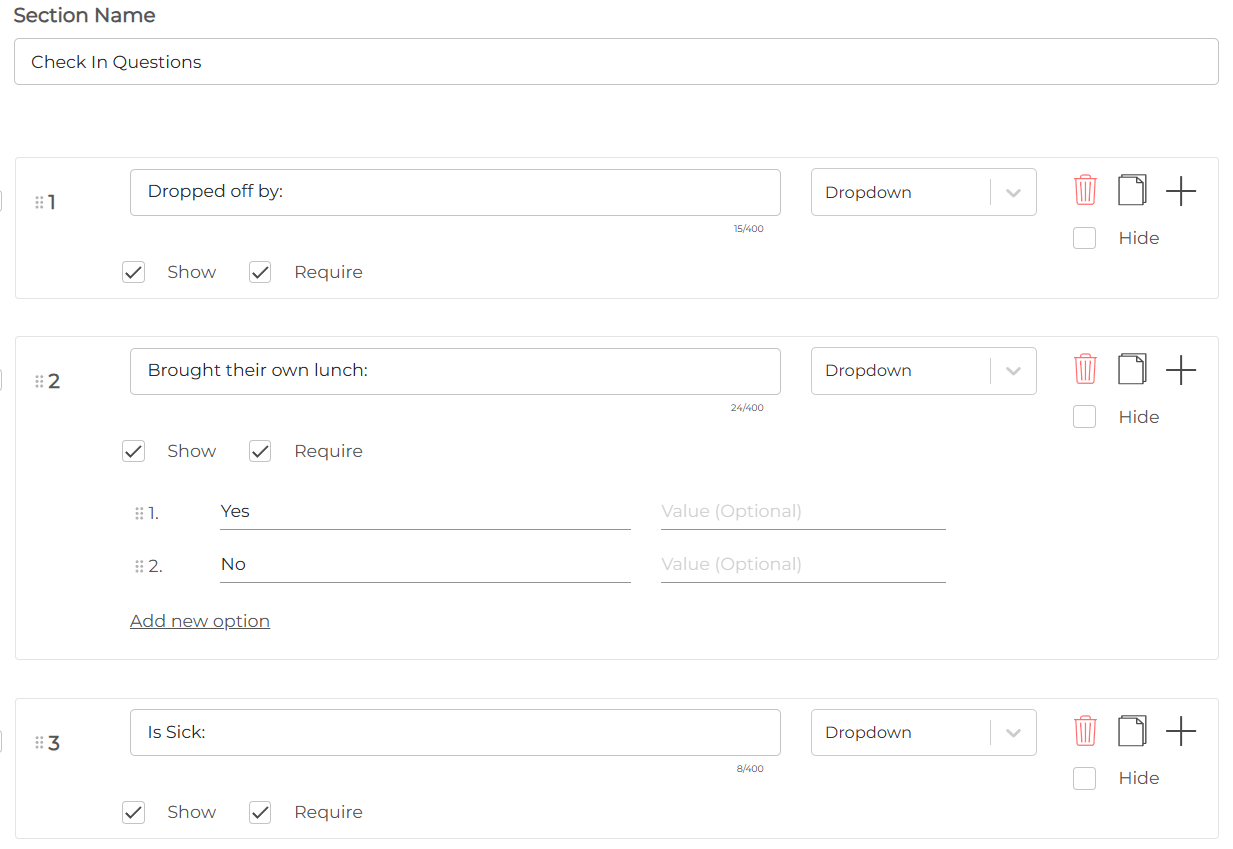
Check-In Examples:
- Dropped off by:
- Brought their own lunch:
- Reason for arriving tardy:
Check-Out Examples:
- Picked up by:
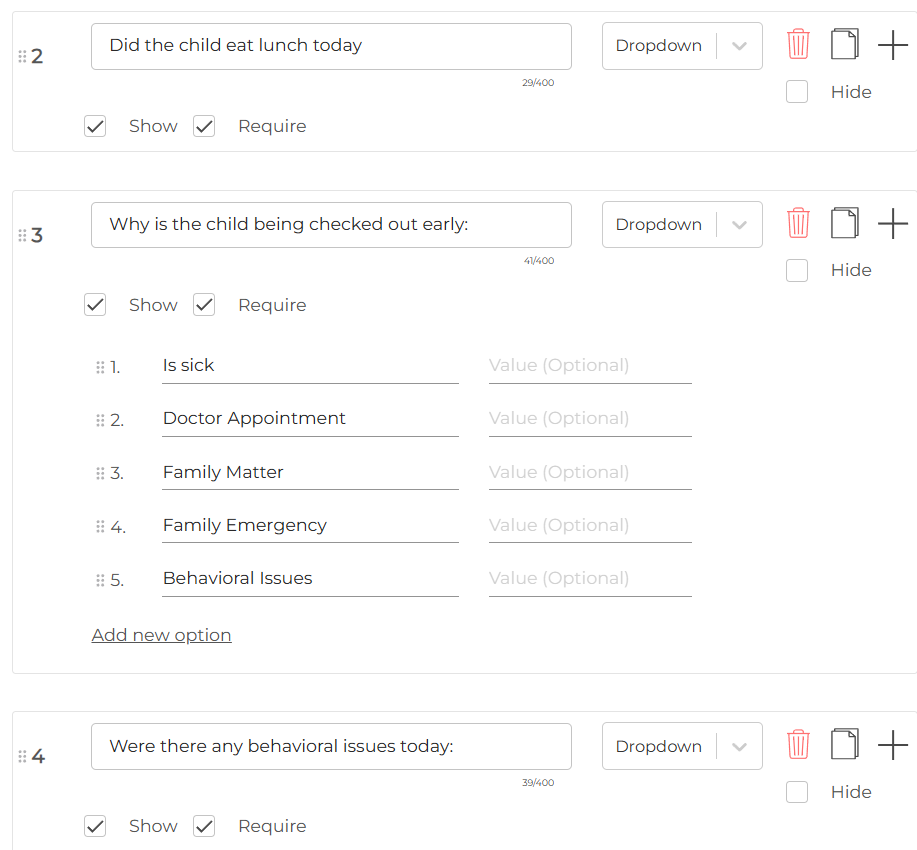
- Did the child eat lunch today:
- Why is the child being checked out early:
- Were there any behavioral issues today:
❗Please make sure to click Save before leaving this page ❗
Attaching the Forms to Activities
Now that you have created your Check In & Check Out forms, you will need to attach them to the desired activity for the questions to appear when it comes time to take attendance.
● Step 1. In the Activity Center, click Extracurricular Activities: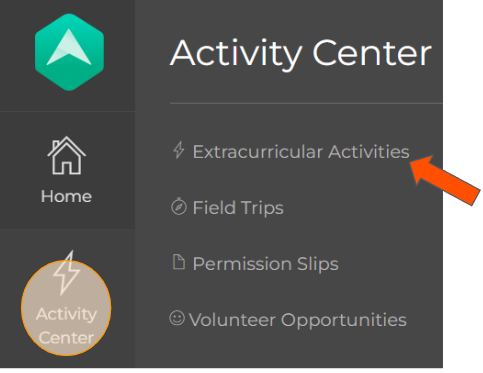
● Step 2. Click Manage next to the Activity name:
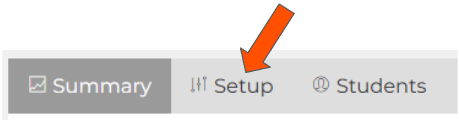
● Step 3. At the top of the page, click Setup:
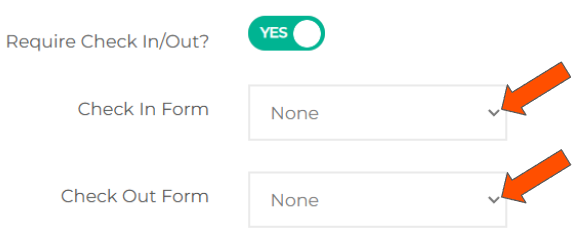
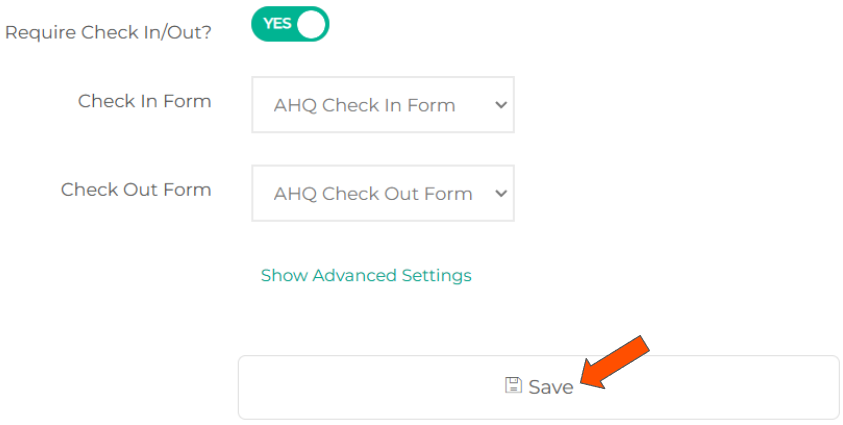
● Step 4. Toggle "Requires Check In/Out" to YES

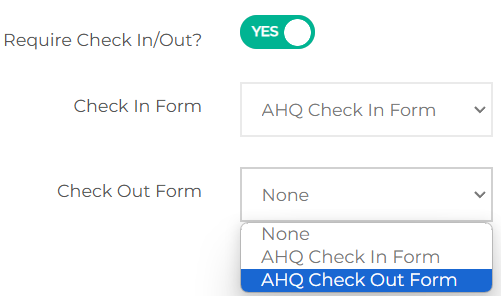
● Step 5. Click on the dropdown menus to select your Check In Form and Check Out Form:
⭐ You can have different sets of questions for Check Ins and Check Outs ⭐
● Step 6. Click Save:
Taking Attendance with Check In & Check Out Forms
Now that everything is set up, let's see how we can take attendance and put these forms into use.
● Step 1. Within an Activity, click Attendance:
● Step 2. Click Take Attendance: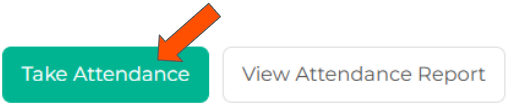
● Step 3. Click in the text areas to answer the questions for the respective student:
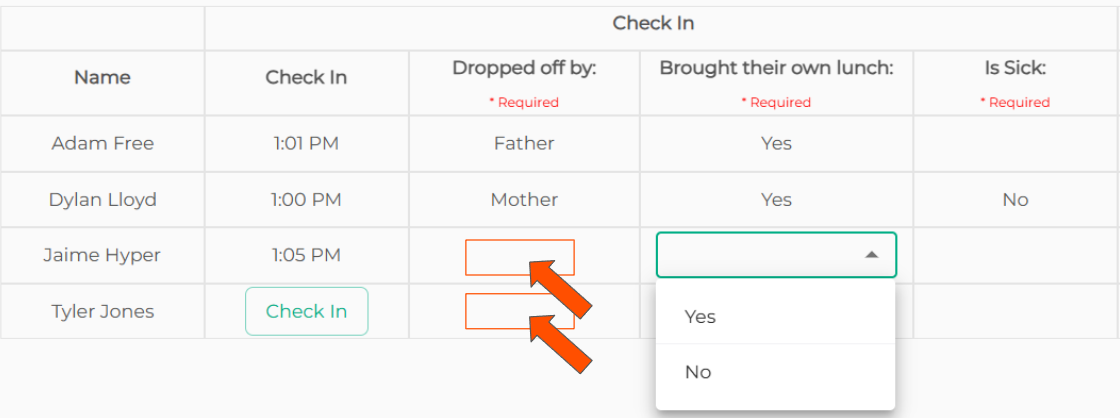
⭐ Your inputs are saved automatically ⭐
💡If you have any questions or experience any technical difficulties with Check In & Check Out Forms, don't hesitate to get in touch with our support team at support@afterschoolhq.com.