(Key Words: expedition, outing, sightseeing, field, trip)
Field Trips are a part of AfterSchool HQ! Learn how to create and share your field trips in this article.
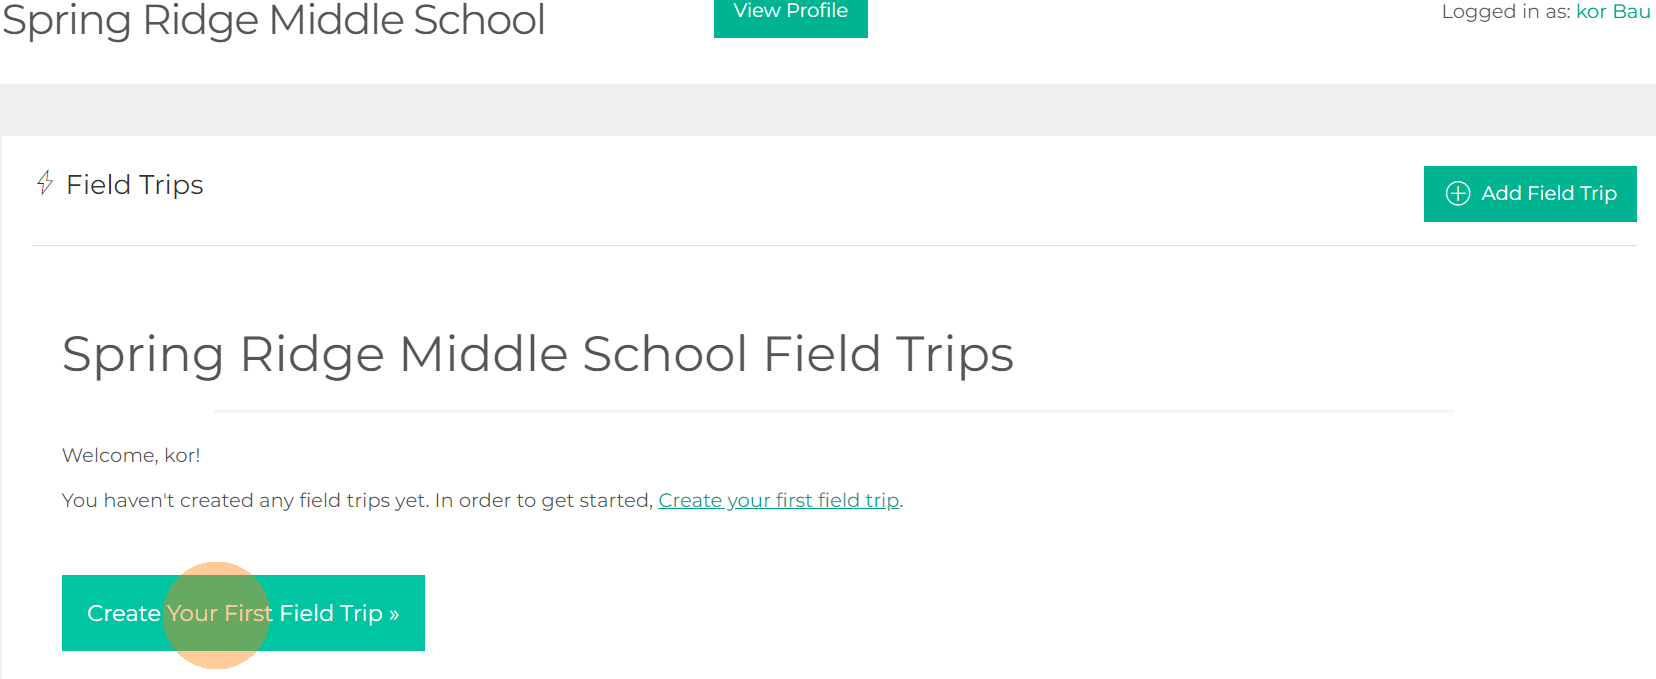
Step 1. Sign in to your AfterSchool HQ account.
Step 2. From the home page, click on "Activity Center ⚡️ " tab on the left-hand sidebar, then choose Field Trips.

Step 3. Click the green Create Your First Field Trip icon.
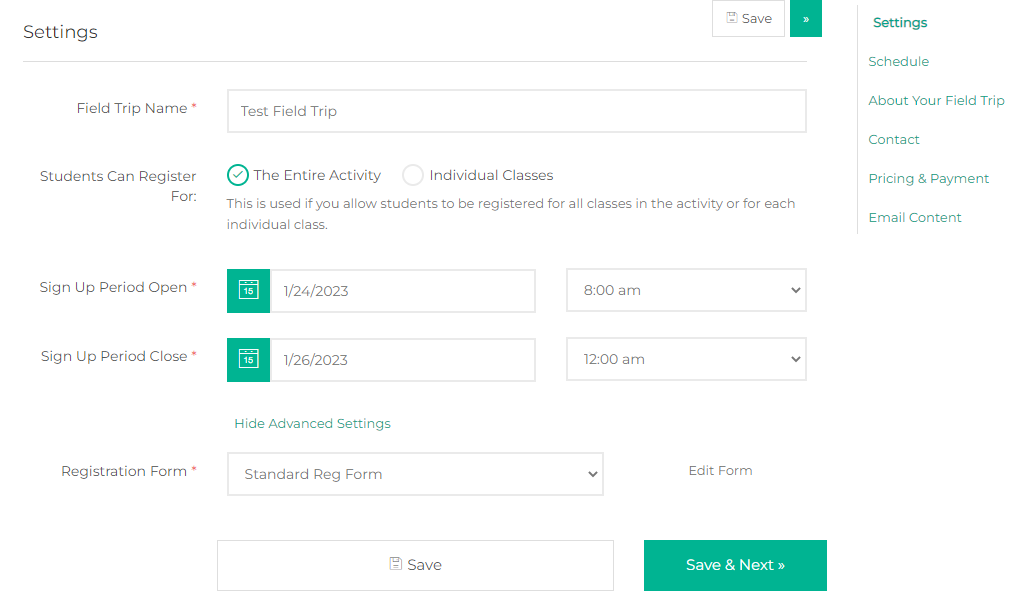
Step 4. First, you will set up the Settings. This is where you can add the field trip name, and confirm whether or not the field trip will be for one time by selecting Entire Activity or if it'll be in parts by selecting Individual Classes, you may also setup the registration period by adding the start and end date as well as the time, and last but not least you may add a registration form by clicking on Show Advanced Settings. Don't forget to Save!
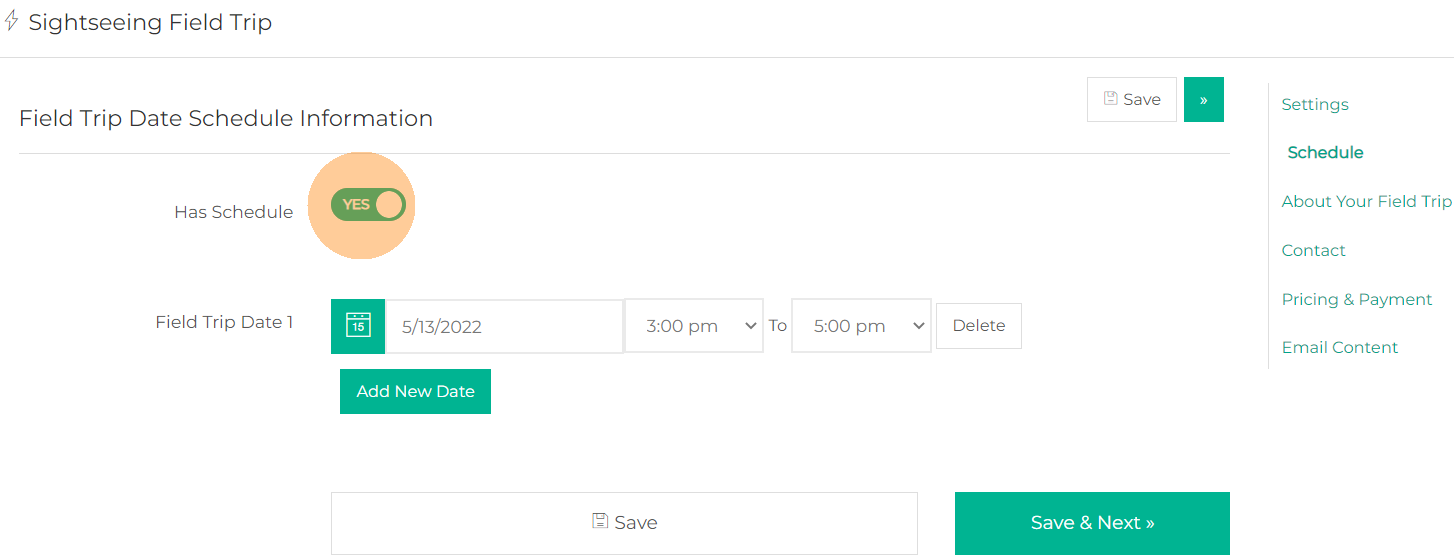
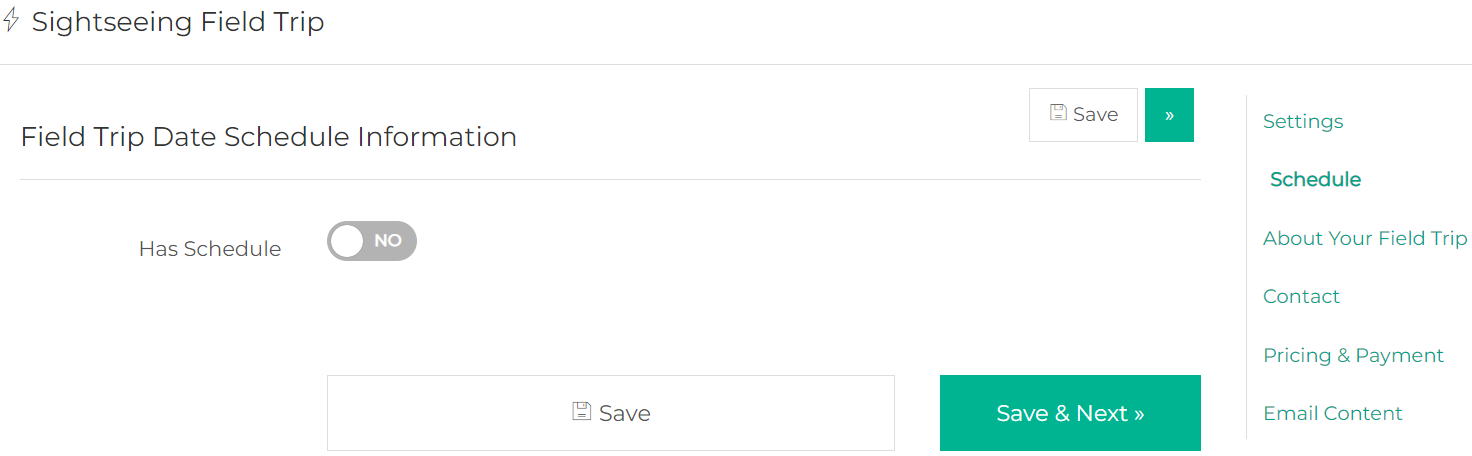
Step 5. If your event has a Schedule, change the slider from "No" to "Yes." Otherwise, select Save & Next.
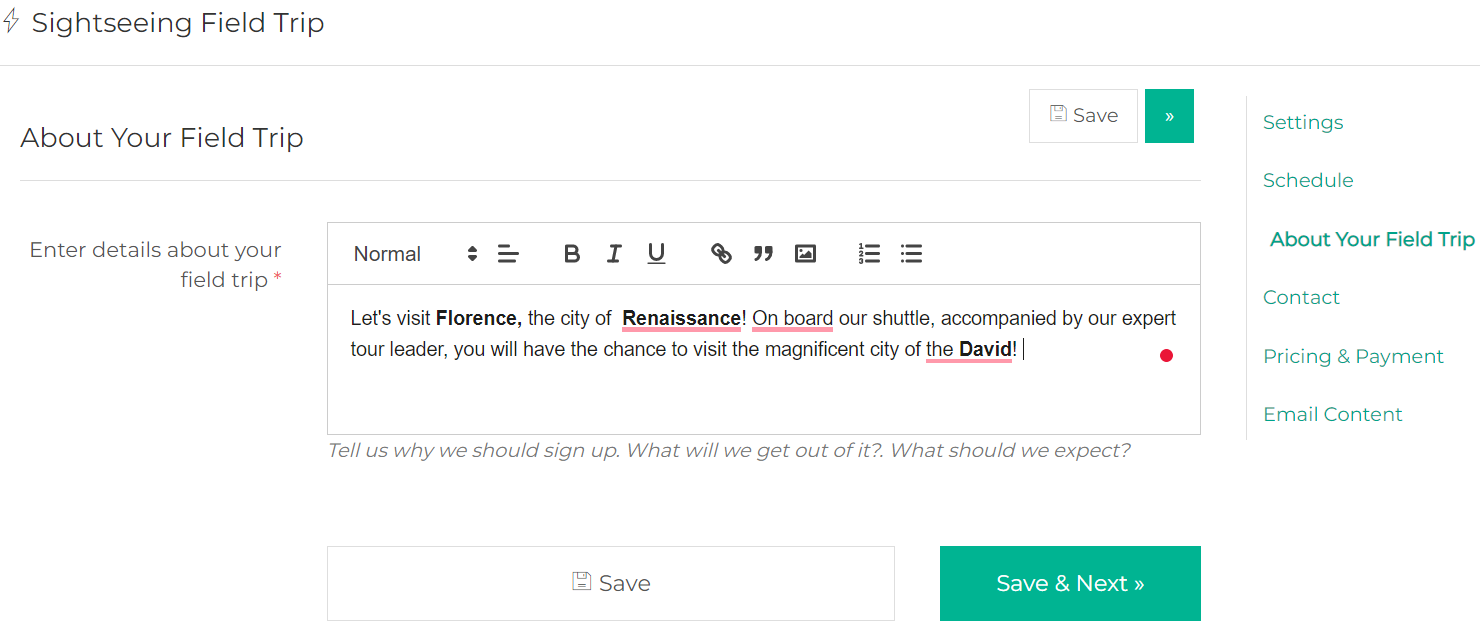
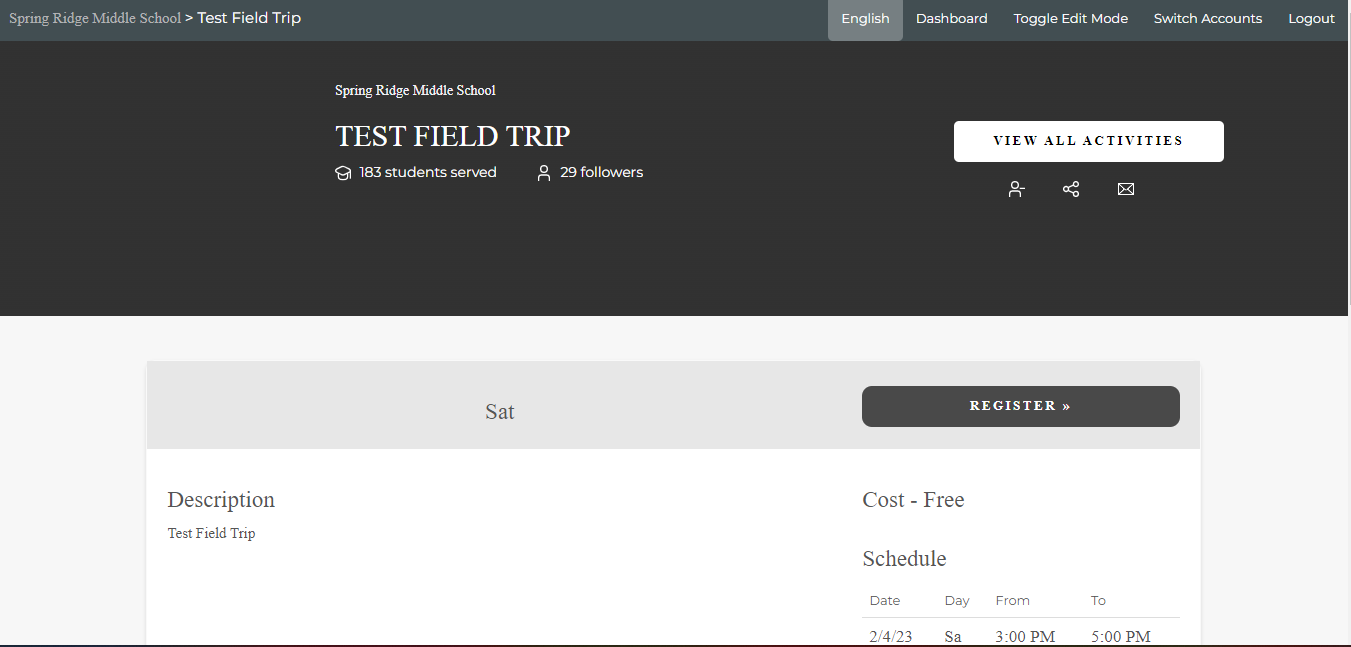
Step 6. Now it's time to Enter details about your field trip. You will need to tell parents why they should sign-up. Use the opportunity to share the benefits and set the right expectations. After providing details on your amazing field trip. Click Save & Next.
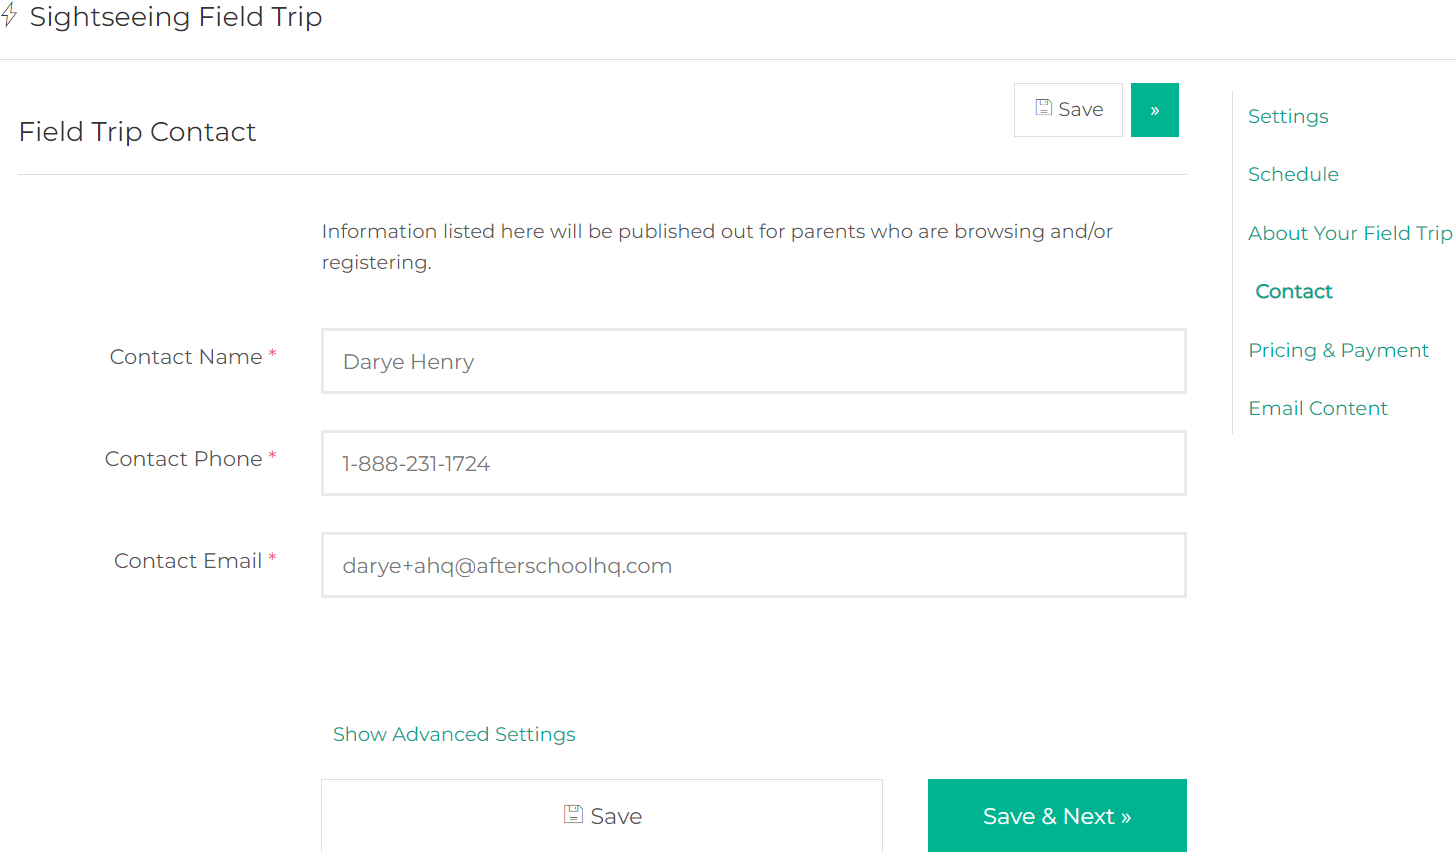
Step 7. Ensure to include your Contact Name, Contact Phone, and Contact Email (all compulsory). Save & Next.
You can assign an Instructor by clicking Show Advanced Settings, then selecting the drop-down arrow.

Pricing & Payment
Step 8. If parents do not pay choose No, then click Save & Next.

If parents will pay, select Yes, then enter Registration Fee.
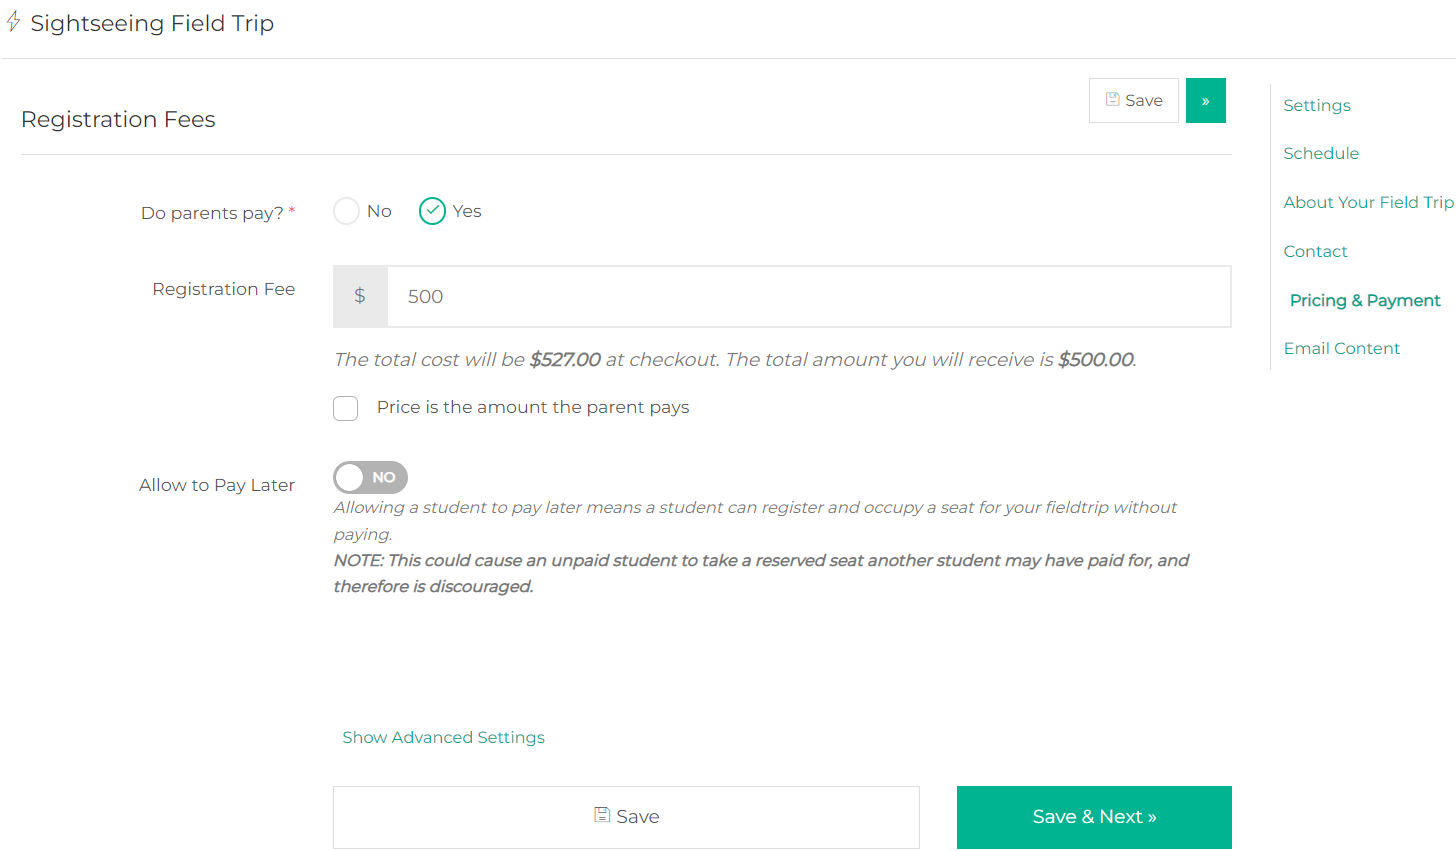
Below the Registration fee field, you will find the total amount that will be charged to the parent at checkout. Your provider amount will also be shown.
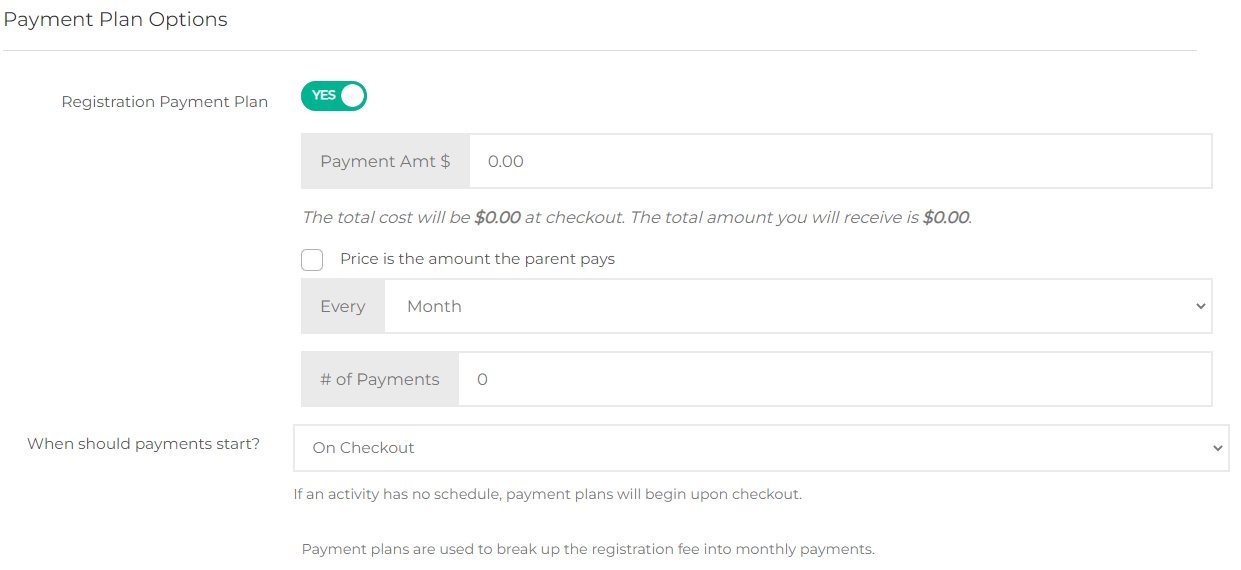
Step 9. Additional payment options can be located by selecting Show Advanced Settings. The options are:
- Payment Plan Options
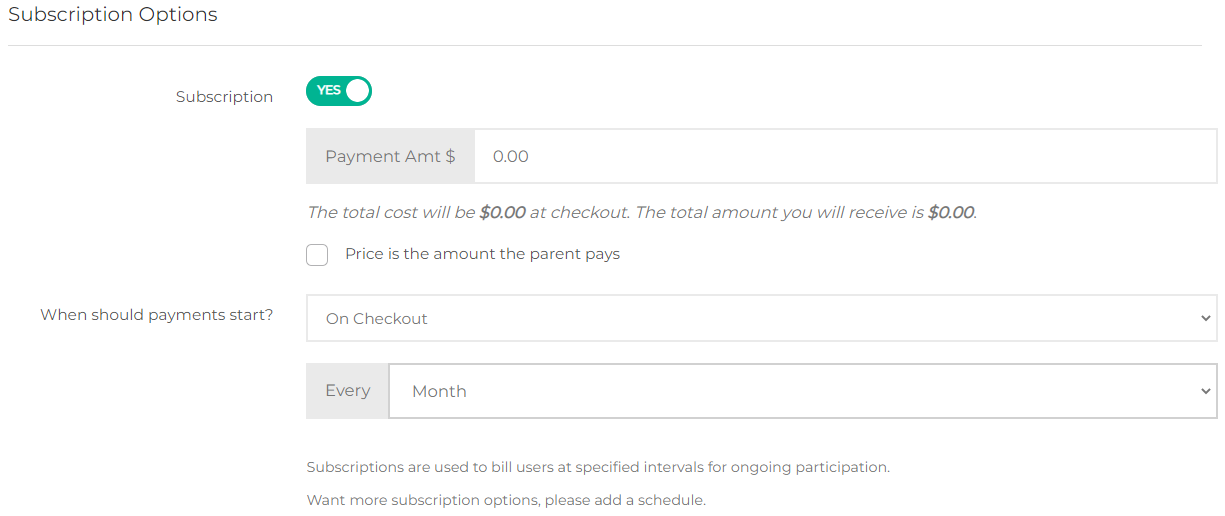
- Subscription Options
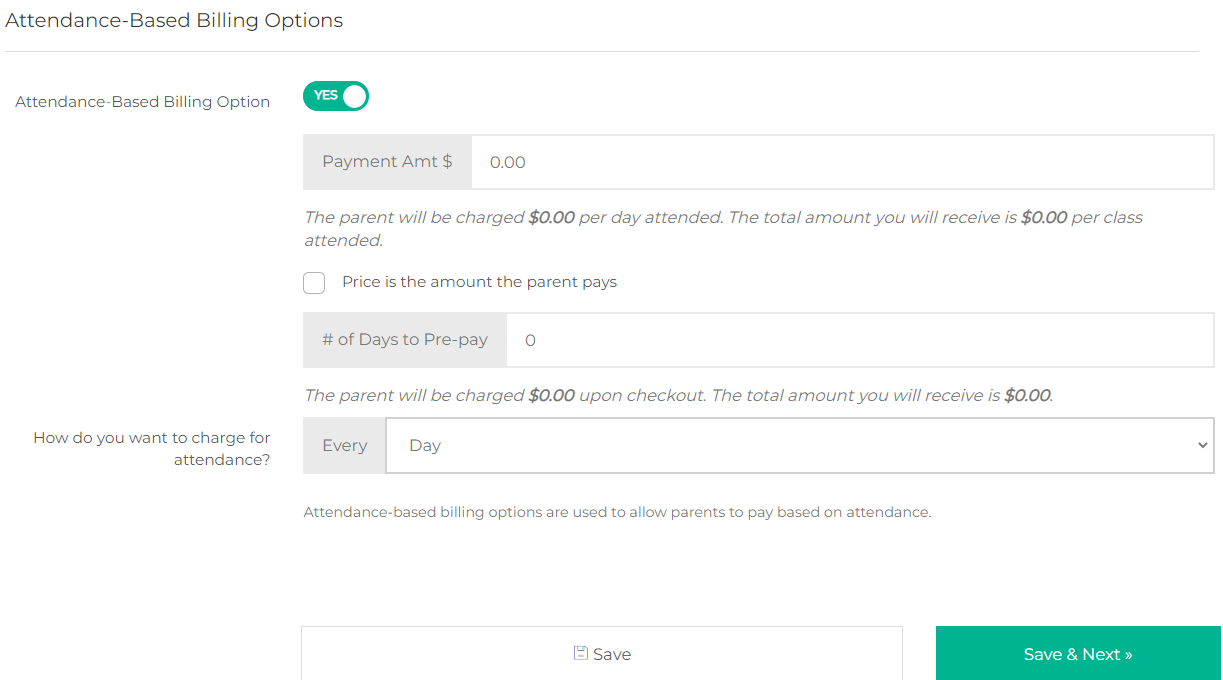
- Attendance-Based Billing Options
You can find details about each payment plan here .
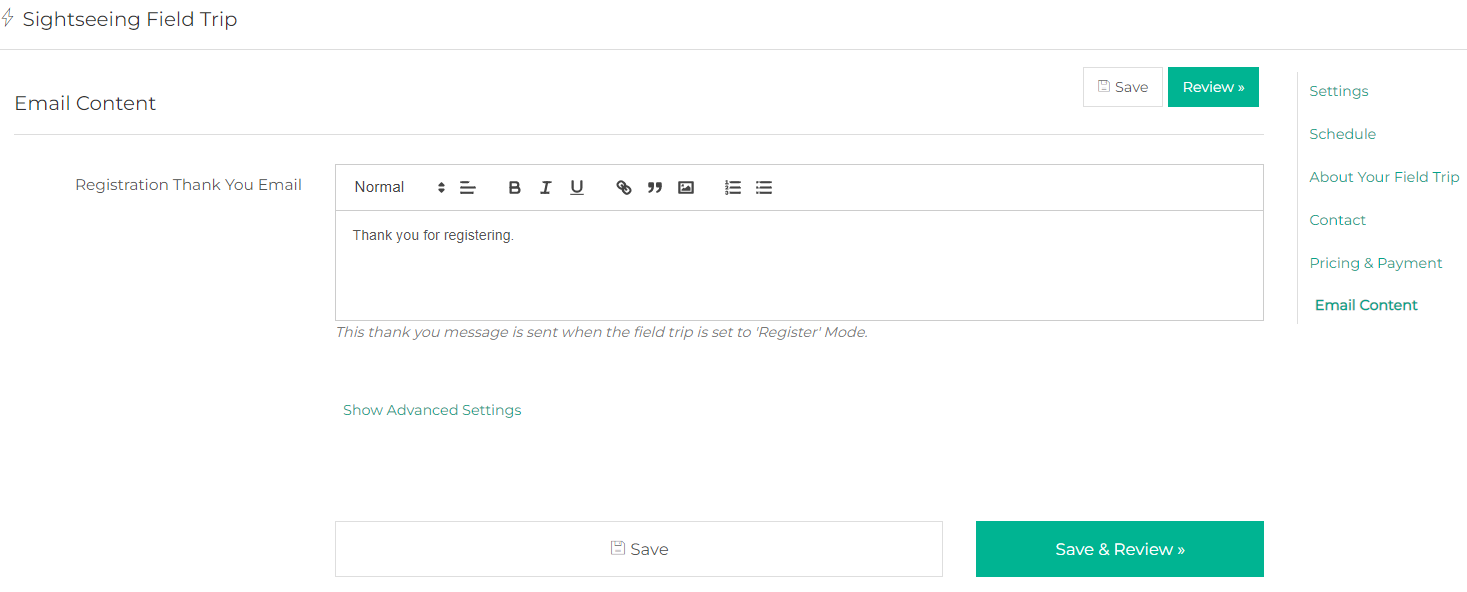
Step 10. You are almost done. Enter a thank you message for your clients, then Save!
Your Field Trip looks fantastic! Click Publish.

Then click on 
You will then be able to see your field trip URL, you may copy that URL and share it with your clients so that they can register.
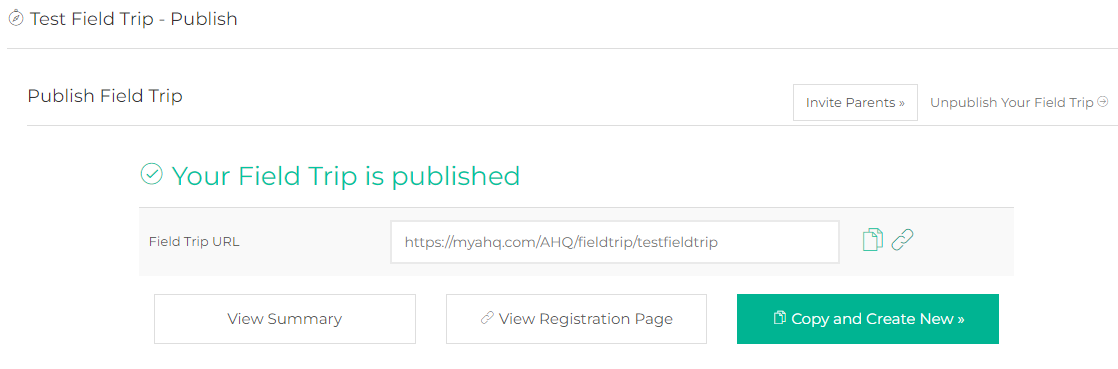
You can also click on View Registration Page to review the sign-up page.
Congratulations, you are all set!
Reminder: You have the ability to send messages!
💡If you have any questions or experience any technical difficulties with How to Create Field Trips, don't hesitate to get in touch with our support team at support@afterschoolhq.com .